Welcome to Laser Pointer Forums - discuss green laser pointers, blue laser pointers, and all types of lasers

Buy Site Supporter Role (remove some ads) | LPF Donations

Links below open in new window

FrozenGate by Avery

Tesla Coil Build Thread


Wow, glad to see some coils being posted. That DRSSTC is impressive upaa27.
Very interesting stuff going on here in the above posts.
Here's a positive update from my coil.

Little back story. I've had some difficulty for a couple months now with heatsink/componant isolating. The half bridge and voltage doubler diodes kept shorting out. It was a nightmare. Finally I just ordered a big sheet of SIL pads I can cut one to size.
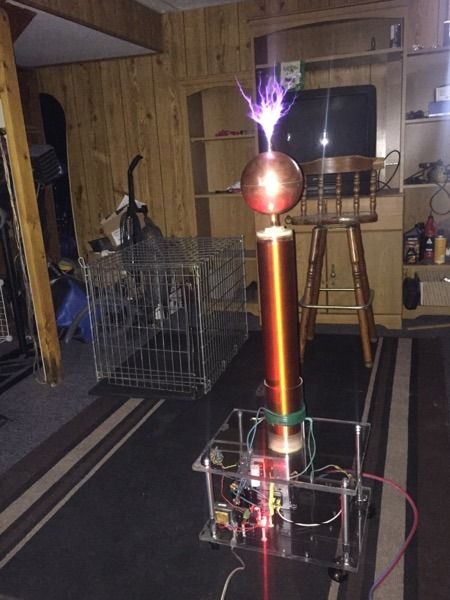
After a long vacation I soldered the bridge up and optimistically flipped the switch. :D I am happy to report the coil came right to life.
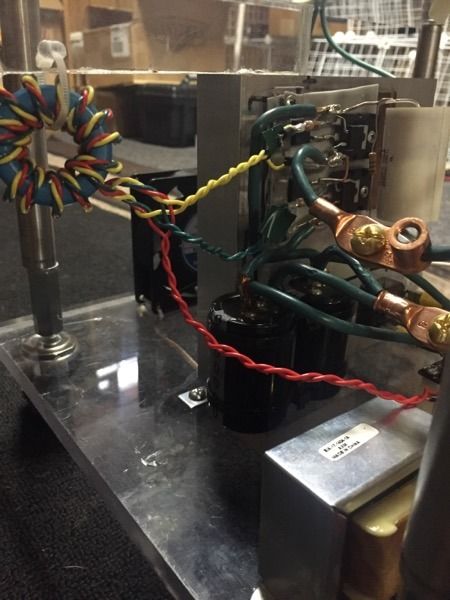
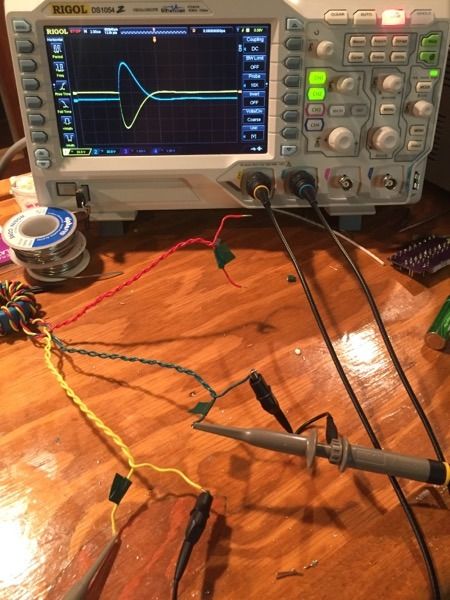
Here are some photos. And a video.

You'll notice the extra room. I bypassed the doubler just for now.

It's alittle ugly but you can see the sheet SIL pad here.


A cool photo while determining the GDT phasing


The photos above is the bridge that I built but while I was having difficulty with HS isolating. Sigurthr was kind enough to sell me a very basic bridge I could use to achieve first light and dial in my primary turns. (That bridge is featured in the YT video) I owe him a big thank you and those of you who helped me with the oscilloscope(other thread).
The coil is pulling 11amps with a substantial Efield. Secondary resonates at approximately 222kHZ.
:yh:
What's the next step in modulation here? I would like to add an interrupter to change the profile of the output.
 
Last edited:
Fantastic, Jefferson! I'm glad you got home safe and sound too. Remember to try out that Xenon tube finally, haha.

As for modulation, there's a whole bunch of stuff you can do depending on how involved you want it to be. From simple 555s to arduino to hifi am/fm audio modulation. You, so have to pick a direction before I can advise a next step.
 
The xenon tube will be in the mail this week so maybe next week I'll try it out.
So the modulator. I was actually thinking of buy one. I see EVR has some kits, Does anyone here have experience with those?
 
I remember looking over the schematics for the EVR modulators. Their higher end one which has independent duty/frequency and a single shot mode looked like it was actually really well and properly done. I remember thinking their basic one was crap though. Take that with a grain of salt, it probably works fine, just not up to my standards of design.

The USSTCC board accepts modulation of +~2.5V to +12V on the expansion port. I recommend using the FB-123/129 LED Fiber Optic couplers and NOT running electrical wire through (though you can use coax if you want, just ground both ends of the shield).
 
Once again someone posts a YouTube video and I get myself trapped for an hour watching lots of other stuff lol
 
Again, these pics and posts are amazing. I miss building TCs these days.
Busy finishing up a hort course. :thinking:
 
I did try that, it didn't do much though. The 7414 has too wide a hysteresis band(it did work for some people though) so the newer drivers use a comparator. Hmm... :thinking:
upaa27, great job on your coil. The CM600s can do 2kA happily if you drive them right so you have a lot more headroom to go. Let me know if you're interested in some UD2 boards. Regardless, you can easily add some phase lead via a variety of ways, and a regular inverter works fine for the presumably low frequency your CM600 coil is running at. Hysteresis is fine, but you'd want to just ensure a pretty high burden resistor to keep the voltage high (with diode clamping) to reduce errors due to hysteresis; at most you'll get poorer switching at the first cycle or two.

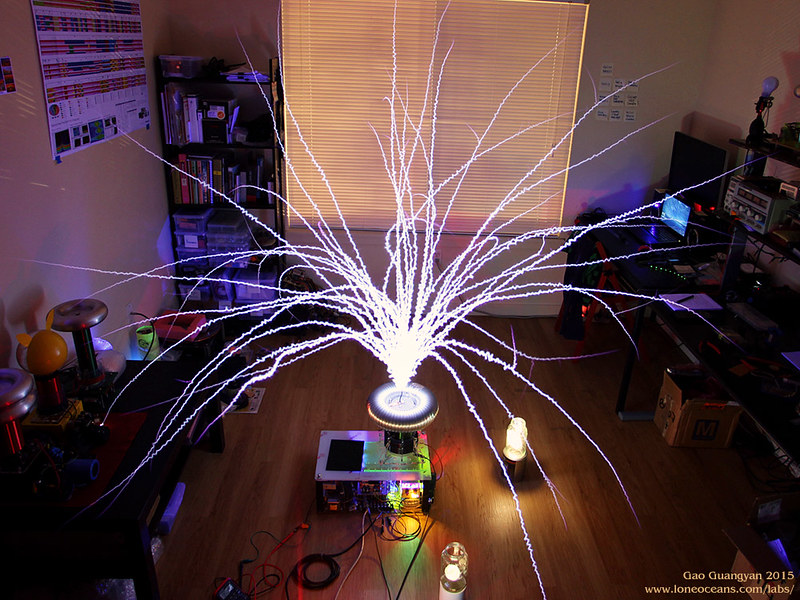
Also, thought I'll give a little update from my QCW coil from page 98. Since then I've got the coil retweaked and it's running slightly better.

The coil now uses a double bridge of TO247 IGBTs (8 in total) running at about 160A peak primary current or so. It uses a new small secondary coil just about 5.5" tall and 3.5" diameter with a fat toroid, and spark length so far over 70".

18651566508_5a71cc71dc_c.jpg


Above shows the coil running in my room. As you can see, maybe not much space left! The loopy nature of the sparks is a function of the drive characteristic and also likely due to the E-field shaping around the toroid.

18839344045_feebb336a9_c.jpg

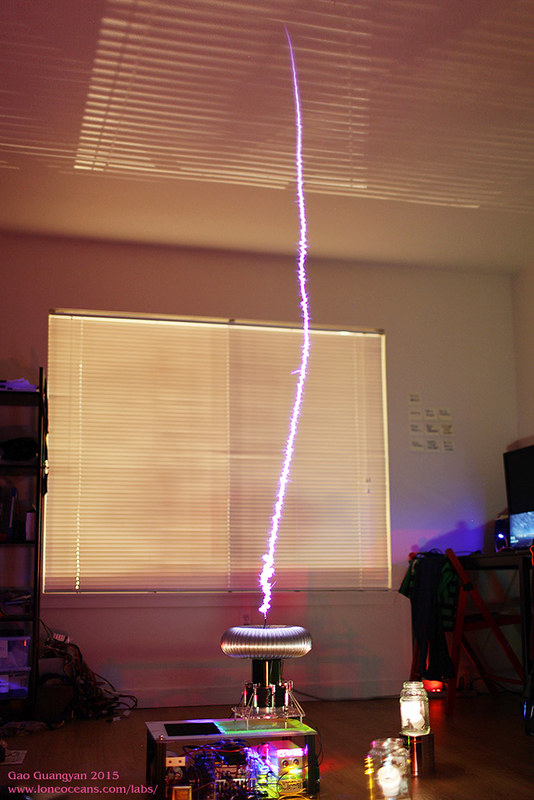
A lucky photo capturing a single spark.

Video:

Above is a video of the coil in action. Having bluetooth control allows the coil to be operated with my phone and safely away from the coil.

For those not familiar, the QCW is a type of solid state tesla coil where power is gradually increased and pumped into the coil over the duration of 10-20ms, which I achieve using a high current buck converter front end feeding into the inverter. The result is the ability to create very long straight sparks as the spark 'grows', just like staccato based VTTC or SSTCs like my SSTC 4: Sales - SSTC 4 Boards.
 
Last edited by a moderator:
I'm at a loss for words with those photos...astonishing work loneoceans.
 
Excellent work Gao! Your coils are always so beautifully done.

How are you mating the double bridge, btw? Are you using a transformer or just straight paralleling them?
 
Thanks for the comments!

For modern IGBTs and in this application it's sufficient to rely on the +ve tempco to parallel the switches, so that's what I'm doing and it's been very reliable so far. However lots of care was taken to ensure all current paths were as close as possible for each switch pair so they will share the current as much as possible. Though with resonant switching at *only* 150-160A, I think it might *just* be possible to get away with a 4-IGBT bridge!

15212979209_d1584aec89_z.jpg


Here's an early version of the coil in it's rough form lashed together on the floor.
 
Last edited:
It's something else to be able to create a virtually straight "bolt" , without streamers , any videos?

Regards
 
It's something else to be able to create a virtually straight "bolt" , without streamers , any videos?

Regards

Yep I did have a link to a youtube video at the end of my original post above :) Creating a single 'bolt' with no branching is essentially the main goal when developing this type of Tesla Coil. It was a bit of work to get right but it seemed to eventually work out. It's somewhat mesmerizing to see in real life.
 
Last edited:
  • Like
Reactions: ped
So you have, sorry didn't see the link.

The sound seems different, more bassy, like a "boomph" , not an electrical "crack" , is that right?

Ped
 
So you have, sorry didn't see the link.

The sound seems different, more bassy, like a "boomph" , not an electrical "crack" , is that right?

Ped

That's correct, and in fact was an active design choice. By the way, is there a way to embed youtube videos in the posts? I'm not sure if it's possible.

The electrical 'crack' from typical spark discharges (speaking in a simplified way) is caused by a sudden increase in energy dumped into the spark, causing the air to expand suddenly creating a pressure wave that sounds like the crack sound. E.g. in a typical DRSSTC, the spark is fully formed in several tens or hundreds of us.

18218667063_3660e9da42_c.jpg

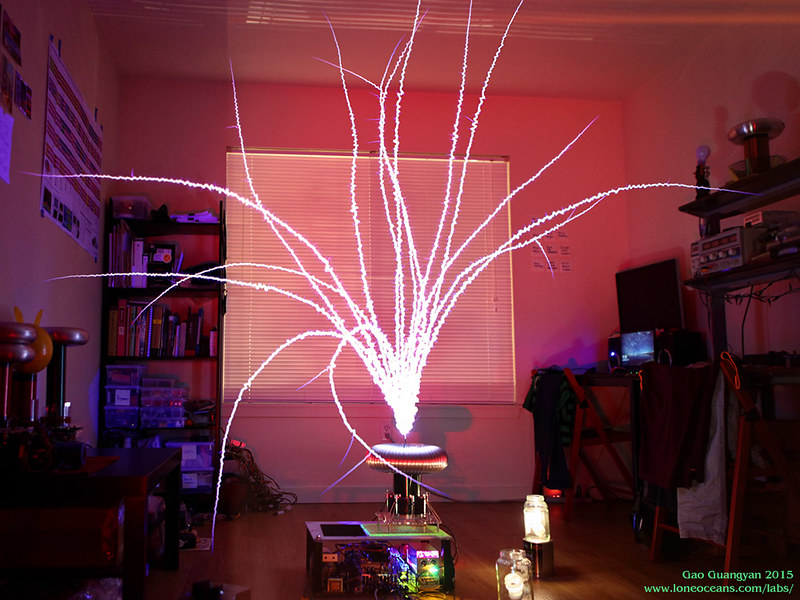
Another photo of the coil in action.

In the QCW type of discharge, the pulse duration is much longer, in my case about 15 to 20ms long. When creating the spark, power is 'slowly' ramped up over this duration, and then gradually ramped down. This causes a much more gradual 'heating' of the plasma channel, resulting in a much more lower frequency and MUCH more quiet spark. It's very soft and beautiful to listen to, with no earplugs required at all.

I tried to record the QCW at 240fps (played back at 960 here) -


You can see how the spark 'grows' gradually over the course of 10-20ms, though it'll be much more interesting to get a higher speed camera.

//edit Thanks kind moderator for helping embed the video!
 
Last edited:
To embed YT video's use ..

Code:
[yt]vid_code_here[/yt_]

Remove the underscore before the last closed bracket. Insert the video code after the = in the YT address , eg :-

https://www.youtube.com/watch?v=MIJFnDJrkGI

so you'll have


Back
Top