lazeerer
0
- Joined
- May 25, 2010
- Messages
- 3,655
- Points
- 0
Hi All,
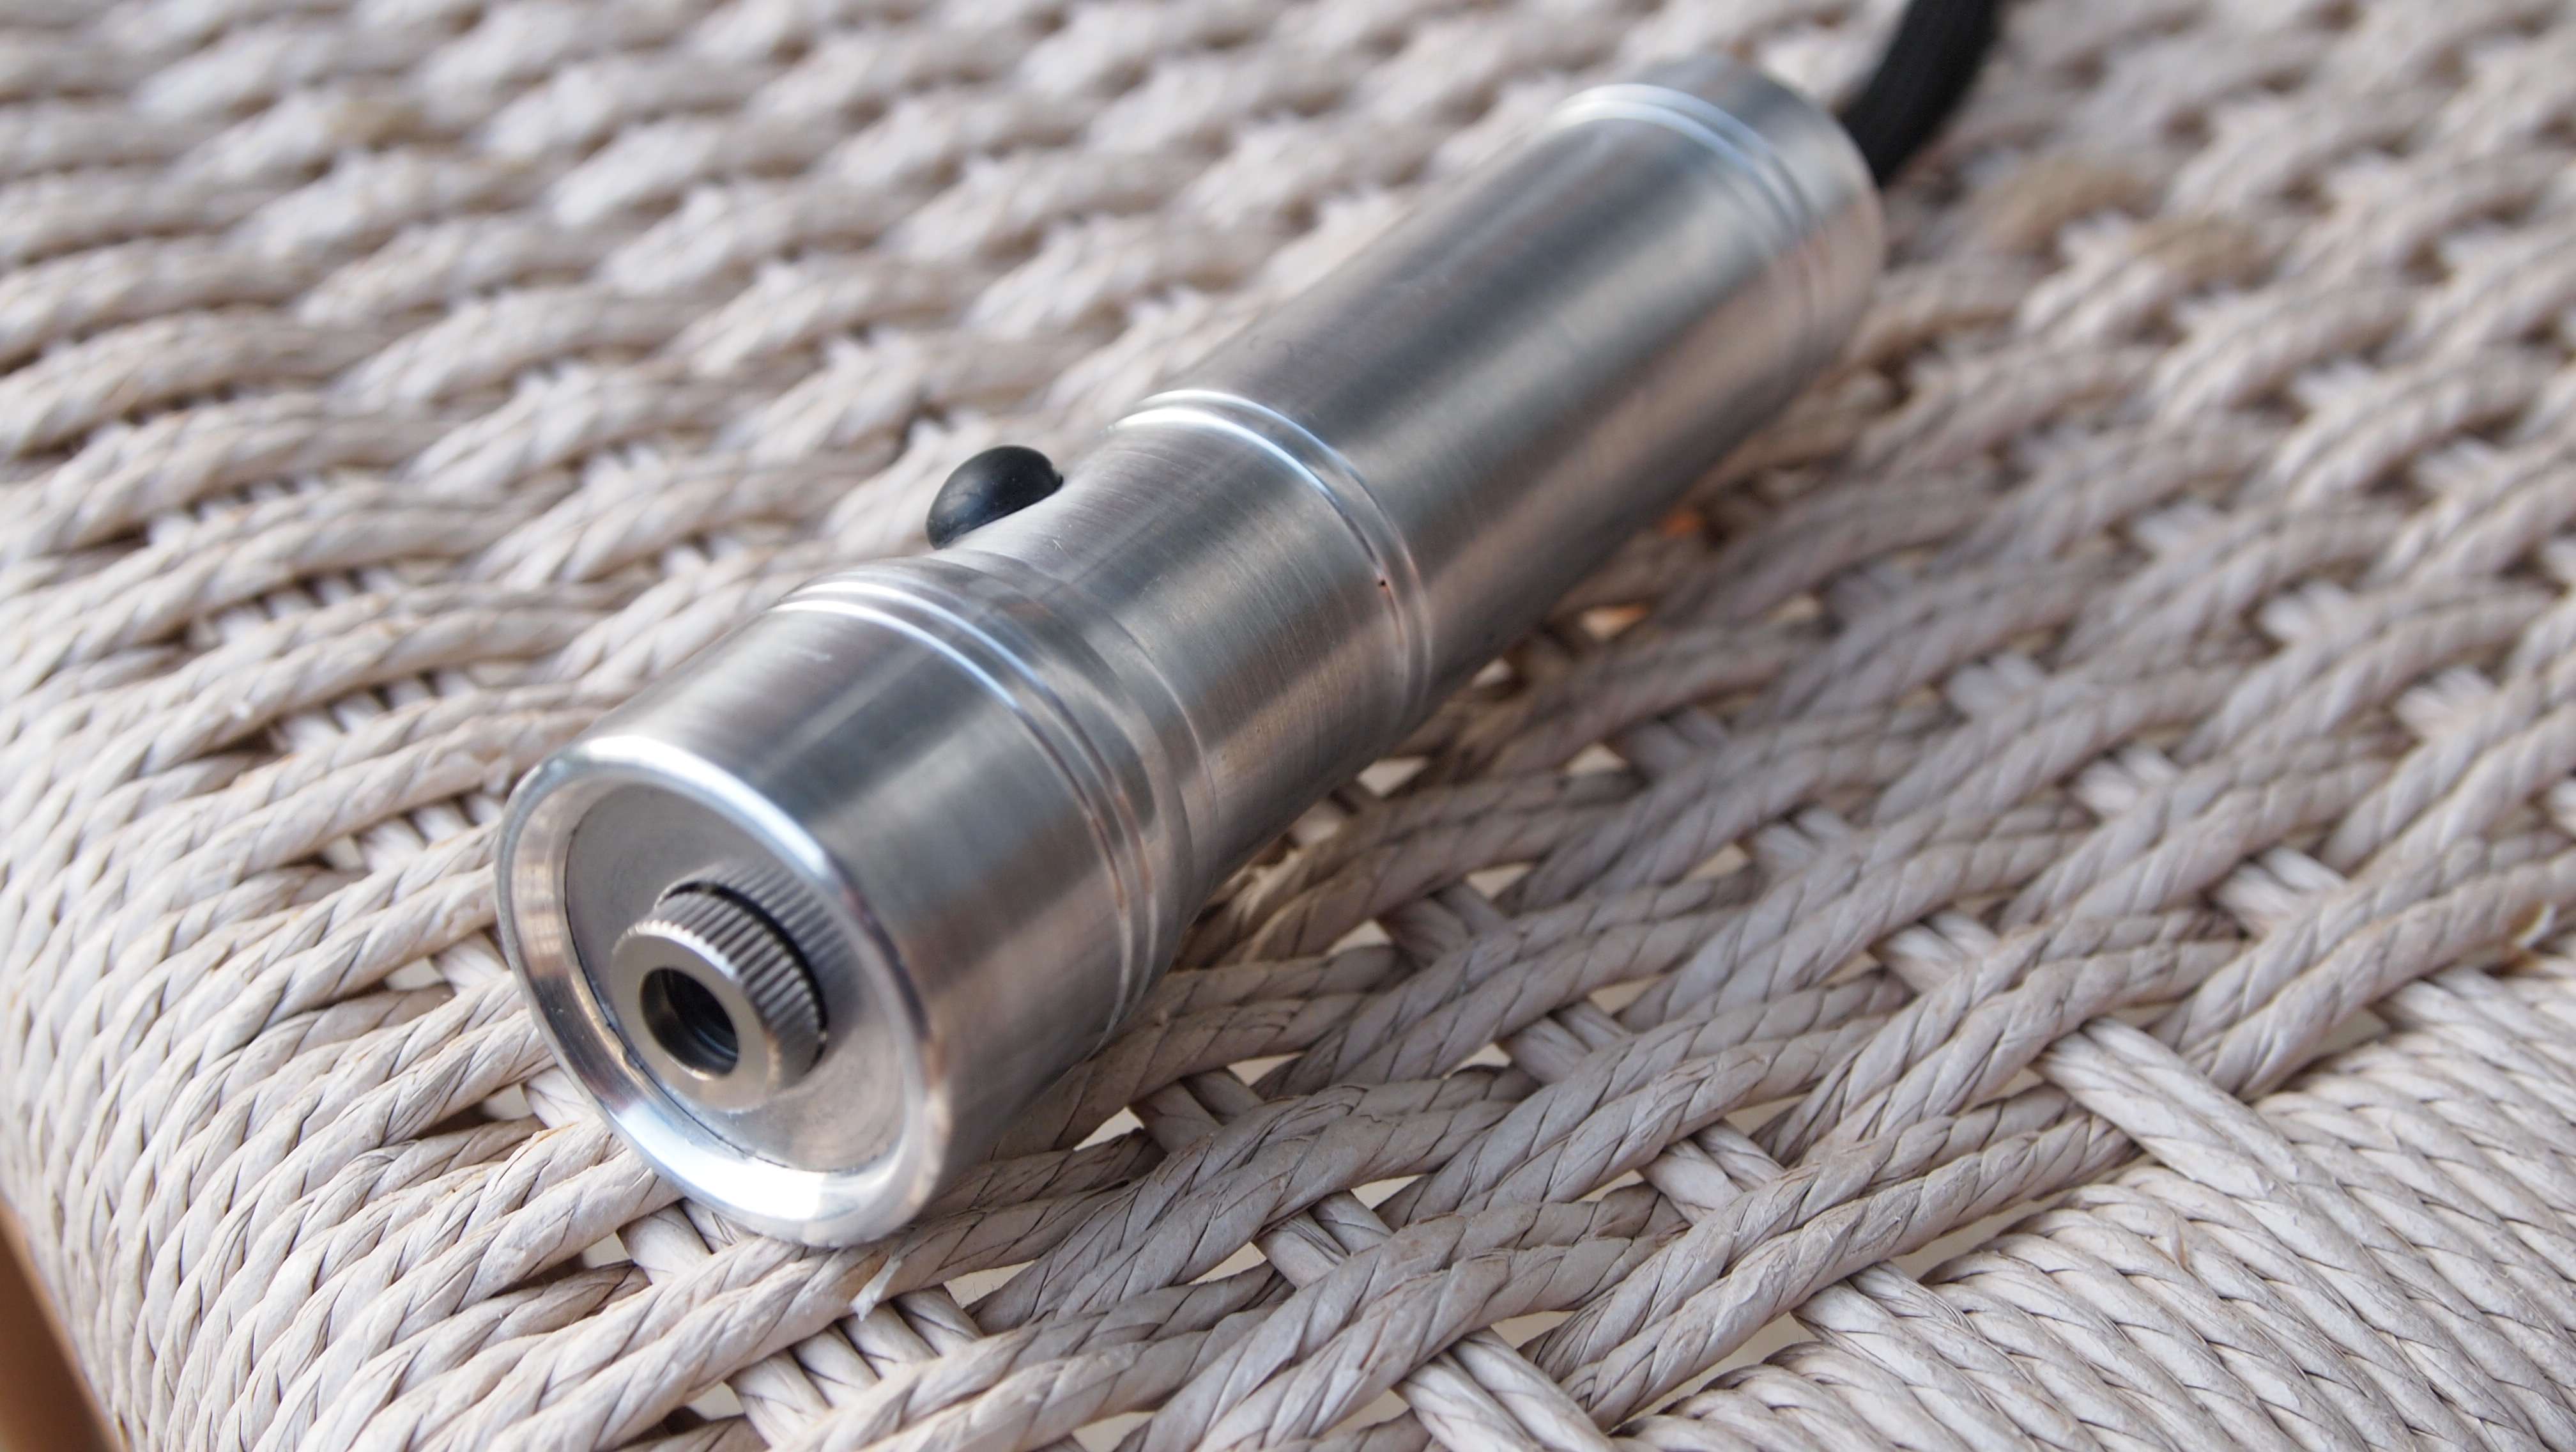
Over the Past Few Days I've Been trying to Make the Blue HotLight Host that Morgenburg Sell Different from all the Others Out there.
I think I have made it Different.
Pictures:


I know there are a few Hotlights that Mohrenbergdid take the Anodizing off but he did it on the Lathe and it took away alot of the Grip. But Still Looked Awesome.:gj:
This was done By using a chemical bath to remove the Anodizing so it will keep the original look of the host and and not leave any anodizing left on the body. Even the Insides Has no Anodizing.:beer:
NOTE: The Method i used is not the common method you see. I do not use chemicals that are available to the average person. It is special chemicals specifically for De anodizing aluminum. I do not recommend you use those other methods. For Example, Drain cleaner, Oven cleaner. That stuff is deadly and extremely toxic. You can get seriously Hurt even if you know what your doing. Please Read CL post down below for more details about the deadly effects of using drain cleaner and over cleaner in post # 15. I REPEAT I USE SPECIAL CHEMICAL THAT ARE SPECIFICALLY MADE FOR DE ANODIZING NOT THOSE OTHER DEADLY CHEMICALS. PLEASE RESPECT MY WISHES AND DONT ASK HOW I DO IT.
After this i Polished the crap out of it using a Dremel. All i had. Took forever but man did it do a Good Job. :bowdown:
One thing i found is, out of all three hotlights i have they all have Scuff/ Imperfections on the Grip area. So When trying to buff it out you cant do to much as it will deform the Grip. Lucky there not that bad. They Are pretty much invisible after you buff and polish them out.")
Waiting for tonight to put it together and take some beam shots. I got to take a Break.
Stay Tuned.")
Hope you like it. It took me a total of ~15 Hours to do everything. Polish in all.:tired:
Iam Pretty Proud of it.:drool:
UPDATE:
IF YOUR INTERESTED IN SENDING ME YOUR HOTLIGHT TO DO. PLEASE READ POST #46 BY CLICKING HERE>>> Click Here to Read Post.
:thanks:For looking.!!!
Over the Past Few Days I've Been trying to Make the Blue HotLight Host that Morgenburg Sell Different from all the Others Out there.
I think I have made it Different.
Pictures:
I know there are a few Hotlights that Mohrenbergdid take the Anodizing off but he did it on the Lathe and it took away alot of the Grip. But Still Looked Awesome.:gj:
This was done By using a chemical bath to remove the Anodizing so it will keep the original look of the host and and not leave any anodizing left on the body. Even the Insides Has no Anodizing.:beer:
NOTE: The Method i used is not the common method you see. I do not use chemicals that are available to the average person. It is special chemicals specifically for De anodizing aluminum. I do not recommend you use those other methods. For Example, Drain cleaner, Oven cleaner. That stuff is deadly and extremely toxic. You can get seriously Hurt even if you know what your doing. Please Read CL post down below for more details about the deadly effects of using drain cleaner and over cleaner in post # 15. I REPEAT I USE SPECIAL CHEMICAL THAT ARE SPECIFICALLY MADE FOR DE ANODIZING NOT THOSE OTHER DEADLY CHEMICALS. PLEASE RESPECT MY WISHES AND DONT ASK HOW I DO IT.
After this i Polished the crap out of it using a Dremel.
All i had. Took forever but man did it do a Good Job. :bowdown:One thing i found is, out of all three hotlights i have they all have Scuff/ Imperfections on the Grip area. So When trying to buff it out you cant do to much as it will deform the Grip. Lucky there not that bad. They Are pretty much invisible after you buff and polish them out.
Waiting for tonight to put it together and take some beam shots.
I got to take a Break.Stay Tuned.
Hope you like it. It took me a total of ~15 Hours to do everything. Polish in all.:tired:
Iam Pretty Proud of it.:drool:
UPDATE:
IF YOUR INTERESTED IN SENDING ME YOUR HOTLIGHT TO DO. PLEASE READ POST #46 BY CLICKING HERE>>> Click Here to Read Post.
:thanks:For looking.!!!
Last edited: