- Joined
- Nov 12, 2011
- Messages
- 962
- Points
- 43
Okay thanks! the original post is working now")
Saw it. Thumbs up


Follow along with the video below to see how to install our site as a web app on your home screen.
Note: This feature may not be available in some browsers.
Okay thanks! the original post is working now


How do you go about testing the voltage sag of a battery when you connect it to a laser?
I have been running my NUB44 with an SXB drawing 8.69 amps off either a single Sanyo NCR18650GA 3500 mAh 10A cell or an LG MJ1 3500 mAh 10A cell. I'm just curious how much these newer cells will compare to a Sony VTC5 in how much their voltage sags when supplying high currents like this.


I was just fiddling with my laser and noticed that right after I turn it off a little faint glow still shines from the diode for about 5 seconds until it slowly fades out.
Has anyone else noticed this with the 44?
pic
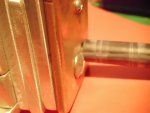
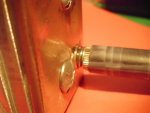
6 watt laser water cooling and driver but i think i bluw up de drive.
Pic
can some one tel me wat chip the 8 pins is so i can fix the drive i think de 8 pins is burnd.

it's also very important that the compound is an electrical insulator.
The test below was much more than a few microns.
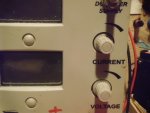
if i want to test the laser no driver but dc power suply wat is the voltage to set de dc power suply to i think 4.6 v max??
If you have a table top adjustable voltage/current limiting power supply then I usually set my voltage between threshold and 75-80% of the diodes max, then start with the current down or just above threshold and adjust up, but your LD must be heat sinked.
Remember some diodes are very static sensitive such as 405's and if you reach a point where it your diode won't take any more current, yet it's at less than it's specified max, then you will need to increase the voltage, BUT make sure to back down your current until you see it go down any amount so you don't jack your voltage with the current adjustment set too high, you could blow your LD quickly.
By limiting your current the diode will not take overvoltage but if you break the circuit and your voltage is past the diodes limit then it can spike if you say, knock off a wire and put it back on without turning everything down first.
With the NUBM44 you can start at 4.0 volts no problem, it lives around 5.0 normally, start your current low and slowly increase. Diode must be well heat sinked.
You do know you have to wear proper safety glasses, but I have to say it.
Normally with a variable power supply you short your leads to set current, or drive a 1 ohm resistor but just start at zero on the current, limit your voltage between threshold and max for your specific diode. Remember if it stops taking additional current and you are not at your desired target always back your current down until the numbers move before raising your voltage to prevent accidental over current and LD failure.
The advice I gave you was from personal experience and is to the best of my knowledge correct, but what ever you do is at your own risk, remember to always practice safety precautions when working with lasers above 5mw.