

Pman
0
- Joined
- Nov 28, 2012
- Messages
- 4,441
- Points
- 113
EDIT! 10/23/2013 Found the right units FINALLY! Ebay seller overfeel out of NYC
3pcs 5mW Red Green Blue Laser Pointer Visible Beam Fast Shipping from USA | eBay
Also, if you want an easy way out, just buy:
https://sites.google.com/site/dtrlpf/home/projector-optics-mirrors-dicros-lenses-motors
as there are multiple lenses in these that will focus the beam up close by just holding in front of your laser.
Better say up front that I don't sell these
Also, I am not responsible for anyones "project" going wrong. Have done my best to describe everything. It's up to you to decide whether you are willing to potentially mess up your laser. In other words I don't mind hearing if something goes wrong as it can help us all but no whining that "I" broke your laser.
Anyone is MORE than welcome to think and post about other ways to do any part of this procedure as we can work together to try to figure out what works and what doesn't. Feel free to post anything you like on what else you've done with your cheapo pen here if you want. I have many other things that I've done with these and I know how it feels to not want to start your own thread when it's just ideas and things we can all work on.
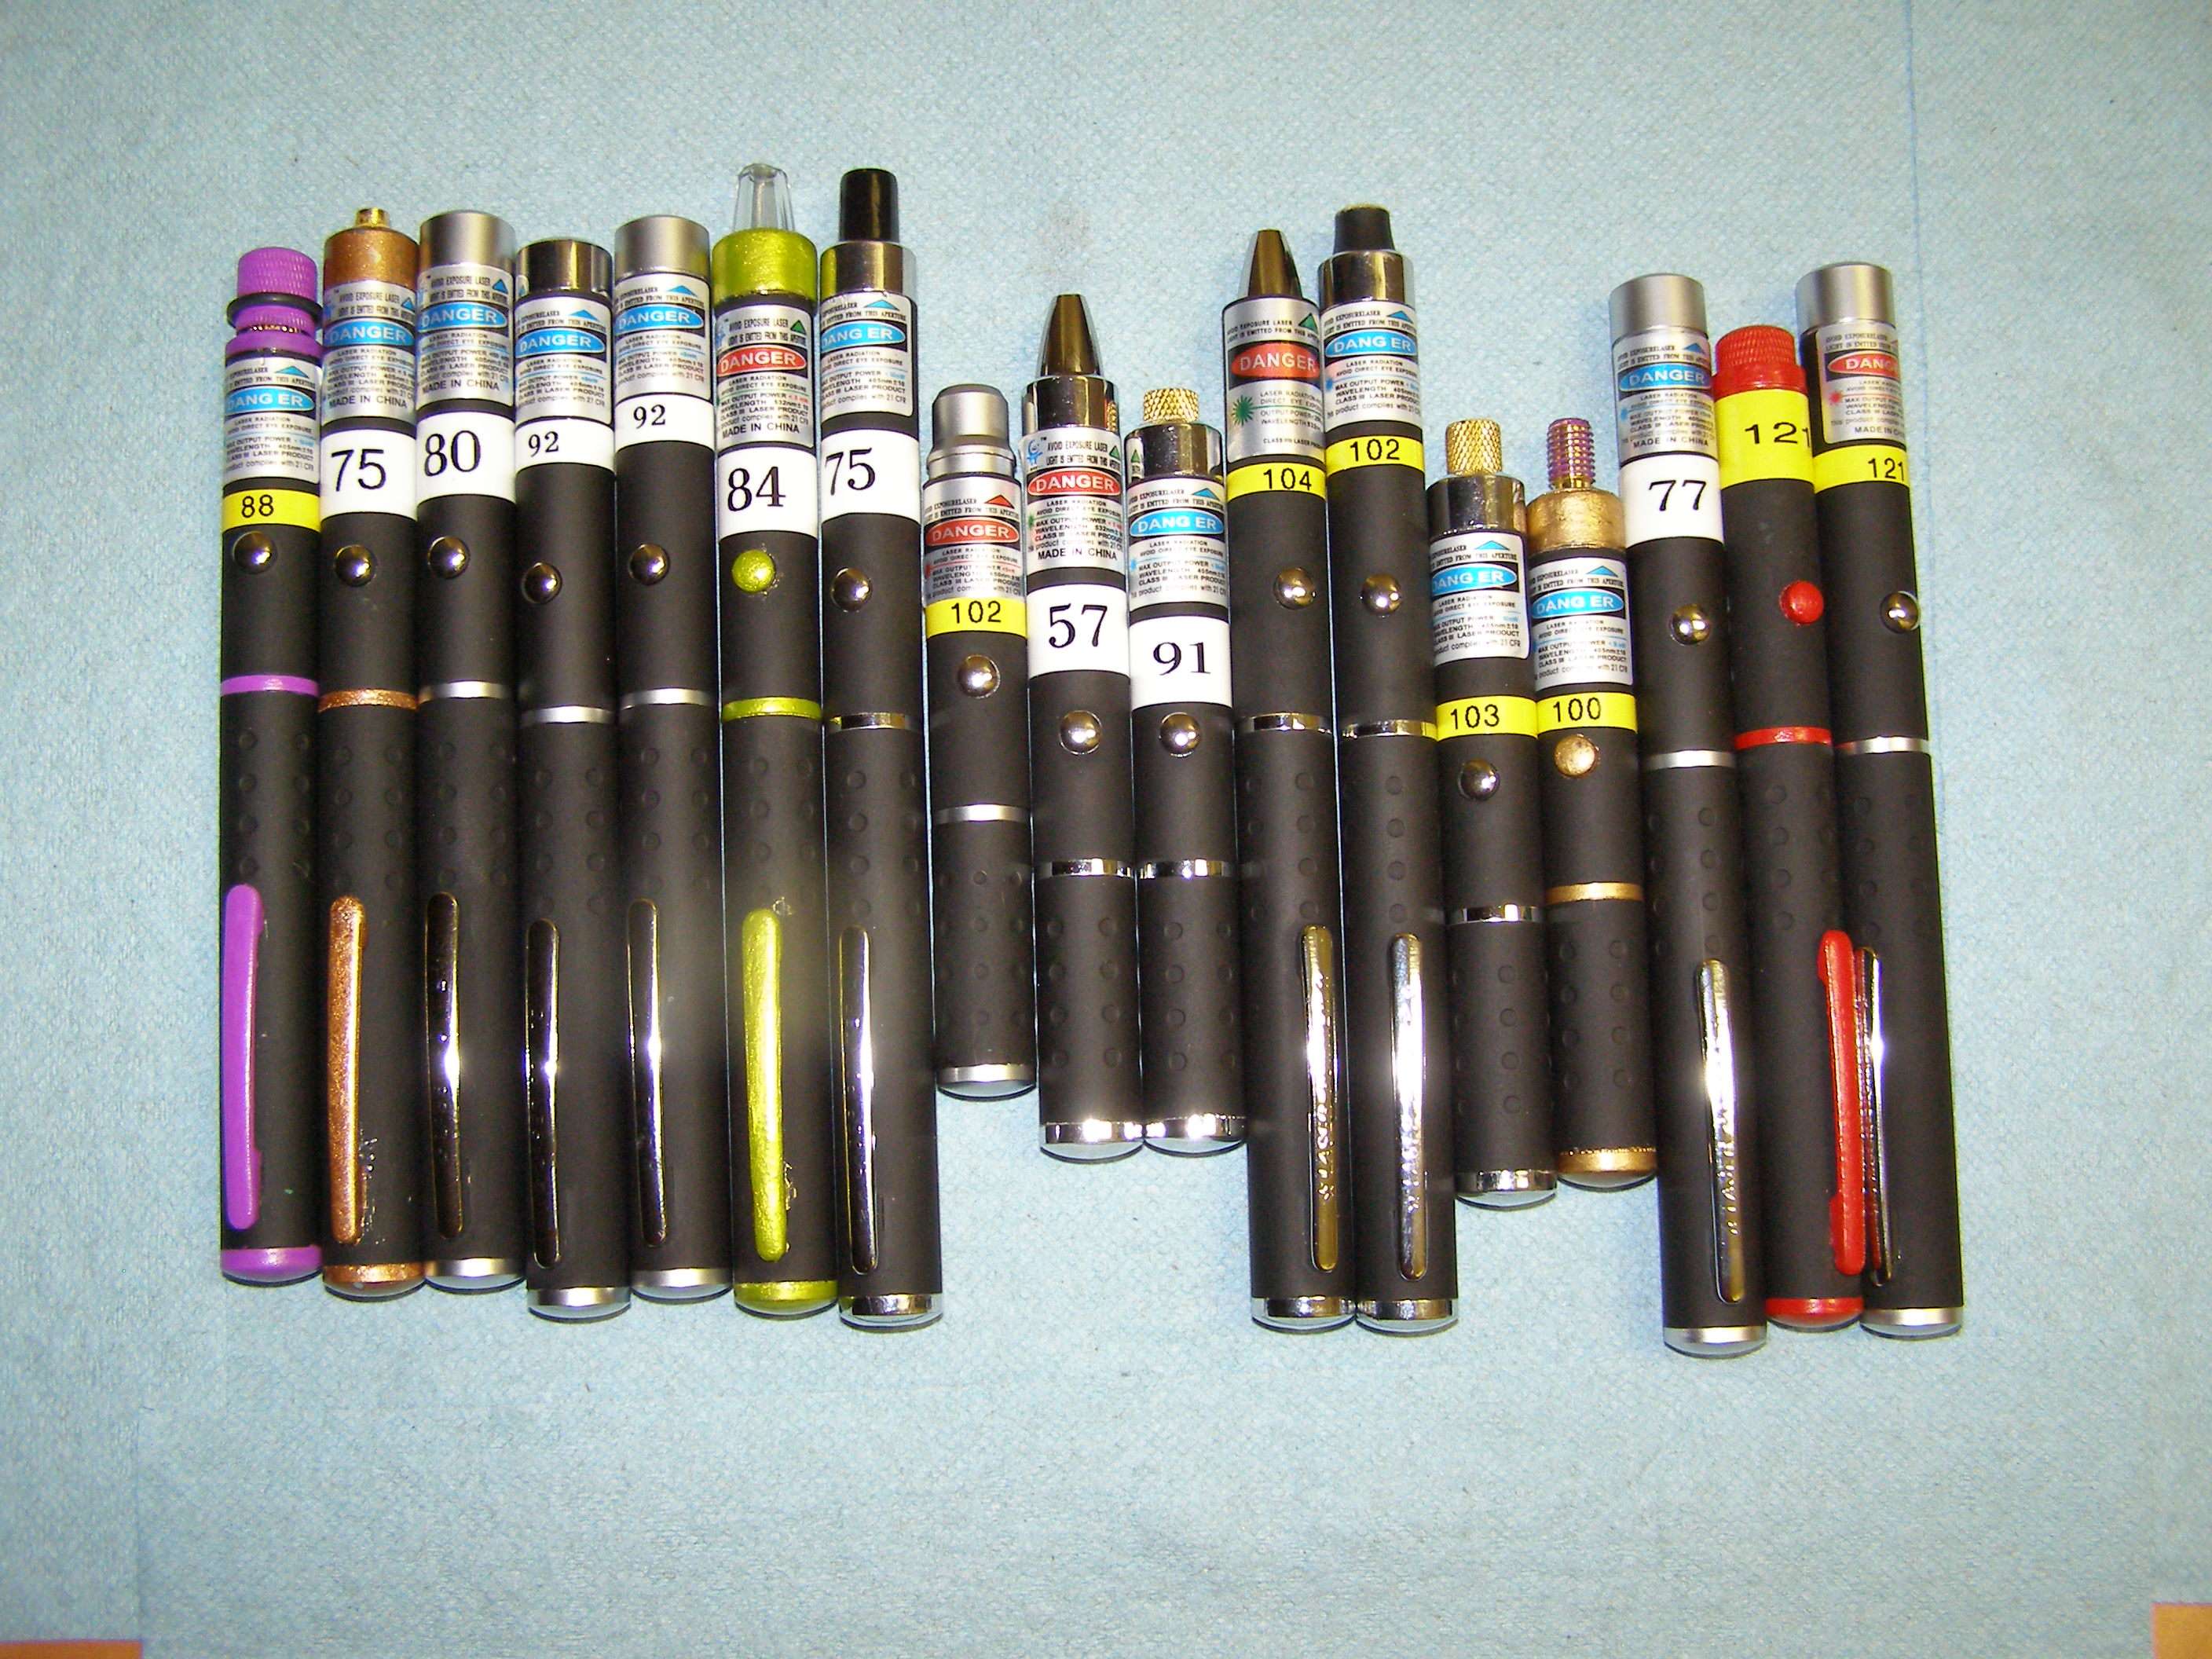

The reason why I found myself wanting to figure this out was because I have so many way over spec $5 units that aren't really very interesting. The 532nm are great in and of themselves and the 405nm are kind of interesting for their ability to "charge" things with glow properties. The 650nm however is kind of .... blah. I mean, who hasn't seen a red dot before.
Anyways, both 405nm and 650nm can burn really well when focused with 70 + mw of output so why not find a way.
My recommended places to purchase WAY over spec pens that have been consistent performers accurately tested with an Ophir are as follows:
Ebay " cjy3271788 " 3 color pack. I believe Hak told me about this one and I've purchased many sets from them. 532nm have been between 25-90mw (lots of IR though), 405nm 70-100mw and 650 over 100mw every time. These have the nicer metal caps rather than the plastic ones.
UPDATE
3pcs Power 5mW Laser Pointer Pen Combo Green Blue Purple Violet Red Light | eBay are now being shipped from California and still free so you can now get them quick")
I've tried the Amazon "millionaccessories" ones and they are over spec but not as consistent as the ones above.
The Amazon BBQ-Buy 3 pack without the star caps are fantastic also and sell for <$13 but I believe that is with an Amazon prime account (which I have).
You could also get the set with the star caps as they are way over spec too.
I haven't taken one of those apart yet.
What's interesting about the Amazon ones is you can buy twice as many if they show shipped from China but if the price is double for 1 set, it's being shipped from Amazon in the states and with an Amazon prime account you get them in 2 days free shipping. I have an Amazon Visa and get points for using it on their site and sometimes use the points to get free lasers
I will also say that if you want a nasty little unit that is already focusable, buy this
100mW 650nm red laser pen/ focusable /Pop balloons [OL-650-100P] - $11.99 : Zen Cart!, The Art of E-commerce
Have 2 and they test at 125/150mw with 2 AAA alkalines and 215/224mw with a single 10440 with spacer They also feel quite nice and heavy in the hand. O-Like does not have free shipping though so I would look through their site for some other things you might like before ordering. Also, O=Like is slow to process and at least to me, kind of frustrating in how they do things. Too used to Fasttech which I learned about months ago from Awillis.
So, here we go....
***I HAVE CANNED AIR ON HAND TO KEEP BLOWING OUT THINGS SO NO DEBRIS GETS INTO ANYTHING!***
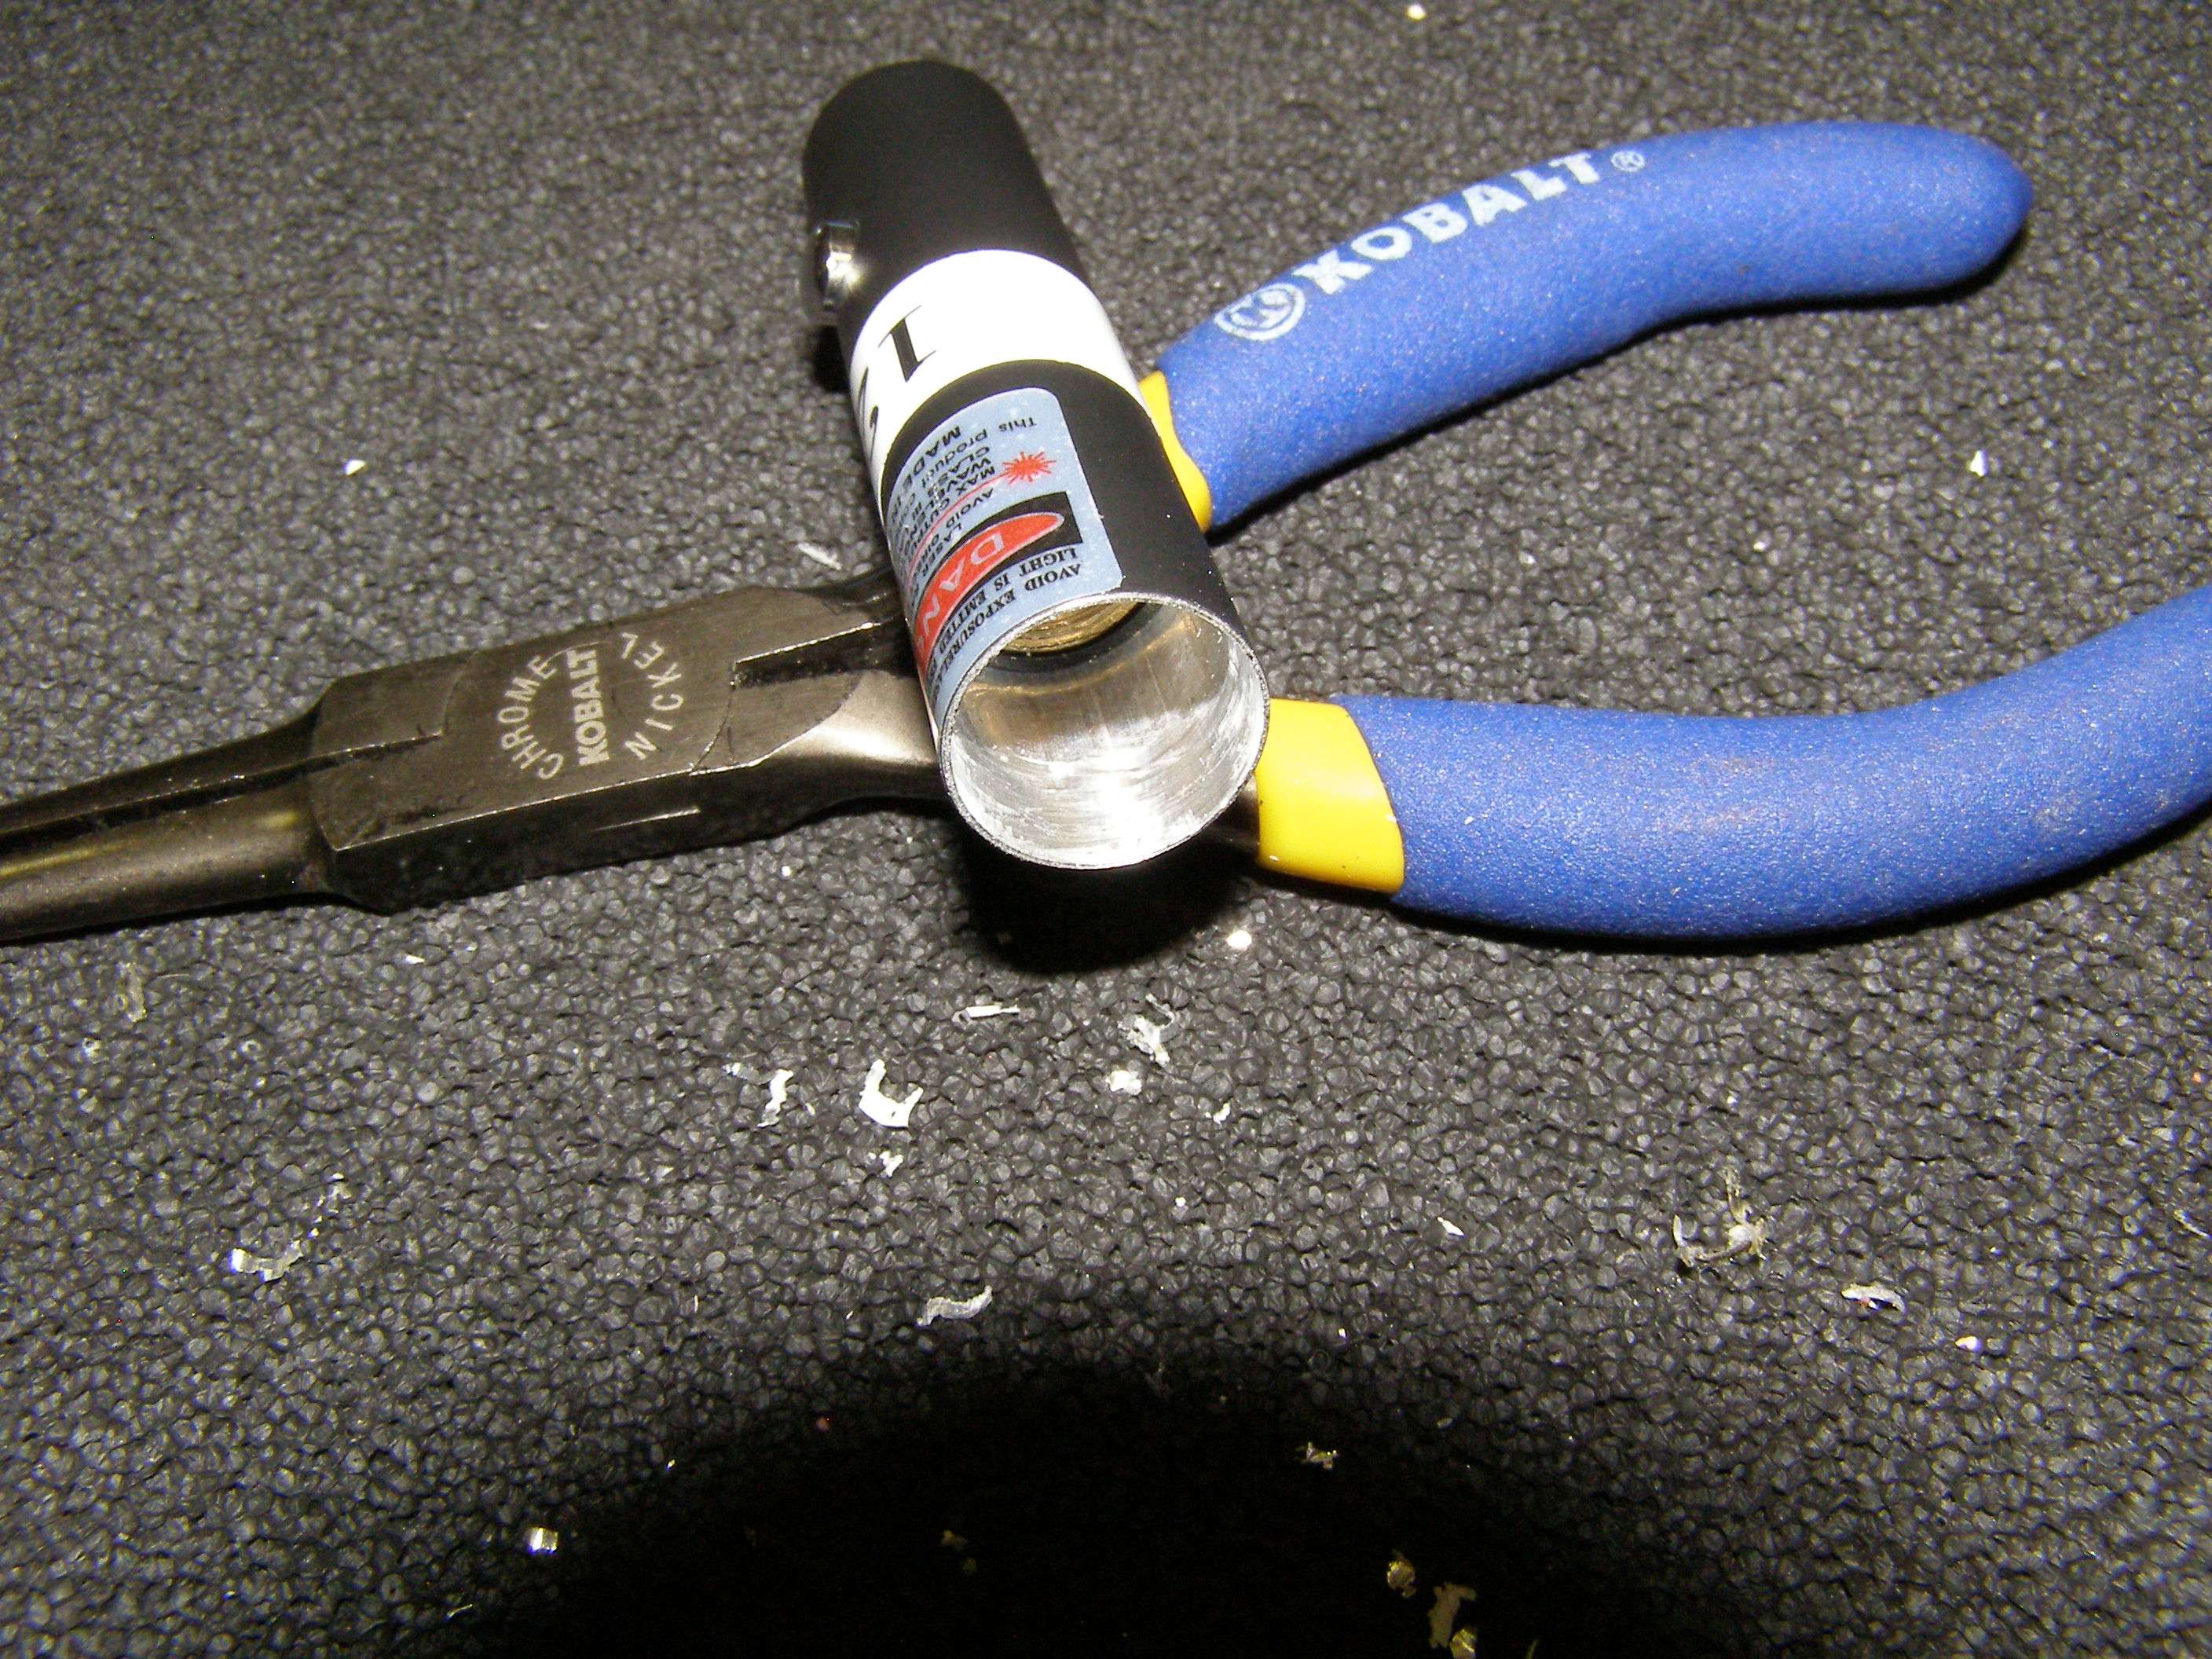
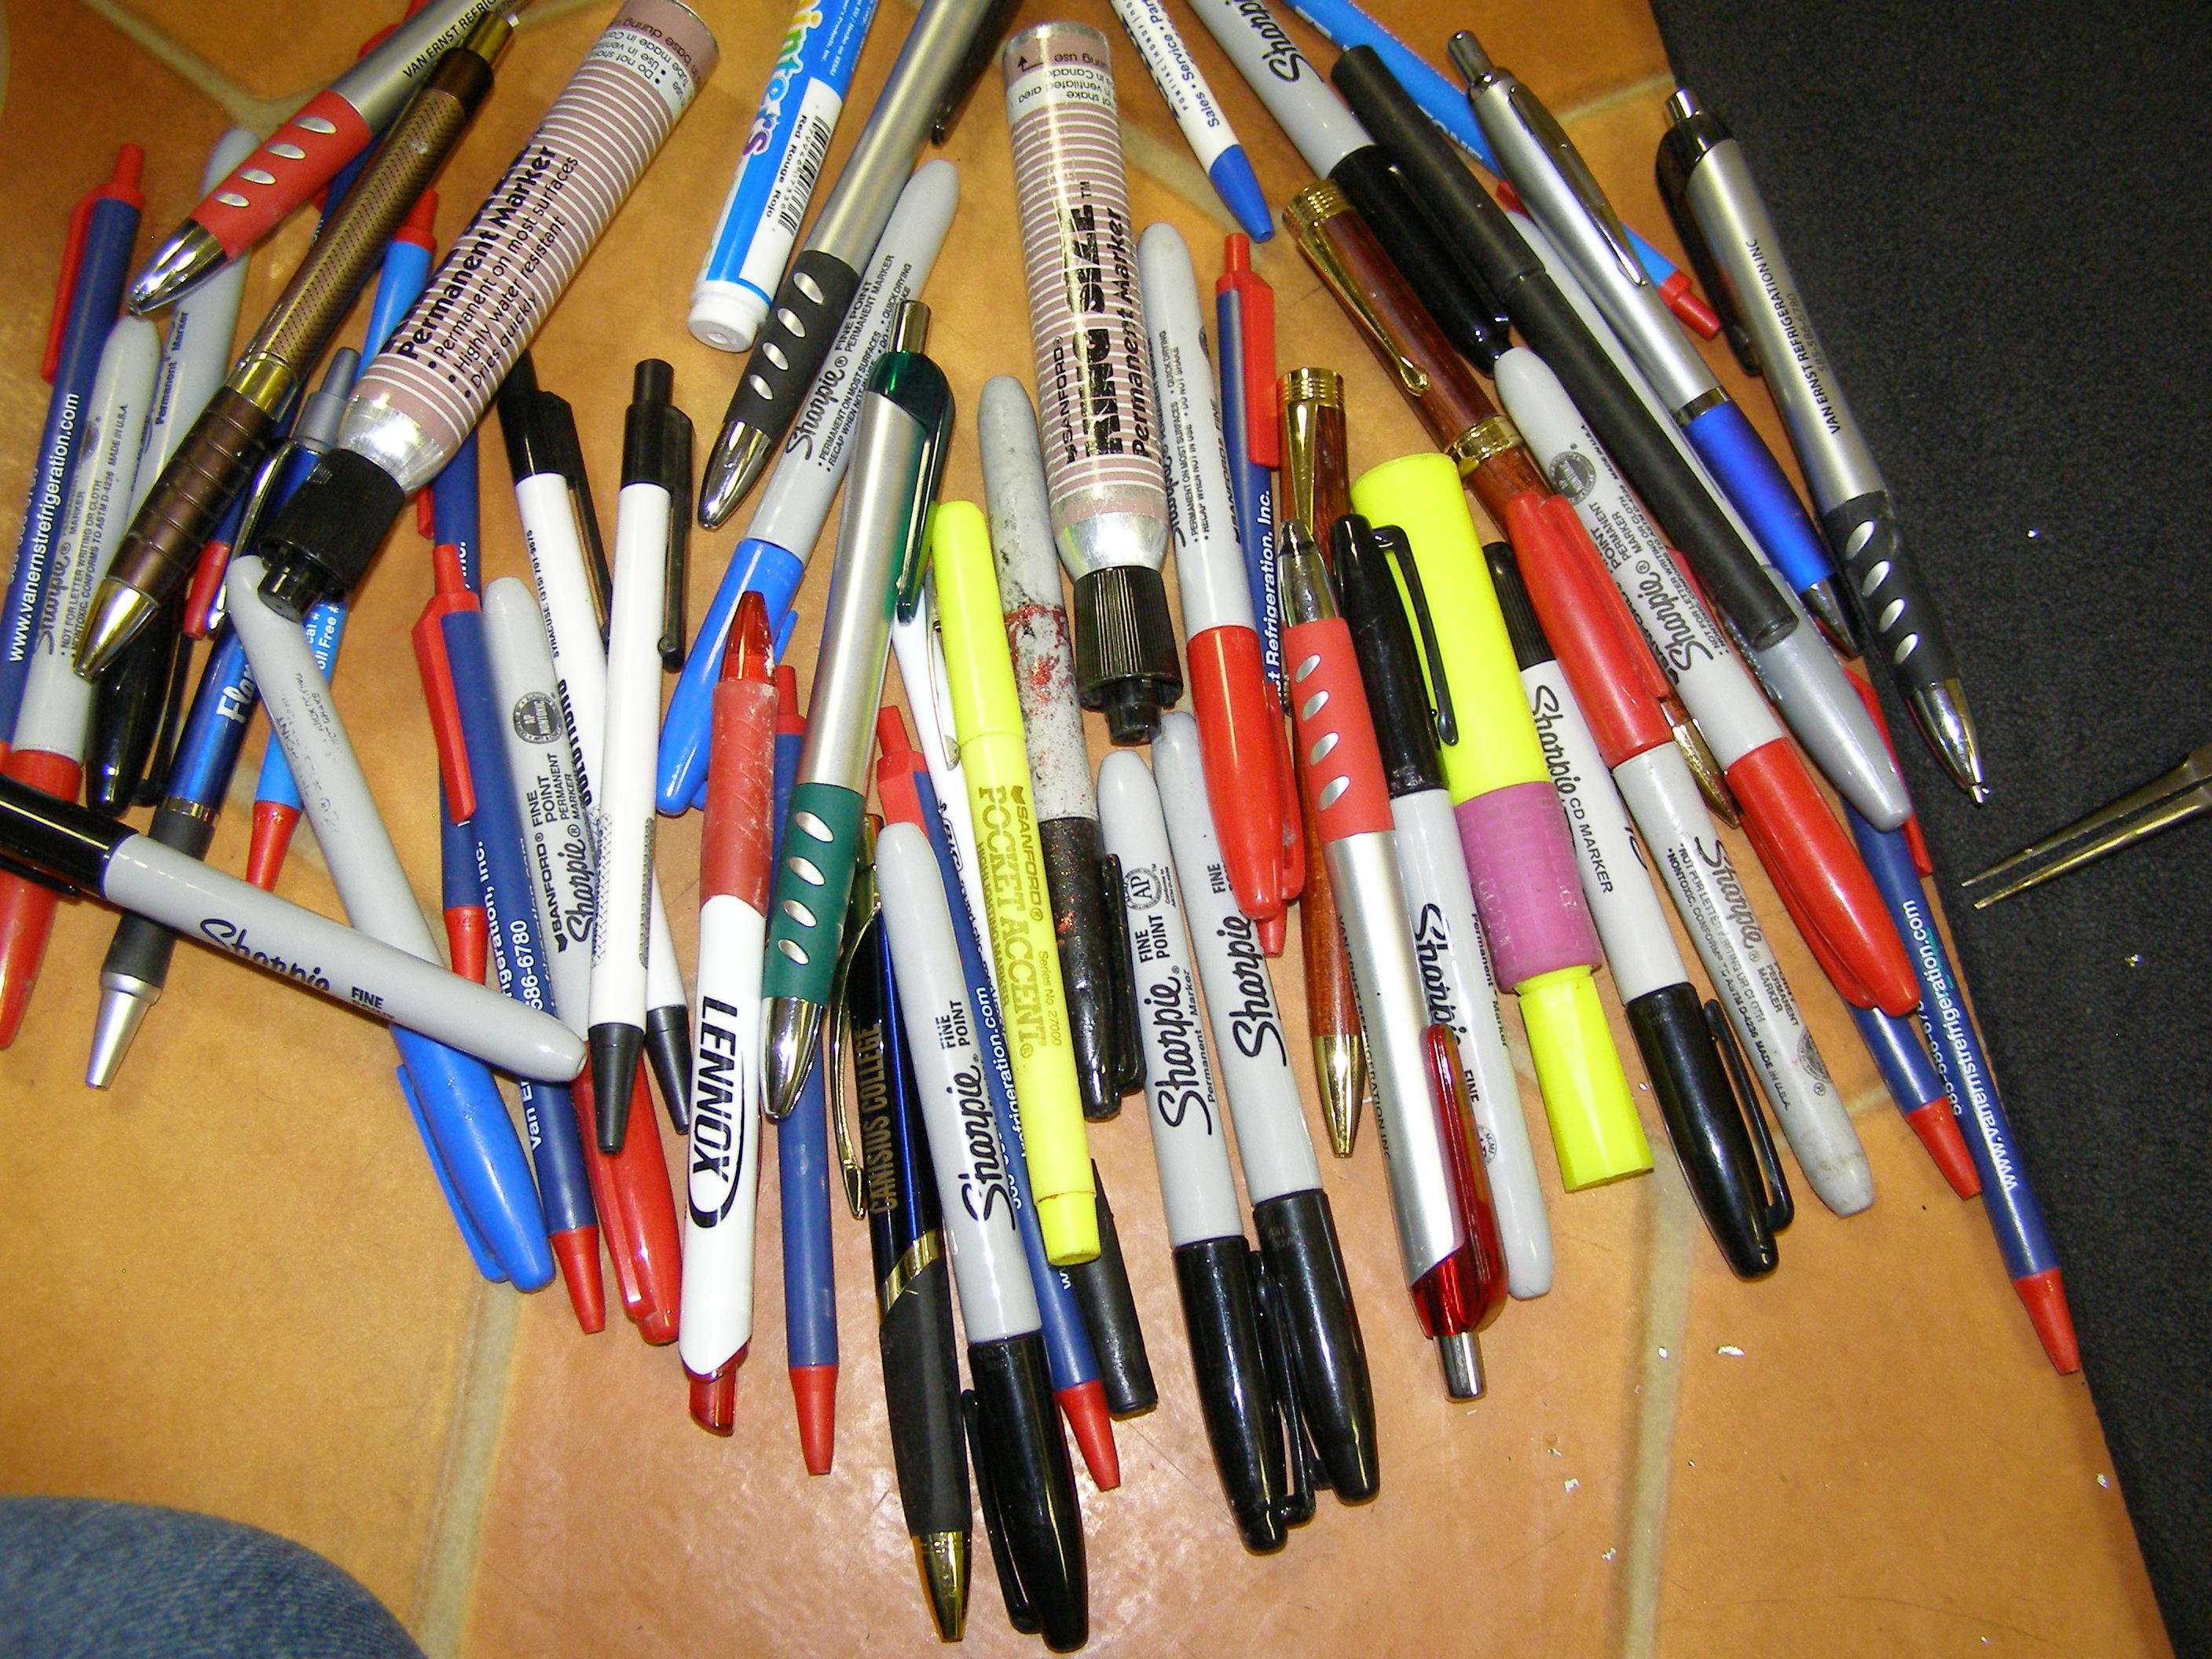
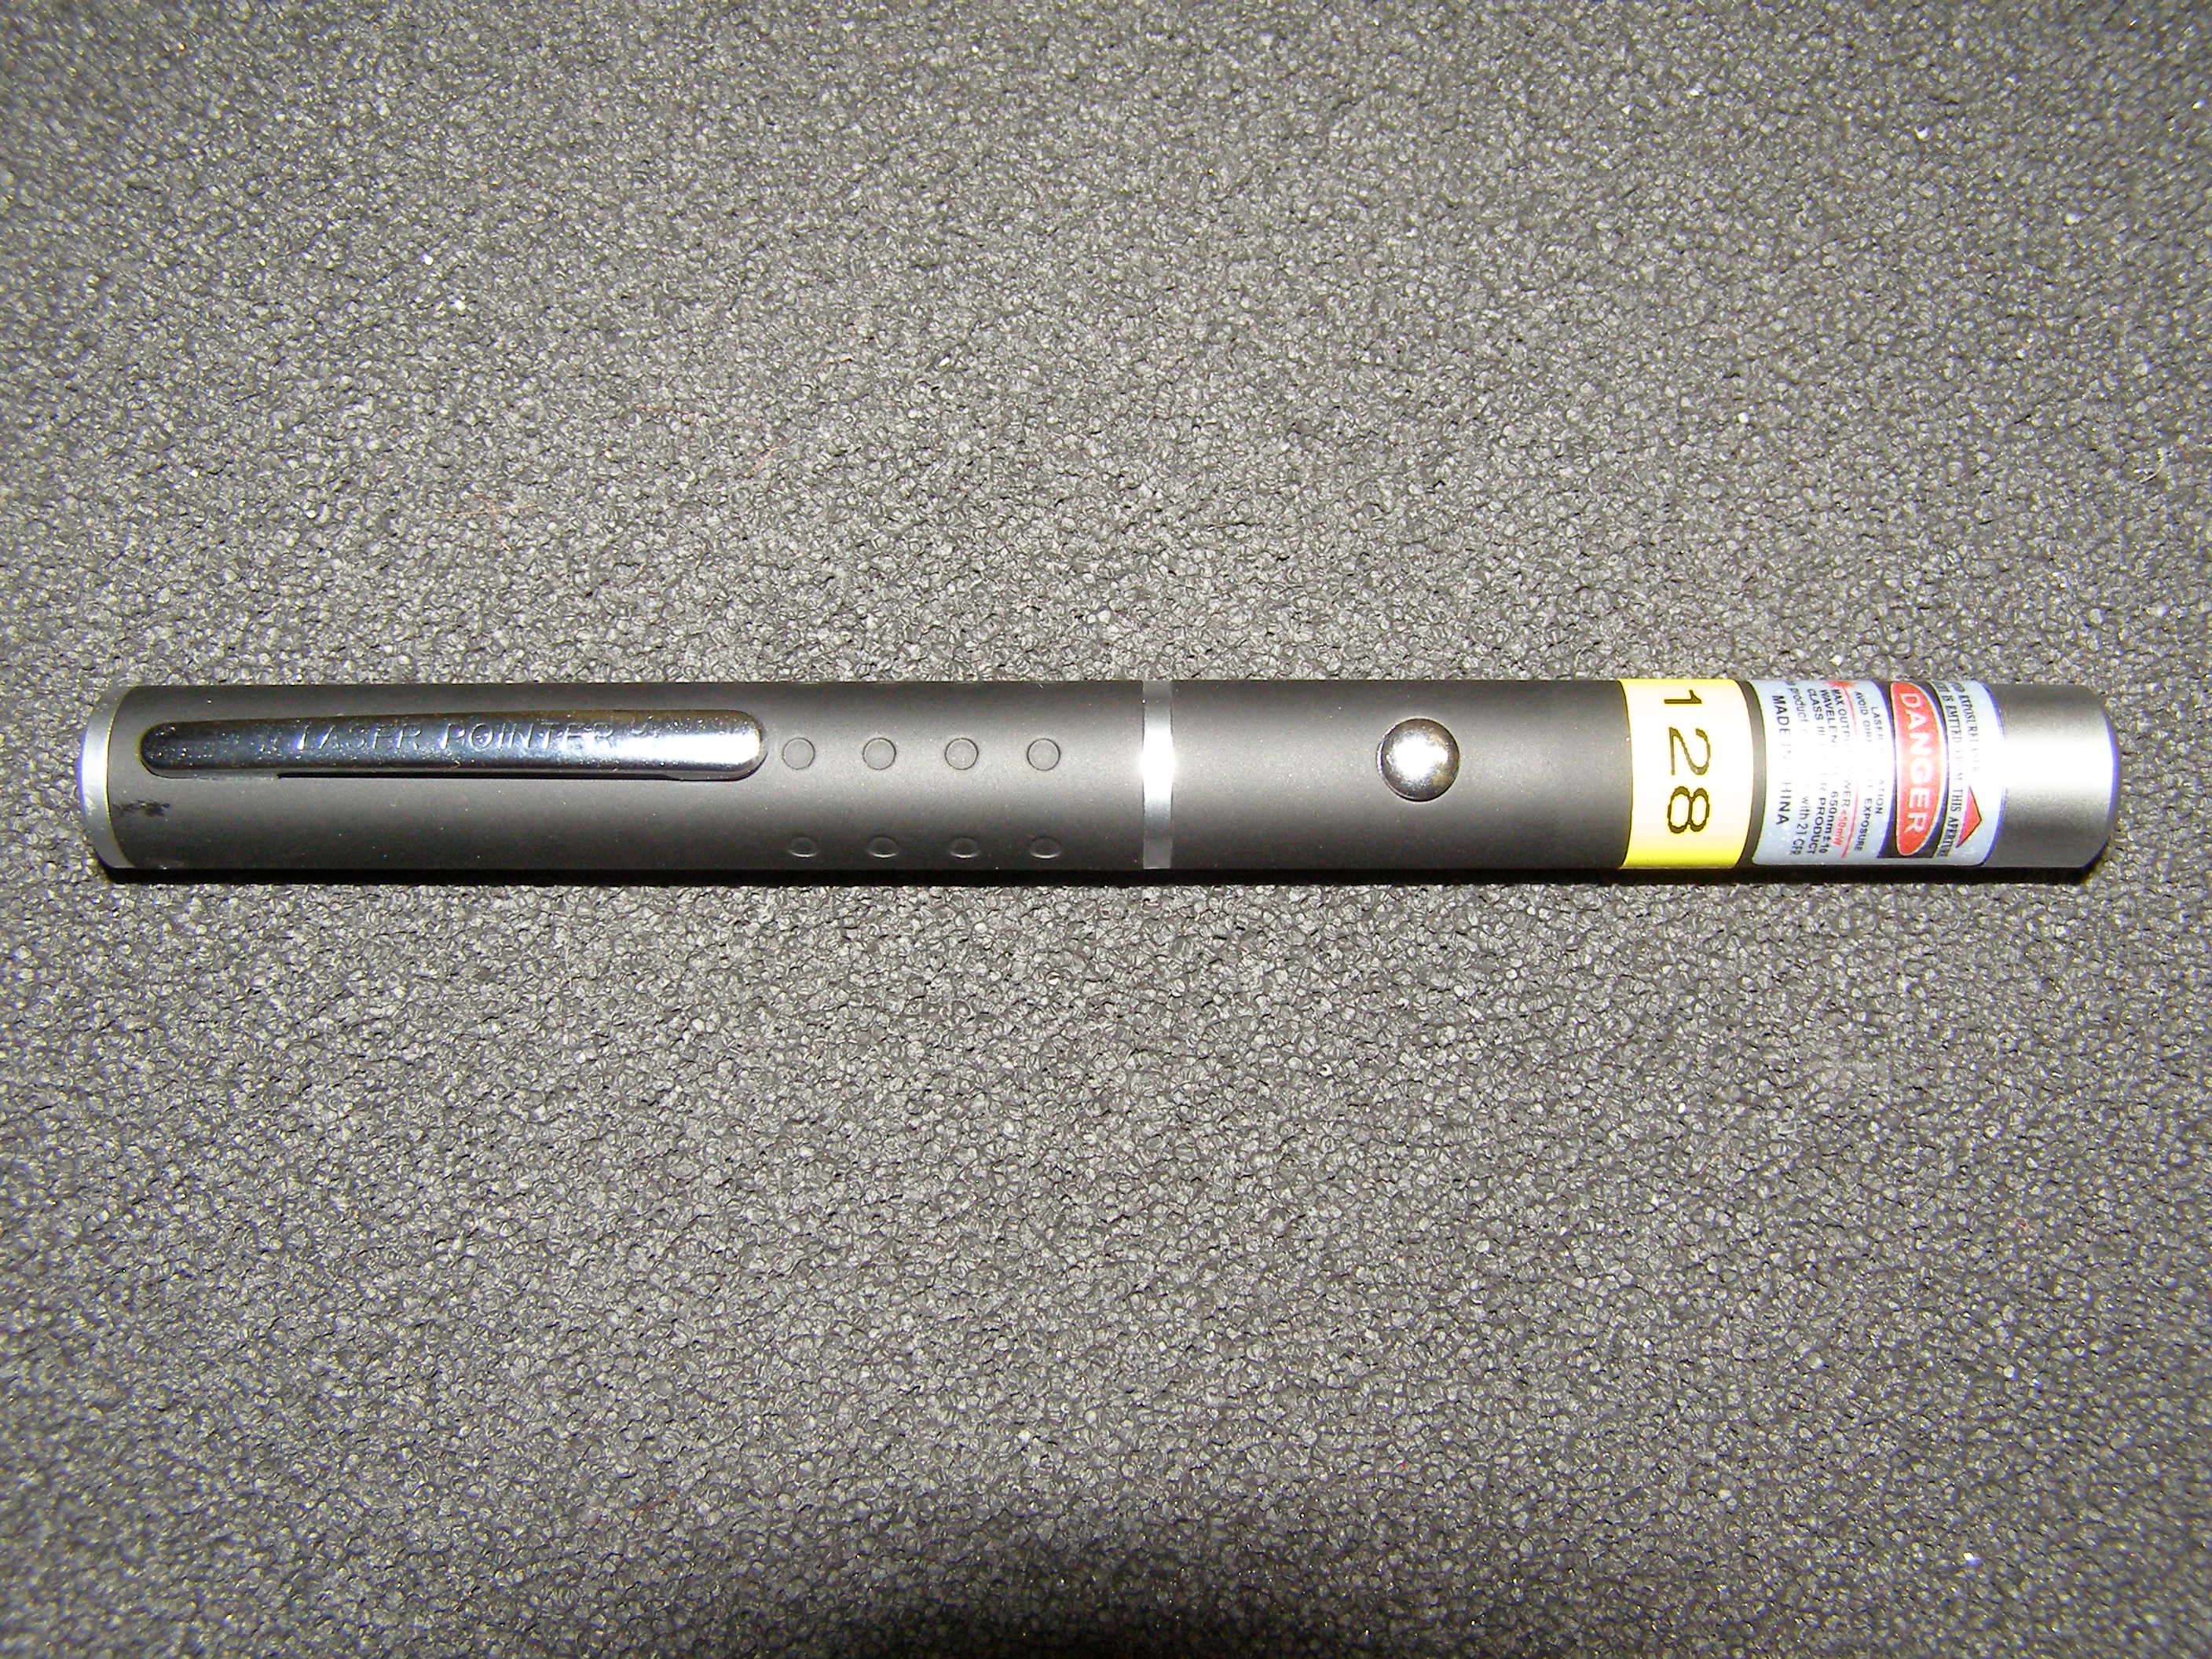
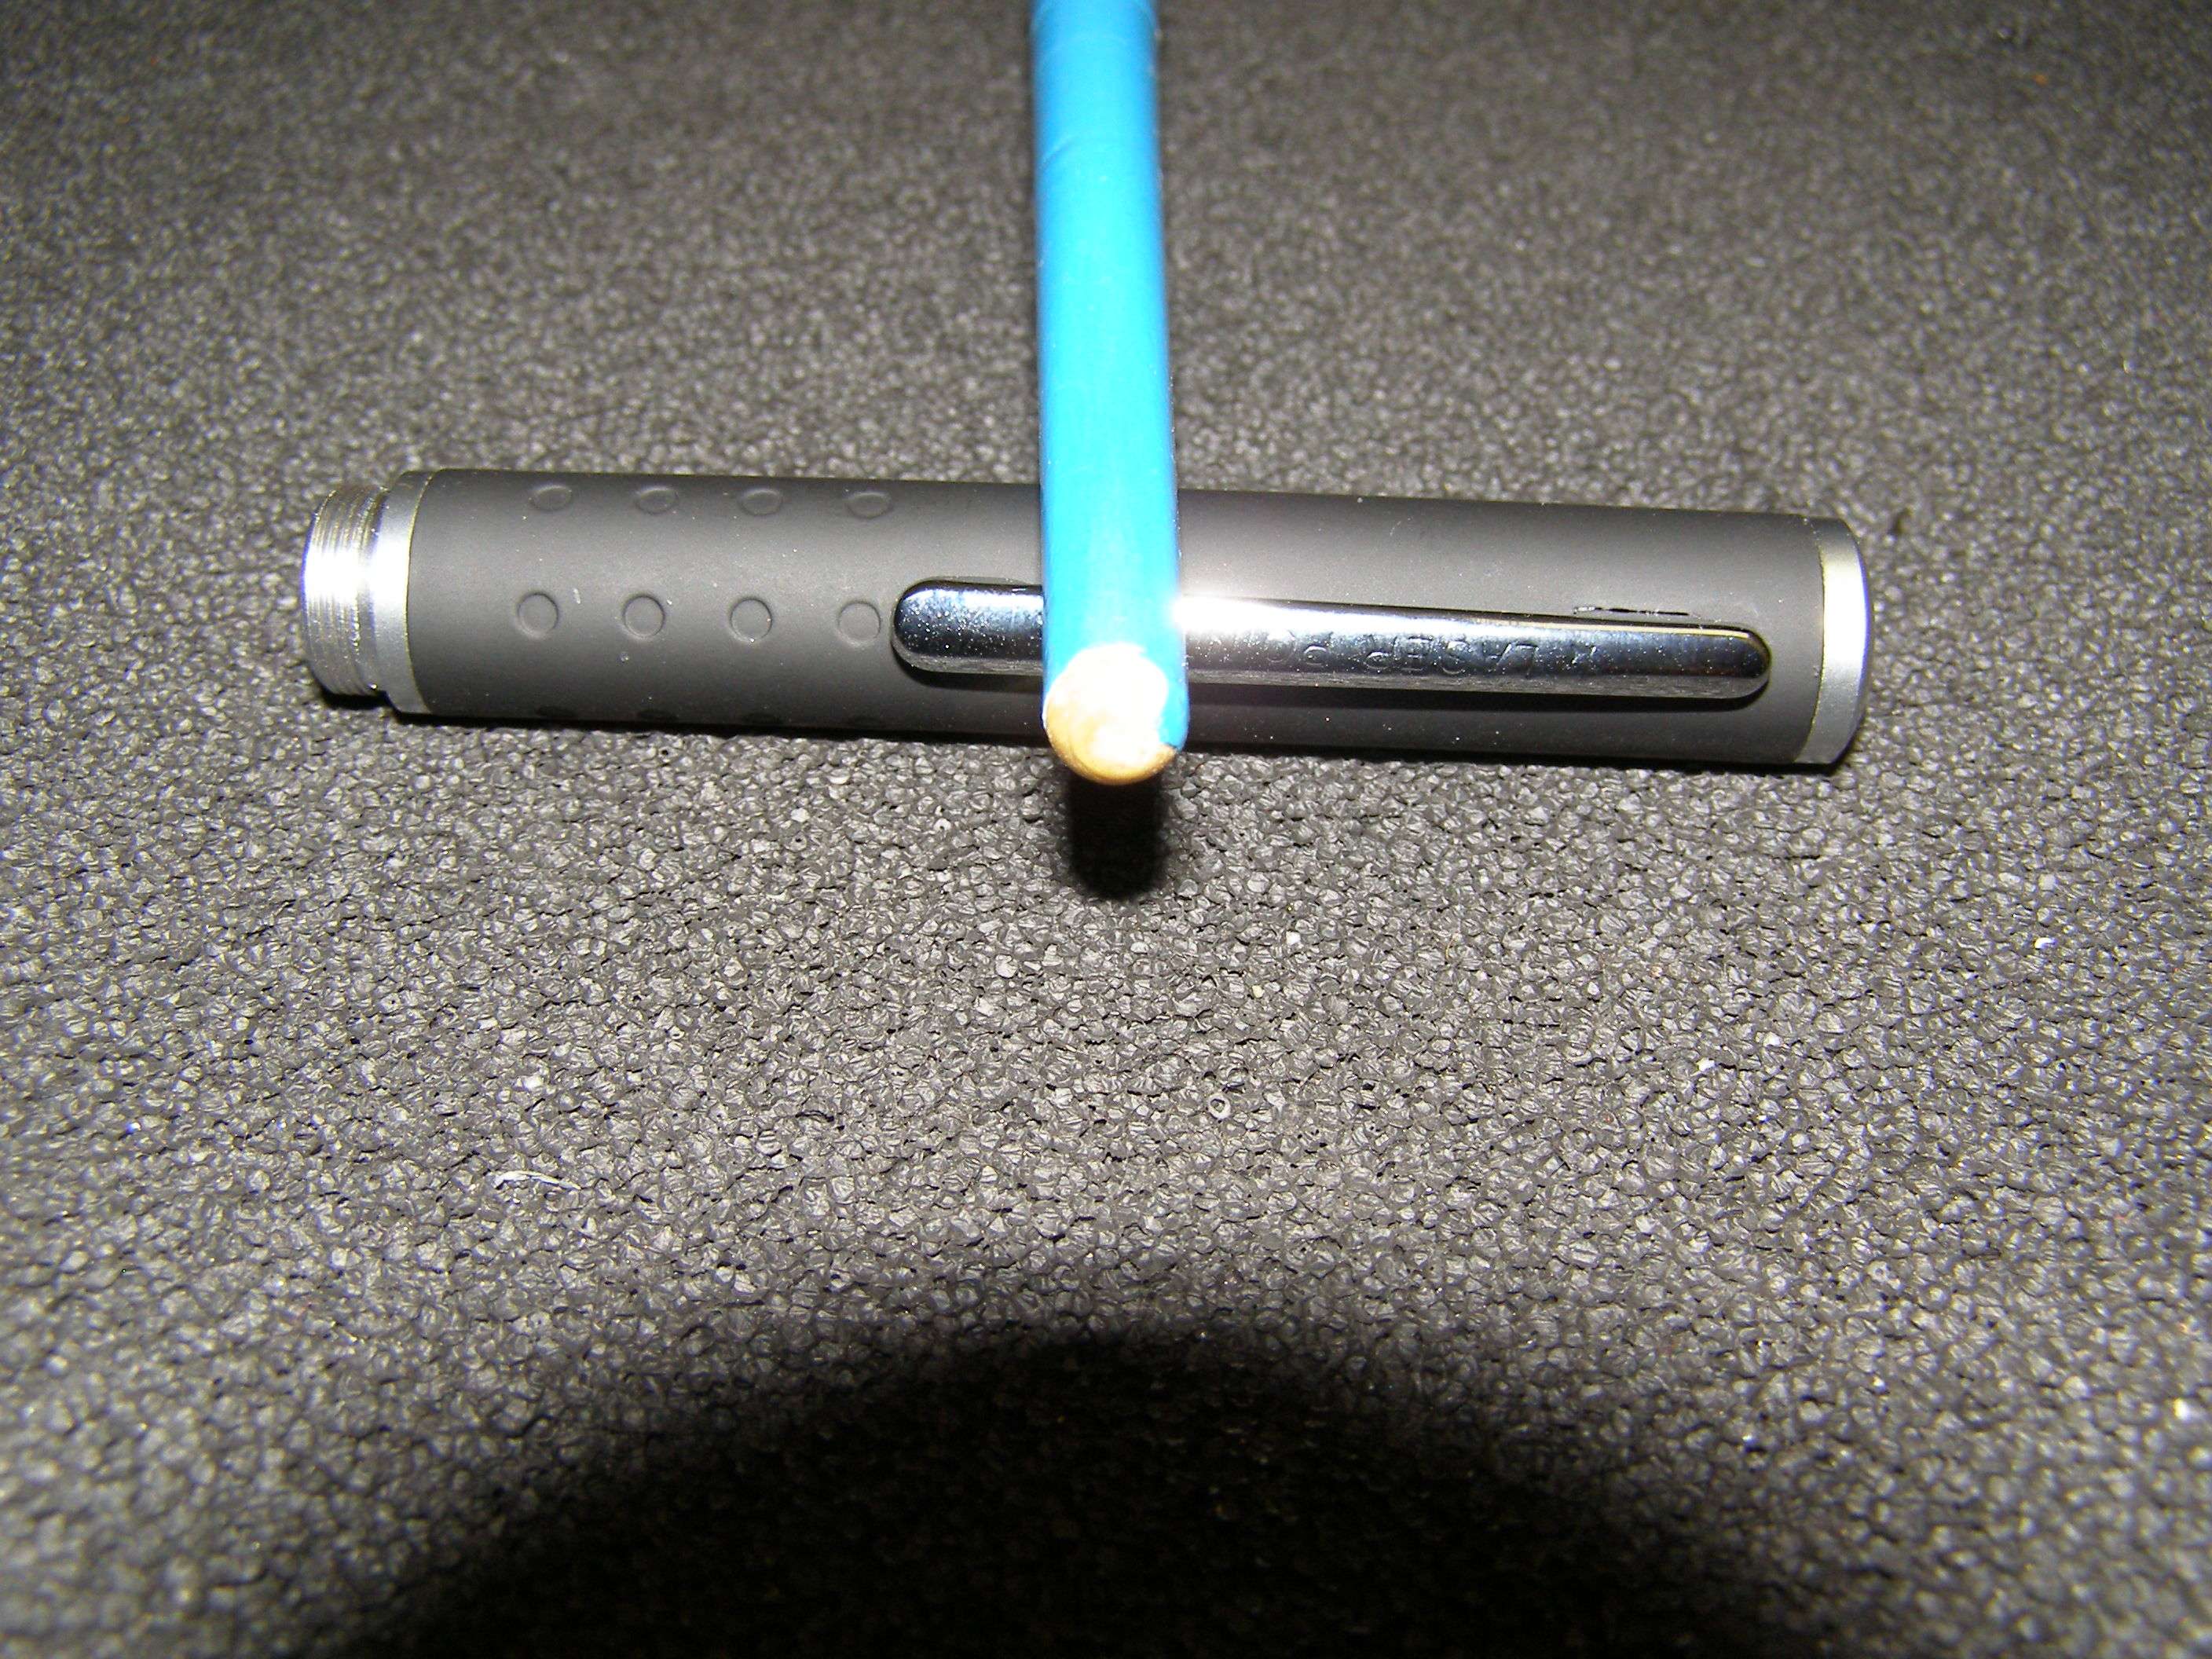
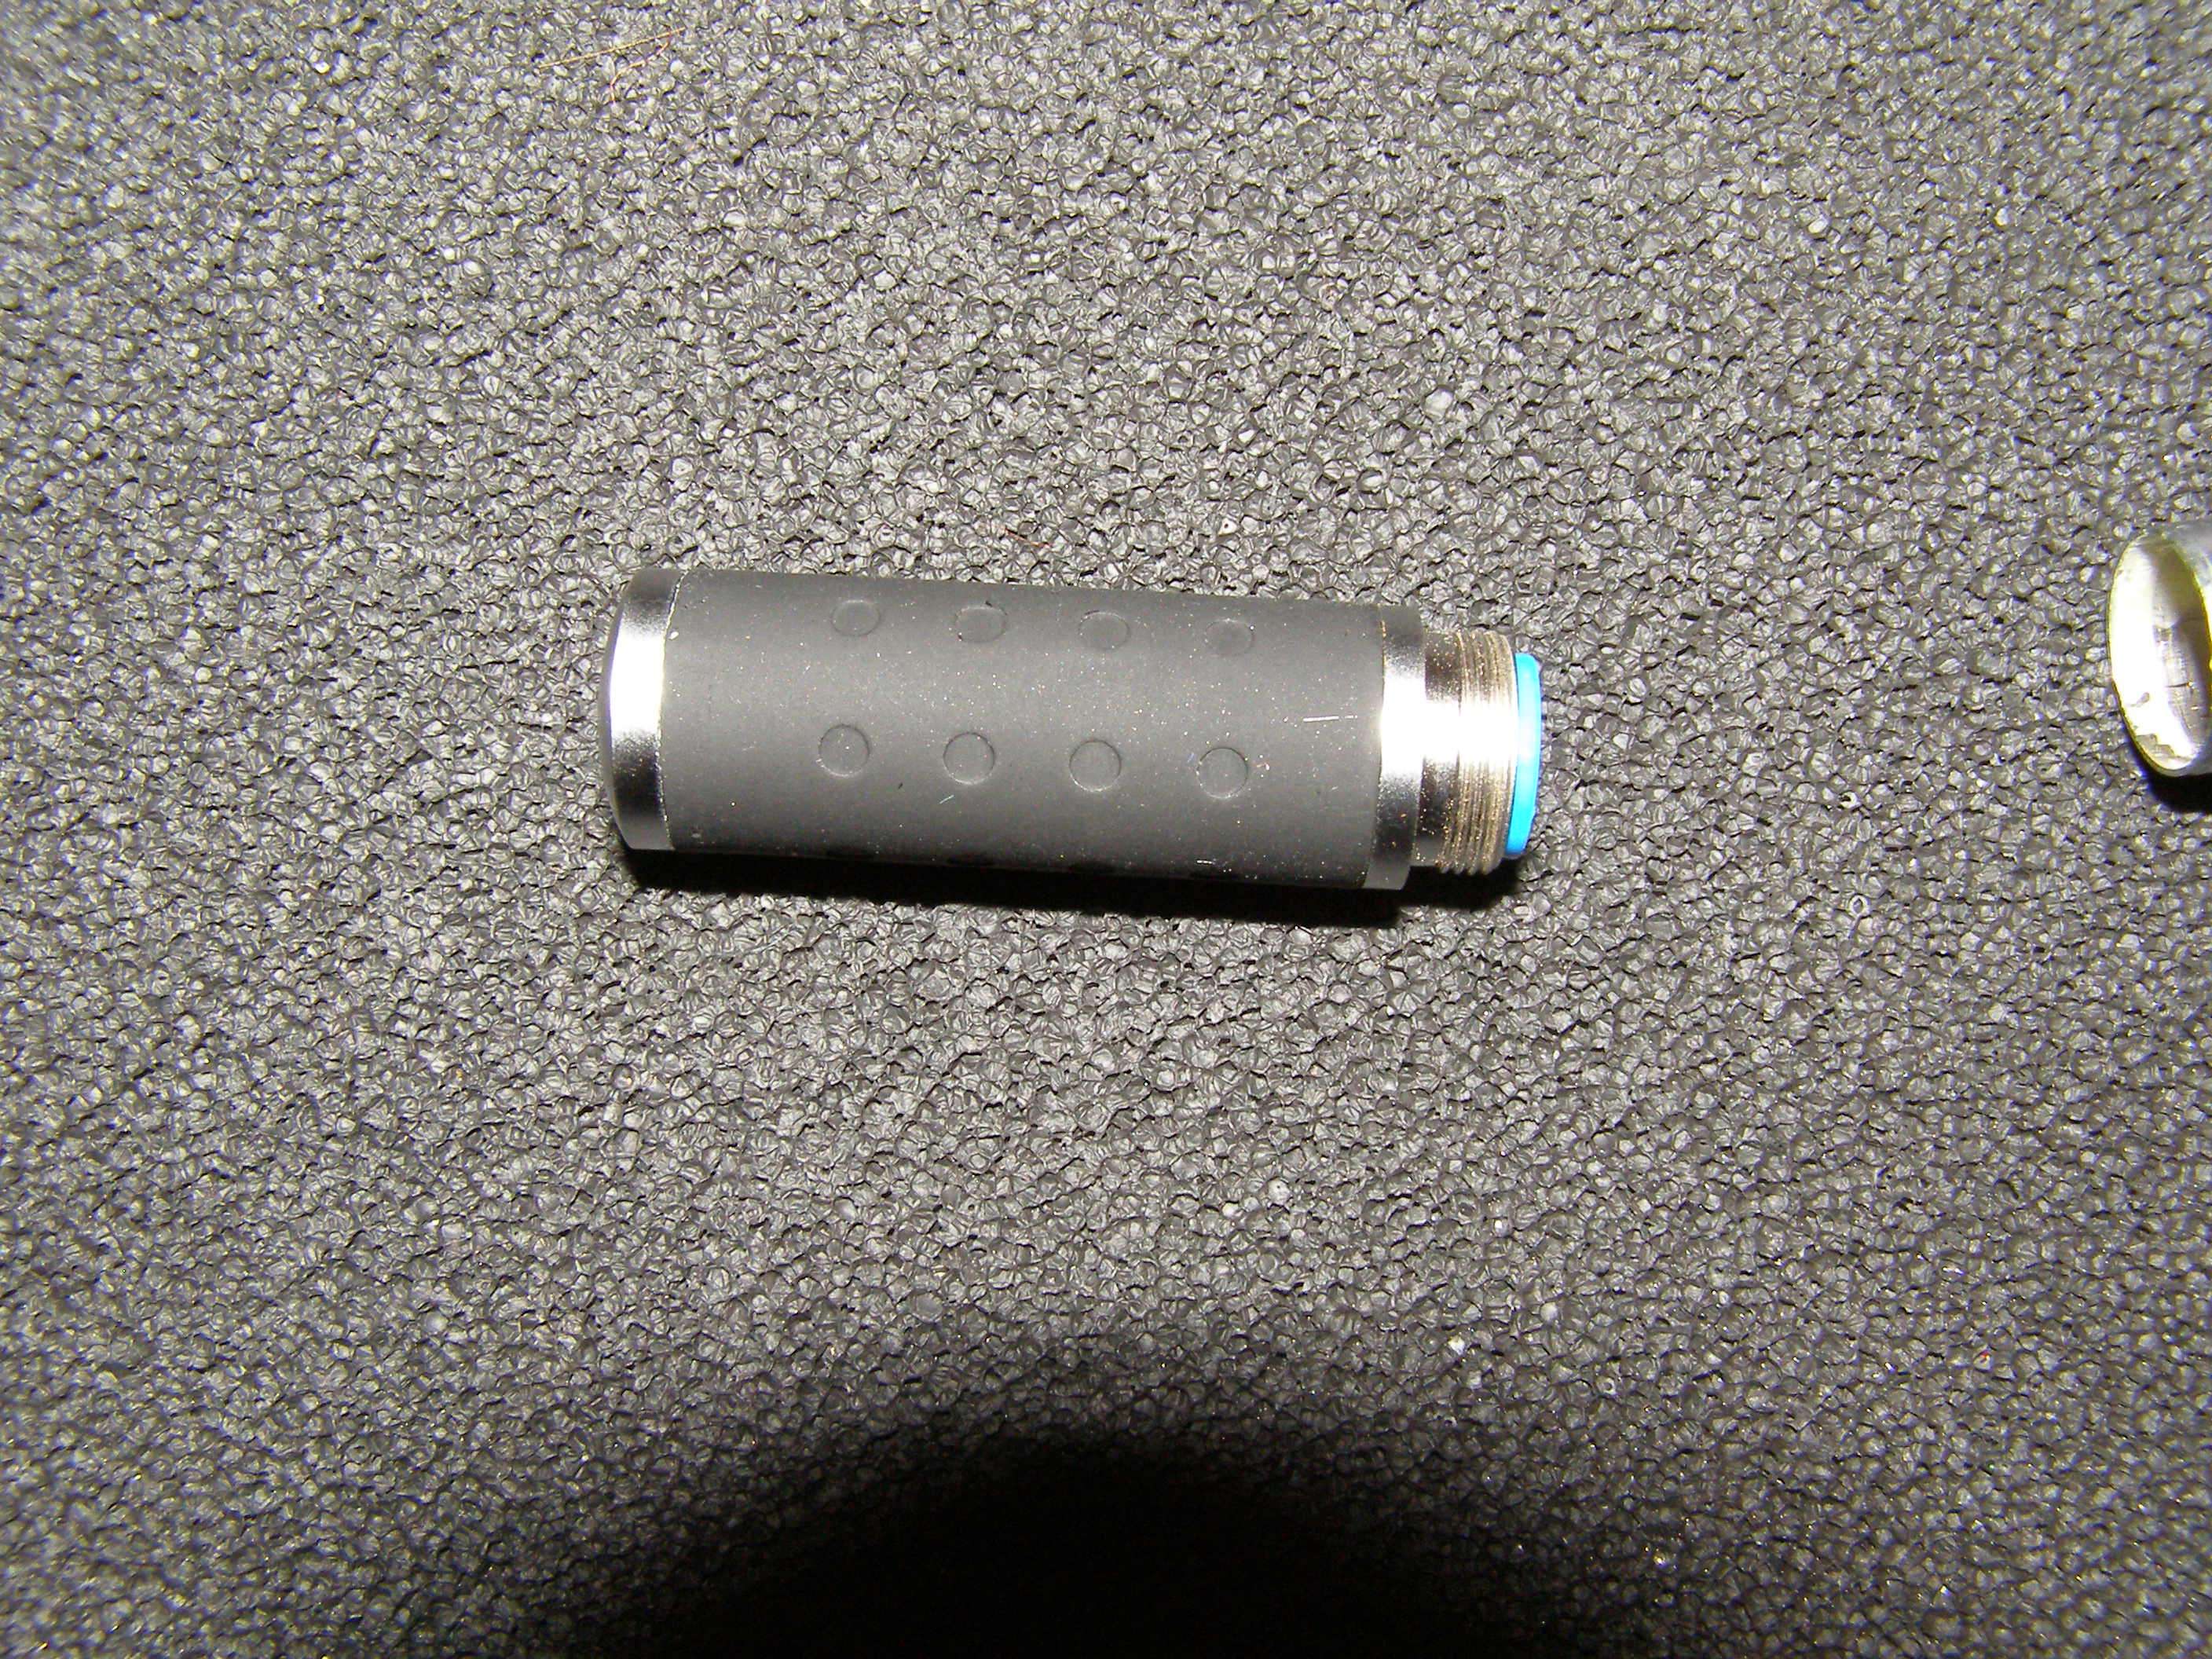
Standard way over spec pen
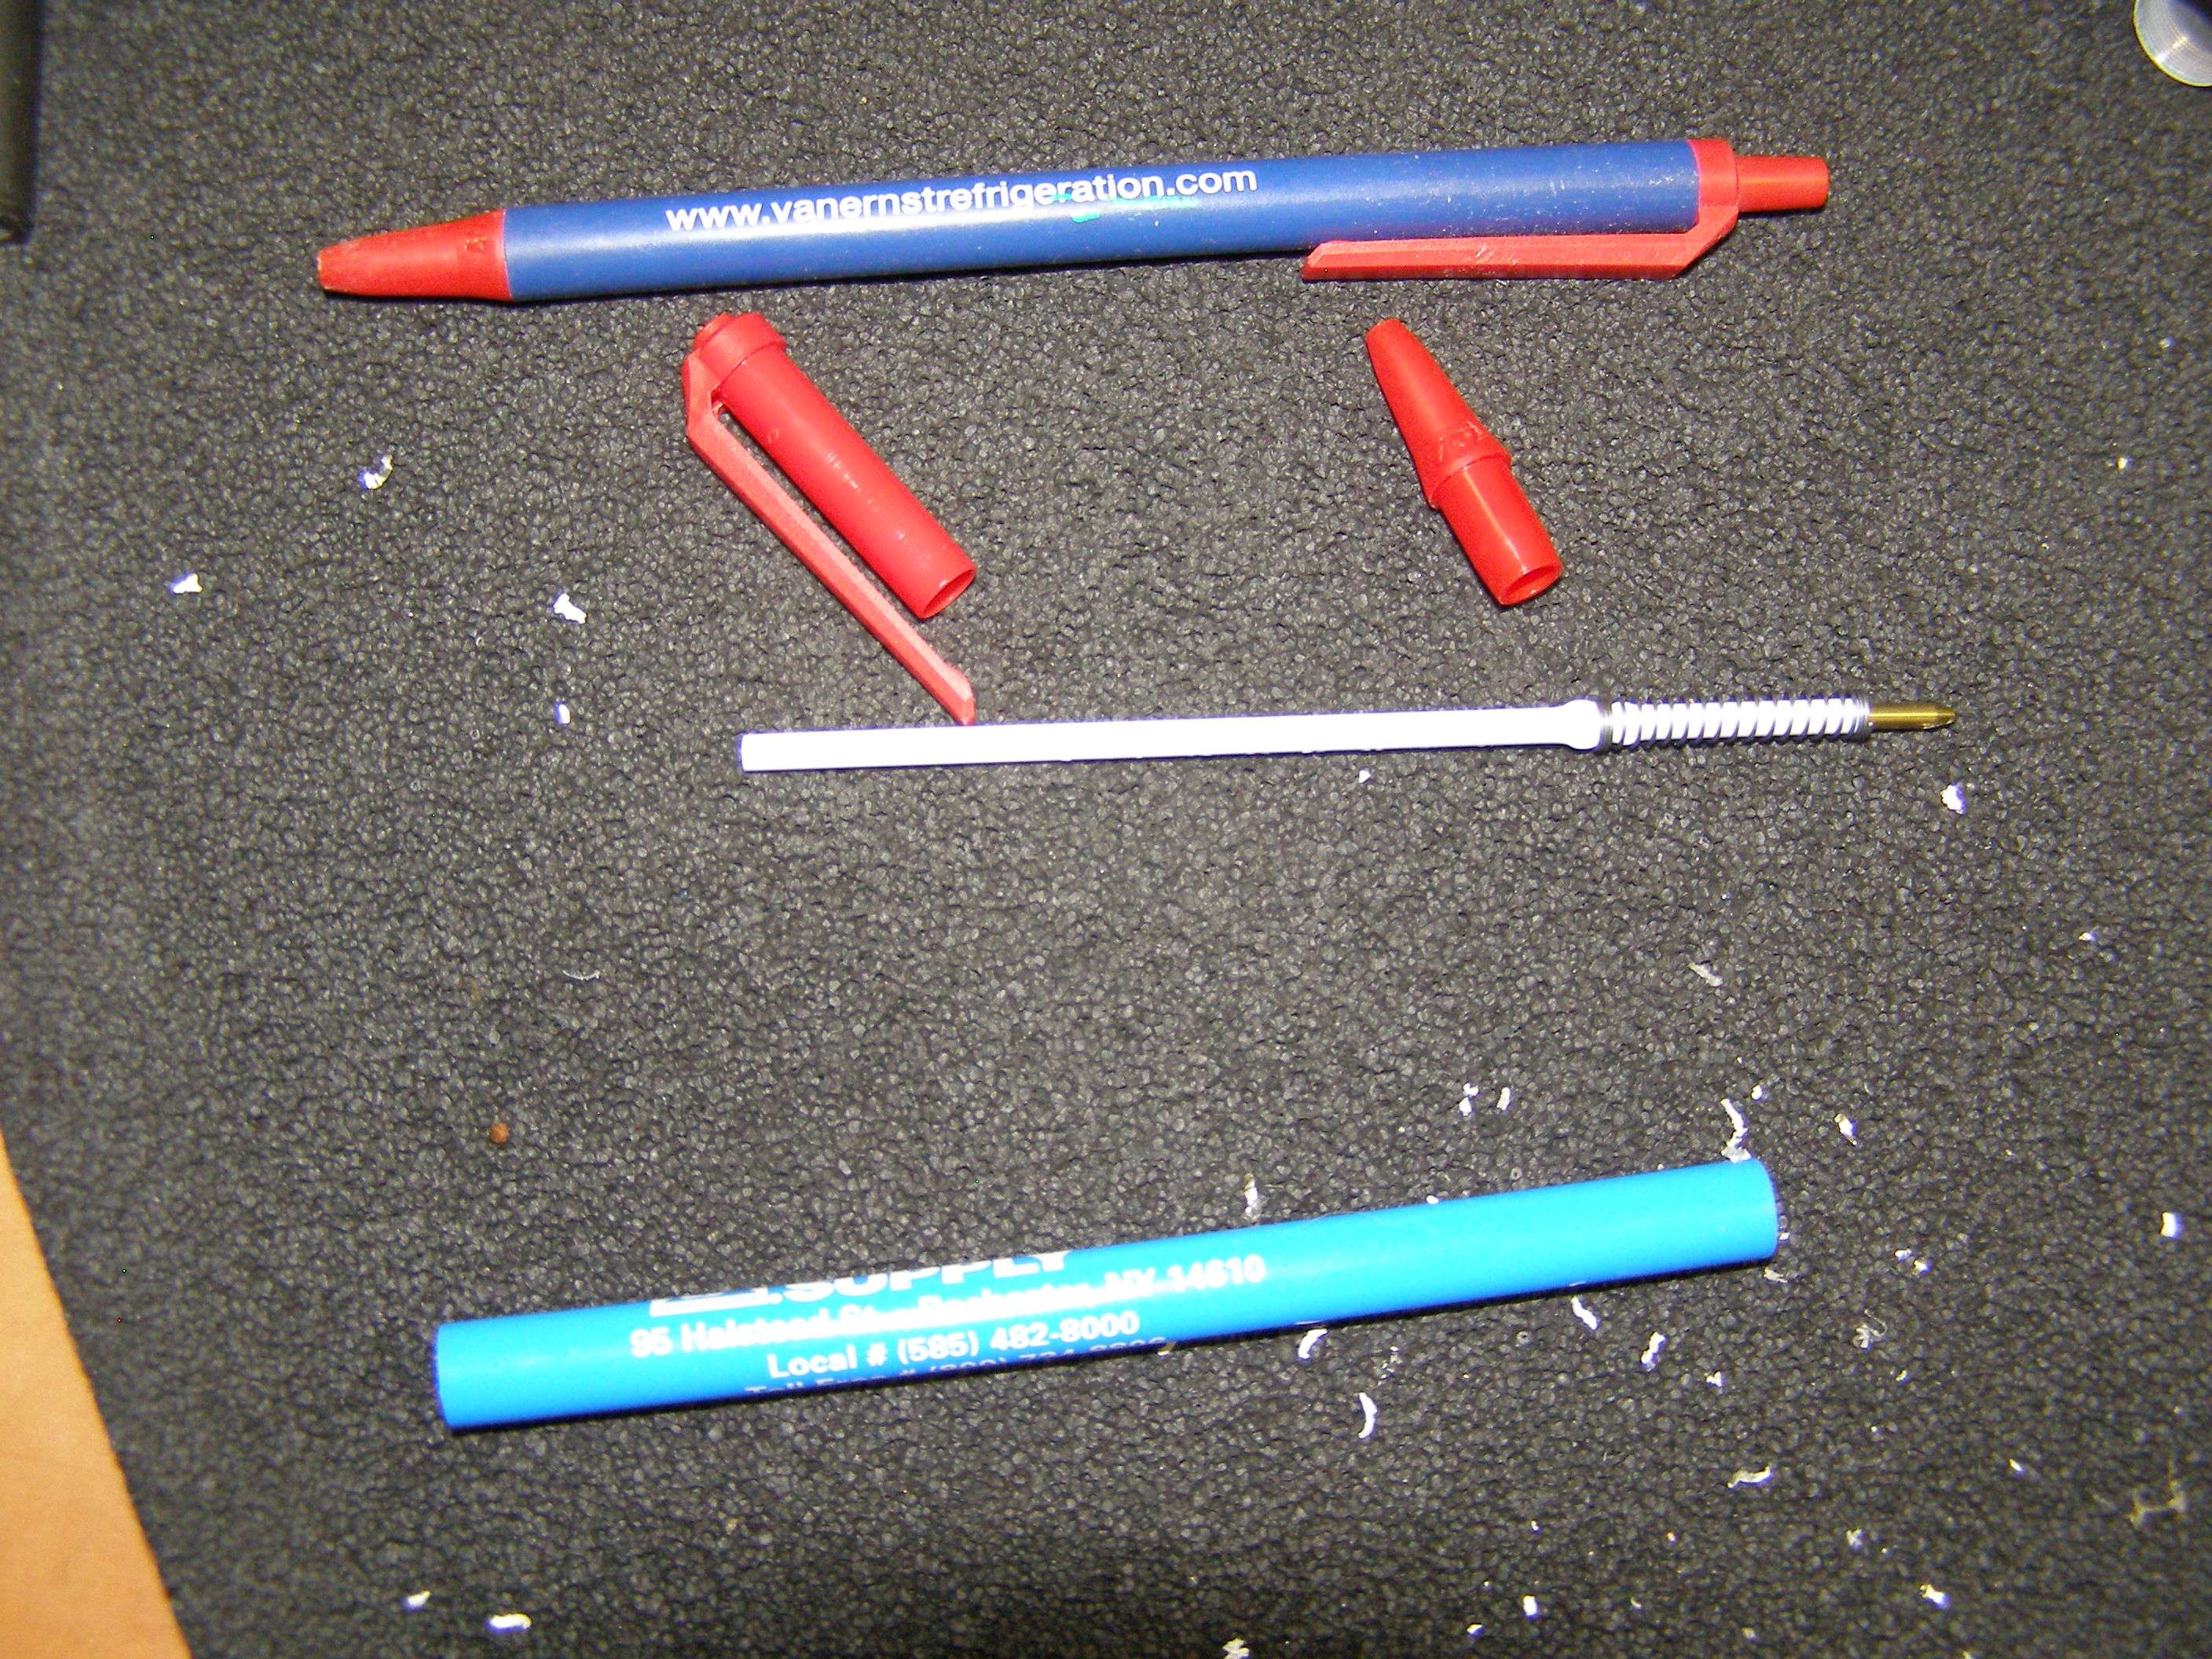
Separate as you only want to be holding the top half when you remove the cap
This is what I have been using as the go-between the pliers and the cap. See how badly the teeth bite into it. You need to find a piece of leather or something like it (belt, strap to a handbag etc...) that can take a lot of pressure from the pliers that won't let the pliers teeth bite all the way through it to the cap. If you have the right material, it will grip using a lot of force and still won't put marks in the metal or even plastic cap. Don't think that I didn't ruin many a cap with marks from trying different materials. In general, rubber won't work as it tends to give too much even when it seems thick enough due to the amount of force necessary to grip the cap.
Here's a pic of the one from above and from one of the single AAA Fasttech pens where I removed the whole module to put inside a different host.
What you are doing is putting the strap around the cap very close to where it meets the host and then gripping it with the pliers hot farther than the strap in case you slip so you don't mark up the host or cap.
You are NOT trying to turn the cap! You ARE holding the pen (only front half as the battery end has been removed so you don't torque at the screw in junction between host halves) while gripping the cap hard and rocking the pliers while putting some force outward to pull it straight out. You do it for a moment on one side and then work your way around and it will start to come loose. This takes effort as the cap is glued in. I used to take a razor and try to score between the cap and host first but it never seemed to help much and almost always left a slight make at the junction on the cap, host or both. The point is to keep the host looking like new. Have a bit of patience when trying to work it out paying strict attention to where the pliers are on the strap and where the strap is on the cap. It it easy for the pliers/strap to slip off the cap as you try to rock the cap with some pulling force. Another reason why you need to pay attention to the strap/pliers positioning so you don't scrape anything.
Also, try to use pliers that are not wider than the cap. What tends to happen when you are trying to wiggle out the cap is the pliers/strap will slip off the cap end because they don't havve anything to grip on.
There's another way in this link that Blord uses with a couple blocks of wood in a vise.
http://laserpointerforums.com/f51/how-extract-module-laser-pen-77676.html
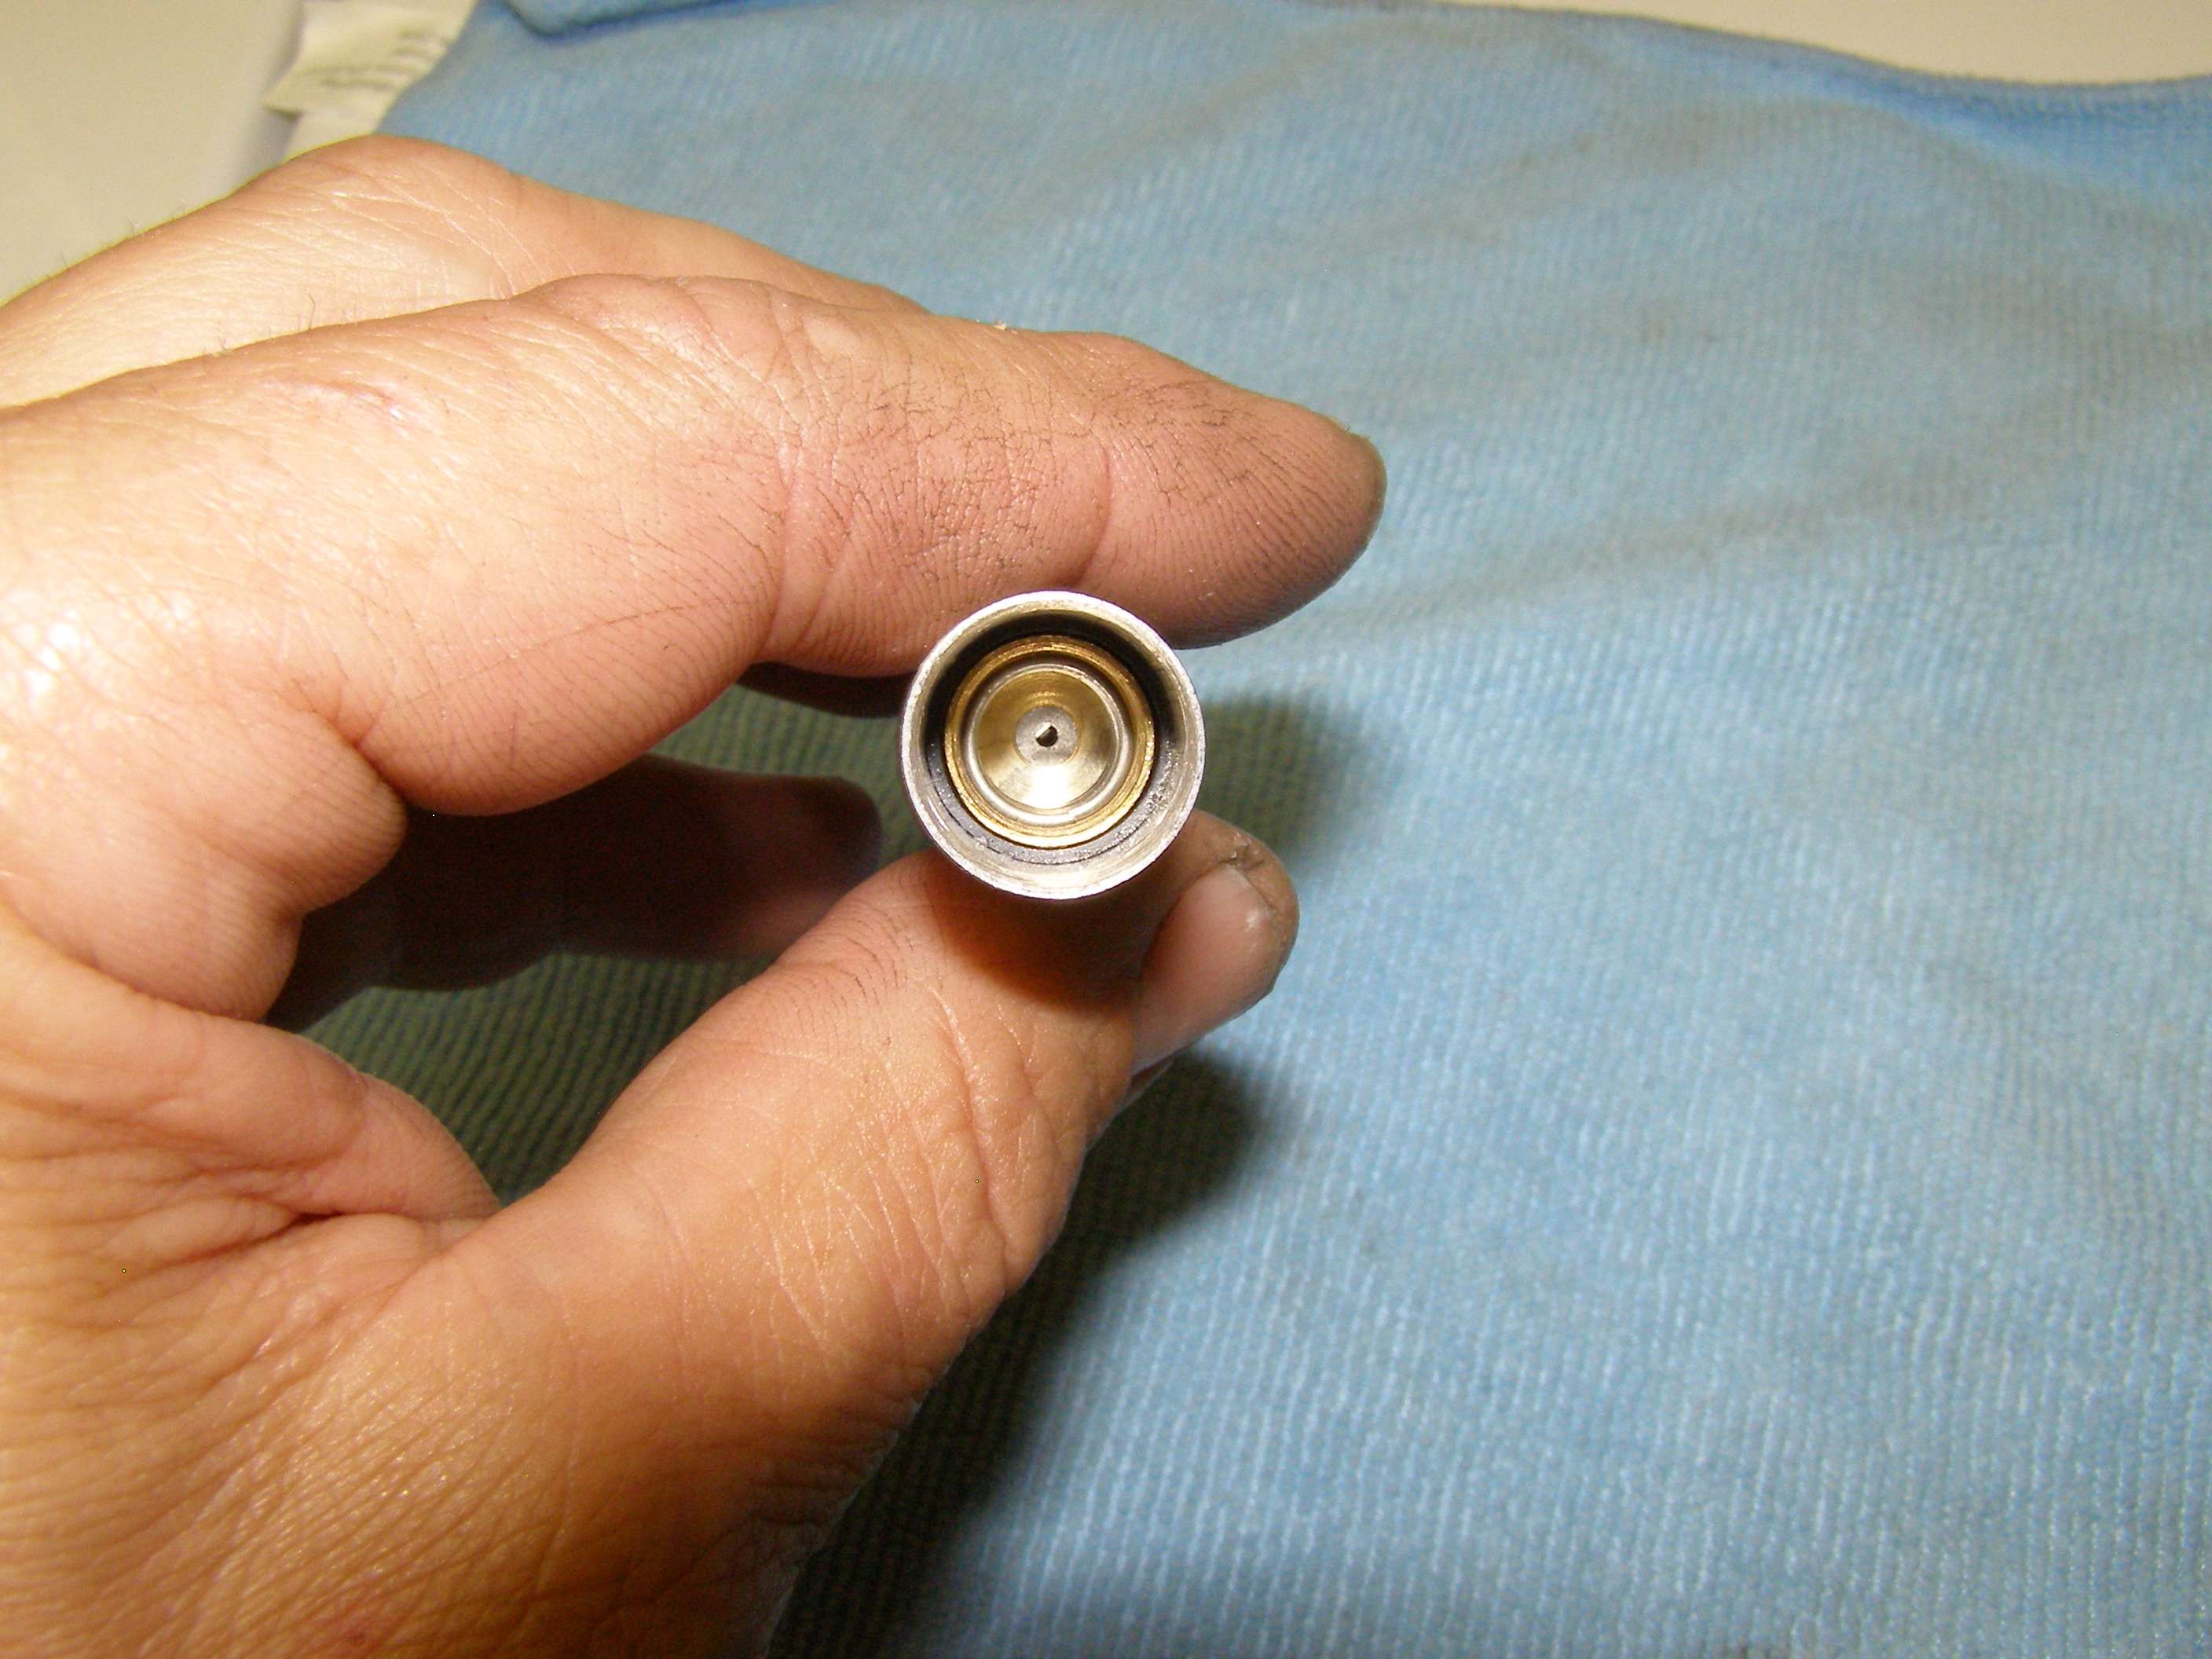
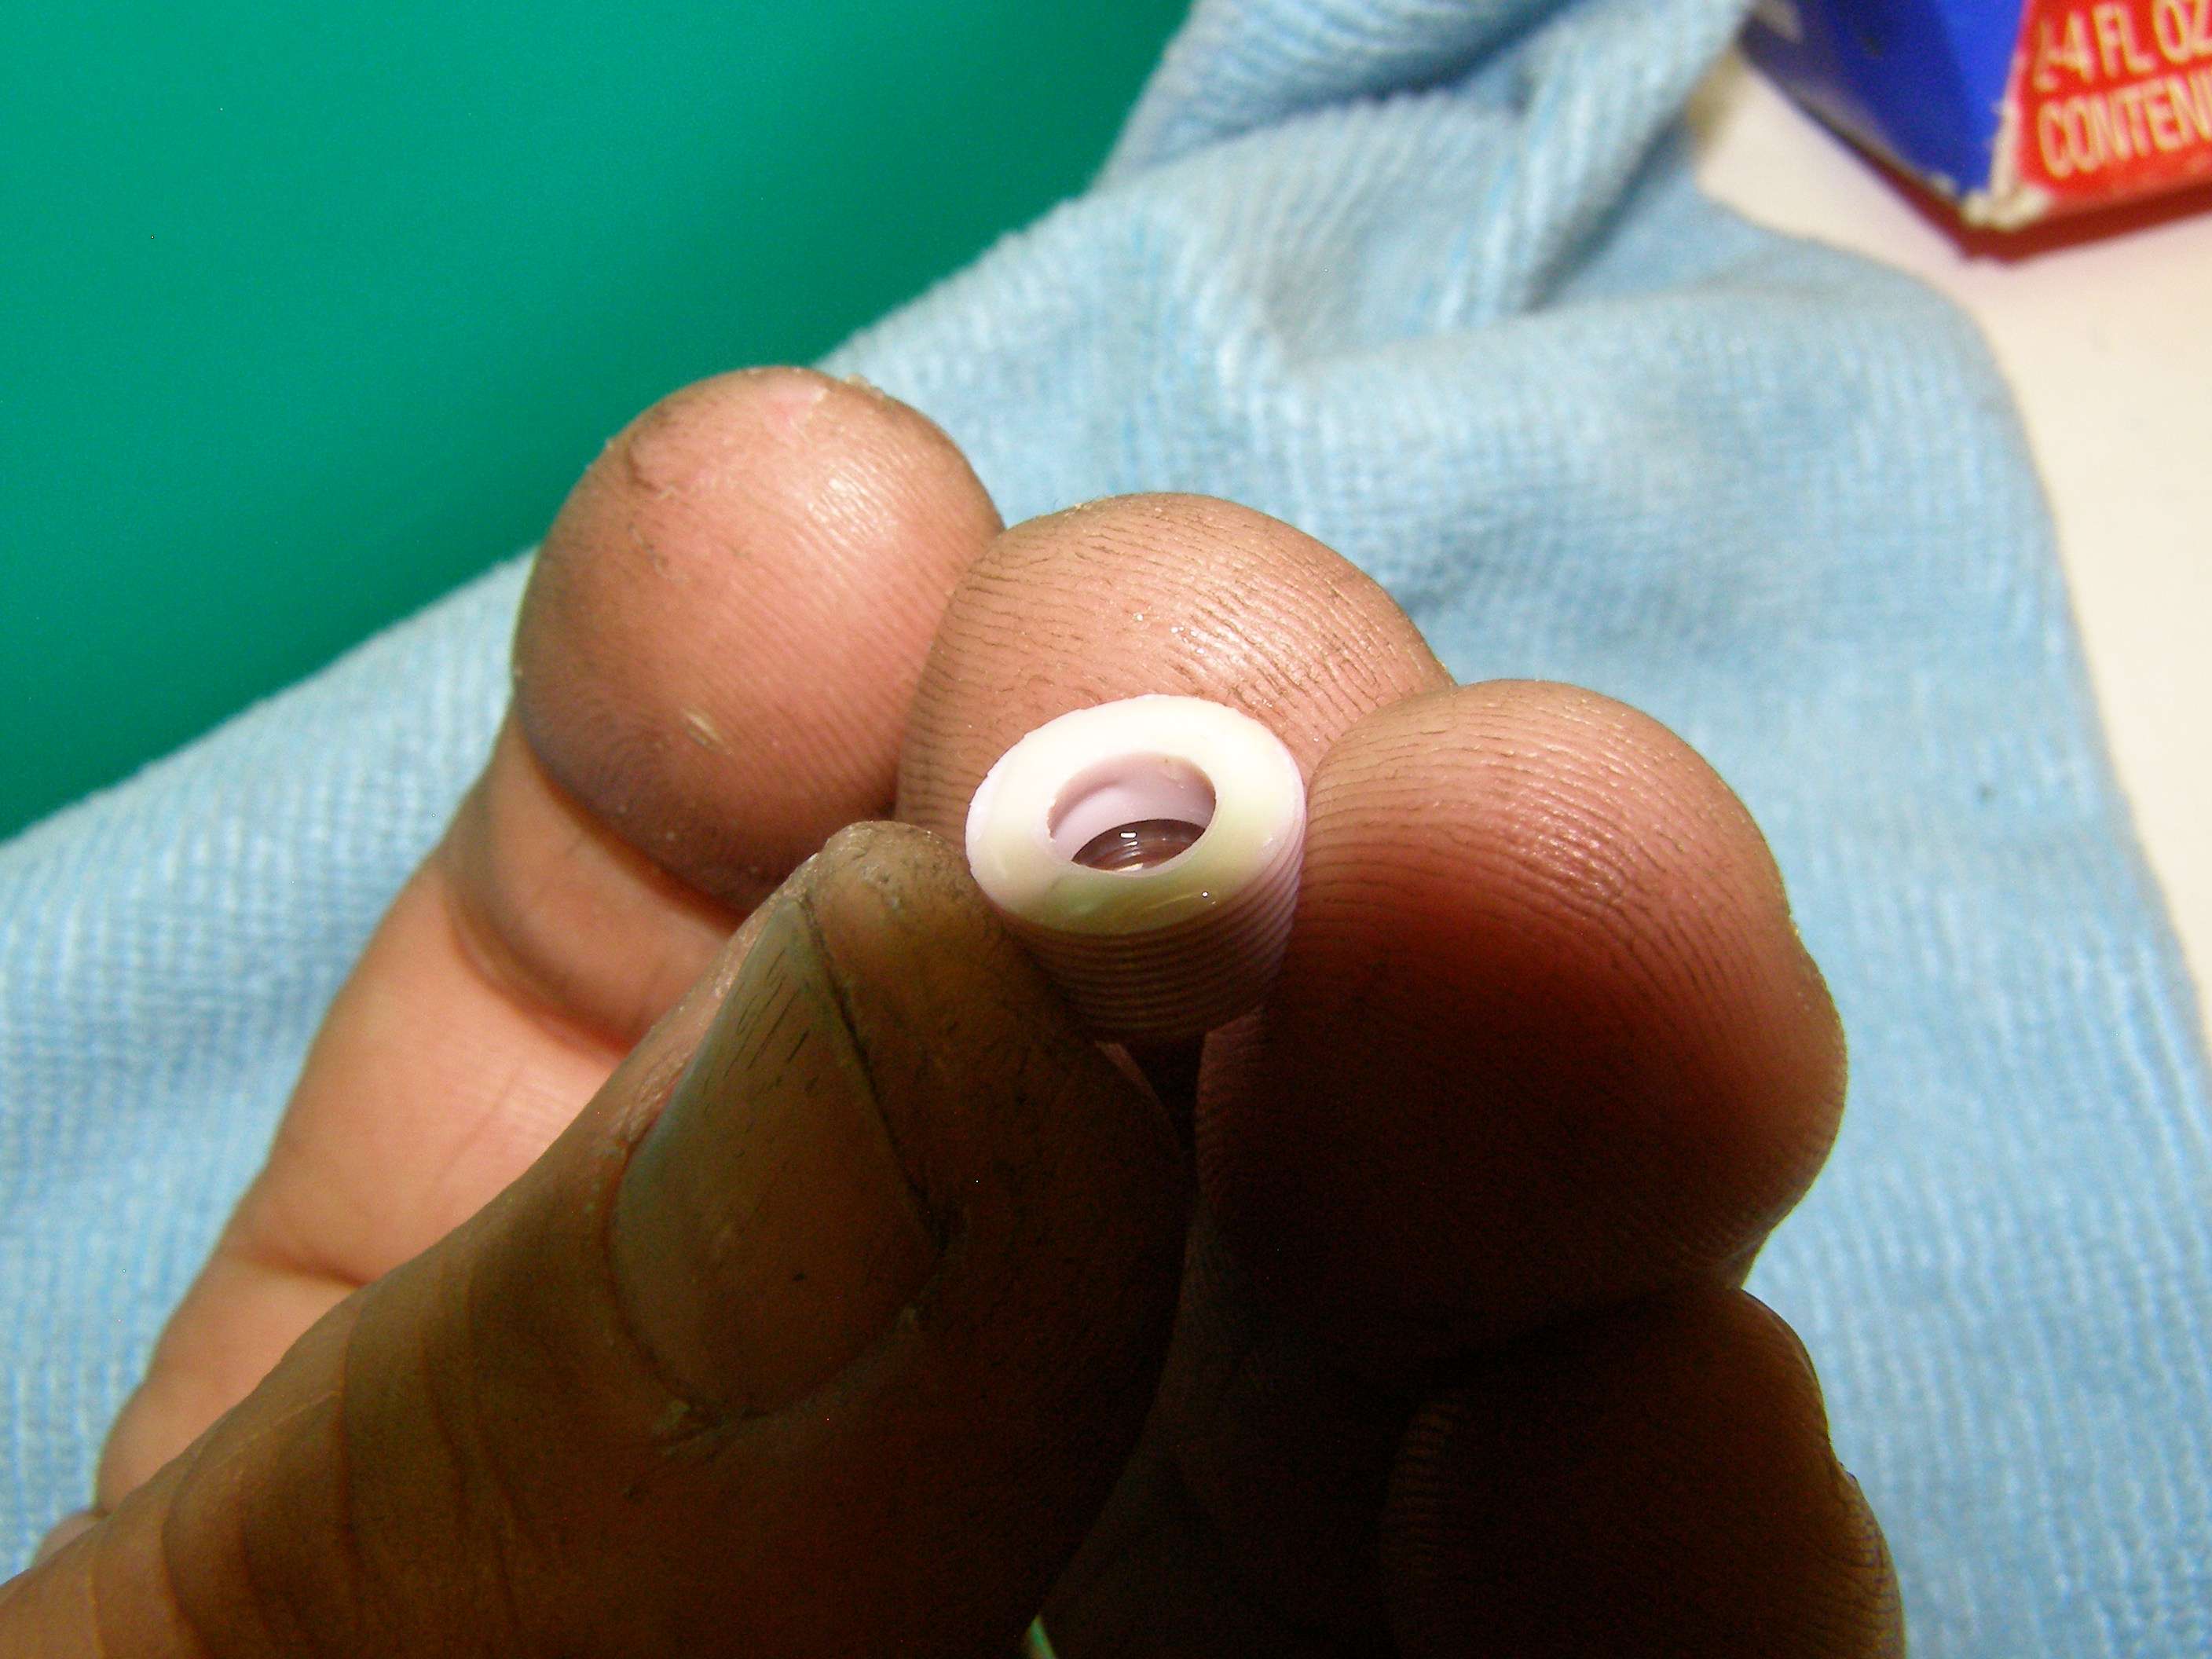
Now when you look inside, you will see the lens and a small amount of adhesive that is easy to remove if you want.
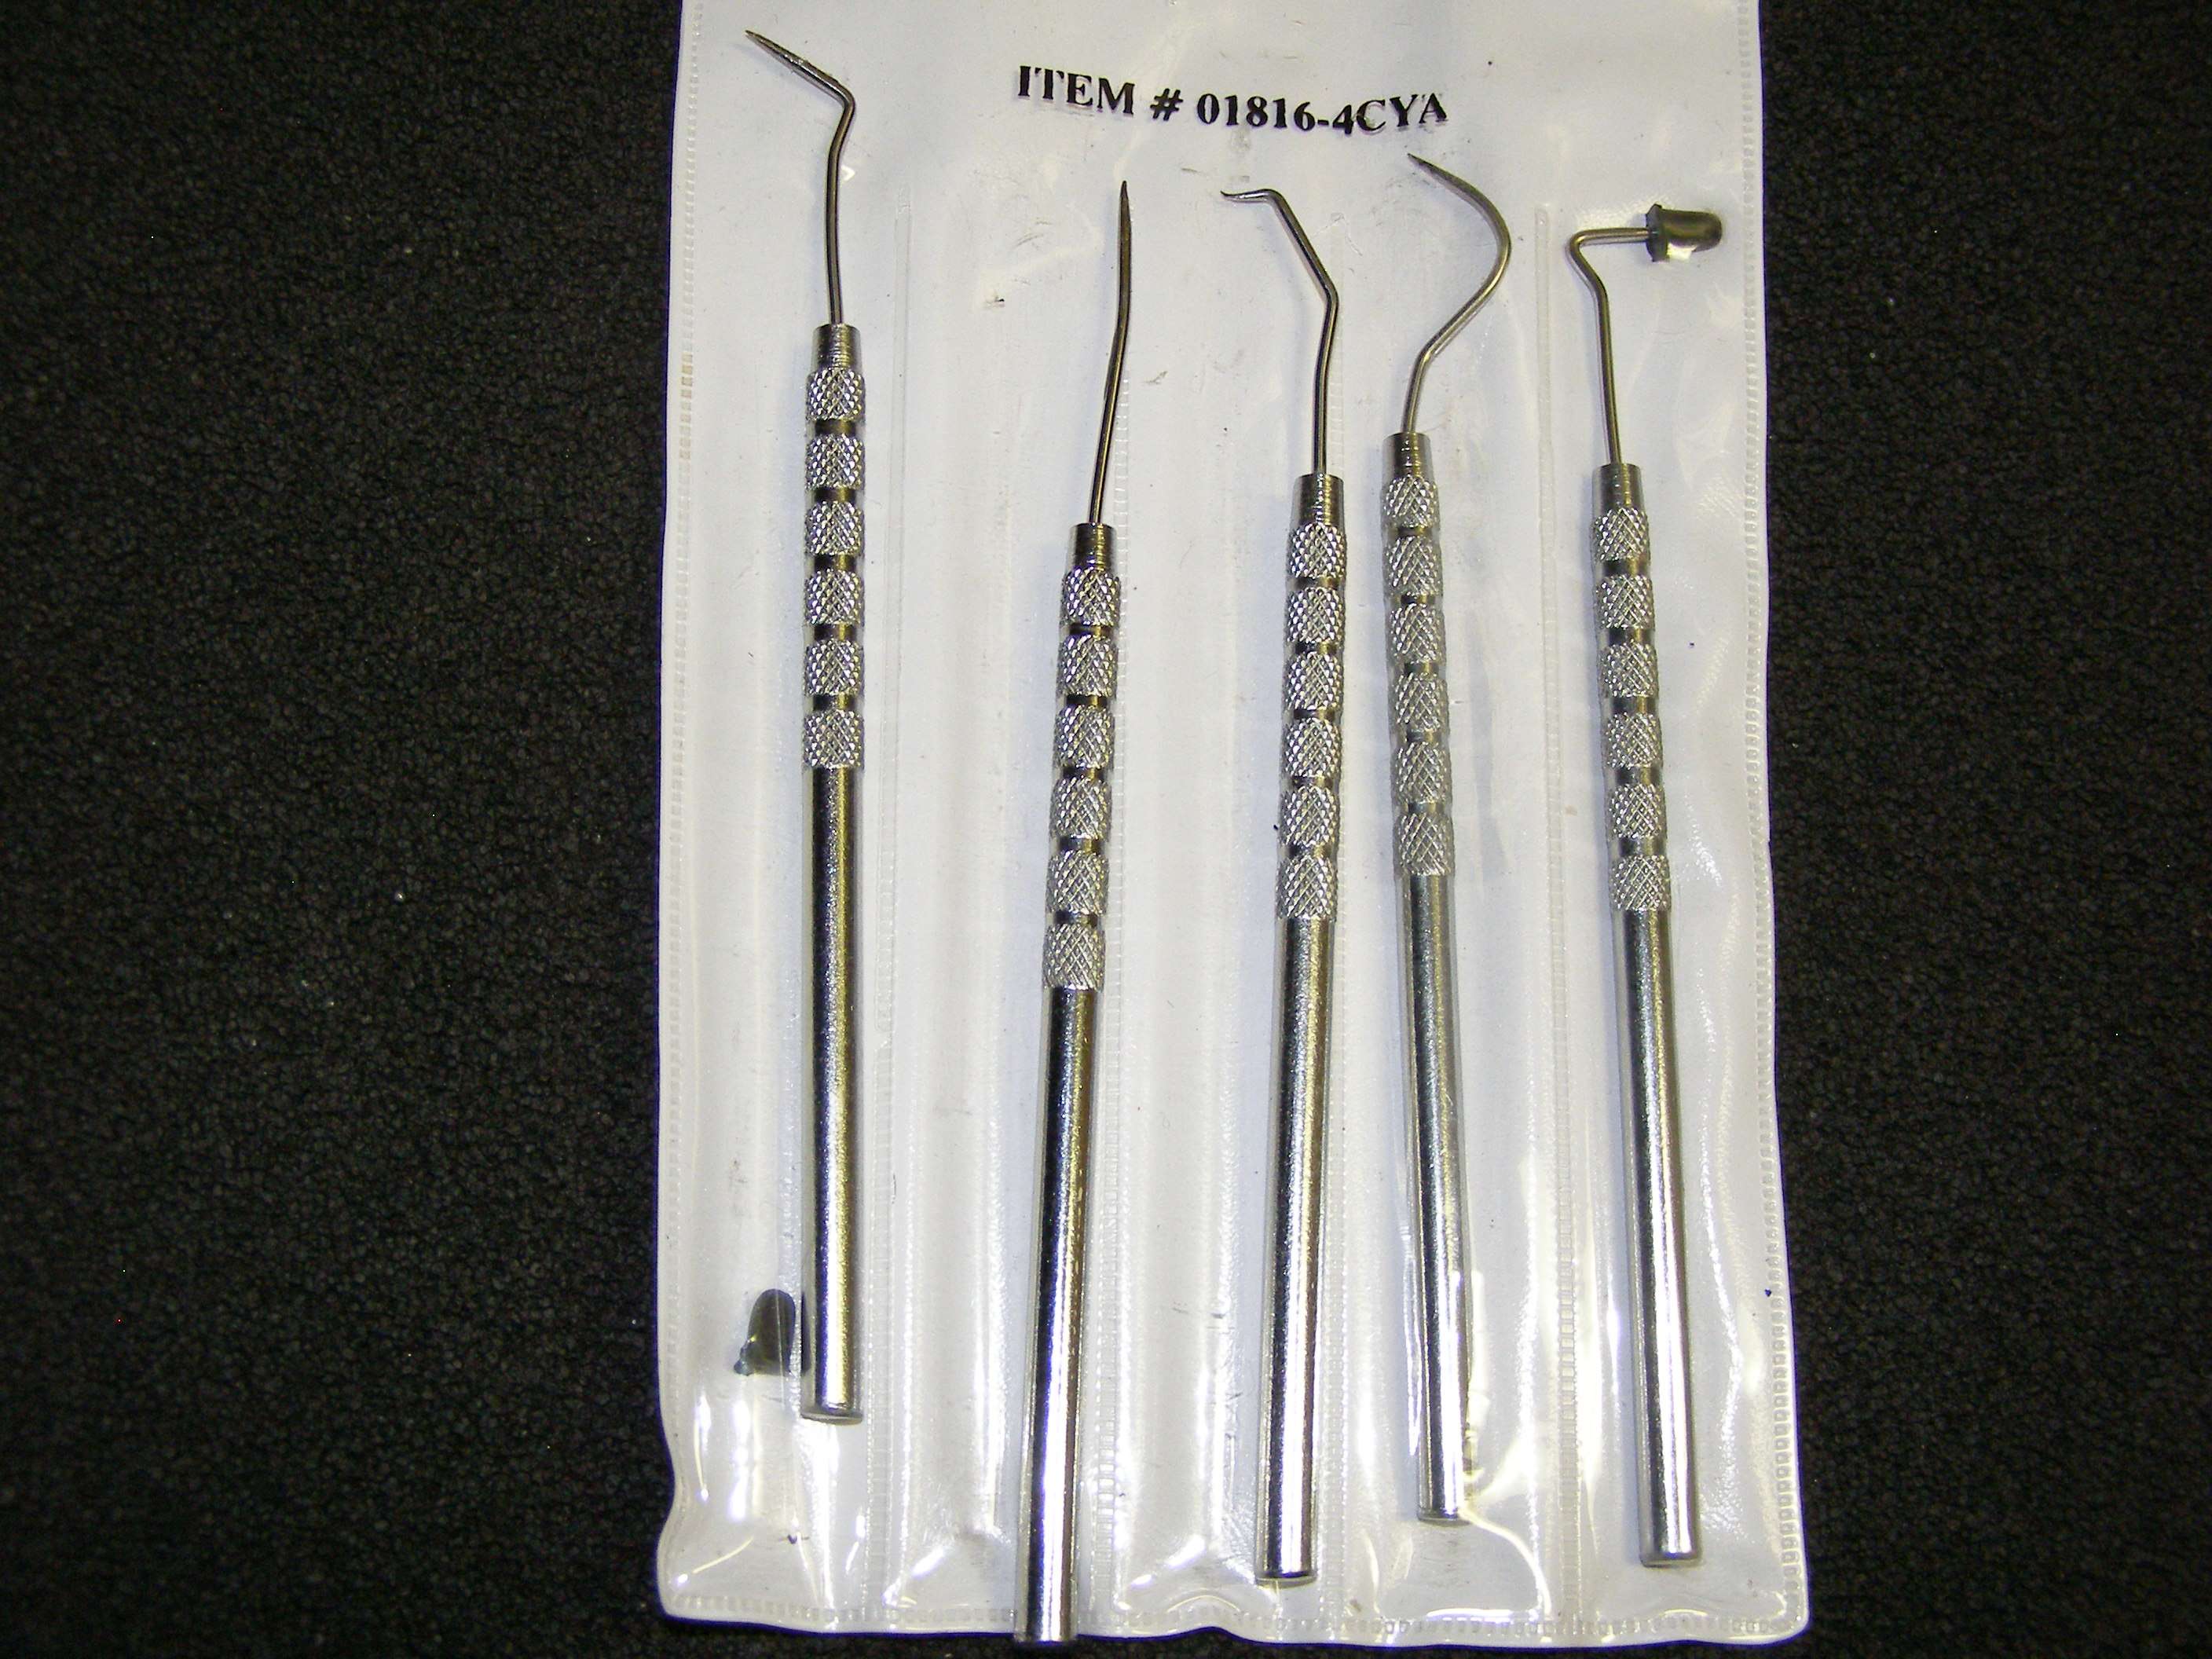
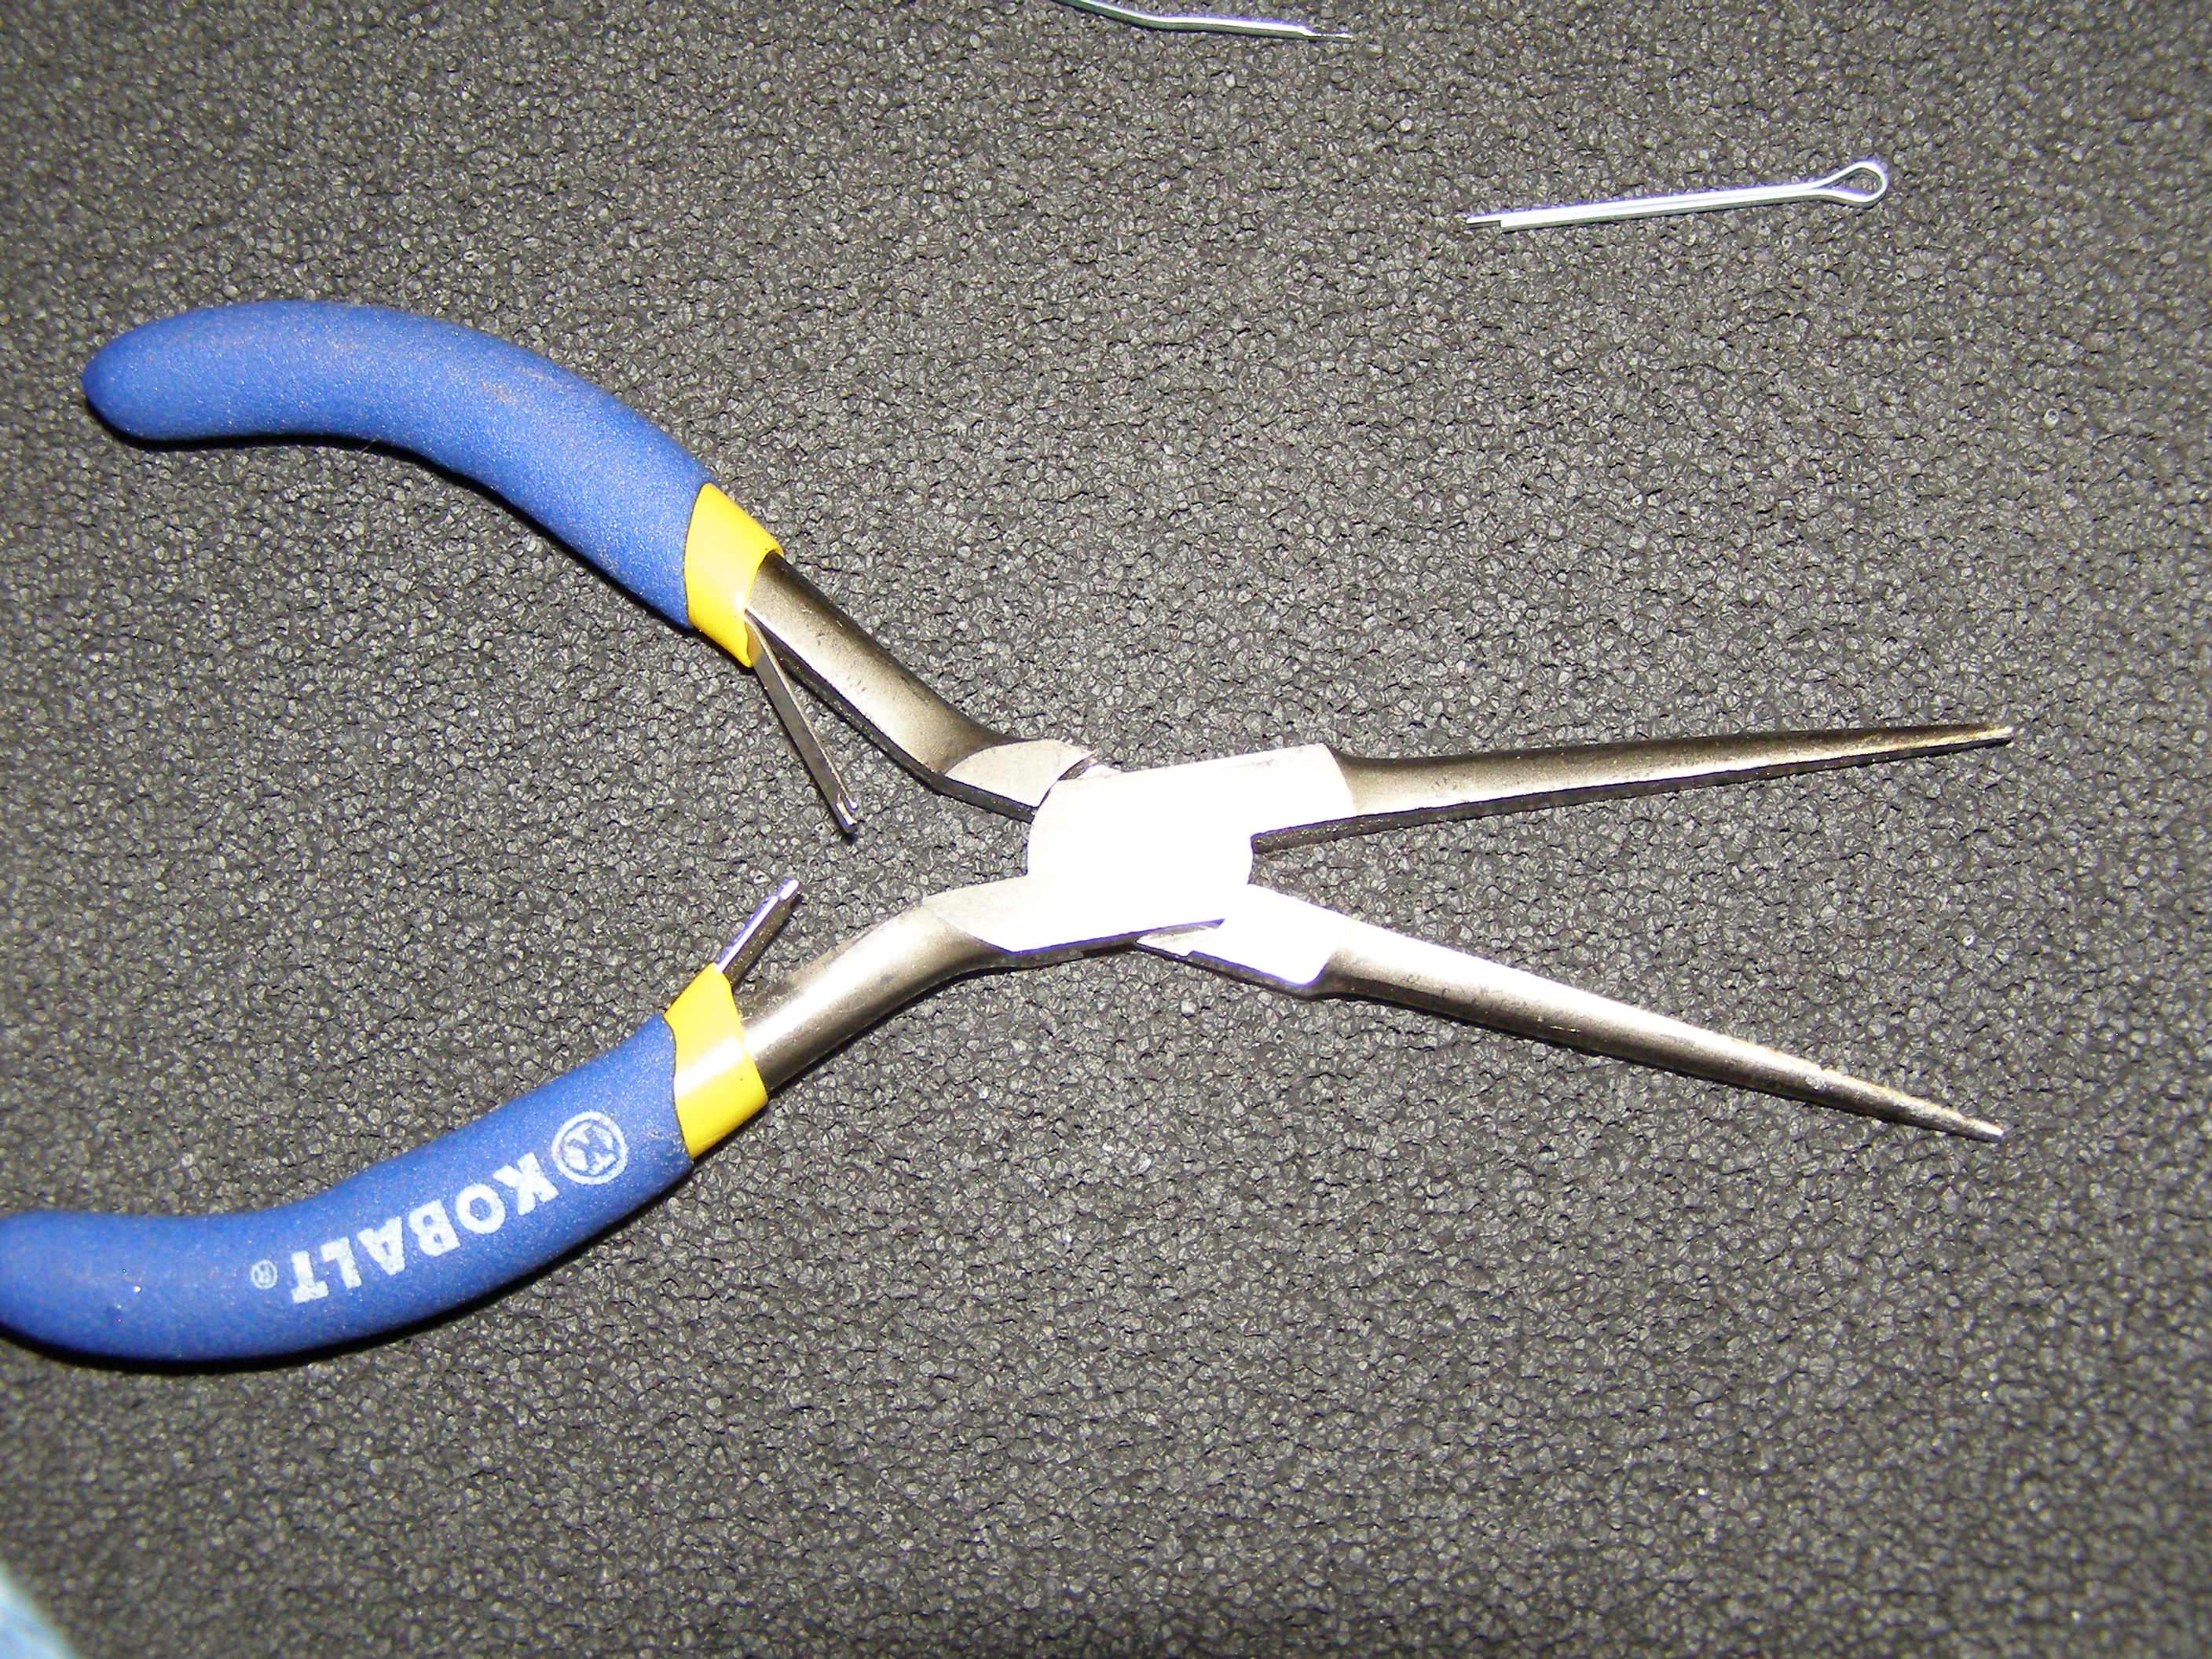
I use one of these picks to snag it out (bought at Harbor Freight)
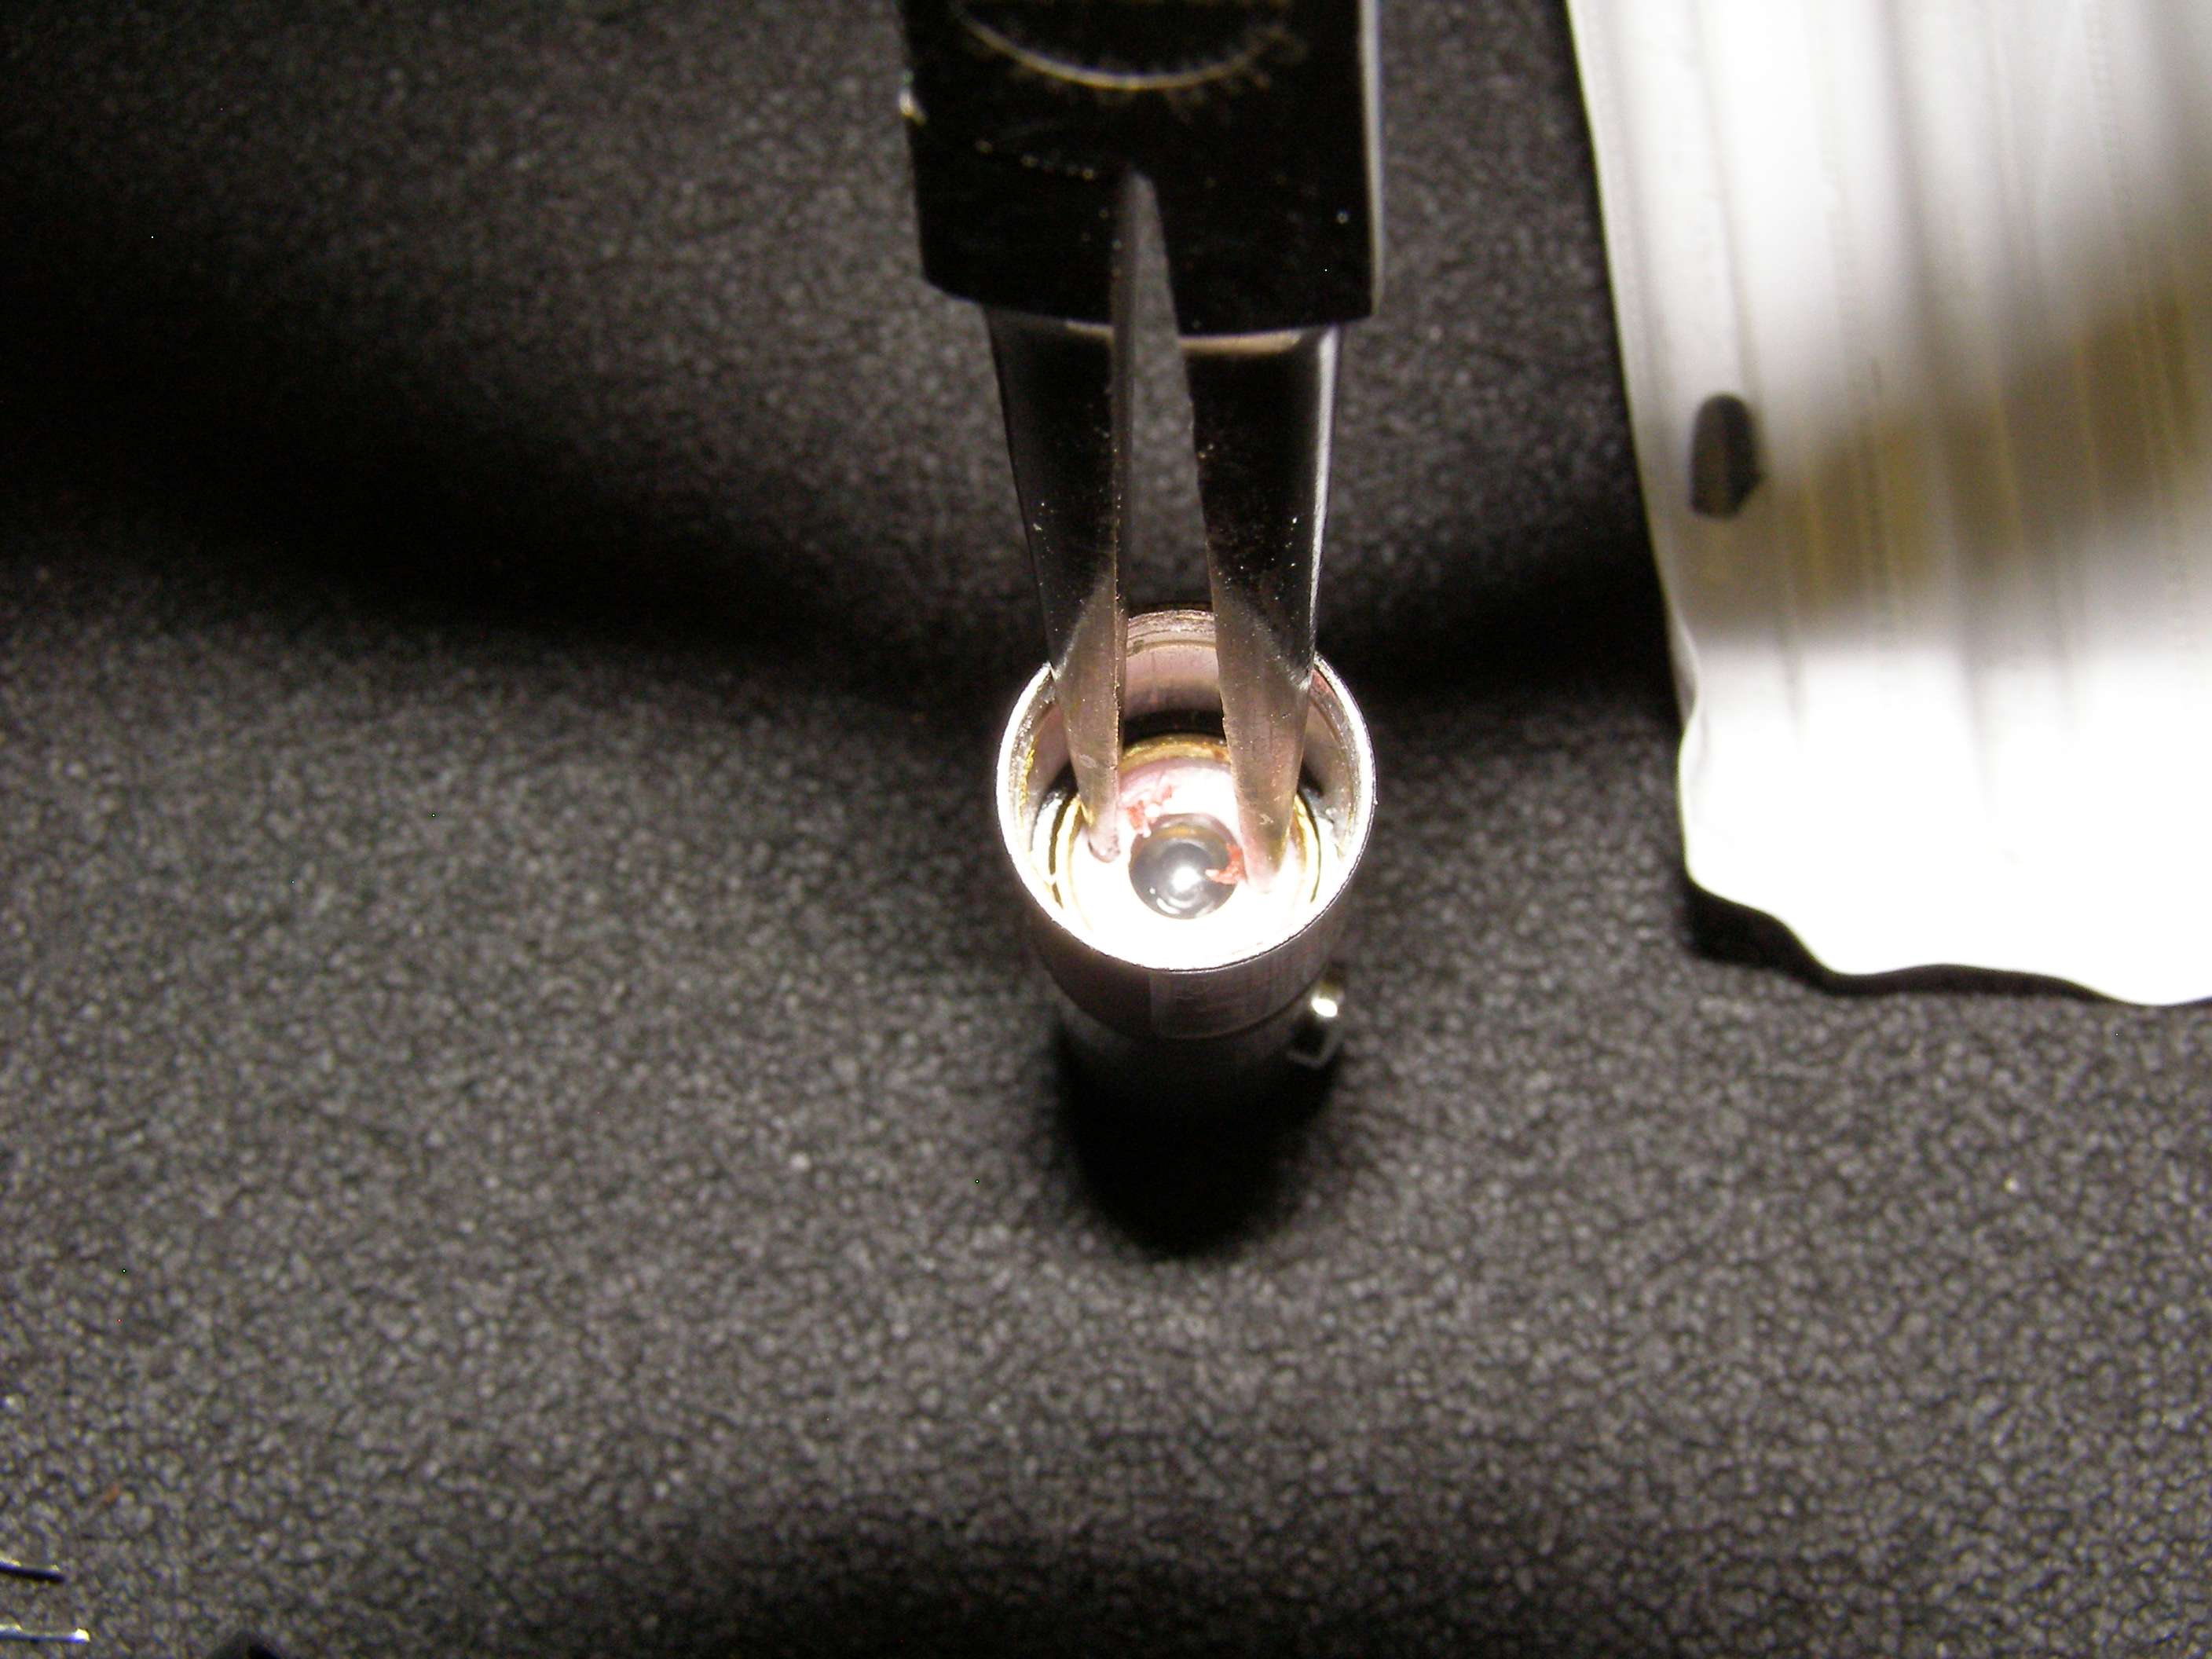
You see the 2 tiny holes that are used to screw it in/out. This is a pic from way down this post. The lens holder looks scratched beceuse was deliberately done later.
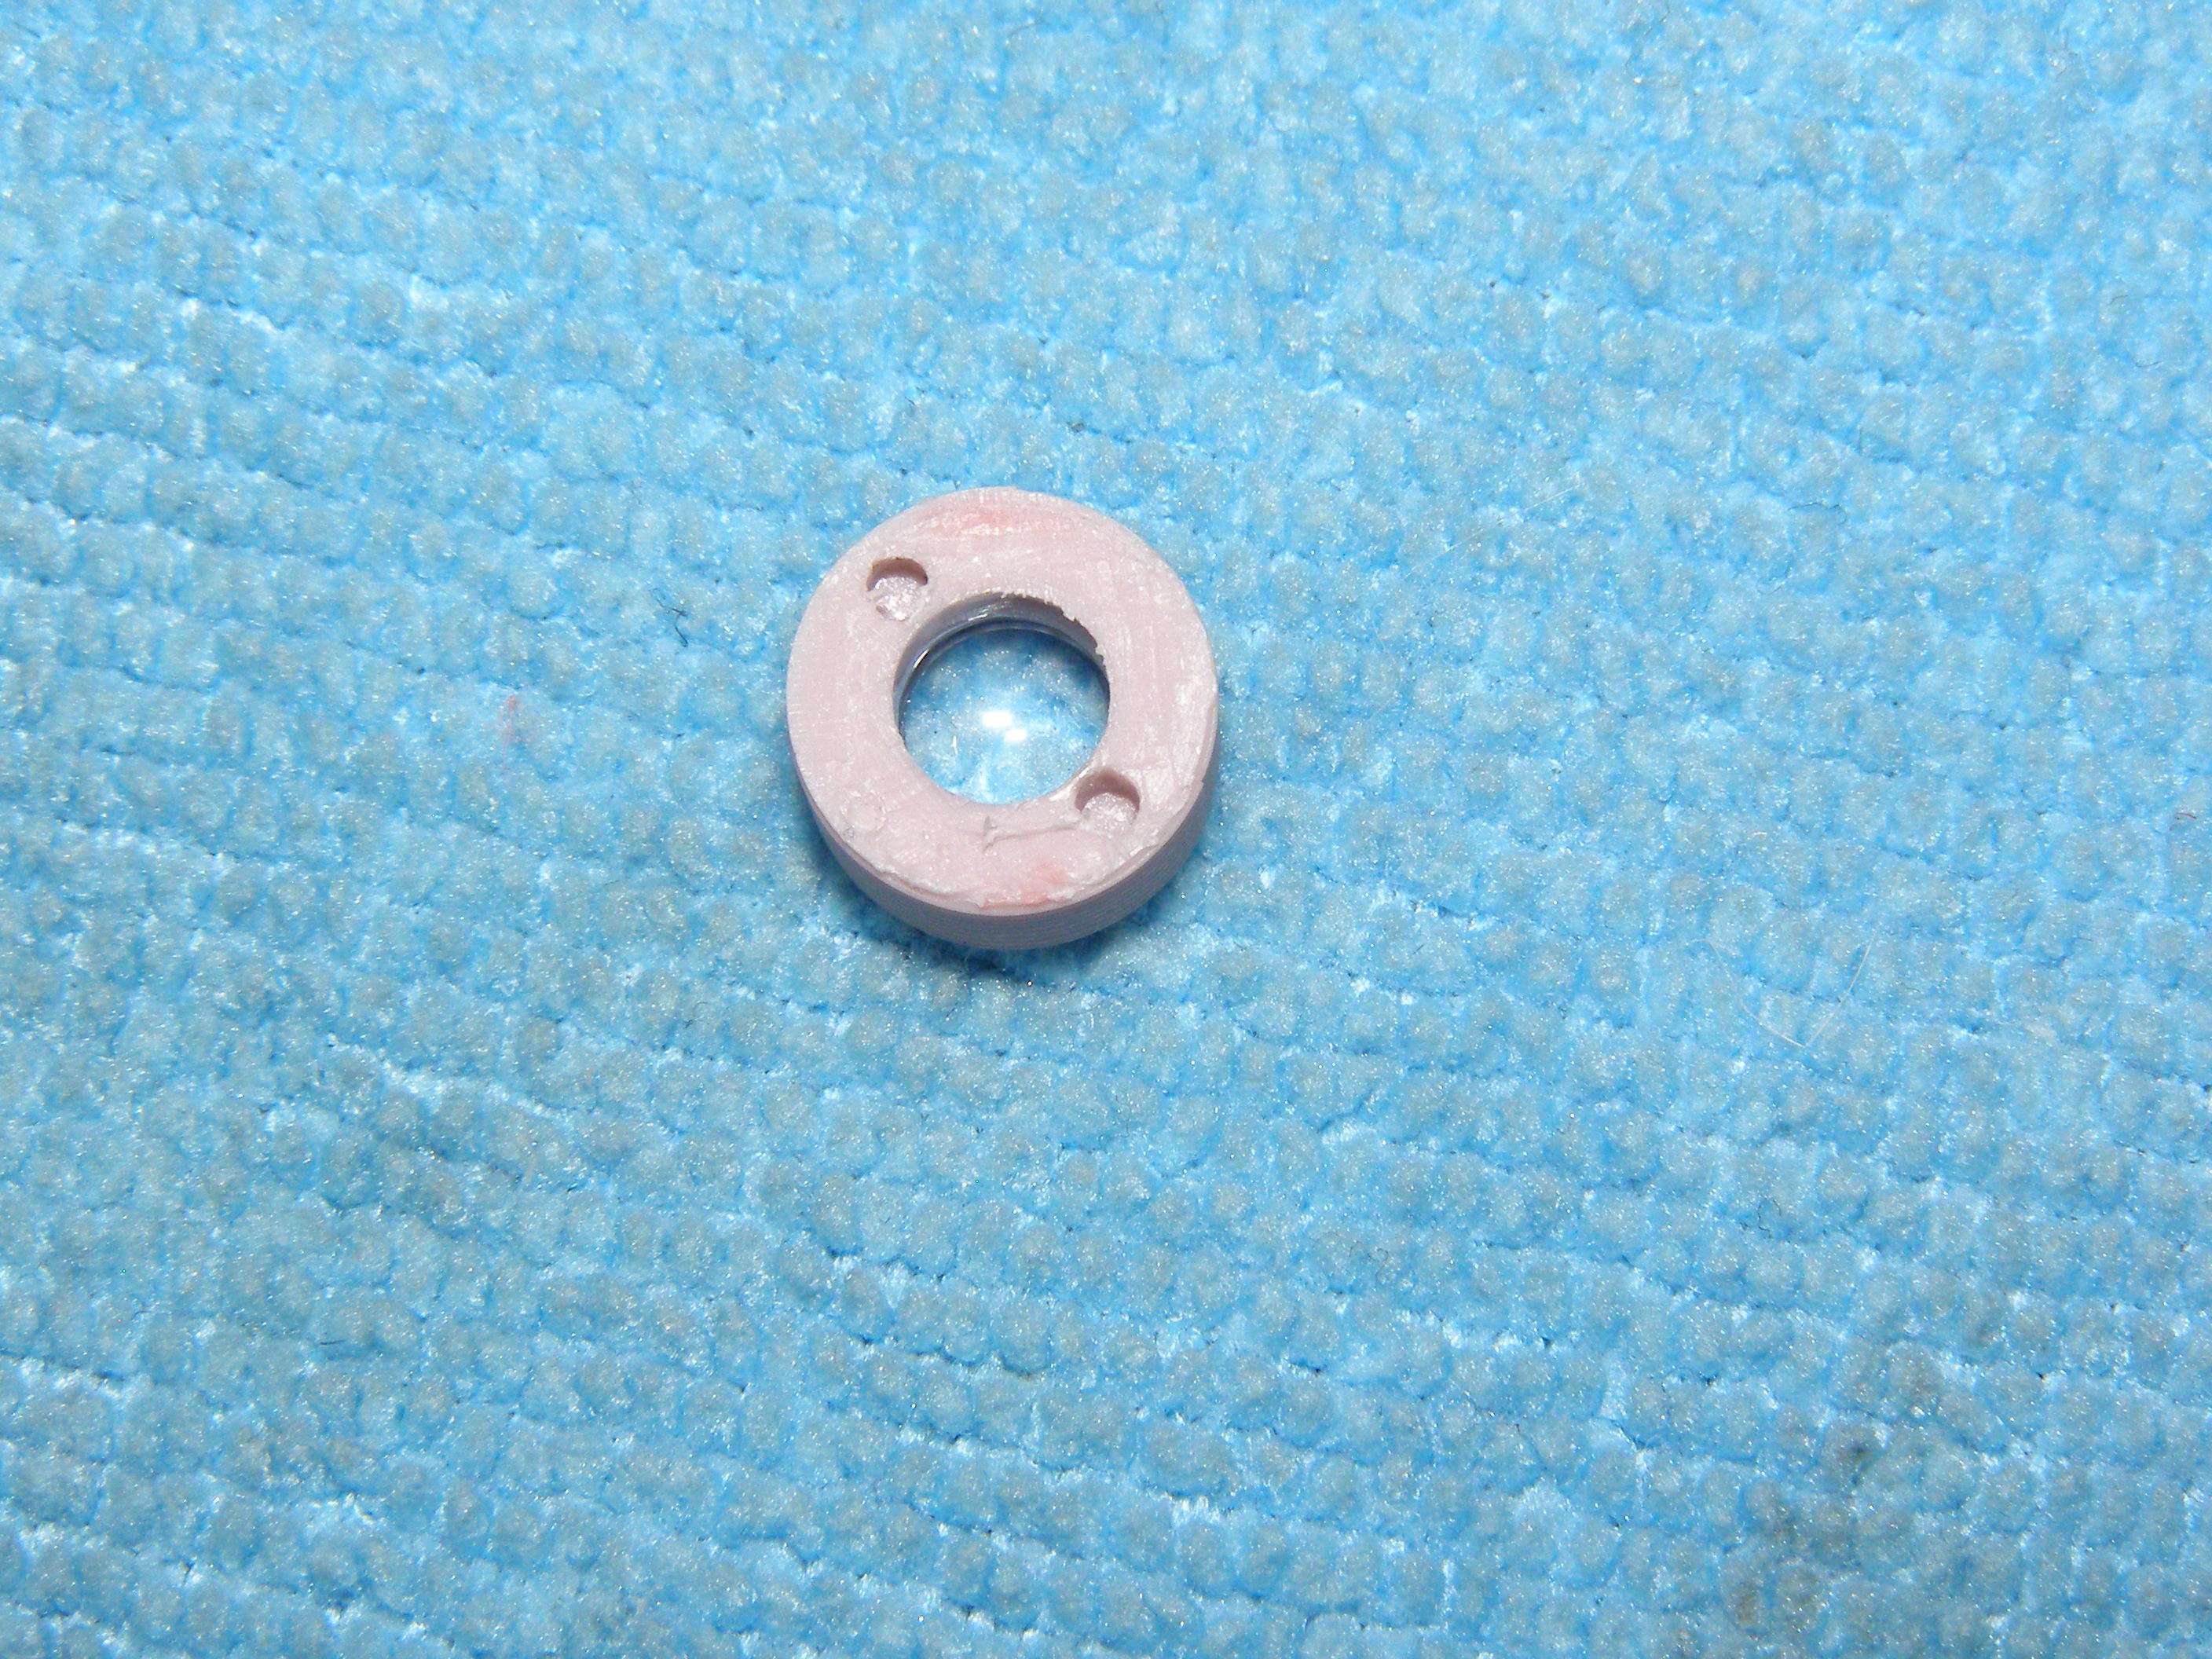
These long needle nose with fin tips fit in the holes and I can easily unscrew the lens even without removing the glue. The glue never seems to be on the threads but just the top and don't stick on well.
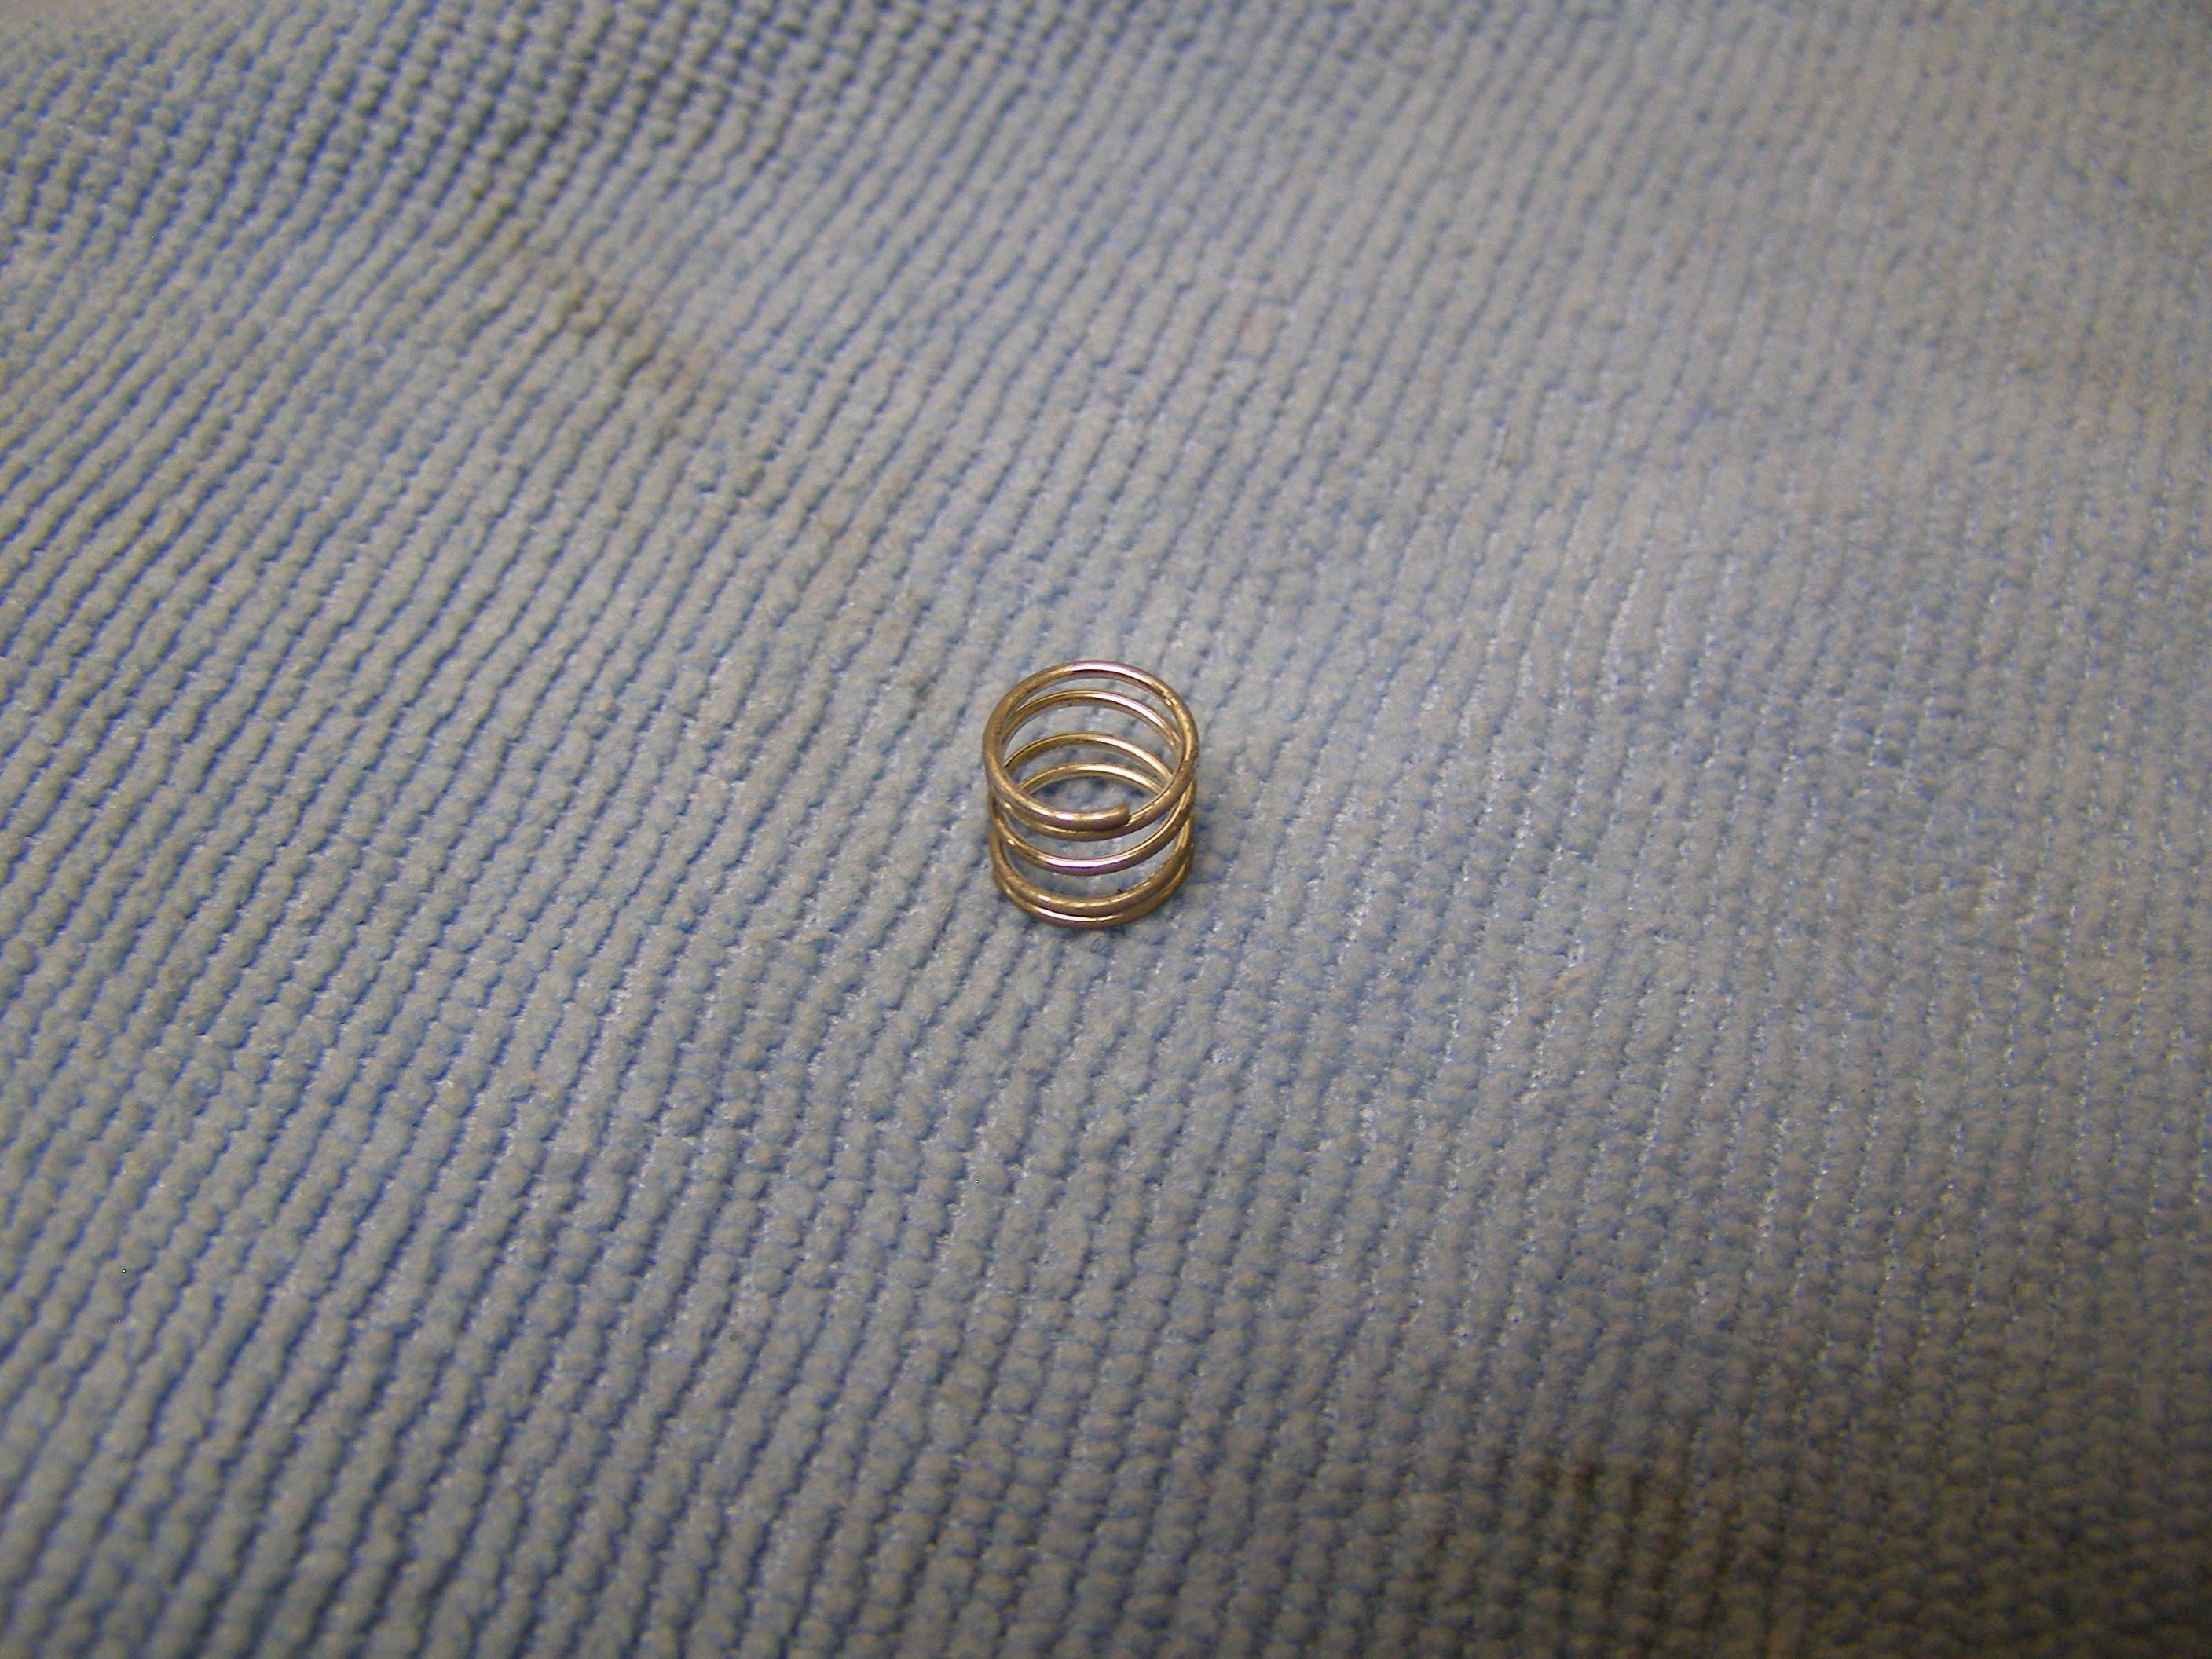
I included a couple of cotter pins in the pic that you could use to get out the lens but it's more of a pain as it twists too much. Just need to make something that is strong enough but small tipped enough to both fit inside the holes and still be able to take sideways torque to unscrew the lens. The lens will start to turn real easy after a couple turns. There's a spring under the lens that is pushing up against it that you can't see yet and as the spring tension drops, it's easier to turn.
The really important thing here is that you DON'T let whatever you are using to remove the lens slip out of the holes and end up putting a mark on the lens! It is plastic and scratches extremely easy. So basically you need to be pushing down on the lens to keep tension on the lens in the holes or you will slip and nick the lens. Think about what you are doing.
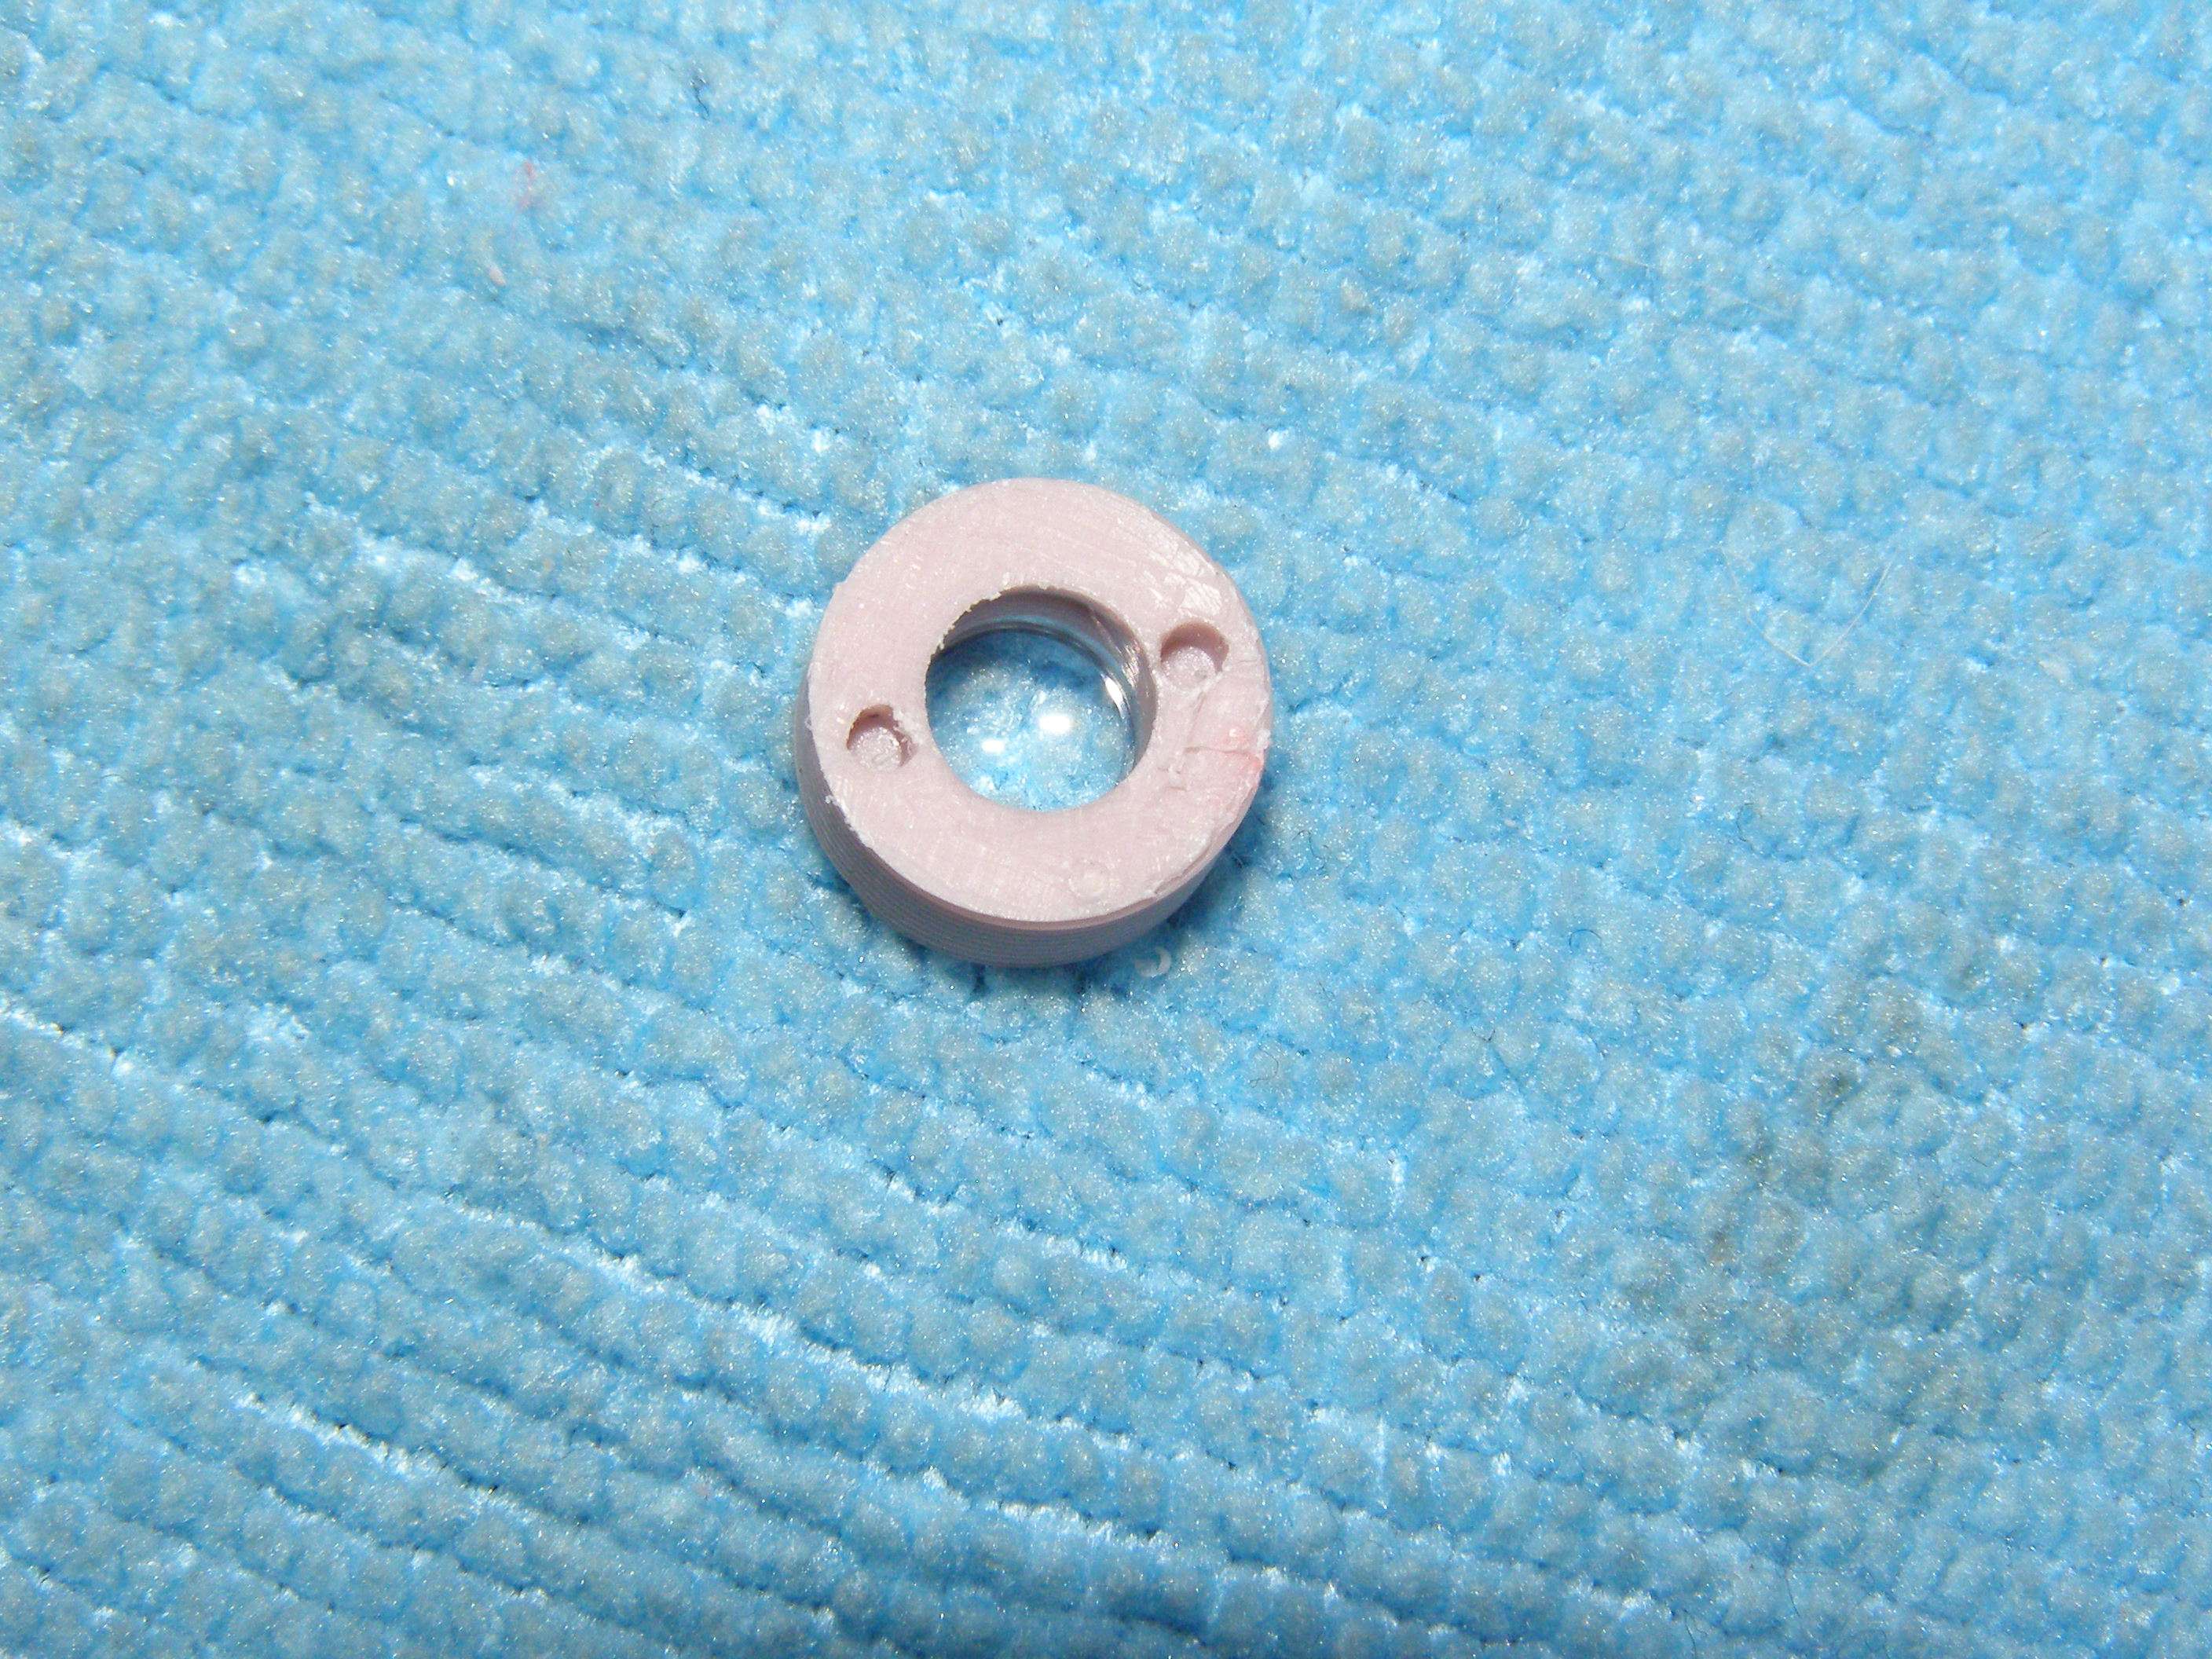
Here's the lens which I immediately place with the holes up on a lint free cloth as it will not mark the lens. The lens on the opposite side of the hole is easy to touch as it is flush or may stick out slightly and you are always trying to be mindful to not touch it. I realize that lint free cloth looks dirty but it wasn't new. It was washed and sometimes there's just a bit of stuff on them that won't come out. Just be careful where you actually place the lens just in case.
This is the spring that was behind the lens. Easy to pull out the lens and end up tipping the host and the spring falls out so you end up searching everywhere for it so it's better to do a lot of this stuff over a lint free rag so things don't go bouncing away on you.
What I am showing you here is what I use to get the glue off the inside of the host where the front cap fits. I had this old knife that somehow managed to break the tip off of and it ended up being a great tool to not only scrape off the glue but also scrape out some of the aluminum. You are just scraping out where the cap fits back in and then enough aluminum so that the cap will fit back in and smoothly turn without any hangups.


Now, let's meet our candidates and look at some of our simple possibilities for "bridging the gap"
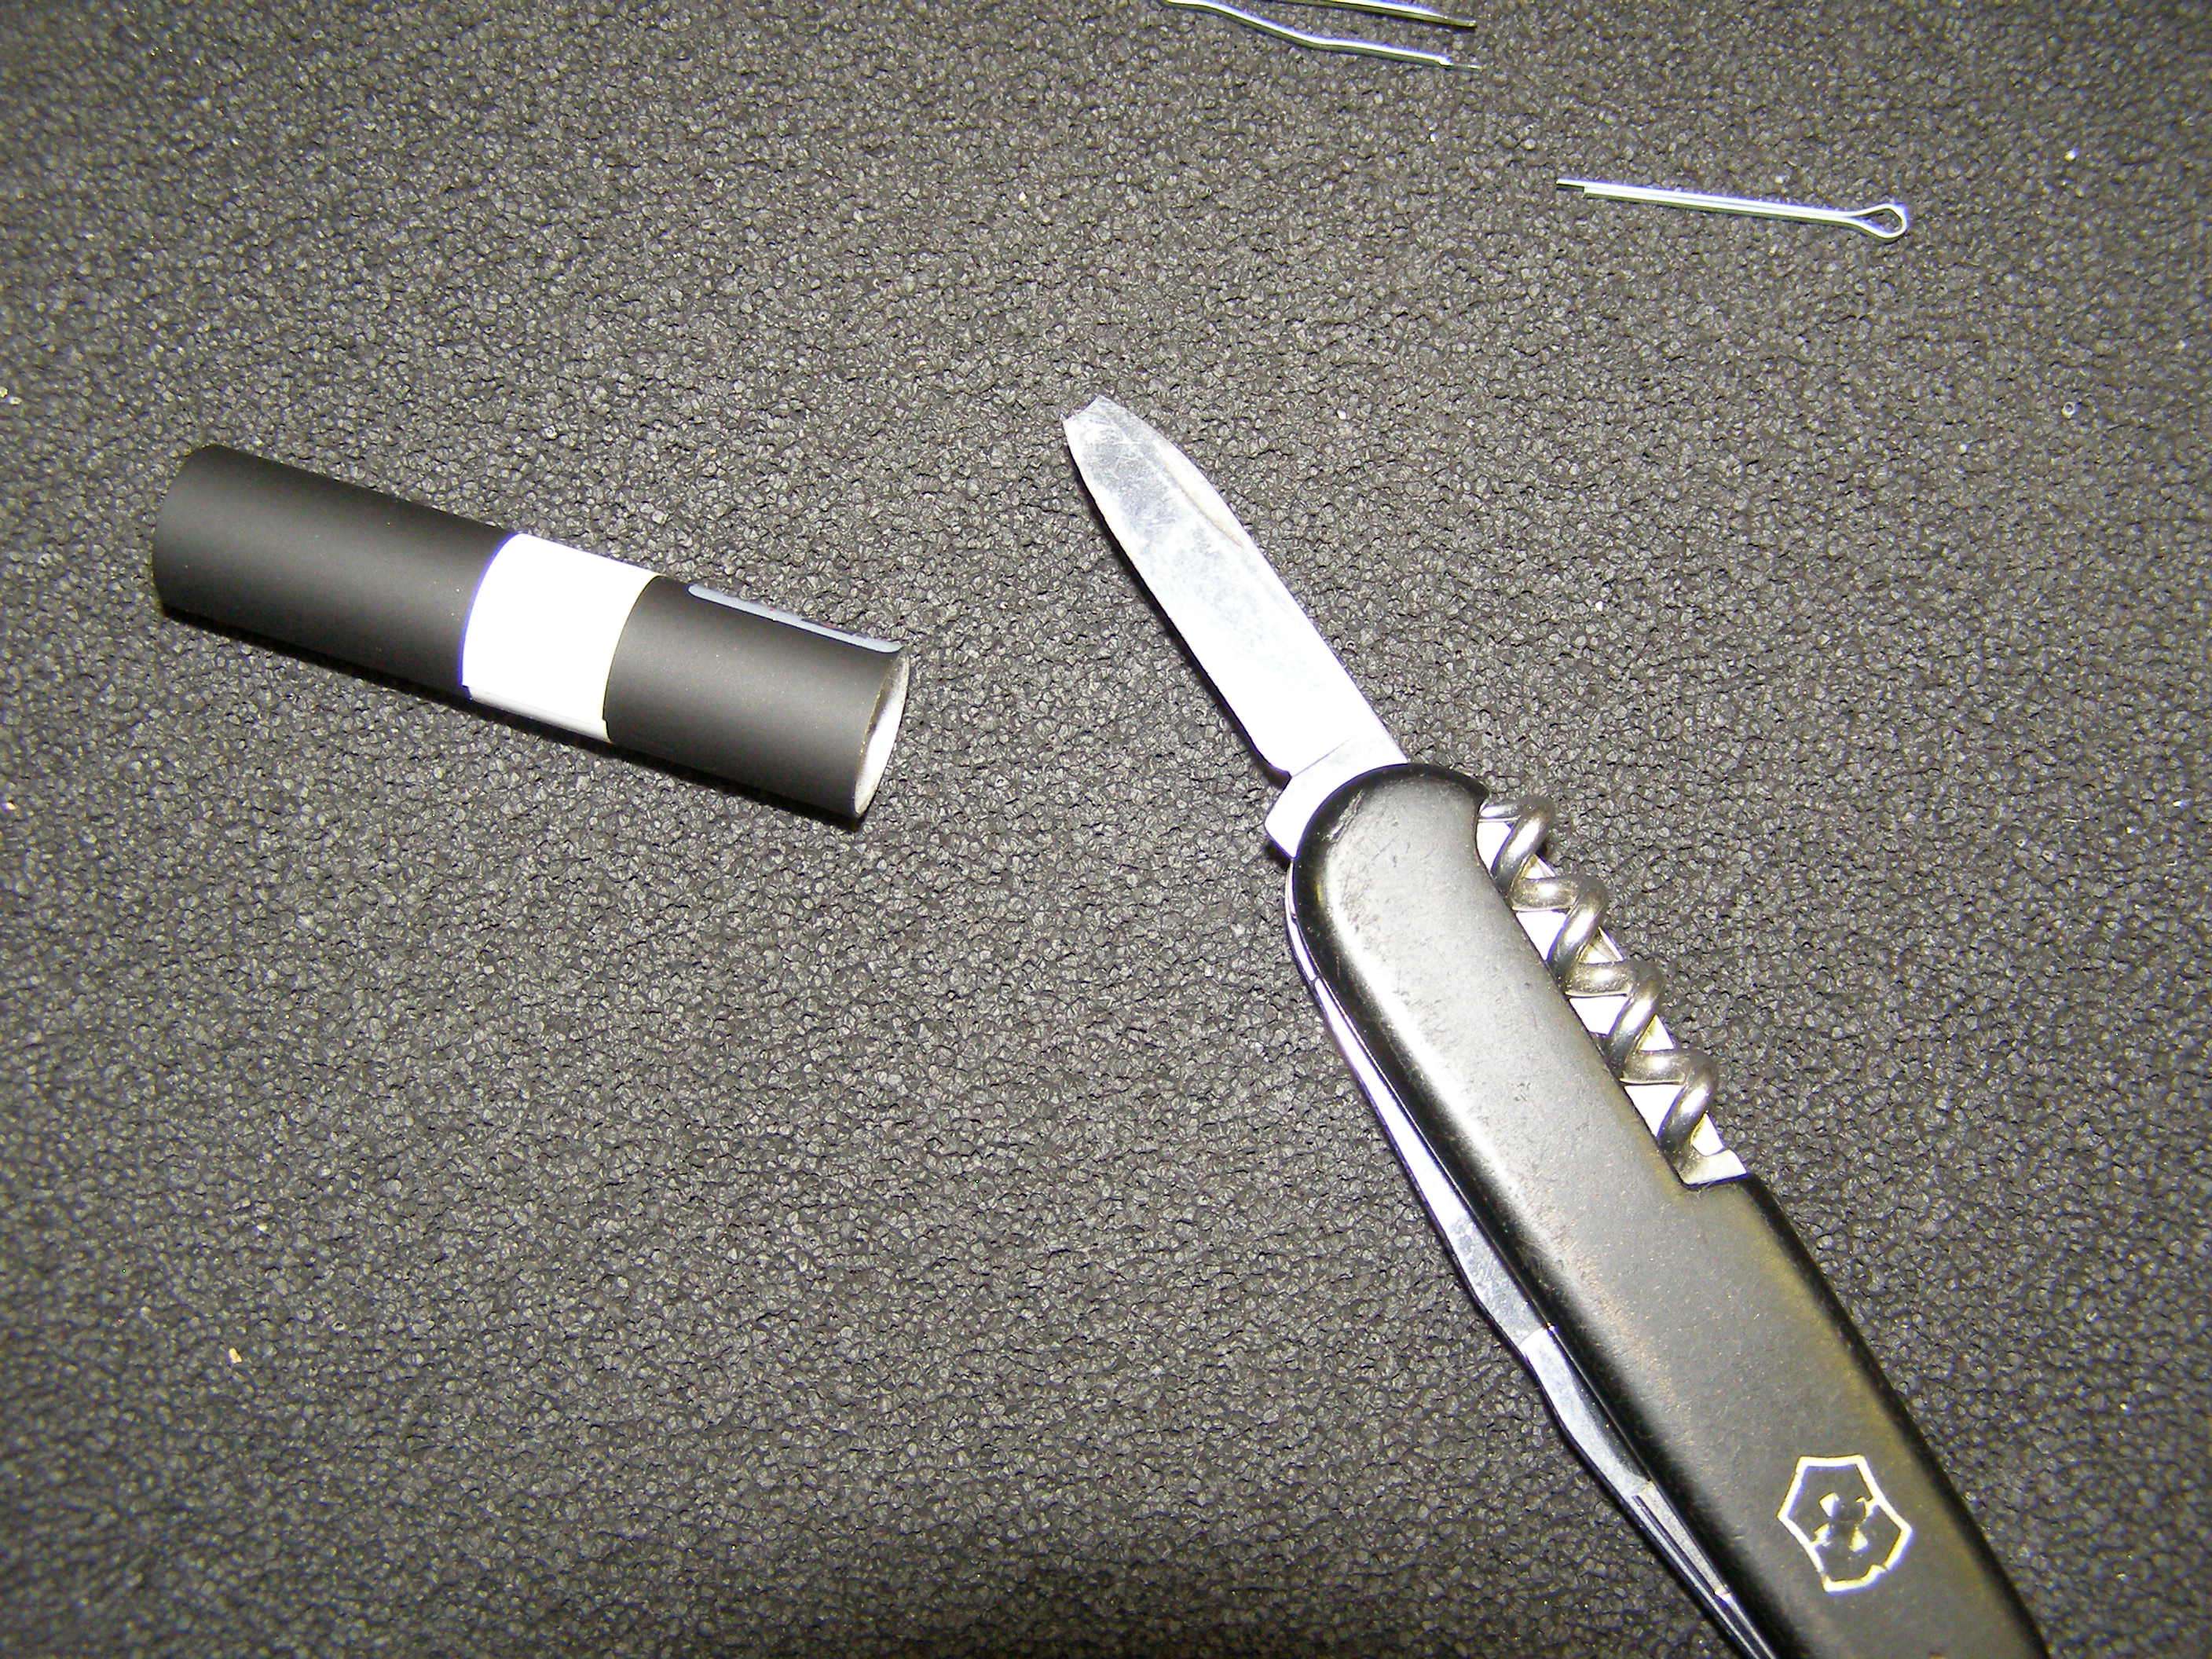
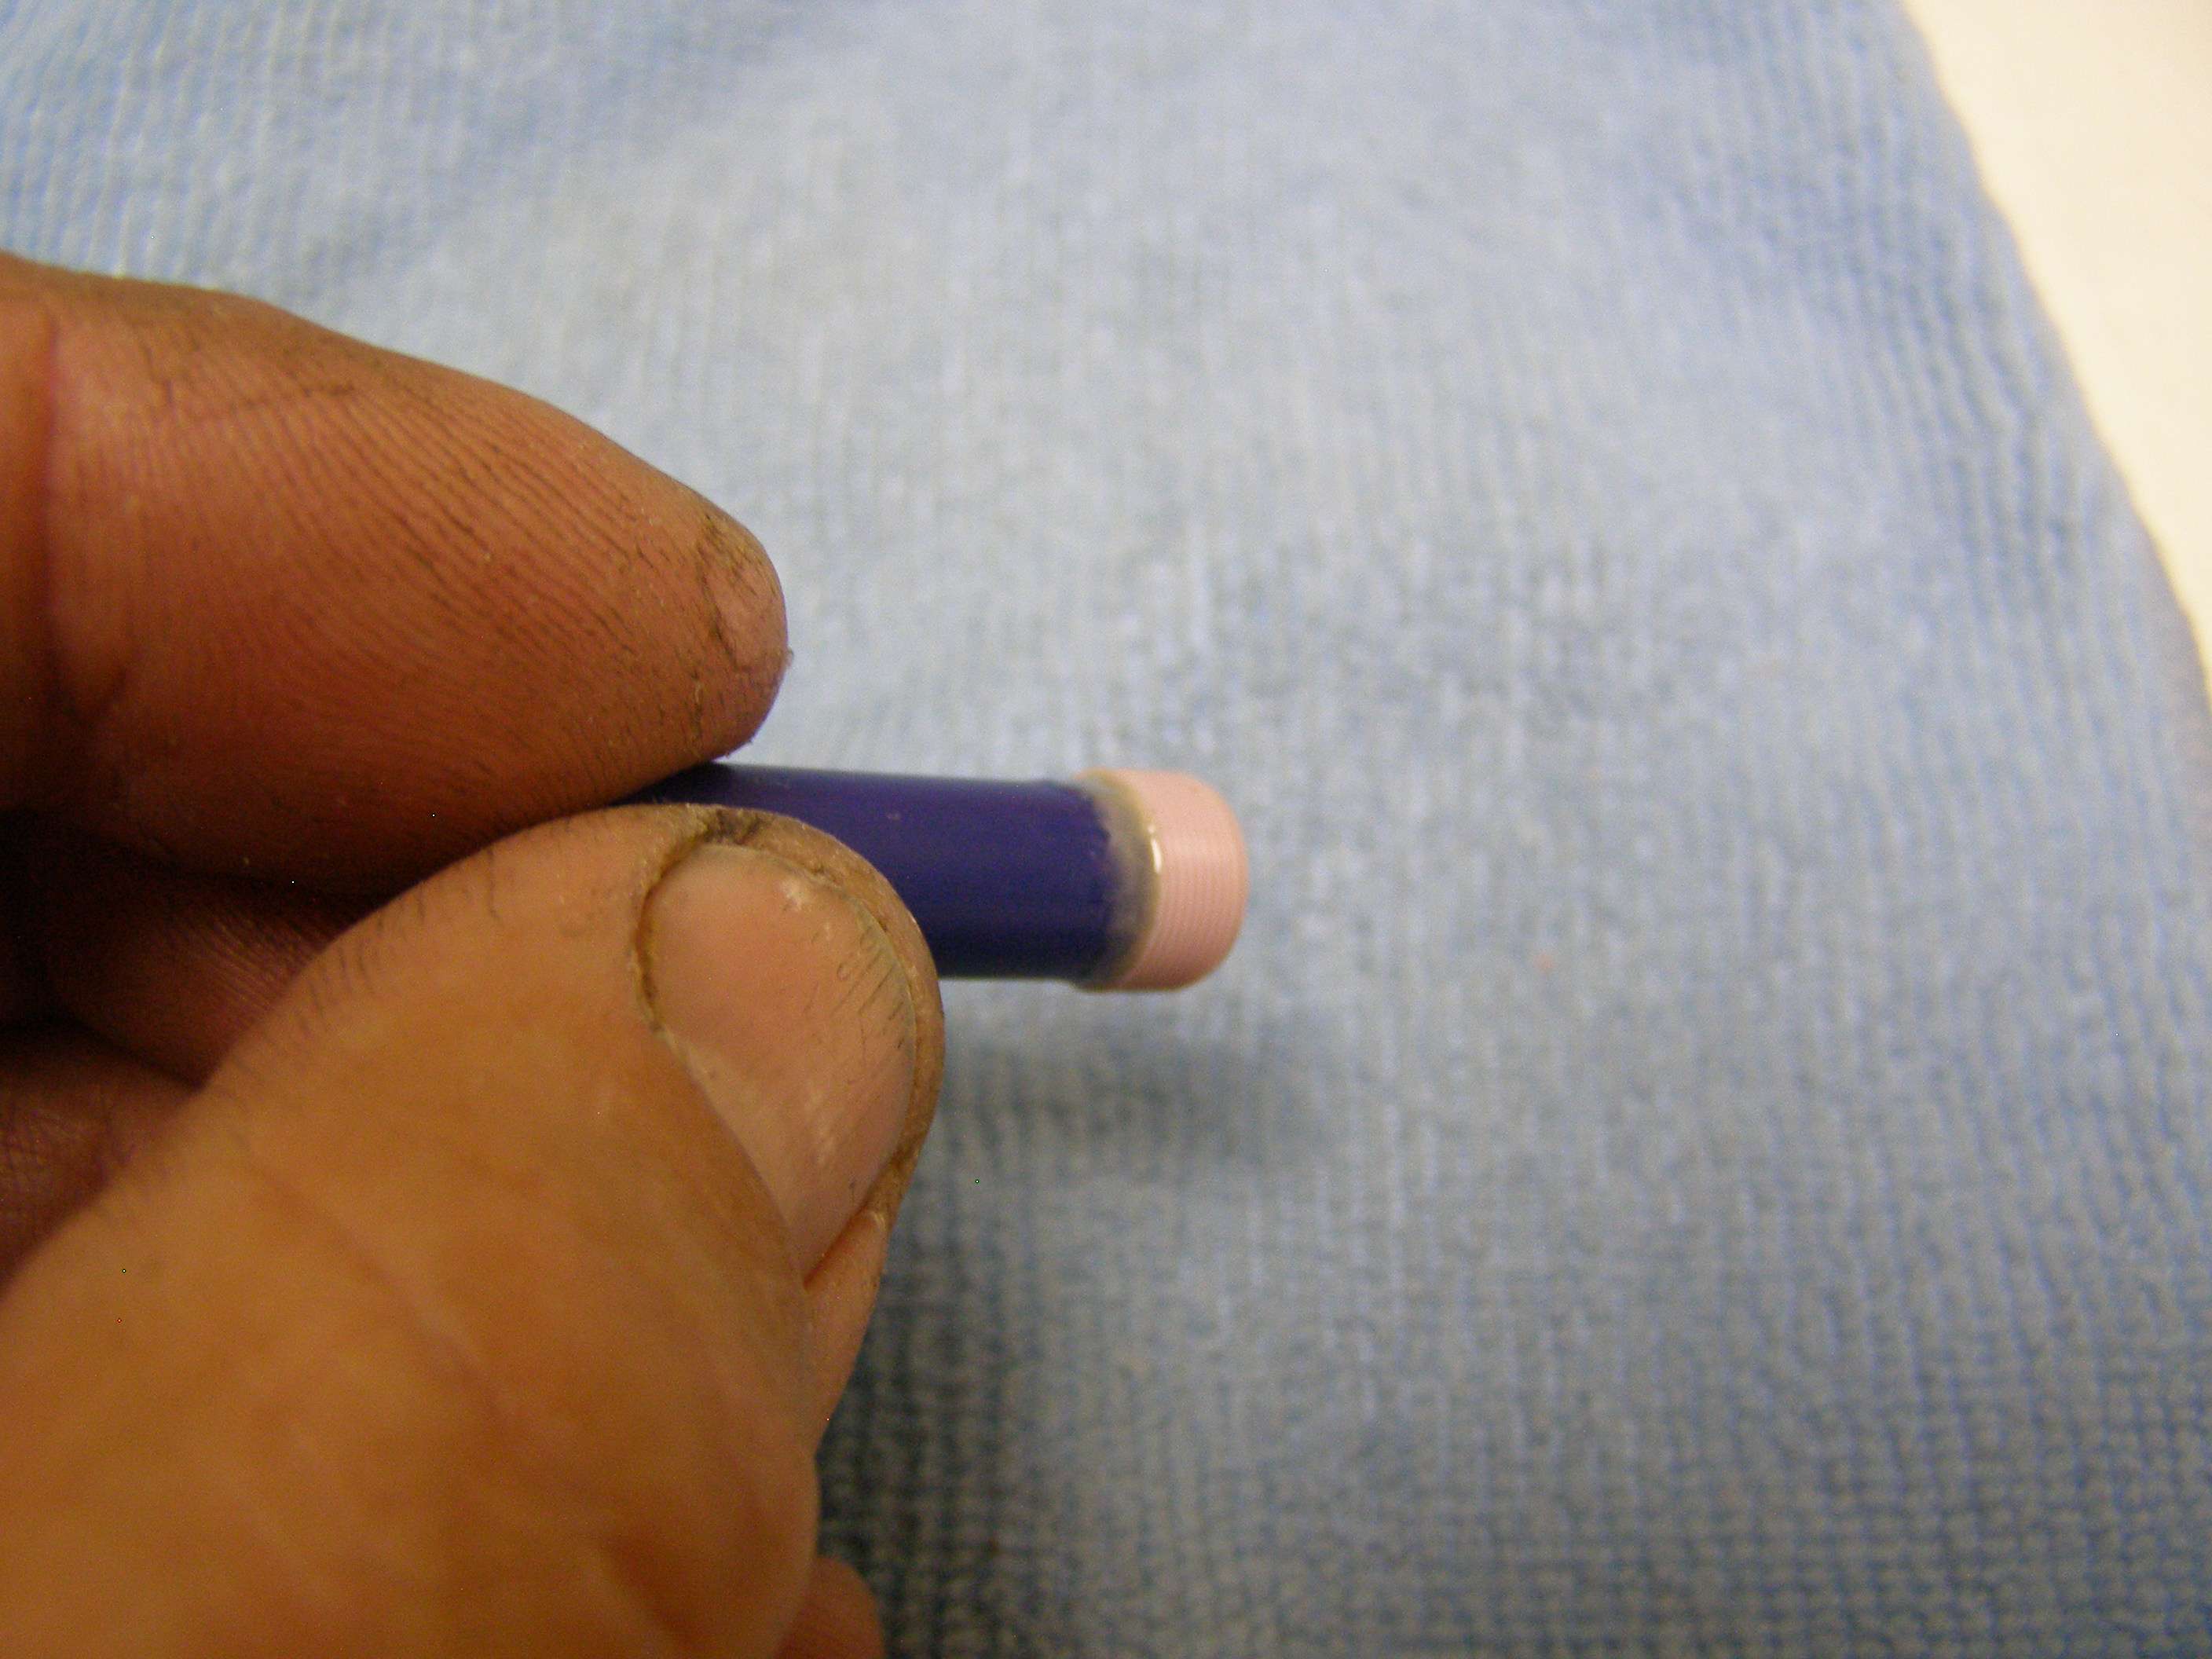
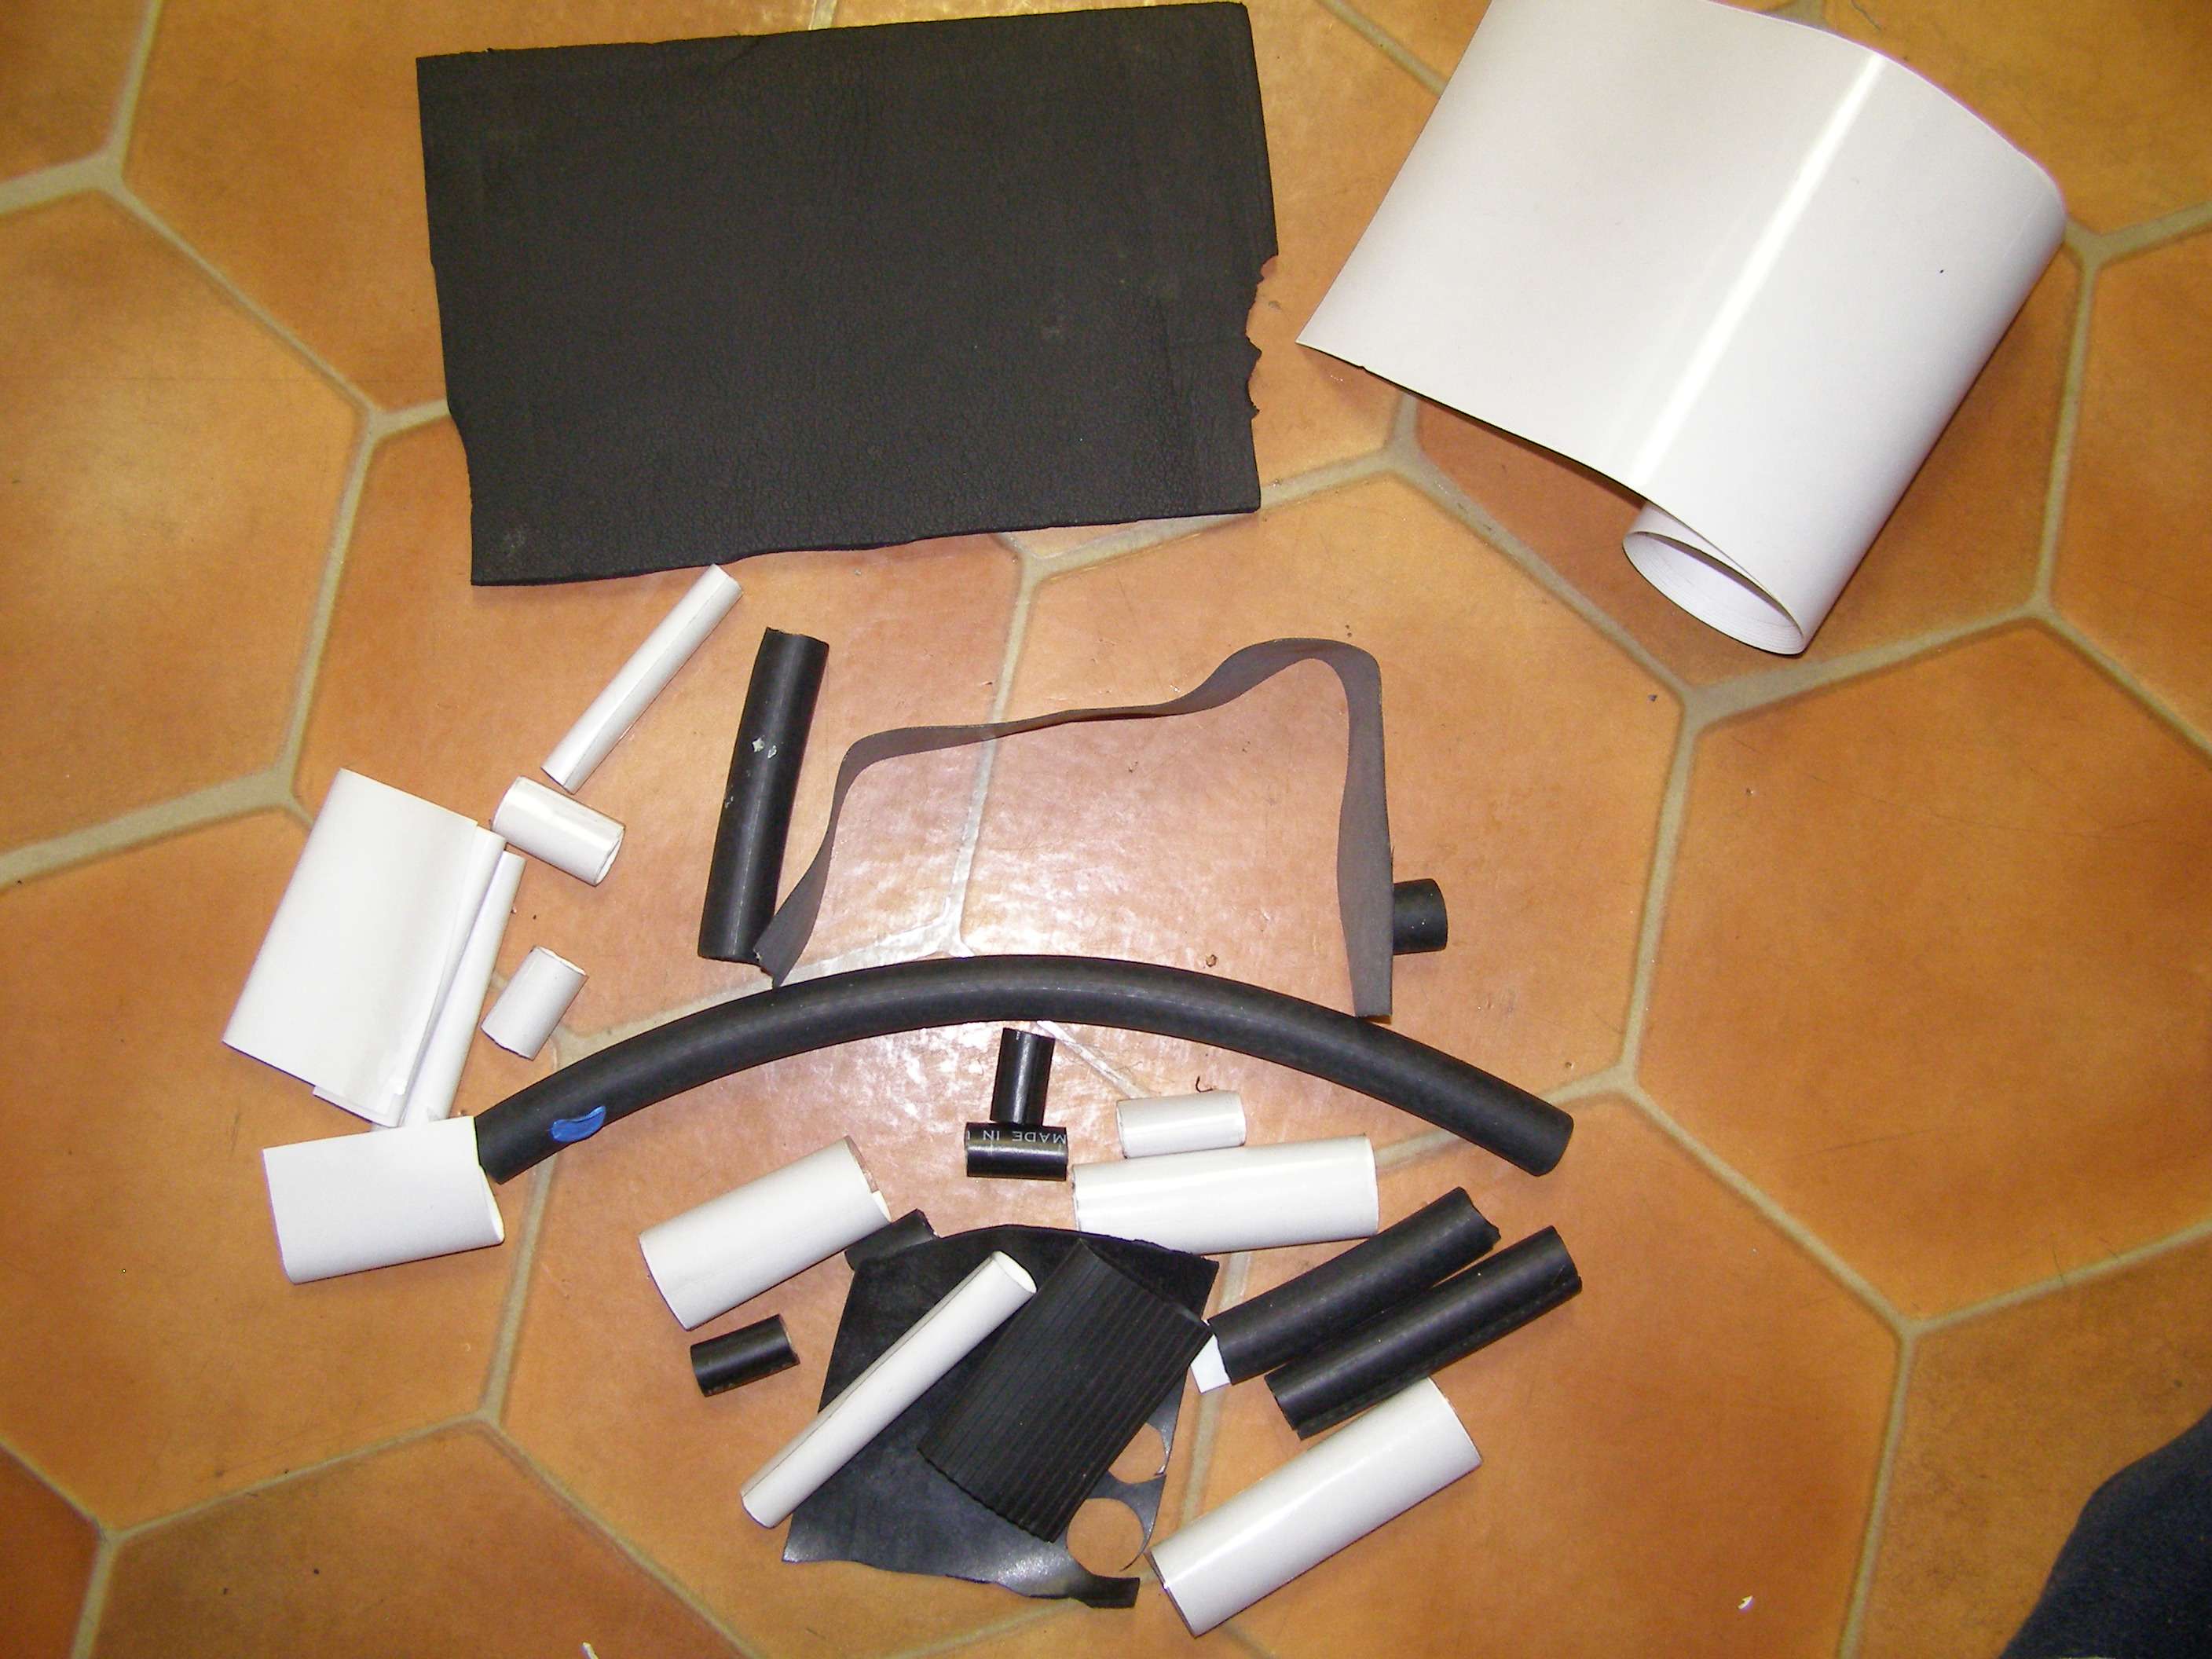
Check out the really cheap simple blue pens with red tips or the white with black tips that you find everywhere as they are great for the next step.
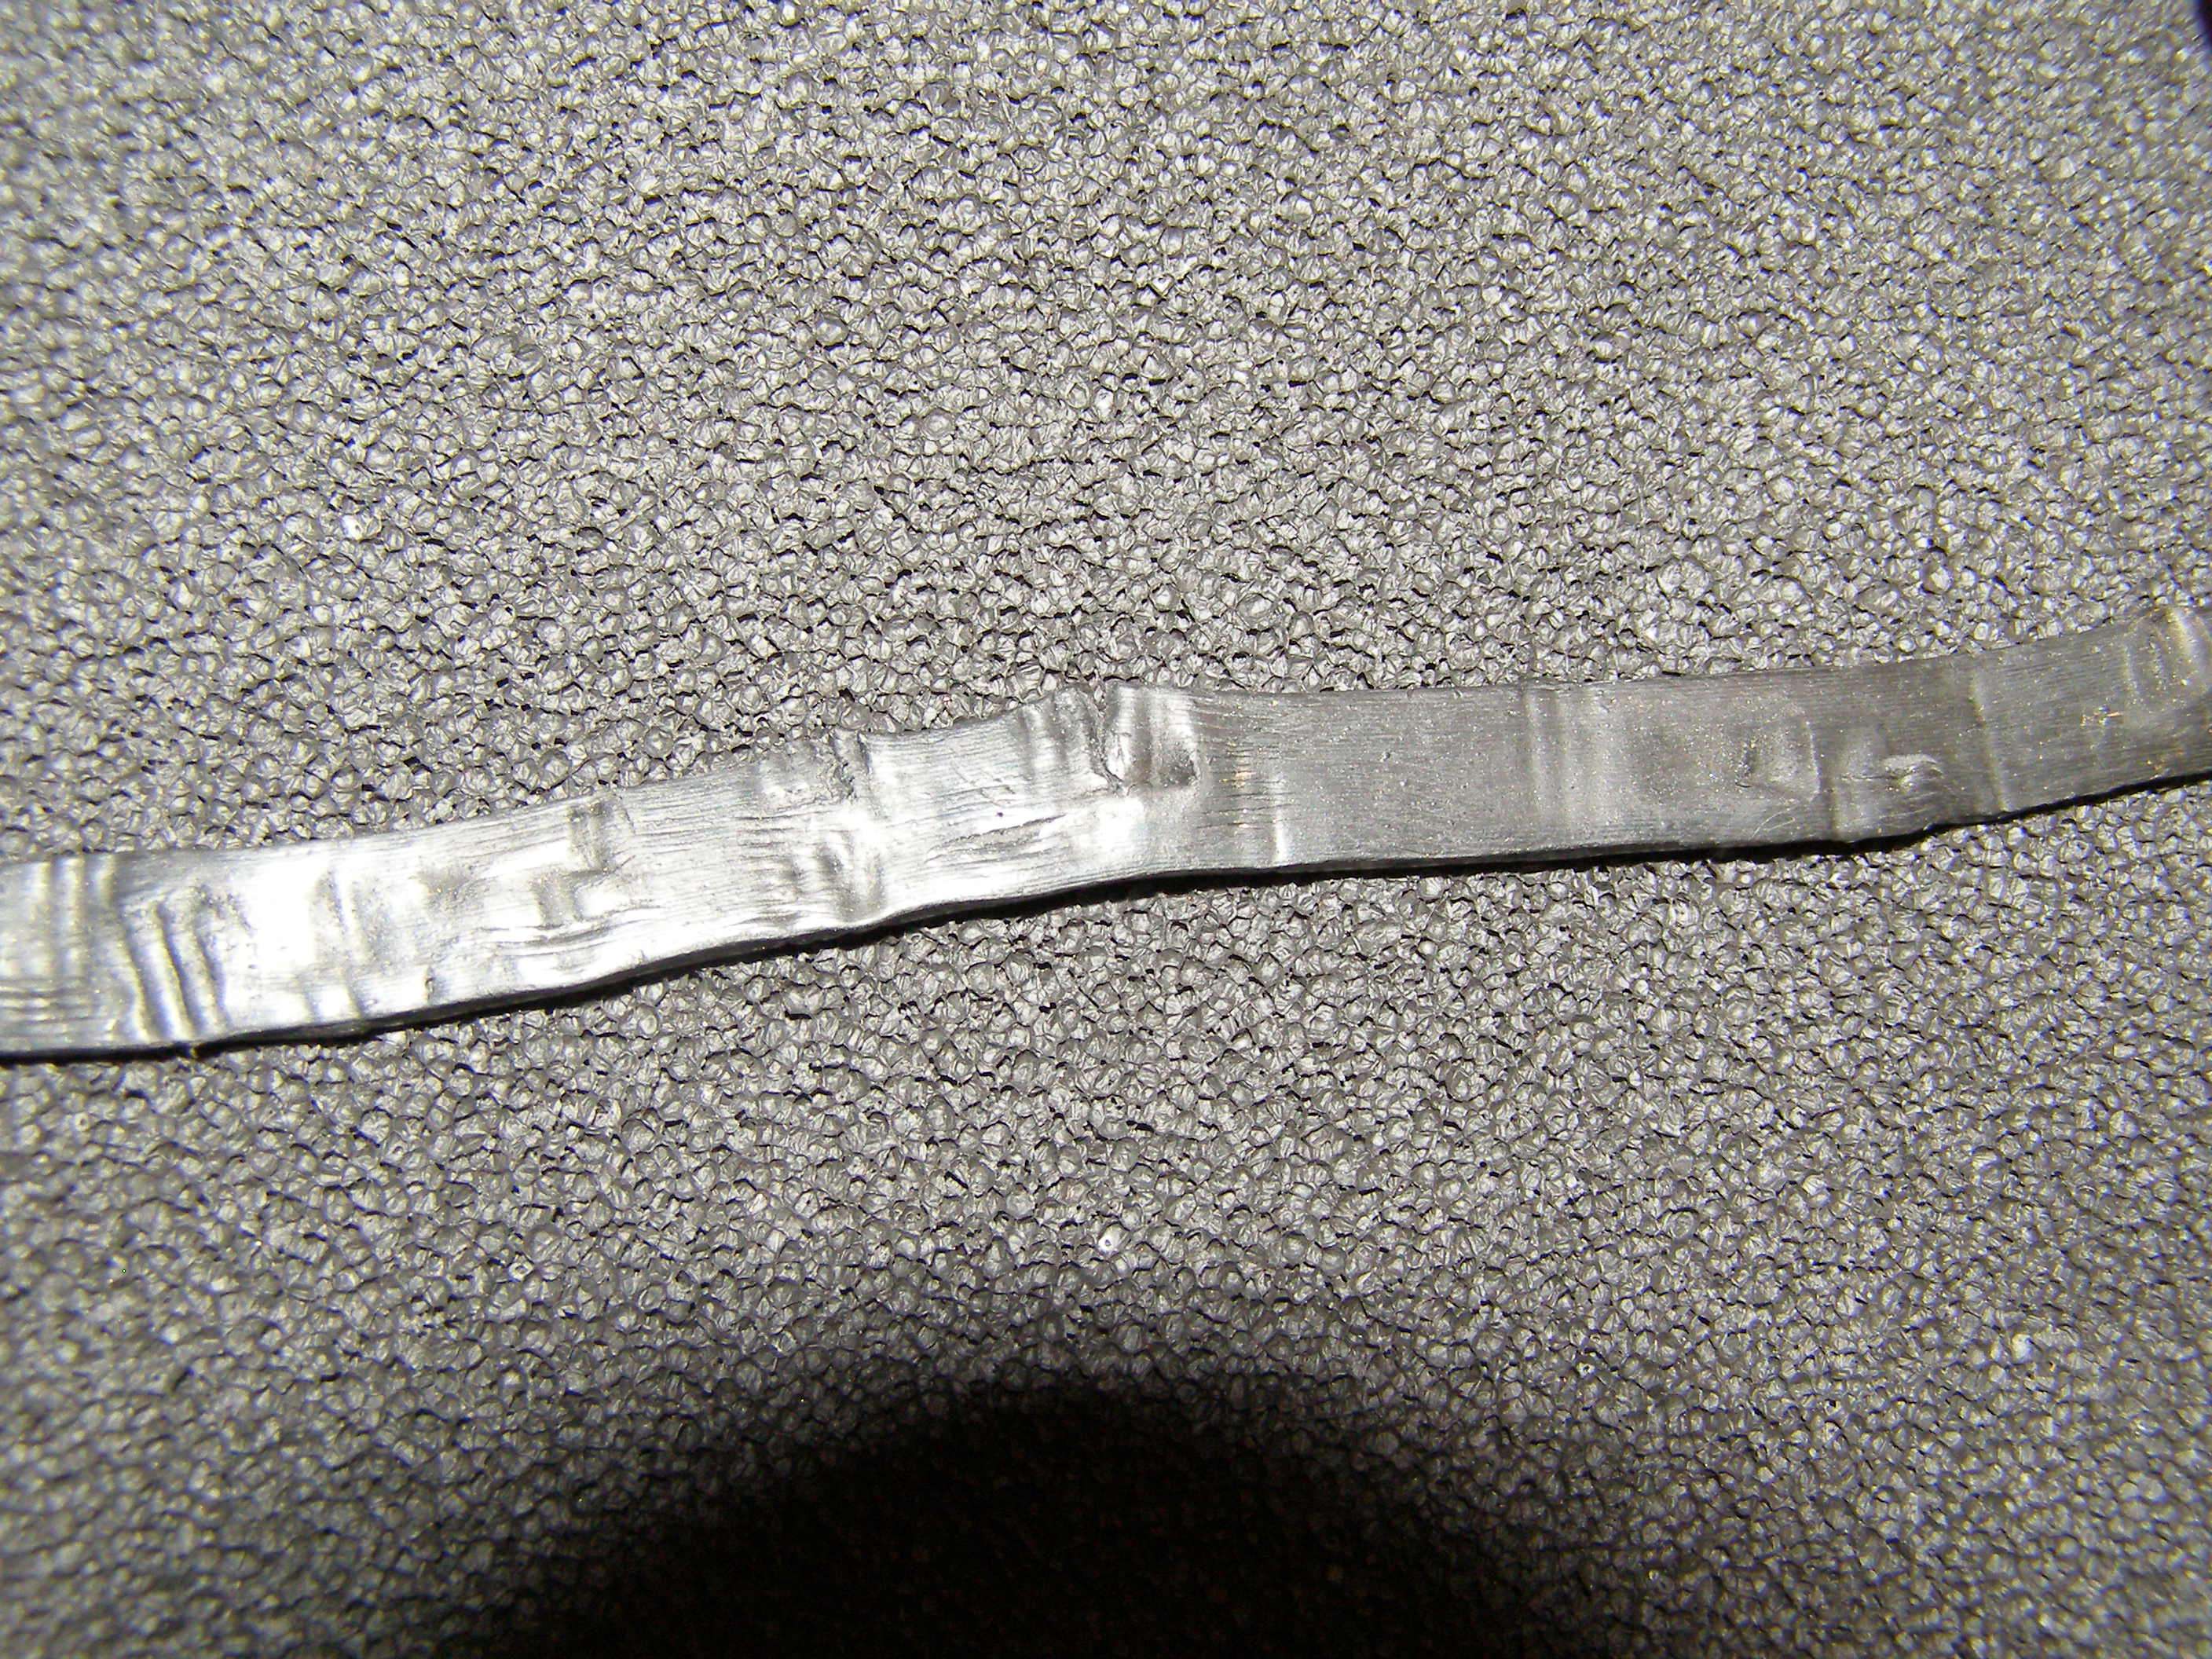
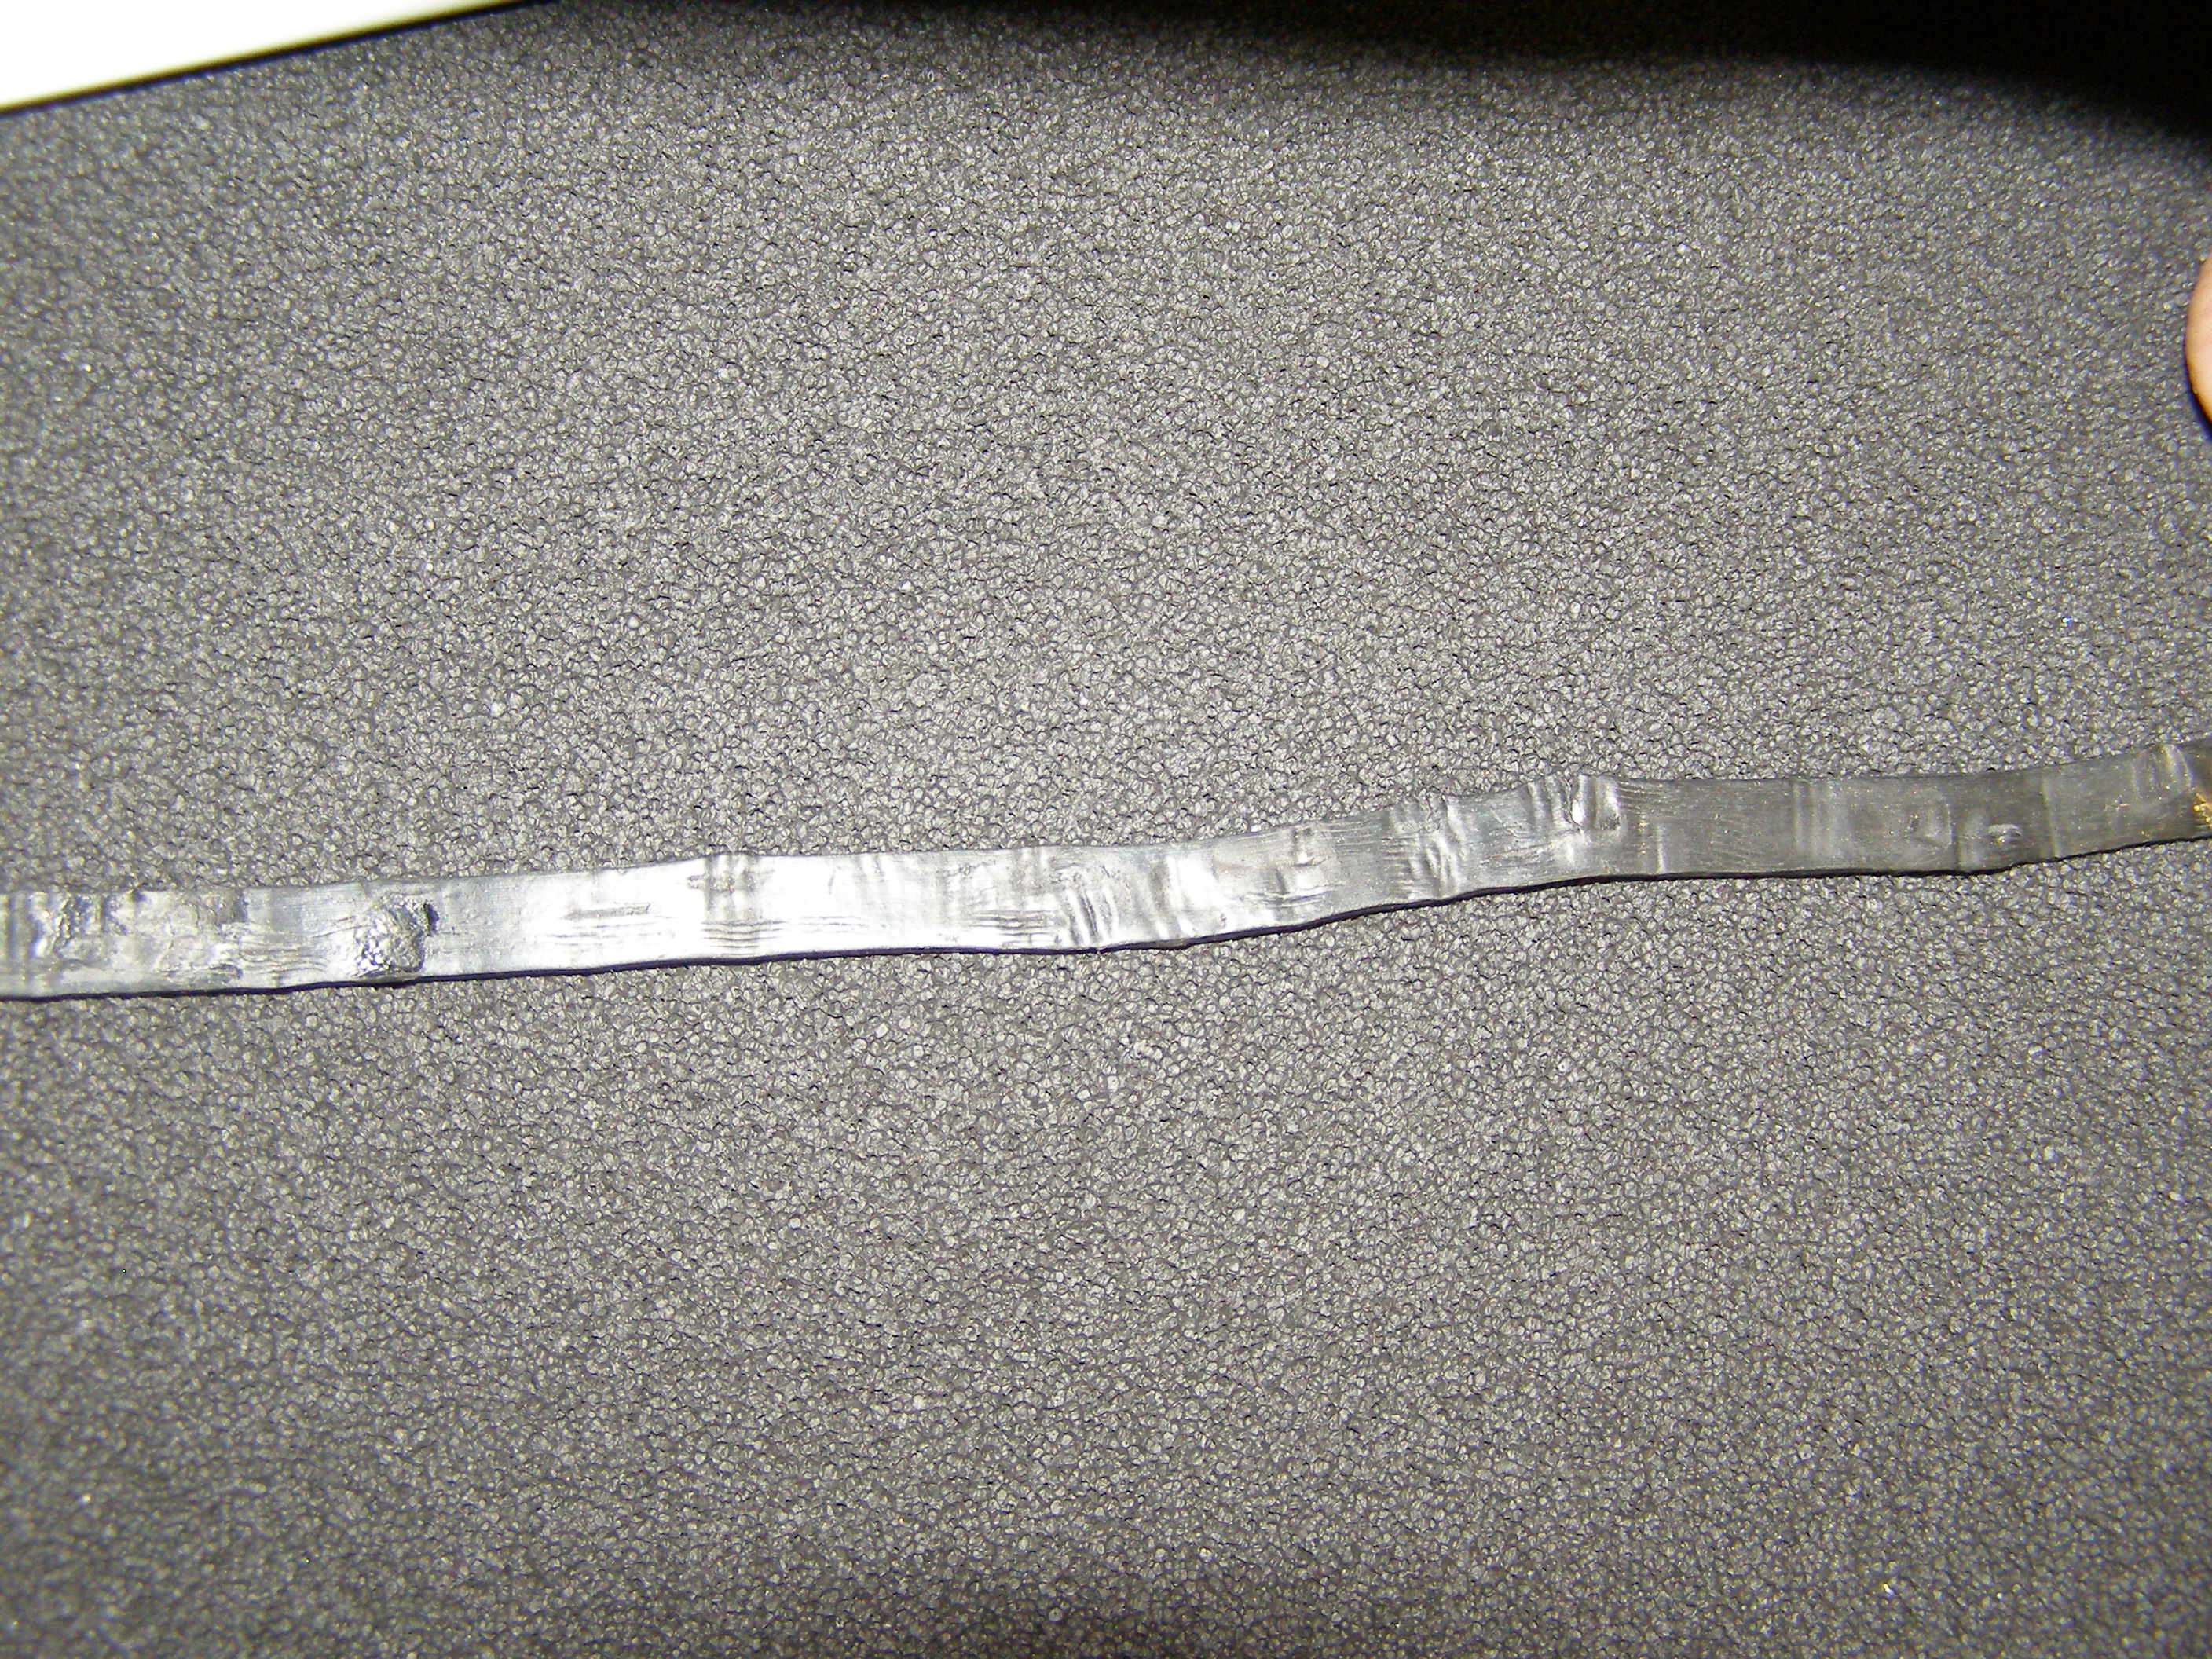
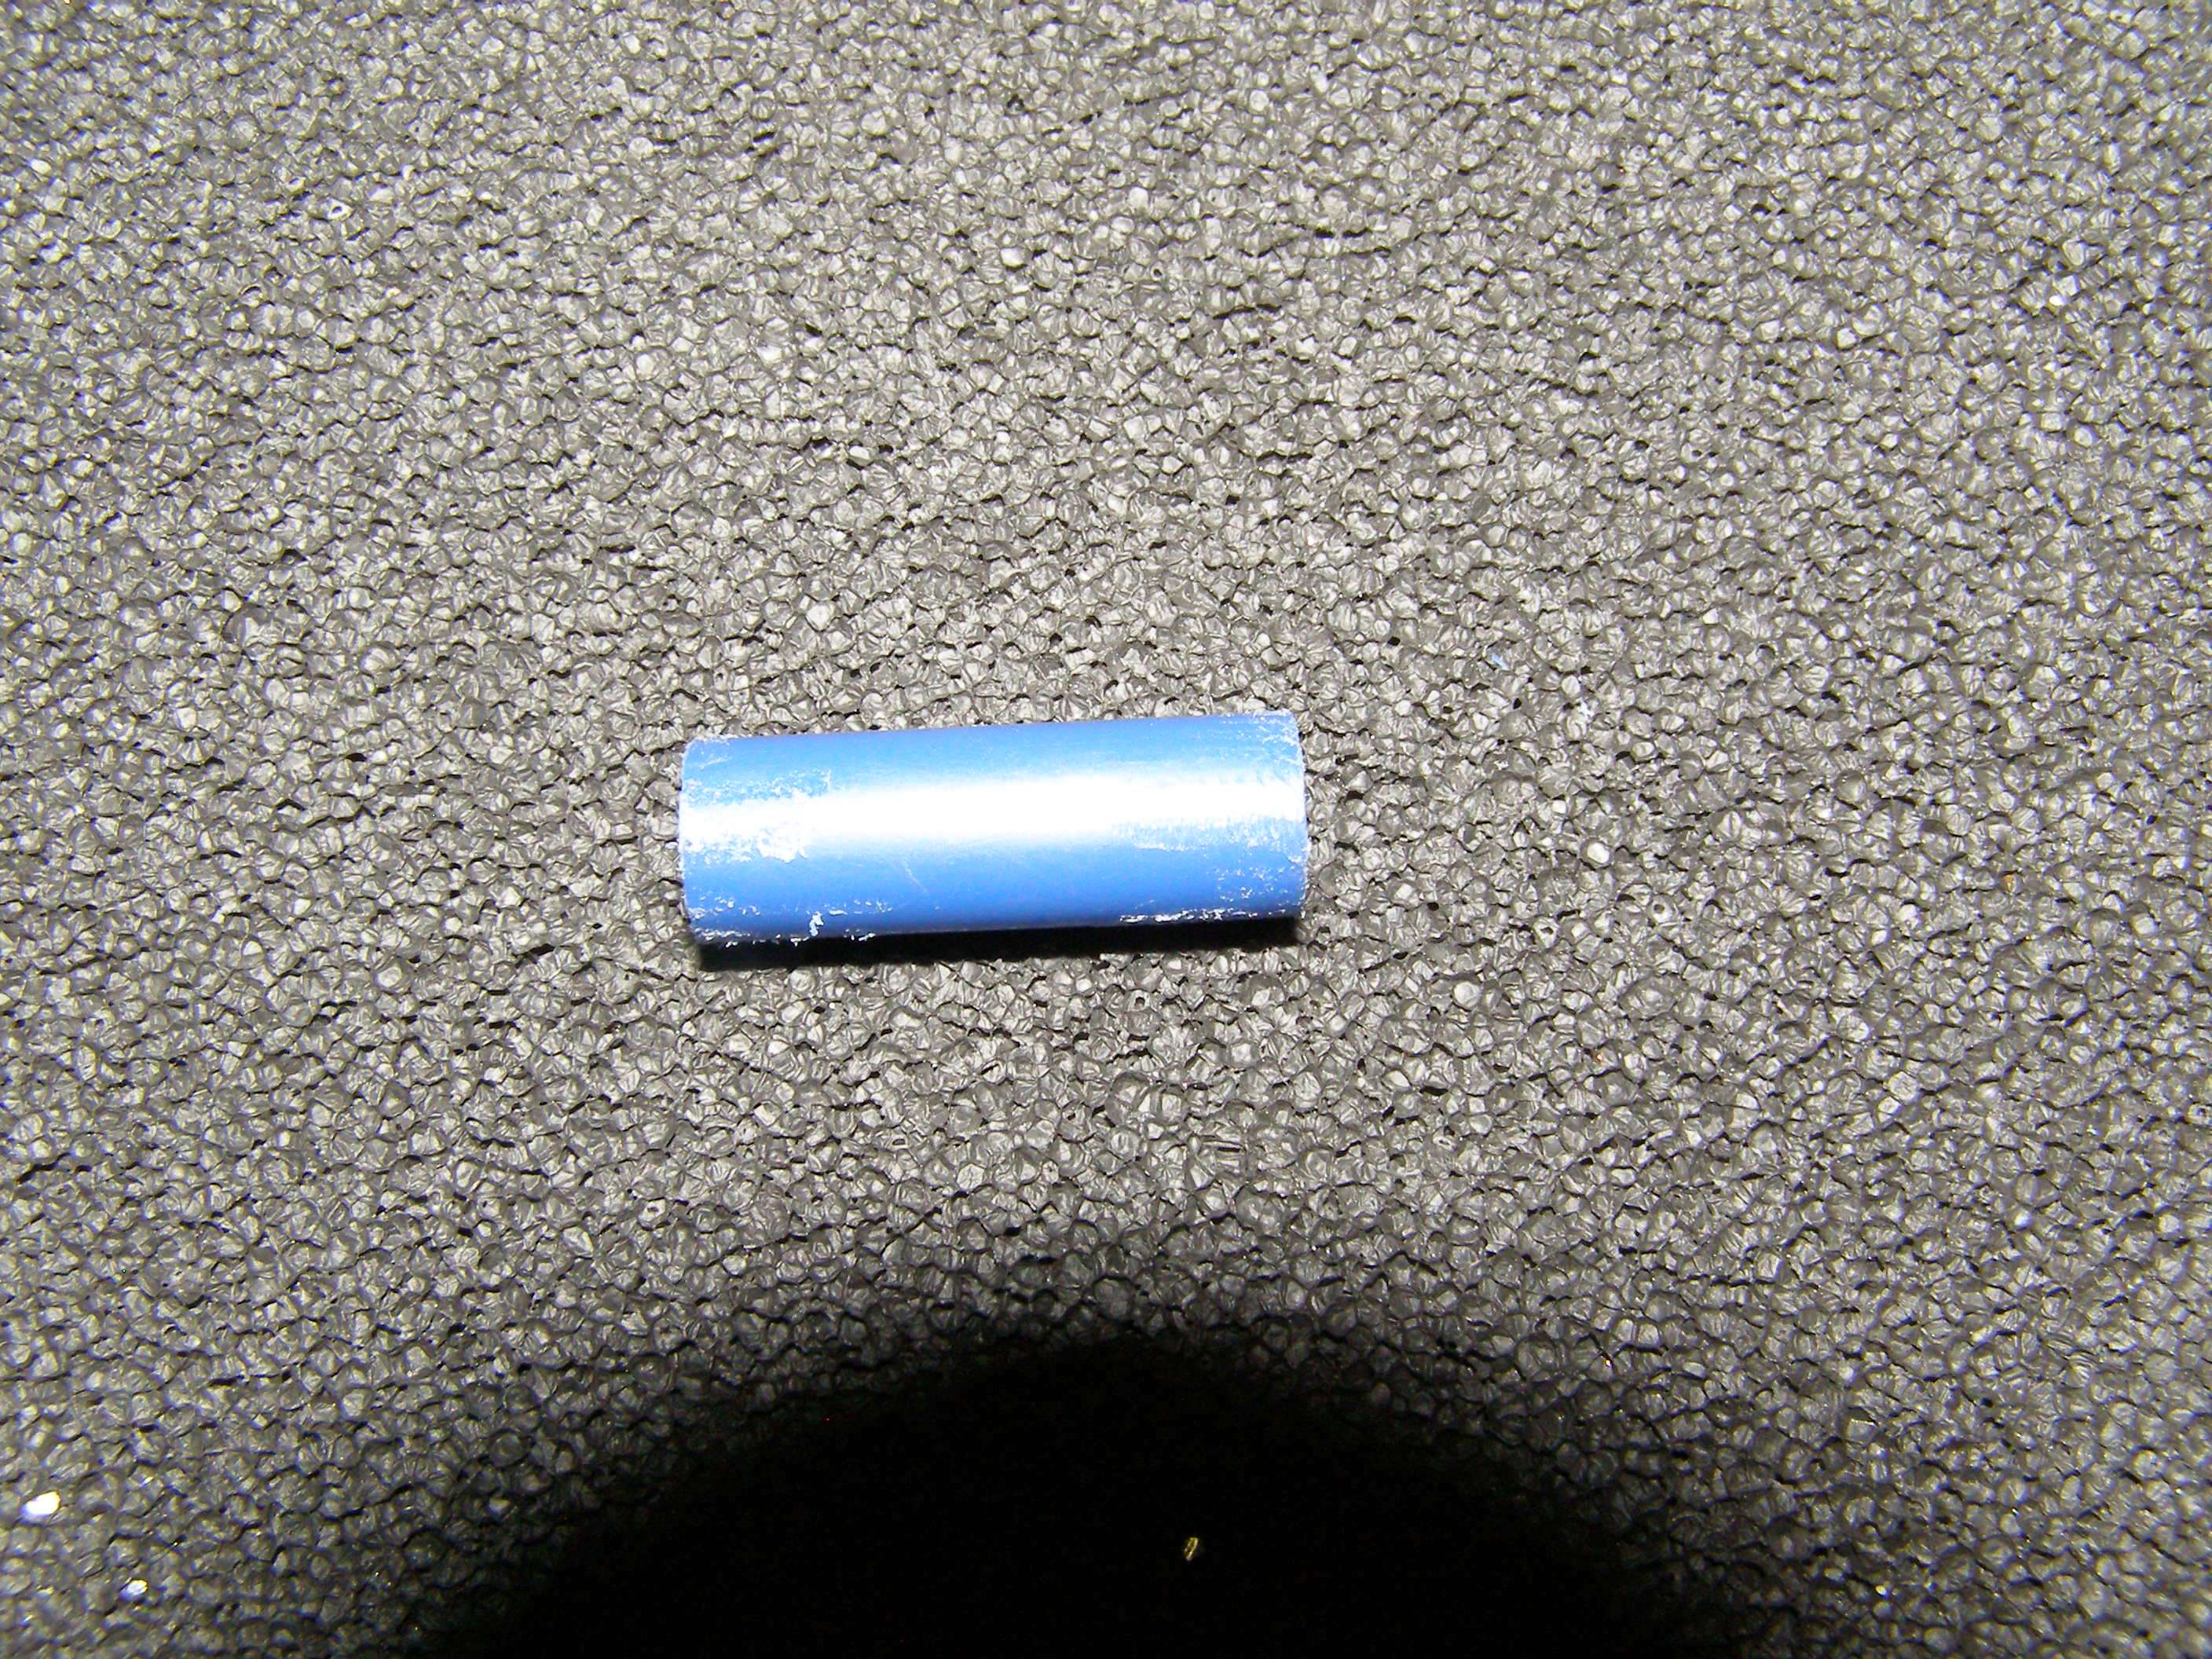
Take off the ends. That entire middle section works like a charm and you have 2 chances to get the next step correct. Both of the ends will be nice and flat/even and an end is what you are going to glue to the lens.
What I did was now that the spring is out, I screwed the lens back in easily and then screwed the battery half back on and screw the lens in until I am at infinity focus. Once at infinity focus, turn the lens in slightly farther and it your dot will get slightly bigger so that you are focusing in just past infinity. You do this so that you have some wiggle room to make sure you can still focus back to infinity when the project is completed.
Now you are trying to cut that bridge piece so that the end side that hits the lens housing and the other side that you cut as flush as possible will hit the lens cap so that there's just a tiny gap left before the entire cap would be all the way in. If you do a good job with this, the gap really won't be noticeable at infinity focus.

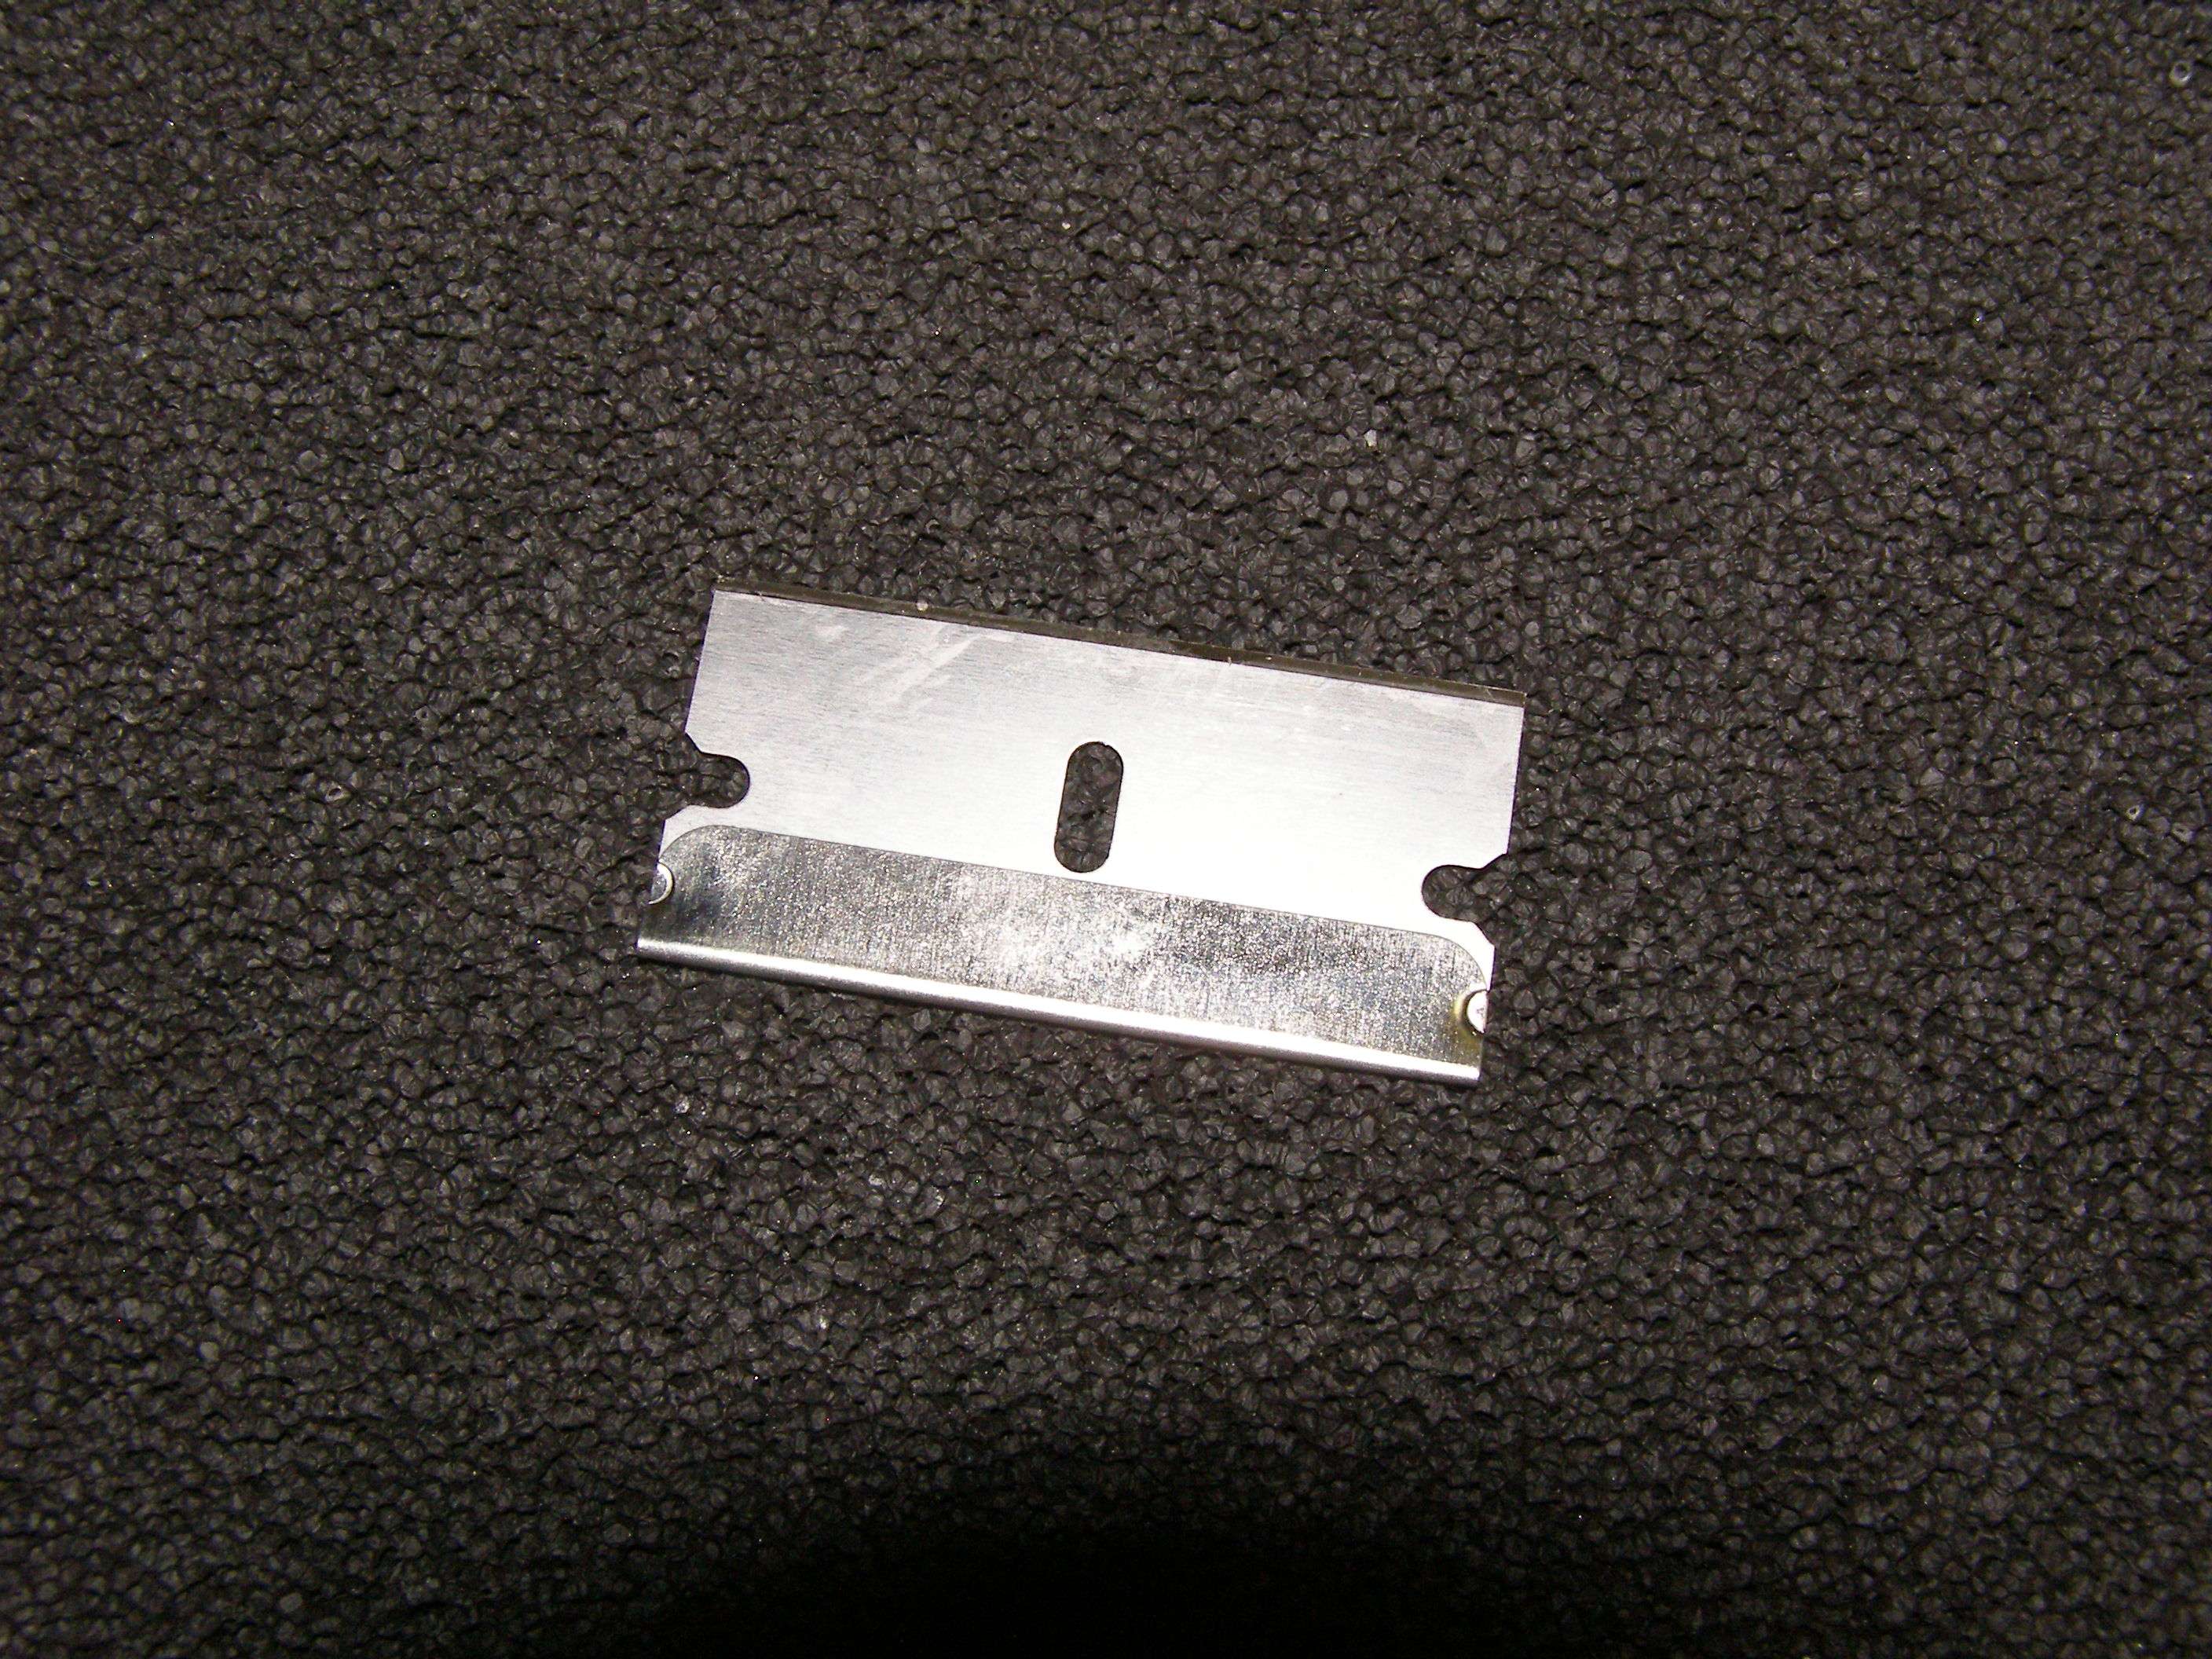
Take a razor
Cut off a piece long enough so that it can touch both the lens when it is screwed back into the module and the top inside of the cap (thus creating a bridge between them). It's not the easiest thing to perfectly cut the other side so perfect and also at the exact length needed so you will likely have to play with it.
Take the lens back out.
Hopefully you can see what I've done with these pieces. I used something sharp to scratch into the surfaces of the bridge, lens and inside top of cap so that the epoxy will have more surface area to grab and make a strong bond.
Now, I have many different kinds of epoxy but what I like to use is this professional strength 5 minute epoxy that I got from Lowes. It works very well for this application. Dries very quickly so you can go onto the next step. It is also important that you don't tell your wife that you are using the top of the washing machine or dryer for some of your projects
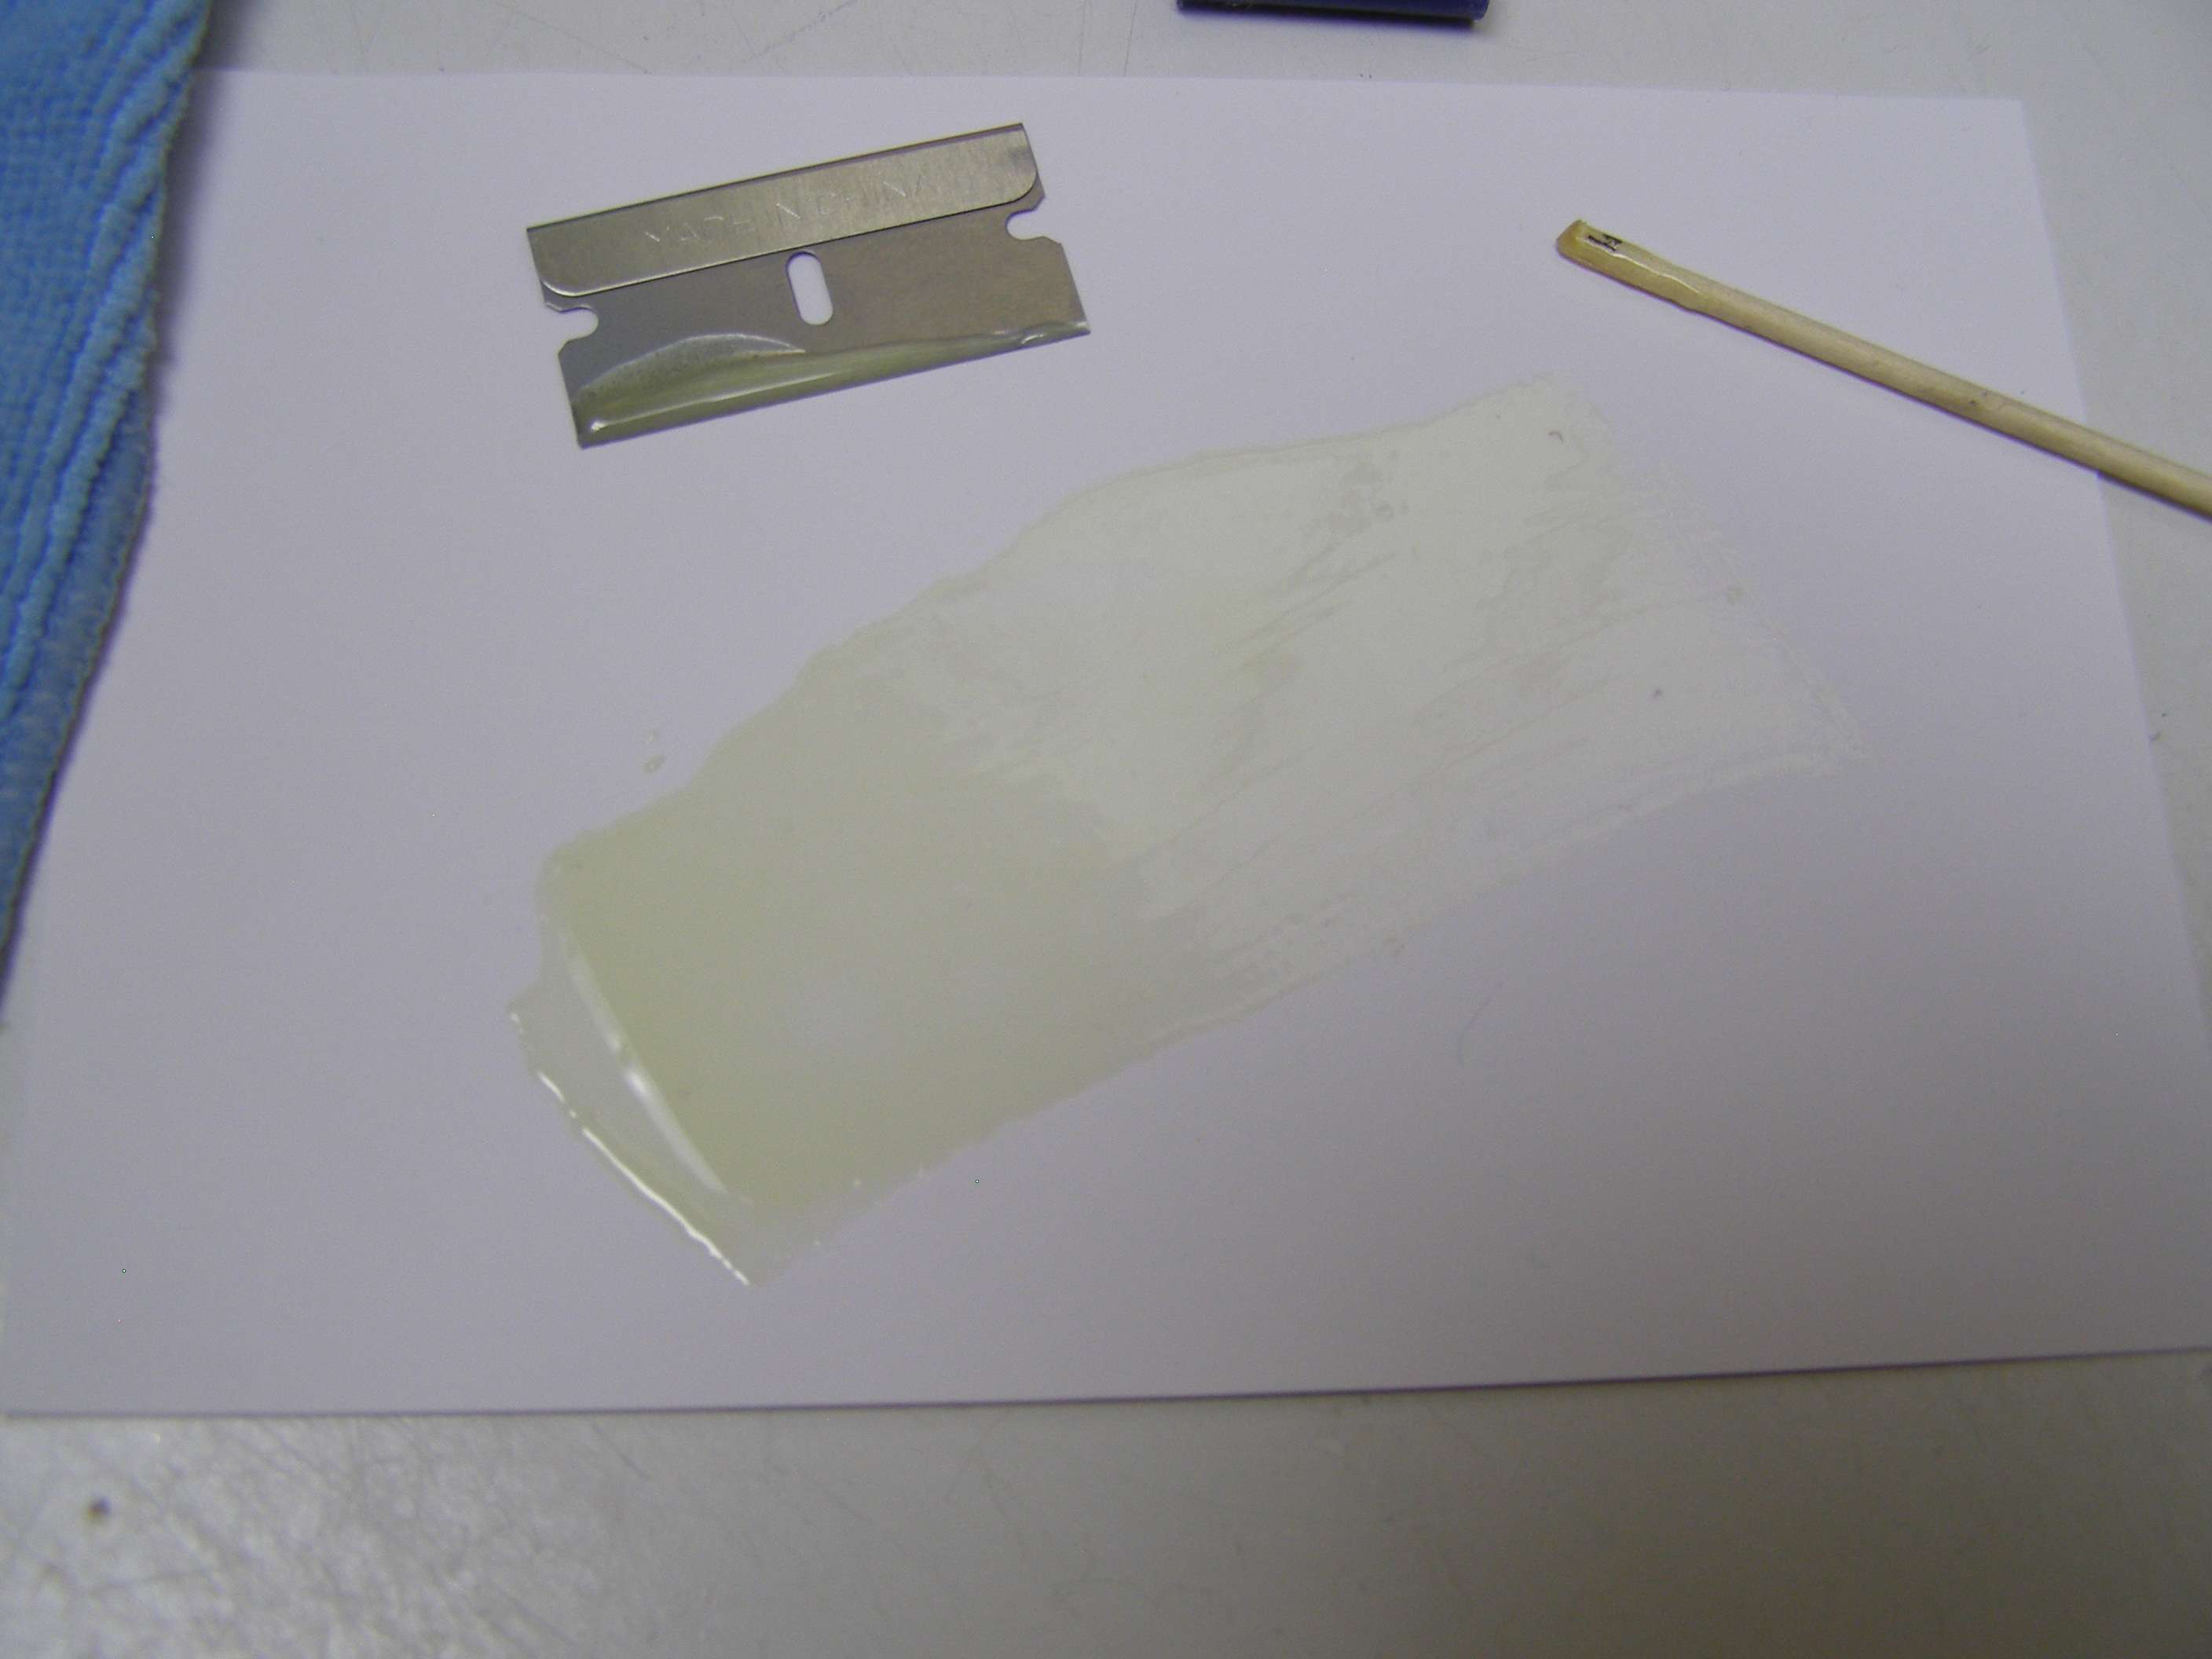
I use a piece of strong paper that is very smooth (like the back of photo paper), a razor and stir stick.
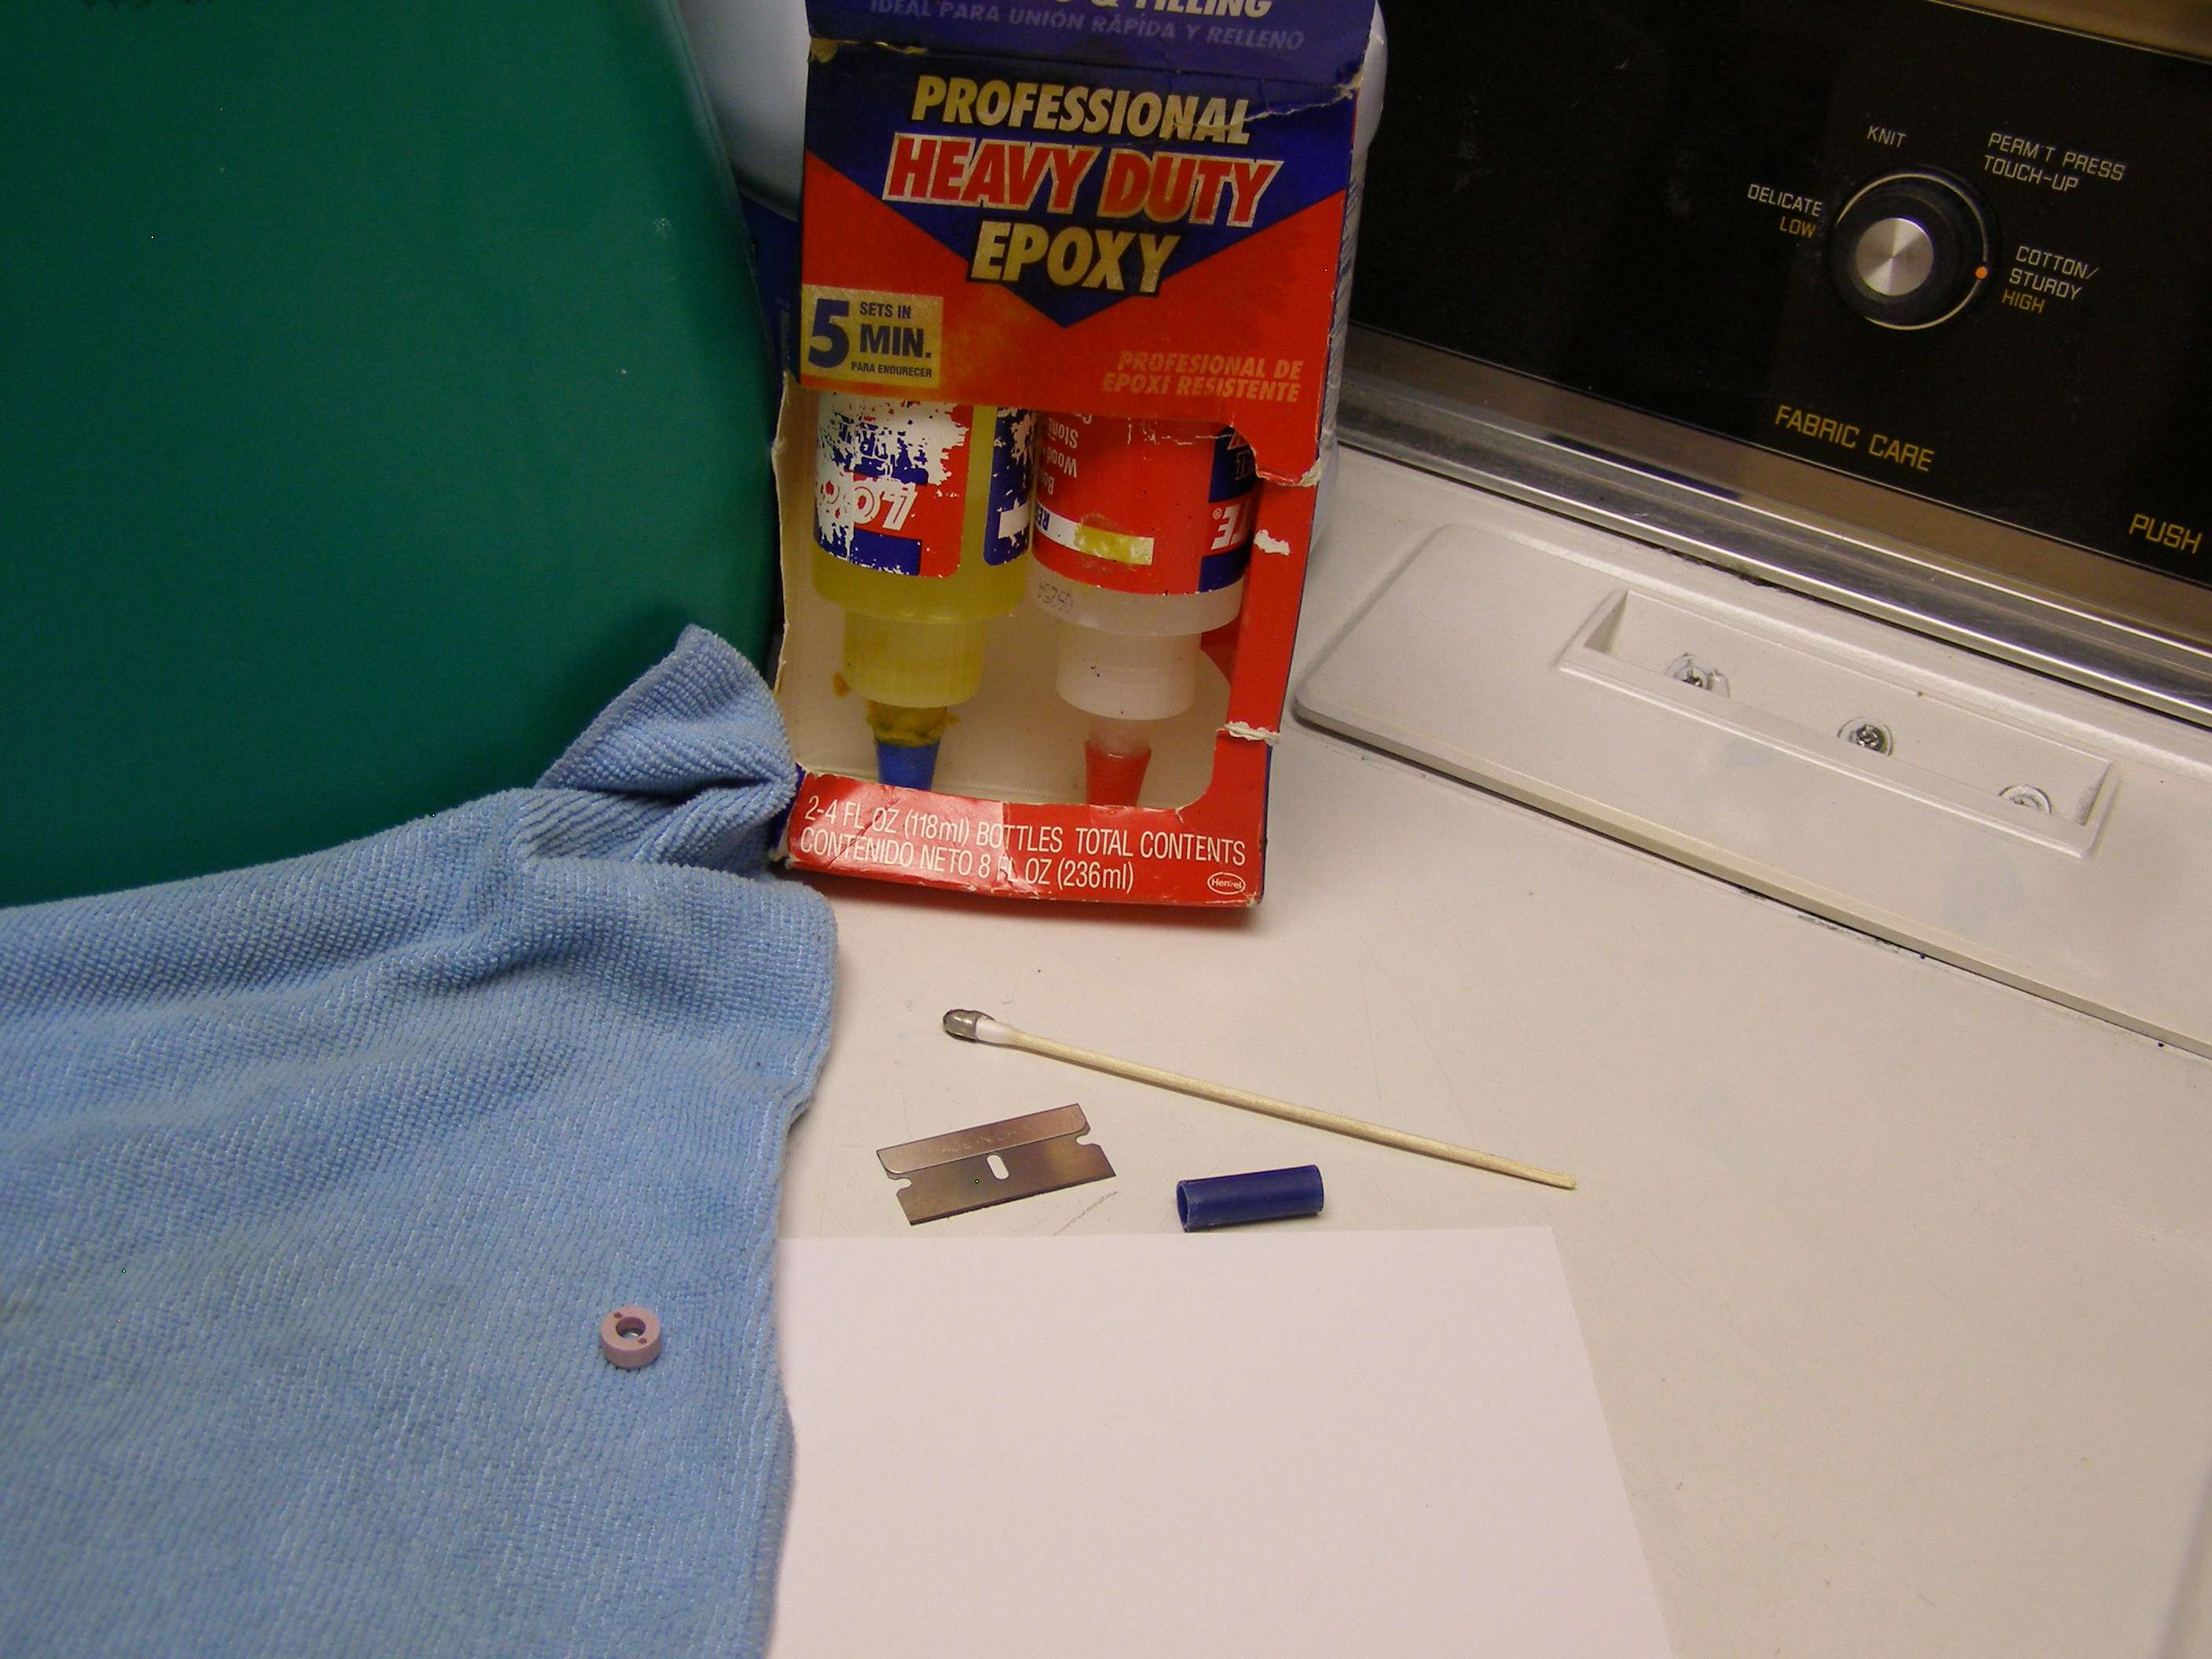
You want EQUAL parts glue and hardener (unless the epoxy you use says otherwise) and prepare more than needed so it's easier to work with.
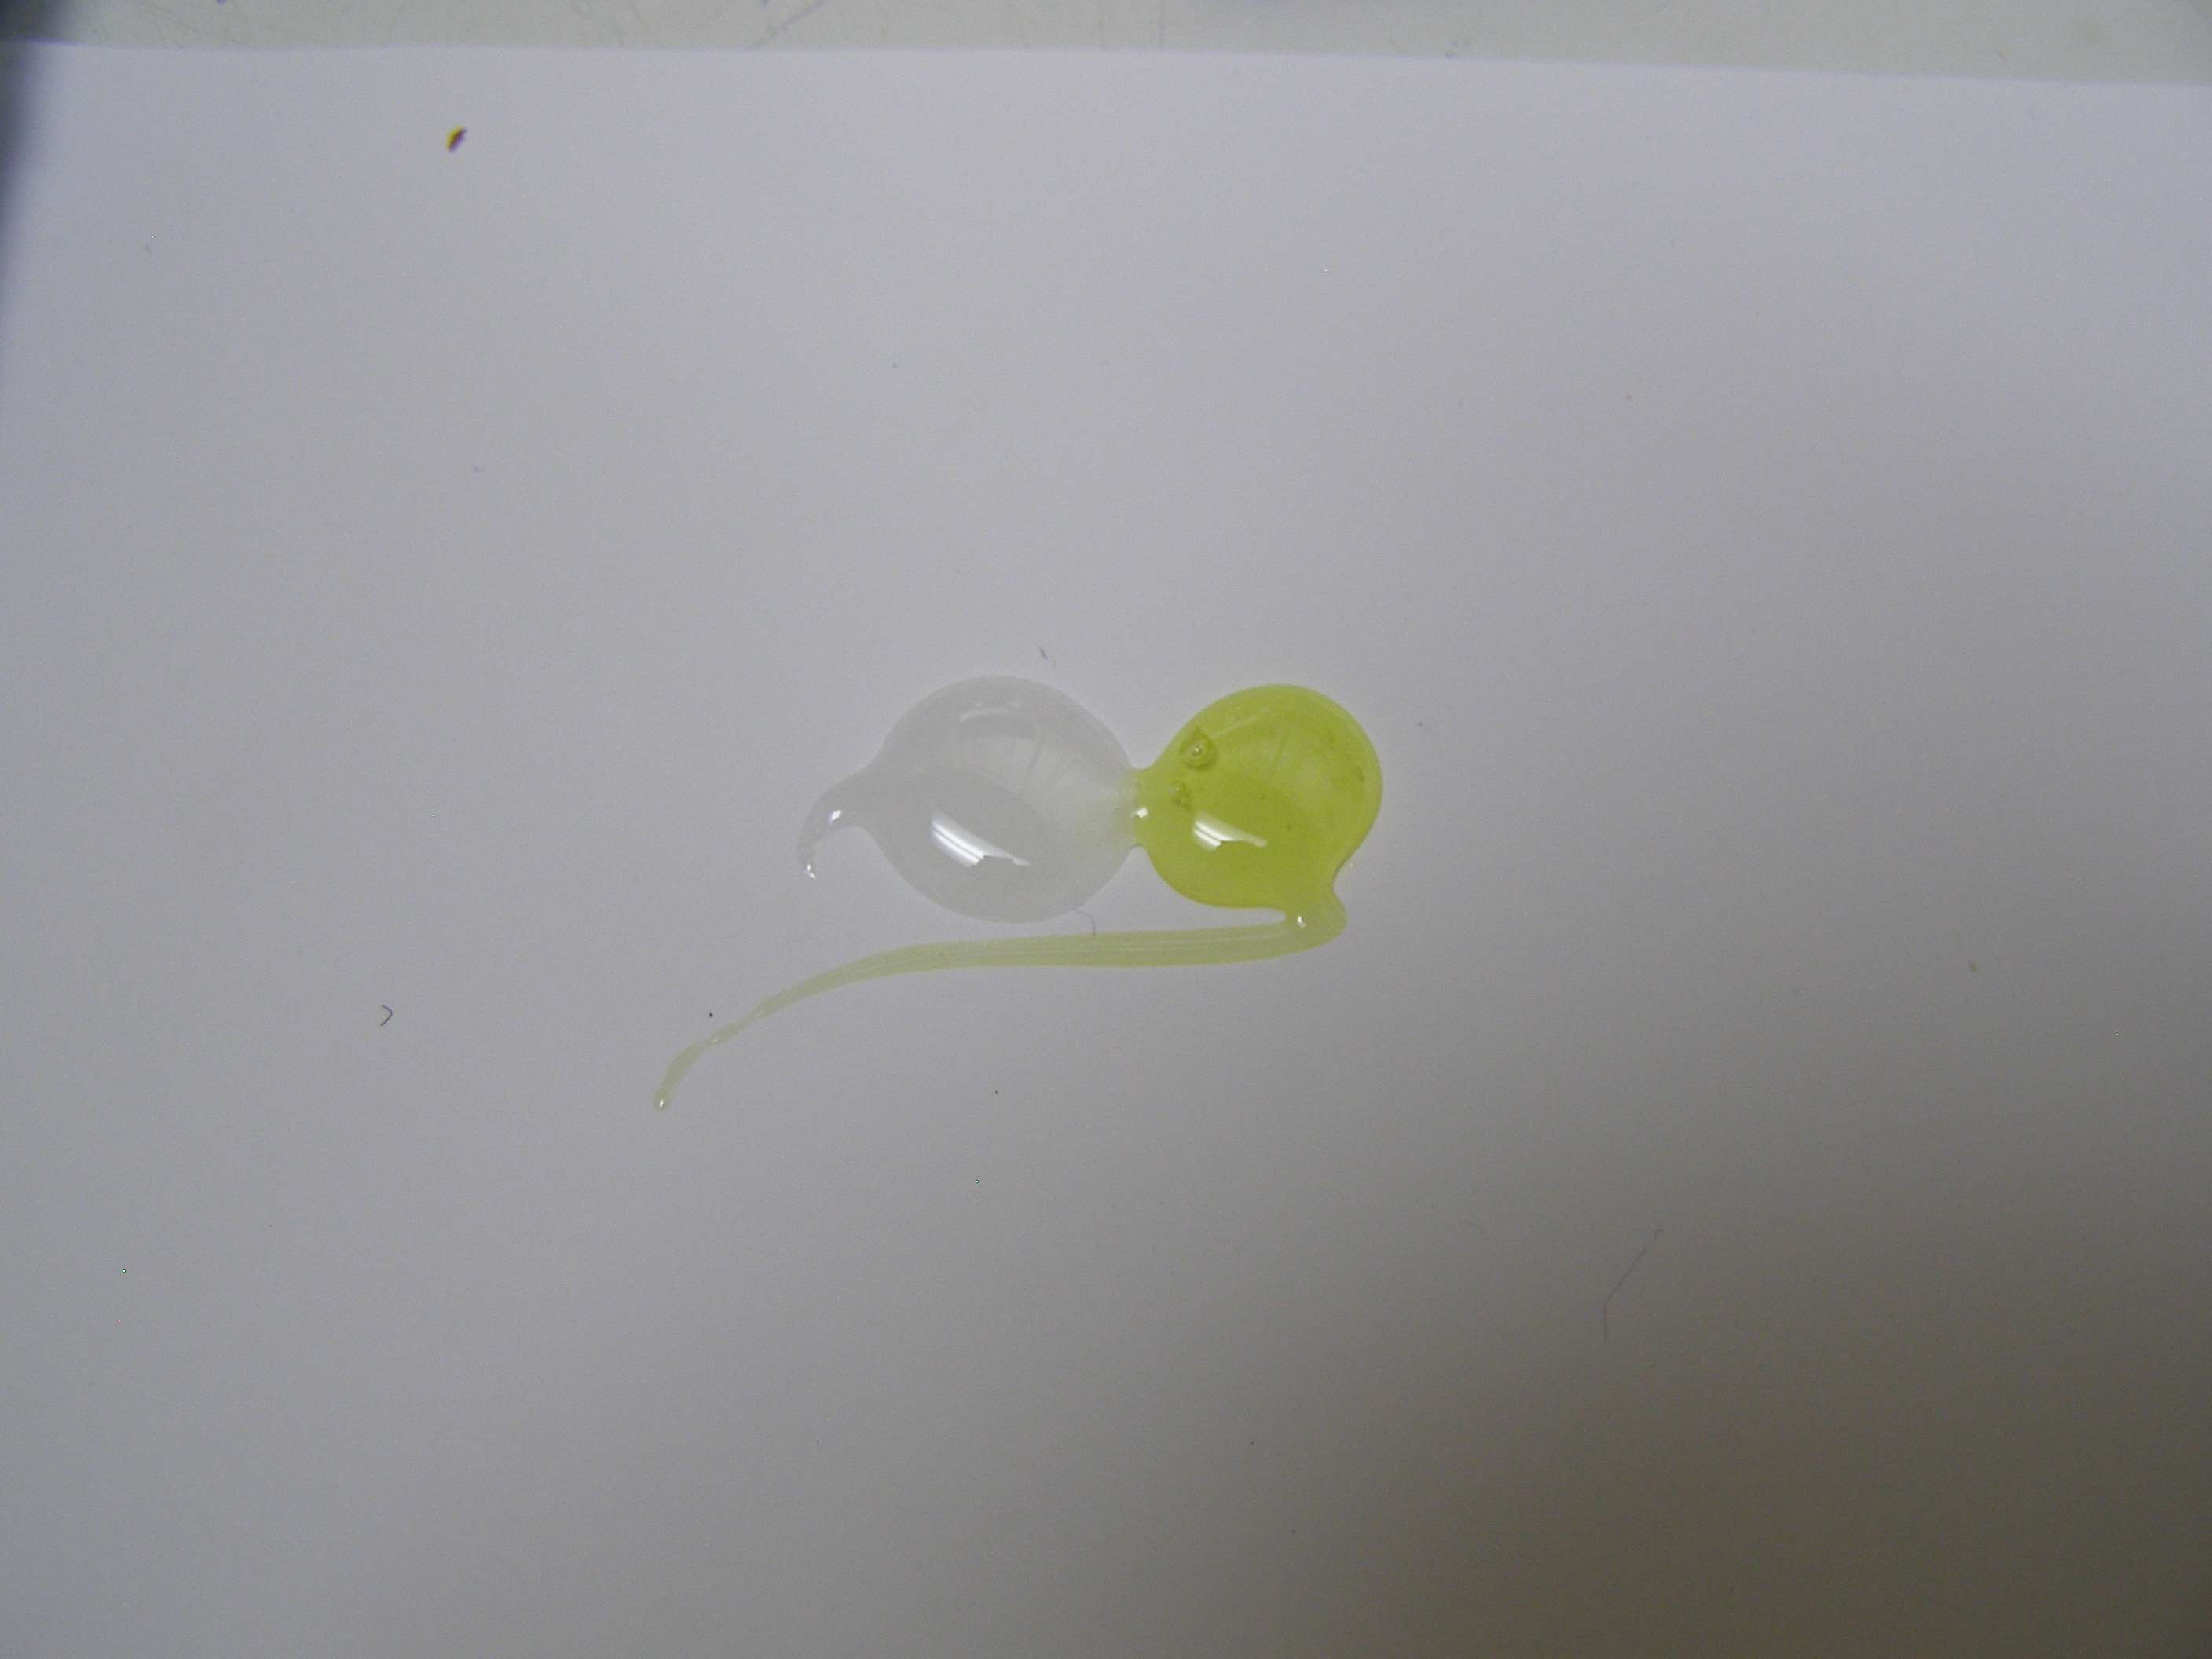
Stir up.
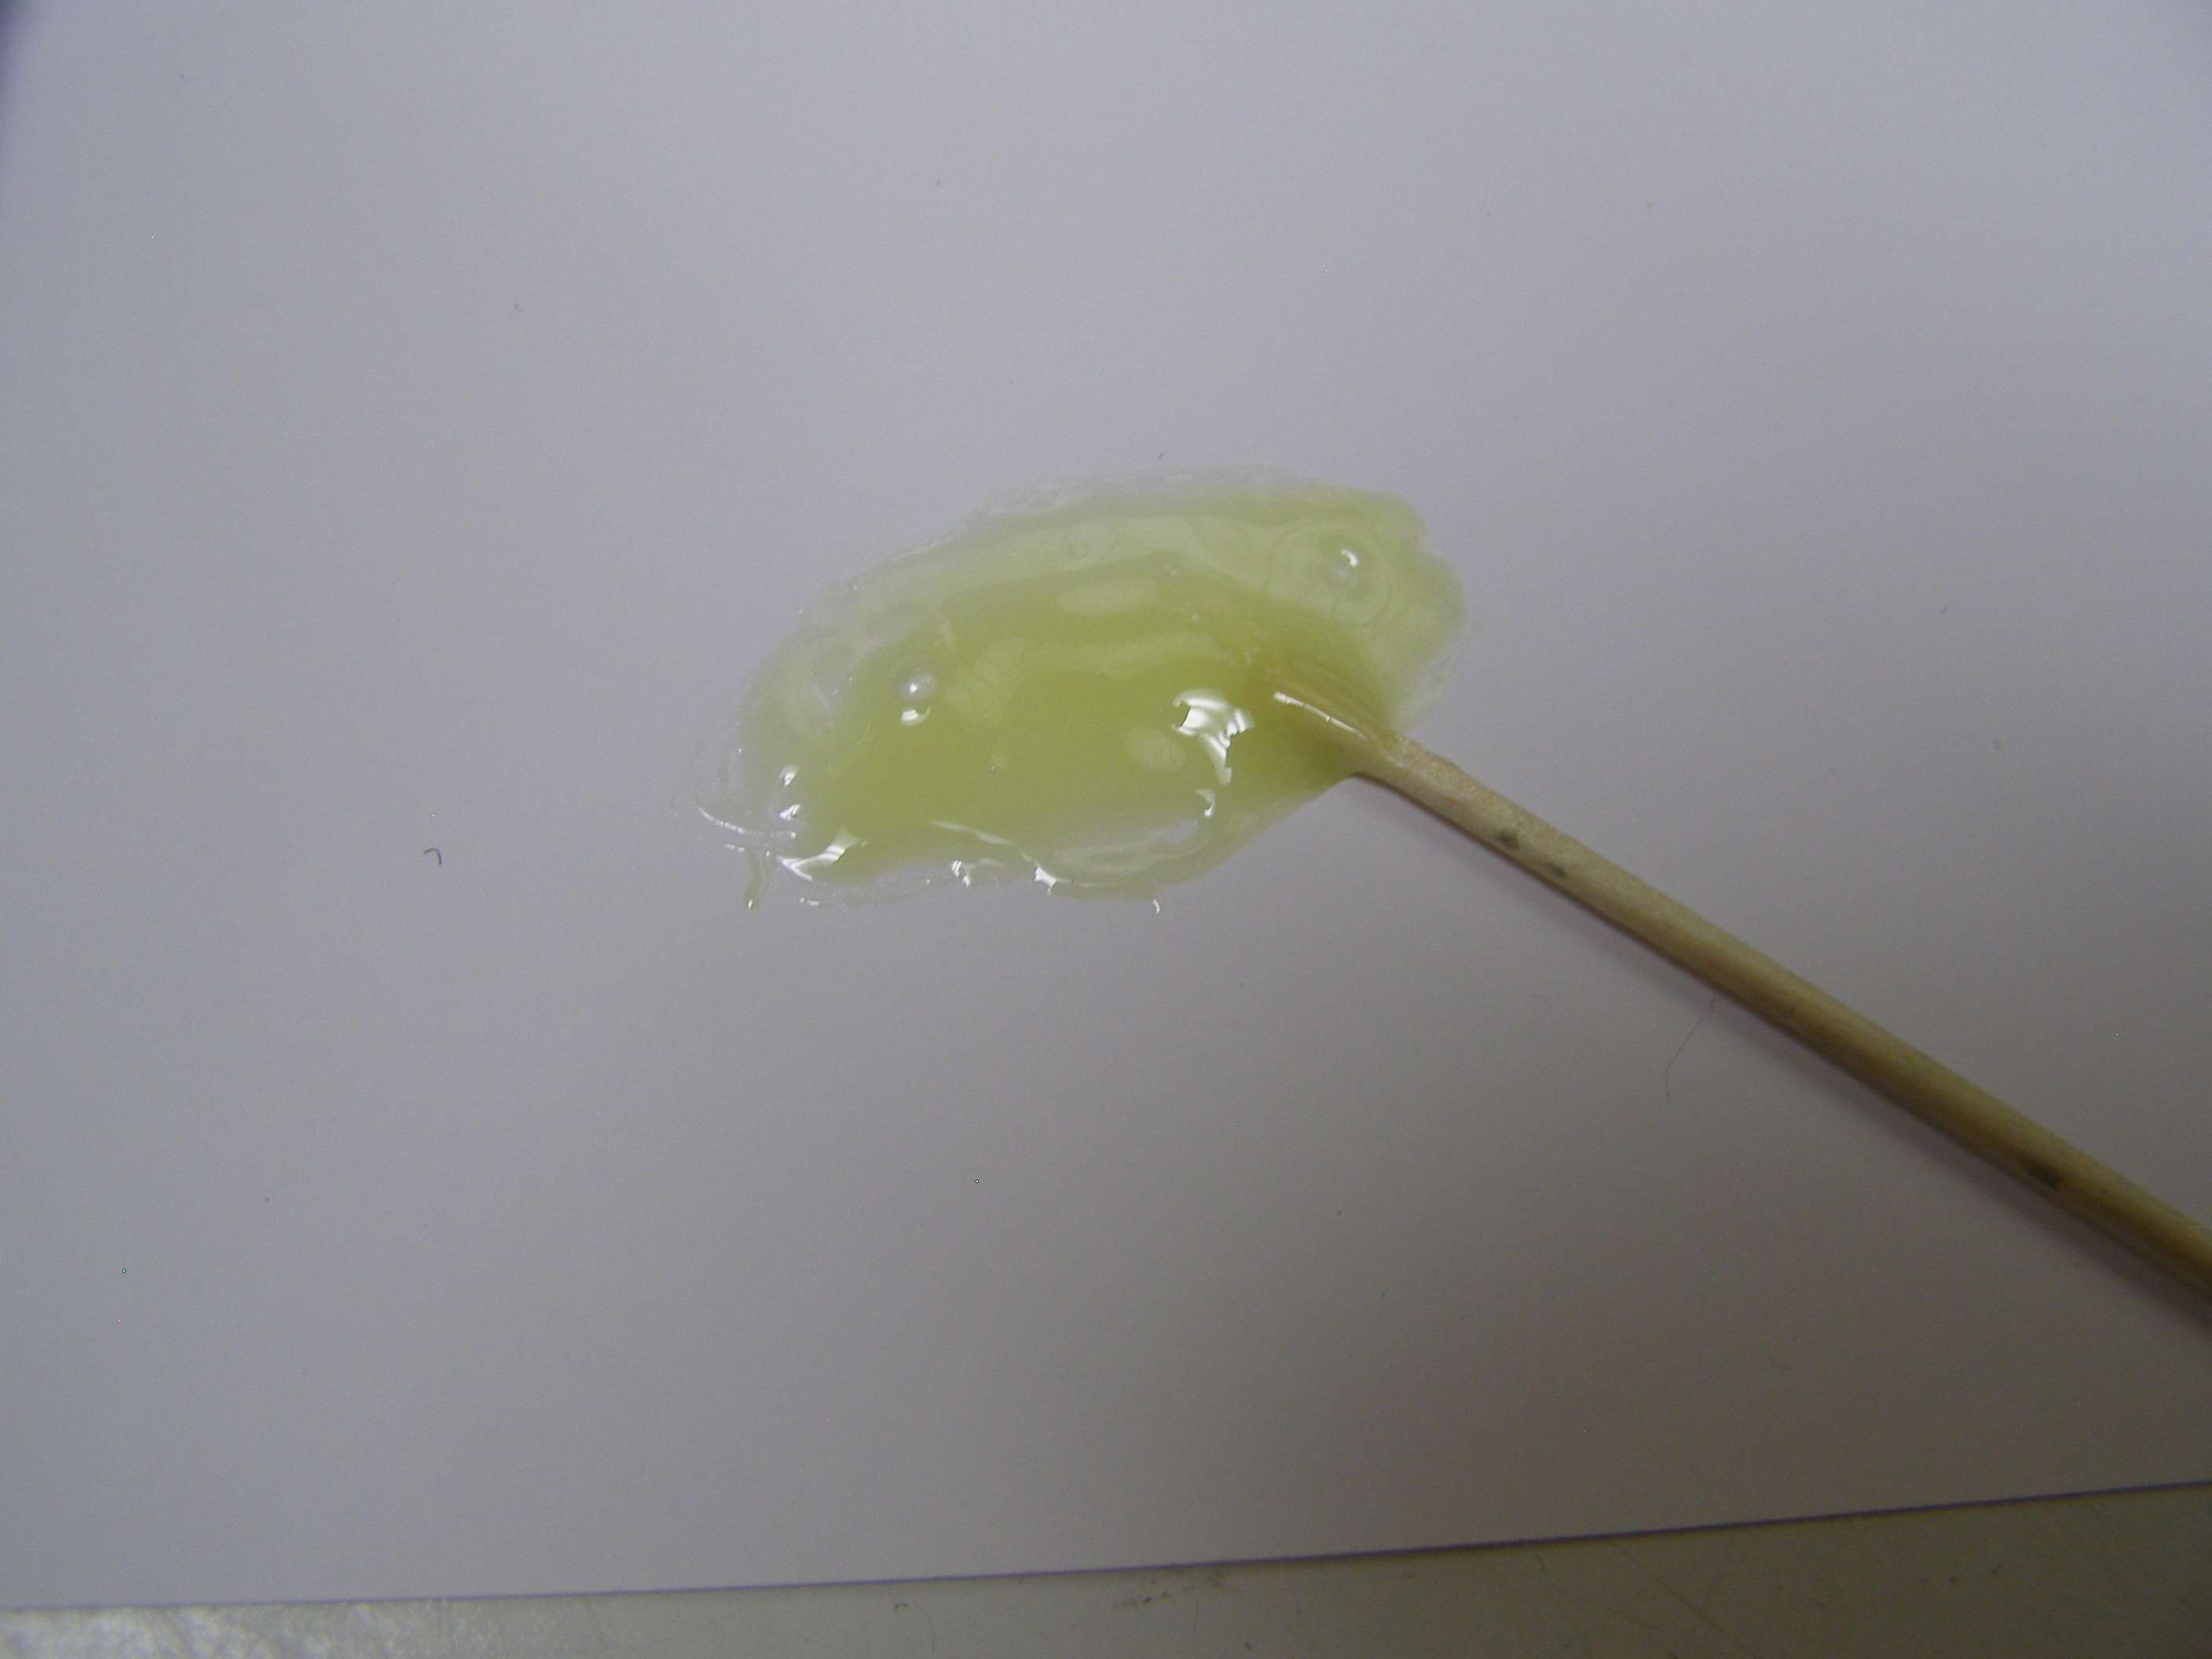
Now, after you stir for say 30 seconds or so, what I do is take a razor and keep scraping the epoxy across itself over and over so that you know that you have done a great job of making sure it is COMPLETELY mixed and smooth. At this point with a 5 minute epoxy, you should be able to tell it's just starting to get thicker.
Use the razor to put some epoxy on the outside edge of the side of the bridge that you didn't cut and a tiny bit on the end trying not to get any inside. This is slightly too much glue so I wiped a small amount off.
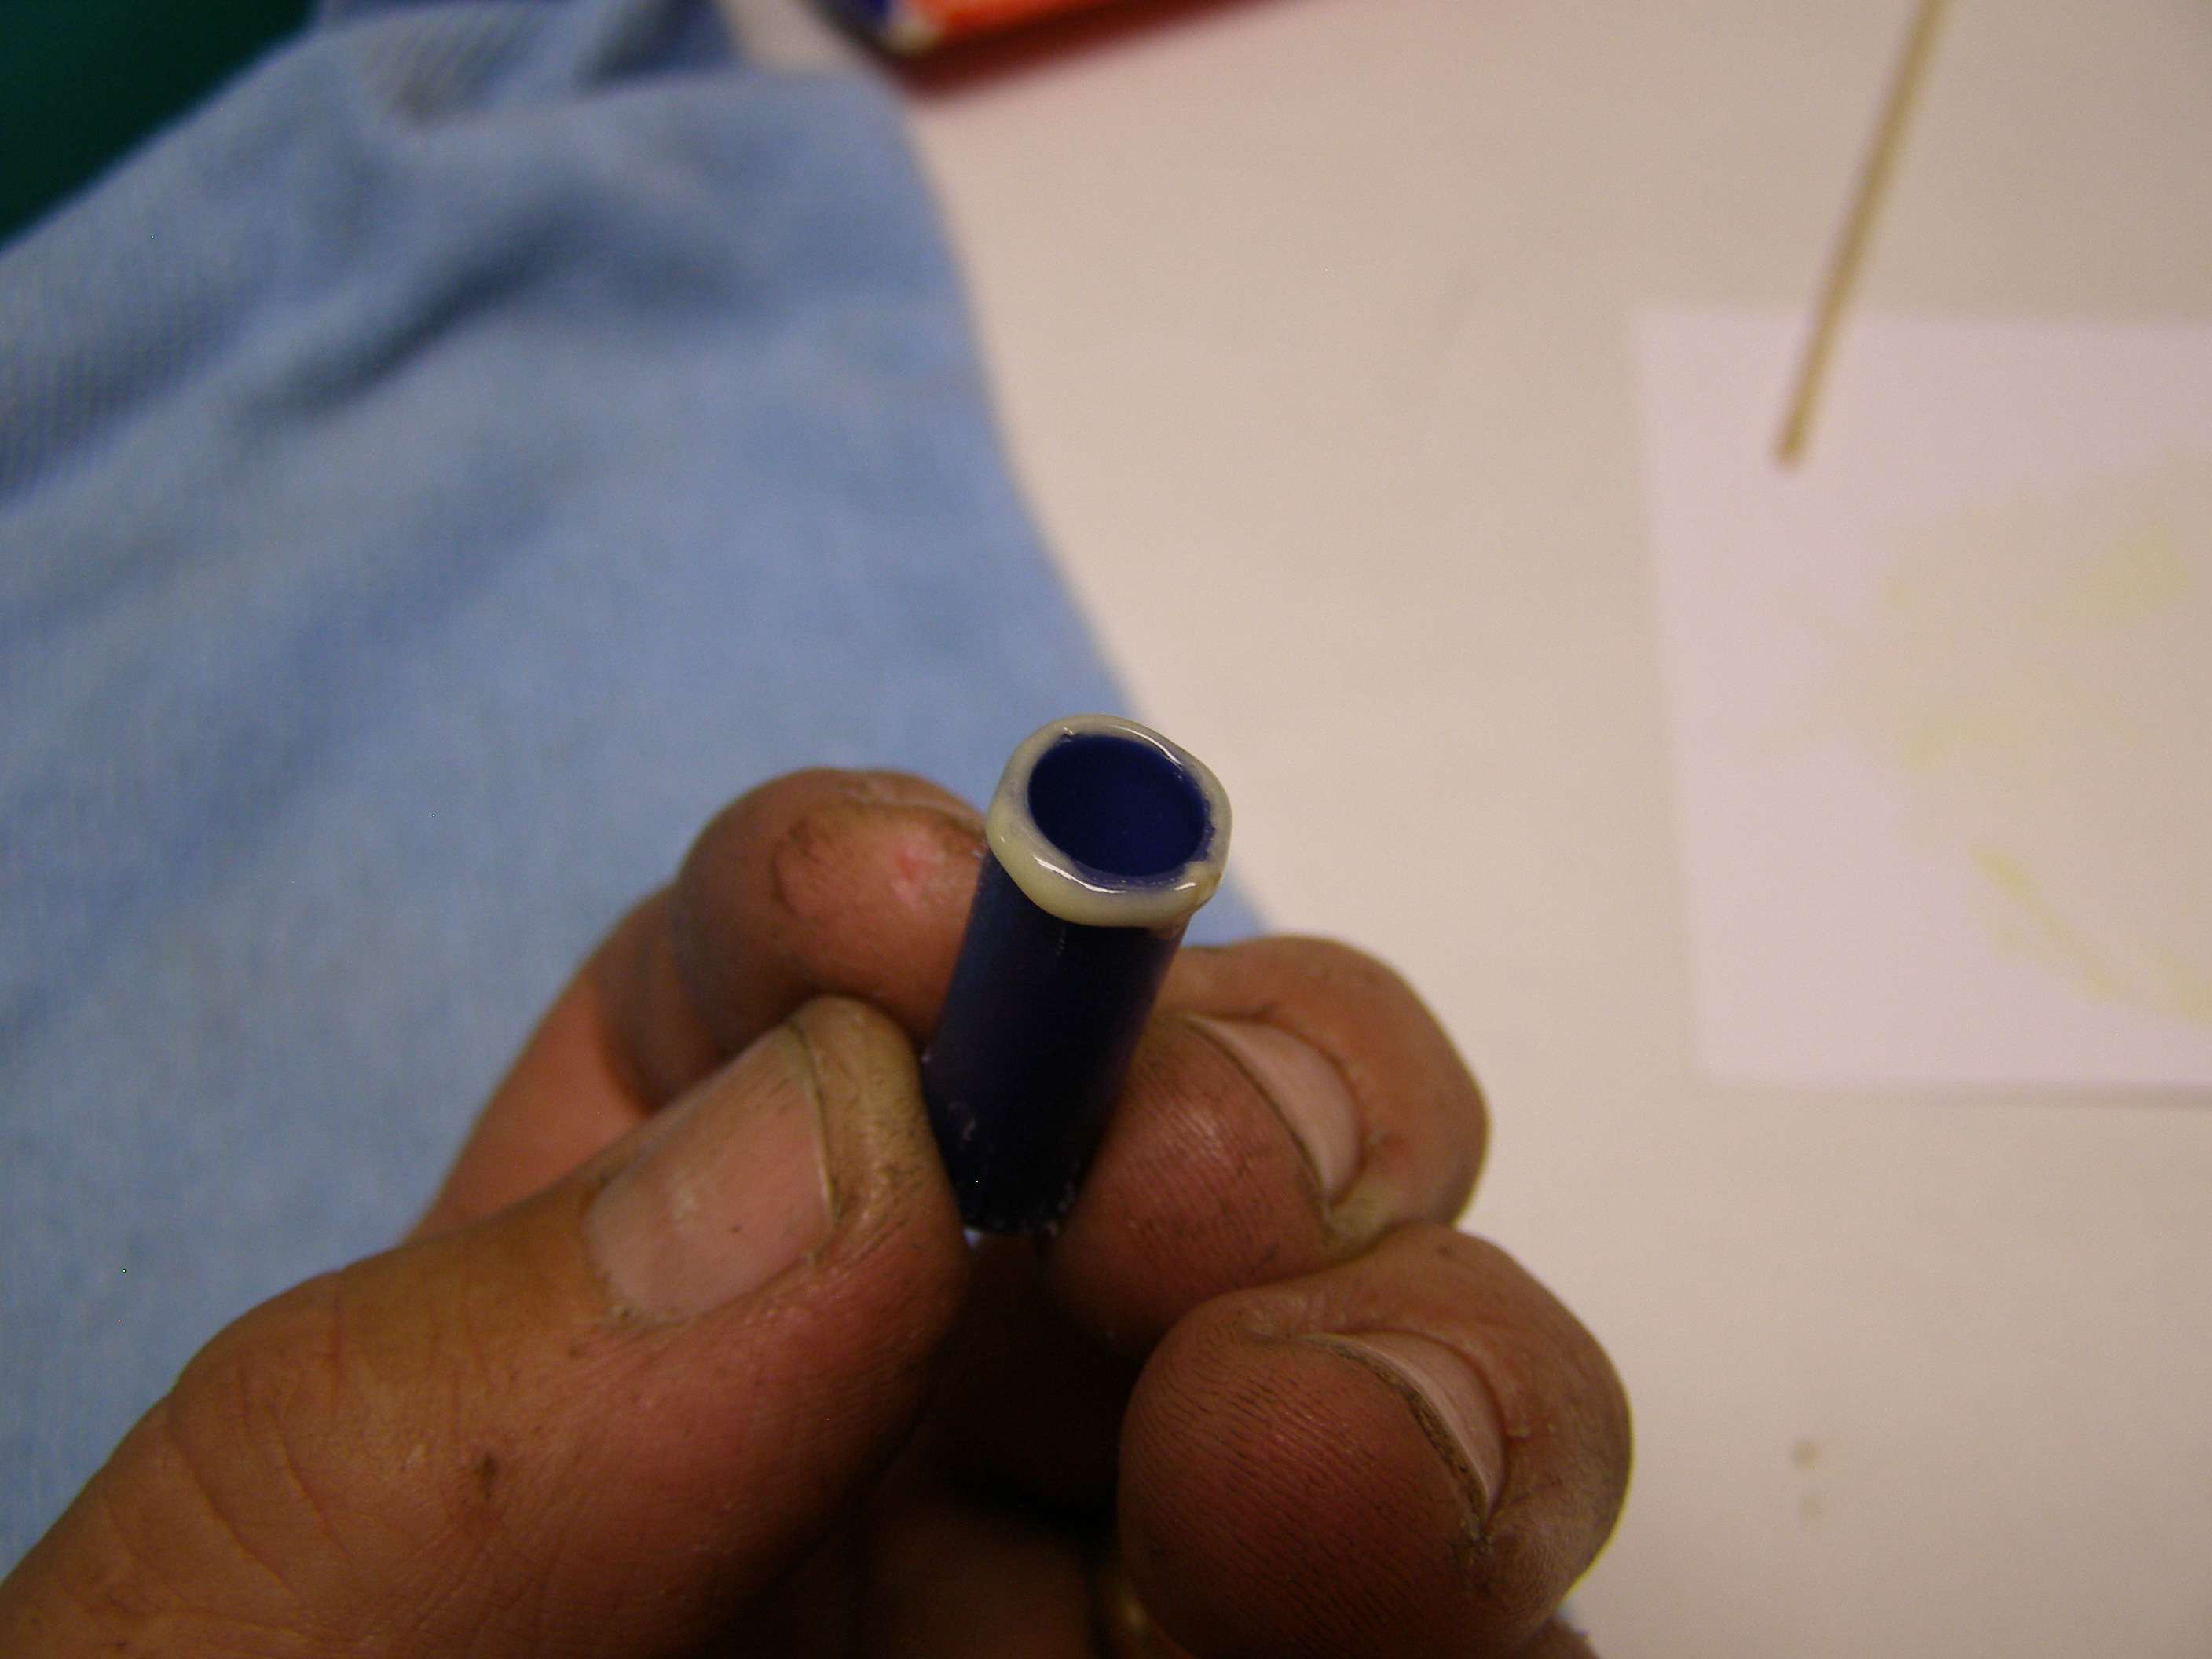
I use the razor to CAREFULLY put the epoxy on the cap so that it is between the inner and outer edges of the plastic holding the lens. You are not using much at all. Obviously you don't want glue to get on the lens or on the outside threads.
Carefully stick the lens to the bridge so it is centered. Keep turning it around so you can check for a centered position as you will obviously want the other end to glue to the cap end straight.

With this particular epoxy and my even mixing, I can actually screw this back into the module with the spring in place and not break the bond. However, it would be better to just put it aside and wait 1/2 hour until you get the hang of things.
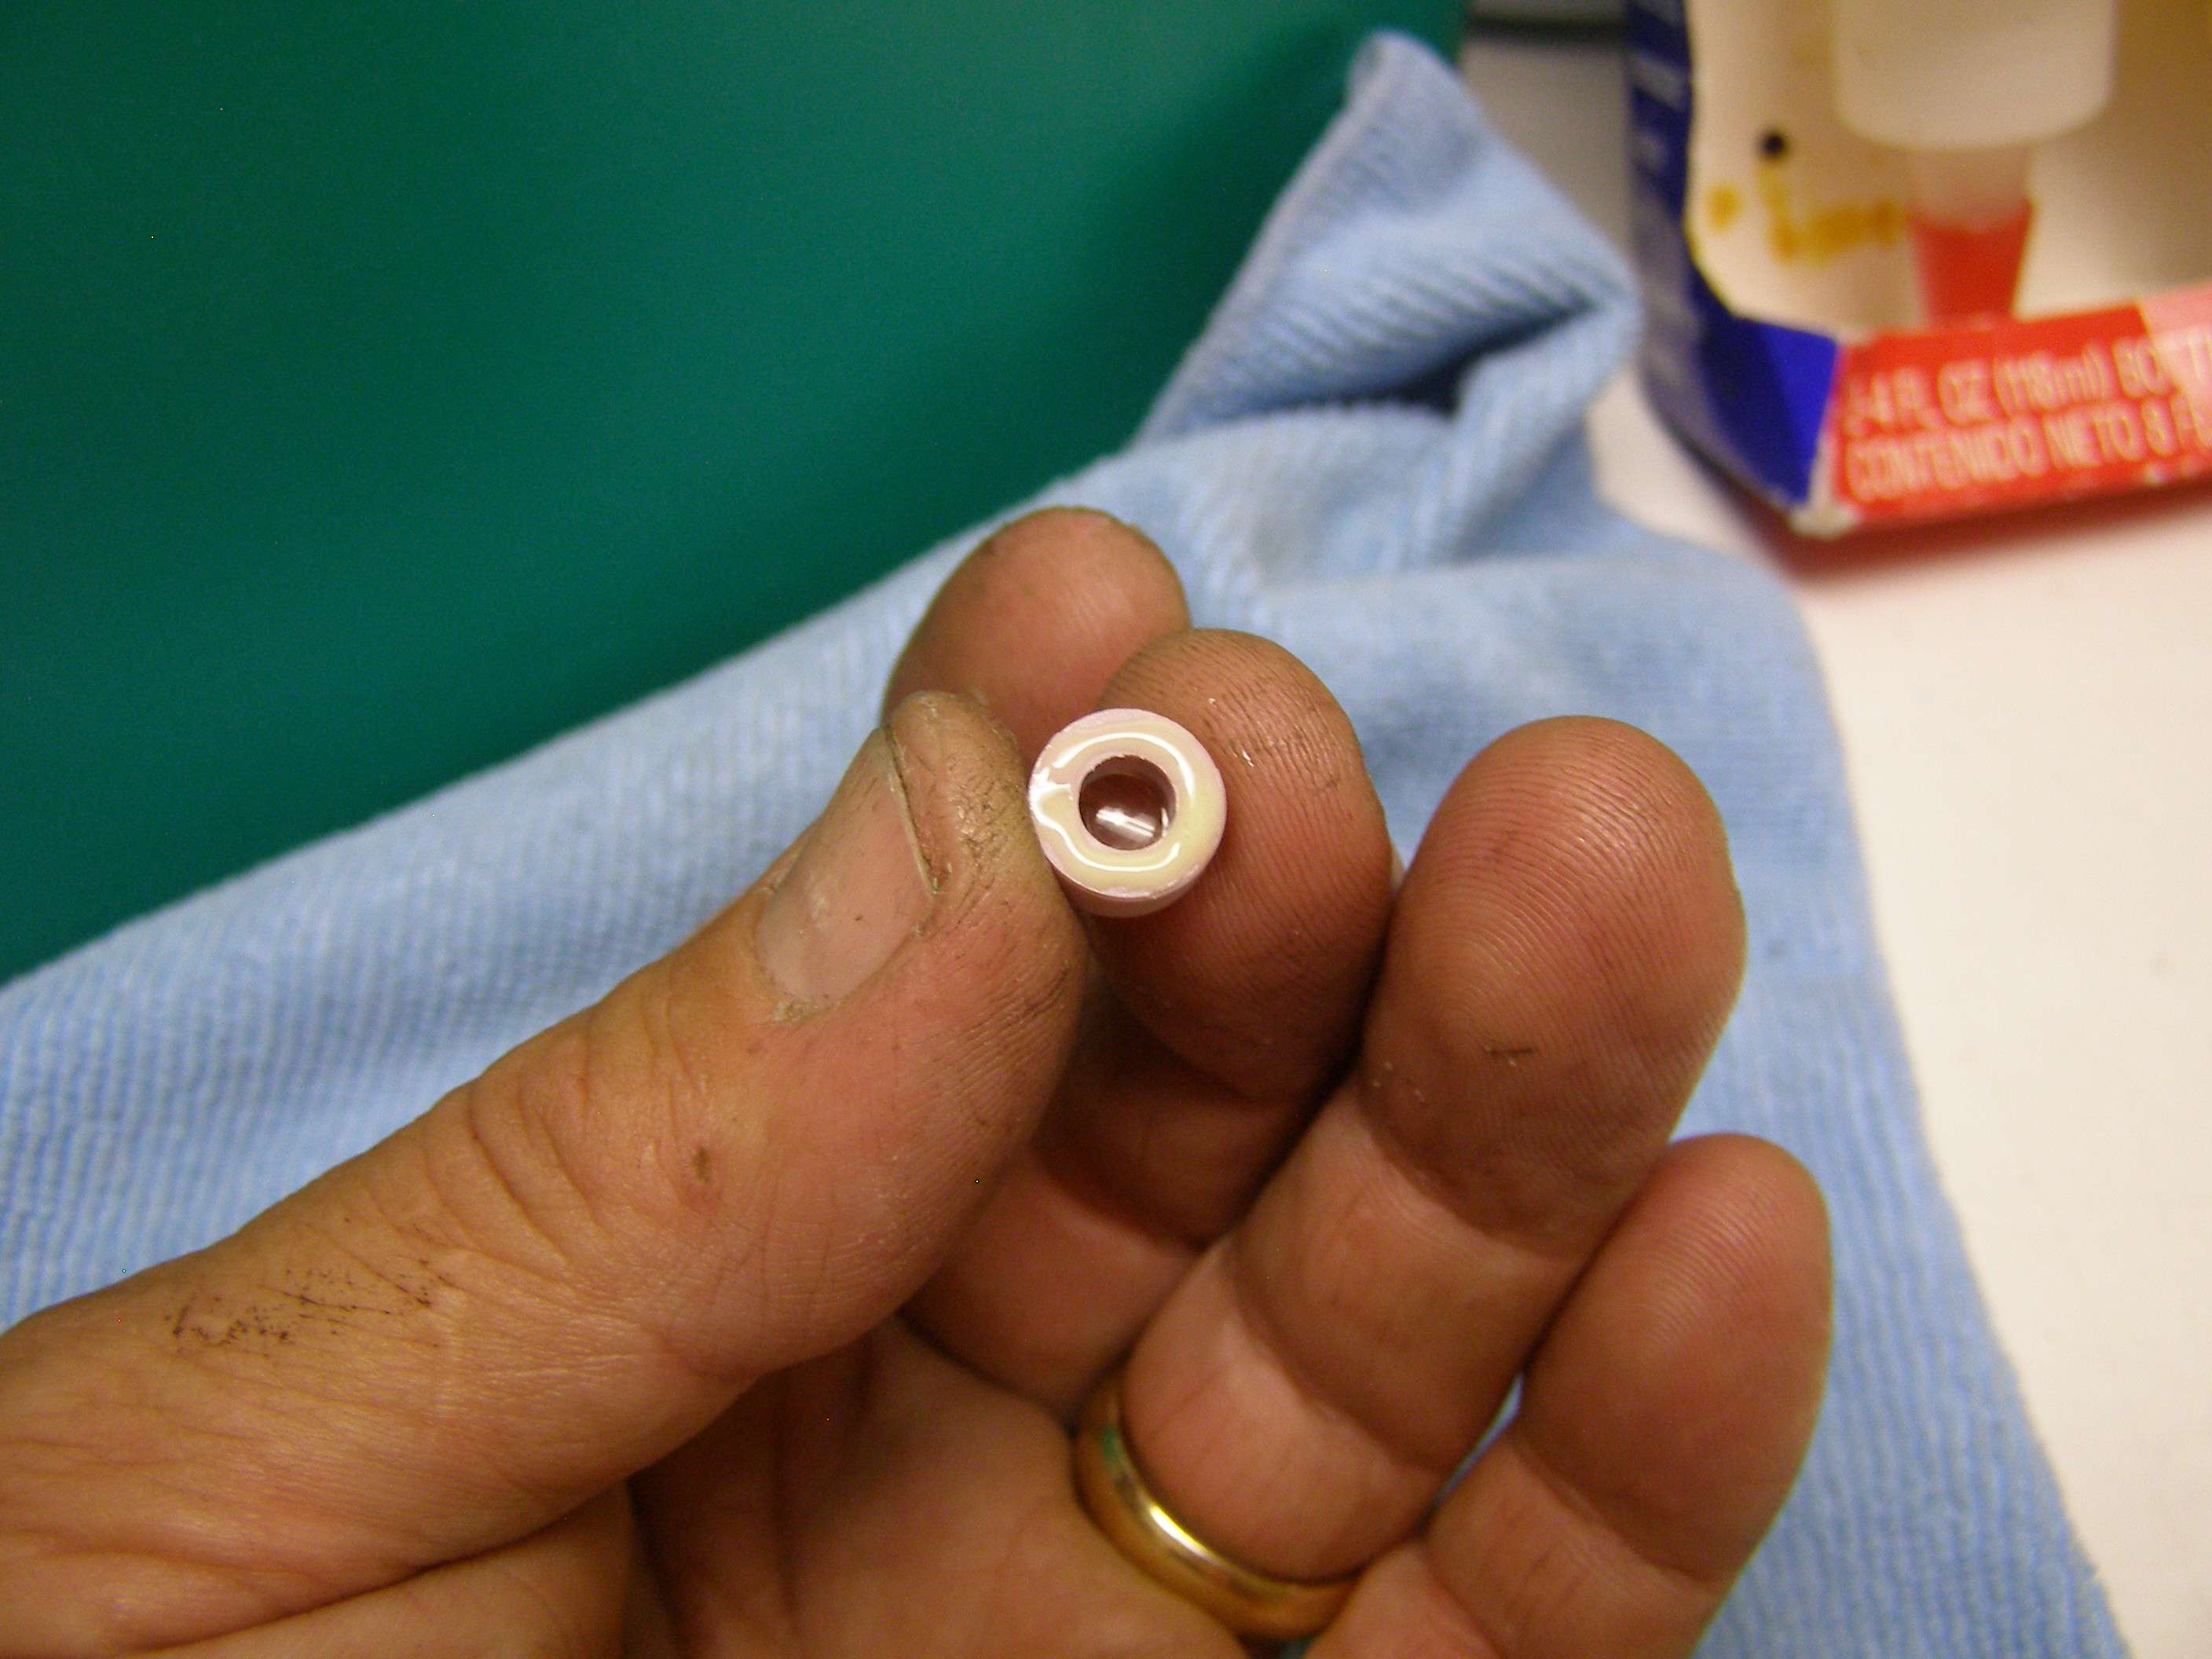
Now when it holds well, you screw it back into the module WITHOUT the spring to the point where you get just past infinity focus again.
Do the same epoxy preparation as above and put some inside the cap and then the same way you did it on the bridge for the lens. In this case, you can and probably should use more epoxy as you are not joining 2 flat surfaces. Just be careful not to get any in the holes. Carefully place the cap on and lightly press down and keep turning the pen around to make sure your tiny gap between the cap and host is even. I usually keep a finger on it for a few minutes to make sure it stays even.
Let it cure upright as above and them you can easily unscrew the whole thing, place the spring back in (when the epoxy is really set).
YOU ARE DONE!!!
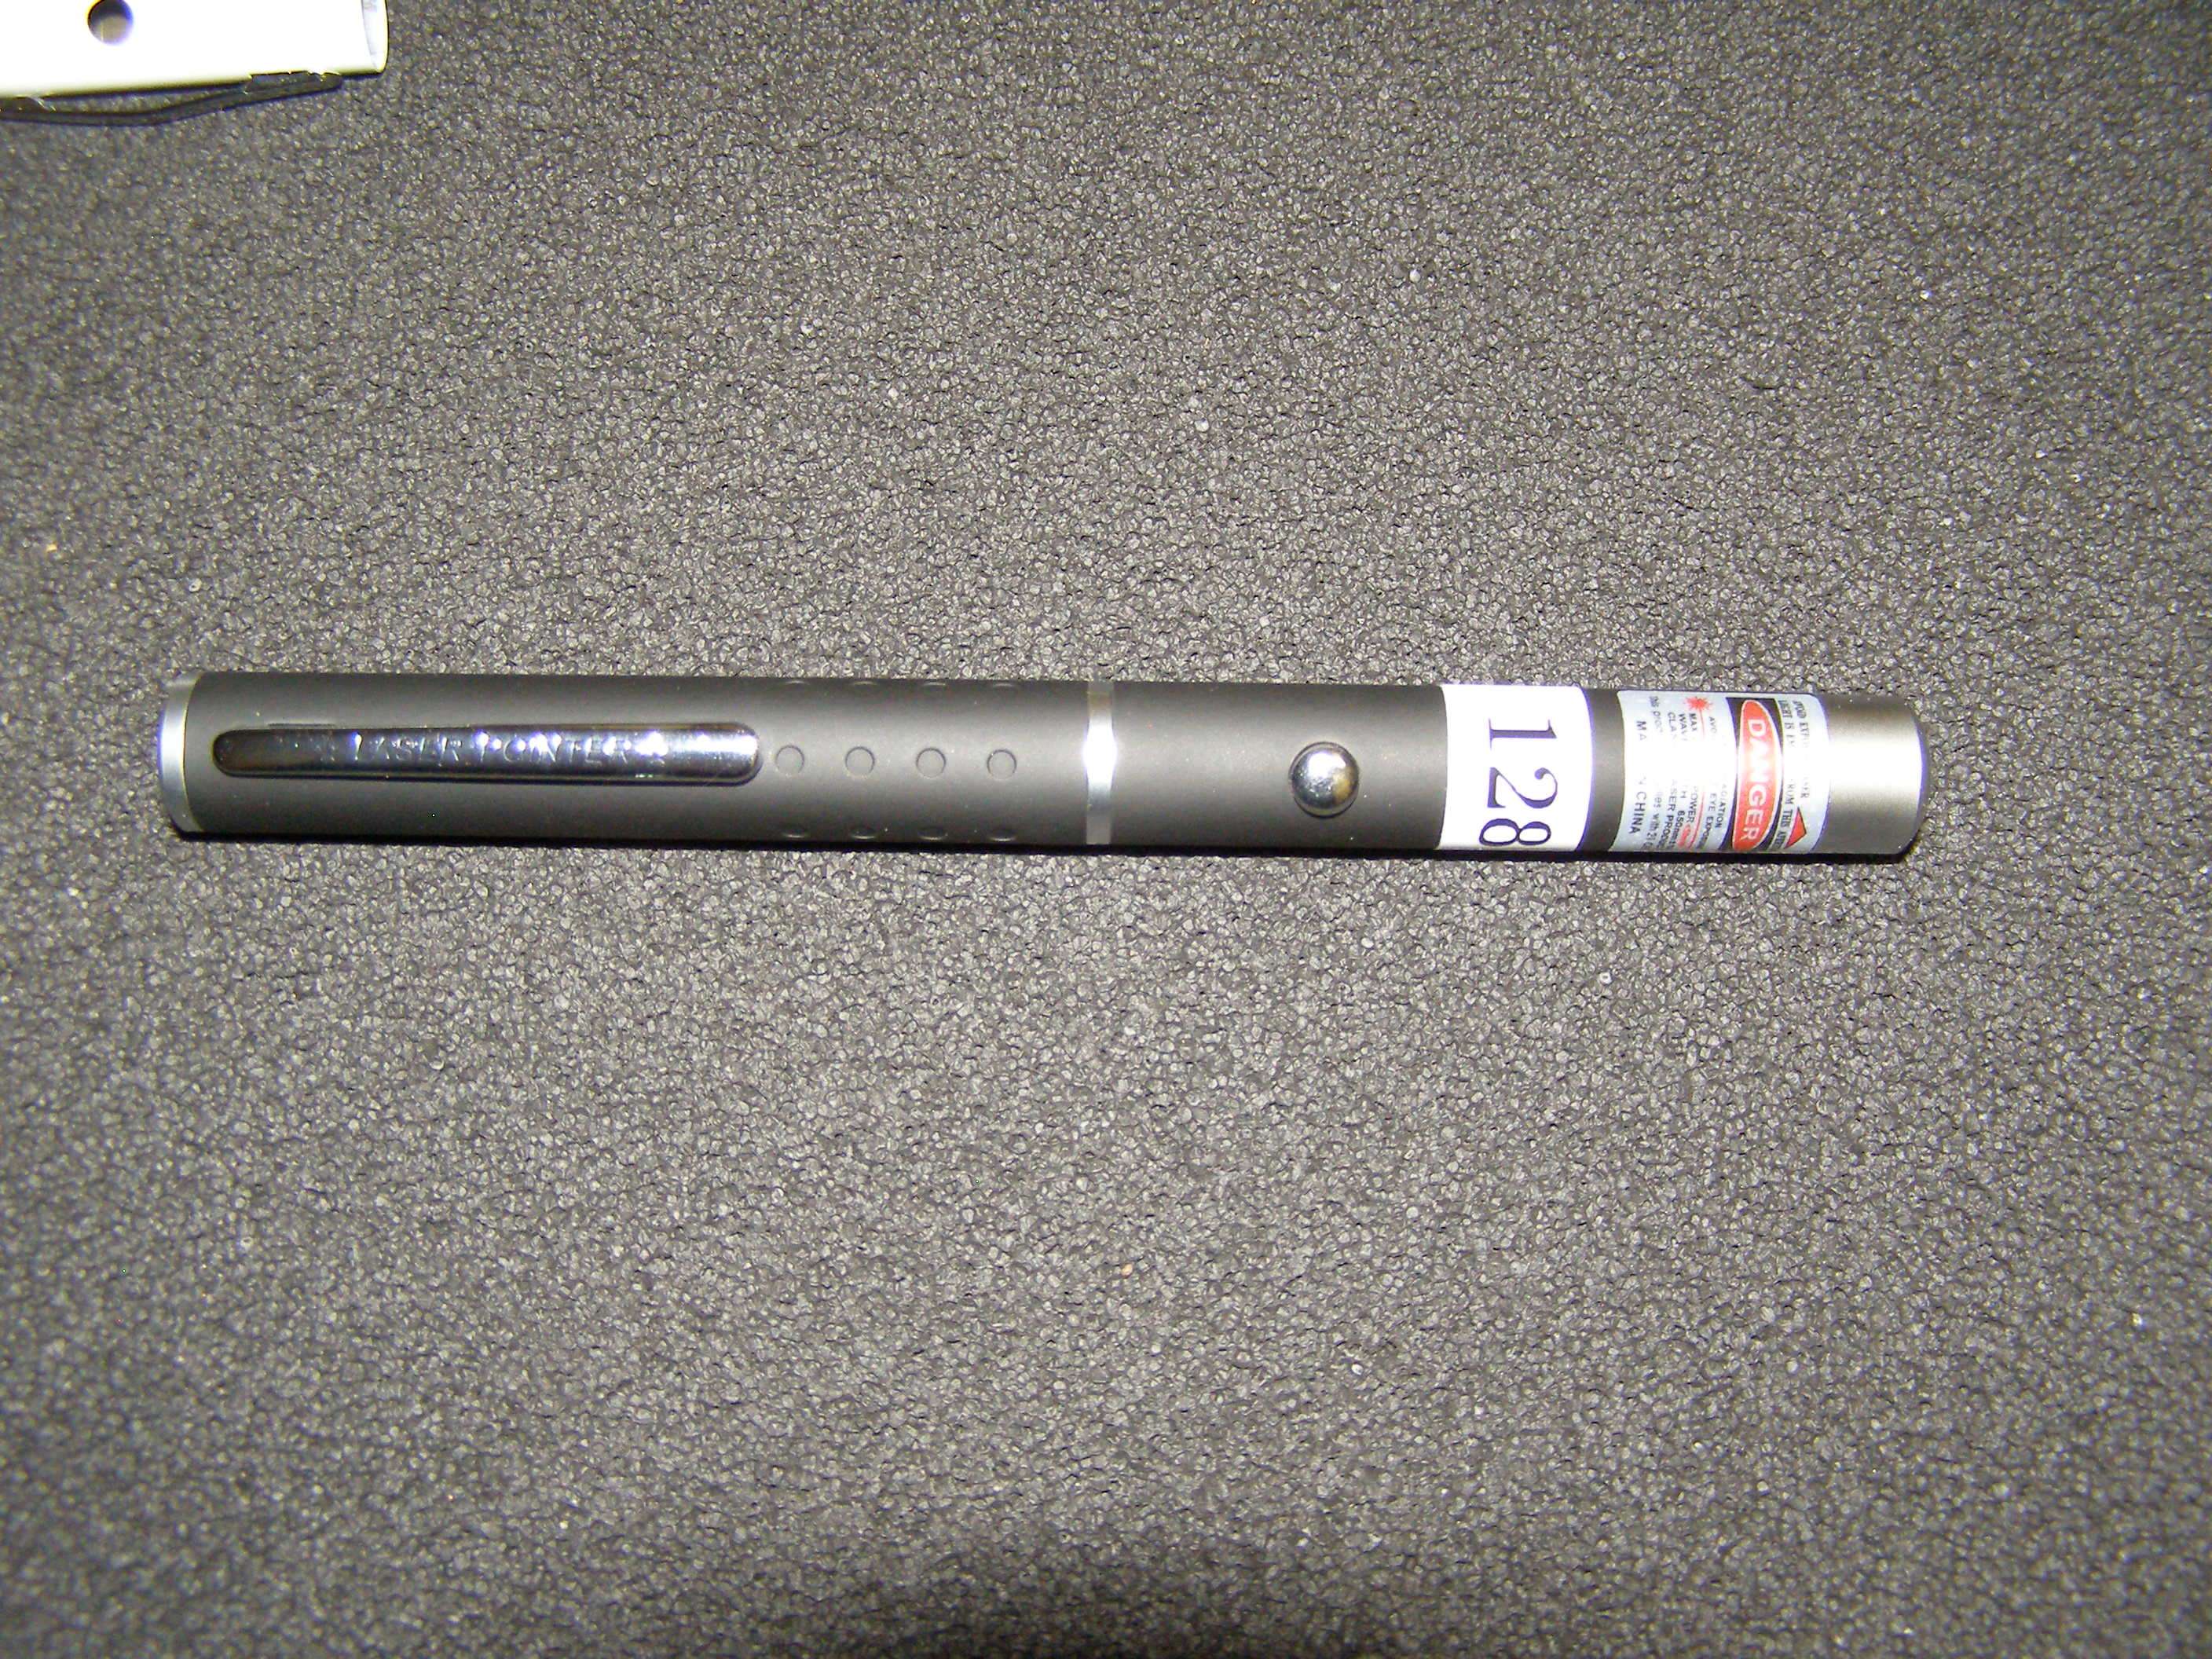
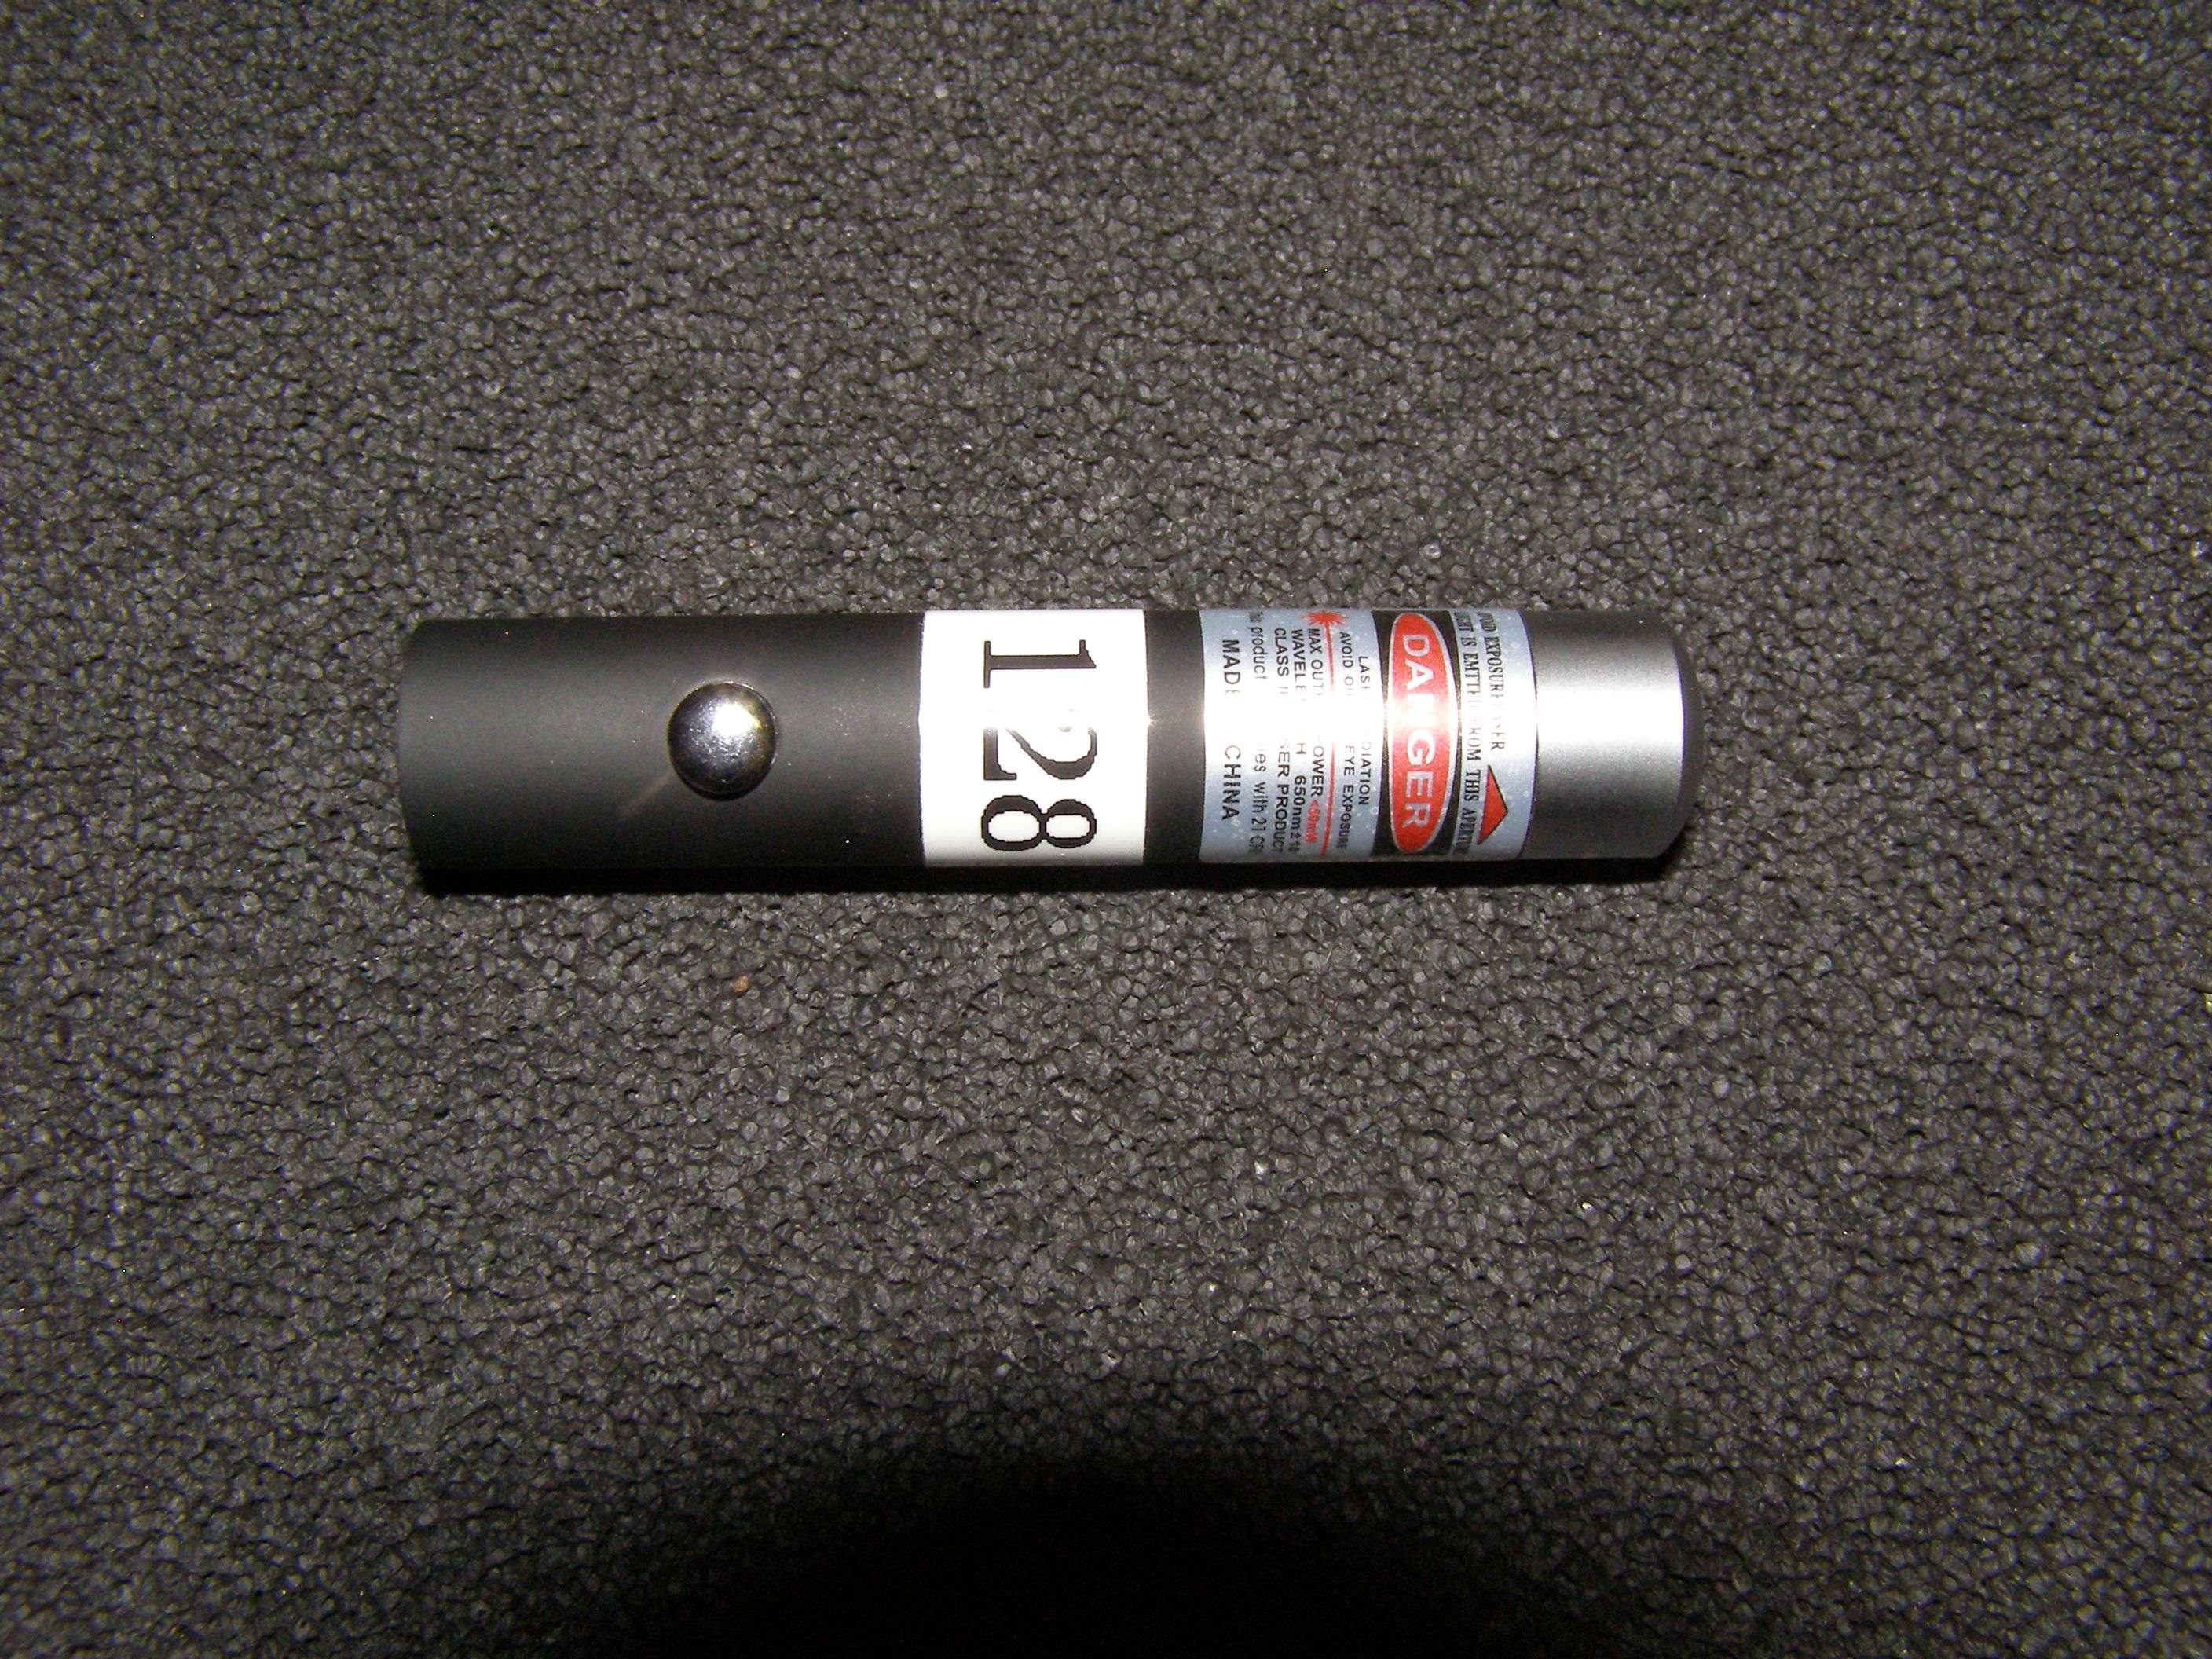
This 128mw 650nm WILL light a red headed match (book or stick). Not bad for a fun project and very little$ Changed the white mw sticker for a yellow as all my units 100mw and above are supposed to have a yellow label.
I've tried many things for the bridge and made some that go through the cap that focus with the cap or left the cap as a press fit and made the hole in it wide enough for the end to go through the cap and you turn the end instead of the cap. You can see I've cut down some of the pens so they run off a single 10440 and are still focusable. I suppose I should show how to cut them down also but I need a break.
I have done this process enough so that I could actually do one from start to finish in just over 1/2 hour if I had everything laid out and ready to go but if I take my time it's closer to an hour.
The one on the left is from a 532nm. The lens is setup differently. The threaded portion doesn't have the lens in it. The lens is actually at the top of that piece. Problem with these is that the threaded end needs to have more threads up the shaft to get it to focus within a few inches otherwise you are at the top of the threads and it falls out. You can focus to maybe 4" or so but I think it's kind of a waste since these have high IR, less power and thus don't burn as well. Better just to enjoy that 532nm as is
The way I do this the epoxy I use holds very strong and I have yet to have one come apart. That being said, I never carry any laser in my pocket so I couldn't tell you how much abuse they could take before the epoxy bond would break.
Man, my neck is killing me from typing all of this. Feels like I just wrote my life's work...
BONUS SECTION
Just so you know, I've found that you useually don't get much benefit from the extra voltage of a 10440 with these pens. You do however get a rechargeable battery to use.
If you would like to make a shorty running on a single 10440, this is what you can do.
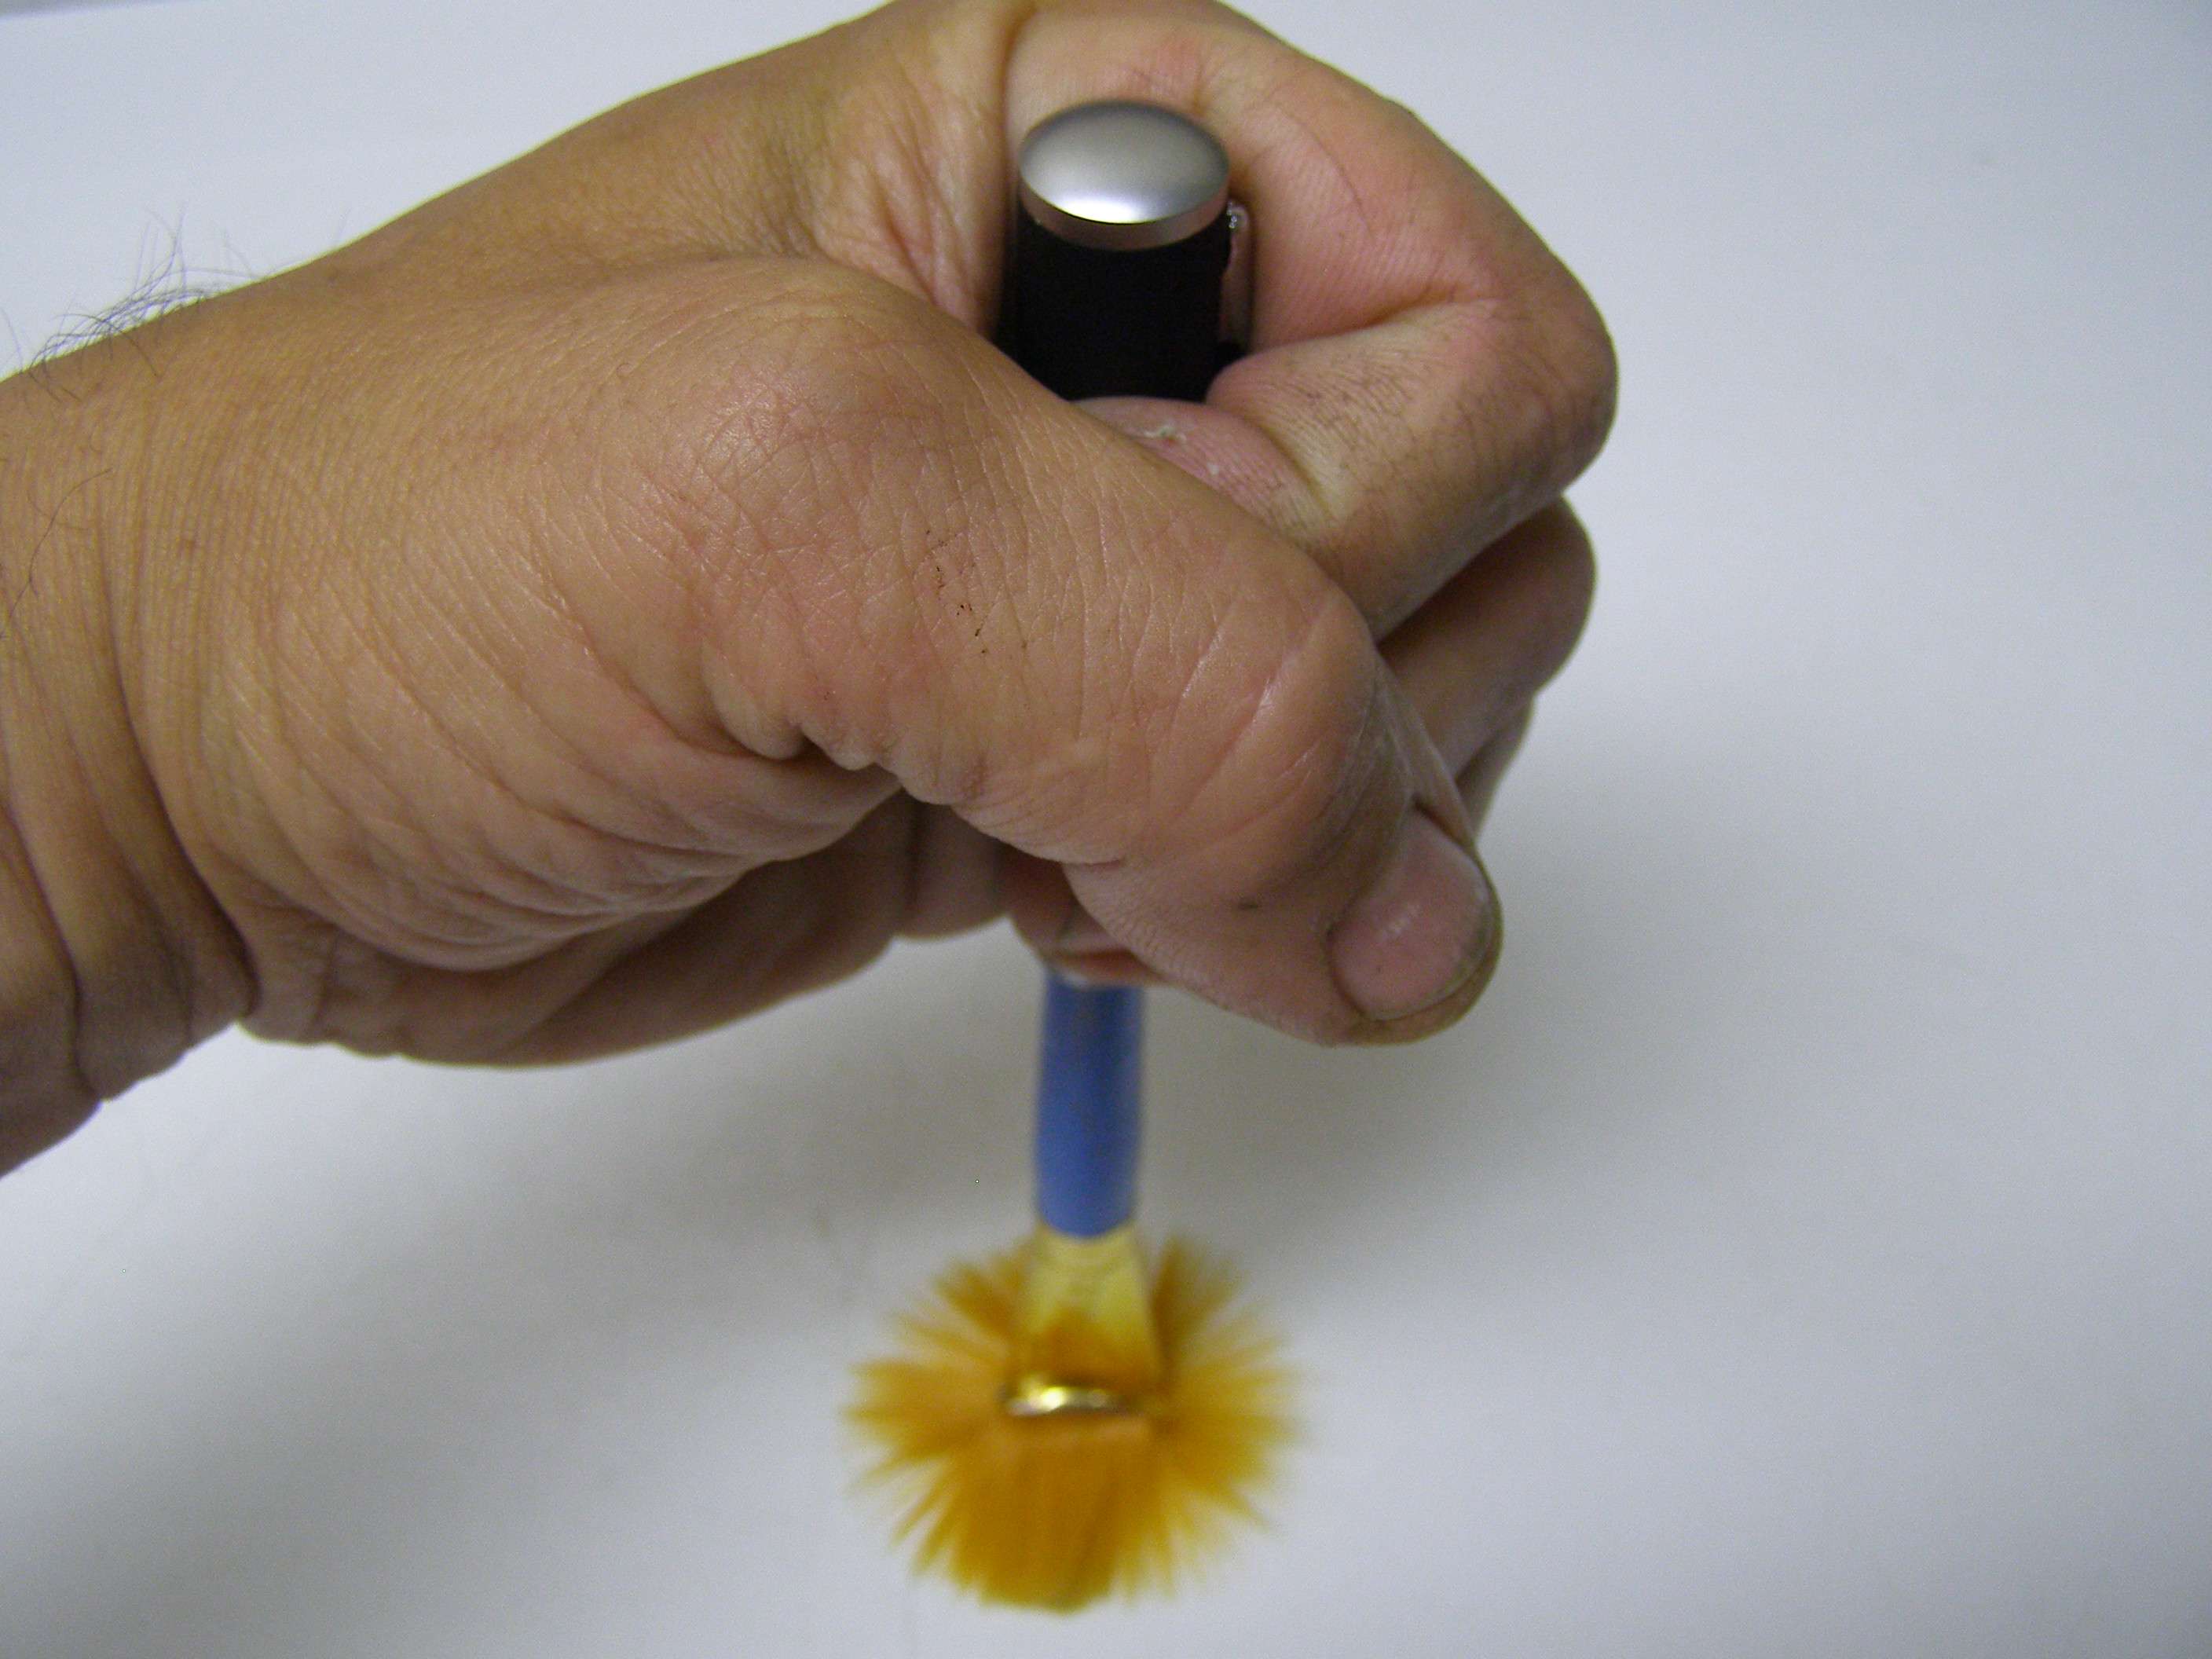
Get something that will fit into the length of the back half of the pen. It is best to use something that has a shape like the inside of the cap so that the force is distributed evenly. Obviously you don't want to use something that could mark or scratch it as depending upon what it is made of it may just have a coating of conductive material on it and you need that to stay intact.
You can see that I am just using an old brush. The cap is just press fit in so all you have to do is hold the pen and smack the other end with this tool inside on something hard. Pay attention to what you are doing because the cap will fly off and try to hide on you
What you will usually find inside is a a piece of plastic so that the batteries will stay centered in place. This should just fall out.

Using a small hacksaw (after removing the clip which is hard to get it off without ruining it so just break the thing), cut the back half off so that you get the apropriate length to fit the 10440 with the same amount of pressure against the other side of the pens spring as it originally had. The 10440 should just stick out with the cap back in place. Be careful when you cut the host because it is easy to slip and mark it up with the blade. It's also hard to get a perfect flat cut doing it freehand without holding the pen against or between something. You can always file it to try and make it as flat as possible.
Now all you have to do is press the cap back into place. If there are any shiny marks on the end that you cut, you can always blacken it carefully with a marker. I say carefully because you really don't want to see the marker as it will contrast against the black of the host. The way I press the cap in is by putting it on the end and then taking a piece of soft wood on the other end and try to evenly press it back in. You will have an easier time with this if the cap is centered before pressing. To help keep the back of the cap from getting marked, place that end on a surface that gives a little (just not a super hard surface that may scratch it). I explain all of this because the goal is to make your pen still look like new.
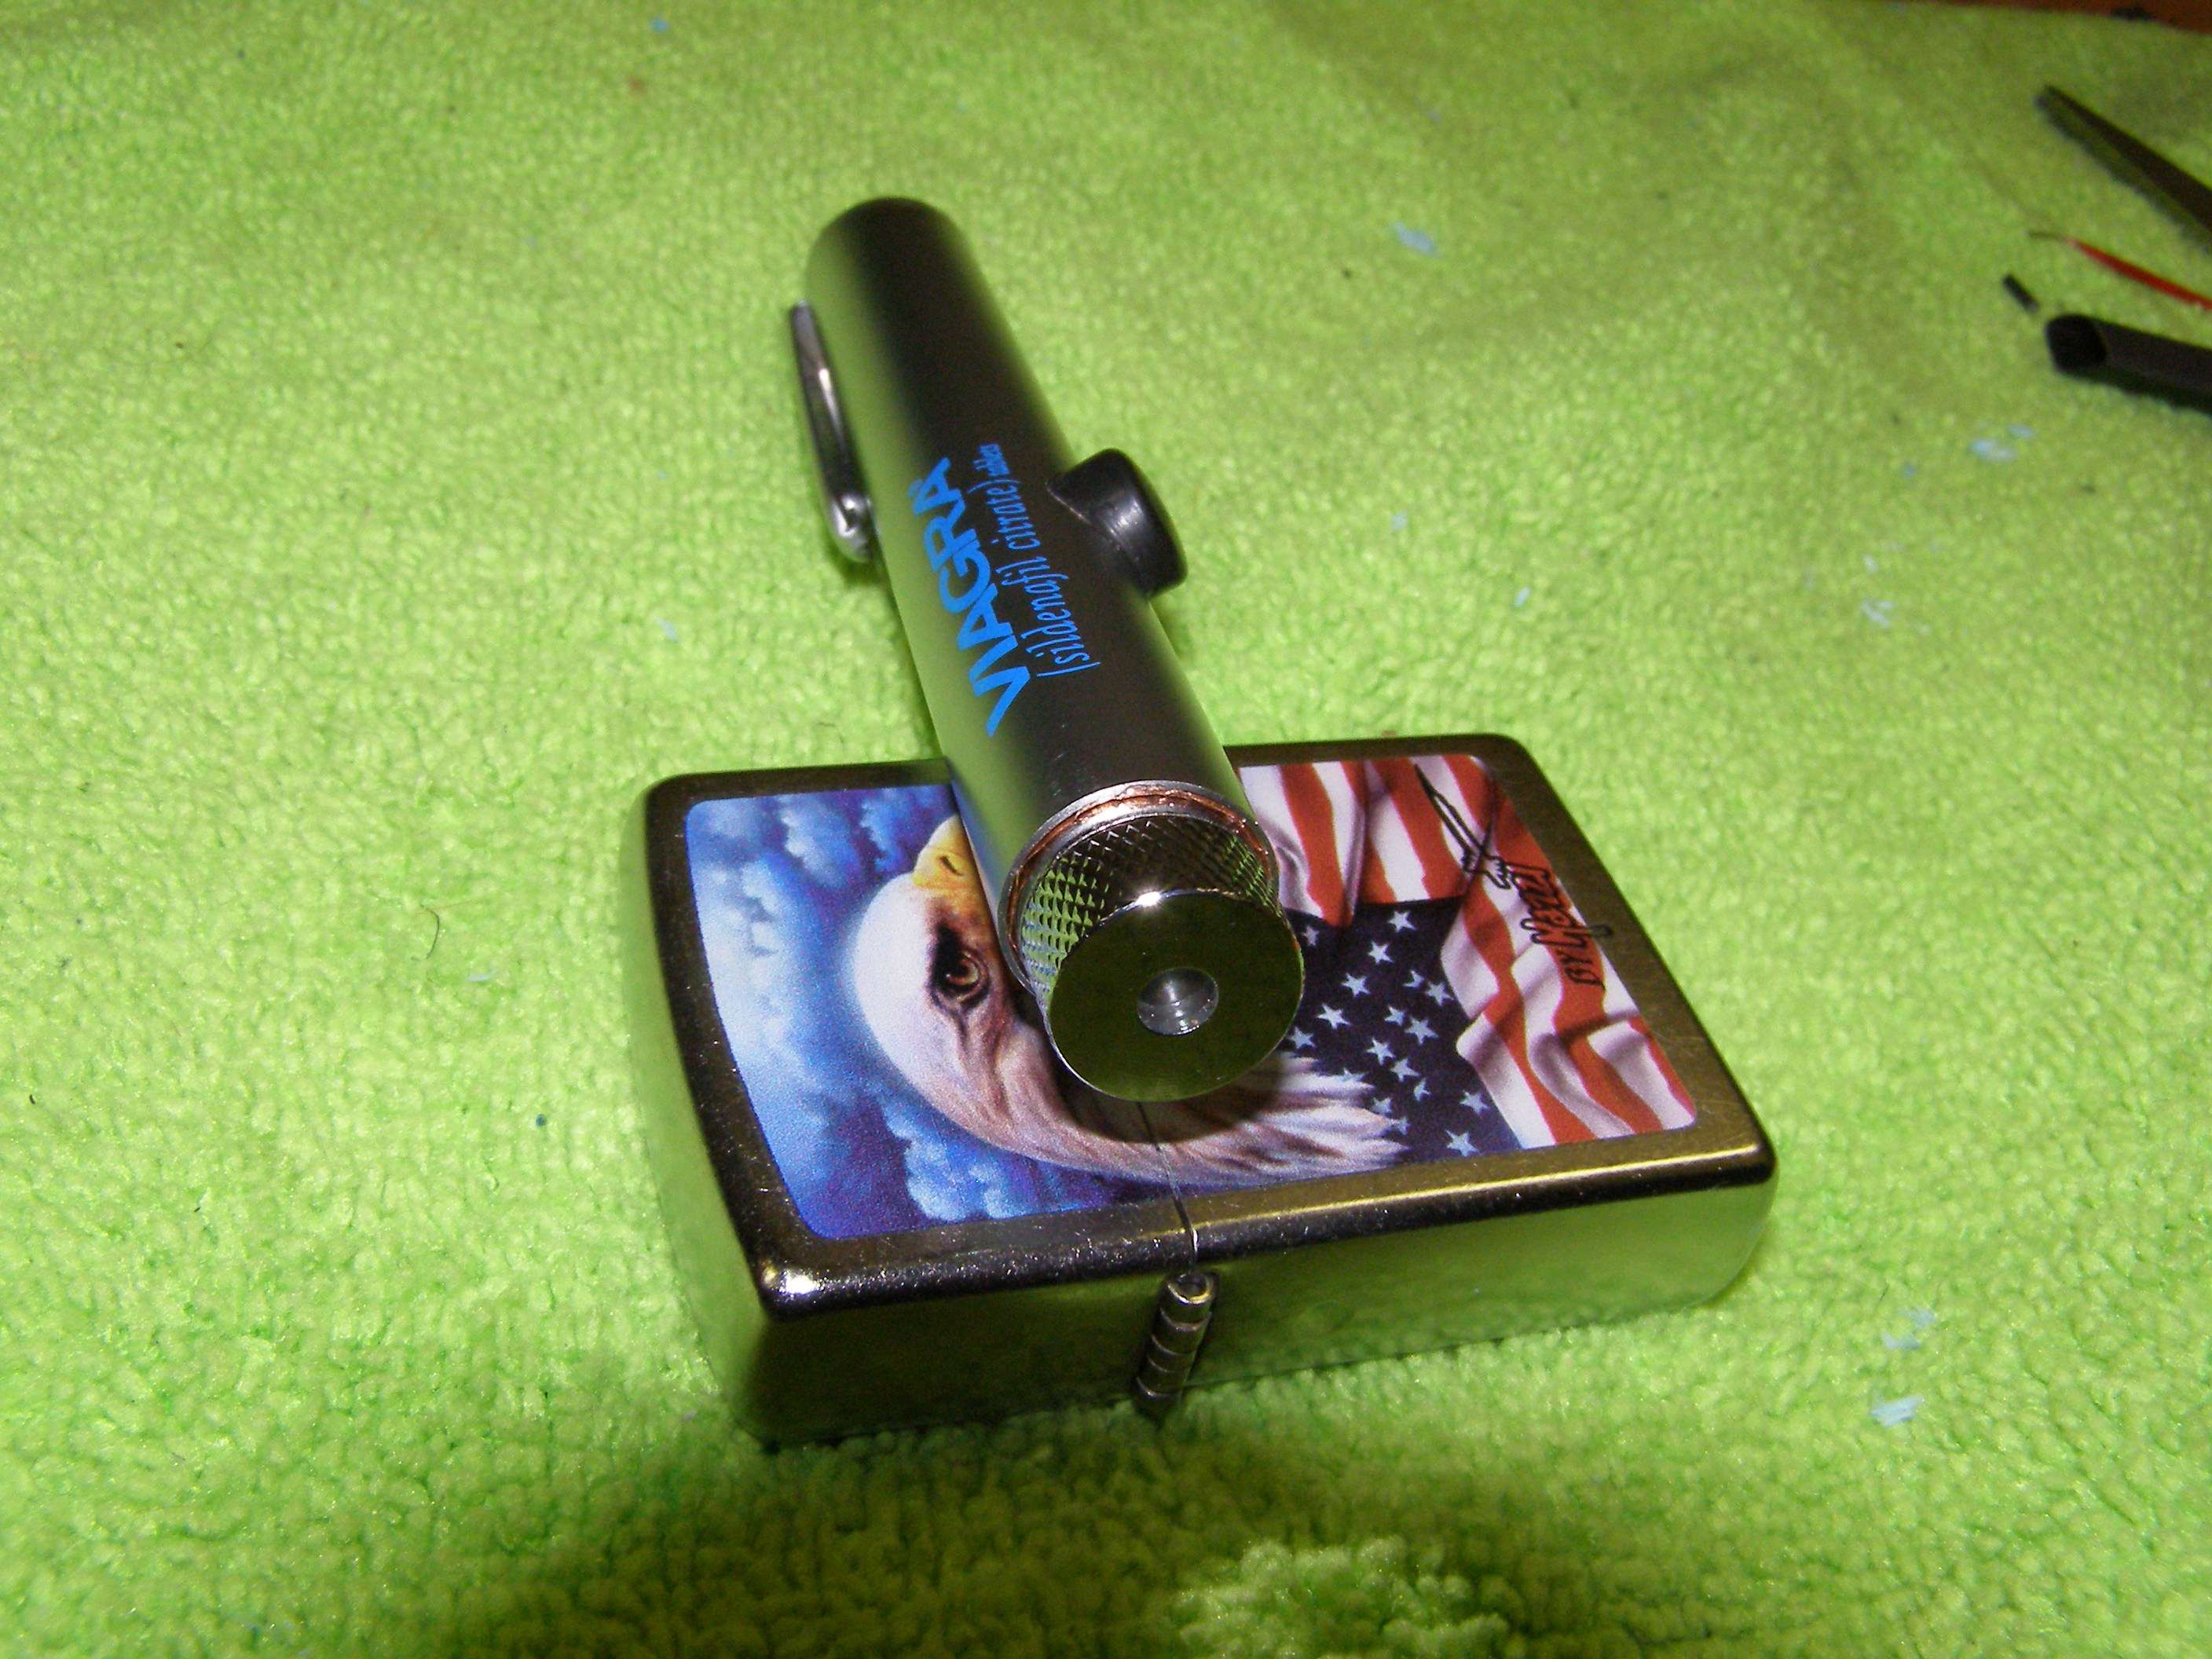
Take a couple of these small section and link them together or just add one of these ends to an existing pen and you could use 3 eneloops for about 3.9V but it looks kind of funny having such a long pen This reminds me of the Viagra pen I made and posted somewhere else. Has a big rubber..... Button

If you decide to remove the module for another project the easiest way I've found is to use a dremel (if you don't have one, I STRONGLY suggest you get one as it is an absolutely fantastic tool for laser stuff as well as many other things not so important). IF you can afford it, I would get the model 8220 as it is portable and comes with 2 long lasting rechargeable lithium ion batteries. Think of it as an investment. There are many attachments that are great such as the right angle and flex shaft. You can buy much cheaper bits than the Dremel brand but I've found that they don't last near as long.
What I do is remove the little foam spring spacer and front cap and then start scoring it down along an edge that looks the safest from possibly messing up the driver if you cut through (just look down inside and you will see what I mean). Remember that even if you just want the module, you should be saving as many parts as possible for other builds.
Once you have it cut/scored to cutting through, take a flathead and stick it in the score and if you scored it well you just twist the screwdriver and it will split the host.
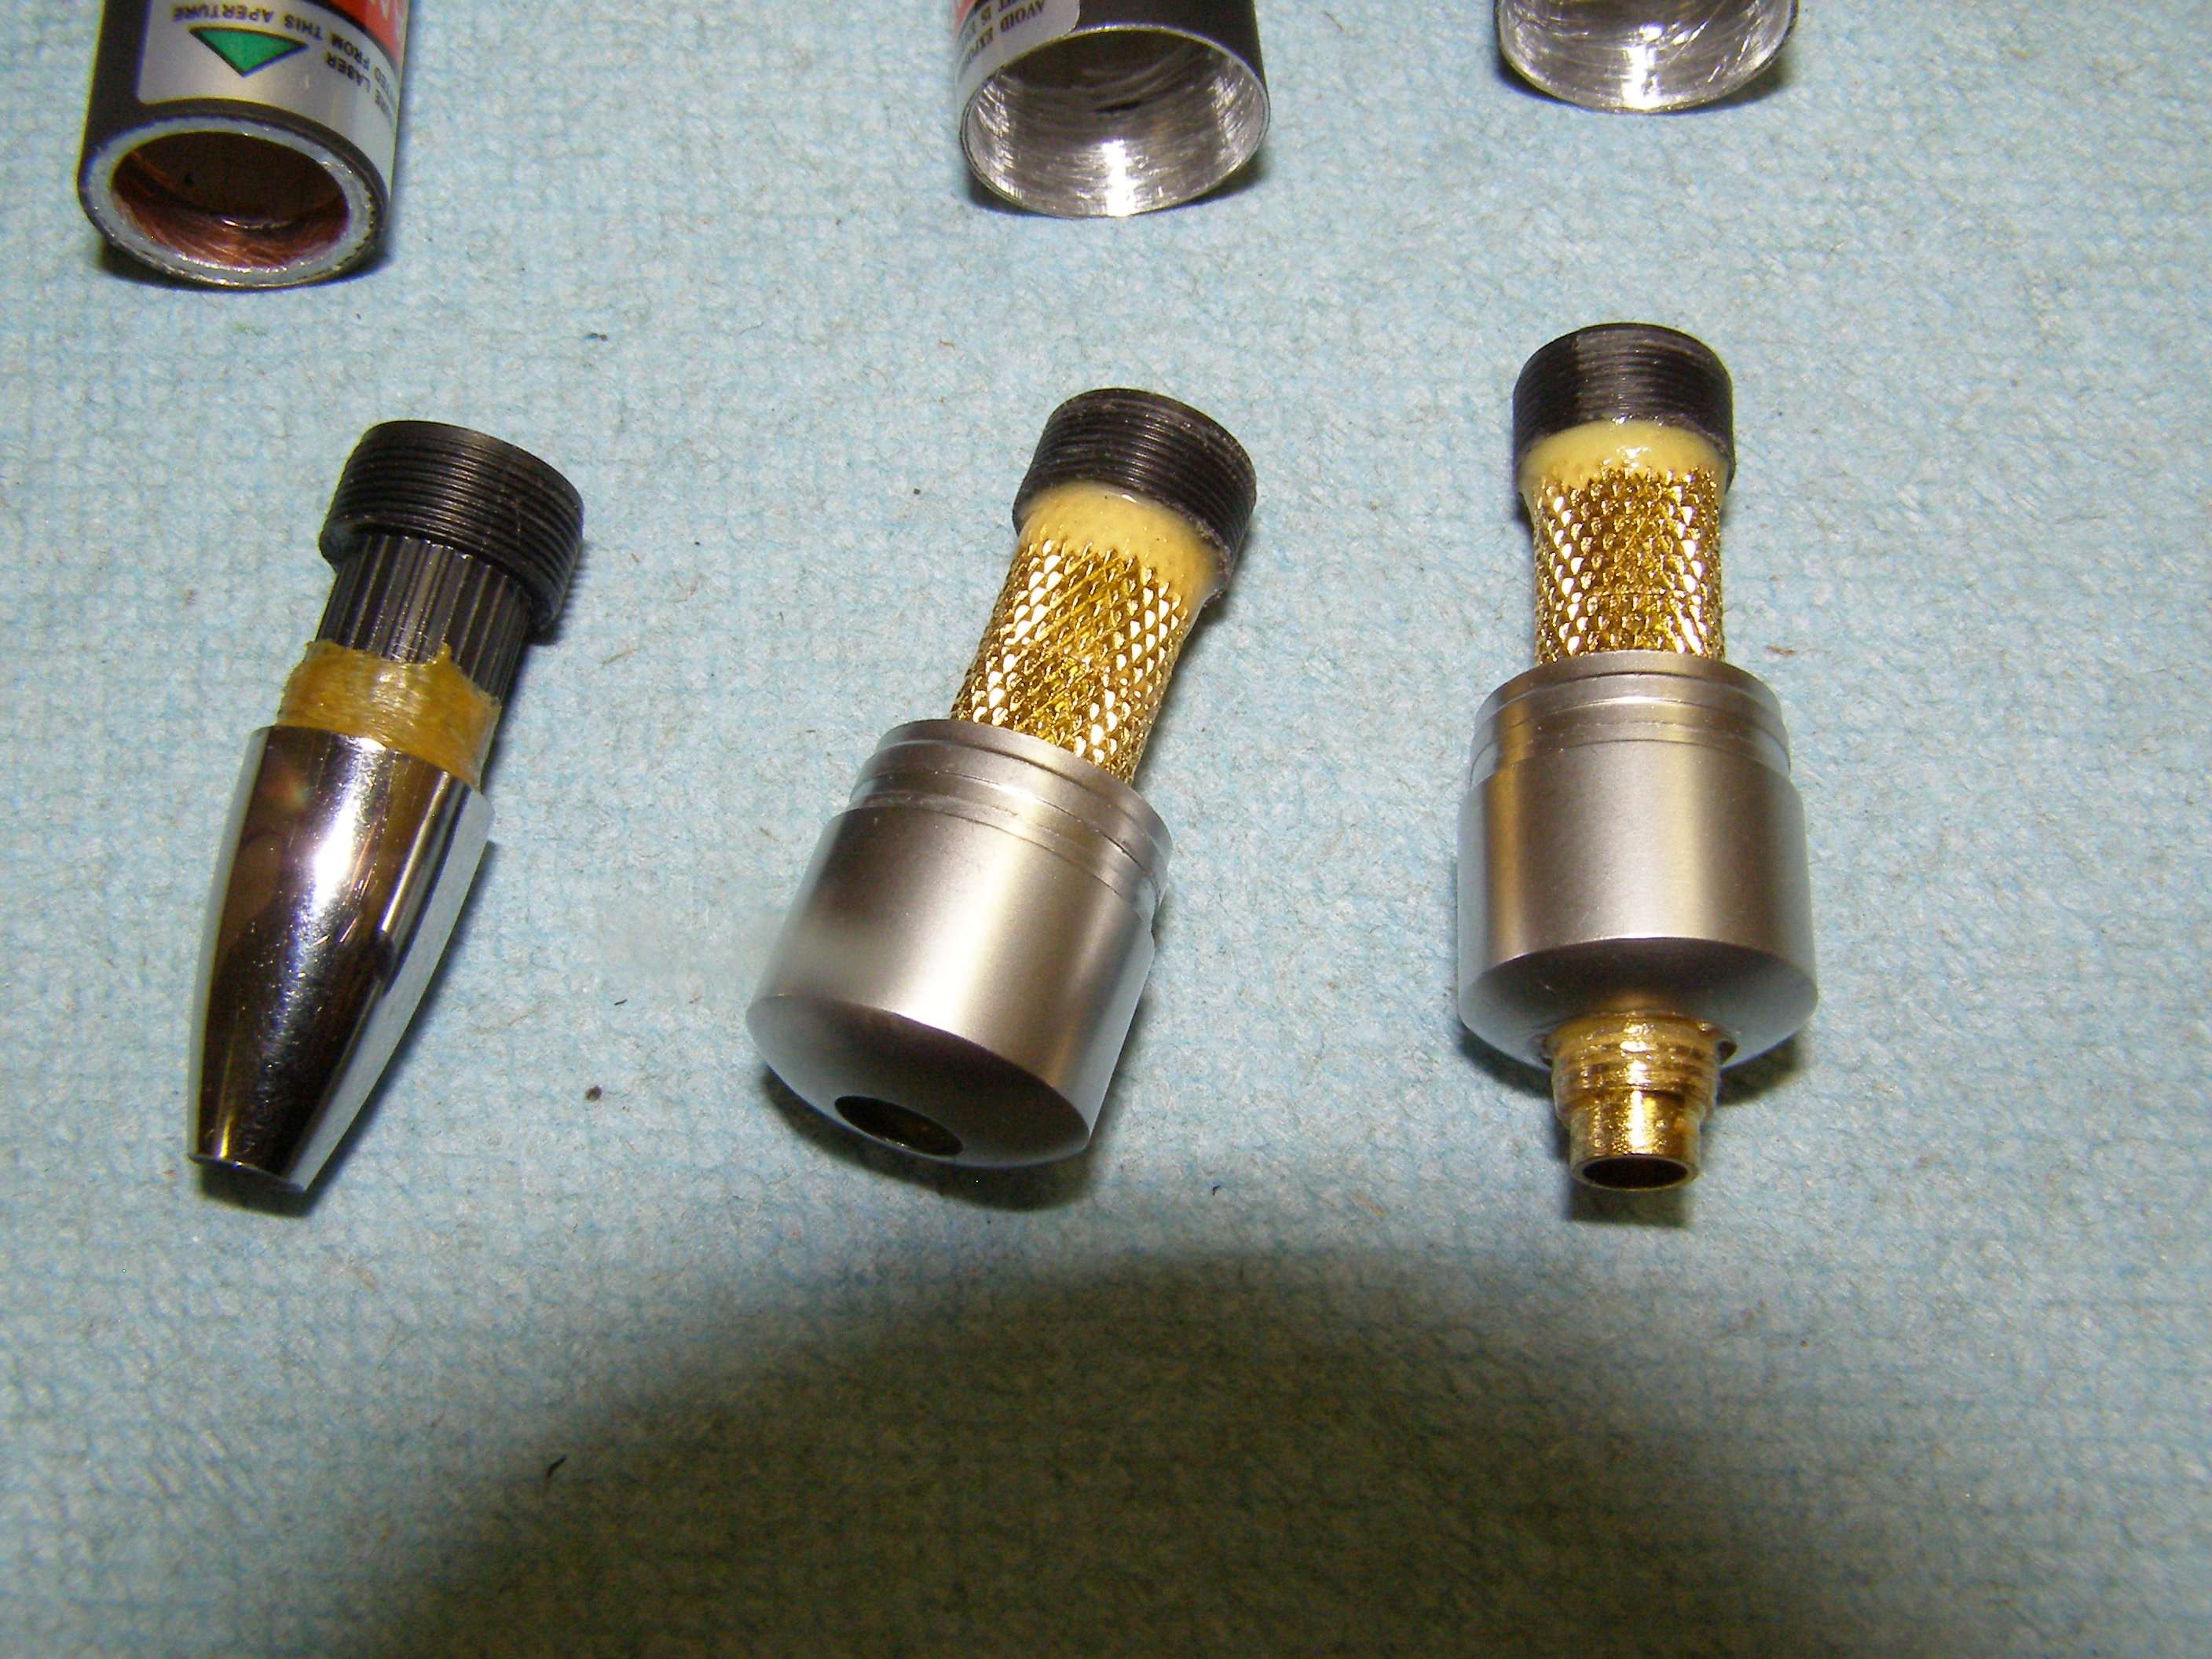
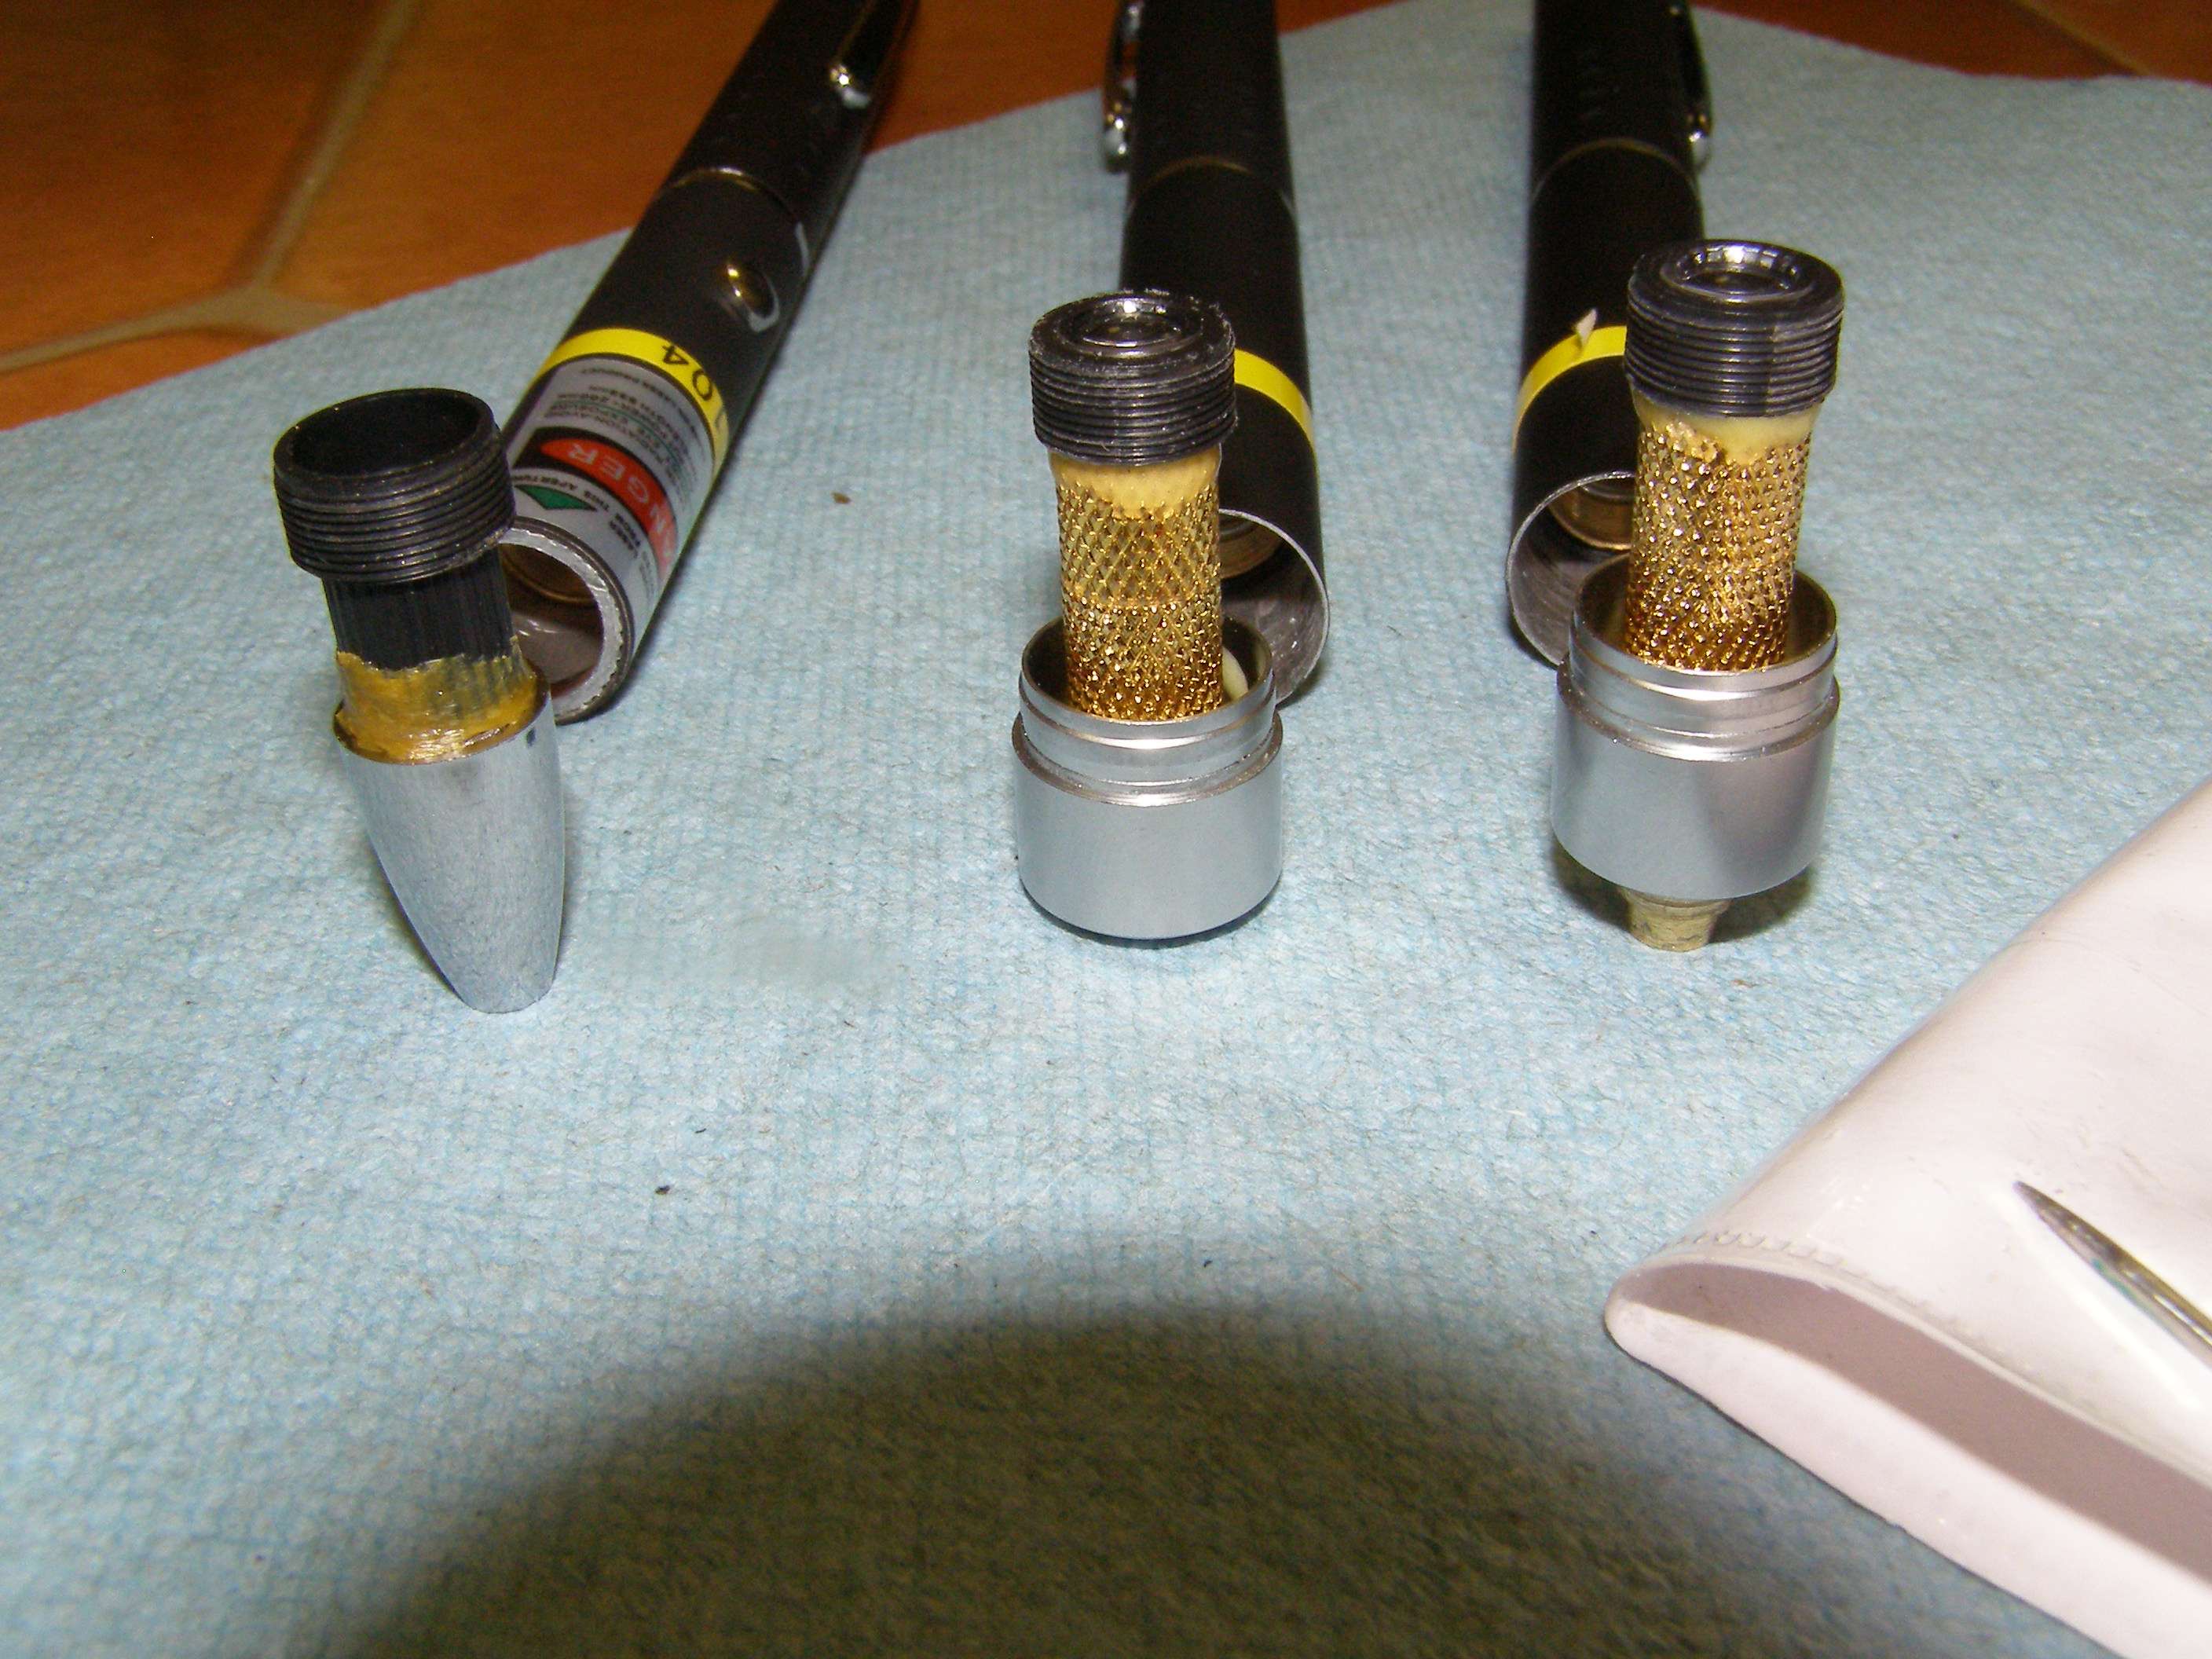
The modules in the 650nm and 405nm are usually quite small once you remove any plastic spacer around them so they can potentially fit in a lot of things a normal module can't such as a spyro. I would caution you about if it looks like this with the long tab (plastic shown removed from around the brass heatsink). That tab for the positive is NOT the same conductive point as the module and it must remain seperated from the brass.
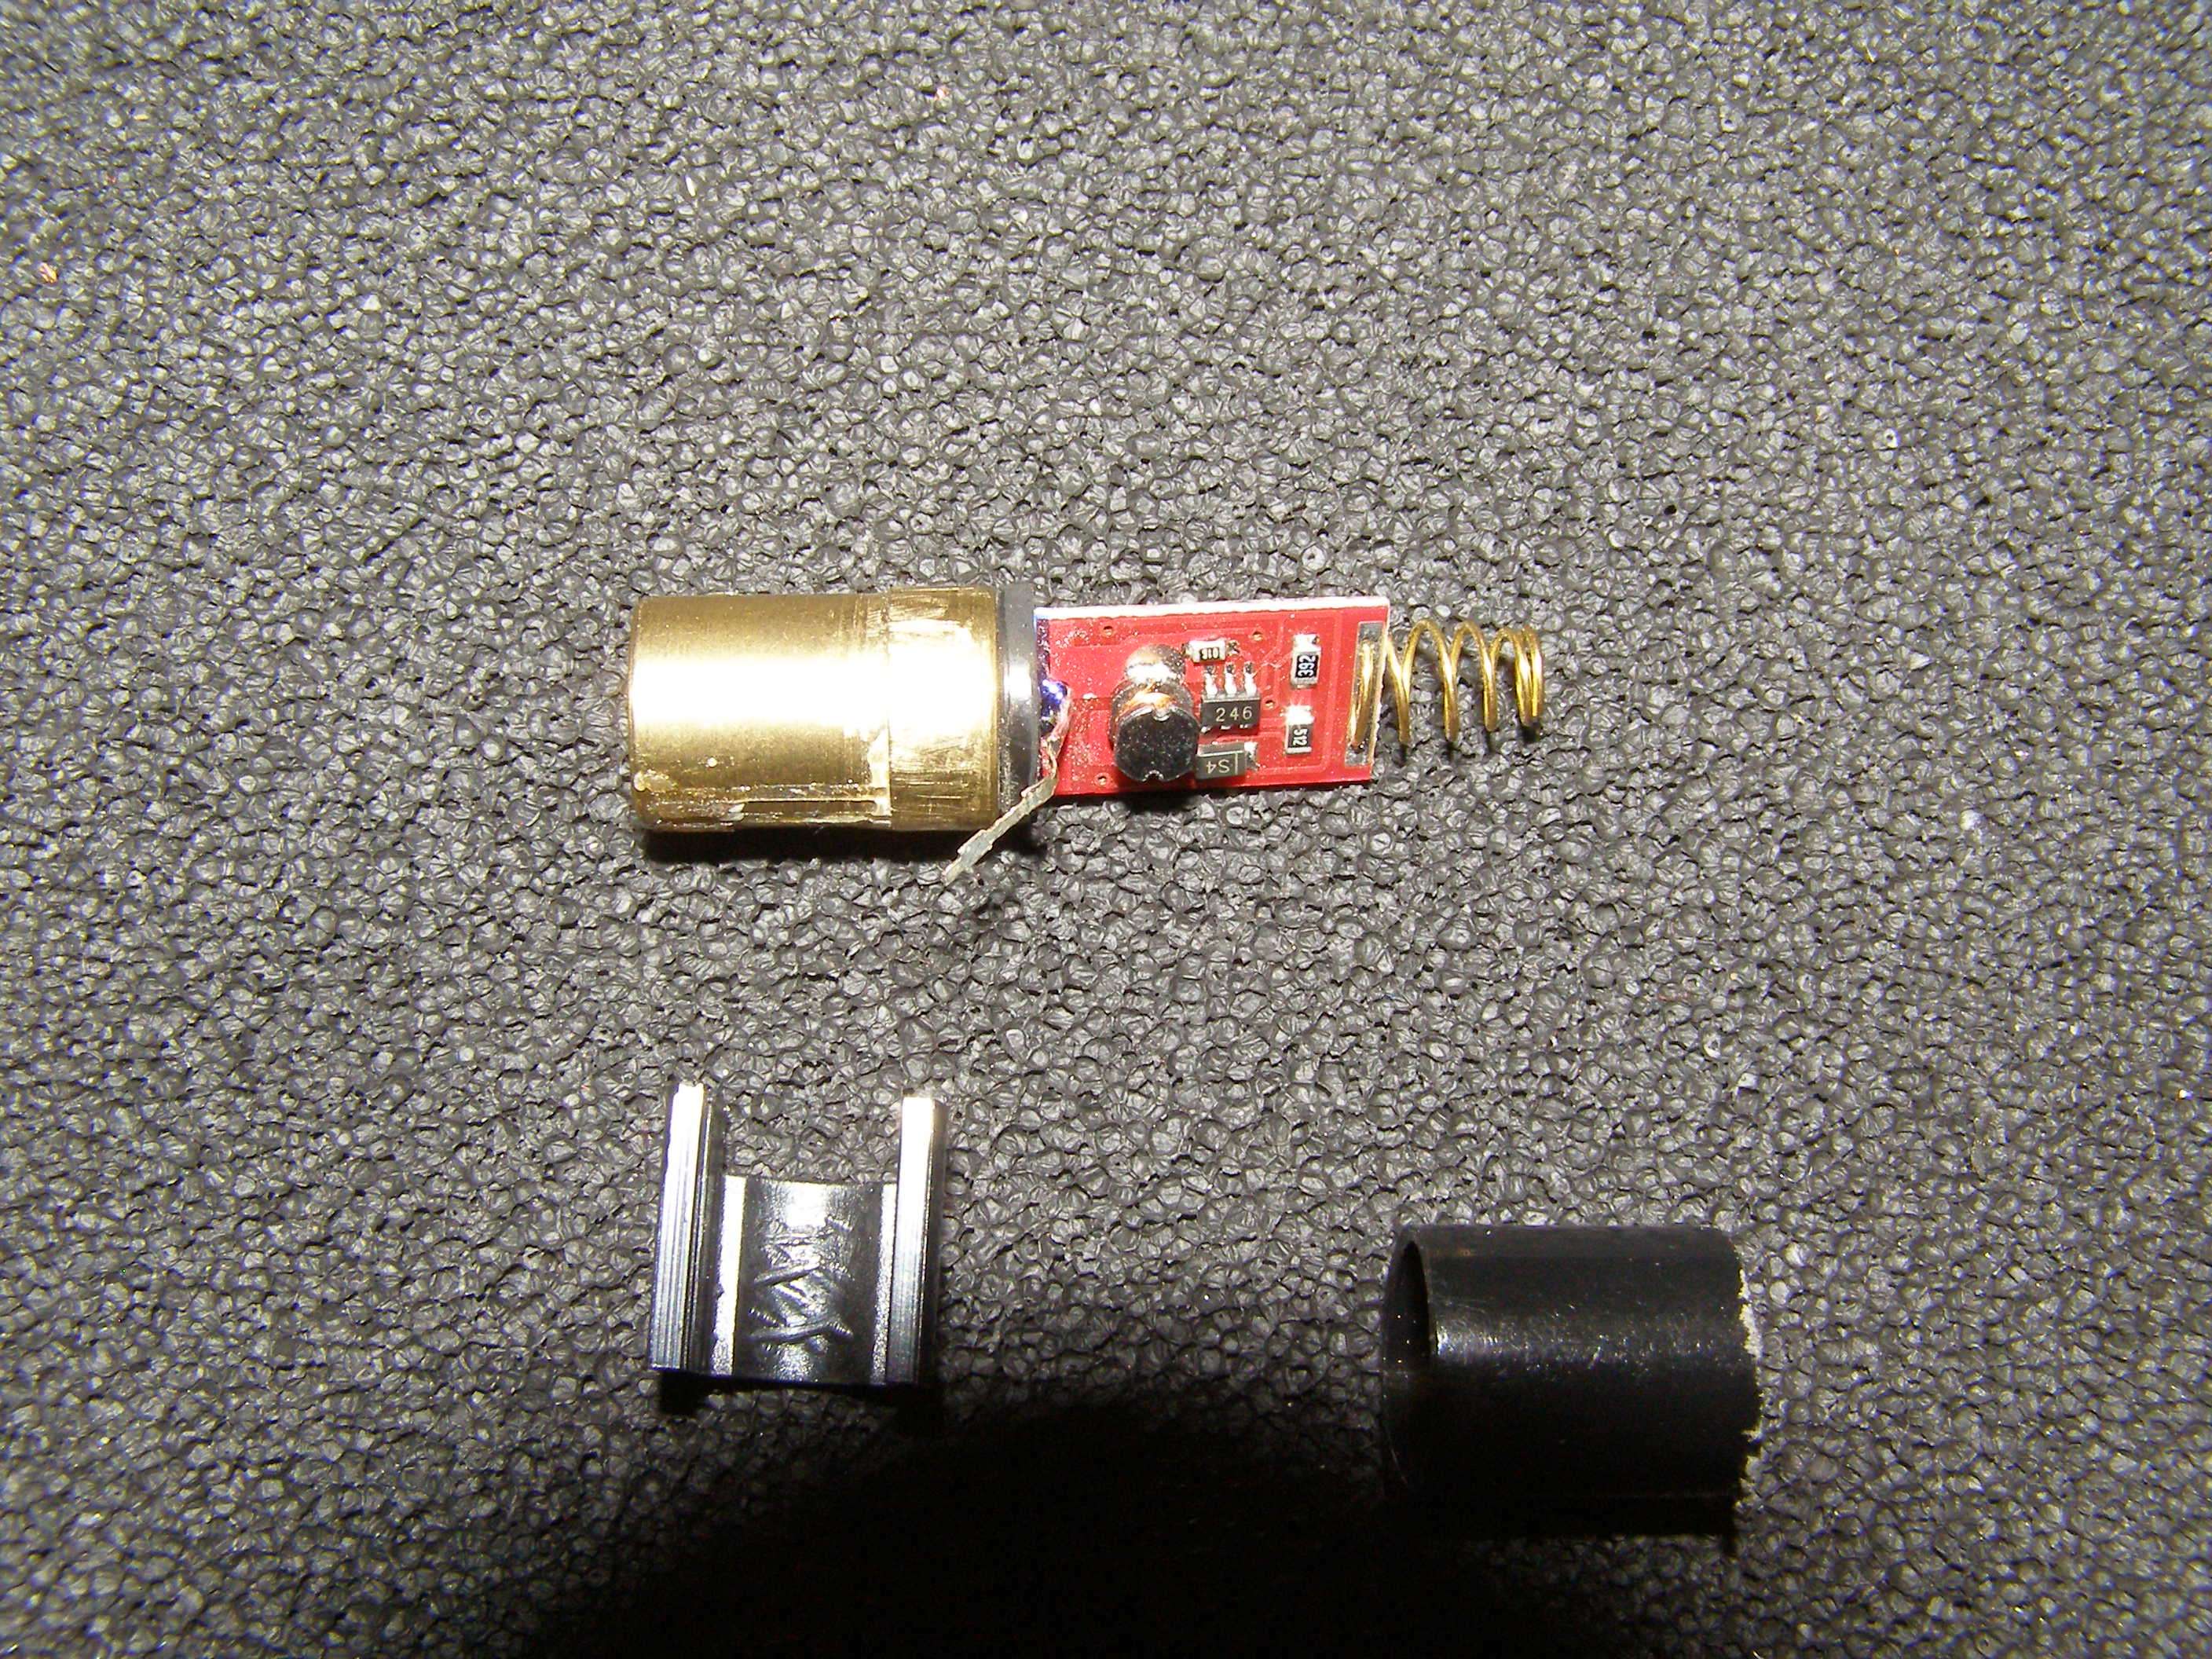
You now also have another piece that is pressed in and that is the female threaded piece. Notice how it has a slight taper on the end that presses in first.
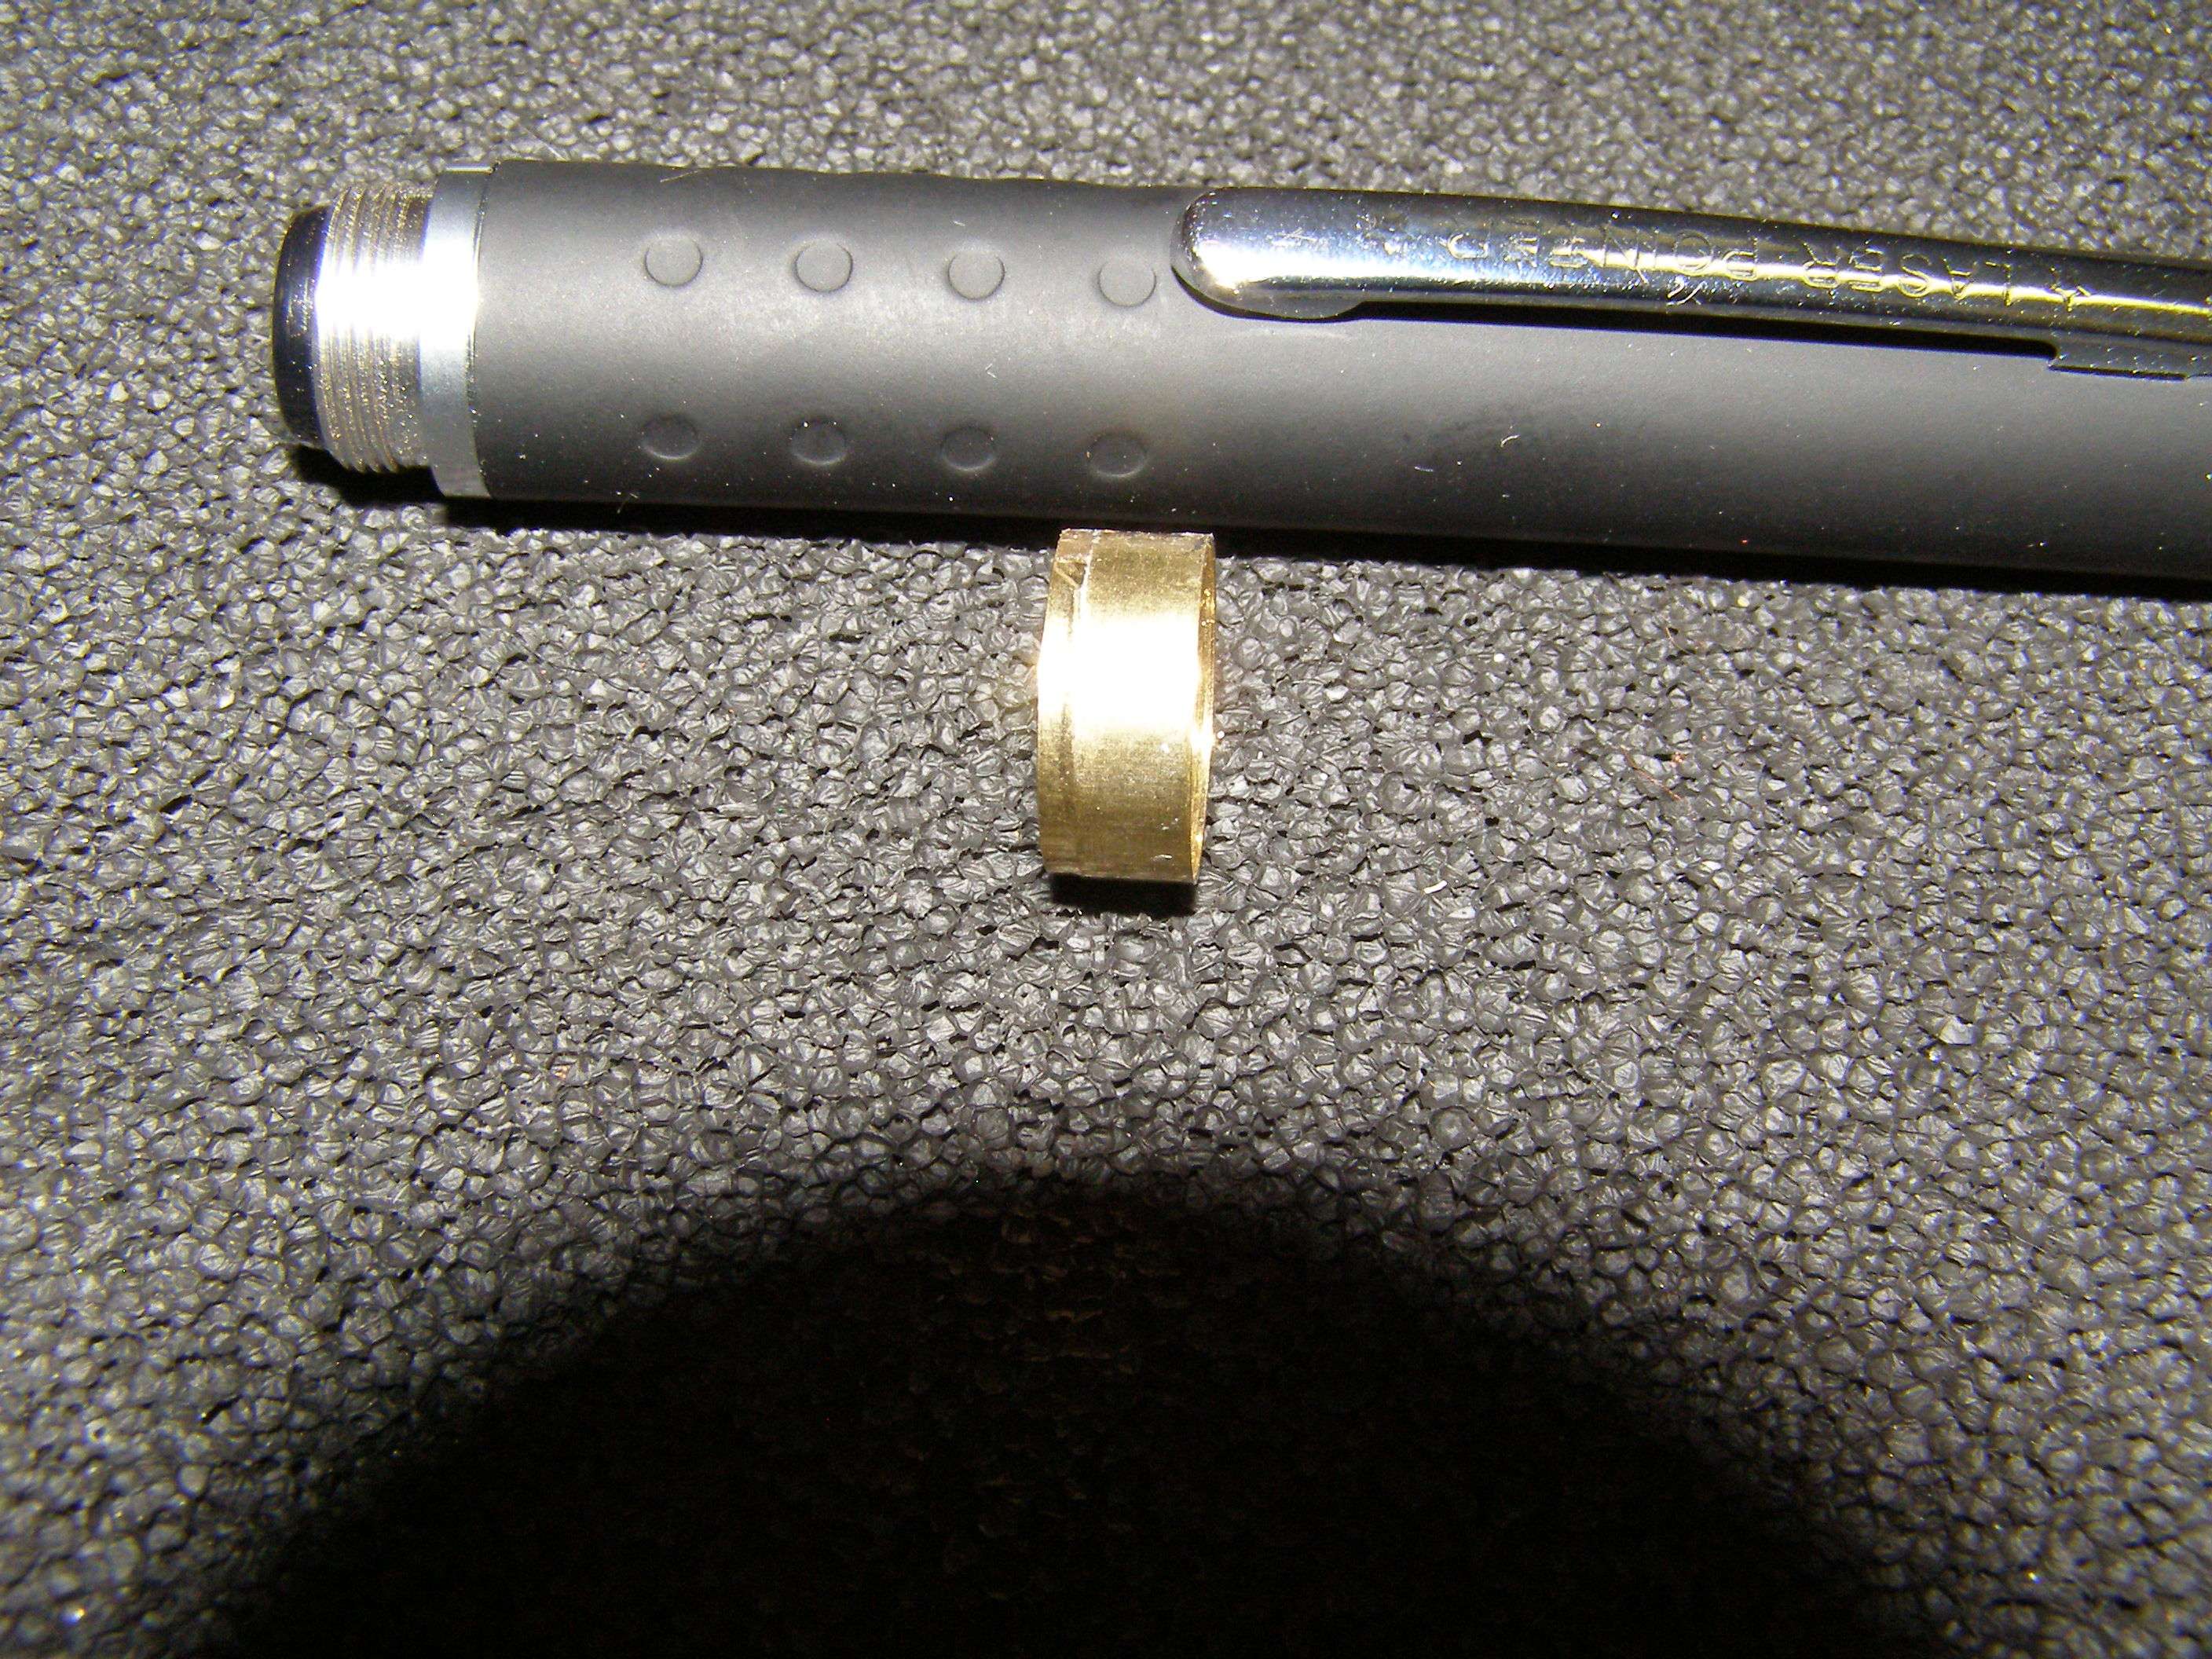
In this pic above, you see the brass female and you can also see the male threaded end of the battery section. There's a way to get them out without cutting. You can use the same procedure that I showed to remove the tail cap by using a couple of those battery centering pieces
to smack them out as they will hit the ends of them and force them out. Of course you have to be able to get to the male ends inside to do it though which means you either cut the host back or drilled out the module. I say drilled out the module because I haven't found a way to remove the module and save the host. This is a huge pain in the butt.
I have removed quite a few modules to use the host by basically removing the spring foam and tearing apart the driver board so I can get something like a small nut driver down inside and pound it to the end of the host (end of host on soft wood) and then holding the host while continuing to pound at it until I get it out. If you use a screwdriver you are likely going to mess up the host. This is a royal PAIN literally as it is hard to hold the pen and strike the nut driver without moving your hand. The module is usually in VERY hard with glue so it is NOT fun to do.
You can use these pieces to build and lengthen or whatever. Use your imagination and always be thinking about how you can save parts for some future use.
Couple more tips.
If you seem to be losing conductivity such as you have a good battery but your output seems eratic or jumpy (532nm can do this anyways) one way to see if it might be the spring or tail cap where the battery connections make is to try unscrewing the pen about a quarter turn and see if you get your output back. Sometimes what happens is the spring will bend downwards too much and shorting on the inside of the host because it isn't aligned properly or the foam piece is missing or never existed. You can make yourself one out of something that is nonconductive to align the spring like most pens come with. You probably have some semi-rigid foam or something you can use around the house somewhere. You could also make yourself a non-conductive sleeve to put down there (like the one that holds the battery centered) but you don't want it to hit the button.
I make sleeves out of this stiff clear plastic that has sticky on one side. Not sure what it is called but you can find it at auto parts stores. It's used to put a clear piece of plastic on your cars lower panels to prevent stone chips. All I do is form it around the battery and then cut a strip of the backing off so that I can stick it to itself. You can also see radiator huse which is good for turning a small dummy cell into one that fits a larger diameter opening.
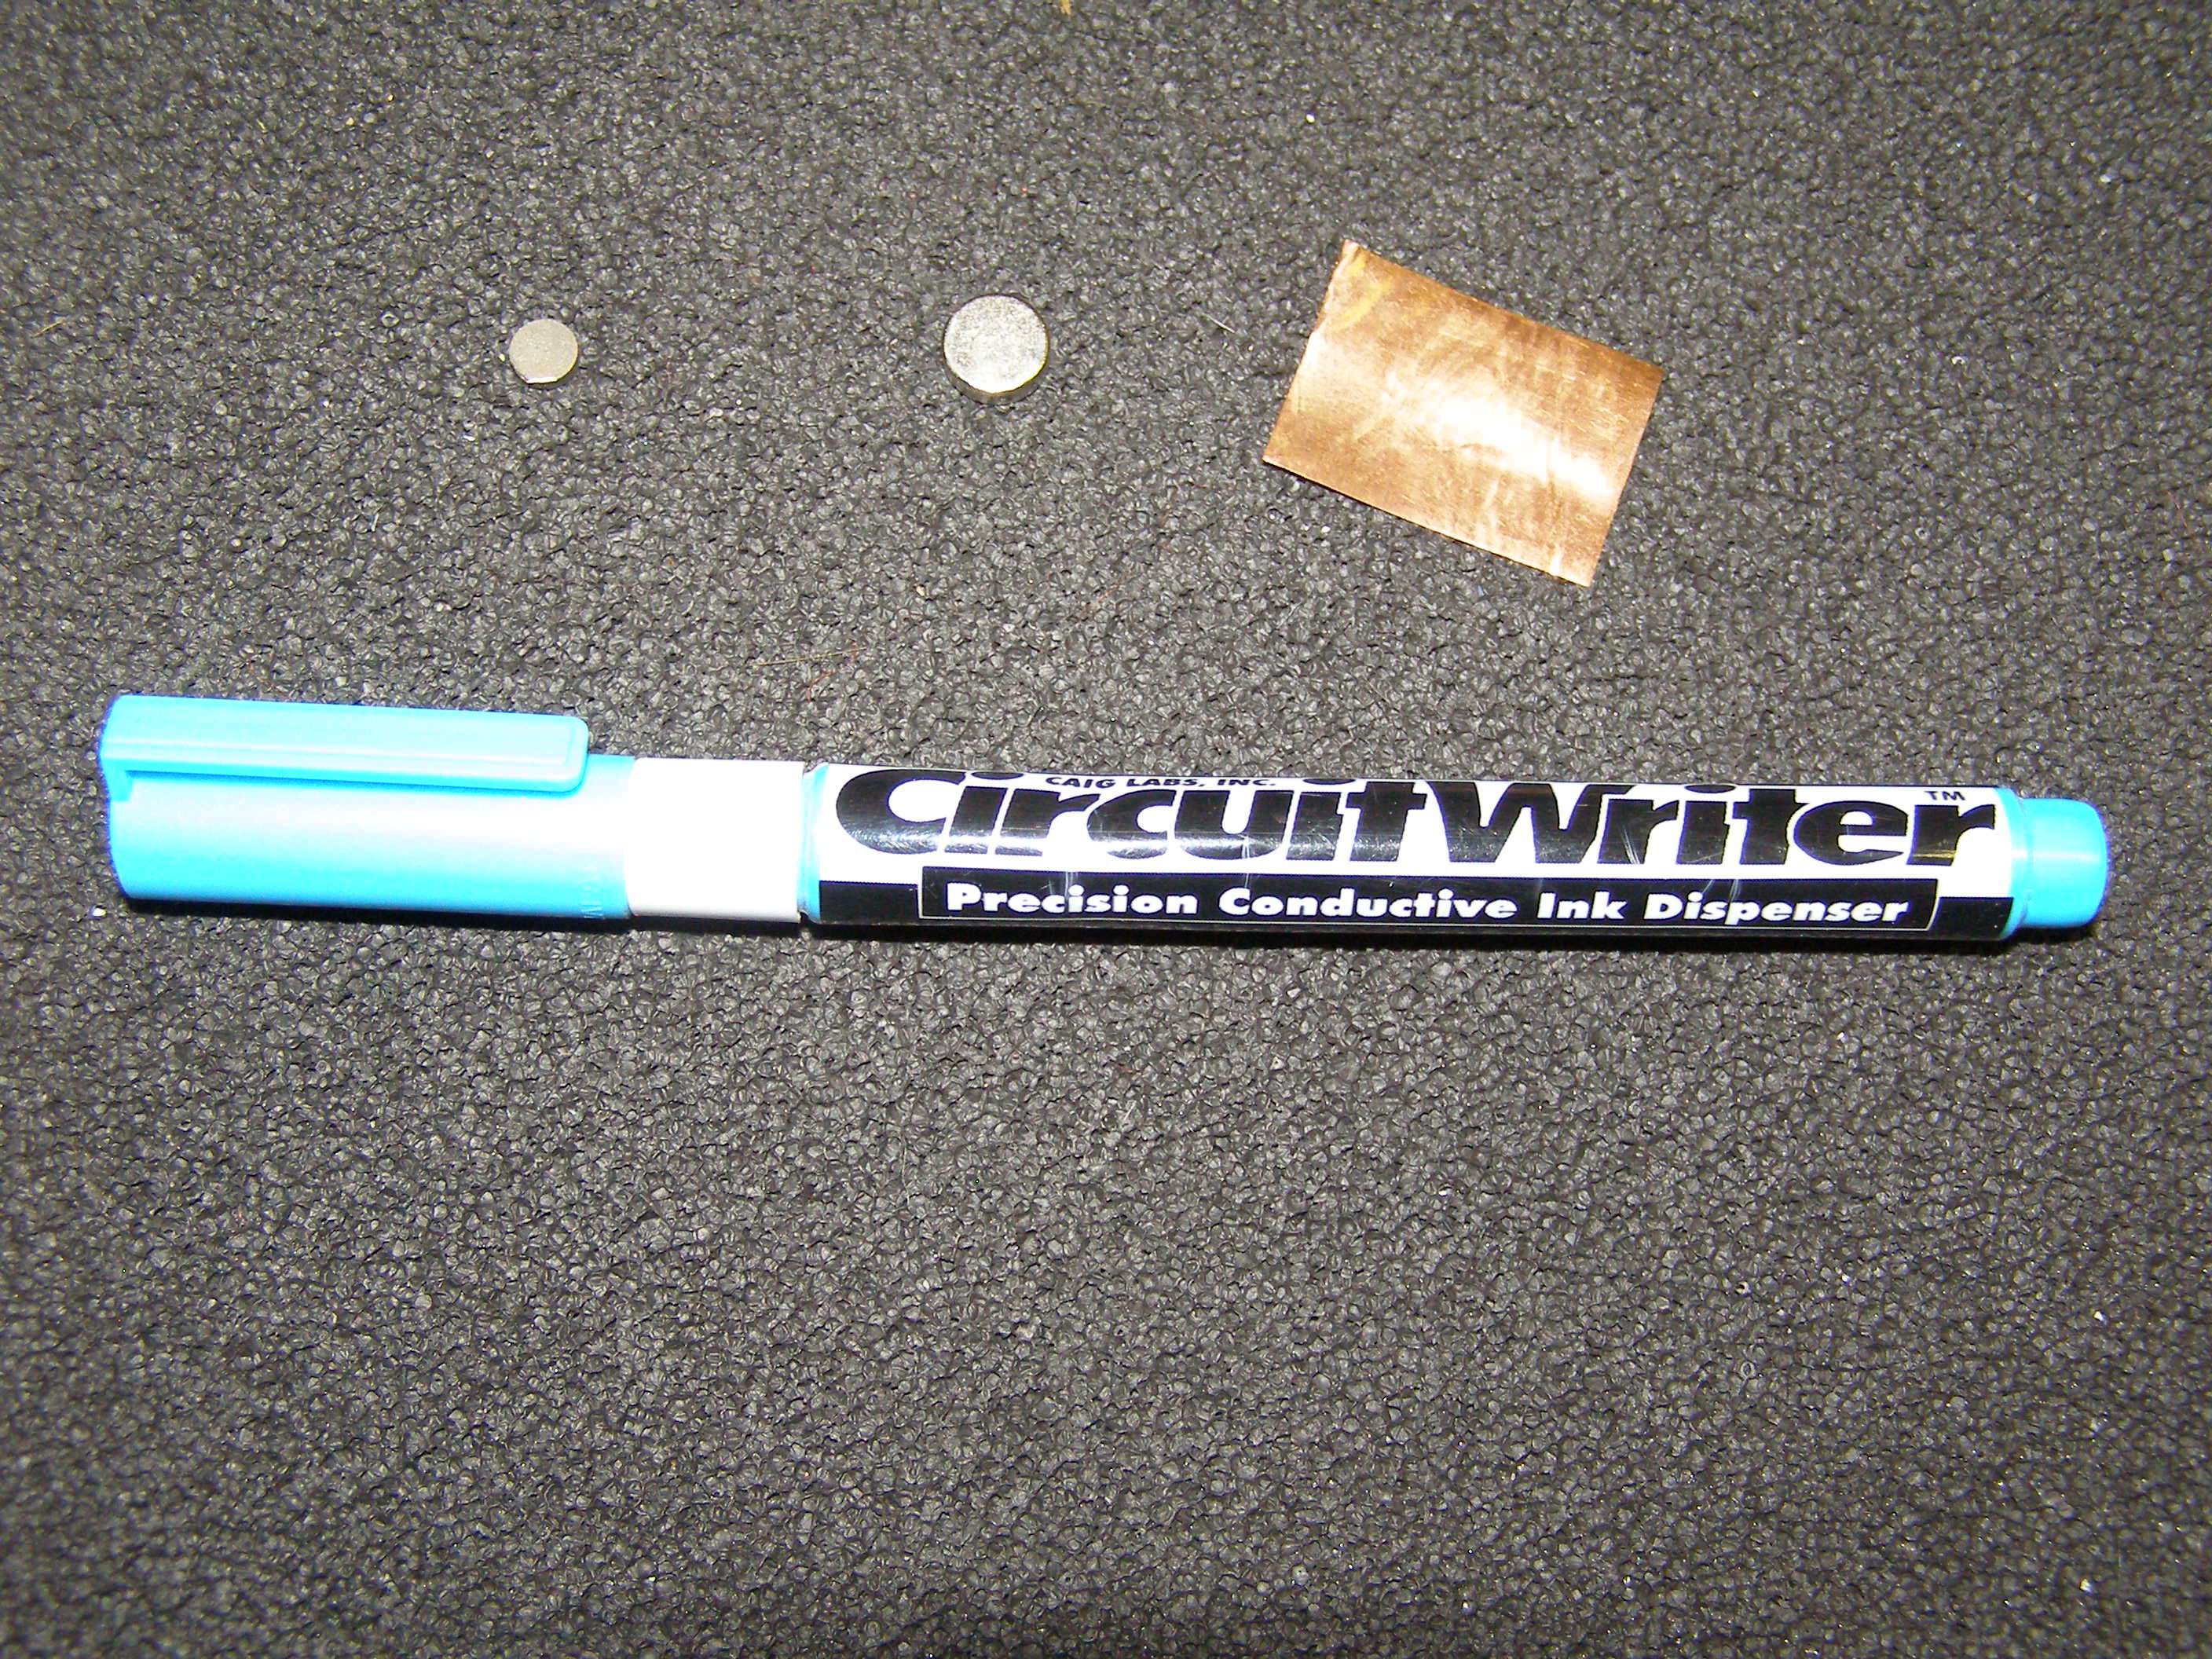
If the problem is not the spring, it is likely the tail cap. Have many options with this one. You could use a small pice of conductive material in the cap or a magnet but I must caustion you about the magnet. All magnets are not fully conductive (some will add resistance and essentially be a drain on the battery so try either measuring the battery voltage with and without the magnet on it or do a conductivity test across it). Some have a coating on them and it adds resistance. Another option is a conductive ink pen. It is used for tracing/repairing circuit traces. Believe I got this at Radio Shack (which of course means I WAY overpaid). Just spread some around on the inside of the cap and let harden.
If you decide to make a pen focusable but not have the "bridge" glued to the cap (so that it extends thru the cap or replaces the cap altogether) I would highly suggest you use something really lite so as not to put so much force against the epoxy holding the bridge to the lens. This particular epoxy is very strong and is mixed properly and will handle a lot of abuse BUT there's still only a very small amount of glued surface area so it just makes sense to not stick a lead pipe on it
3pcs 5mW Red Green Blue Laser Pointer Visible Beam Fast Shipping from USA | eBay
Also, if you want an easy way out, just buy:
https://sites.google.com/site/dtrlpf/home/projector-optics-mirrors-dicros-lenses-motors
as there are multiple lenses in these that will focus the beam up close by just holding in front of your laser.
Better say up front that I don't sell these
Also, I am not responsible for anyones "project" going wrong. Have done my best to describe everything. It's up to you to decide whether you are willing to potentially mess up your laser. In other words I don't mind hearing if something goes wrong as it can help us all but no whining that "I" broke your laser.
Anyone is MORE than welcome to think and post about other ways to do any part of this procedure as we can work together to try to figure out what works and what doesn't. Feel free to post anything you like on what else you've done with your cheapo pen here if you want. I have many other things that I've done with these and I know how it feels to not want to start your own thread when it's just ideas and things we can all work on.
The reason why I found myself wanting to figure this out was because I have so many way over spec $5 units that aren't really very interesting. The 532nm are great in and of themselves and the 405nm are kind of interesting for their ability to "charge" things with glow properties. The 650nm however is kind of .... blah. I mean, who hasn't seen a red dot before.
Anyways, both 405nm and 650nm can burn really well when focused with 70 + mw of output so why not find a way.
My recommended places to purchase WAY over spec pens that have been consistent performers accurately tested with an Ophir are as follows:
Ebay " cjy3271788 " 3 color pack. I believe Hak told me about this one and I've purchased many sets from them. 532nm have been between 25-90mw (lots of IR though), 405nm 70-100mw and 650 over 100mw every time. These have the nicer metal caps rather than the plastic ones.
UPDATE
3pcs Power 5mW Laser Pointer Pen Combo Green Blue Purple Violet Red Light | eBay are now being shipped from California and still free so you can now get them quick
I've tried the Amazon "millionaccessories" ones and they are over spec but not as consistent as the ones above.
The Amazon BBQ-Buy 3 pack without the star caps are fantastic also and sell for <$13 but I believe that is with an Amazon prime account (which I have).
You could also get the set with the star caps as they are way over spec too.
I haven't taken one of those apart yet.
What's interesting about the Amazon ones is you can buy twice as many if they show shipped from China but if the price is double for 1 set, it's being shipped from Amazon in the states and with an Amazon prime account you get them in 2 days free shipping. I have an Amazon Visa and get points for using it on their site and sometimes use the points to get free lasers
I will also say that if you want a nasty little unit that is already focusable, buy this
100mW 650nm red laser pen/ focusable /Pop balloons [OL-650-100P] - $11.99 : Zen Cart!, The Art of E-commerce
Have 2 and they test at 125/150mw with 2 AAA alkalines and 215/224mw with a single 10440 with spacer
They also feel quite nice and heavy in the hand. O-Like does not have free shipping though so I would look through their site for some other things you might like before ordering. Also, O=Like is slow to process and at least to me, kind of frustrating in how they do things. Too used to Fasttech which I learned about months ago from Awillis. So, here we go....
***I HAVE CANNED AIR ON HAND TO KEEP BLOWING OUT THINGS SO NO DEBRIS GETS INTO ANYTHING!***
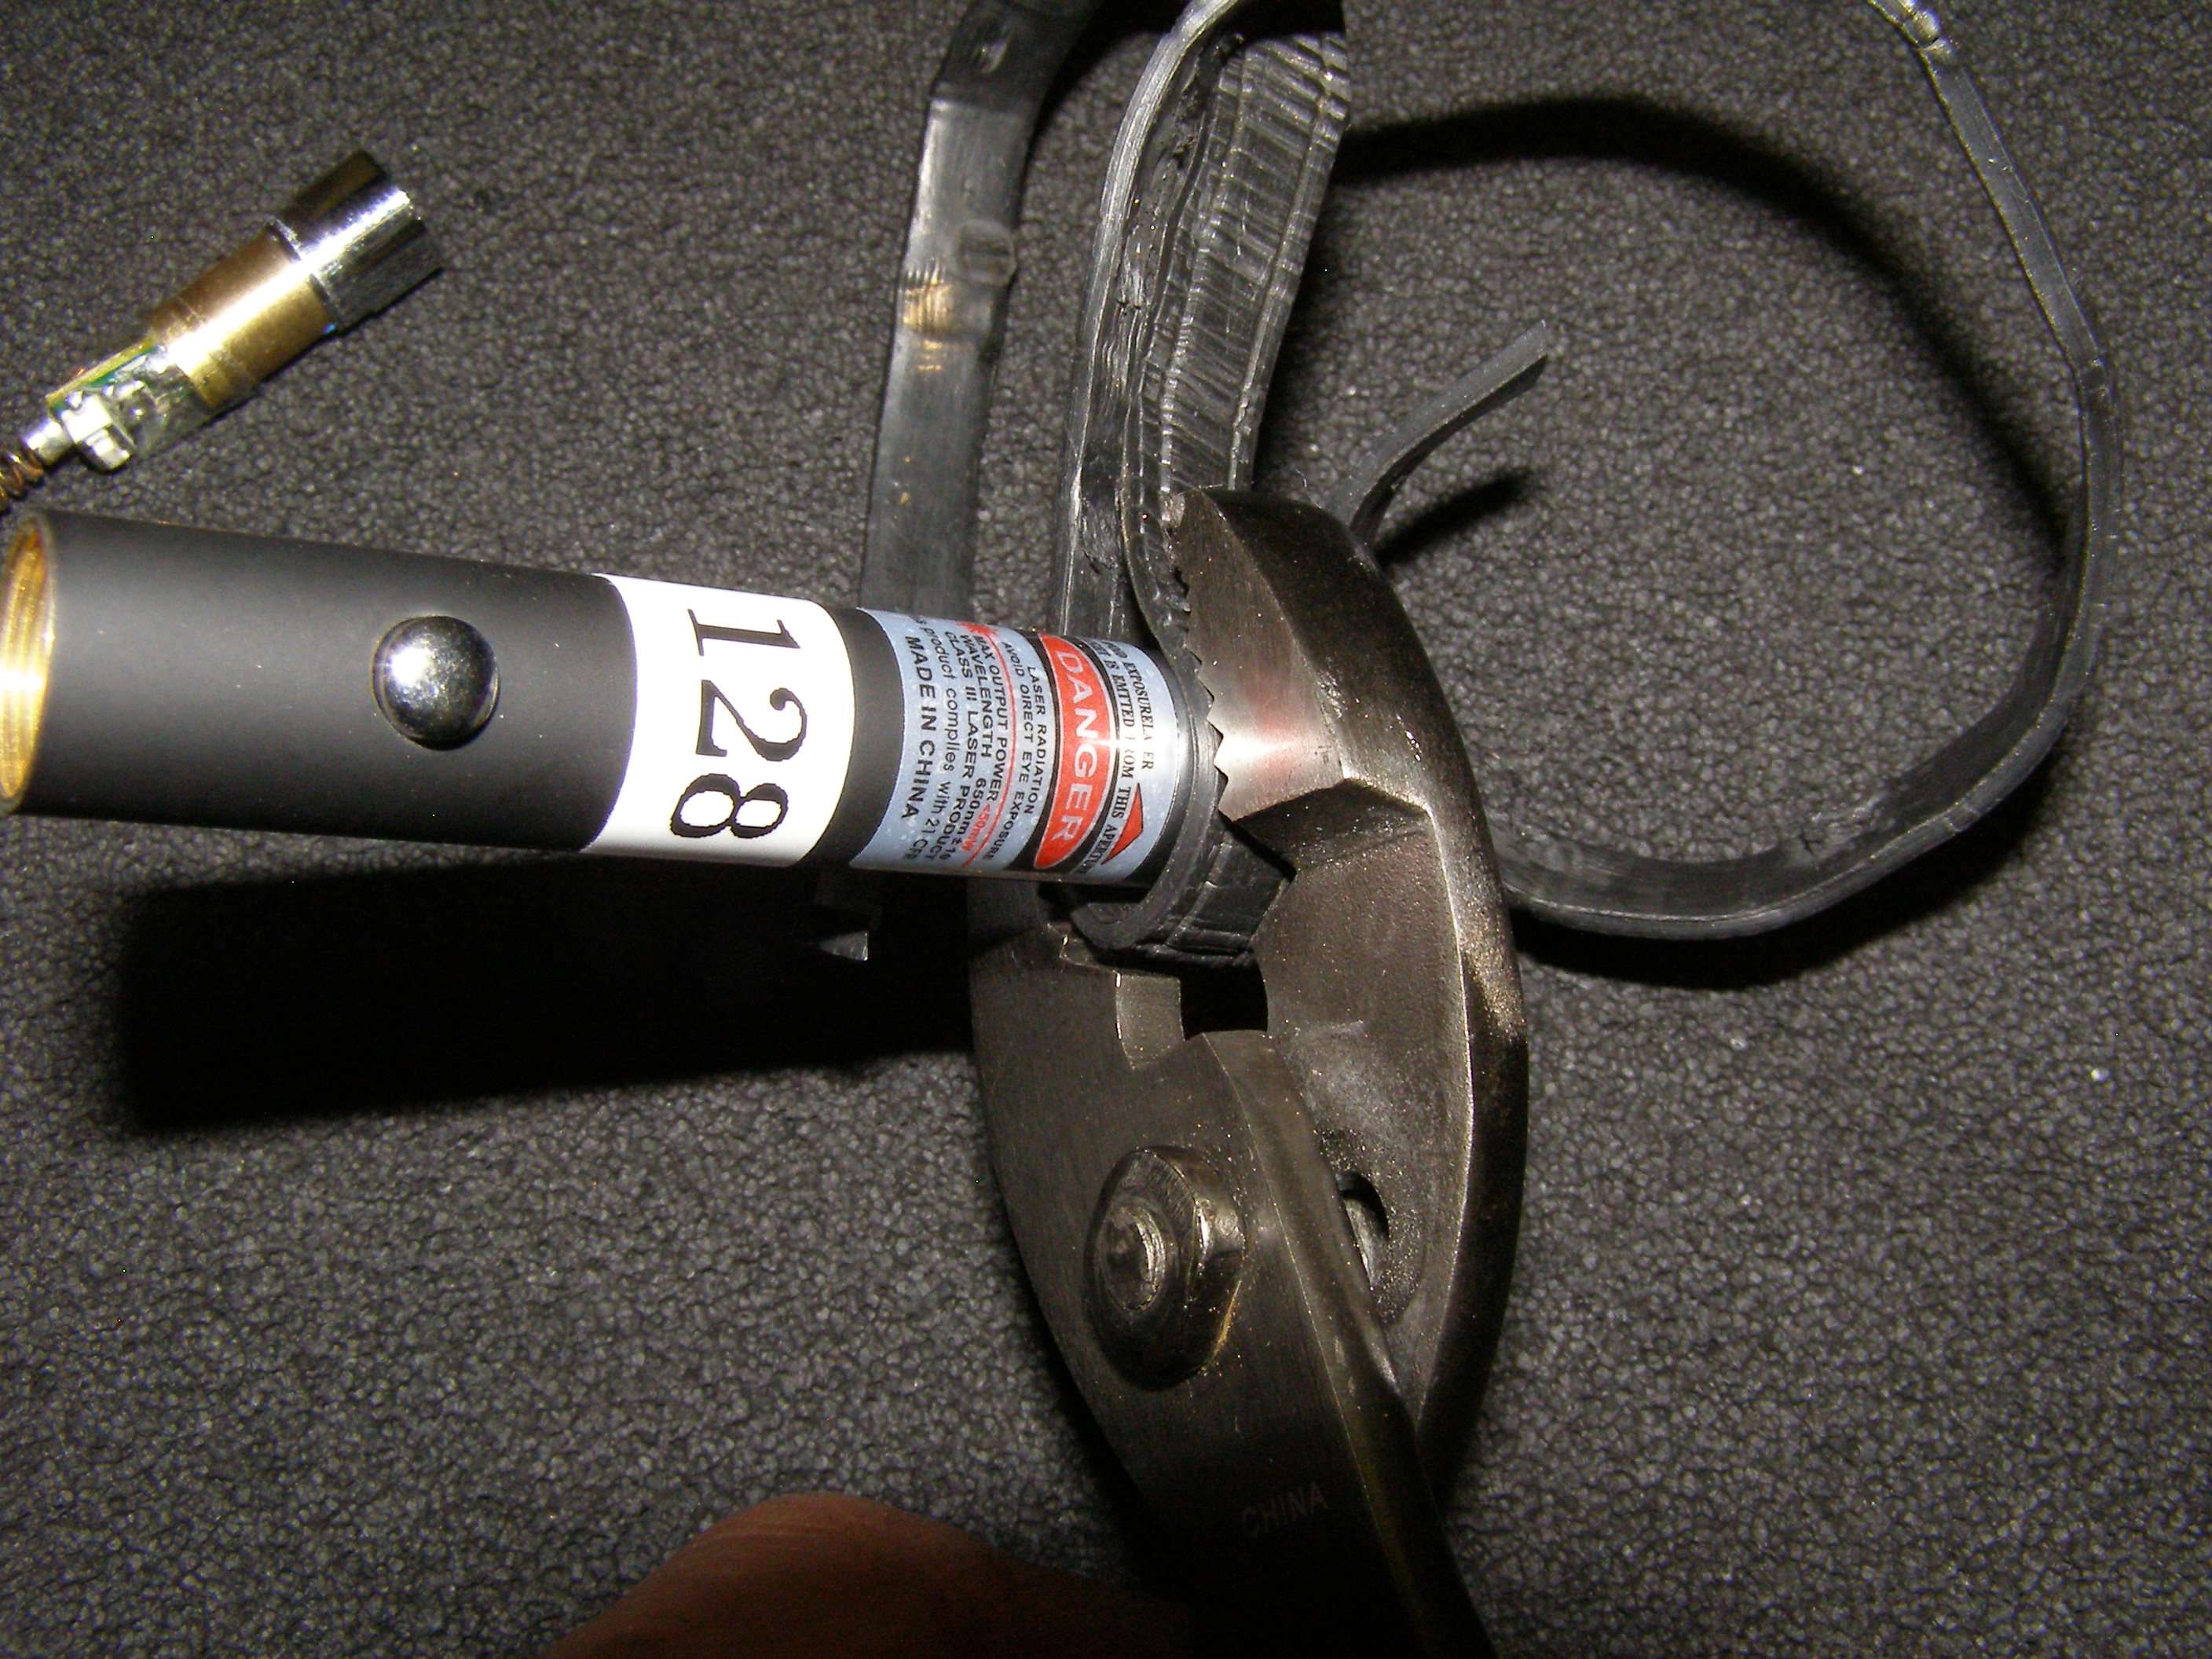
Standard way over spec pen
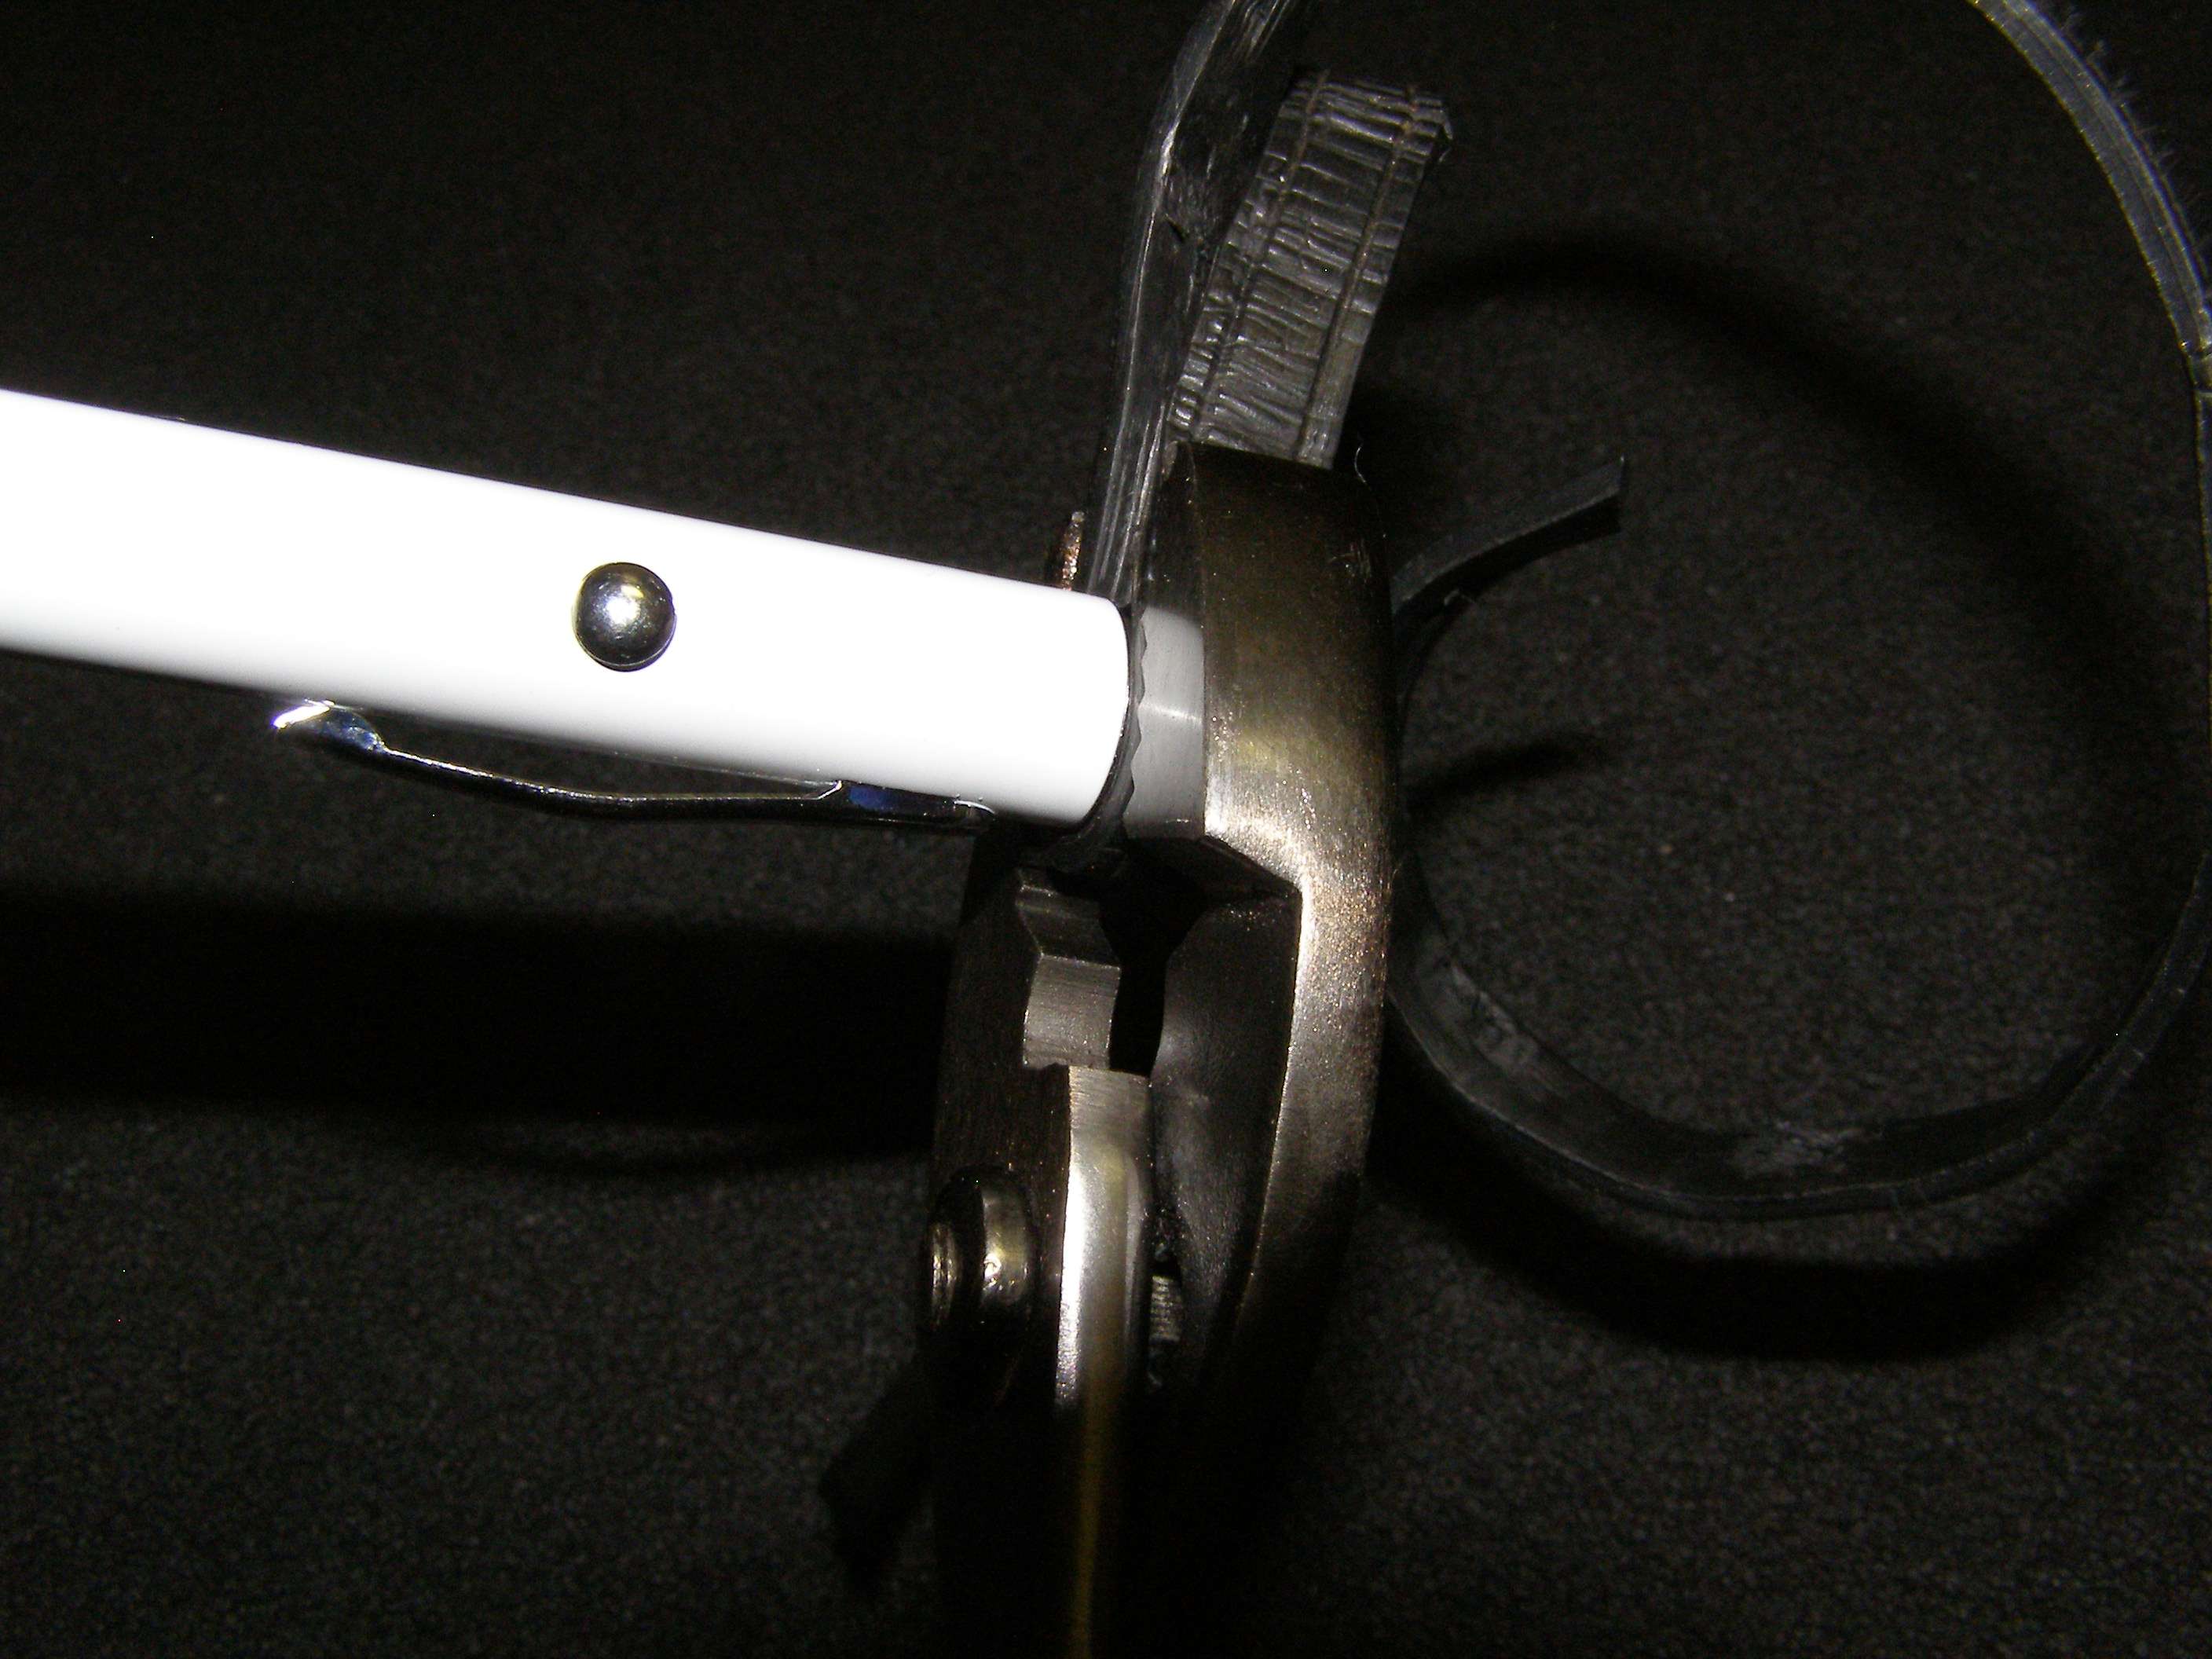
Separate as you only want to be holding the top half when you remove the cap
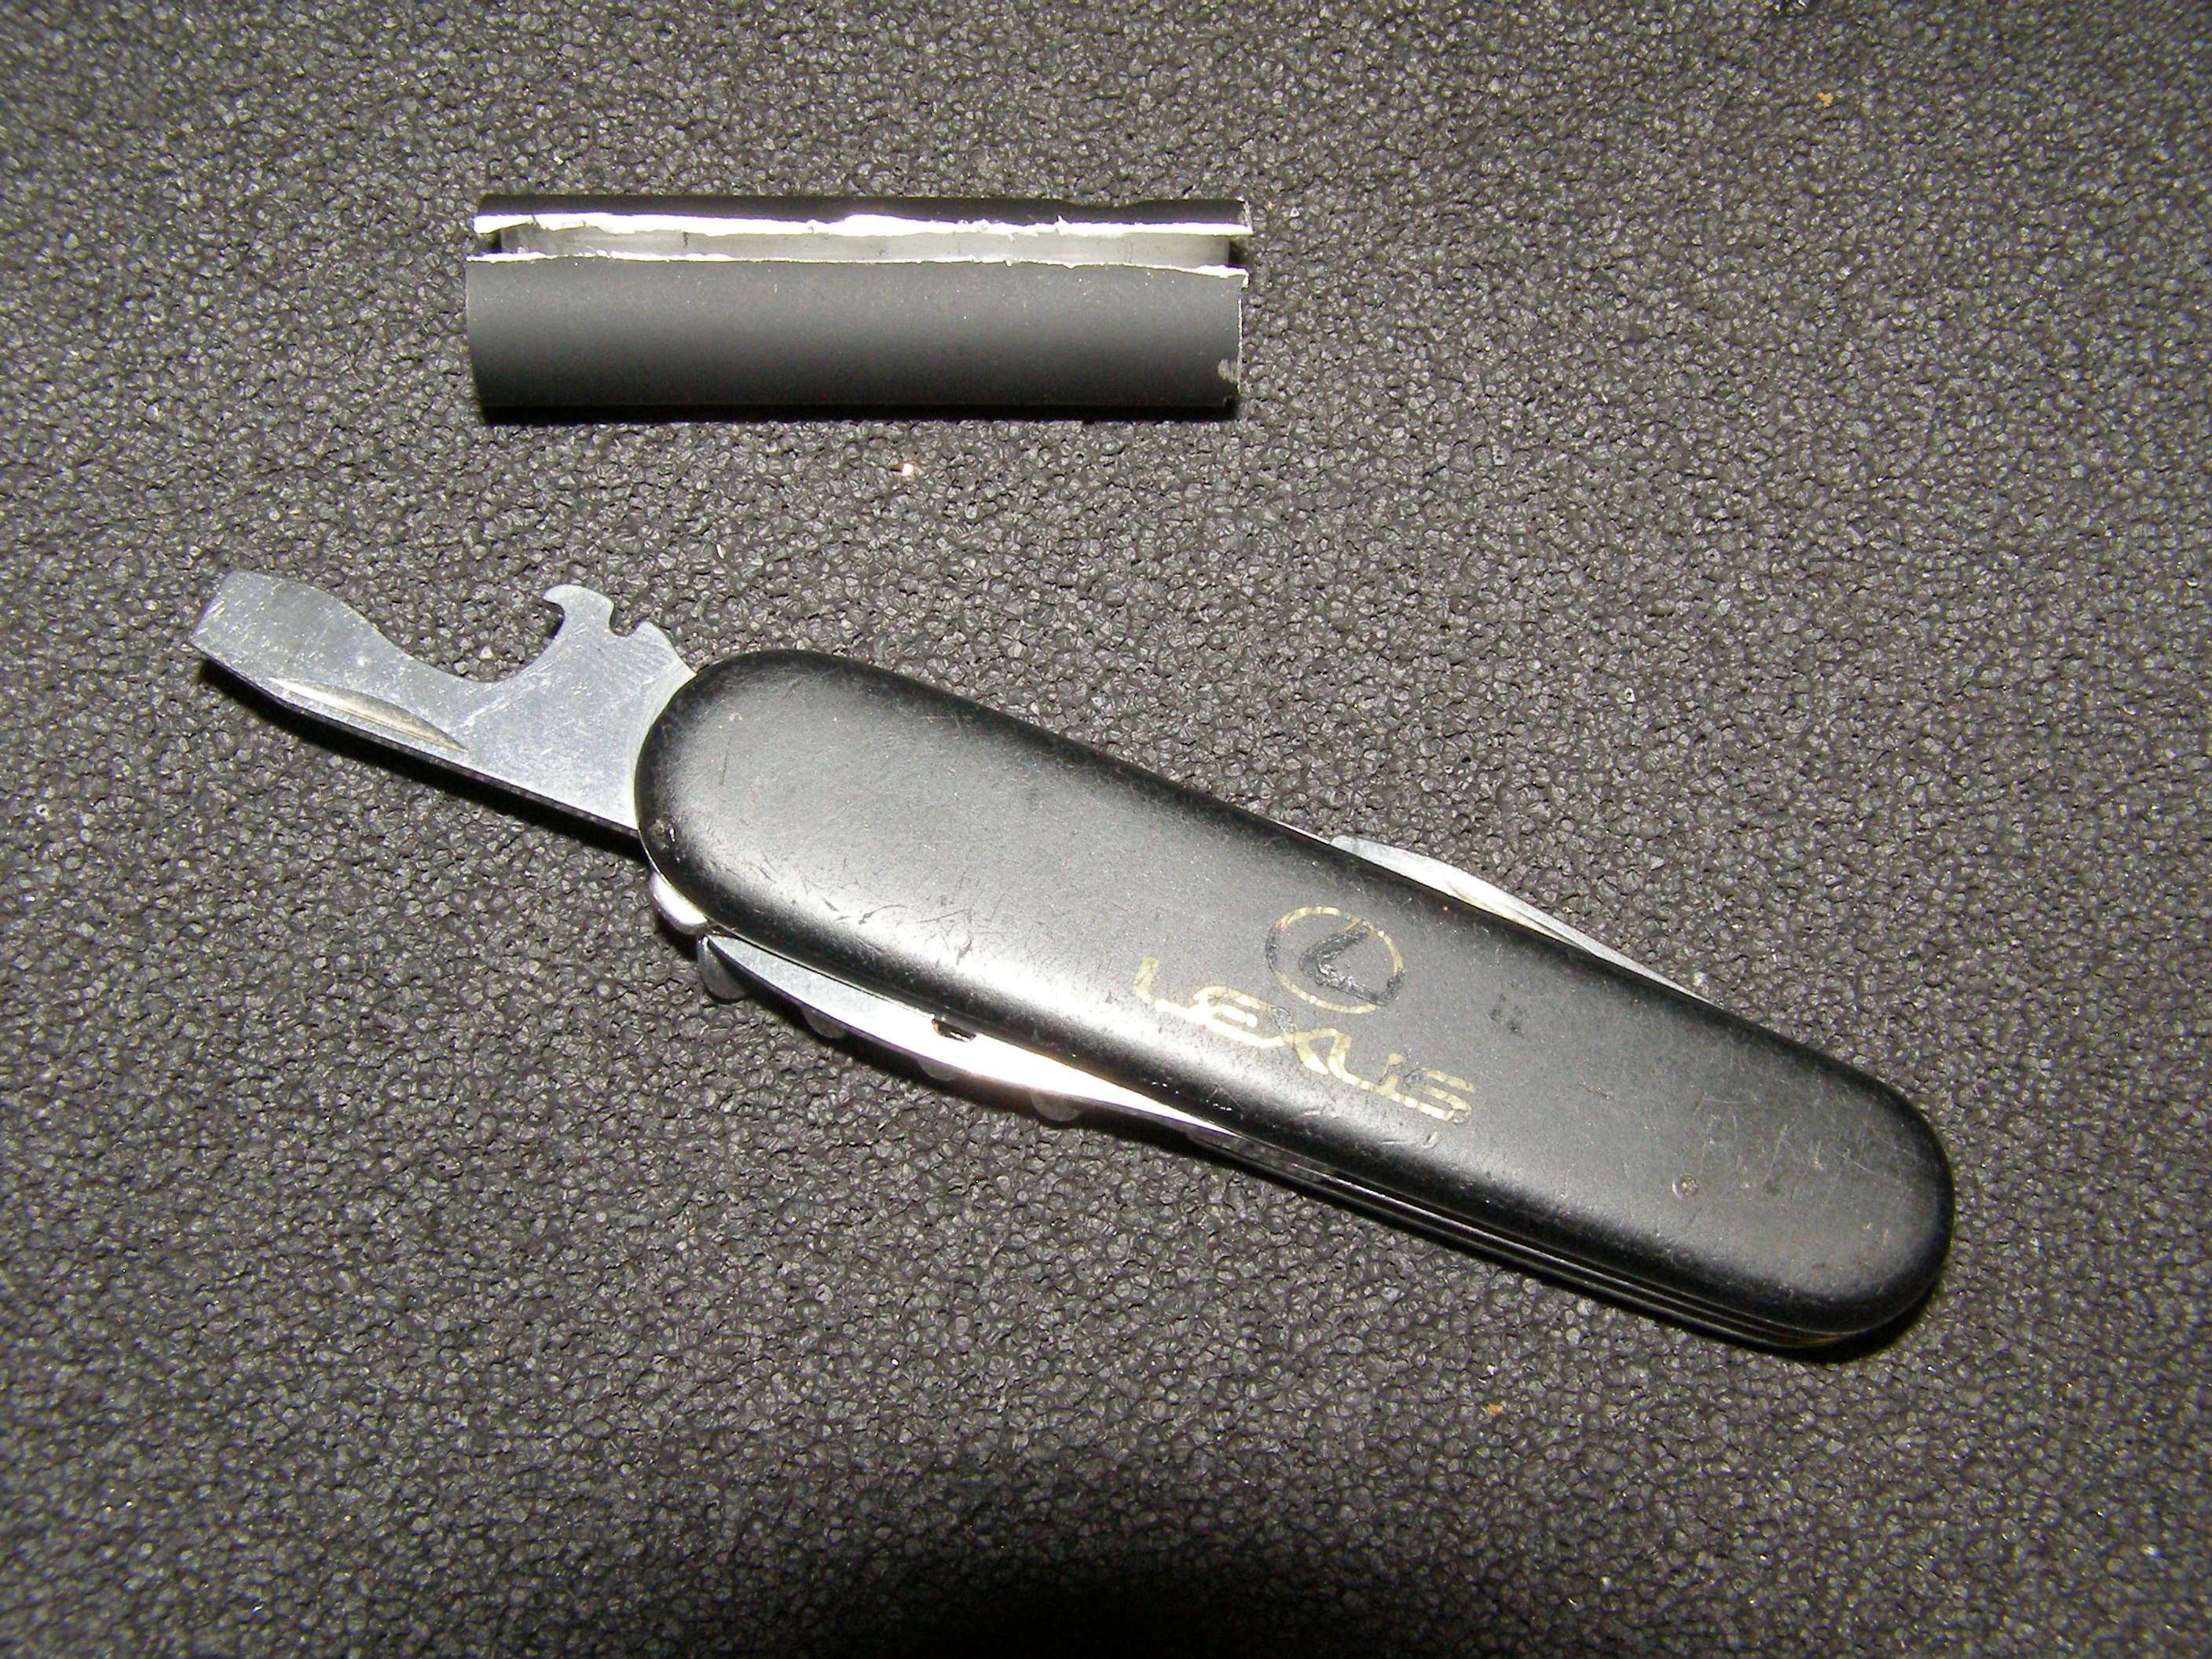
This is what I have been using as the go-between the pliers and the cap. See how badly the teeth bite into it. You need to find a piece of leather or something like it (belt, strap to a handbag etc...) that can take a lot of pressure from the pliers that won't let the pliers teeth bite all the way through it to the cap. If you have the right material, it will grip using a lot of force and still won't put marks in the metal or even plastic cap. Don't think that I didn't ruin many a cap with marks from trying different materials. In general, rubber won't work as it tends to give too much even when it seems thick enough due to the amount of force necessary to grip the cap.
Here's a pic of the one from above and from one of the single AAA Fasttech pens where I removed the whole module to put inside a different host.
What you are doing is putting the strap around the cap very close to where it meets the host and then gripping it with the pliers hot farther than the strap in case you slip so you don't mark up the host or cap.
You are NOT trying to turn the cap! You ARE holding the pen (only front half as the battery end has been removed so you don't torque at the screw in junction between host halves) while gripping the cap hard and rocking the pliers while putting some force outward to pull it straight out. You do it for a moment on one side and then work your way around and it will start to come loose. This takes effort as the cap is glued in. I used to take a razor and try to score between the cap and host first but it never seemed to help much and almost always left a slight make at the junction on the cap, host or both. The point is to keep the host looking like new. Have a bit of patience when trying to work it out paying strict attention to where the pliers are on the strap and where the strap is on the cap. It it easy for the pliers/strap to slip off the cap as you try to rock the cap with some pulling force. Another reason why you need to pay attention to the strap/pliers positioning so you don't scrape anything.
Also, try to use pliers that are not wider than the cap. What tends to happen when you are trying to wiggle out the cap is the pliers/strap will slip off the cap end because they don't havve anything to grip on.
There's another way in this link that Blord uses with a couple blocks of wood in a vise.
http://laserpointerforums.com/f51/how-extract-module-laser-pen-77676.html
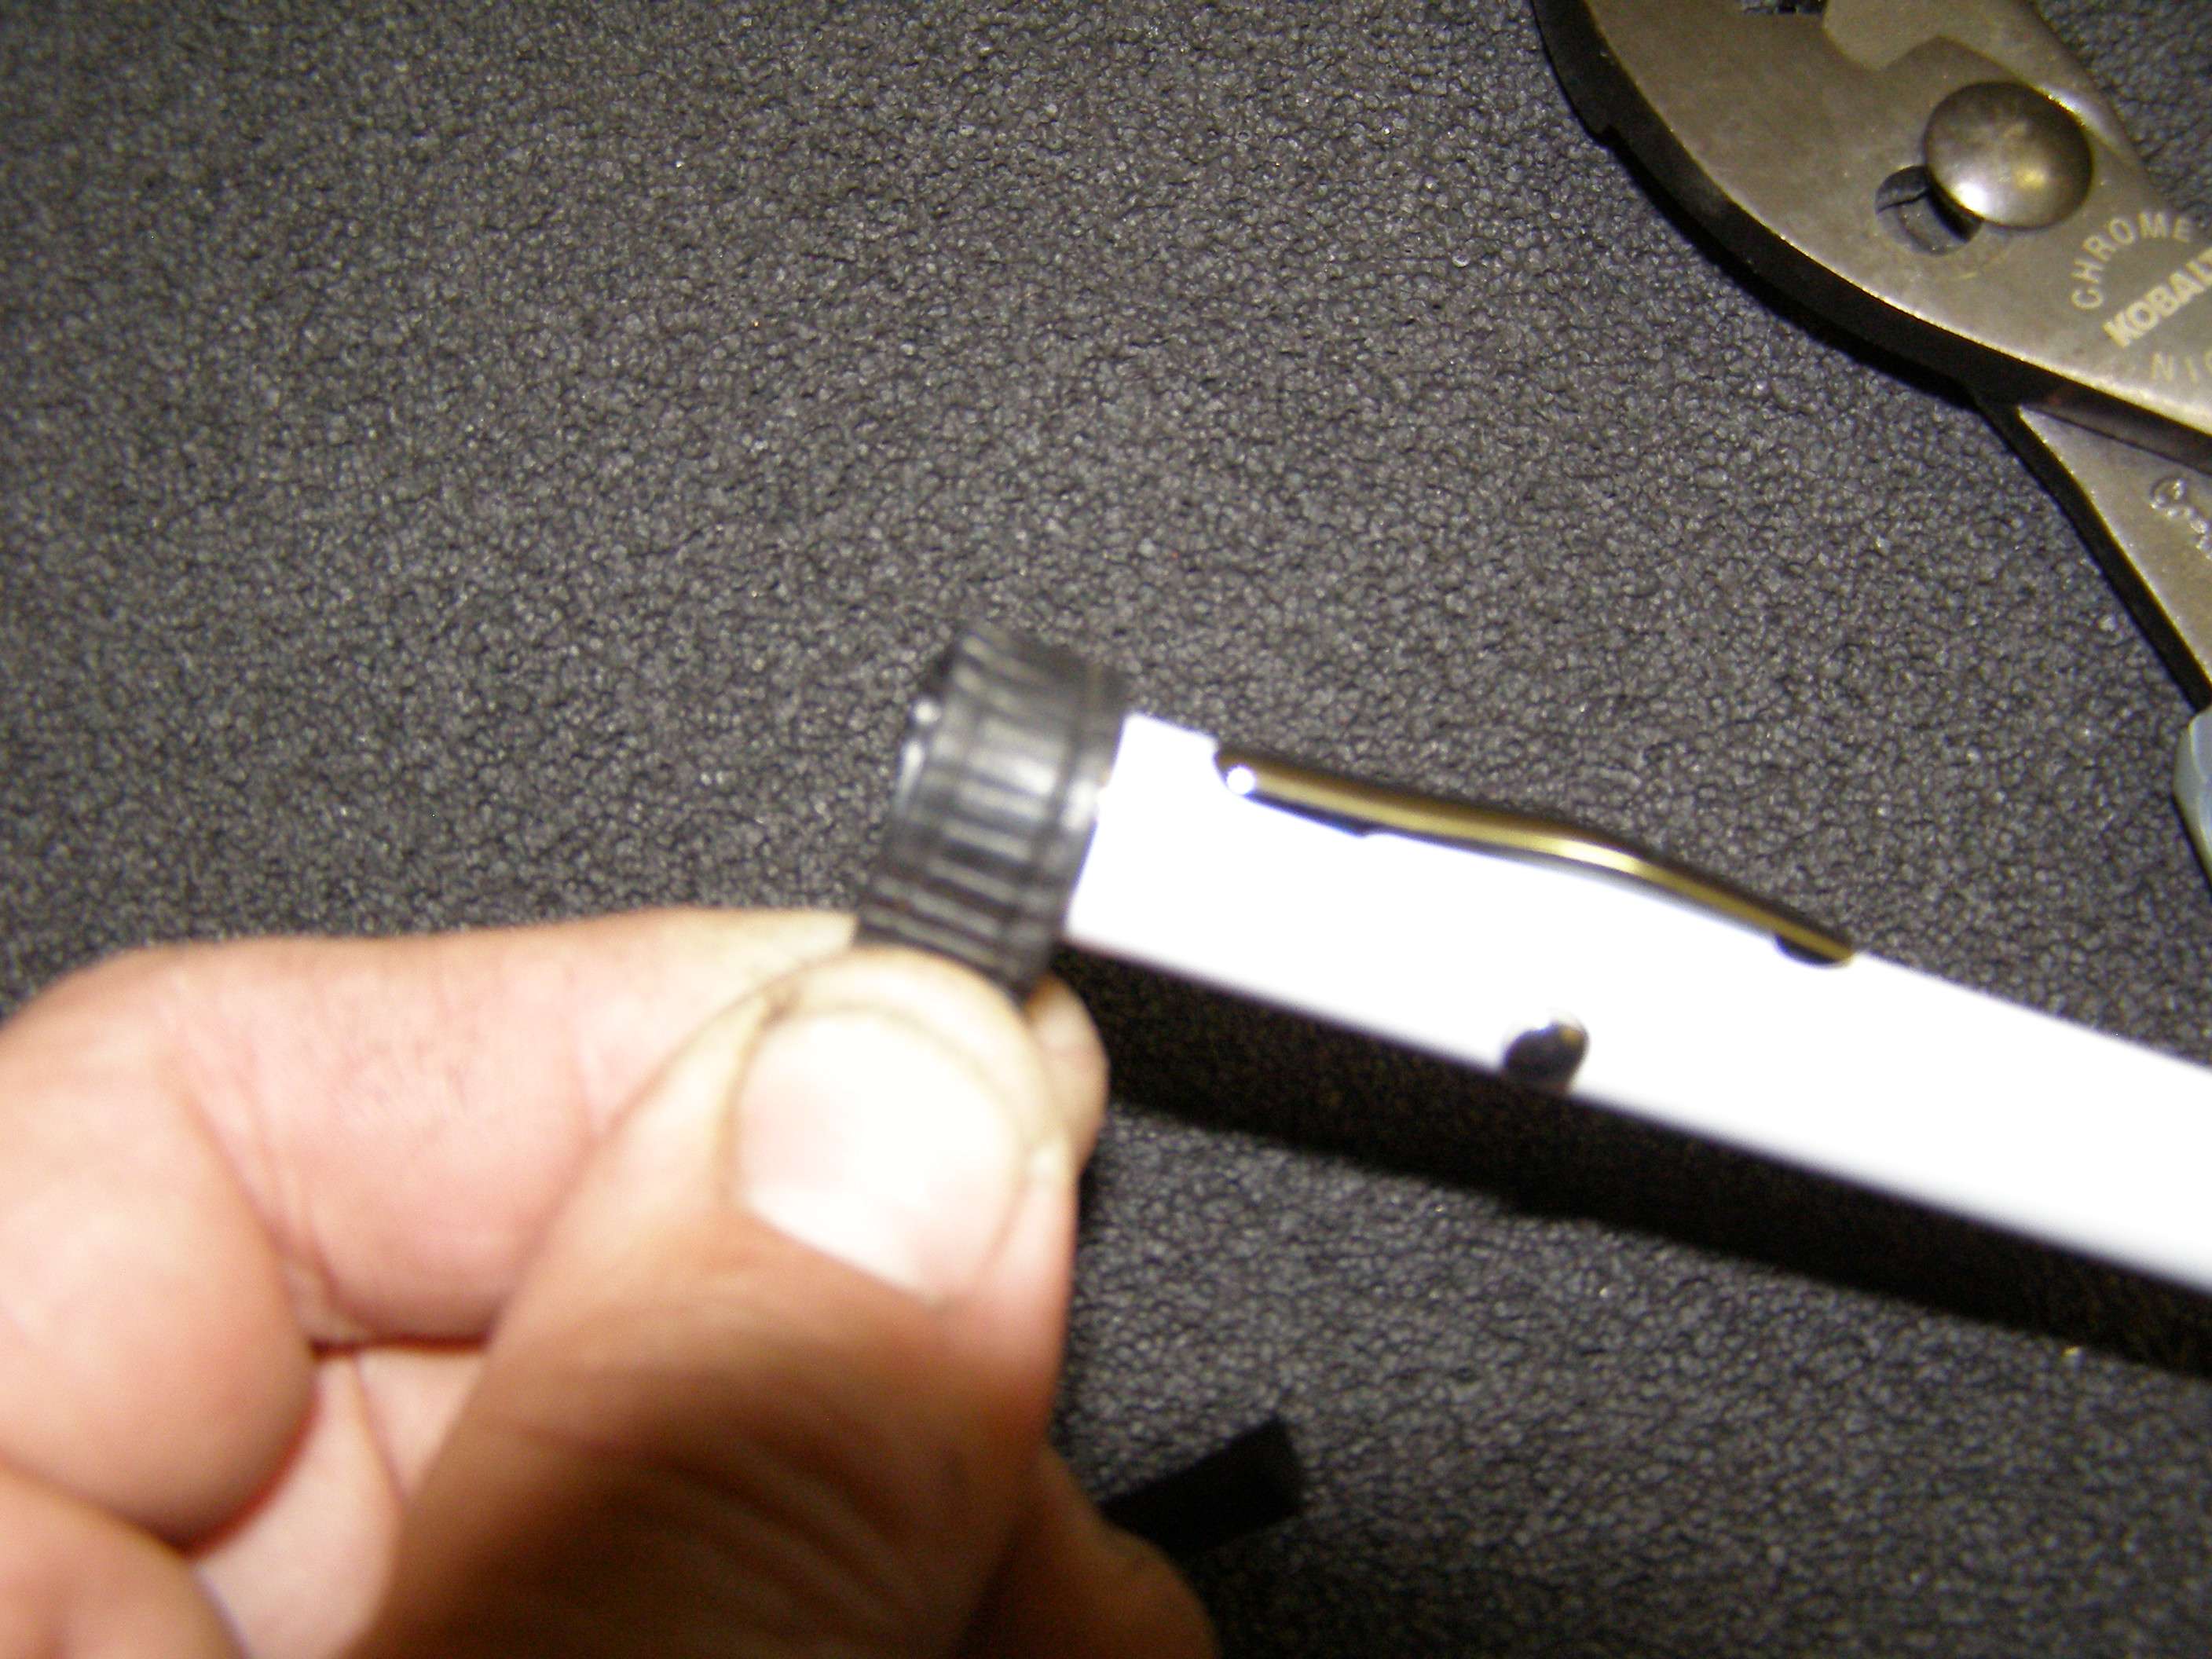
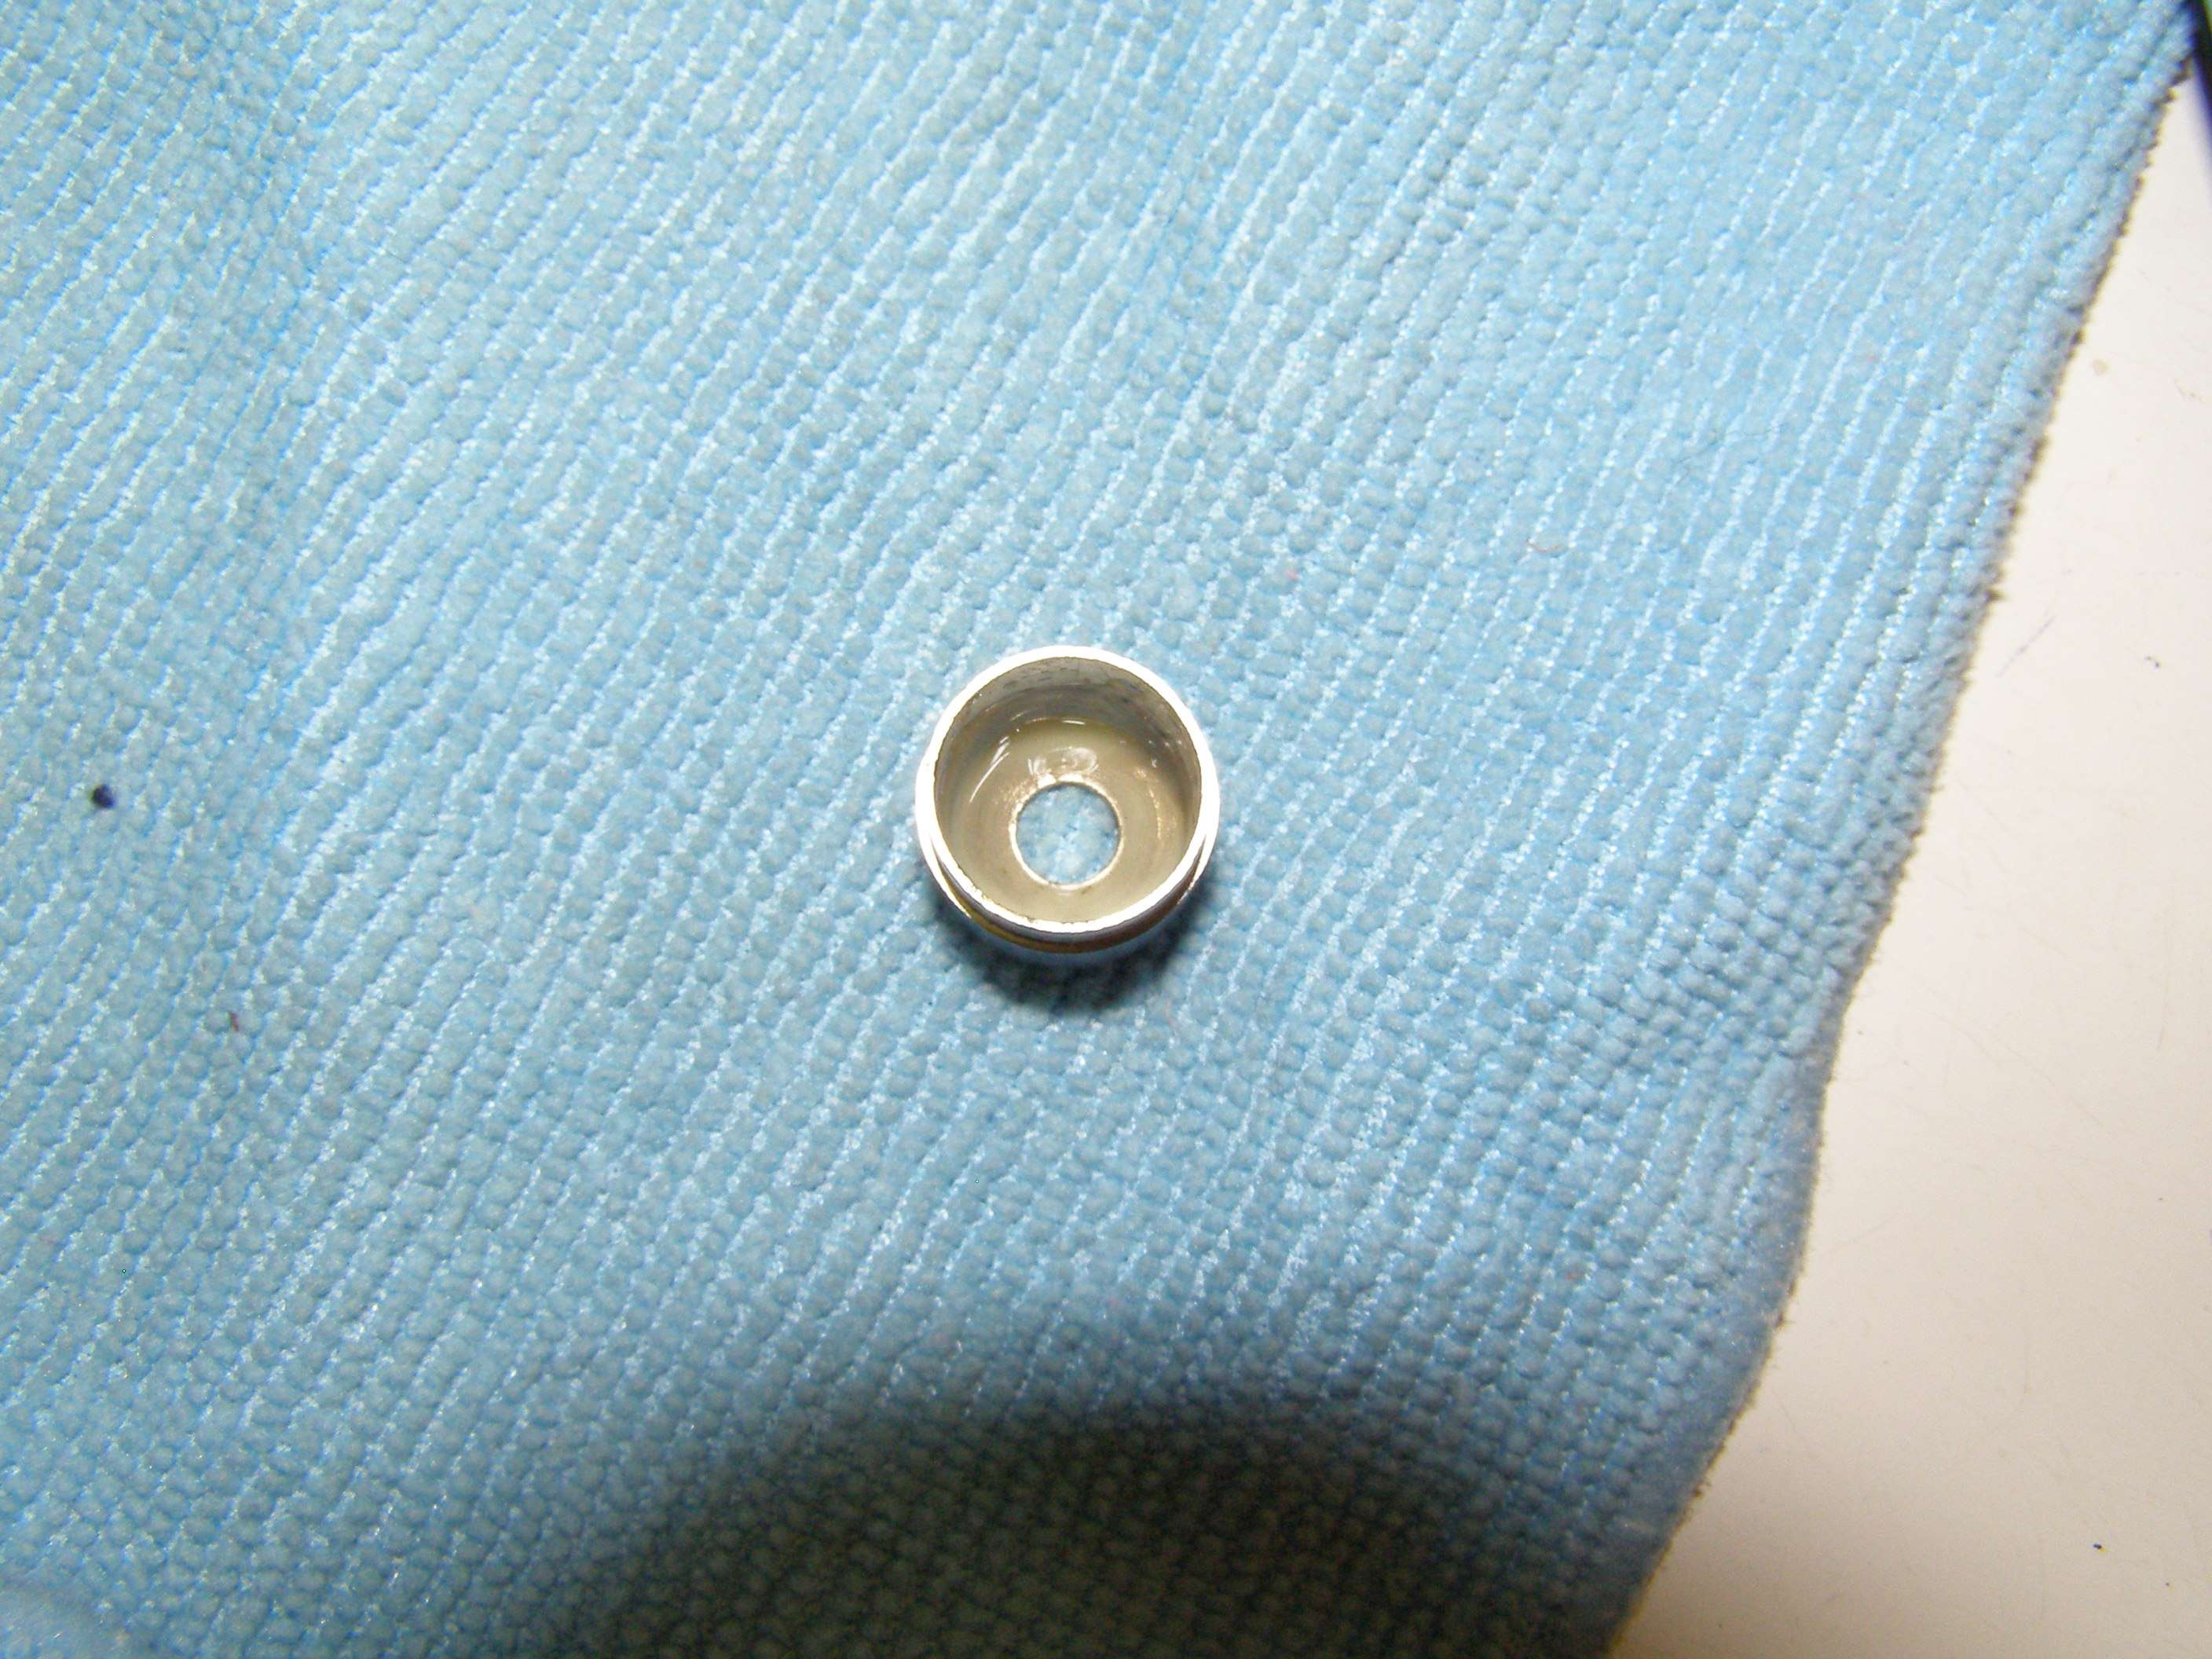
Now when you look inside, you will see the lens and a small amount of adhesive that is easy to remove if you want.
I use one of these picks to snag it out (bought at Harbor Freight)
You see the 2 tiny holes that are used to screw it in/out. This is a pic from way down this post. The lens holder looks scratched beceuse was deliberately done later.
These long needle nose with fin tips fit in the holes and I can easily unscrew the lens even without removing the glue. The glue never seems to be on the threads but just the top and don't stick on well.
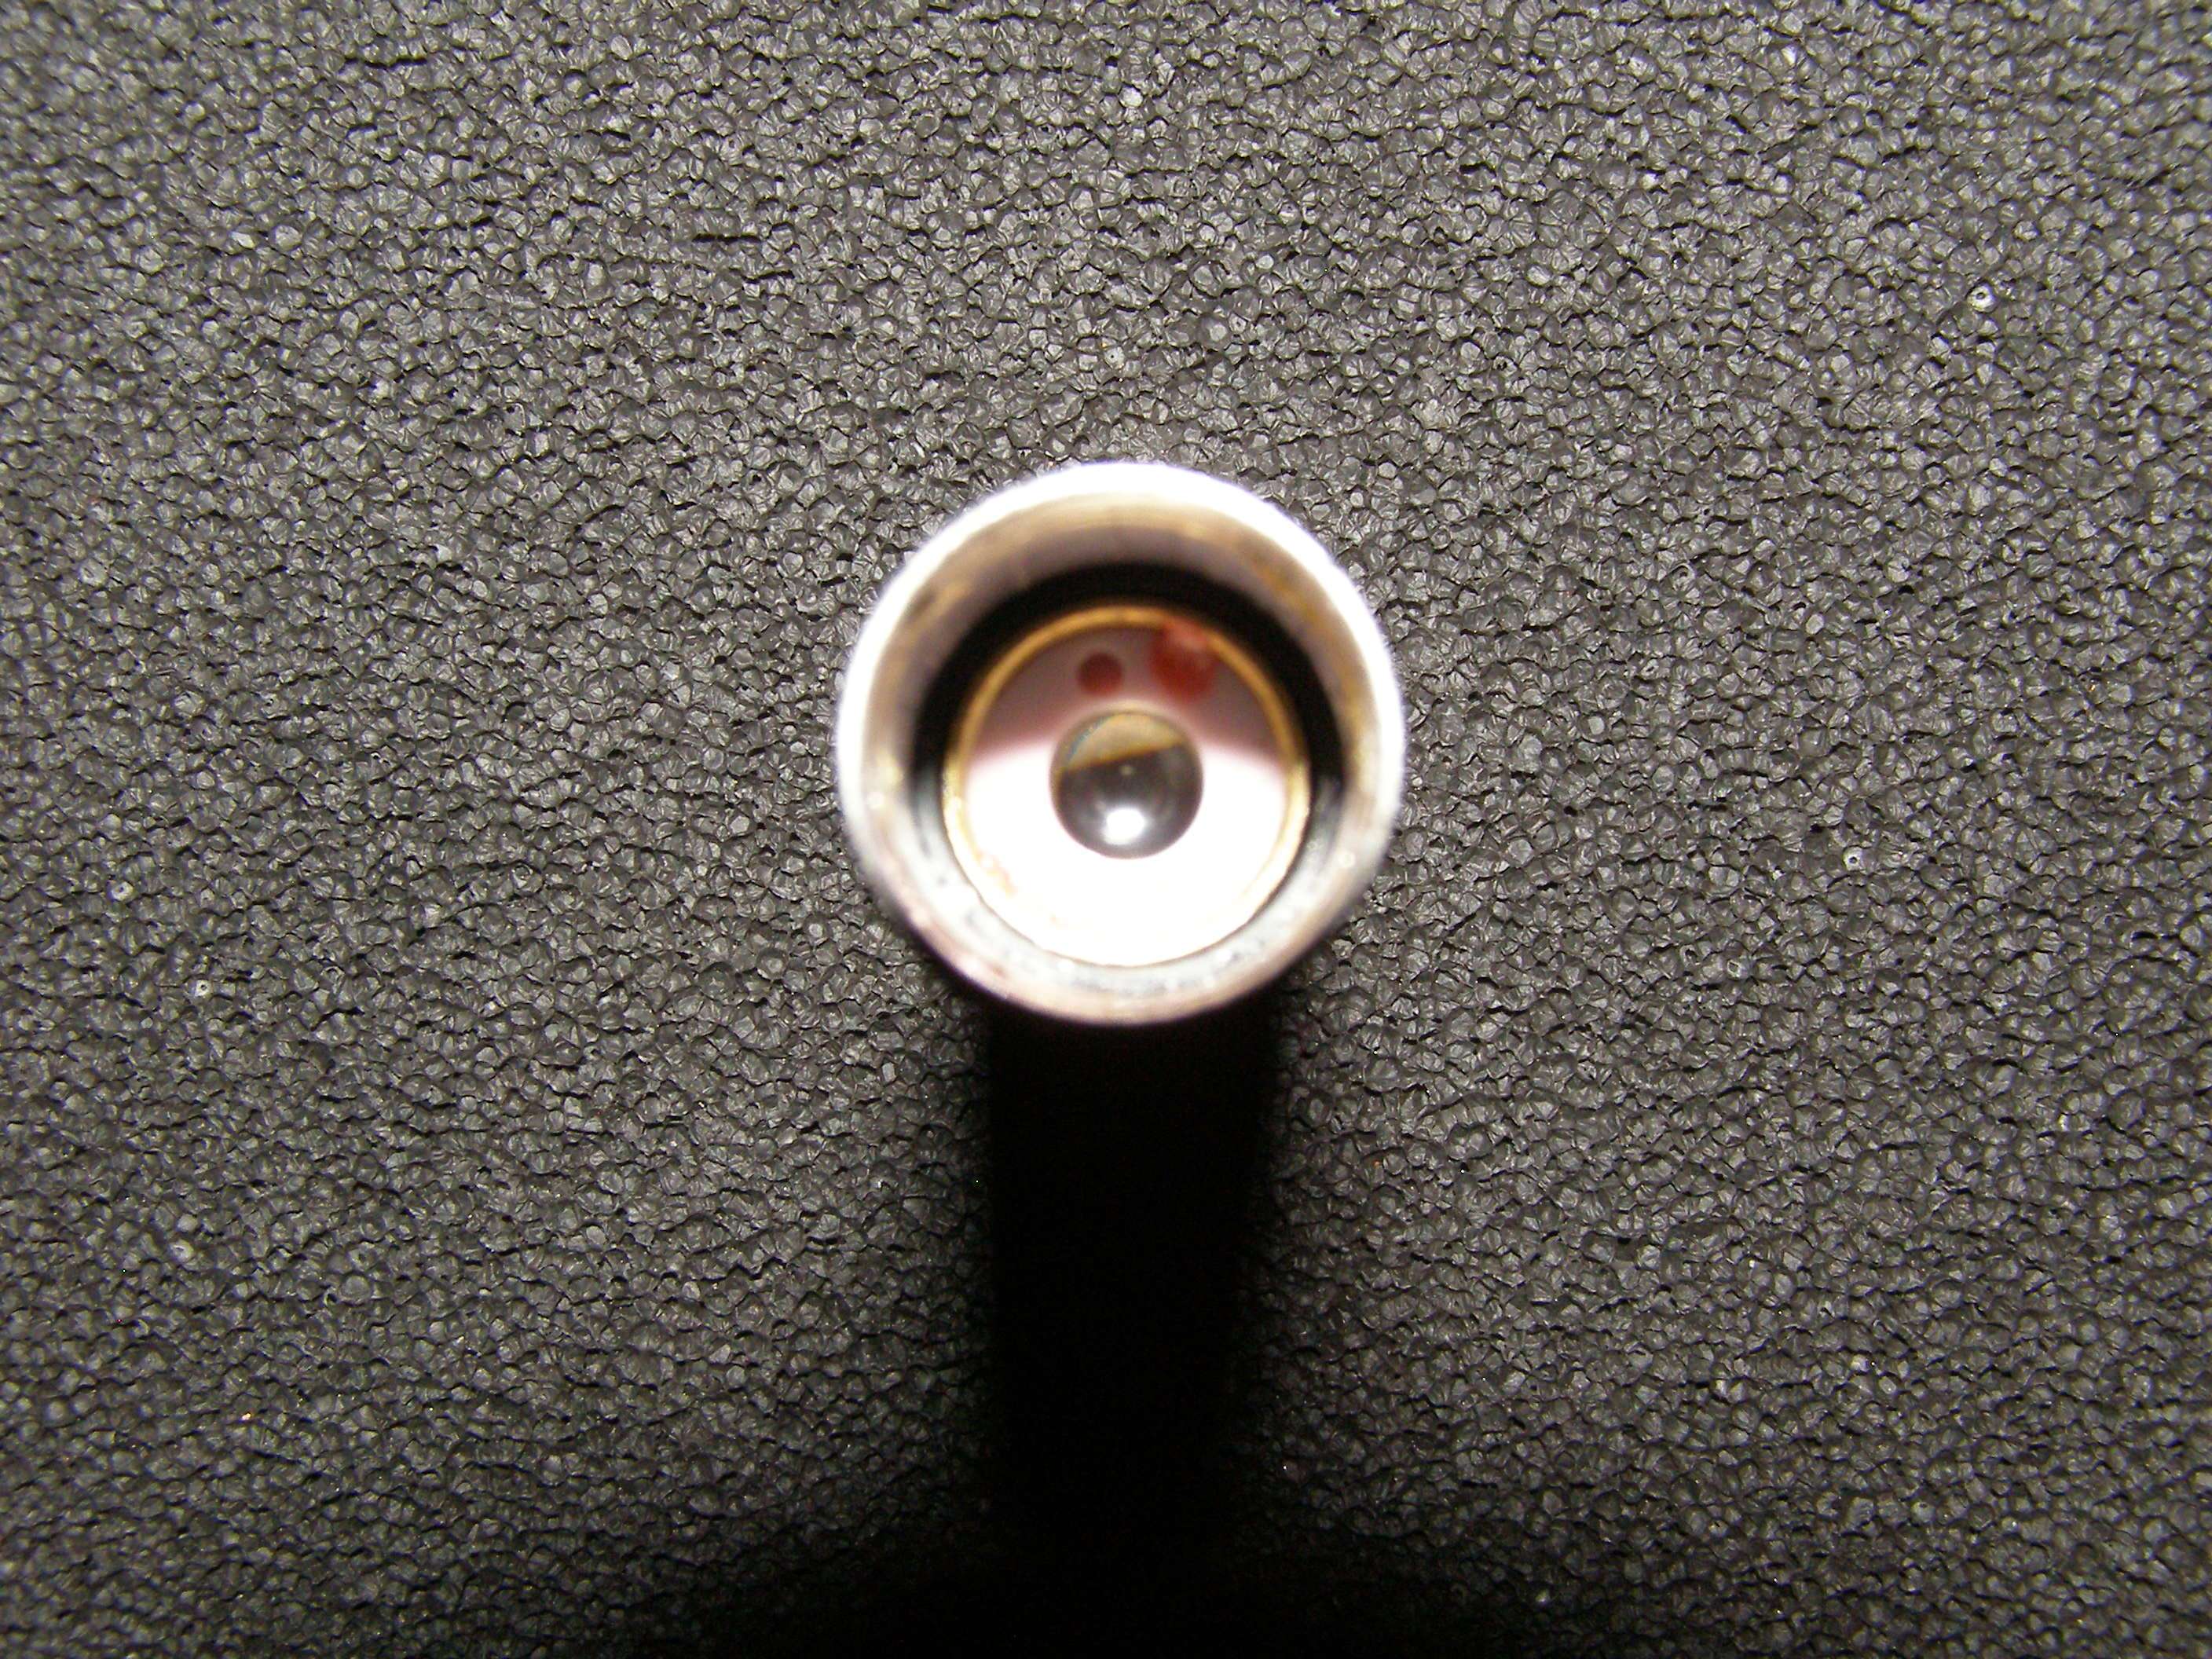
I included a couple of cotter pins in the pic that you could use to get out the lens but it's more of a pain as it twists too much. Just need to make something that is strong enough but small tipped enough to both fit inside the holes and still be able to take sideways torque to unscrew the lens. The lens will start to turn real easy after a couple turns. There's a spring under the lens that is pushing up against it that you can't see yet and as the spring tension drops, it's easier to turn.
The really important thing here is that you DON'T let whatever you are using to remove the lens slip out of the holes and end up putting a mark on the lens! It is plastic and scratches extremely easy. So basically you need to be pushing down on the lens to keep tension on the lens in the holes or you will slip and nick the lens. Think about what you are doing.
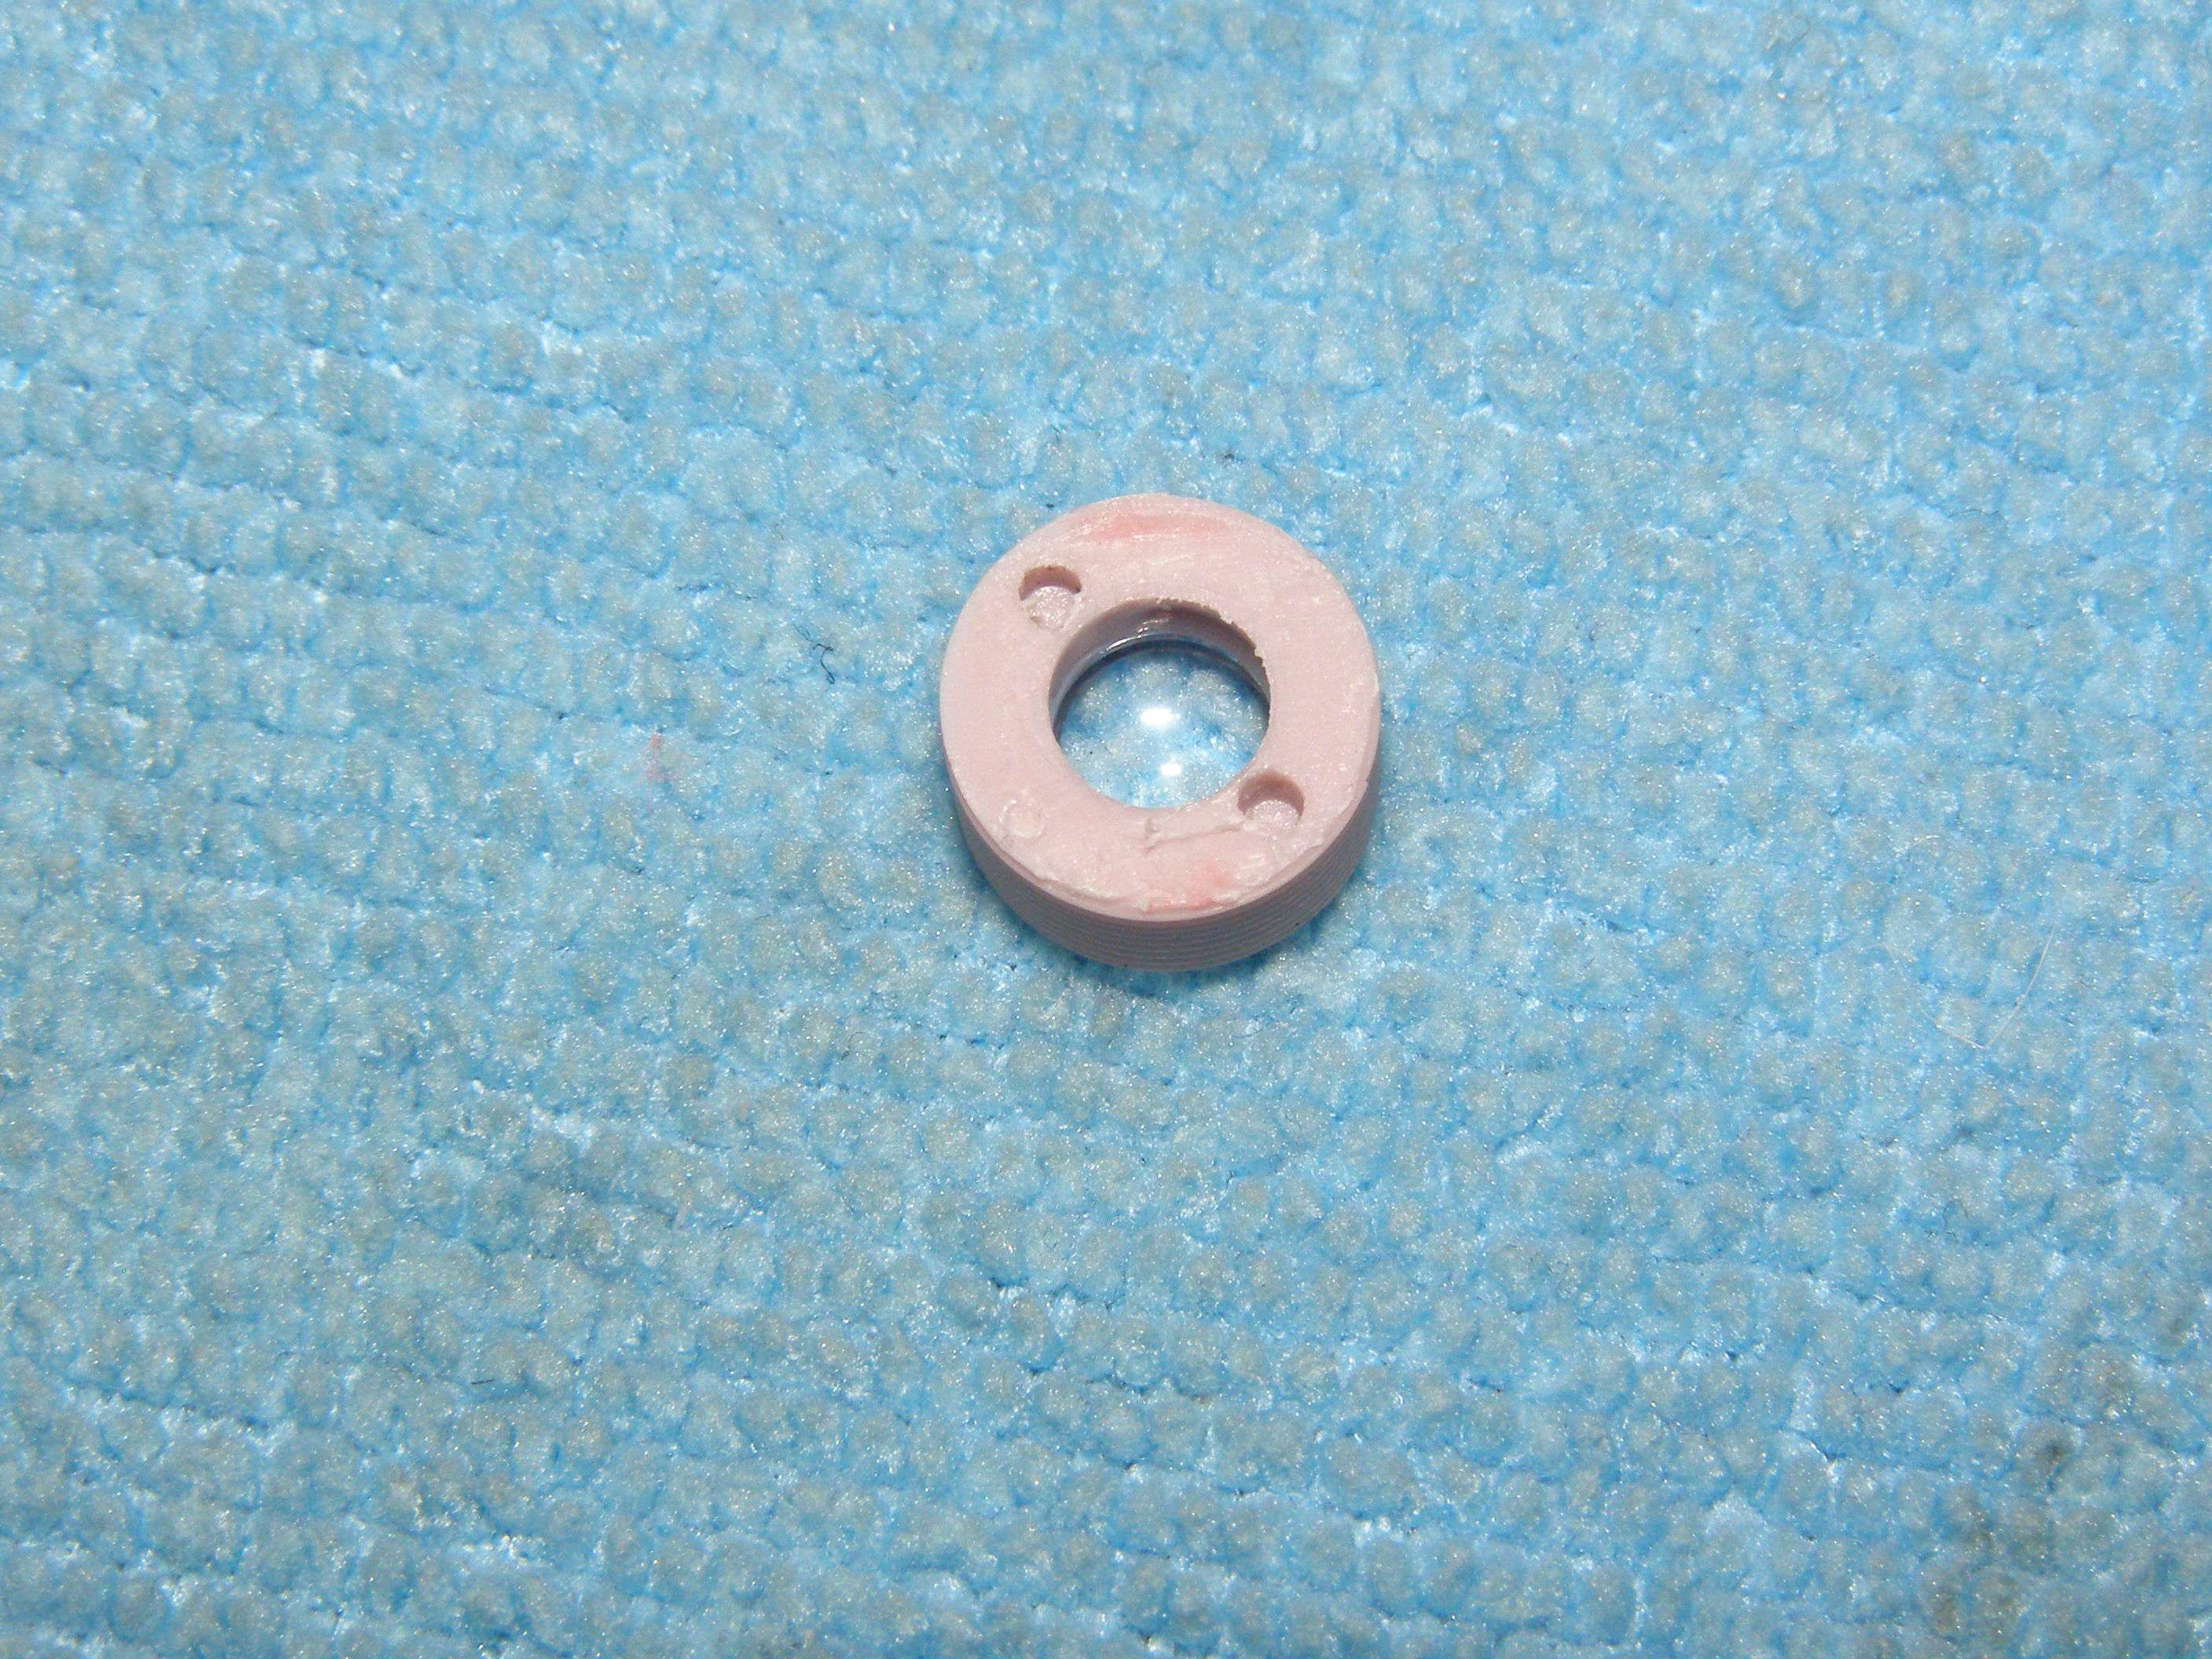
Here's the lens which I immediately place with the holes up on a lint free cloth as it will not mark the lens. The lens on the opposite side of the hole is easy to touch as it is flush or may stick out slightly and you are always trying to be mindful to not touch it. I realize that lint free cloth looks dirty but it wasn't new. It was washed and sometimes there's just a bit of stuff on them that won't come out. Just be careful where you actually place the lens just in case.
This is the spring that was behind the lens. Easy to pull out the lens and end up tipping the host and the spring falls out so you end up searching everywhere for it so it's better to do a lot of this stuff over a lint free rag so things don't go bouncing away on you.
What I am showing you here is what I use to get the glue off the inside of the host where the front cap fits. I had this old knife that somehow
managed to break the tip off of and it ended up being a great tool to not only scrape off the glue but also scrape out some of the aluminum. You are just scraping out where the cap fits back in and then enough aluminum so that the cap will fit back in and smoothly turn without any hangups.
Now, let's meet our candidates and look at some of our simple possibilities for "bridging the gap"
Check out the really cheap simple blue pens with red tips or the white with black tips that you find everywhere as they are great for the next step.
Take off the ends. That entire middle section works like a charm and you have 2 chances to get the next step correct. Both of the ends will be nice and flat/even and an end is what you are going to glue to the lens.
What I did was now that the spring is out, I screwed the lens back in easily and then screwed the battery half back on and screw the lens in until I am at infinity focus. Once at infinity focus, turn the lens in slightly farther and it your dot will get slightly bigger so that you are focusing in just past infinity. You do this so that you have some wiggle room to make sure you can still focus back to infinity when the project is completed.
Now you are trying to cut that bridge piece so that the end side that hits the lens housing and the other side that you cut as flush as possible will hit the lens cap so that there's just a tiny gap left before the entire cap would be all the way in. If you do a good job with this, the gap really won't be noticeable at infinity focus.
Take a razor
Cut off a piece long enough so that it can touch both the lens when it is screwed back into the module and the top inside of the cap (thus creating a bridge between them). It's not the easiest thing to perfectly cut the other side so perfect and also at the exact length needed so you will likely have to play with it.
Take the lens back out.
Hopefully you can see what I've done with these pieces. I used something sharp to scratch into the surfaces of the bridge, lens and inside top of cap so that the epoxy will have more surface area to grab and make a strong bond.
Now, I have many different kinds of epoxy but what I like to use is this professional strength 5 minute epoxy that I got from Lowes. It works very well for this application. Dries very quickly so you can go onto the next step. It is also important that you don't tell your wife that you are using the top of the washing machine or dryer for some of your projects
I use a piece of strong paper that is very smooth (like the back of photo paper), a razor and stir stick.
You want EQUAL parts glue and hardener (unless the epoxy you use says otherwise) and prepare more than needed so it's easier to work with.
Stir up.
Now, after you stir for say 30 seconds or so, what I do is take a razor and keep scraping the epoxy across itself over and over so that you know that you have done a great job of making sure it is COMPLETELY mixed and smooth. At this point with a 5 minute epoxy, you should be able to tell it's just starting to get thicker.
Use the razor to put some epoxy on the outside edge of the side of the bridge that you didn't cut and a tiny bit on the end trying not to get any inside. This is slightly too much glue so I wiped a small amount off.
I use the razor to CAREFULLY put the epoxy on the cap so that it is between the inner and outer edges of the plastic holding the lens. You are not using much at all. Obviously you don't want glue to get on the lens or on the outside threads.
Carefully stick the lens to the bridge so it is centered. Keep turning it around so you can check for a centered position as you will obviously want the other end to glue to the cap end straight.
With this particular epoxy and my even mixing, I can actually screw this back into the module with the spring in place and not break the bond. However, it would be better to just put it aside and wait 1/2 hour until you get the hang of things.
Now when it holds well, you screw it back into the module WITHOUT the spring to the point where you get just past infinity focus again.
Do the same epoxy preparation as above and put some inside the cap and then the same way you did it on the bridge for the lens. In this case, you can and probably should use more epoxy as you are not joining 2 flat surfaces. Just be careful not to get any in the holes. Carefully place the cap on and lightly press down and keep turning the pen around to make sure your tiny gap between the cap and host is even. I usually keep a finger on it for a few minutes to make sure it stays even.
Let it cure upright as above and them you can easily unscrew the whole thing, place the spring back in (when the epoxy is really set).
YOU ARE DONE!!!
This 128mw 650nm WILL light a red headed match (book or stick). Not bad for a fun project and very little$ Changed the white mw sticker for a yellow as all my units 100mw and above are supposed to have a yellow label.
I've tried many things for the bridge and made some that go through the cap that focus with the cap or left the cap as a press fit and made the hole in it wide enough for the end to go through the cap and you turn the end instead of the cap. You can see I've cut down some of the pens so they run off a single 10440 and are still focusable. I suppose I should show how to cut them down also but I need a break.
I have done this process enough so that I could actually do one from start to finish in just over 1/2 hour if I had everything laid out and ready to go but if I take my time it's closer to an hour.
The one on the left is from a 532nm. The lens is setup differently. The threaded portion doesn't have the lens in it. The lens is actually at the top of that piece. Problem with these is that the threaded end needs to have more threads up the shaft to get it to focus within a few inches otherwise you are at the top of the threads and it falls out. You can focus to maybe 4" or so but I think it's kind of a waste since these have high IR, less power and thus don't burn as well. Better just to enjoy that 532nm as is
The way I do this the epoxy I use holds very strong and I have yet to have one come apart. That being said, I never carry any laser in my pocket so I couldn't tell you how much abuse they could take before the epoxy bond would break.
Man, my neck is killing me from typing all of this. Feels like I just wrote my life's work...
BONUS SECTION
Just so you know, I've found that you useually don't get much benefit from the extra voltage of a 10440 with these pens. You do however get a rechargeable battery to use.
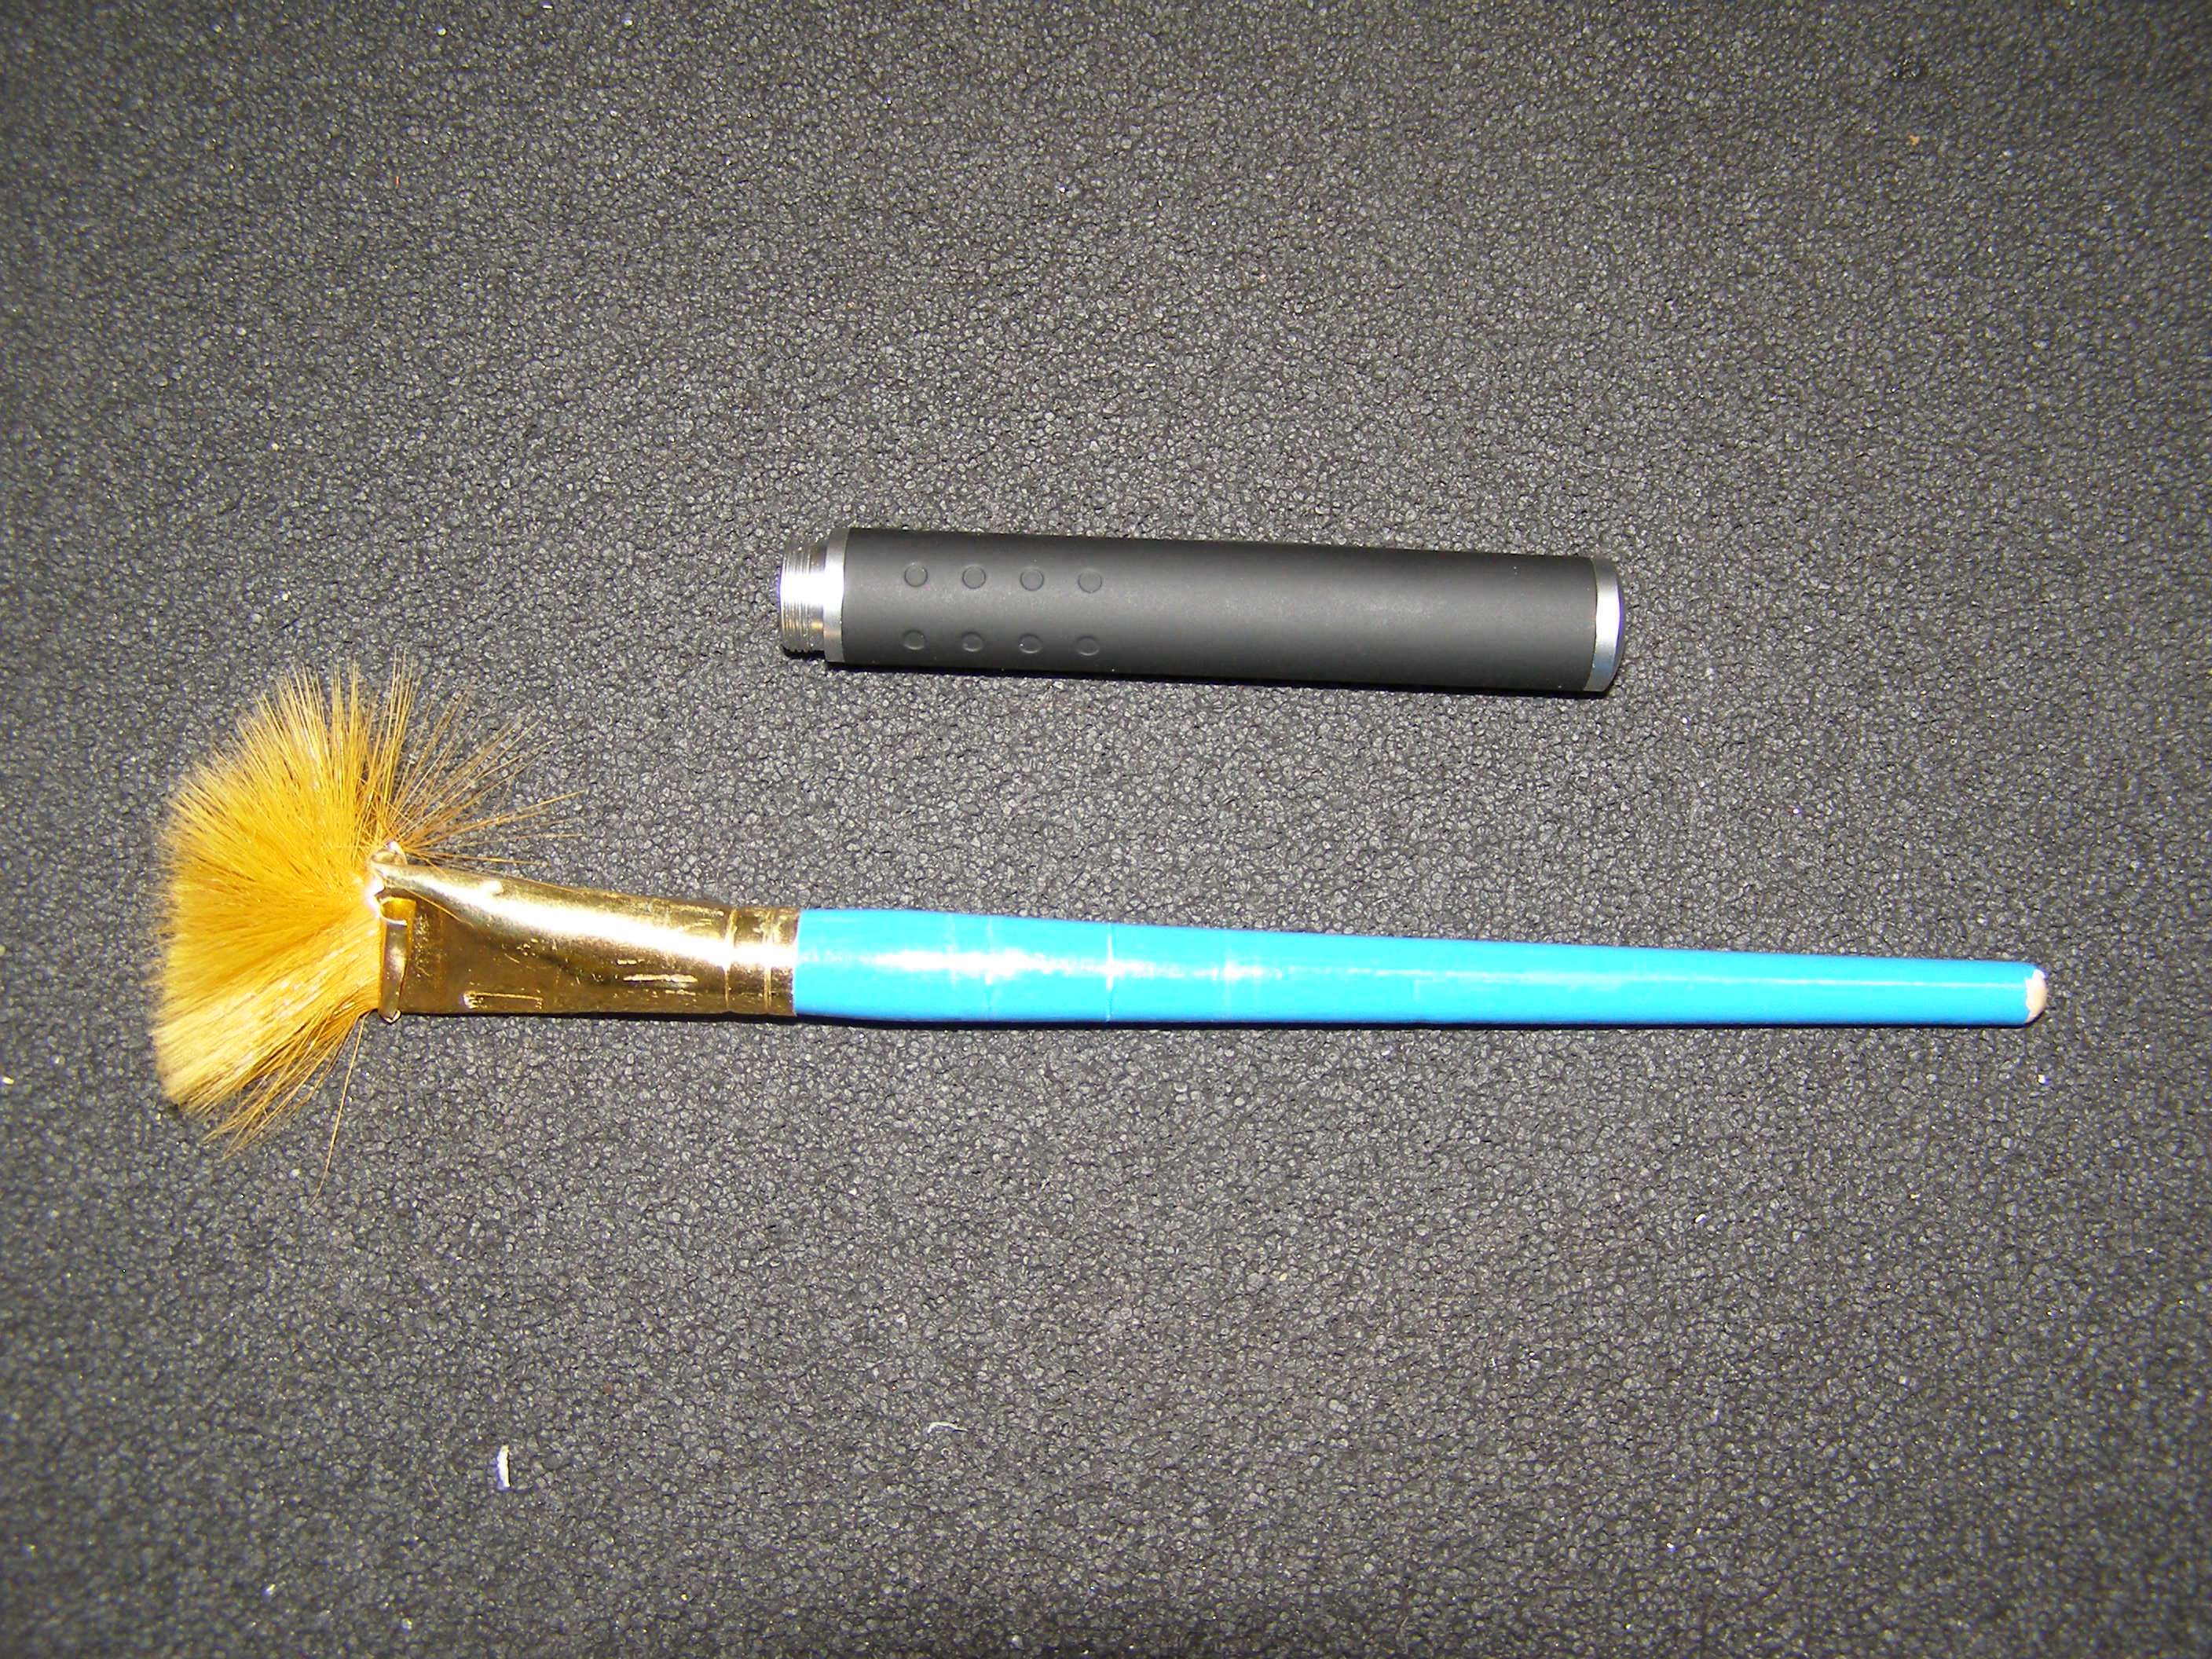
If you would like to make a shorty running on a single 10440, this is what you can do.
Get something that will fit into the length of the back half of the pen. It is best to use something that has a shape like the inside of the cap so that the force is distributed evenly. Obviously you don't want to use something that could mark or scratch it as depending upon what it is made of it may just have a coating of conductive material on it and you need that to stay intact.
You can see that I am just using an old brush. The cap is just press fit in so all you have to do is hold the pen and smack the other end with this tool inside on something hard. Pay attention to what you are doing because the cap will fly off and try to hide on you
What you will usually find inside is a a piece of plastic so that the batteries will stay centered in place. This should just fall out.
Using a small hacksaw (after removing the clip which is hard to get it off without ruining it so just break the thing), cut the back half off so that you get the apropriate length to fit the 10440 with the same amount of pressure against the other side of the pens spring as it originally had. The 10440 should just stick out with the cap back in place. Be careful when you cut the host because it is easy to slip and mark it up with the blade. It's also hard to get a perfect flat cut doing it freehand without holding the pen against or between something. You can always file it to try and make it as flat as possible.
Now all you have to do is press the cap back into place. If there are any shiny marks on the end that you cut, you can always blacken it carefully with a marker. I say carefully because you really don't want to see the marker as it will contrast against the black of the host. The way I press the cap in is by putting it on the end and then taking a piece of soft wood on the other end and try to evenly press it back in. You will have an easier time with this if the cap is centered before pressing. To help keep the back of the cap from getting marked, place that end on a surface that gives a little (just not a super hard surface that may scratch it). I explain all of this because the goal is to make your pen still look like new.
Take a couple of these small section and link them together or just add one of these ends to an existing pen and you could use 3 eneloops for about 3.9V but it looks kind of funny having such a long pen
This reminds me of the Viagra pen I made and posted somewhere else. Has a big rubber..... Button
If you decide to remove the module for another project the easiest way I've found is to use a dremel (if you don't have one, I STRONGLY suggest you get one as it is an absolutely fantastic tool for laser stuff as well as many other things not so important
). IF you can afford it, I would get the model 8220 as it is portable and comes with 2 long lasting rechargeable lithium ion batteries. Think of it as an investment. There are many attachments that are great such as the right angle and flex shaft. You can buy much cheaper bits than the Dremel brand but I've found that they don't last near as long.What I do is remove the little foam spring spacer and front cap and then start scoring it down along an edge that looks the safest from possibly messing up the driver if you cut through (just look down inside and you will see what I mean). Remember that even if you just want the module, you should be saving as many parts as possible for other builds.
Once you have it cut/scored to cutting through, take a flathead and stick it in the score and if you scored it well you just twist the screwdriver and it will split the host.
The modules in the 650nm and 405nm are usually quite small once you remove any plastic spacer around them so they can potentially fit in a lot of things a normal module can't such as a spyro. I would caution you about if it looks like this with the long tab (plastic shown removed from around the brass heatsink). That tab for the positive is NOT the same conductive point as the module and it must remain seperated from the brass.
You now also have another piece that is pressed in and that is the female threaded piece. Notice how it has a slight taper on the end that presses in first.
In this pic above, you see the brass female and you can also see the male threaded end of the battery section. There's a way to get them out without cutting. You can use the same procedure that I showed to remove the tail cap by using a couple of those battery centering pieces
to smack them out as they will hit the ends of them and force them out. Of course you have to be able to get to the male ends inside to do it though which means you either cut the host back or drilled out the module. I say drilled out the module because I haven't found a way to remove the module and save the host. This is a huge pain in the butt.
I have removed quite a few modules to use the host by basically removing the spring foam and tearing apart the driver board so I can get something like a small nut driver down inside and pound it to the end of the host (end of host on soft wood) and then holding the host while continuing to pound at it until I get it out. If you use a screwdriver you are likely going to mess up the host. This is a royal PAIN literally as it is hard to hold the pen and strike the nut driver without moving your hand. The module is usually in VERY hard with glue so it is NOT fun to do.
You can use these pieces to build and lengthen or whatever. Use your imagination and always be thinking about how you can save parts for some future use.
Couple more tips.
If you seem to be losing conductivity such as you have a good battery but your output seems eratic or jumpy (532nm can do this anyways) one way to see if it might be the spring or tail cap where the battery connections make is to try unscrewing the pen about a quarter turn and see if you get your output back. Sometimes what happens is the spring will bend downwards too much and shorting on the inside of the host because it isn't aligned properly or the foam piece is missing or never existed. You can make yourself one out of something that is nonconductive to align the spring like most pens come with. You probably have some semi-rigid foam or something you can use around the house somewhere. You could also make yourself a non-conductive sleeve to put down there (like the one that holds the battery centered) but you don't want it to hit the button.
I make sleeves out of this stiff clear plastic that has sticky on one side. Not sure what it is called but you can find it at auto parts stores. It's used to put a clear piece of plastic on your cars lower panels to prevent stone chips. All I do is form it around the battery and then cut a strip of the backing off so that I can stick it to itself. You can also see radiator huse which is good for turning a small dummy cell into one that fits a larger diameter opening.
If the problem is not the spring, it is likely the tail cap. Have many options with this one. You could use a small pice of conductive material in the cap or a magnet but I must caustion you about the magnet. All magnets are not fully conductive (some will add resistance and essentially be a drain on the battery so try either measuring the battery voltage with and without the magnet on it or do a conductivity test across it). Some have a coating on them and it adds resistance. Another option is a conductive ink pen. It is used for tracing/repairing circuit traces. Believe I got this at Radio Shack (which of course means I WAY overpaid). Just spread some around on the inside of the cap and let harden.
If you decide to make a pen focusable but not have the "bridge" glued to the cap (so that it extends thru the cap or replaces the cap altogether) I would highly suggest you use something really lite so as not to put so much force against the epoxy holding the bridge to the lens. This particular epoxy is very strong and is mixed properly and will handle a lot of abuse BUT there's still only a very small amount of glued surface area so it just makes sense to not stick a lead pipe on it
Last edited:

