Welcome to Laser Pointer Forums - discuss green laser pointers, blue laser pointers, and all types of lasers

LPF Donation via Stripe | LPF Donation - Other Methods

Links below open in new window

ArcticMyst Security by Avery

FREE DIY open source BOOST driver!!! Tested & working!!

Johnyz

0
Joined
Jul 19, 2010
Messages
421
Points
0
Well, I added OVP after killing three of them because of mistakes during testing. The highest risk of the diode dying is when you are stuffing 1.8A into a 445... That is two $5 drivers. But the thing that matters is that you will need to put in new drivers. That means not only unsoldering the diode and replacing it, but unsoldering the battery contacts, possibly the switch too, removing the thermal adhesive etc. etc. It does not only save a small amount of money, but a pretty considerable amount of work, too. It's not really a big design issue (a SOT-323 diode and a 0603 resistor) too.


benmwv

0
Joined
Sep 10, 2010
Messages
1,380
Points
48
OK, I fit it in without enlarging the PCB. This is going off of the one RHD posted (with 1206 caps). I had to remove the direct-diode solder pads on the bottom and put the output cap there, but you could still solder the diode pins to the edges of the capacitor if you wanted.

D2:
12v Zener - $0.27: Digi-Key - 568-6279-1-ND (Manufacturer - BZX384-C12,115)
R4:
100 ohm 0603 - $0.02: Digi-Key - P100GCT-ND (Manufacturer - ERJ-3GEYJ101V)

attachment.php


I still recommend just using the original, but if anybody wants OVP here it is ;)
 

Attachments

  • LD Boost Driver lm3410 R6 R11 - OVP2.png
    LD Boost Driver lm3410 R6 R11 - OVP2.png
    400 KB · Views: 881
  • LD Boost Driver lm3410 R6 R11 - OVP2.zip
    7.7 KB · Views: 56
Joined
Jan 27, 2012
Messages
13
Points
0
Kick ass! It's the few members like you gents that push the edges of this hobby. To think there is nothing like this at this price point being produced in the world is awesome. This forum has the most cutting edge recreational laser builds and info in the world I'm sure.. Maybe I'll kick another 2 bucks into the pot and hope others do to
 

rhd

0
Joined
Dec 7, 2010
Messages
8,475
Points
0

Ben - that's a really elegant addition. Props on that addition. I might suggest popping that zip file back into the OP (and maybe my R10 as well).

It also might be worth adding a brief changelog to the OP - something as simple as:
R9: Description....
R10: Description....
R11: Description....
etc
 
Last edited:
Joined
Mar 29, 2011
Messages
1,056
Points
48
Good going on the OVP! I like it. It really is a pain in the @ss if your blew the IC and have to replace it instead of just the laser diode :beer:
 

Johnyz

0
Joined
Jul 19, 2010
Messages
421
Points
0
One more thing: does Dorkbot really allow for such tight spacing between traces?
 
Joined
Sep 20, 2008
Messages
17,622
Points
113
OK, I fit it in without enlarging the PCB. This is going off of the one RHD posted (with 1206 caps). I had to remove the direct-diode solder pads on the bottom and put the output cap there, but you could still solder the diode pins to the edges of the capacitor if you wanted.

D2:
12v Zener - $0.27: Digi-Key - 568-6279-1-ND (Manufacturer - BZX384-C12,115)
R4:
100 ohm 0603 - $0.02: Digi-Key - P100GCT-ND (Manufacturer - ERJ-3GEYJ101V)

attachment.php


I still recommend just using the original, but if anybody wants OVP here it is ;)

Well done...:gj:


Jerry

You can contact us at any time on our Website: J.BAUER Electronics
 
Last edited:

benmwv

0
Joined
Sep 10, 2010
Messages
1,380
Points
48
One more thing: does Dorkbot really allow for such tight spacing between traces?

Their minimum spacing is 6mils, minimum trace size is 6mils, minimum drill size is 13mills.

@rhd: Will do.
 

Johnyz

0
Joined
Jul 19, 2010
Messages
421
Points
0
I know, but that looks like less than 6 mils to me. Maybe it's because of its size, nevermind.
 
Joined
Aug 14, 2010
Messages
177
Points
18
I couldn`t fin answers for a few basic questions:

Is this driver good for reds aswell?
How´s the efficiency?
Is is it continuous - ?
 

rhd

0
Joined
Dec 7, 2010
Messages
8,475
Points
0
I couldn`t fin answers for a few basic questions:

Is this driver good for reds aswell?
How´s the efficiency?
Is is it continuous - ?

1) Can you give me an example of a RED that you'd be needing to boost above the voltage of 1x lithium ion cell?

2) I think we need more data before we can gain a consensus on this front.

3) No.
 
Joined
Aug 14, 2010
Messages
177
Points
18
1) Can you give me an example of a RED that you'd be needing to boost above the voltage of 1x lithium ion cell?

2) I think we need more data before we can gain a consensus on this front.

3) No.


Hi rhd!

Well, It´s not very common to use linear drivers on a LOCs with one cell right? There arent alot of options and it doenst take long for the batt to drop in voltage and not being able to supply what`s needed.
I mean people use boost drivers on locs all the time..


I thought you could figure that out right after you made the driver :p
 
Joined
Jan 14, 2011
Messages
3,816
Points
63
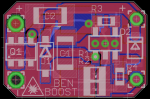
So regarding efficiency... I just did some math, assuming we are using this to power a 12x BR diode at 500mA with a 3.7V li-ion.

The equation for efficiency is as follows, where n = efficiency.

n = (1-D2*Vd/Vin)/(1+(Rdcr+D*Rdson)/(D2^2*Rout))

Vd = .35V, which is the typical forward drop of the Schottky.
Vin = 3.7V because that's the nominal voltage of a li-ion
Rdcr = .047 Ohms, which is the resistance of the inductor (I used another inductor for my version of this design - smaller)
Rdson = .17 Ohms, which is the on-resistance of the switch (stated in the datasheet)
D = Duty-cycle, which is calculated as (Vout-n*Vin)/Vout, so I substituted that into the equation.
D2 = Defined in the datasheet as (Vin*n)/Vout, so I substituted that into the equation.
Rout = equivalent resistance of the load diode - Vf/I.

That left me with this:

n = (1-0.05833333334*n)/(1+(.2191380569*(.217-.1048333333*n))/n^2)

Then, using Maple to solve it (I did all of this in Maple, by the way, because it's such a great program :p), I got three values of n = 0, .917, and .049.

Obviously, the value we will be using is .917, because the value of 0 is trivial and the value of .049 is the conjugate of the efficiency (other side of the curve).

So, assuming the values obtained for all parts are equal to the typical value stated in data-sheets, we are looking at a minimum efficiency of 89.7% (the formula stated above says that it does not account for losses totaling less than 2%, so we can take that into account).

Not bad for such a simple driver. Often better than the Flex!

I redid the math for one driver set at 900mA outputting 4.6V for a 445nm diode (assuming we would parallel these two). The minimum efficiency comes out to be 88% even. Turns out, paralleling drivers shouldn't reduce the efficiency of the entire system. So, we are looking at an input of 2.4A at 3.7V to power a 445nm diode at 1.8A.

Not bad at all!

(Sorry for the long post!)
 

DTR

0
Joined
Jun 24, 2010
Messages
5,684
Points
113
Not bad at all if right. My very loose estimate on the flex puts it @ 81% efficiency.:D

The 1W 445 modules I build are set to 1040mA and pull 1.3A from the power supply @ 4.2V. So I am figuring (100%/1300)*1050=80.76%
 
Last edited:
Joined
Jan 14, 2011
Messages
3,816
Points
63
Ah, very nice ^_^

As does my FlexDrive build with my 445 in it... of course, I turned the pot all the way up, so efficiency is certainly lower. In this case, I am drawing about 2.3A at 3.7V and putting out 4.5-4.6V at 1.5A or so.
 
Last edited:


Top