Welcome to Laser Pointer Forums - discuss green laser pointers, blue laser pointers, and all types of lasers

Buy Site Supporter Role (remove some ads) | LPF Donations

Links below open in new window

FrozenGate by Avery

Electronics Tips

Joined
Sep 4, 2010
Messages
57
Points
8
Hi
i will be building a list of any tips i have in electronics as i learn :beer:

Tip 1 (gotta start somewhere :P)

WANT A VERY ACCURATE TRIP POT?
but only have a 100 Ohm one?
try putting a resistor across the outer pins (the track) :)
if you add a 10 Ohm resistor to a 100 Ohm pot you get a ~10 Ohm trim pot :D

Tip 2
dnar said:
Do you need a non-polarised electrolytic for an audio project and you do not have one? Wire two identical polarised electros in series by joining negatives. Resulting C is half the value of capacitors used.
I tested this on an NE555P using sink/source with 2 100uf 50v electrolytic caps and after about 3hrs (10k+cycles) at 12v ive notice no change in farads on my DMM, also used in RC timing and pulsed more or less identical time to 47uf cap. :gj:

if anyone has tips plz add, i will include them here :thanks:

ps will try some suggestions and post my findings too :D
 
Last edited:


I think he means he is going to compile electronics tips in this thread as he learns 'em.

V=I*R <remember this one.

how bout for two resistors paralleled: product over sums
(R1*R2)/(R1+R2)
 
Think of ohms law as a pyramid

v
i r

Cover up the letter you are looking for, and the remaining letters show the equation to use.
If you need V, look at the pyramid, it's shows I*R.
Need I? Look at the pyramid, it's V/R.
Need R? V/I
 
Do you need a non-polarised electrolytic for an audio project and you do not have one? Wire two identical polarised electros in series by joining negatives. Resulting C is half the value of capacitors used.

Are you building a project that requires universal AC/DC low voltage input? Use a diode bridge. This also protects you circuit from reverse polarity DC connections.
 
These are more utility-tips:

- If one does not already exist, cut a finger-diameter hole in the sponge that comes with your soldering iron. Then to easily wipe off any solder, wipe your soldering tip on the inner circle of your sponge. I find a single hole is better than multiple holes that some sponges have.

- Put a blob of solder on your soldering iron tip any time you're going to leave it for more than 1 minute (including when you're done!). This protects the tip from oxidization, especially when heated, and your tip should last near forever.

- If you have a pair of helping hands that has one of those magnifying glasses, remove the magnifying glass, and attach one of the claws to the magnifying glass connector instead. Now you have an adjustable helping hands.

- Need a virtual ground, or a fixed voltage in between your power/ground rails? Don't depend on a voltage divider, or not directly, because your load can affect the voltage. Instead construct a your virtual ground using op-amps or buffers. A better description and example circuits can be found here. I'd also suggest reading over his guides, as they're easy to follow and contain very nice tips and tricks.
 
That sentence makes no sense at all. :tinfoil:

lol :thinking: :yabbem: , um edited :whistle:

i guess my built in english translator to finger typing have issues :crackup:

Bionic-Badger said:
...eter hole in the sponge that comes with your solder...
i had a job soldering connectors/ethernet boards and they used stainless steel scouring pads but were gold in colour (not sure what metal) but they worked a treat, so with that in mind im thinking of making an iron stand out of a wire coat hanger with a metal camping cup to hold the pad.

got to say im gonna try that elec' cap dnar, tho not sure if its going to degrade the film/oxidisation/etc dielectric between the conductors, still worth a try, will bung the tested caps on DMM to see if theres any change in farads.

:gj:
 
The supermarket dishrags and household chemicals section usually have stainless steel sponges for pot scrubbing. They are made from really long lathe shavings and are great as sponges to wipe your soldering iron on.
 
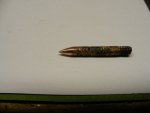
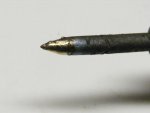
I unscrew my soldering tips , chuck them in a drill and reshape them with a file and then finish with 400 grit emery cloth. When working in tight places and with SMD components the 60* tip can block your view, cause bridges and blobs. Just be sure to re tin as soon as it heats up. The drill chuck may dent the threads on the tip. No problem, its soft copper and will straighten them right up when threaded back in. Tighten firmly with pliers.
 

Attachments

  • 12tip.jpg
    12tip.jpg
    179.6 KB · Views: 88
  • 13tinned.jpg
    13tinned.jpg
    171.2 KB · Views: 92
never use your tounge to test a 9 volt battery
never carry a 9 volt battery in your pocket with pennies(or pence)
 
I unscrew my soldering tips , chuck them in a drill and reshape them with a file and then finish with 400 grit emery cloth. When working in tight places and with SMD components the 60* tip can block your view, cause bridges and blobs. Just be sure to re tin as soon as it heats up. The drill chuck may dent the threads on the tip. No problem, its soft copper and will straighten them right up when threaded back in. Tighten firmly with pliers.

Good Irons have plated tips to protect the copper core. NEVER grind/file them! You only wear the plating off.

I was always taught to NOT wipe the tip before putting it back in the stand. Always leave solder on the tip as a protective layer.
 
Always work with one hand when working with high voltage. If you use two, and jump the circuit you may die. Also use a wire to short any capacitors because they may have a charge. Even static electricity will charge them. When stored always keep a wire connected to all connections on the bigger caps. When I say big, I mean...
2q3x7nl.jpg


Back
Top