

IsaacT
0
- Joined
- Aug 25, 2010
- Messages
- 5,950
- Points
- 83
THE CYPREUS II COPPER HOST FROM SINNER
Hello everyone! I have had this host for about five days now, and I have been putting off this little
review for a bit until I had the time to give it some attention...
So, let me introduce you all to the newest host from Sinner, the Cypreus II!
I had originally simply asked Sinner to build me a custom copper host fit for a single 18650 as
something a little different and unique as that is really what piques my interests with hosts.
I asked that it be sleek and elegant and basically told him as long as it met those criteria I was
a happy camper and he could use whatever ideas he had.
I had no idea it would become a host line, but I guess that is fine haha. At any rate, it is what
I asked for and I am really loving the feel of the copper in my hand. The size and weight are perfect IMO.
Length: 6.2"
Width: 1"
Weight: 375g
Battery Configuration: 1 x 18650
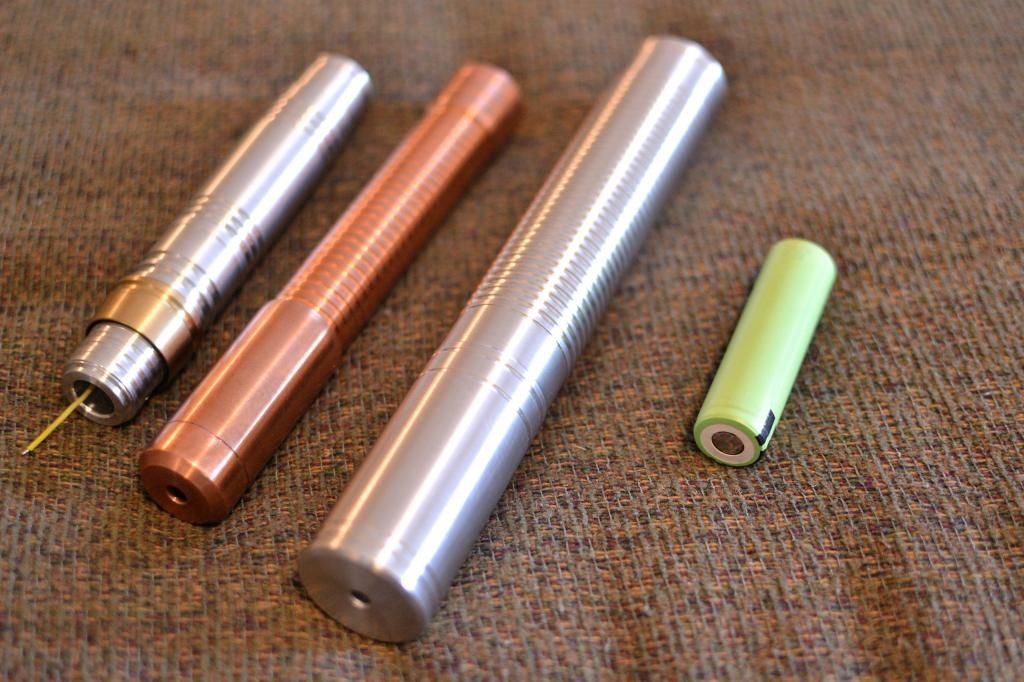
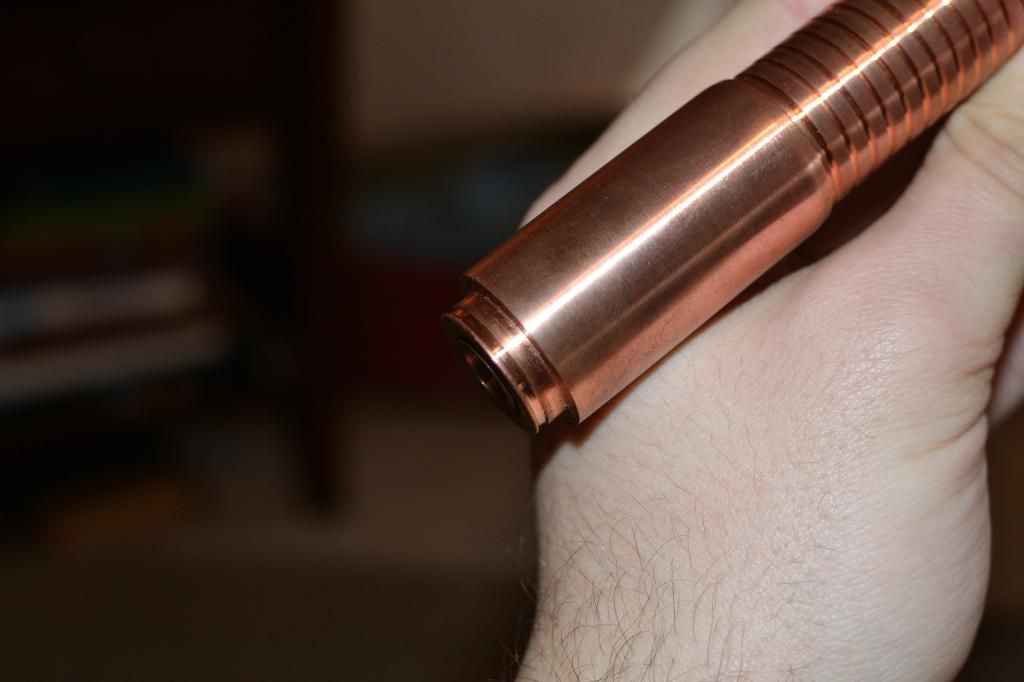
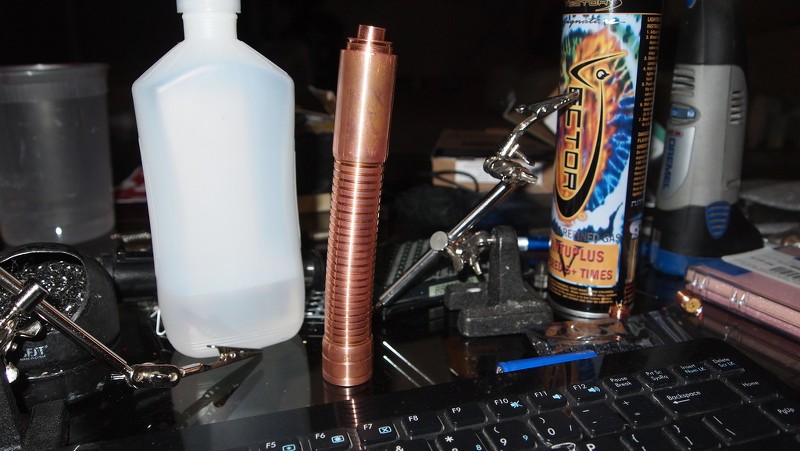
Pictures of the host:
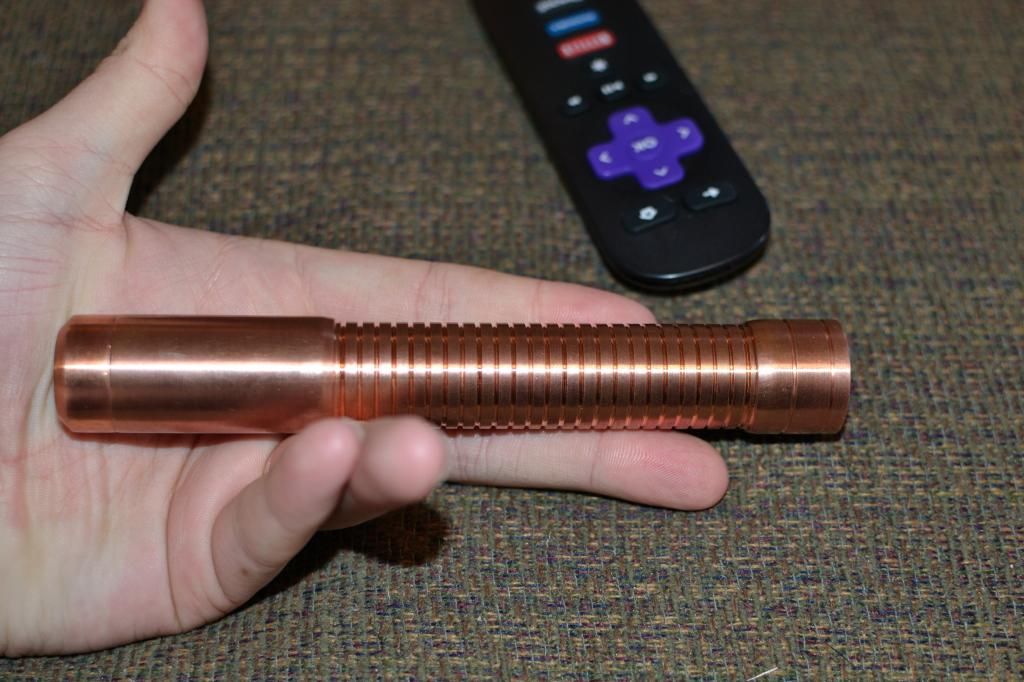
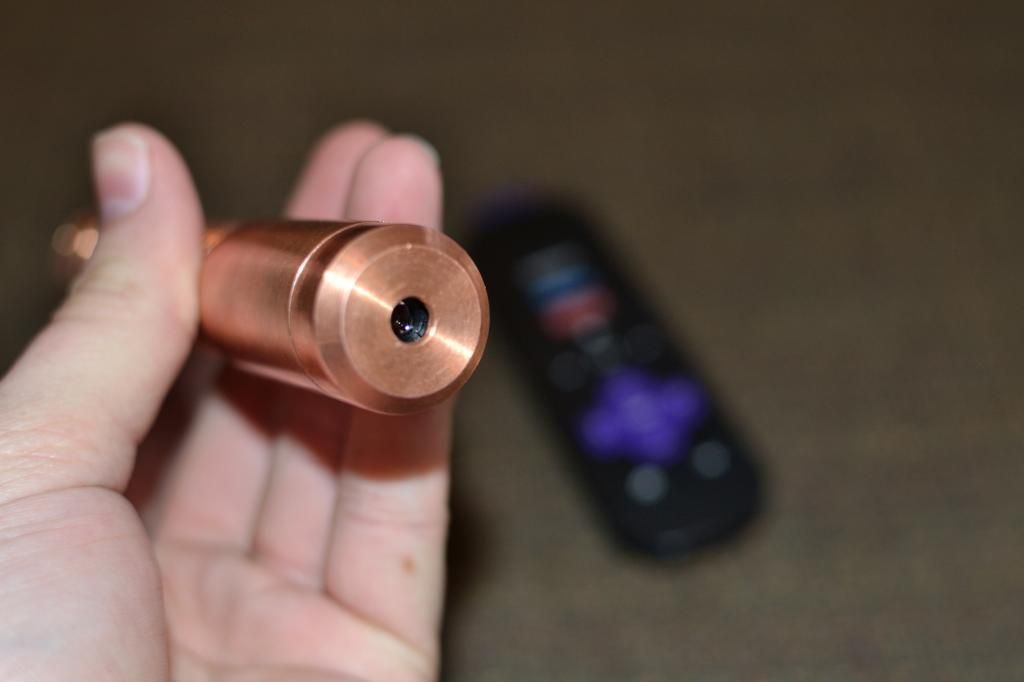
Anyone have a Roku Box?
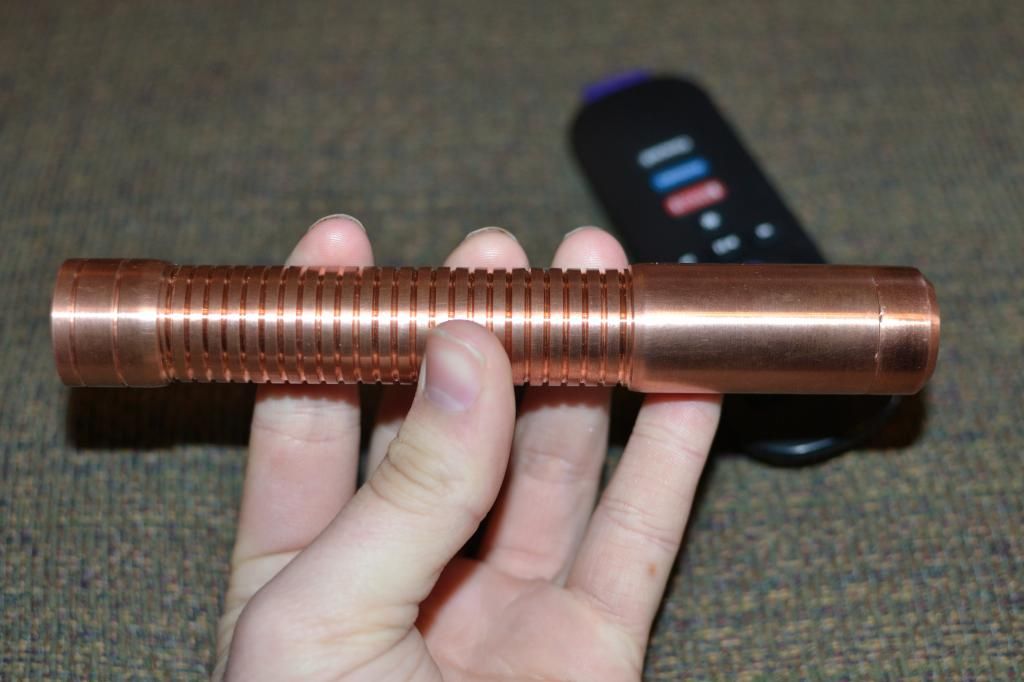
Seriously, anybody have one? Lol.
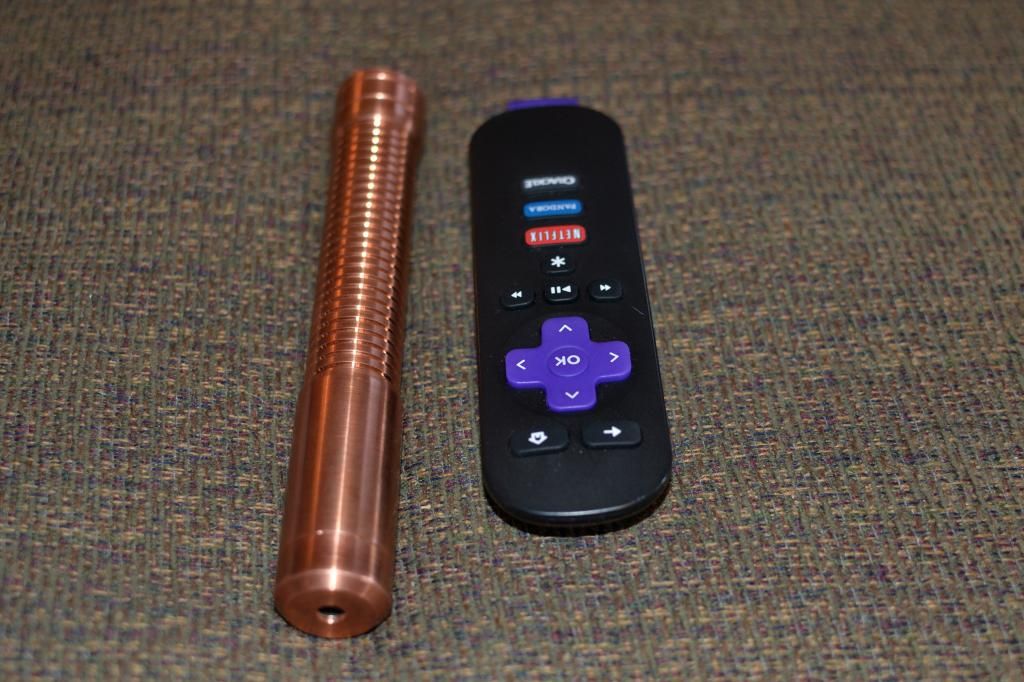
Next to some other hosts and a battery:
Note no silicon oring:
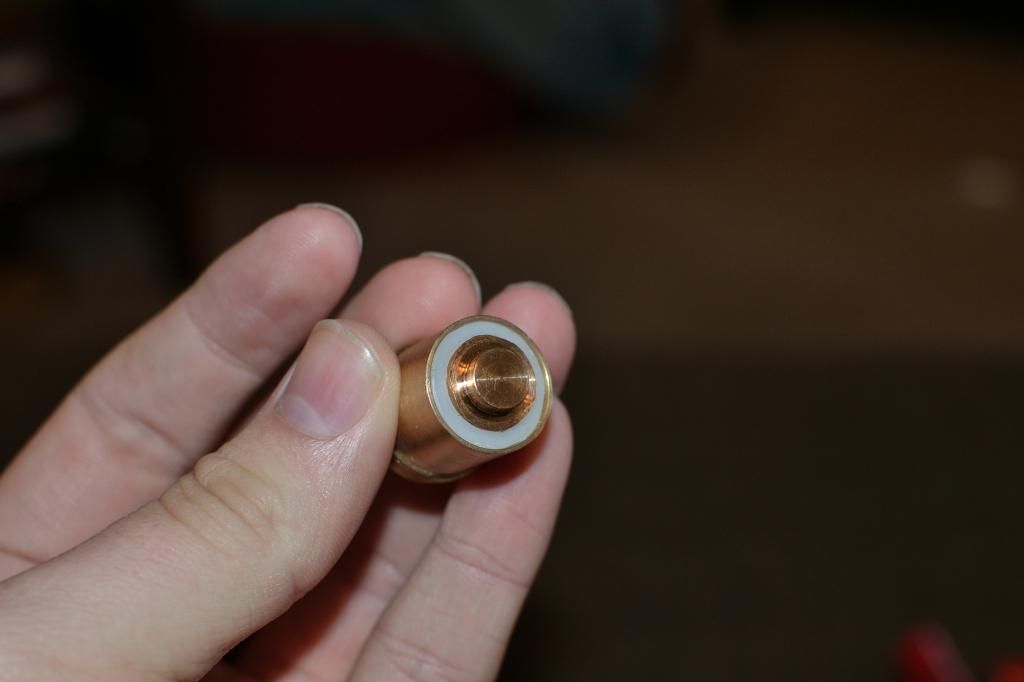
Hooray for Focus Adapter!
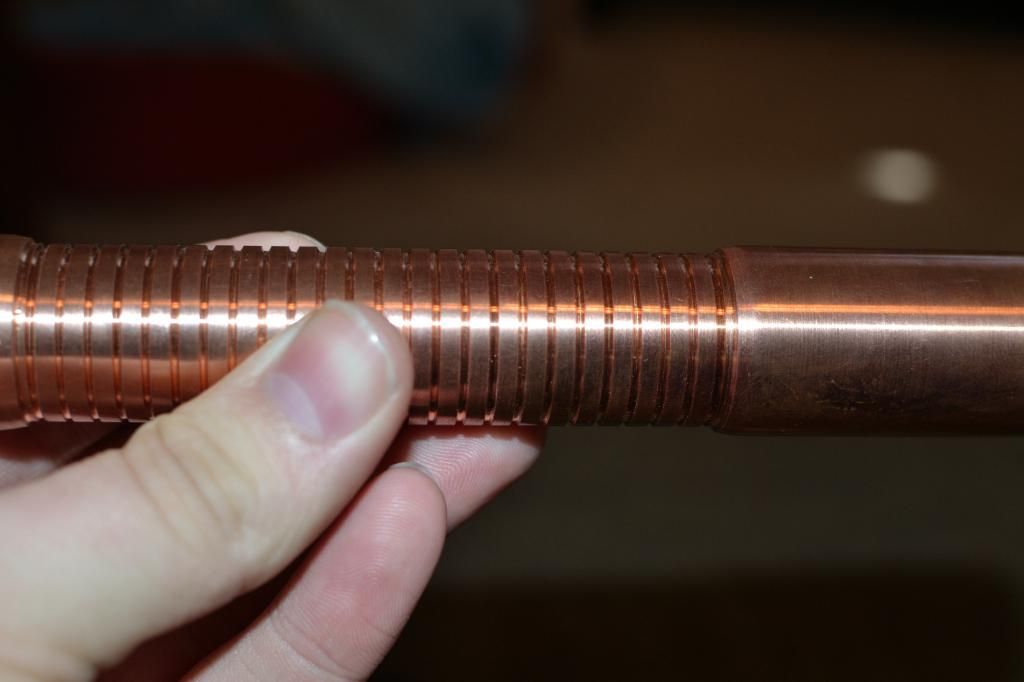
Notice here how the tailcap is inset into the host. The notches and fingernails are how you gain passage.
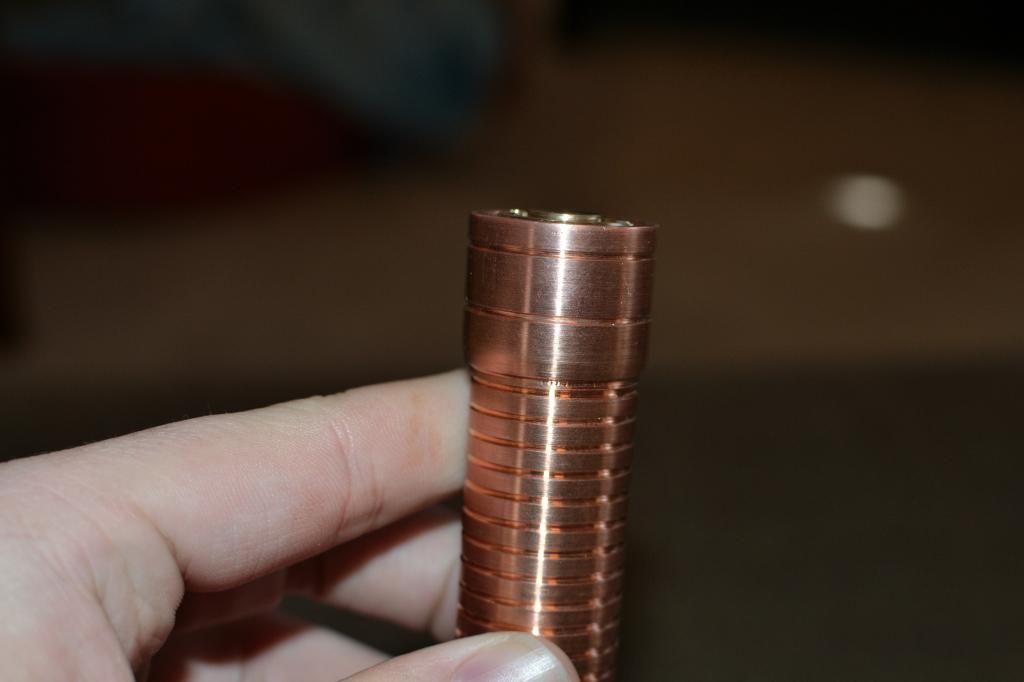
Lovely Grooves:
Tailcap from the side.
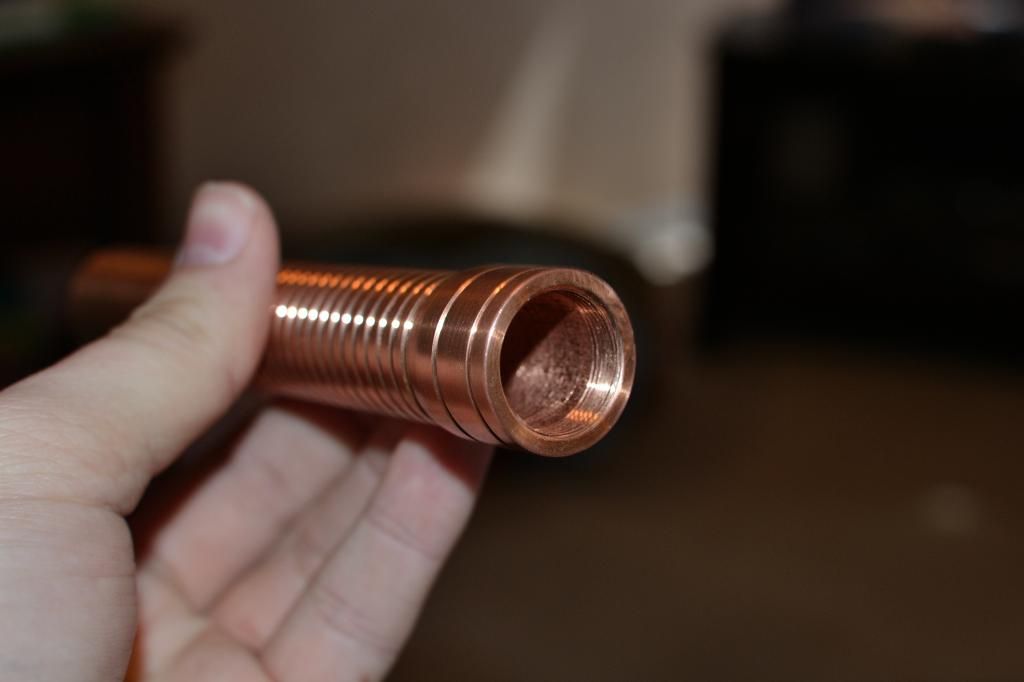
The front from the side. I think this is the only host Sinner has made withOUT being a pressfit.
And I am pleased it isn't as well. Twisted too many threads!
More Focus!
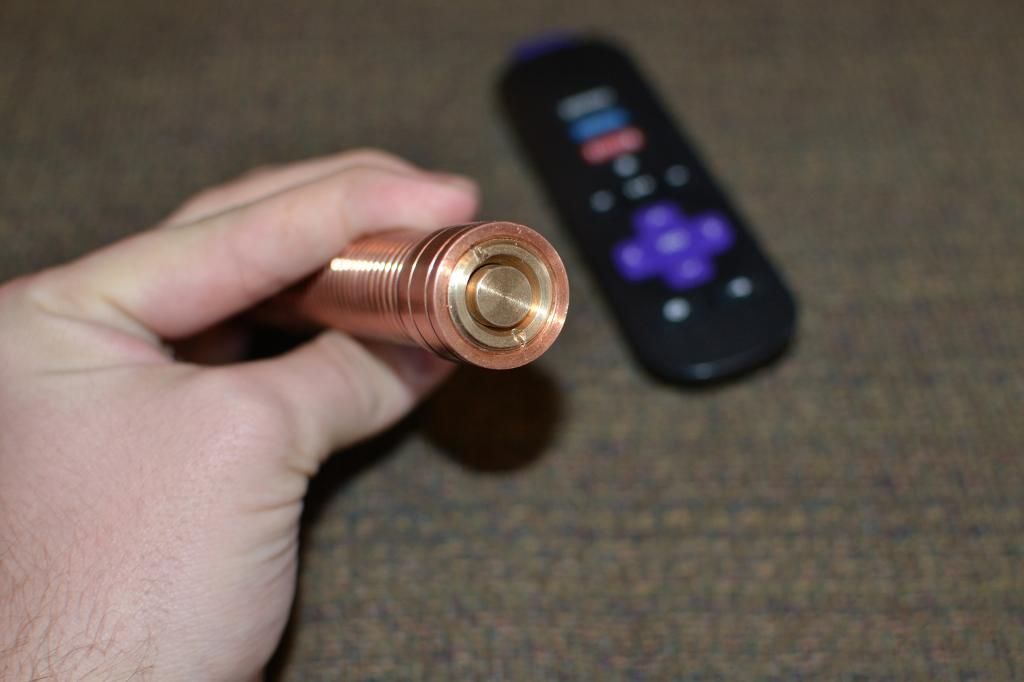
Focus from the rear!
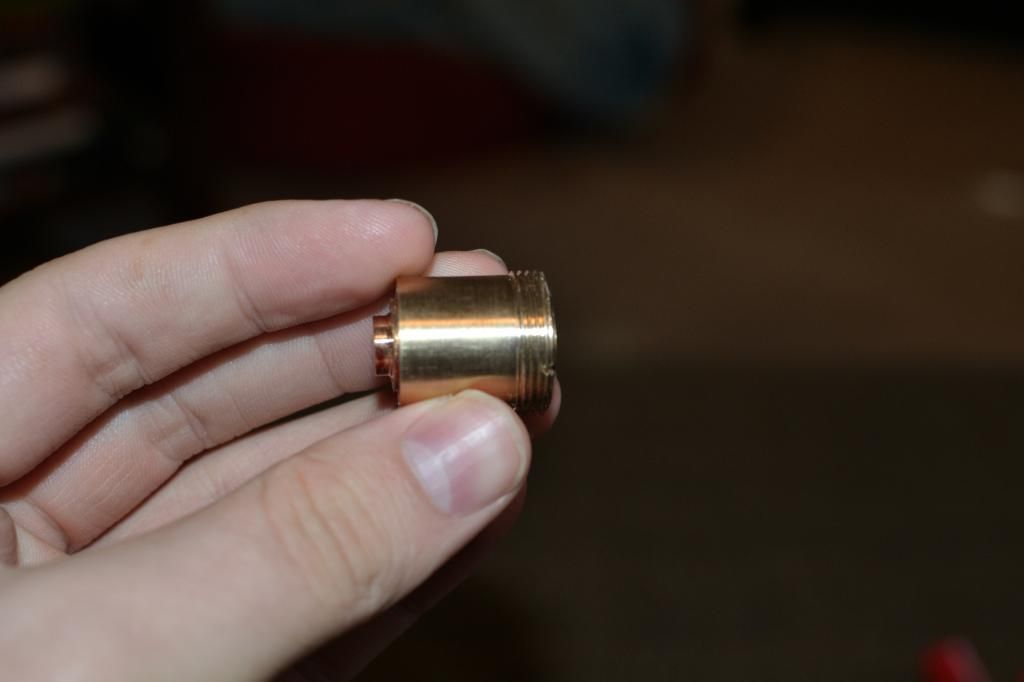
Tailcap removed.

And driver board with holes and space for a contact board....I presume?
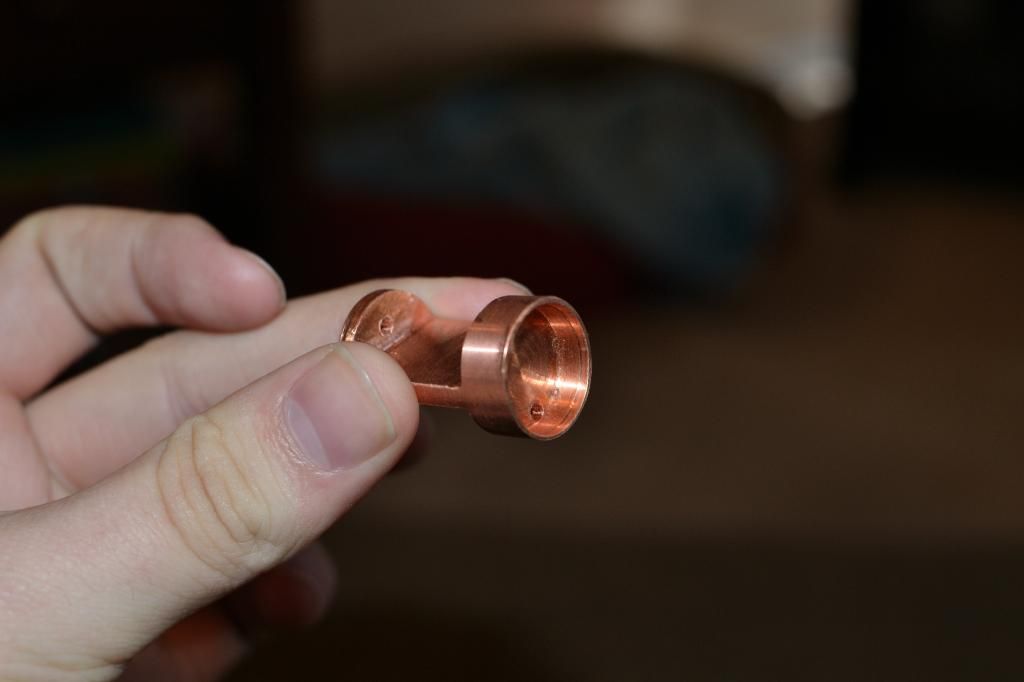

Where the battery goes!
In case you didn't understand that last part!

My Impressions:
THE GOOD
1. The weight and feel of the host is fantastic.
2. The thermal capabilities will be stellar.
3. The brass clicky adds a really professional feel which is nice, considering the cost for this
particular unit was 140 dollars.
4. The design is nice, and the grooves along the handle really add a flair to it that I admire.
THE NOT-SO-GOOD
1. There are a number of machining marks and nicks on the body
2. In his sale thread he mentions a silicon ring to help keep focus tight. Mine didn't come with one,
although the slot is milled for it.
3. The Tailcap is difficult to remove. Due to it being inset, one must rely on fingernails to twist it most of the way out.
4. The build requires a contact board and spring, but it does not come with either.
5. The spring must be a good 2 inches or so as the battery tube is slightly too long.
SUGGESTIONS:
1. Shorten the battery tube some(maybe 0.5inch or so). This will save copper and lessen the size
requirement of the spring.
2. Include the spring and contact board. The presale prices are much lower than the initial unit's
cost, but still not having to shop around is always preferred.
3. The tailcap I am unsure of how to improve. For what it is it seems to be the best design I can
think of. The copper appears difficult to work with which is why I assume there are no threads
between copper on the host itself.
4. Include the Silicon ring you mentioned including.
5. Try to reduce the number of nicks and dents that get left in the host. I understand copper is
difficult, but it did surprise me when I saw it for the first time.
BUILD THREAD TO FOLLOW IN A FEW DAYS
-Waiting on my Diode from DTR; he was kind enough to send a contact board for me- still need to
source a spring however.
Thanks for looking, I will update the thread when the build is completed!
-Isaac
THE BUILD! V1 Atleast*
Well i got the diode in yesterday and built her, so I have step by step build pictures and all that
and a few beamshots, however not long after I made her the diode was crippled. I have a feeling
the die cracked or something because now the output looks like a striped circle instead of a bar.
It is weird. But, I will post
the initial build so everyone has an idea of how the host takes to a diode.
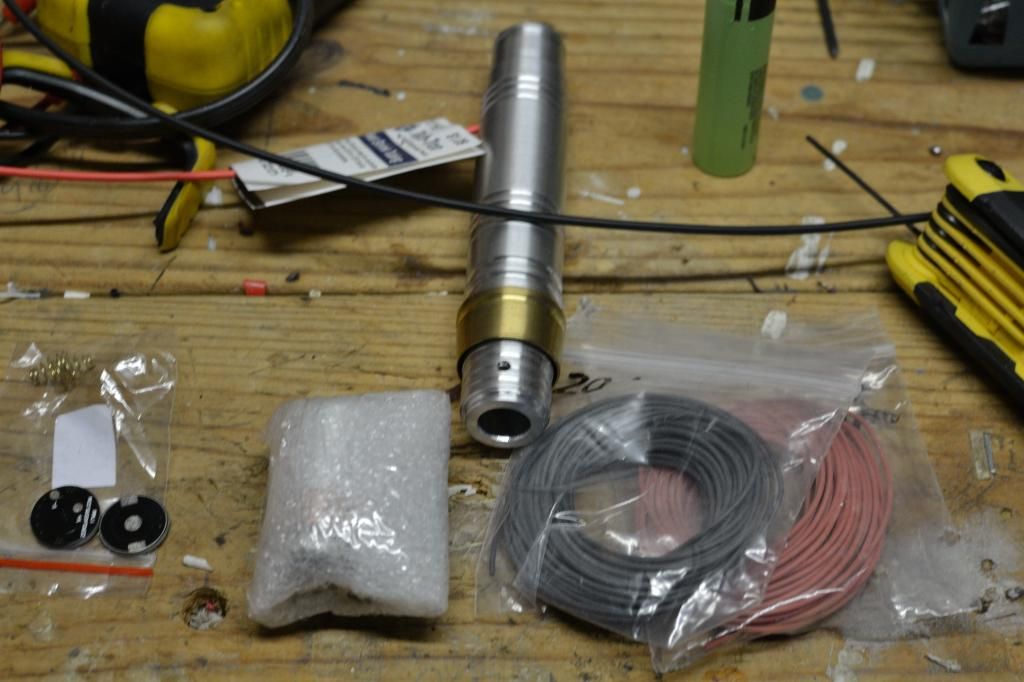
1. First I got all my parts together. Note: picture has my other host I made a laser with last night, parts
are all there though.
Parts, Components, and Tools
1. P73 Mitsubishi Diode from DTR set to 1.2A
2. Copper Cypreus II Host
3. Flaminpyro Silicon Wire
4. Fry's Electronics Heatshrink Tubing
5. Soldering Iron w/ Solder
6. Helping Hands Contraption. *note: very unwieldy IMHO
7. Contact Board and Spring from DTR
2. I decided to work on the contact board first, as I usually have some difficulty soldering the
spring to the board. Sure enough, it took me a good thirty minutes to get this done, but here are some pictures:
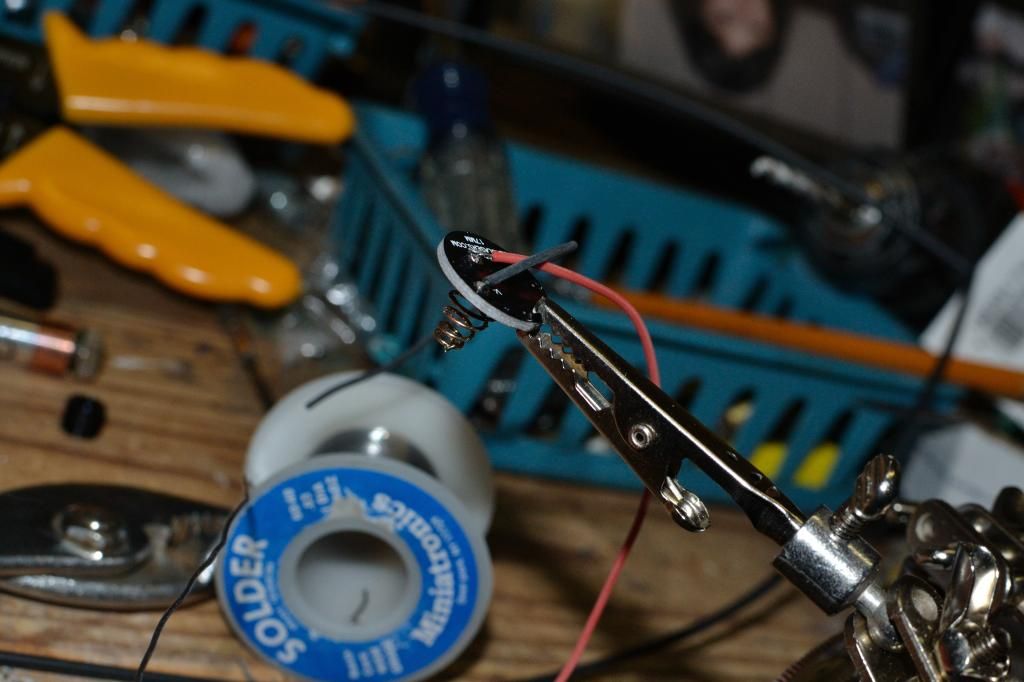
2a. Adding solder to the contact board.
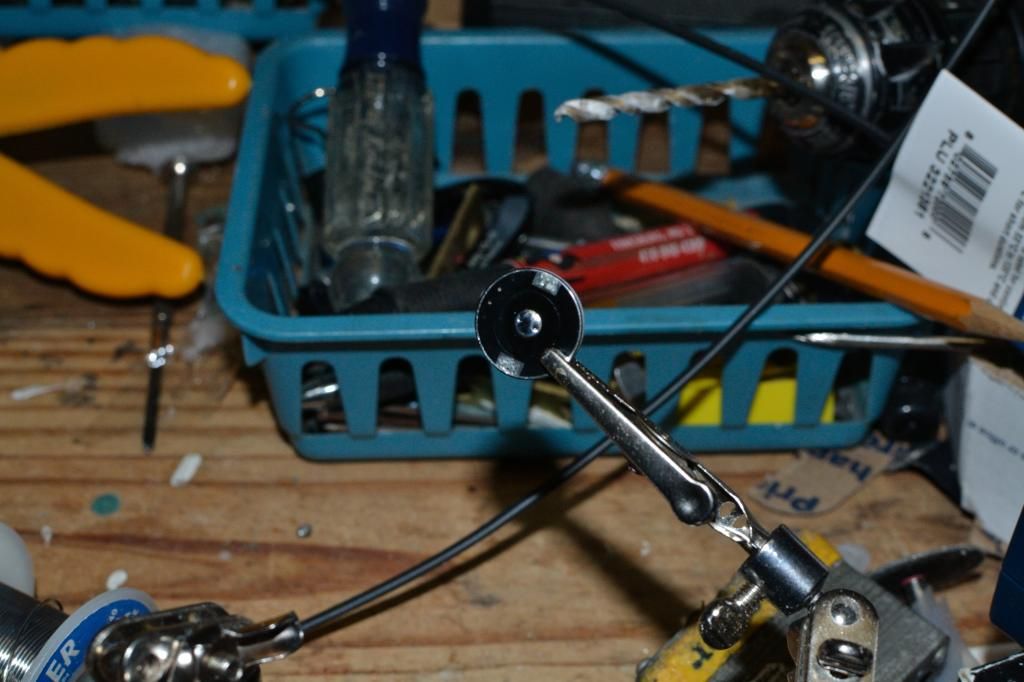
2b. Then to the spring.
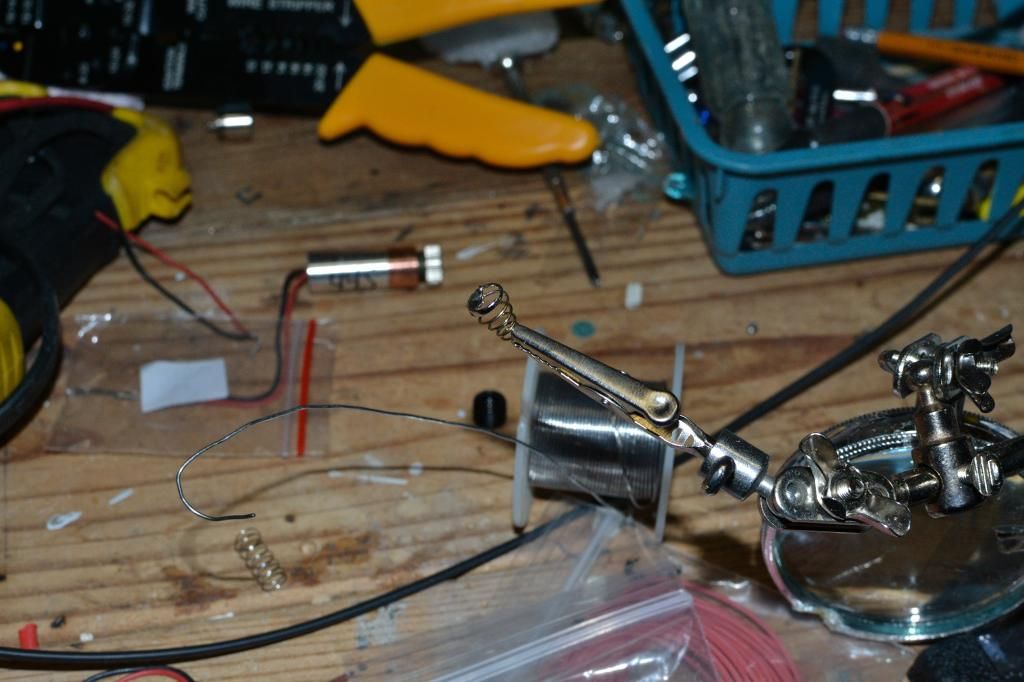
2c. Then soldered them together and added long wires. This is important to do because the copper driver
tray slides into the host from the battery tube. It is all one piece of copper, so I cannot just remove
a head or something.
2d. Insert Wires through holes of driver tray to prepare to press the contact board in.
2e. Press the contact board in. I used pliers. It might be easier to first press the board in and then
solder on the spring, but I worried about the copper wicking away that heat. Besides, the helping
hands hold a board much easier than a piece of copper lol.
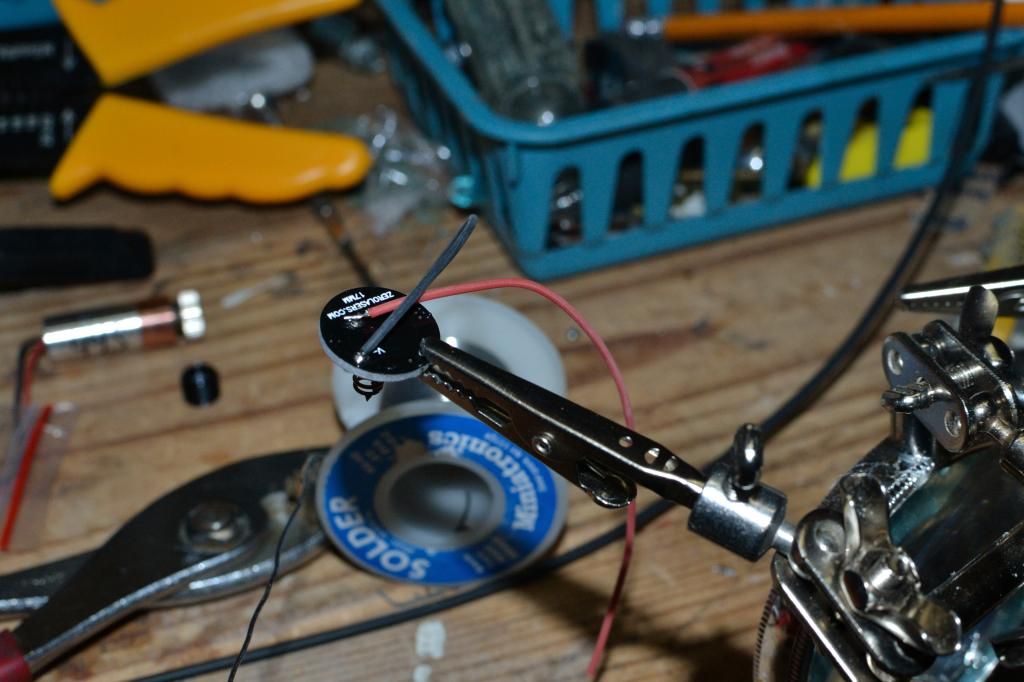
2f. Bridging the Contact point for the negative battery input to the side of the copper driver tray for
good electrical contact. I could have used the case pin as a negative battery in for the driver but
I decided to use the contact board to its full potential instead. For others, I would recommend
using the case pin method if possible in your build as the wires tend to be difficult to manage
with two. This wouldn't be a problem if the wires could be shorter, but having the copper host all
one piece does a lot for heatsinking.
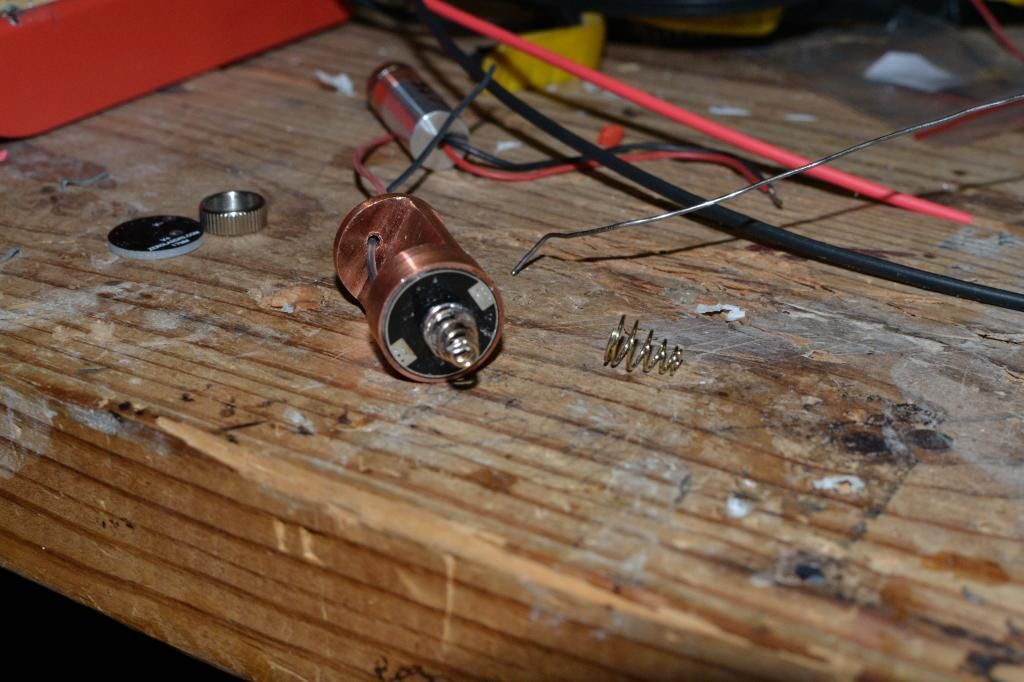
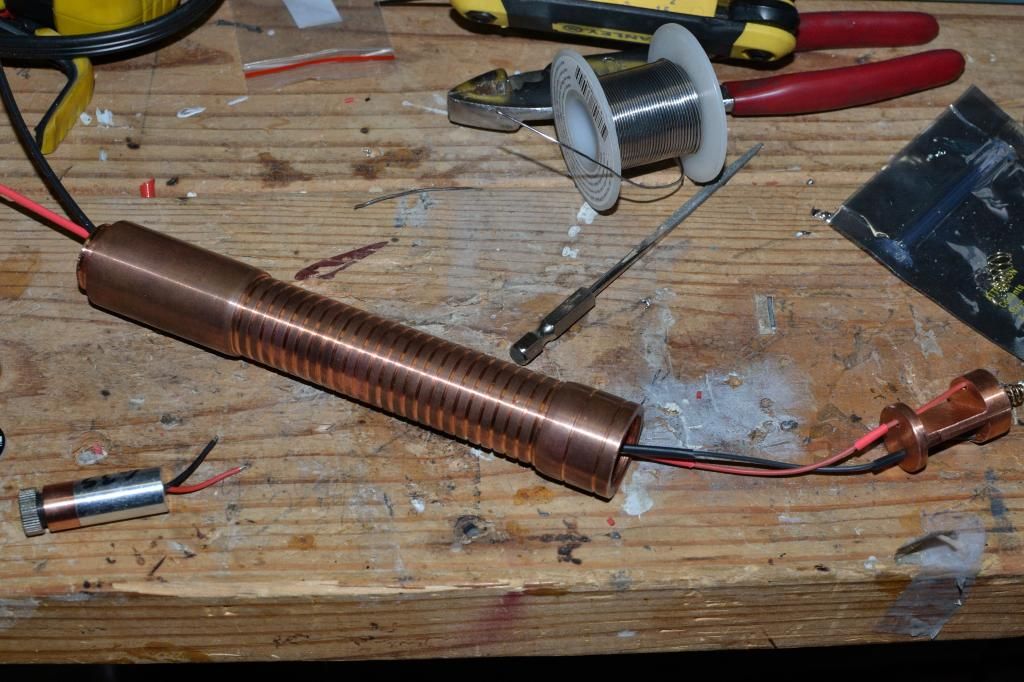
3. Slide the Driver tray in, you are done with it. The wires kept not wanting to go all the way through,
and kept bunching up where the Inner diameter of the head gets smaller for the module. So since
my heatshink tubing is a long piece(two long pieces, I got one red and one black) I used them to
slide all the way through the host, then slid the wires in, and then guided the wires through the host.
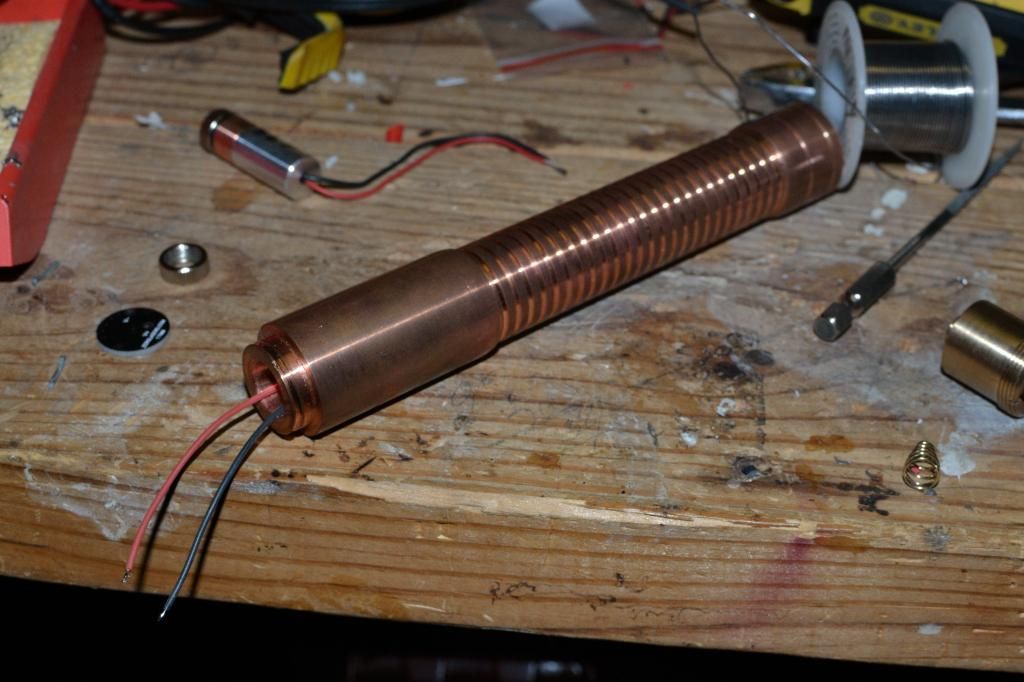
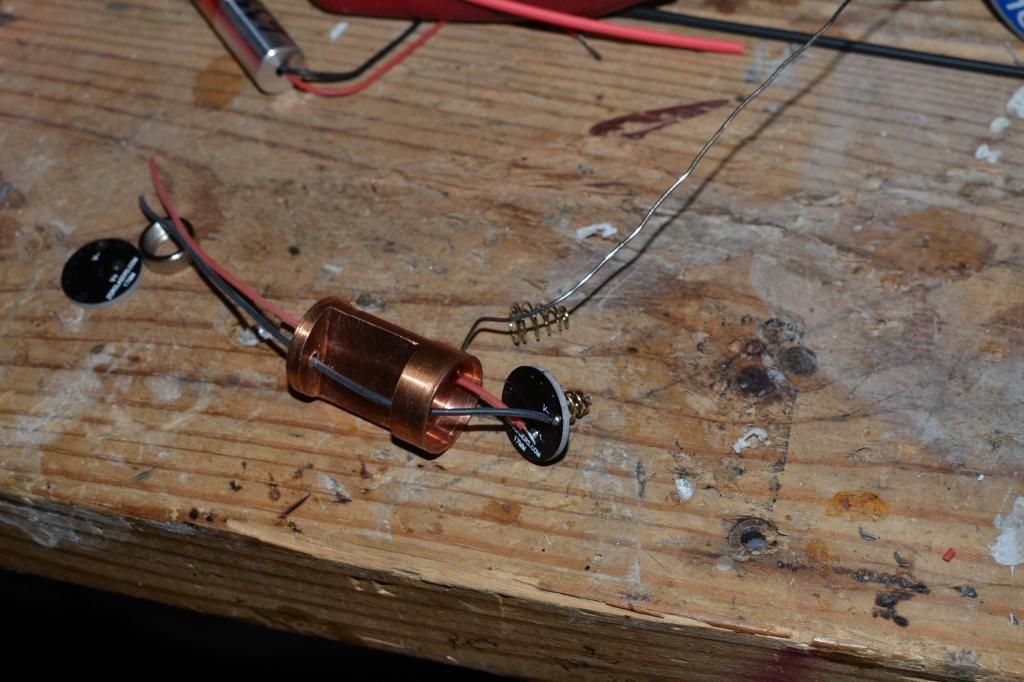
4. Tin both sets of wires; the ones from the diode module and the ones from the contact board.
The wires shown here were too long(oops), so I ended up trimming them down. The contact
board wires I trimmed so they barely came out of the head of the laser, and the diode module
wires were trimmed a good half inch. This was necessary to fit the wires and the module in the host.
Solder it up and shrink the heatshrink tubing.

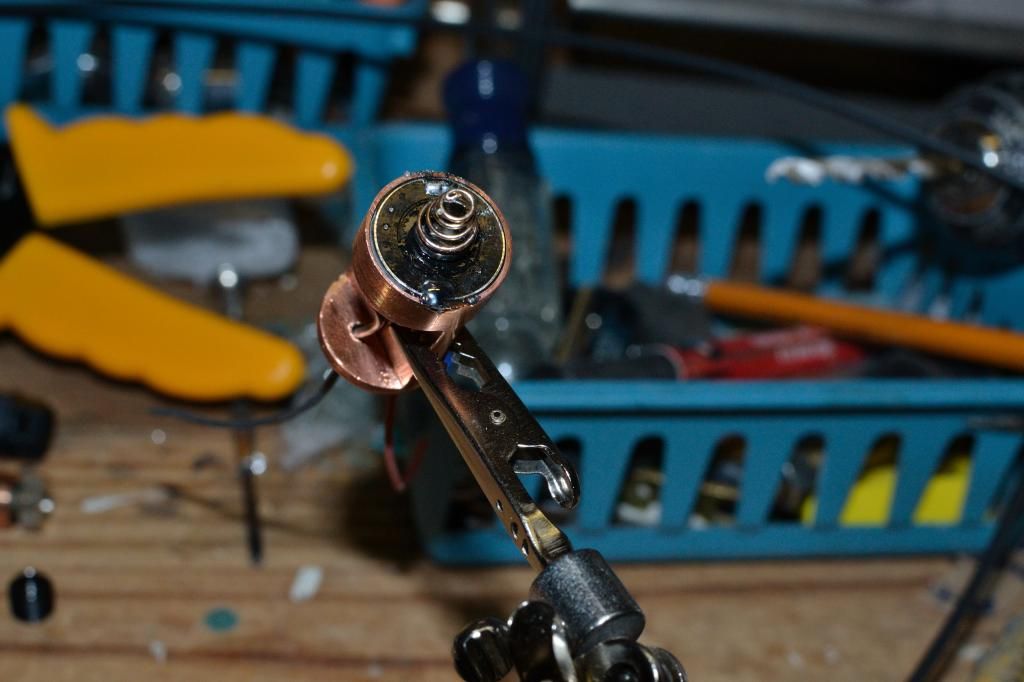
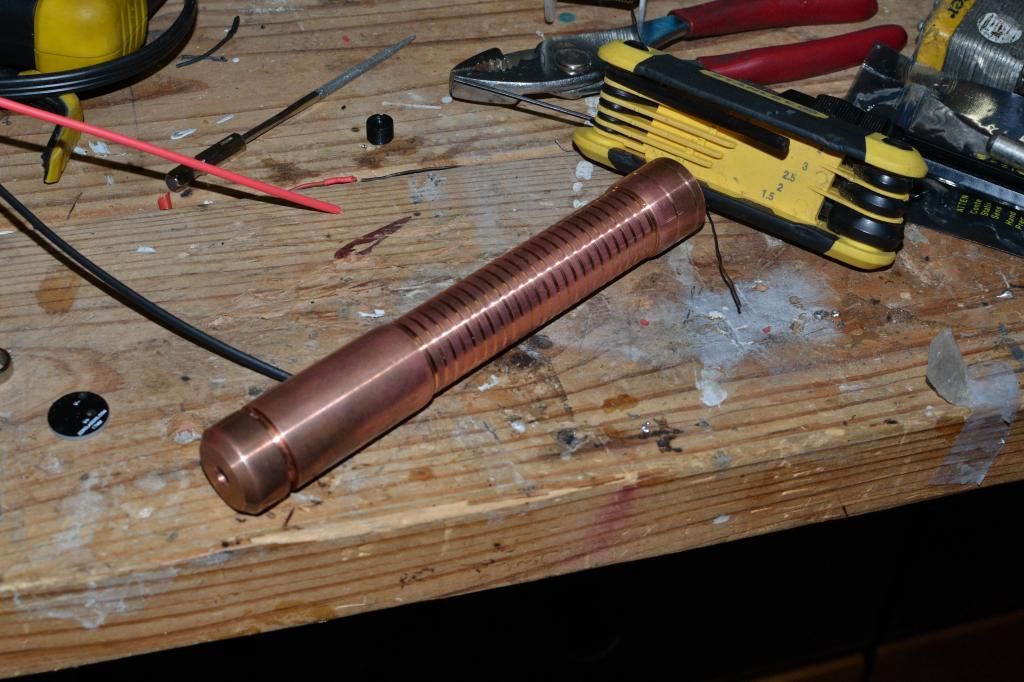
5. Press the module into the heatsink. I had one module that would fit in using just the set screw and
it would pop right out. This one however was a little bit larger diameter and had to be pressed. I am
glad sinner made these a semi pressfit because mine turned out to be a full on pressfit. Luckily, the
difference was small, so the press didn't warp my module threads like they did with the MSV4 I had.
To help, I put an acrylic lens in completely to the module. This protected the open can diode from
dust and insured that the threads stayed straight. Then I used a C-Clamp to carefully press the
module in. It was slow going but eventually I got it pretty nicely flush with the host head. In the
following picture that is where my diode was in focus, which is why the adapter isn't flush with the body.
6. Put in batteries and light her up! Note: Even with the spring in there, there is still a bit too much
room in the battery tube. It doesn't fit snugly, more like she has been around the block a few times.
This isn't a terrible thing, as screwing the tailcap in with my fingernail would probably hurt a bit if
it was the right size battery tube.
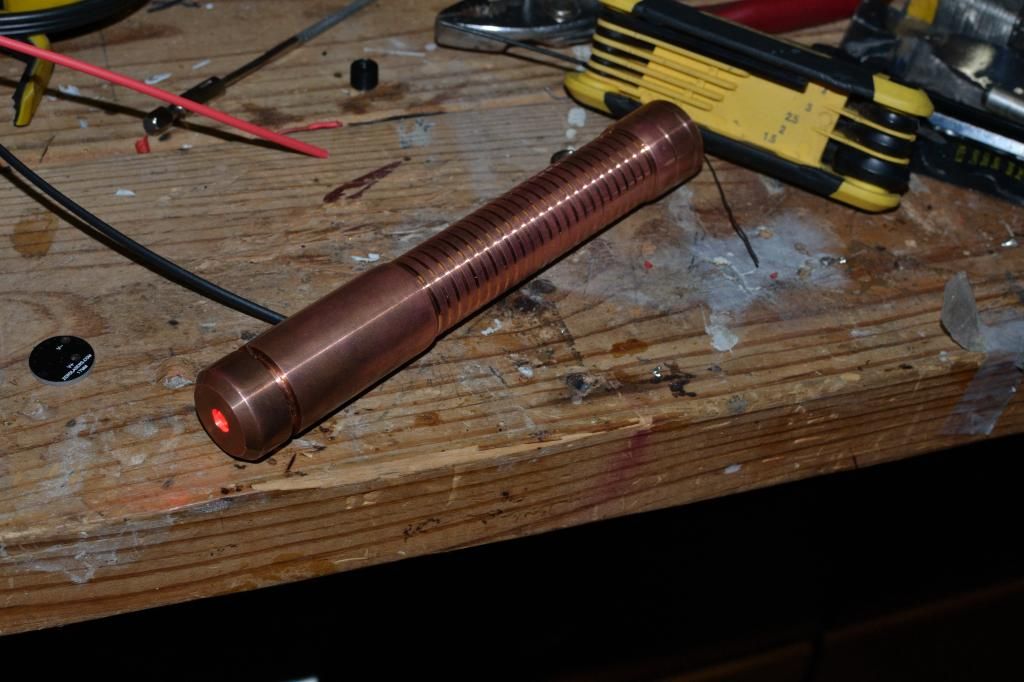
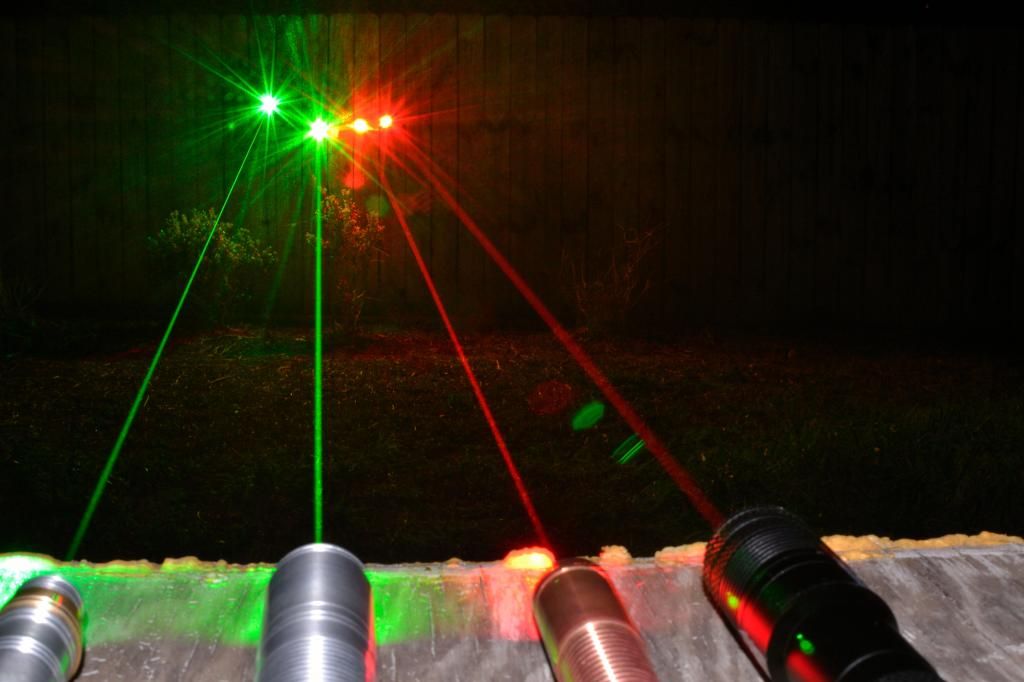
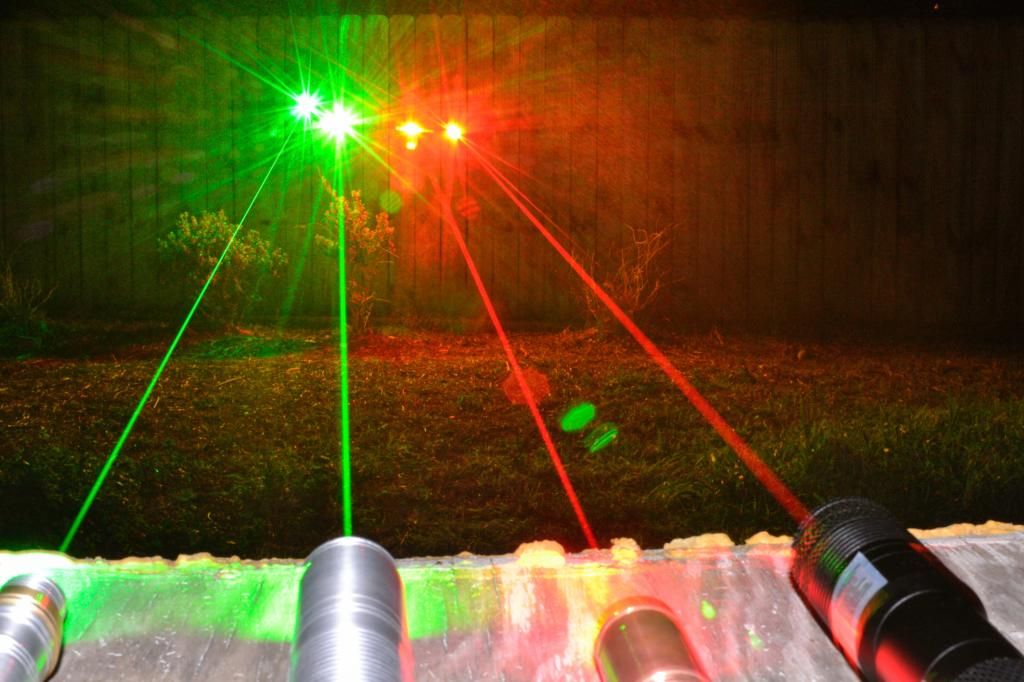
BEAMSHOTS!
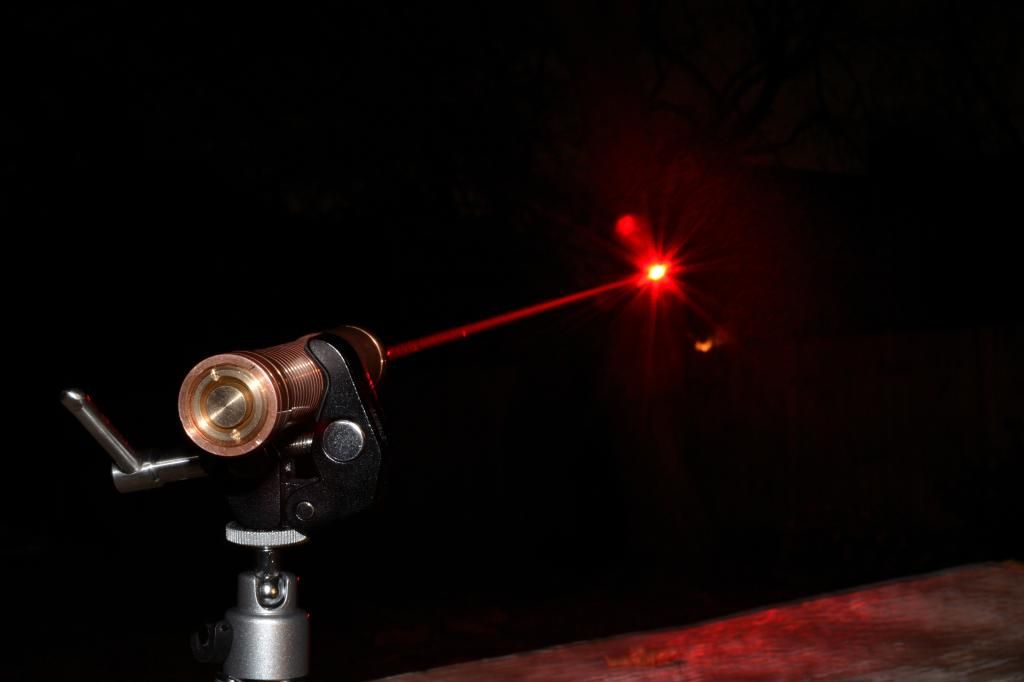
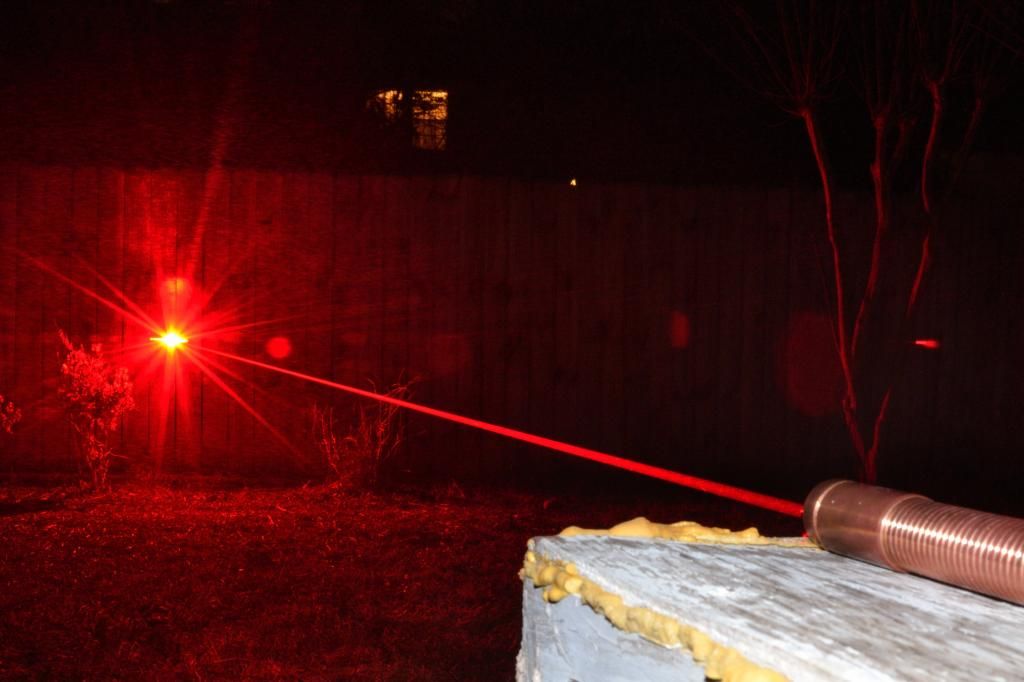
Comparison shot with my 660:
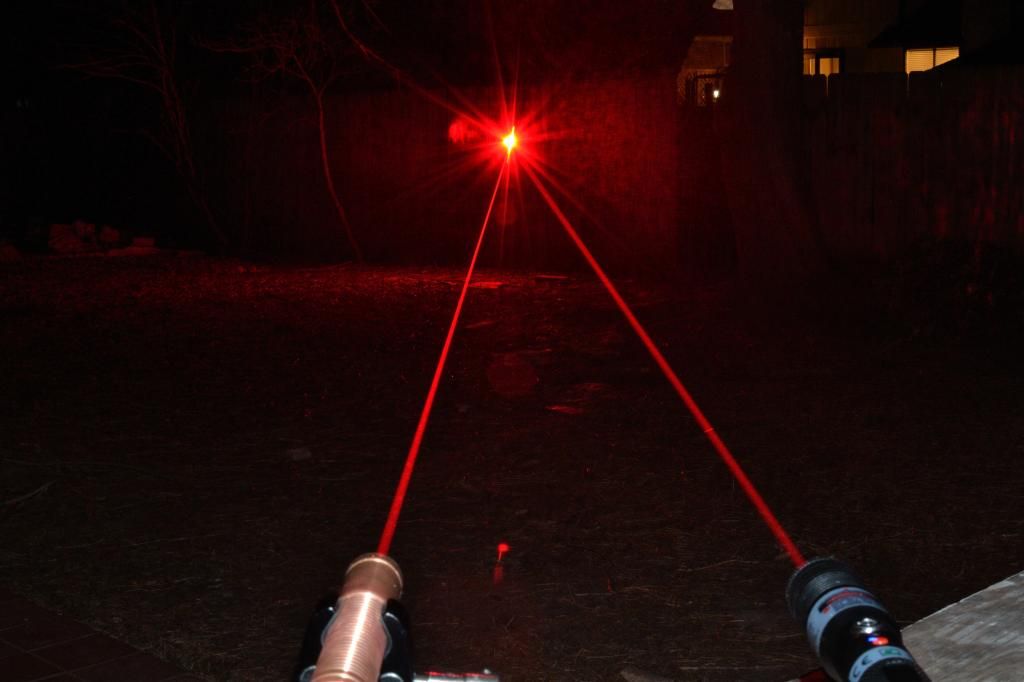
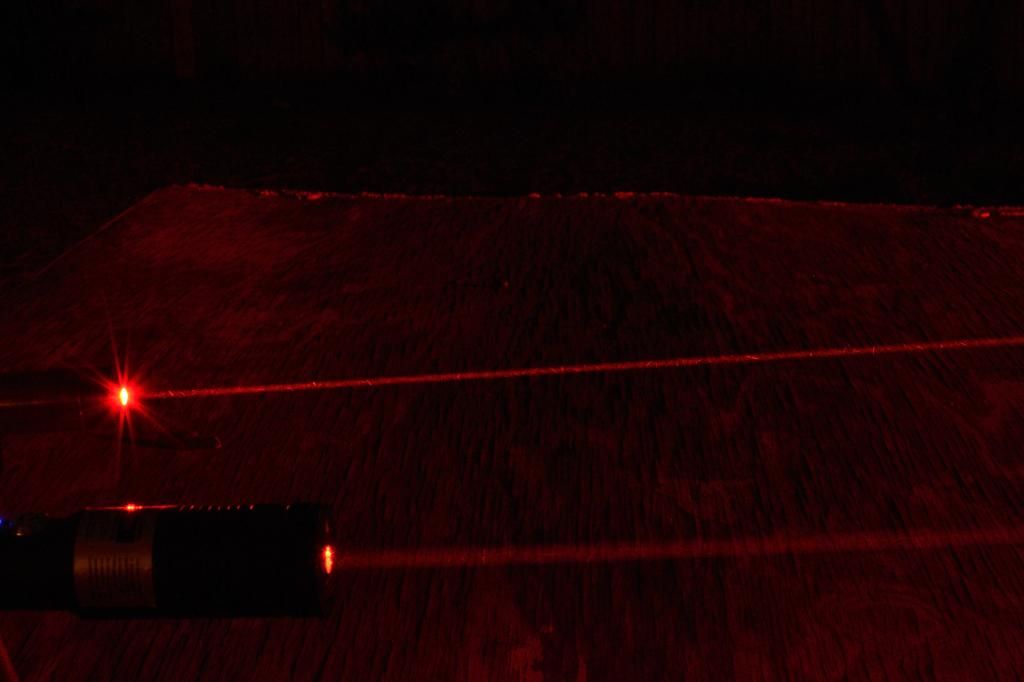
All my Handhelds ATM:
CONCLUSION:
This is a good host but a lot of the aspects of it felt unfinished. It seems more like a rough prototype
than a finished product which is somewhat unfortunate. There are simply a lot of details that seemed
to be over looked. A better length for the battery tube wouldn't have been difficult to do, and
making the dual driver tray useable would seem like an important step. Including the Oring
that a ring exists for seemed like a no brainer as well as including the contact board and spring.
With all that said, it is a great
feeling host. The
weight of it is everything I dreamed of when I requested an all copper host from Sinner.
If anyone has any specific questions about building with this host feel free to drop me a line and I will
be glad to help in any way I can.
I am shipping this off to DTR today to see what he can see about the diode and about getting this
lovely laser up and running again. I hope you all have enjoyed my review and build thread, I really
enjoy making them!
Thanks for looking!
-Isaac
UPDATE: 3/31/2014
Well, this laser is dead and the host is also dead. That was an expensive loss.
140 for the host
100 for the diode
DTR did his best but when trying to press the module out of the host, the press bent the host.
Apparently a battery can still slide in and out of the host fine. Well...anybody know the melt price of copper?
Not quite sure if it is worth the return postage to get it back to me.
Hello everyone! I have had this host for about five days now, and I have been putting off this little
review for a bit until I had the time to give it some attention...
So, let me introduce you all to the newest host from Sinner, the Cypreus II!
I had originally simply asked Sinner to build me a custom copper host fit for a single 18650 as
something a little different and unique as that is really what piques my interests with hosts.
I asked that it be sleek and elegant and basically told him as long as it met those criteria I was
a happy camper and he could use whatever ideas he had.
I had no idea it would become a host line, but I guess that is fine haha. At any rate, it is what
I asked for and I am really loving the feel of the copper in my hand. The size and weight are perfect IMO.
Length: 6.2"
Width: 1"
Weight: 375g
Battery Configuration: 1 x 18650
Pictures of the host:

Anyone have a Roku Box?

Seriously, anybody have one? Lol.

Next to some other hosts and a battery:

Note no silicon oring:

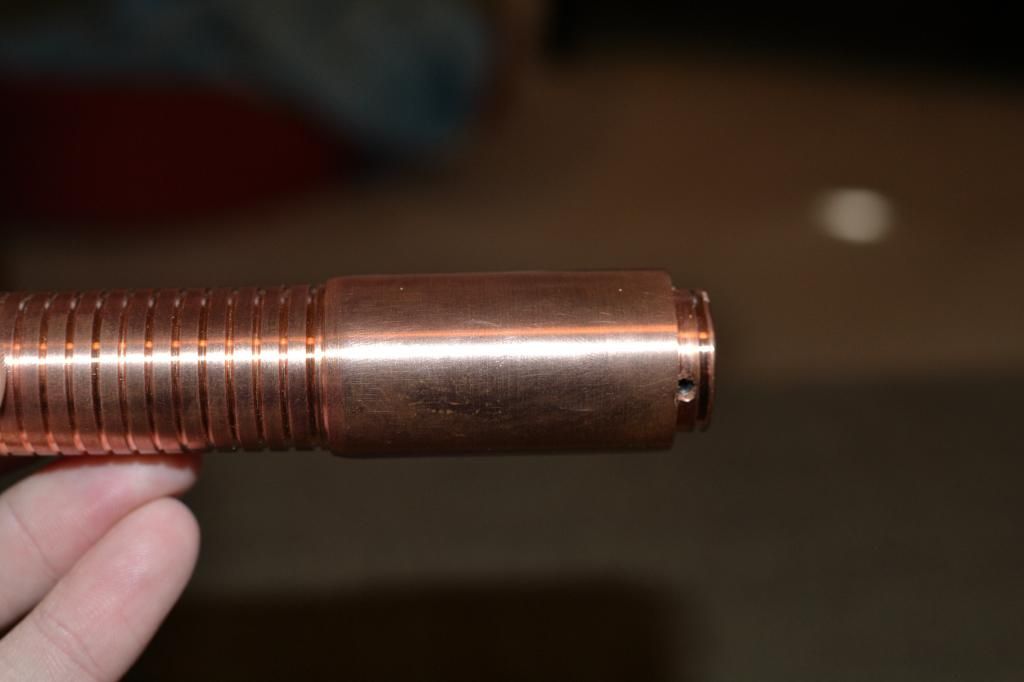
Hooray for Focus Adapter!

Notice here how the tailcap is inset into the host. The notches and fingernails are how you gain passage.

Lovely Grooves:

Tailcap from the side.

The front from the side. I think this is the only host Sinner has made withOUT being a pressfit.
And I am pleased it isn't as well. Twisted too many threads!

More Focus!

Focus from the rear!

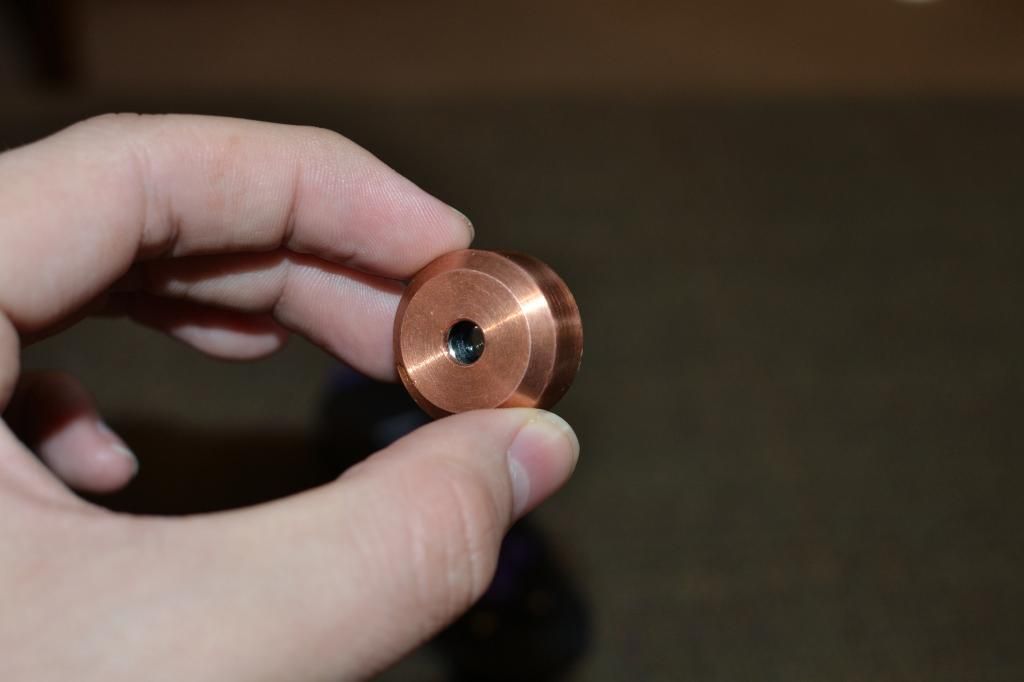
Tailcap removed.


And driver board with holes and space for a contact board....I presume?


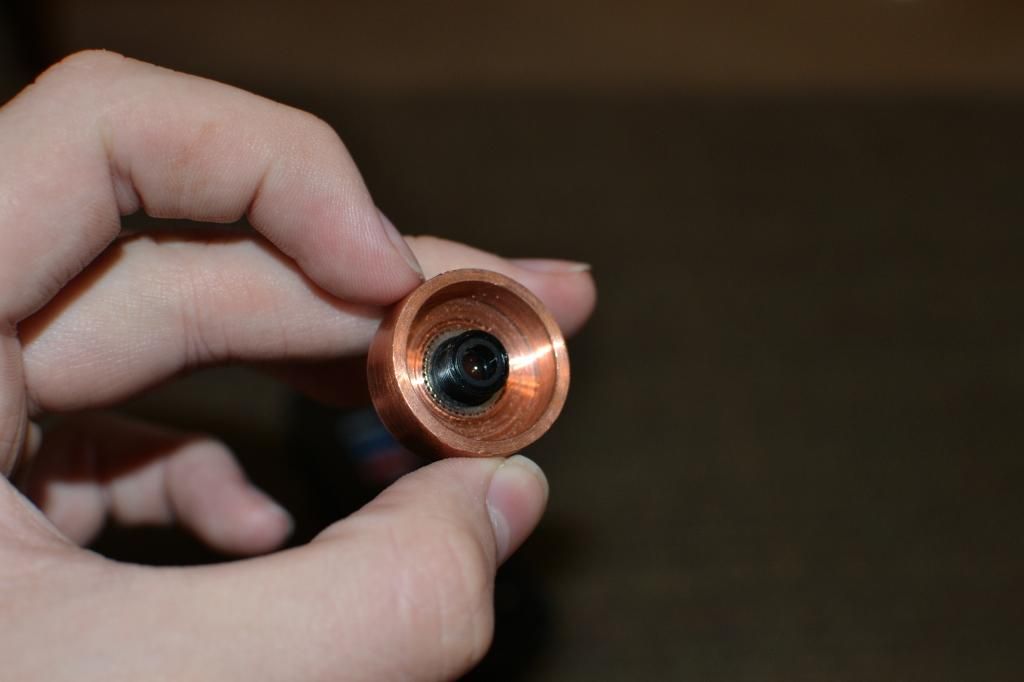
Where the battery goes!

In case you didn't understand that last part!

My Impressions:
THE GOOD
1. The weight and feel of the host is fantastic.
2. The thermal capabilities will be stellar.
3. The brass clicky adds a really professional feel which is nice, considering the cost for this
particular unit was 140 dollars.
4. The design is nice, and the grooves along the handle really add a flair to it that I admire.
THE NOT-SO-GOOD
1. There are a number of machining marks and nicks on the body
2. In his sale thread he mentions a silicon ring to help keep focus tight. Mine didn't come with one,
although the slot is milled for it.
3. The Tailcap is difficult to remove. Due to it being inset, one must rely on fingernails to twist it most of the way out.
4. The build requires a contact board and spring, but it does not come with either.
5. The spring must be a good 2 inches or so as the battery tube is slightly too long.
SUGGESTIONS:
1. Shorten the battery tube some(maybe 0.5inch or so). This will save copper and lessen the size
requirement of the spring.
2. Include the spring and contact board. The presale prices are much lower than the initial unit's
cost, but still not having to shop around is always preferred.
3. The tailcap I am unsure of how to improve. For what it is it seems to be the best design I can
think of. The copper appears difficult to work with which is why I assume there are no threads
between copper on the host itself.
4. Include the Silicon ring you mentioned including.
5. Try to reduce the number of nicks and dents that get left in the host. I understand copper is
difficult, but it did surprise me when I saw it for the first time.
BUILD THREAD TO FOLLOW IN A FEW DAYS
-Waiting on my Diode from DTR; he was kind enough to send a contact board for me- still need to
source a spring however.
Thanks for looking, I will update the thread when the build is completed!
-Isaac
THE BUILD! V1 Atleast*
Well i got the diode in yesterday and built her, so I have step by step build pictures and all that
and a few beamshots, however not long after I made her the diode was crippled. I have a feeling
the die cracked or something because now the output looks like a striped circle instead of a bar.
It is weird. But, I will post
the initial build so everyone has an idea of how the host takes to a diode.
1. First I got all my parts together. Note: picture has my other host I made a laser with last night, parts
are all there though.
Parts, Components, and Tools
1. P73 Mitsubishi Diode from DTR set to 1.2A
2. Copper Cypreus II Host
3. Flaminpyro Silicon Wire
4. Fry's Electronics Heatshrink Tubing
5. Soldering Iron w/ Solder
6. Helping Hands Contraption. *note: very unwieldy IMHO
7. Contact Board and Spring from DTR

2. I decided to work on the contact board first, as I usually have some difficulty soldering the
spring to the board. Sure enough, it took me a good thirty minutes to get this done, but here are some pictures:
2a. Adding solder to the contact board.

2b. Then to the spring.

2c. Then soldered them together and added long wires. This is important to do because the copper driver
tray slides into the host from the battery tube. It is all one piece of copper, so I cannot just remove
a head or something.


2d. Insert Wires through holes of driver tray to prepare to press the contact board in.

2e. Press the contact board in. I used pliers. It might be easier to first press the board in and then
solder on the spring, but I worried about the copper wicking away that heat. Besides, the helping
hands hold a board much easier than a piece of copper lol.

2f. Bridging the Contact point for the negative battery input to the side of the copper driver tray for
good electrical contact. I could have used the case pin as a negative battery in for the driver but
I decided to use the contact board to its full potential instead. For others, I would recommend
using the case pin method if possible in your build as the wires tend to be difficult to manage
with two. This wouldn't be a problem if the wires could be shorter, but having the copper host all
one piece does a lot for heatsinking.

3. Slide the Driver tray in, you are done with it. The wires kept not wanting to go all the way through,
and kept bunching up where the Inner diameter of the head gets smaller for the module. So since
my heatshink tubing is a long piece(two long pieces, I got one red and one black) I used them to
slide all the way through the host, then slid the wires in, and then guided the wires through the host.


4. Tin both sets of wires; the ones from the diode module and the ones from the contact board.
The wires shown here were too long(oops), so I ended up trimming them down. The contact
board wires I trimmed so they barely came out of the head of the laser, and the diode module
wires were trimmed a good half inch. This was necessary to fit the wires and the module in the host.
Solder it up and shrink the heatshrink tubing.

5. Press the module into the heatsink. I had one module that would fit in using just the set screw and
it would pop right out. This one however was a little bit larger diameter and had to be pressed. I am
glad sinner made these a semi pressfit because mine turned out to be a full on pressfit. Luckily, the
difference was small, so the press didn't warp my module threads like they did with the MSV4 I had.
To help, I put an acrylic lens in completely to the module. This protected the open can diode from
dust and insured that the threads stayed straight. Then I used a C-Clamp to carefully press the
module in. It was slow going but eventually I got it pretty nicely flush with the host head. In the
following picture that is where my diode was in focus, which is why the adapter isn't flush with the body.

6. Put in batteries and light her up! Note: Even with the spring in there, there is still a bit too much
room in the battery tube. It doesn't fit snugly, more like she has been around the block a few times.
This isn't a terrible thing, as screwing the tailcap in with my fingernail would probably hurt a bit if
it was the right size battery tube.

BEAMSHOTS!


Comparison shot with my 660:


All my Handhelds ATM:


CONCLUSION:
This is a good host but a lot of the aspects of it felt unfinished. It seems more like a rough prototype
than a finished product which is somewhat unfortunate. There are simply a lot of details that seemed
to be over looked. A better length for the battery tube wouldn't have been difficult to do, and
making the dual driver tray useable would seem like an important step. Including the Oring
that a ring exists for seemed like a no brainer as well as including the contact board and spring.
With all that said, it is a great
feeling host. The
weight of it is everything I dreamed of when I requested an all copper host from Sinner.
If anyone has any specific questions about building with this host feel free to drop me a line and I will
be glad to help in any way I can.
I am shipping this off to DTR today to see what he can see about the diode and about getting this
lovely laser up and running again. I hope you all have enjoyed my review and build thread, I really
enjoy making them!
Thanks for looking!
-Isaac
UPDATE: 3/31/2014
Well, this laser is dead and the host is also dead. That was an expensive loss.
140 for the host
100 for the diode
DTR did his best but when trying to press the module out of the host, the press bent the host.
Apparently a battery can still slide in and out of the host fine. Well...anybody know the melt price of copper?
Not quite sure if it is worth the return postage to get it back to me.
Last edited:


 Thanks, also looking forward to the p73 build.
  op:
op:")
")