DTR
0
- Joined
- Jun 24, 2010
- Messages
- 5,683
- Points
- 113
3A Super Pyroload
I will start off by saying that I have melted quite a few test loads in my building.:eg: The problem is I am often measuring current in the 1A-2A range when setting drivers for the 445's and it sometimes takes longer than you like to get to just the right mA. About 3 months ago I got one of Flaminpryo's 3A test loads that has held up pretty well. It gets hot and you have to be conscious of how much time you have had it on and let cool down after so long. But thankfully I have not lost that one yet.
Jeff sent me a PM the other day telling me about his new test load and after seeing some of the pictures I asked him to send me one. A few days later this arrives on my doorstep.

It is much bigger than my previous test loads.
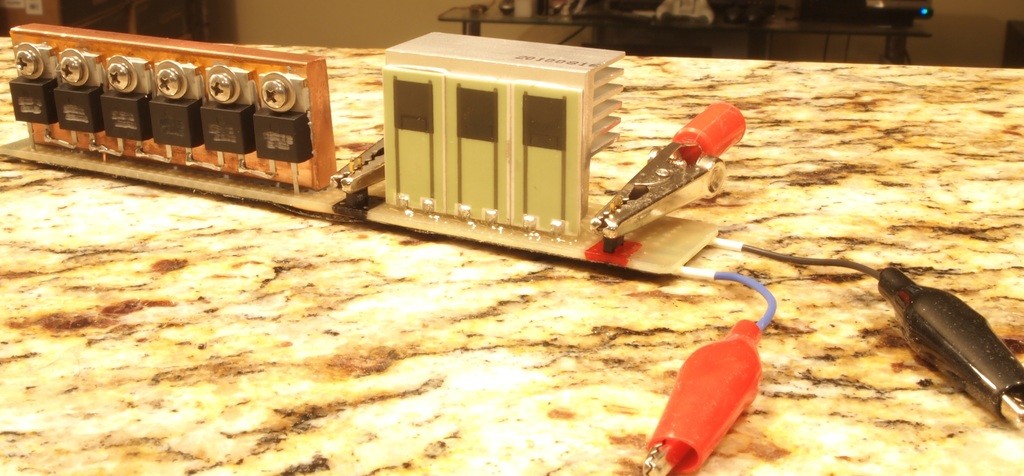
He is using a large bar of copper and a finned aluminum heatsink to keep the components from overheating. I added alligator clips to the pins on either side of the resistor so I could slide in the tips of my DMM leads. I also soldered on some smaller alligator clips to the driver leads for quick connections.

Looks like he used some diodes in a SMD package with a sinkable metal back for heat distribution into the copper bar. I see some thermal adhesive between the copper and the diodes. Also there are screws holding each tight in place. I am hoping this load should let me forget about duty cycle altogether.
I decided to pull the electrical tape that covers the bottom to check out his work. On his previous loads he used that hard clear rubber stuff(for lack of the proper term) to cover the wiring. He did use some on the stress points like where the leads for the driver are and the point where the negative wire bends to go up to the switch. It is possible that he wanted it to sit more flat so that it does not wobble. I would have liked seen the bottom covered but no big deal. On the wiring itself all the points look nicely soldered and it is neat in presentation.

This one has a switch for red or blue. He asked me if I wanted it so I am not sure if it will be standard on them.
Anyway here it the real test. I got a driver that puts out around 2.4A and ran a test. I was thinking when I began the test I would go for a few minutes but I decided what the hell while running it and went all the way to 10 minutes.:eg: I could have cooked an egg off the copper bar but it did not seem to mind.
Anyway I am very happy with this unit and I would definitely recommend it for anyone that does not want to build one for them self. Now that I don't have to worry about duty cycle when setting my drivers my laser building will be just that much easier. Thanks for the great product Jeff.:beer:
Last edited:


