TaterMay
0
- Joined
- May 16, 2015
- Messages
- 350
- Points
- 0
Edit: Just for future reference, as I keep getting questions about the module not being flush with the heatsink, even after I posted the results of my testing on multiple threads. When using modules with a full copper back half, it does NOT make enough of a difference to sacrifice the ease of focusing the laser to flush the module with the heatsink. I observed less than 1 degree C difference after many duty cycles when pulling it all the way out to where the front half meets the back half. If someone wants to purchase one of these, I will gladly flush it if it will give them peace of mind, however, based on my testing, it will only make it more difficult to adjust the focus on this host while providing nearly no effect on heat dissipation/transfer.
So I decided I wanted to do a build thread...after I had pretty much completed the build. So this won't feature every single step of the build, but I might go back and add some of the skipped steps when I build another. I've built many lasers now, but this will be my first to actually post on LPF. This is one of my favorite hosts at the moment, so I will be building many more. I actually have 3 more hosts and heatsinks on the way, so if anyone would like one of these, PM me.
So this is what Rick Trent calls the "Zombie Killer" host. It does, in fact, seem like a pretty good backup skull smasher in case of a zombie apocalypse. Lol. I have had a very difficult time finding these hosts anywhere except through Rick. The only other source I've found is in bulk @ around 1,000 pieces. That seller called them "Anti-Wolf Attack Flashlights". I like "Zombie Killer" better.
[URL=http://s356.photobucket.com/user/TaterMay22/media/Mobile%20Uploads/Screenshot_2015-07-28-15-10-49_zpswox8t8dl.png.html]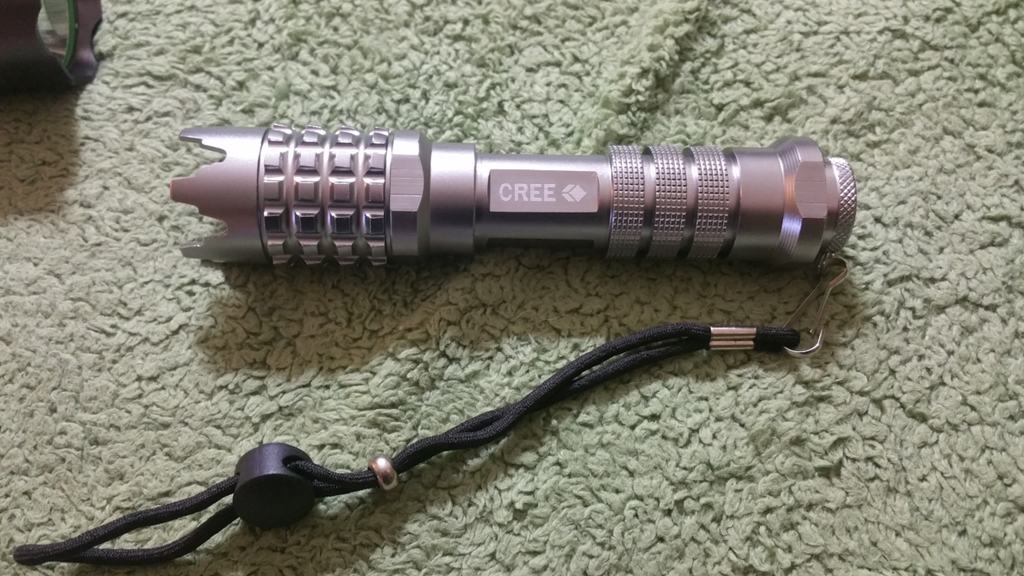 [/URL]
The heatsink he sells for this host is an aluminum set-screw type which includes a 12mm copper module. What I really like about Rick's modules is the fact that the rear portion of the module butts up to the back of the diode. It makes me feel a bit better about heat transfer from the diode to the module.
[URL=http://s356.photobucket.com/user/TaterMay22/media/Mobile%20Uploads/Screenshot_2015-07-27-14-58-54_zpsgbtqmhqq.png.html]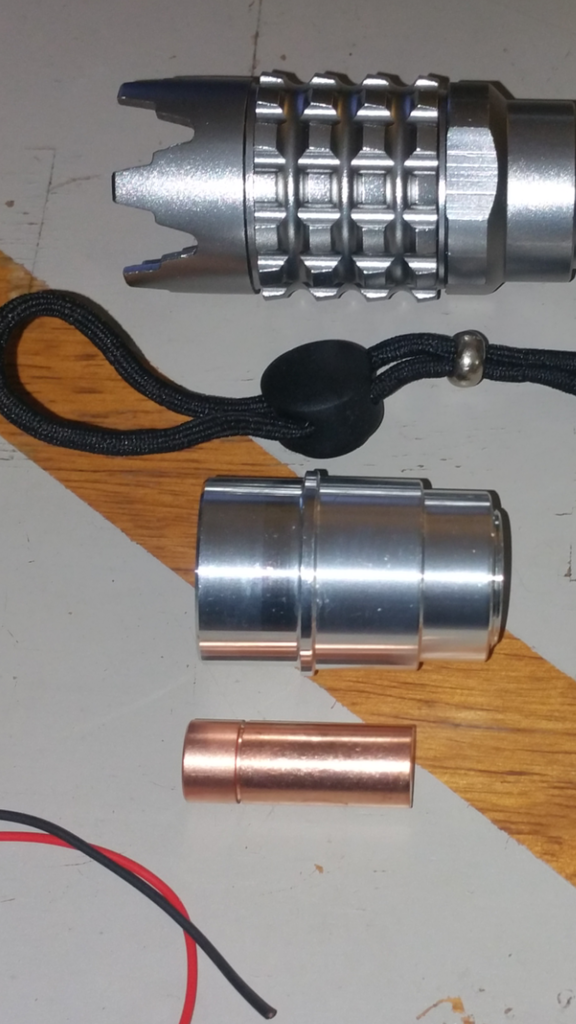 [/URL]
Since I didn't think to take pictures during the build, I'll just go over some of the basics. I used Arctic Silver as thermal interface between both diode/module and module/heatsink. All leads are heat shrink wrapped. I used a BlitzBuck V5 driver set at 2.4A with an aluminum heatsink attached via Arctic Alumina thermal adhesive, and covered all exposed points on the driver with AA to prevent shorts. The heatsink for this host is designed for a larger(20mm, I believe) driver or contact board, however the driver contact ring can be flipped over to work with a smaller driver. I did so, and simply used the Arctic Alumina to attach the driver to the heatsink.
[URL=http://s356.photobucket.com/user/TaterMay22/media/Mobile%20Uploads/Screenshot_2015-07-22-10-55-30_zpsxohboksw.png.html]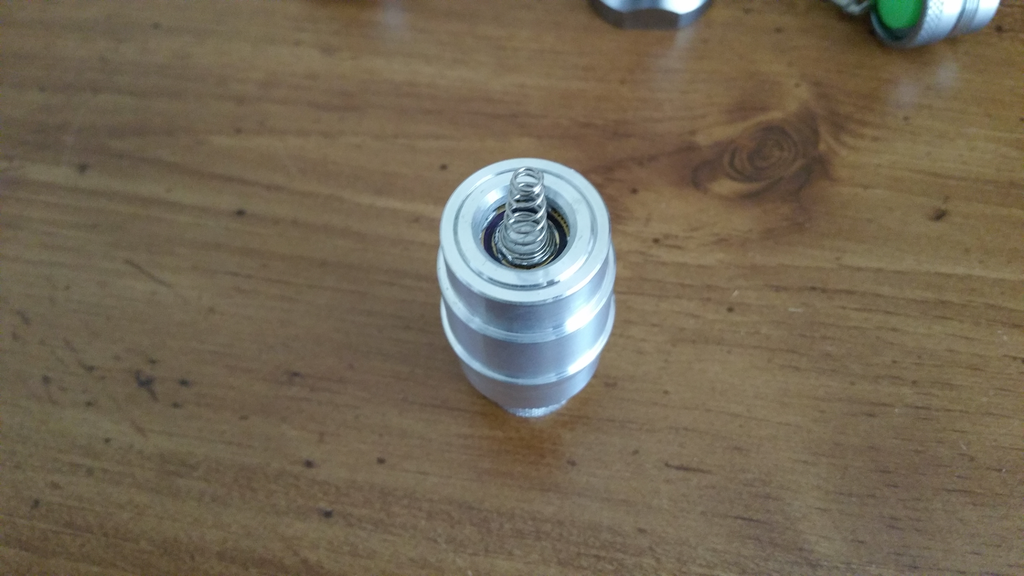 [/URL]
[URL=http://s356.photobucket.com/user/TaterMay22/media/Mobile%20Uploads/Screenshot_2015-07-22-10-55-56_zpspp9s7fmm.png.html]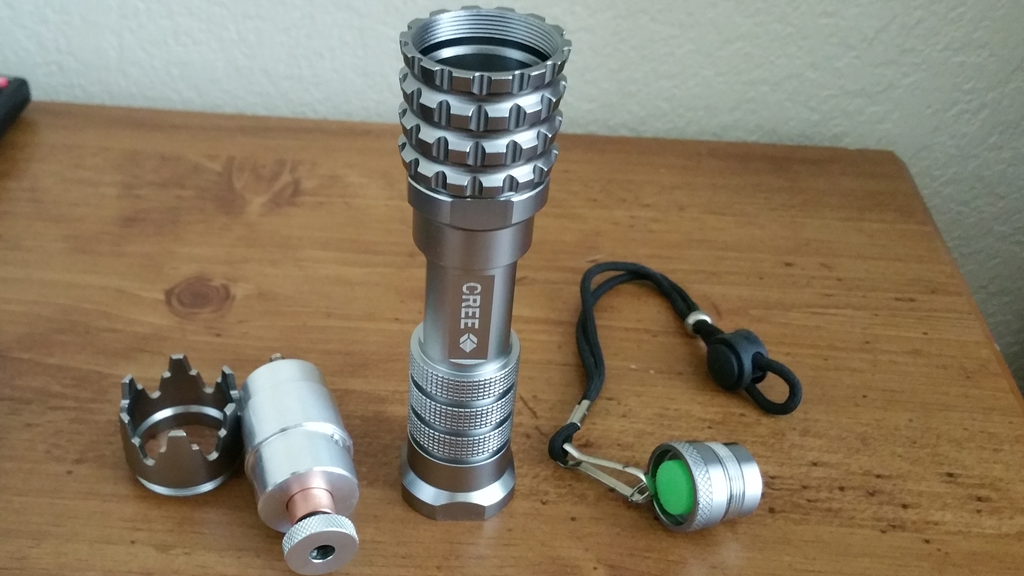 [/URL]
[URL=http://s356.photobucket.com/user/TaterMay22/media/Mobile%20Uploads/Screenshot_2015-07-22-10-57-18_zpsbqfa0wuk.png.html]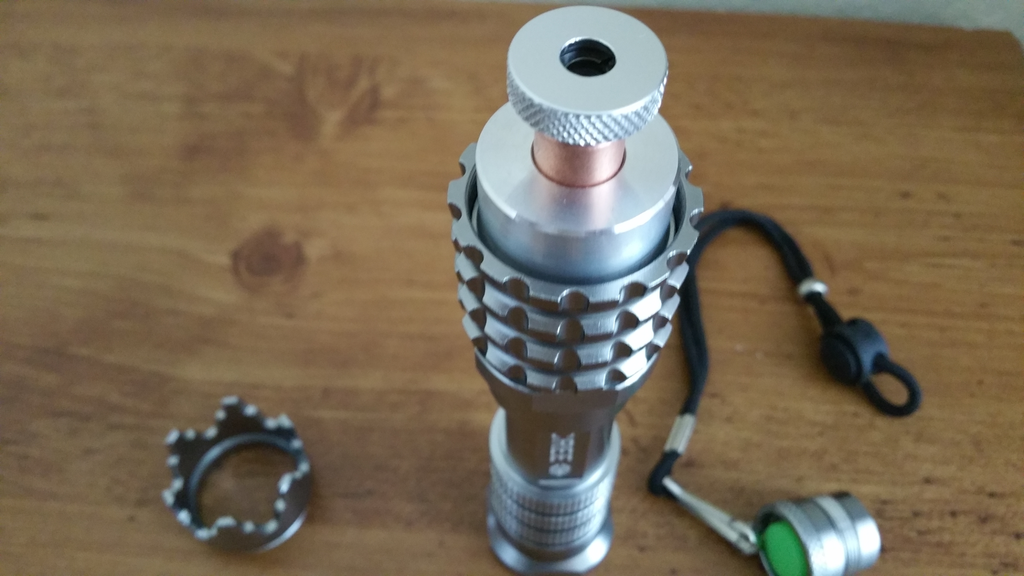 [/URL]
Once all that is complete and the laser assembly is tested successfully, all that is left is to drop it into the host and screw on the bezel that makes this the "Zombie Killer", and not just another silver flashlight host.
Edit: Two of the other hosts I received do not have the vertical play between heatsink and host. I am now using one of those hosts to eliminate the vertical play since I have put this one up for sale, so the wire contact ring you see in the pictures is no longer necessary. I have had no issues whatsoever with the wire fix, but this one will no longer require it.
[URL=http://s356.photobucket.com/user/TaterMay22/media/Mobile%20Uploads/Screenshot_2015-07-22-10-56-21_zpselqti8zg.png.html]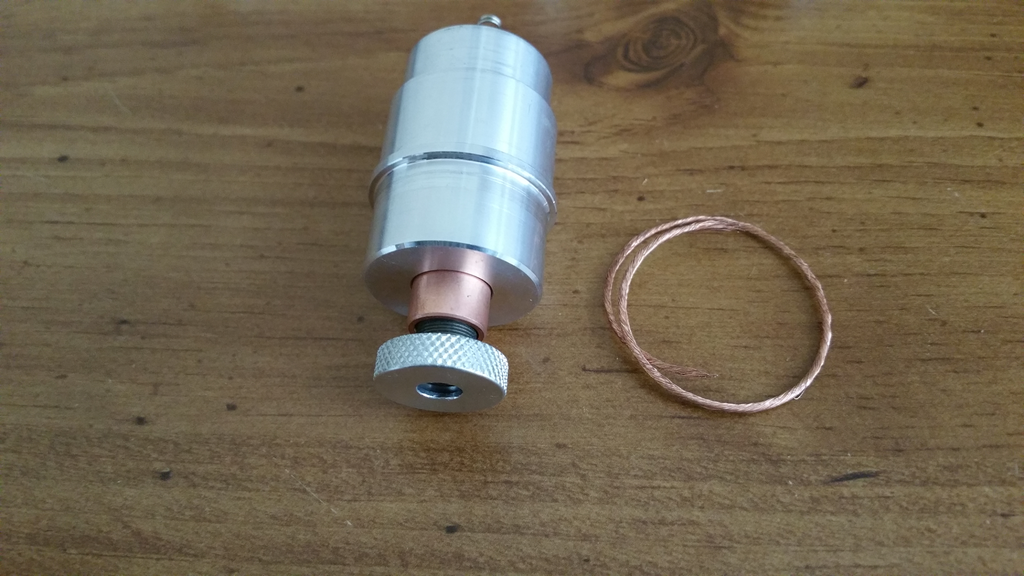 [/URL]
[URL=http://s356.photobucket.com/user/TaterMay22/media/Mobile%20Uploads/Screenshot_2015-07-22-10-56-27_zpsdrmd1o5i.png.html]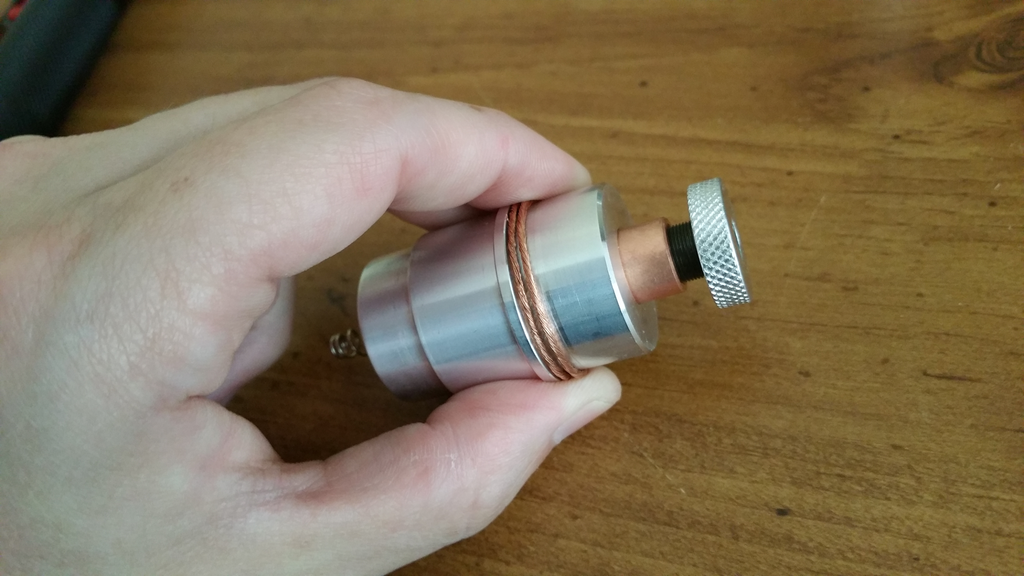 [/URL]
[URL=http://s356.photobucket.com/user/TaterMay22/media/Mobile%20Uploads/Screenshot_2015-07-22-10-57-24_zpsibnz76la.png.html]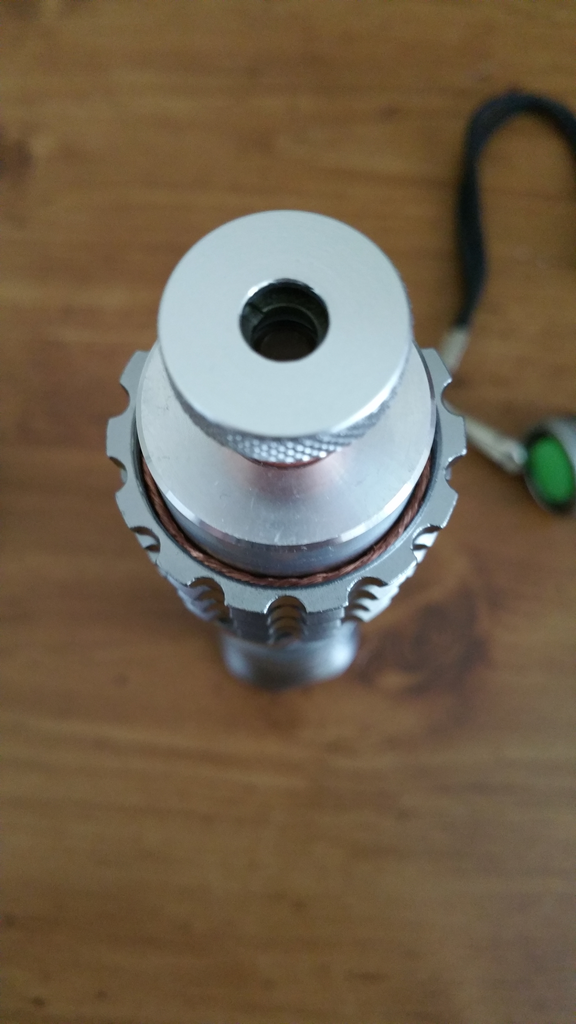 [/URL]
And finally, the finished product. Let me know what you think!
[URL=http://s356.photobucket.com/user/TaterMay22/media/Mobile%20Uploads/Screenshot_2015-07-22-10-58-58_zpsqrrwuiif.png.html]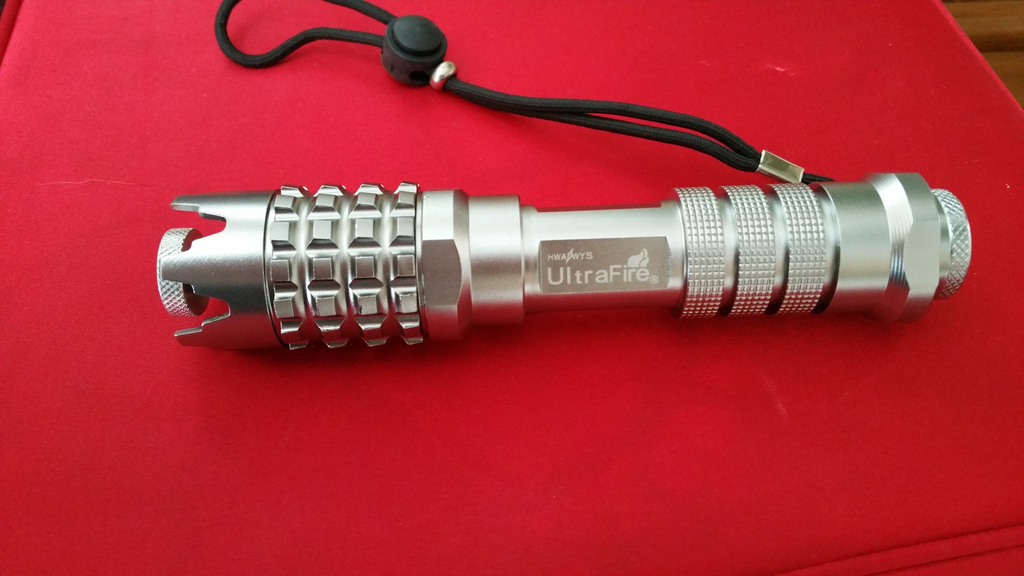 [/URL]
[URL=http://s356.photobucket.com/user/TaterMay22/media/Mobile%20Uploads/Screenshot_2015-07-22-11-01-17_zpsoirbvkym.png.html]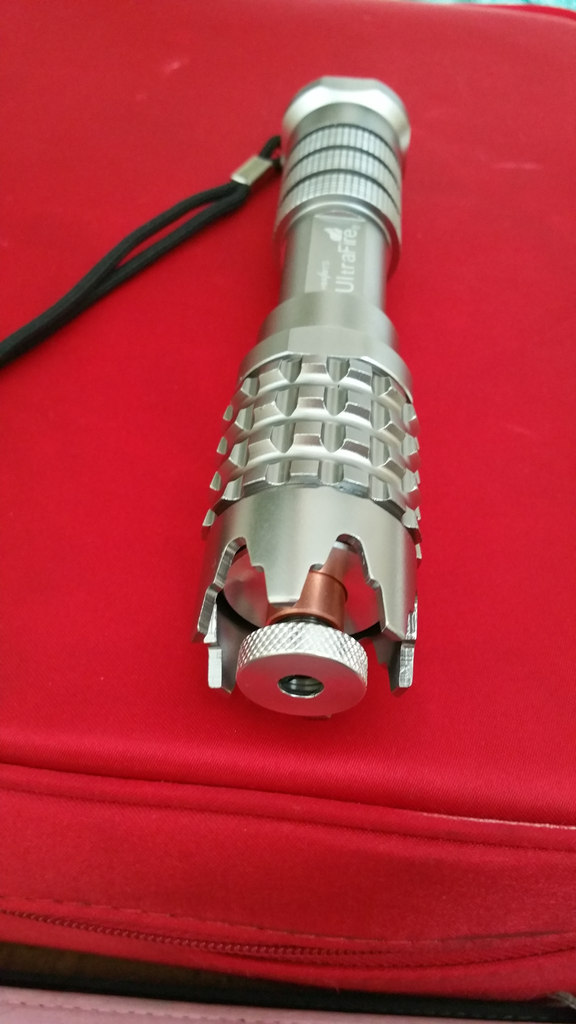 [/URL]
[URL=http://s356.photobucket.com/user/TaterMay22/media/Mobile%20Uploads/Screenshot_2015-07-22-11-01-48_zpsytnwasbe.png.html]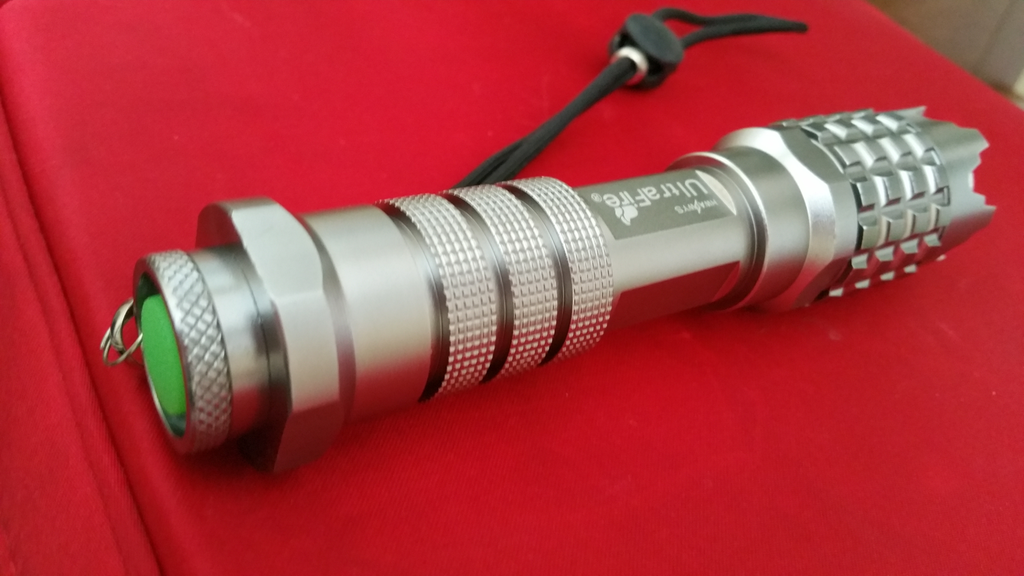 [/URL]
[URL=http://s356.photobucket.com/user/TaterMay22/media/Mobile%20Uploads/Screenshot_2015-07-22-11-03-17_zpshsiyn6bu.png.html]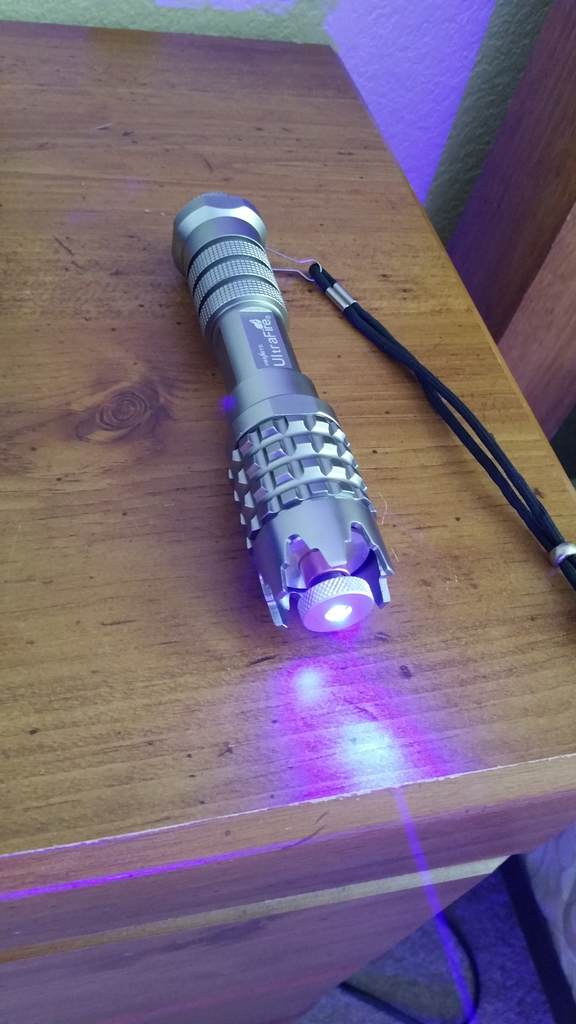 [/URL]
[URL=http://s356.photobucket.com/user/TaterMay22/media/Mobile%20Uploads/Screenshot_2015-07-22-11-02-17_zps2zmatkcl.png.html]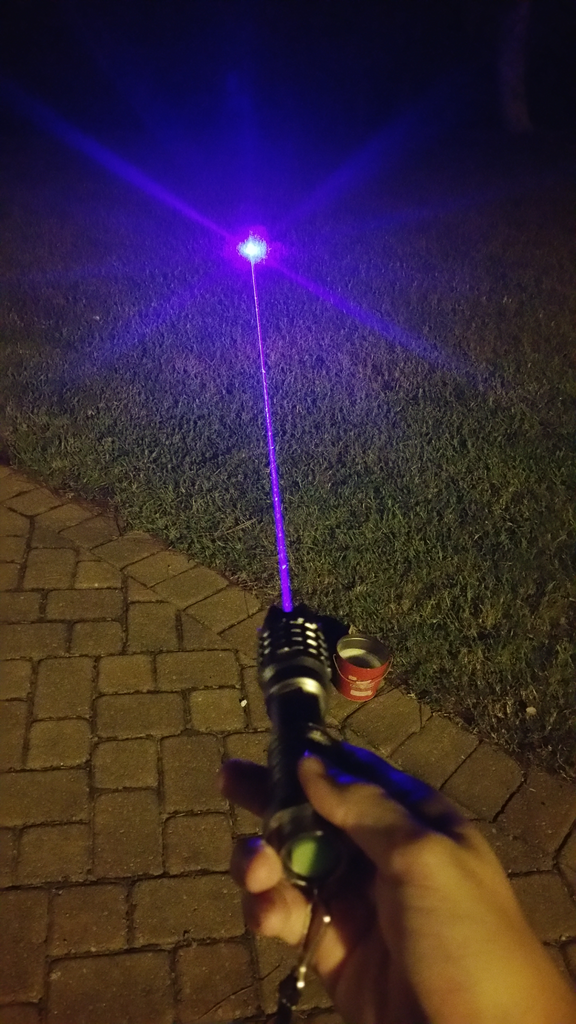 [/URL]
And the power output. A little more than I expected.
[URL=http://s356.photobucket.com/user/TaterMay22/media/Mobile%20Uploads/Zombie%20Killer%20BlitzBuck%202.4A_zpsxcojfoyv.png.html]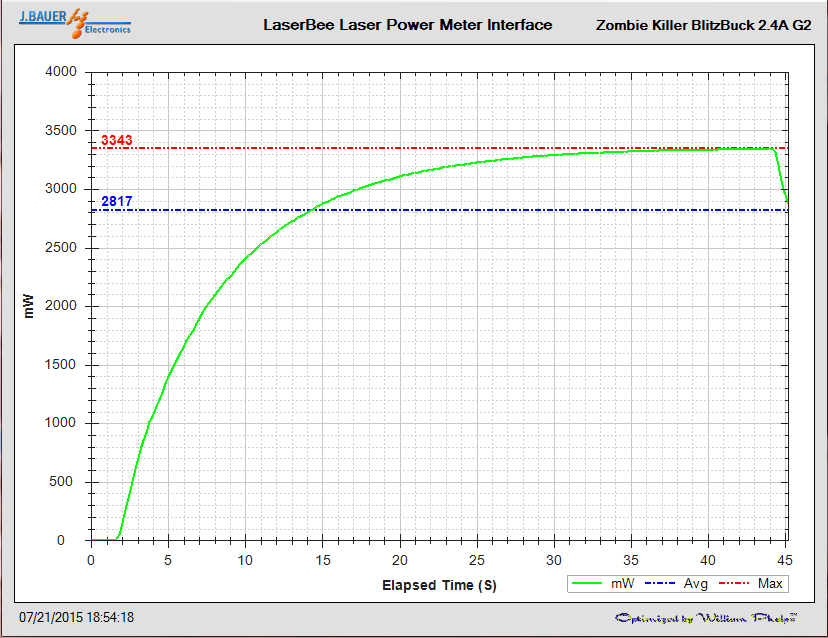 [/URL]
So I decided I wanted to do a build thread...after I had pretty much completed the build. So this won't feature every single step of the build, but I might go back and add some of the skipped steps when I build another. I've built many lasers now, but this will be my first to actually post on LPF. This is one of my favorite hosts at the moment, so I will be building many more. I actually have 3 more hosts and heatsinks on the way, so if anyone would like one of these, PM me.
So this is what Rick Trent calls the "Zombie Killer" host. It does, in fact, seem like a pretty good backup skull smasher in case of a zombie apocalypse. Lol. I have had a very difficult time finding these hosts anywhere except through Rick. The only other source I've found is in bulk @ around 1,000 pieces. That seller called them "Anti-Wolf Attack Flashlights". I like "Zombie Killer" better.
[URL=http://s356.photobucket.com/user/TaterMay22/media/Mobile%20Uploads/Screenshot_2015-07-28-15-10-49_zpswox8t8dl.png.html]
 [/URL]
The heatsink he sells for this host is an aluminum set-screw type which includes a 12mm copper module. What I really like about Rick's modules is the fact that the rear portion of the module butts up to the back of the diode. It makes me feel a bit better about heat transfer from the diode to the module.
[URL=http://s356.photobucket.com/user/TaterMay22/media/Mobile%20Uploads/Screenshot_2015-07-27-14-58-54_zpsgbtqmhqq.png.html]
 [/URL]
Since I didn't think to take pictures during the build, I'll just go over some of the basics. I used Arctic Silver as thermal interface between both diode/module and module/heatsink. All leads are heat shrink wrapped. I used a BlitzBuck V5 driver set at 2.4A with an aluminum heatsink attached via Arctic Alumina thermal adhesive, and covered all exposed points on the driver with AA to prevent shorts. The heatsink for this host is designed for a larger(20mm, I believe) driver or contact board, however the driver contact ring can be flipped over to work with a smaller driver. I did so, and simply used the Arctic Alumina to attach the driver to the heatsink.
[URL=http://s356.photobucket.com/user/TaterMay22/media/Mobile%20Uploads/Screenshot_2015-07-22-10-55-30_zpsxohboksw.png.html]
 [/URL]
[URL=http://s356.photobucket.com/user/TaterMay22/media/Mobile%20Uploads/Screenshot_2015-07-22-10-55-56_zpspp9s7fmm.png.html]
 [/URL]
[URL=http://s356.photobucket.com/user/TaterMay22/media/Mobile%20Uploads/Screenshot_2015-07-22-10-57-18_zpsbqfa0wuk.png.html]
 [/URL]
Once all that is complete and the laser assembly is tested successfully, all that is left is to drop it into the host and screw on the bezel that makes this the "Zombie Killer", and not just another silver flashlight host.
Edit: Two of the other hosts I received do not have the vertical play between heatsink and host. I am now using one of those hosts to eliminate the vertical play since I have put this one up for sale, so the wire contact ring you see in the pictures is no longer necessary. I have had no issues whatsoever with the wire fix, but this one will no longer require it.
[URL=http://s356.photobucket.com/user/TaterMay22/media/Mobile%20Uploads/Screenshot_2015-07-22-10-56-21_zpselqti8zg.png.html]
 [/URL]
[URL=http://s356.photobucket.com/user/TaterMay22/media/Mobile%20Uploads/Screenshot_2015-07-22-10-56-27_zpsdrmd1o5i.png.html]
 [/URL]
[URL=http://s356.photobucket.com/user/TaterMay22/media/Mobile%20Uploads/Screenshot_2015-07-22-10-57-24_zpsibnz76la.png.html]
 [/URL]
And finally, the finished product. Let me know what you think!
[URL=http://s356.photobucket.com/user/TaterMay22/media/Mobile%20Uploads/Screenshot_2015-07-22-10-58-58_zpsqrrwuiif.png.html]
 [/URL]
[URL=http://s356.photobucket.com/user/TaterMay22/media/Mobile%20Uploads/Screenshot_2015-07-22-11-01-17_zpsoirbvkym.png.html]
 [/URL]
[URL=http://s356.photobucket.com/user/TaterMay22/media/Mobile%20Uploads/Screenshot_2015-07-22-11-01-48_zpsytnwasbe.png.html]
 [/URL]
[URL=http://s356.photobucket.com/user/TaterMay22/media/Mobile%20Uploads/Screenshot_2015-07-22-11-03-17_zpshsiyn6bu.png.html]
 [/URL]
[URL=http://s356.photobucket.com/user/TaterMay22/media/Mobile%20Uploads/Screenshot_2015-07-22-11-02-17_zps2zmatkcl.png.html]
 [/URL]
And the power output. A little more than I expected.
[URL=http://s356.photobucket.com/user/TaterMay22/media/Mobile%20Uploads/Zombie%20Killer%20BlitzBuck%202.4A_zpsxcojfoyv.png.html]
 [/URL]
Last edited:


