Pman
0
- Joined
- Nov 28, 2012
- Messages
- 4,441
- Points
- 113
*****I DON'T SELL LASERS***** I do however at my discretion give things away for free. Some of the units I am making (have a bunch more pieces/parts on order) will be finding new homes and I also will be giving away some of the dual lights so others can build something into them.
I was originally going to make some more of the "black ones" when some parts arrived and post this tutorial on my 1000th post but since I am in a hospital waiting room as my father is having a surprise 5 bypass surgery and just went into the OR I have time now.
This isn't about what you can buy from some of our resident pro builders (which I GREATLY admire and take my hat off too not to mention own some of their stunning work). This is thinking more out of the box on a shoestring budget old school style I've got no money or just want to challenge yourself to build something with a piece of string and some flip-flops") Well, maybe not that far out but I think you get the point. I've accumulated a ton of stuff to play around with my fun little builds so it's certainly not as hard for me to do this kind of stuff at this point. Hopefully this will encourage others to mess around and share with the rest of us interesting possibilities, solutions to build problems and other ways around issues we haven't thought of yet.
Well, maybe not that far out but I think you get the point. I've accumulated a ton of stuff to play around with my fun little builds so it's certainly not as hard for me to do this kind of stuff at this point. Hopefully this will encourage others to mess around and share with the rest of us interesting possibilities, solutions to build problems and other ways around issues we haven't thought of yet.
I am a "tinkerer" and if you have ever taken a look at my inexpensive build thread you knew this already. The way I do this build allows you to take everything apart if you want.
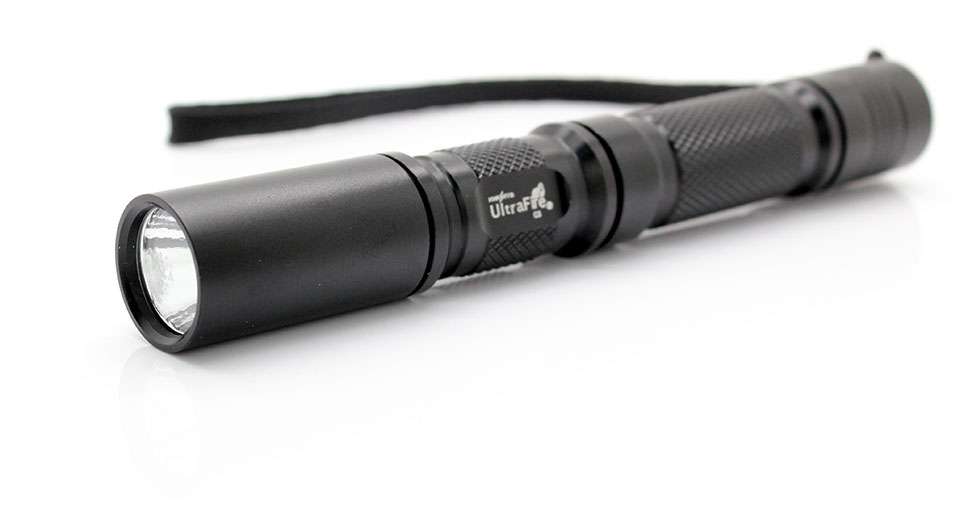
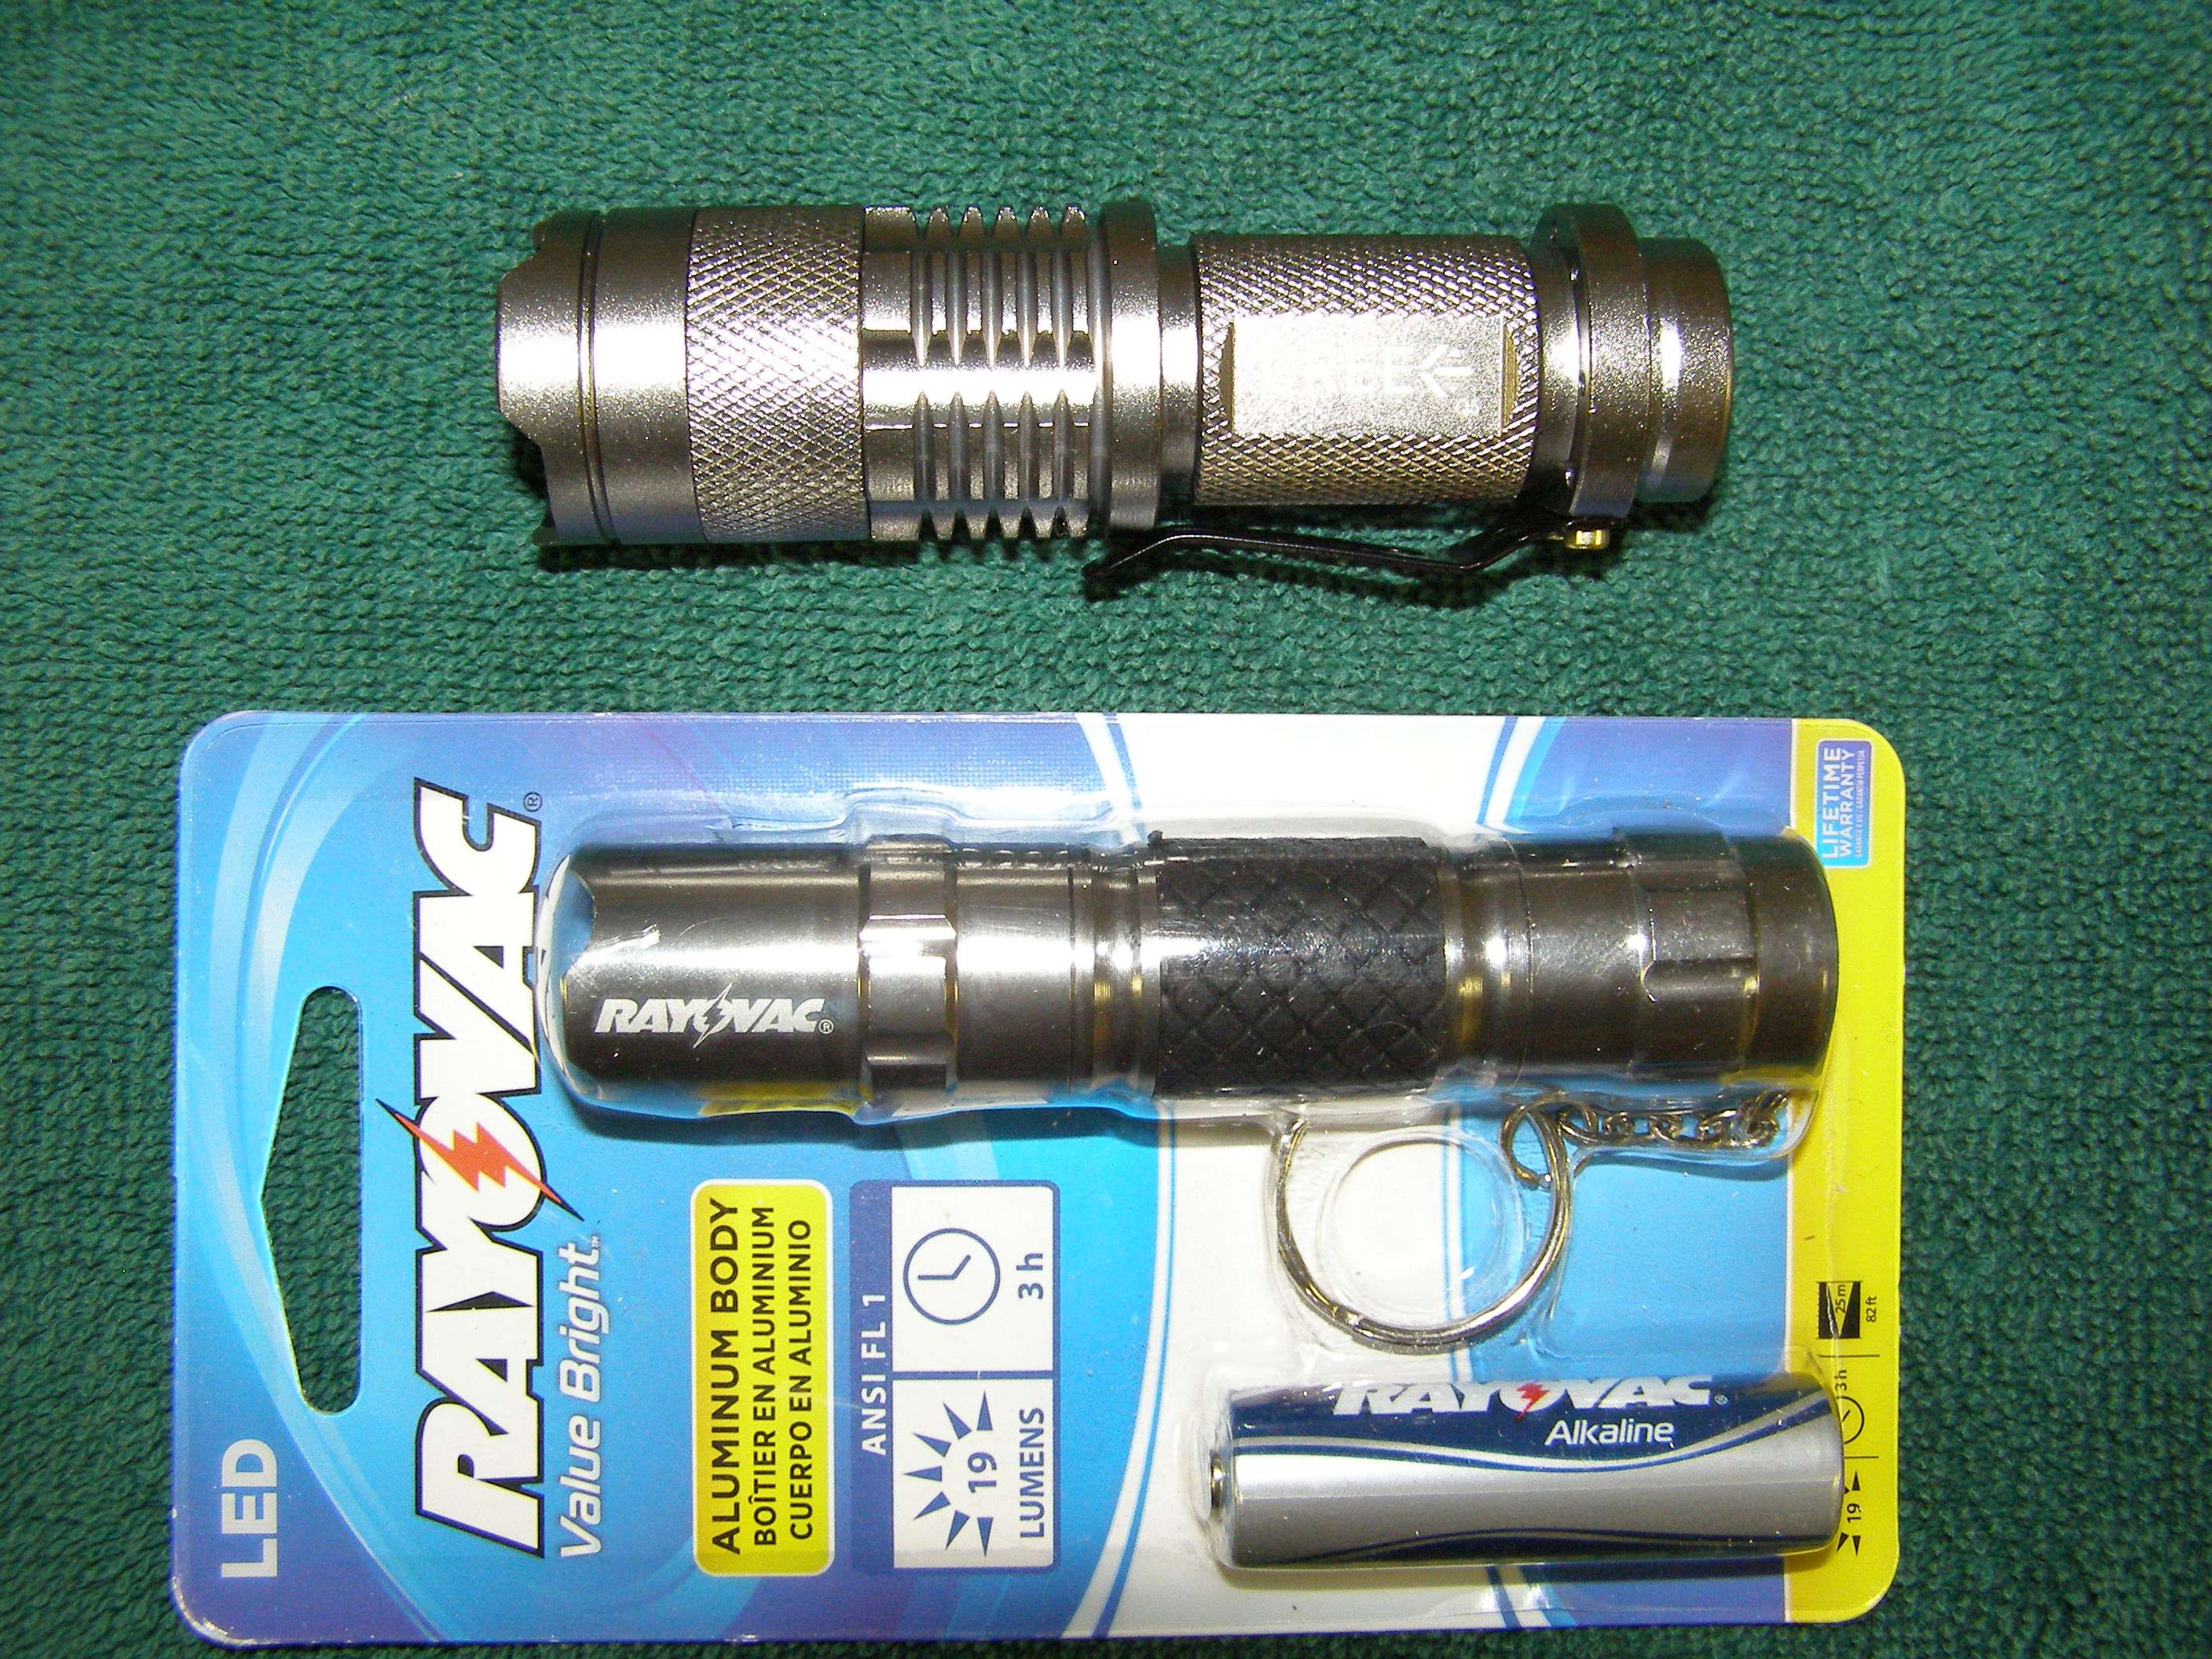
Came across what I consider to be a great matchup between 2 different very inexpensive flashlights from 2 different sources. When I combined them I personally couldn't believe how cool they looked so without further ado let me reveal our players.
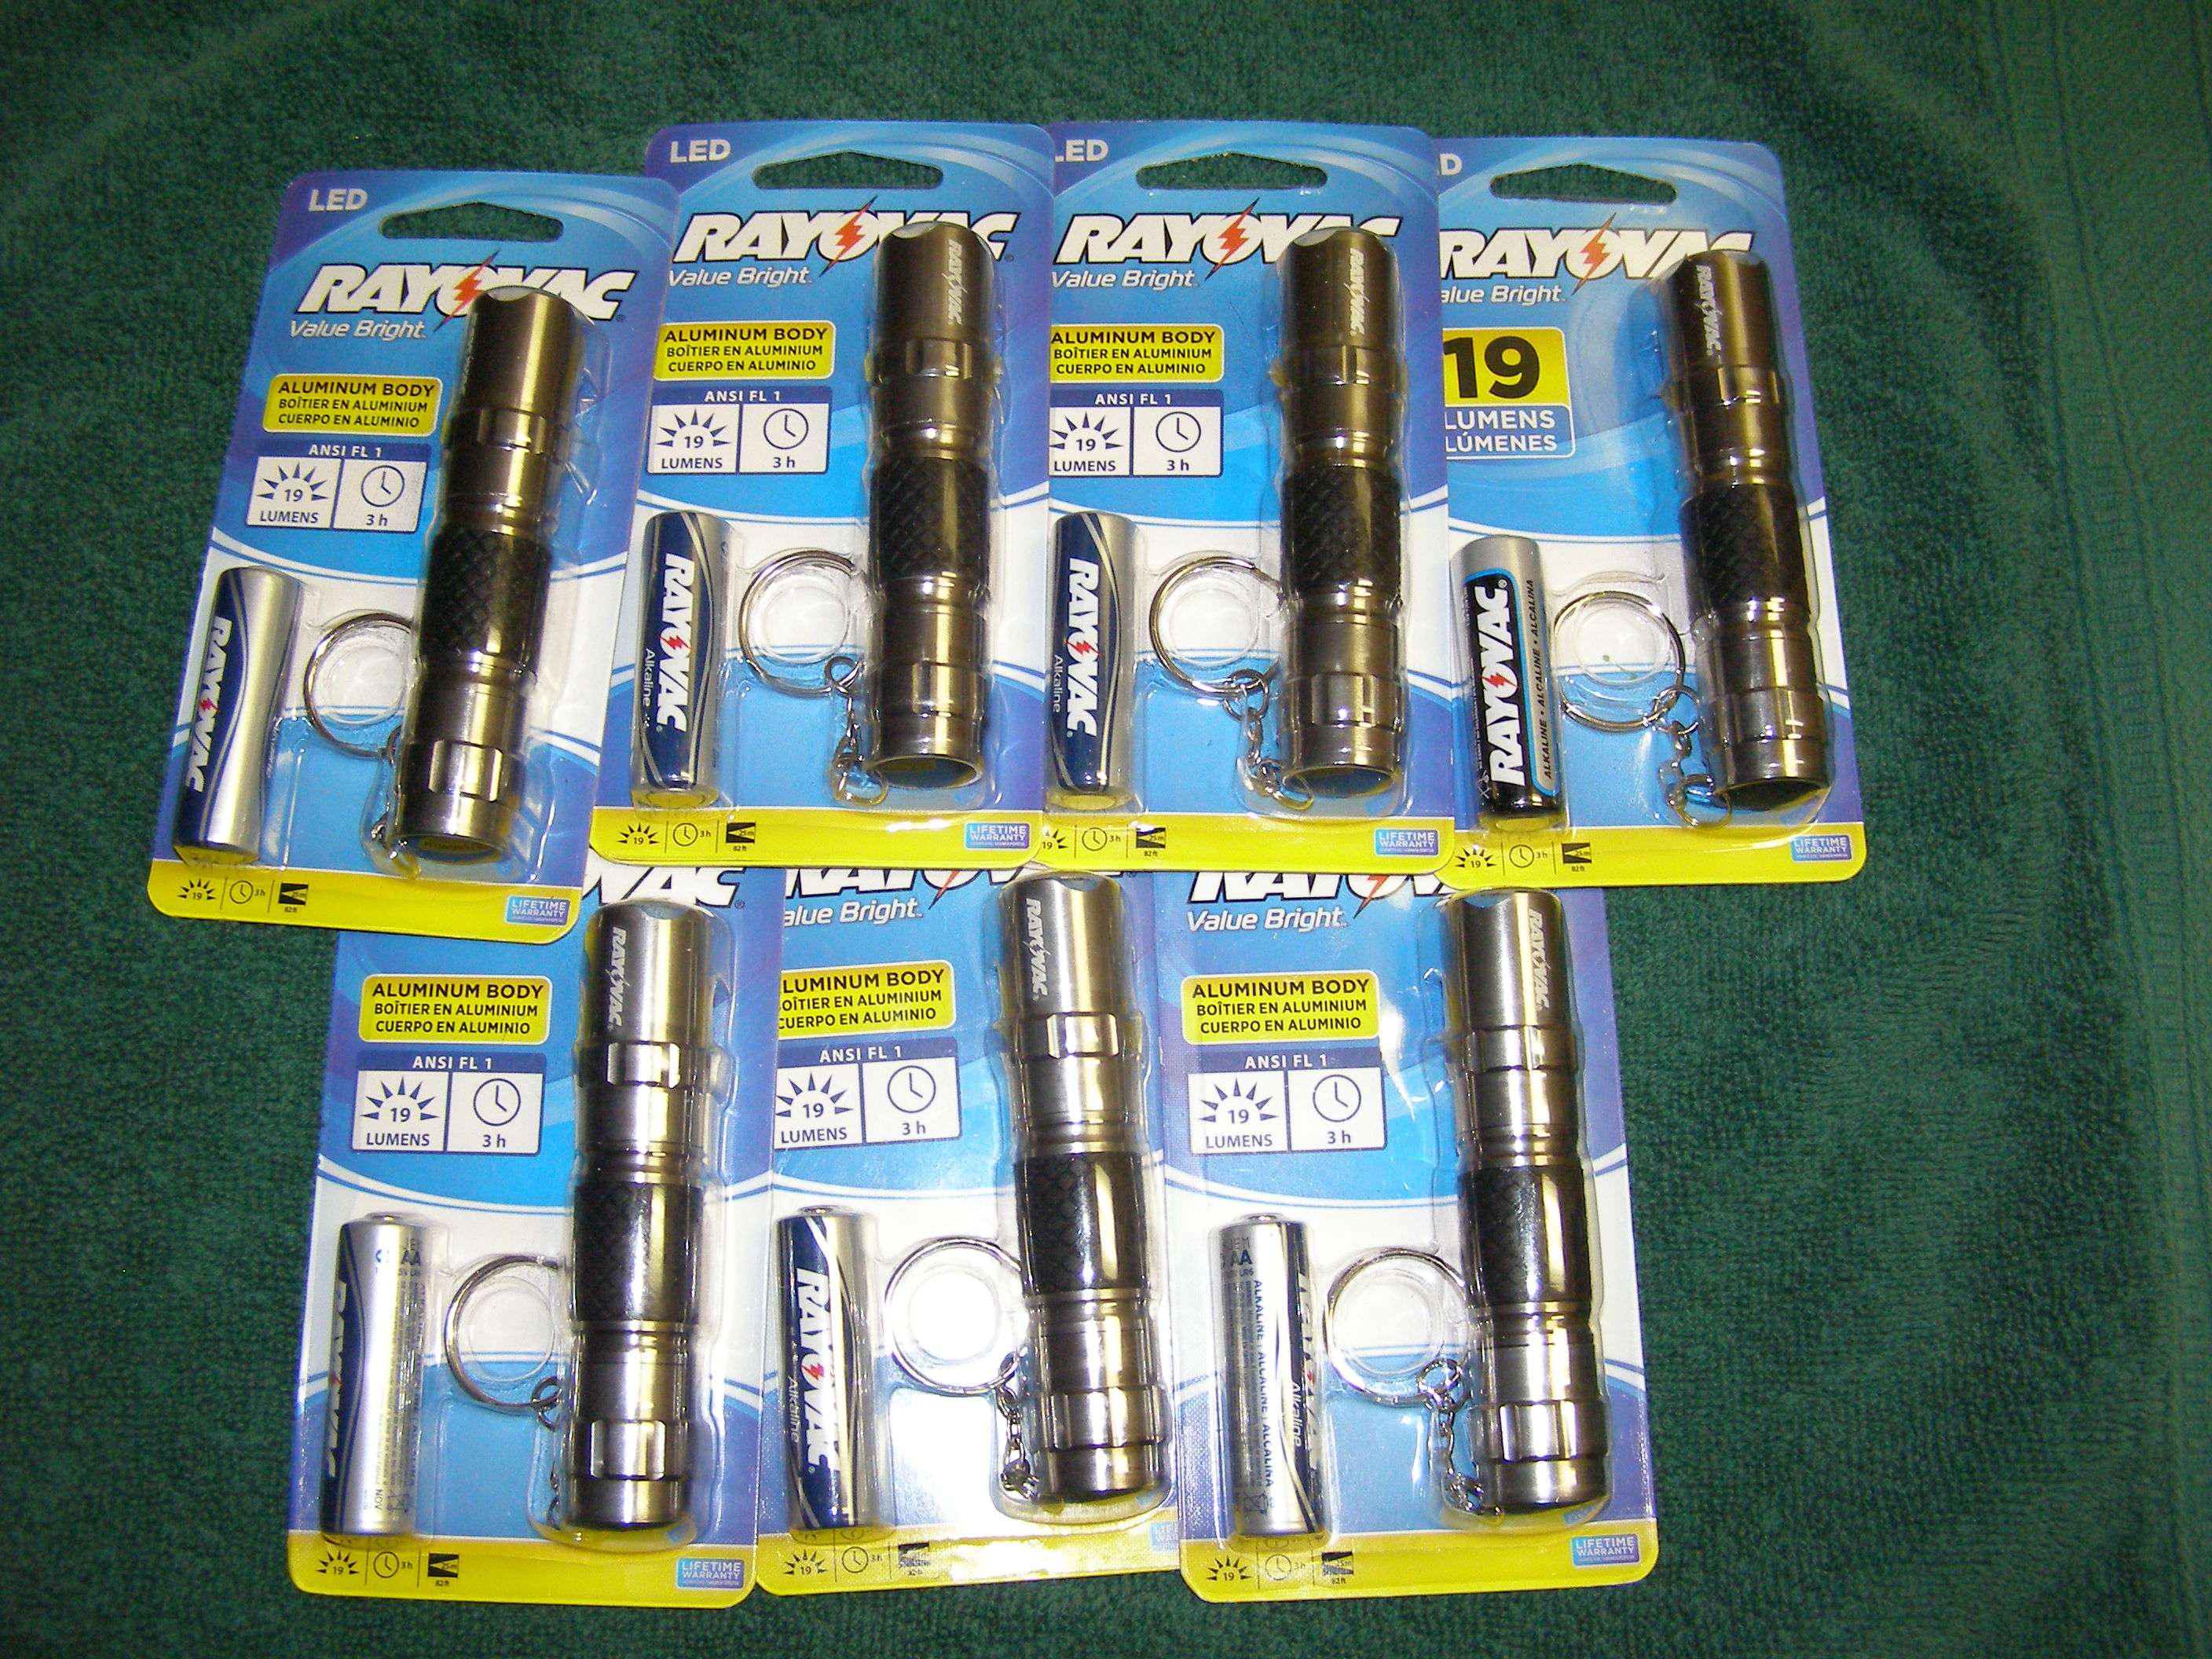
These $4 flashlights can be found at your local Walmart usually in 3 different locations in the store. Most of the time 2 of those locations is up at the registers right before you get into a checkout line at either end of the store and are in a kind of square/round battery center thing sitting in the middle of the floor. The black rubber hand grip can slide right off (it's not glued on).
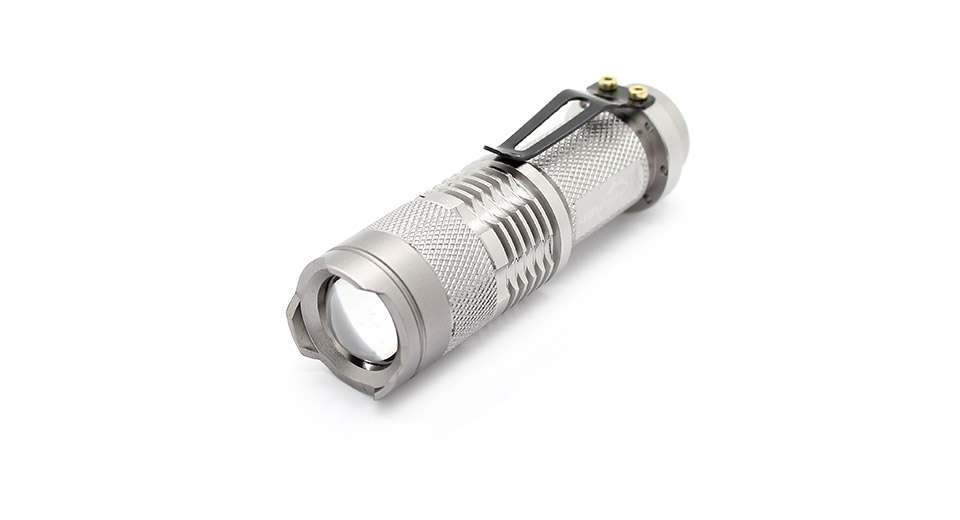
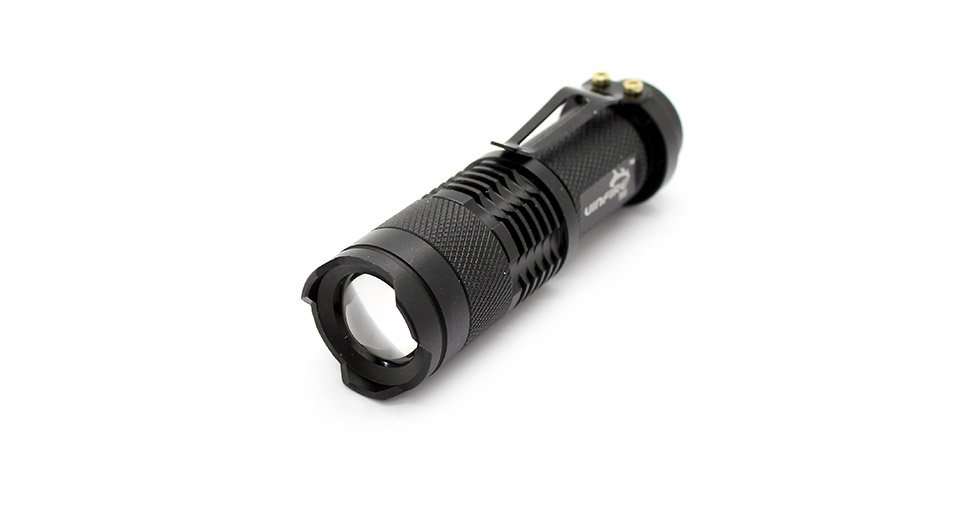
The other source is Fasttech flashlight model B68 which comes in 4 different ways. You can get a black or silver version and either a single mode or 3 mode. The cost is <$5.50 for any version. Will say that currently the 3 mode versions have a 4 day wait period to ship right now. I hadn't noticed that it came in a black version so that's why I only had a couple black ones made so far. Ordered a lot more black ones. I try to make a bunch of them at once.
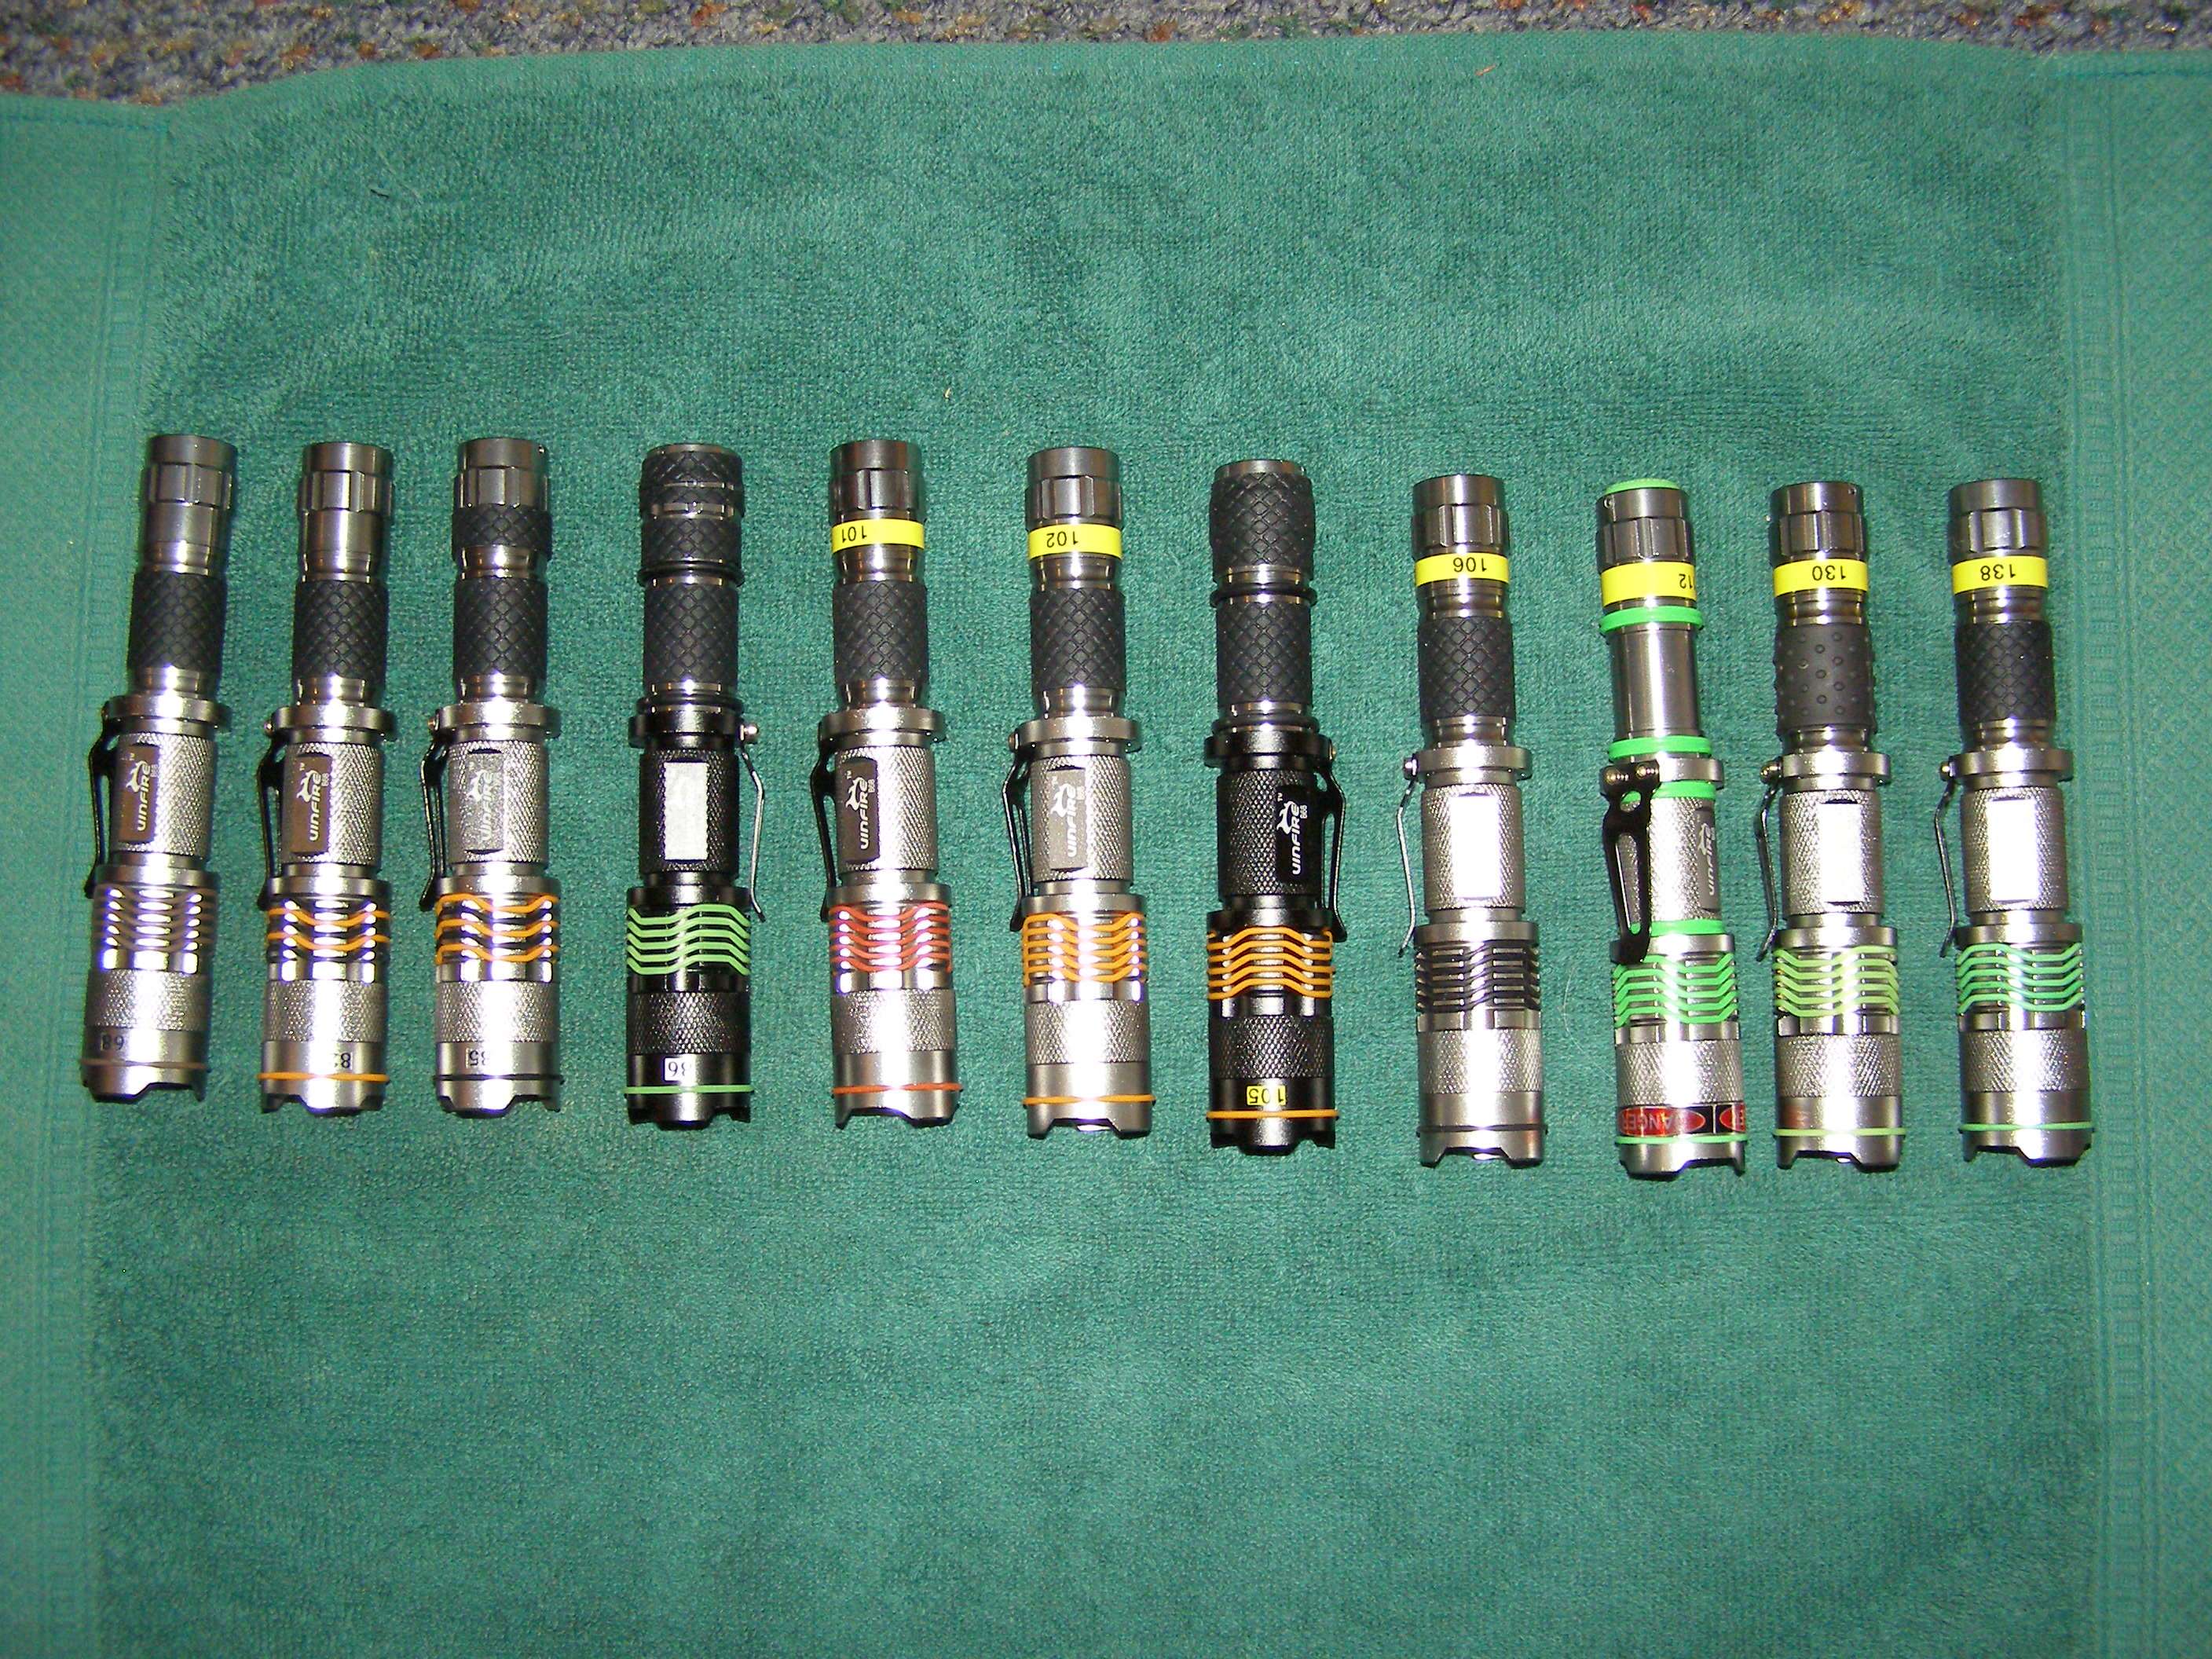
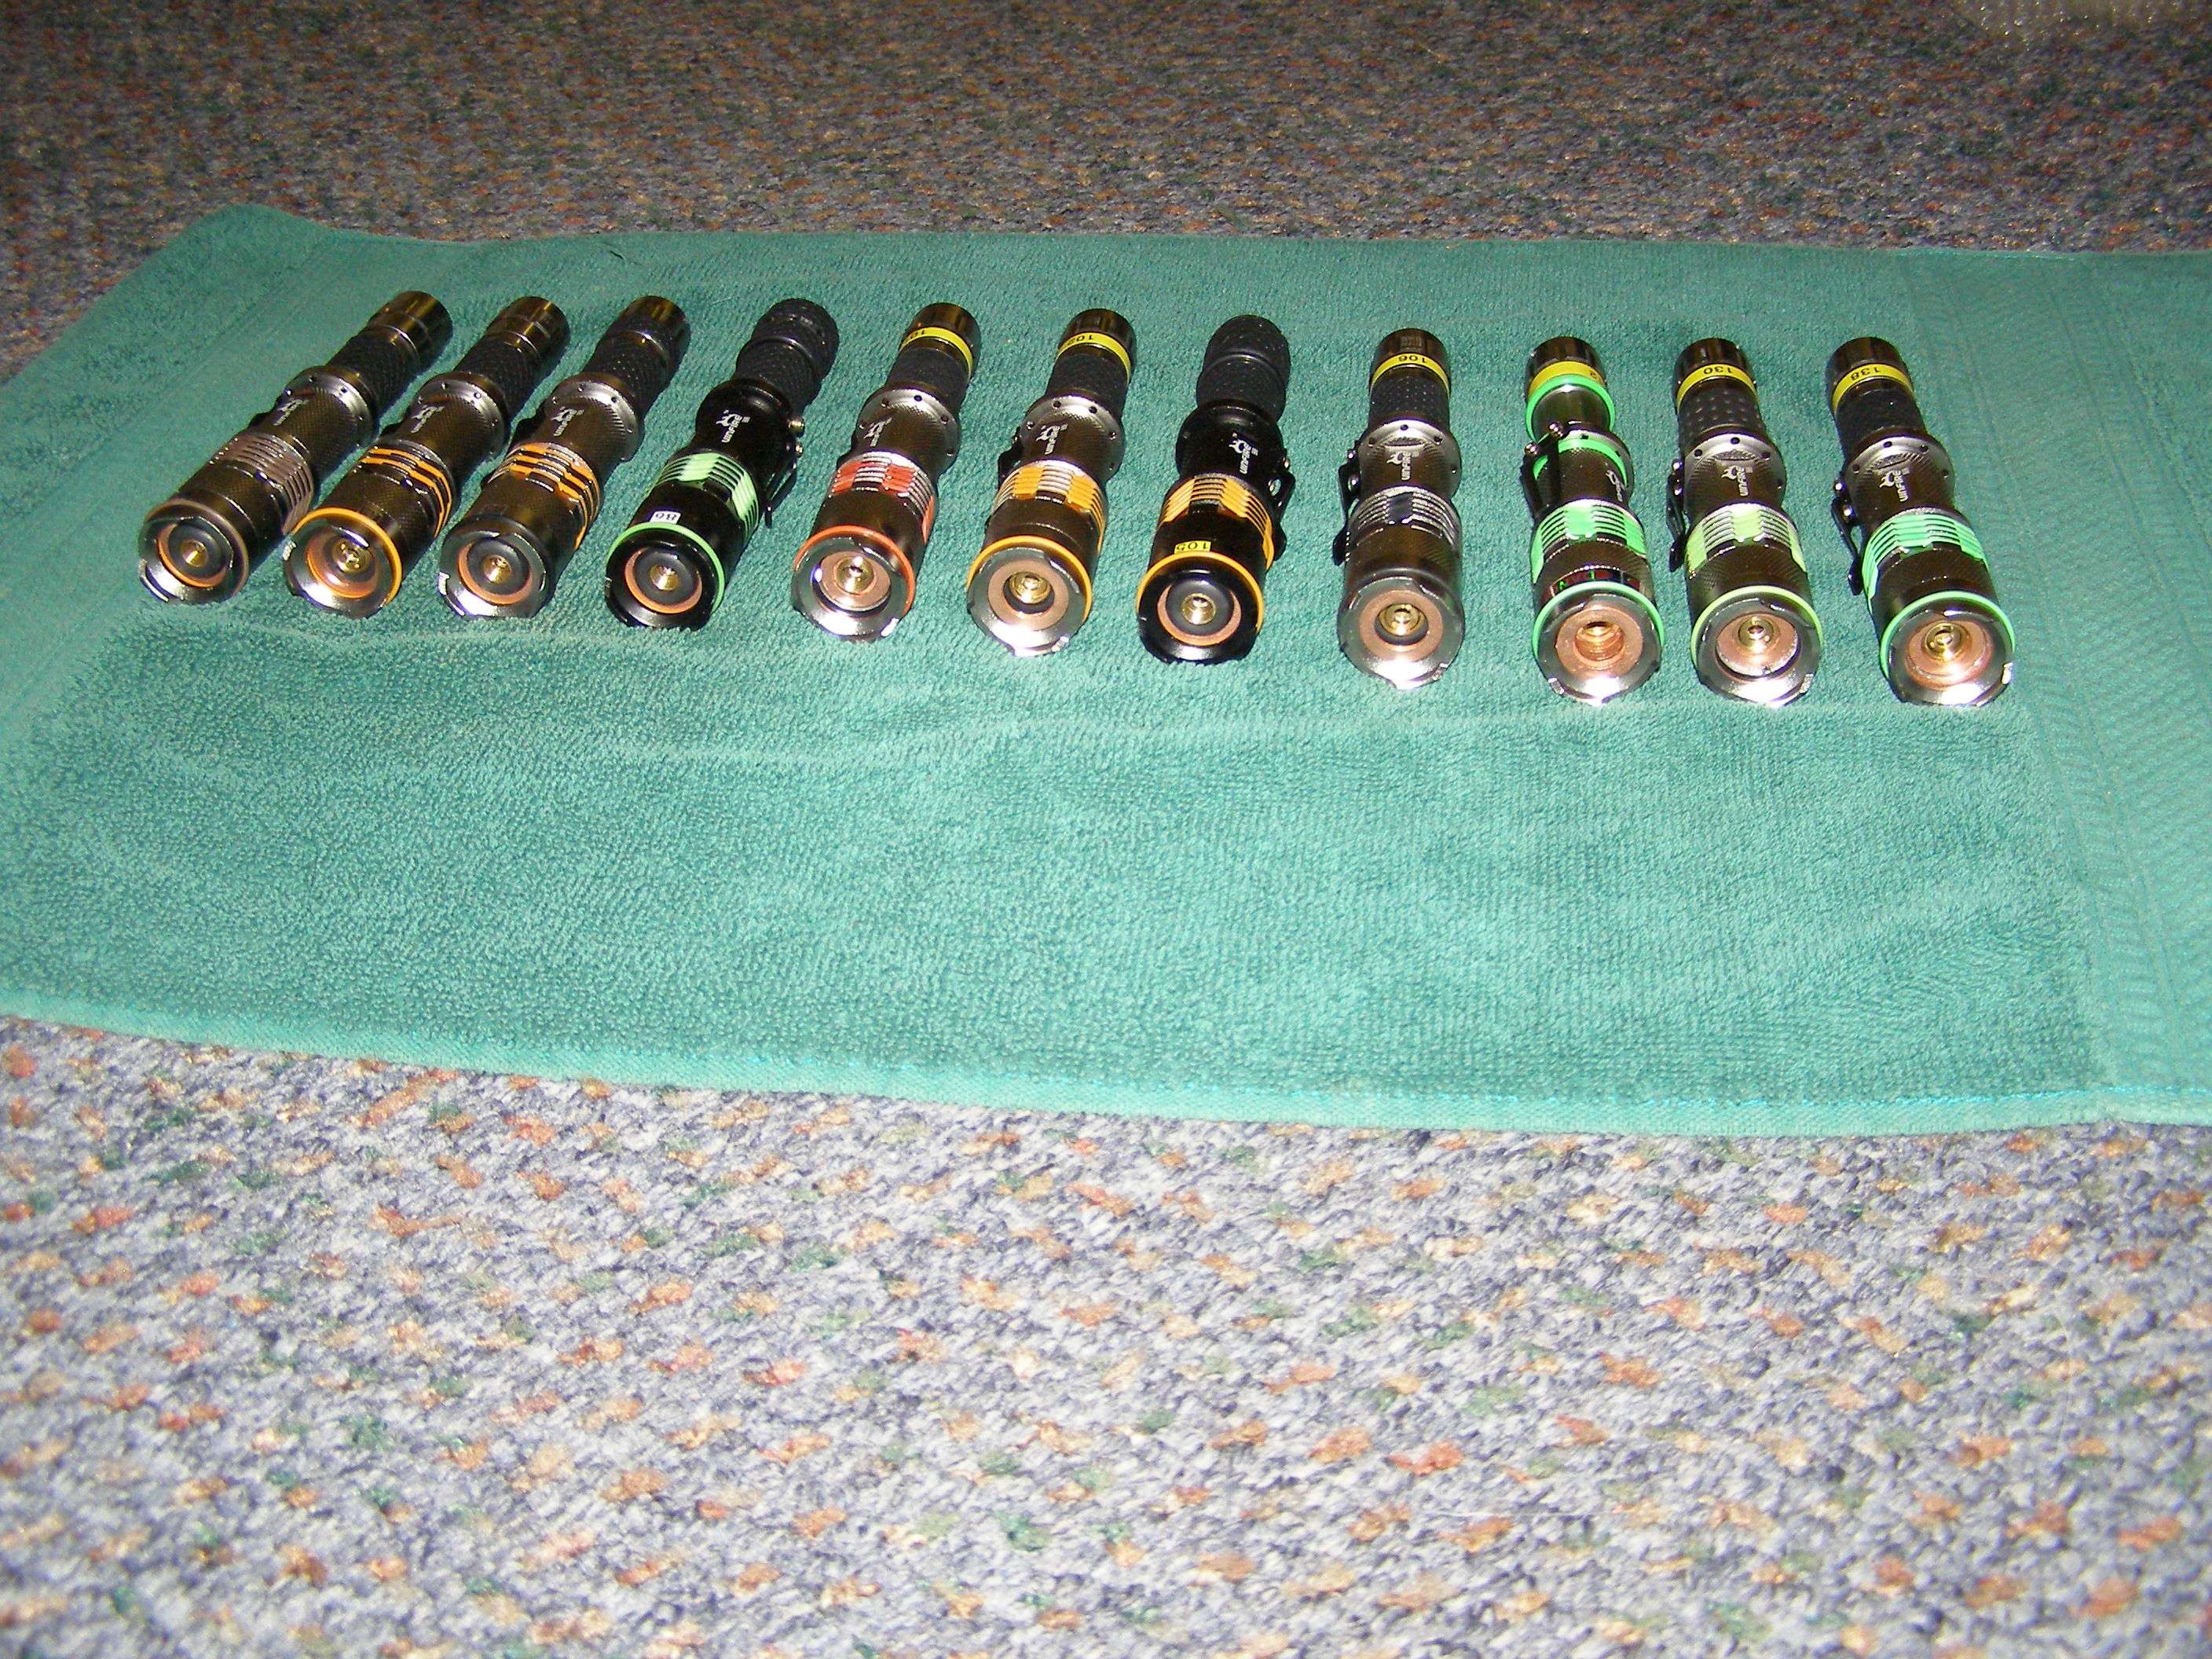
Now I realize some don't want to read this whole thing and would like to just see the results so here's a bunch of pics of possible end product.
The first pic shows 4 units just as 240lm 3 mode flashlights still.


Now here's the step by step for anyone interested. Keep in mind again that I am trying to keep cost to a minimum so there's no "custom" bought heat-sinks or anything like that.
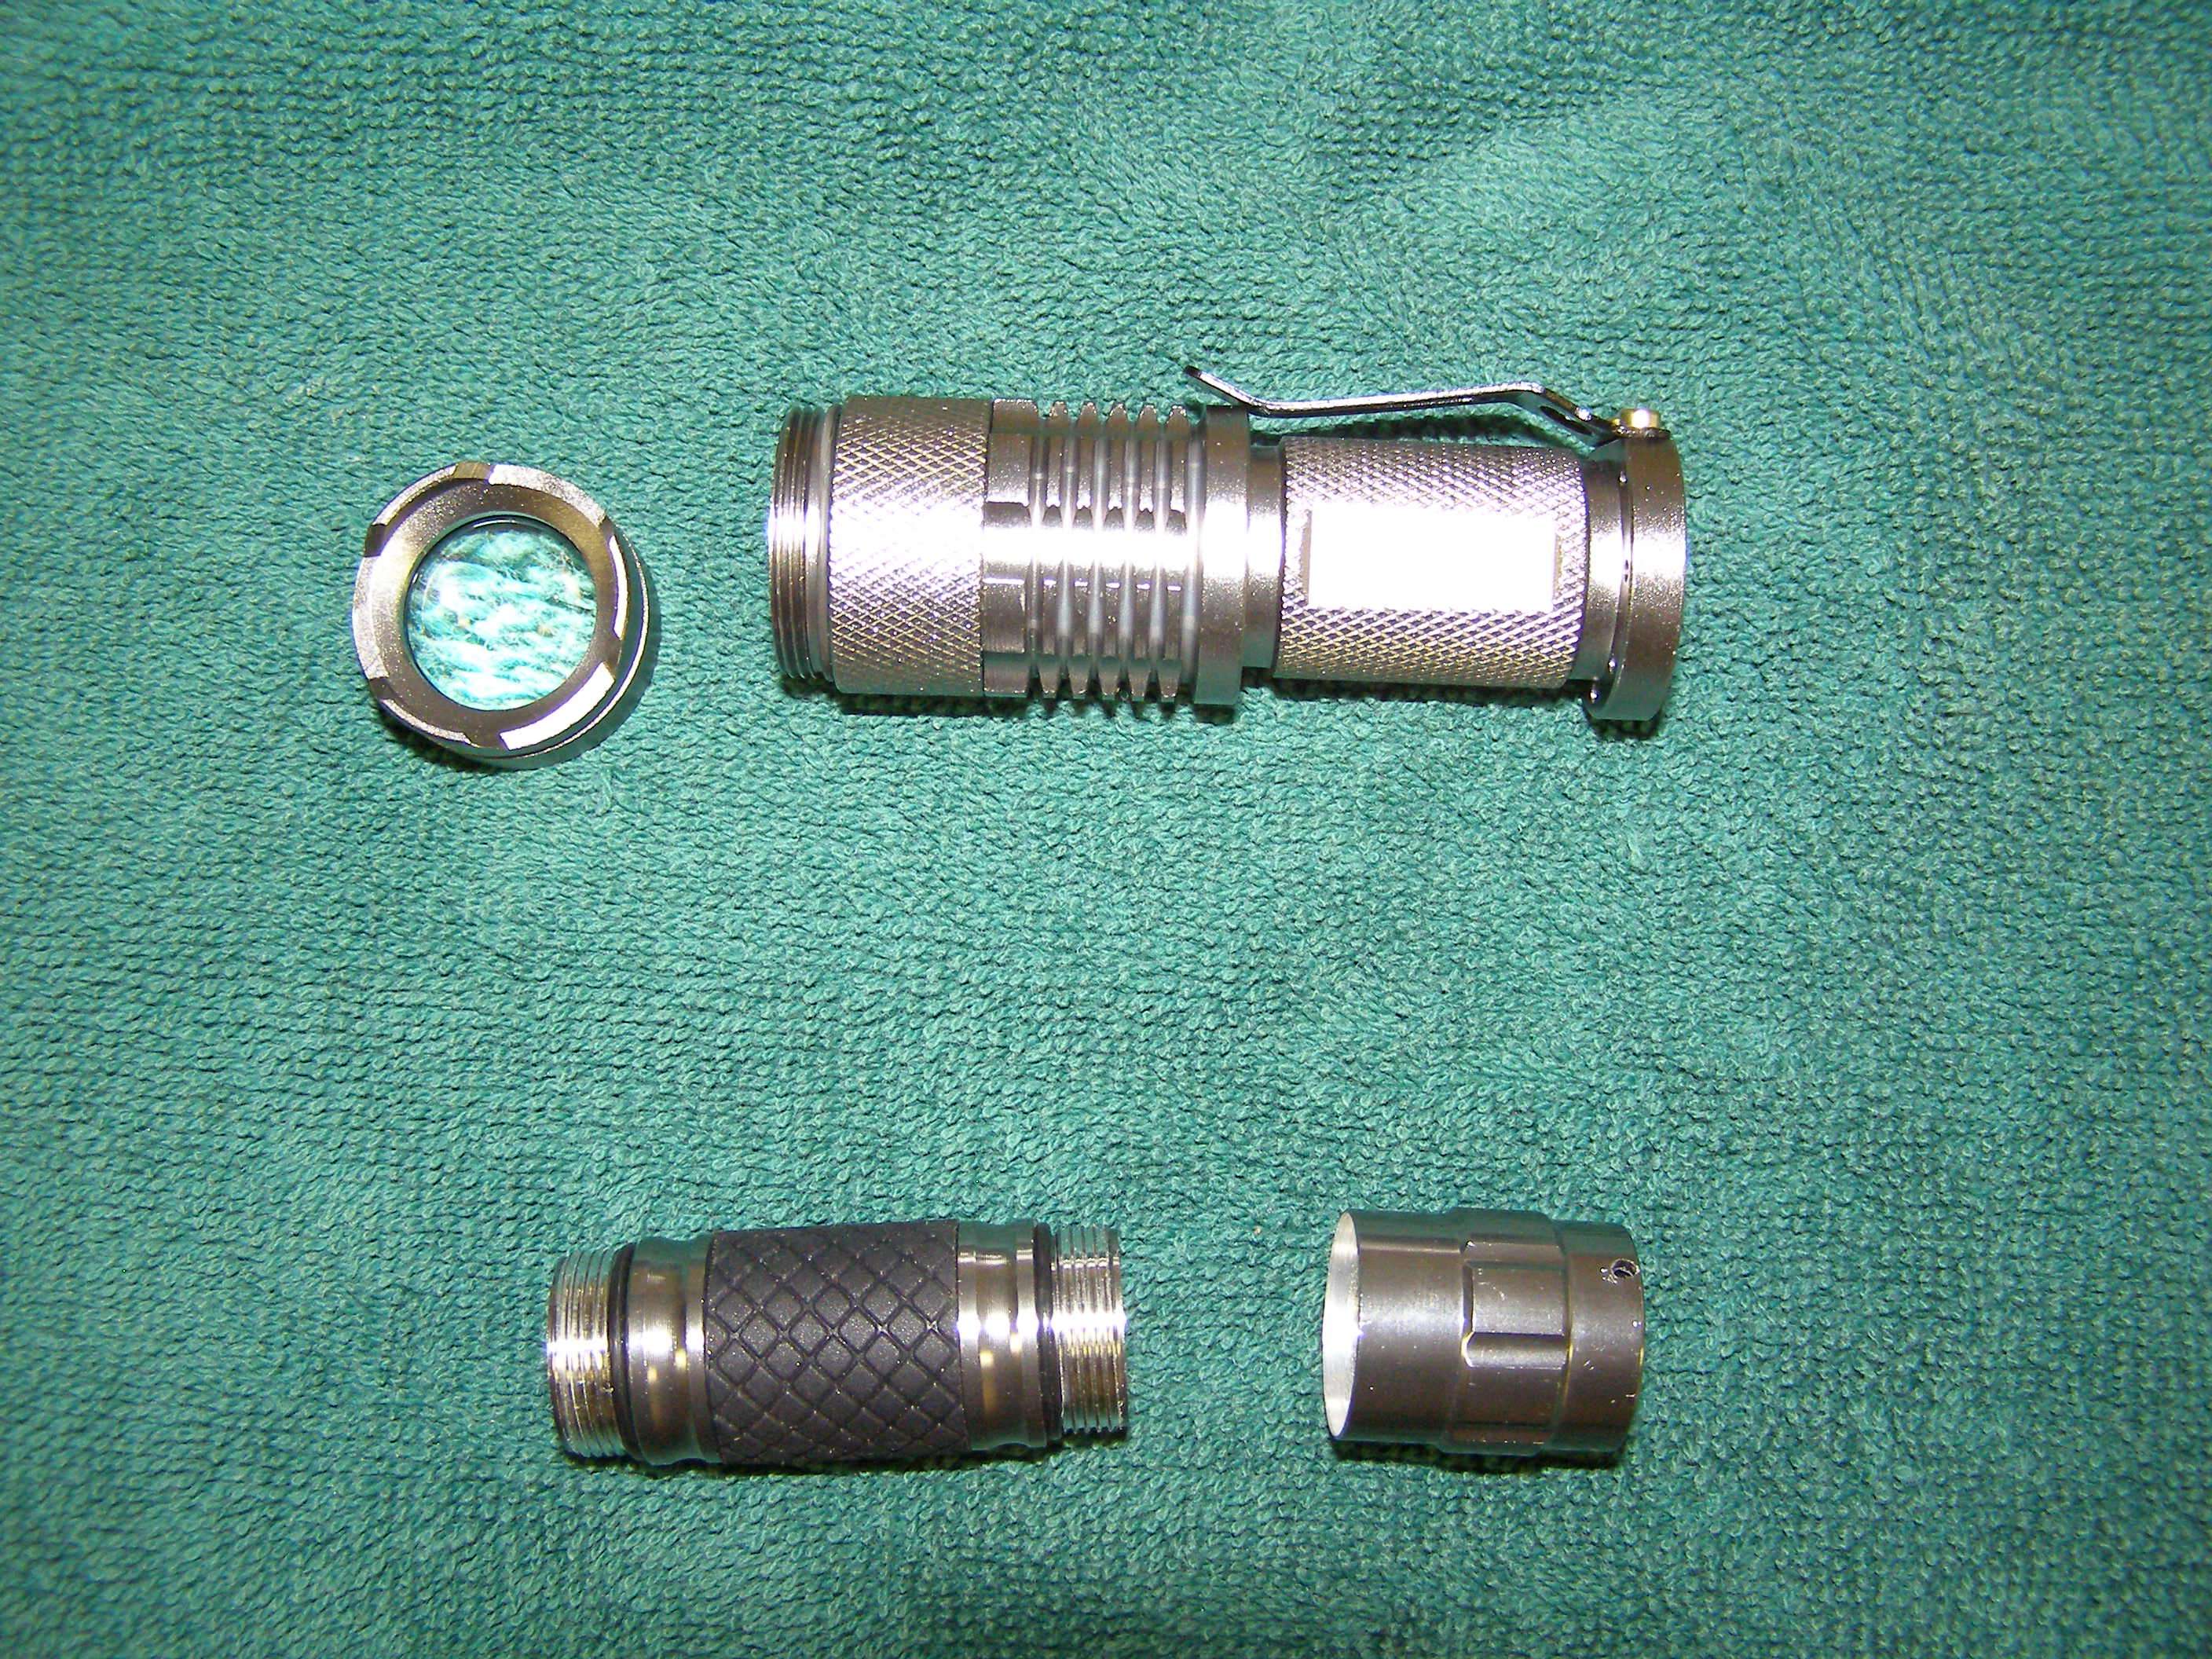
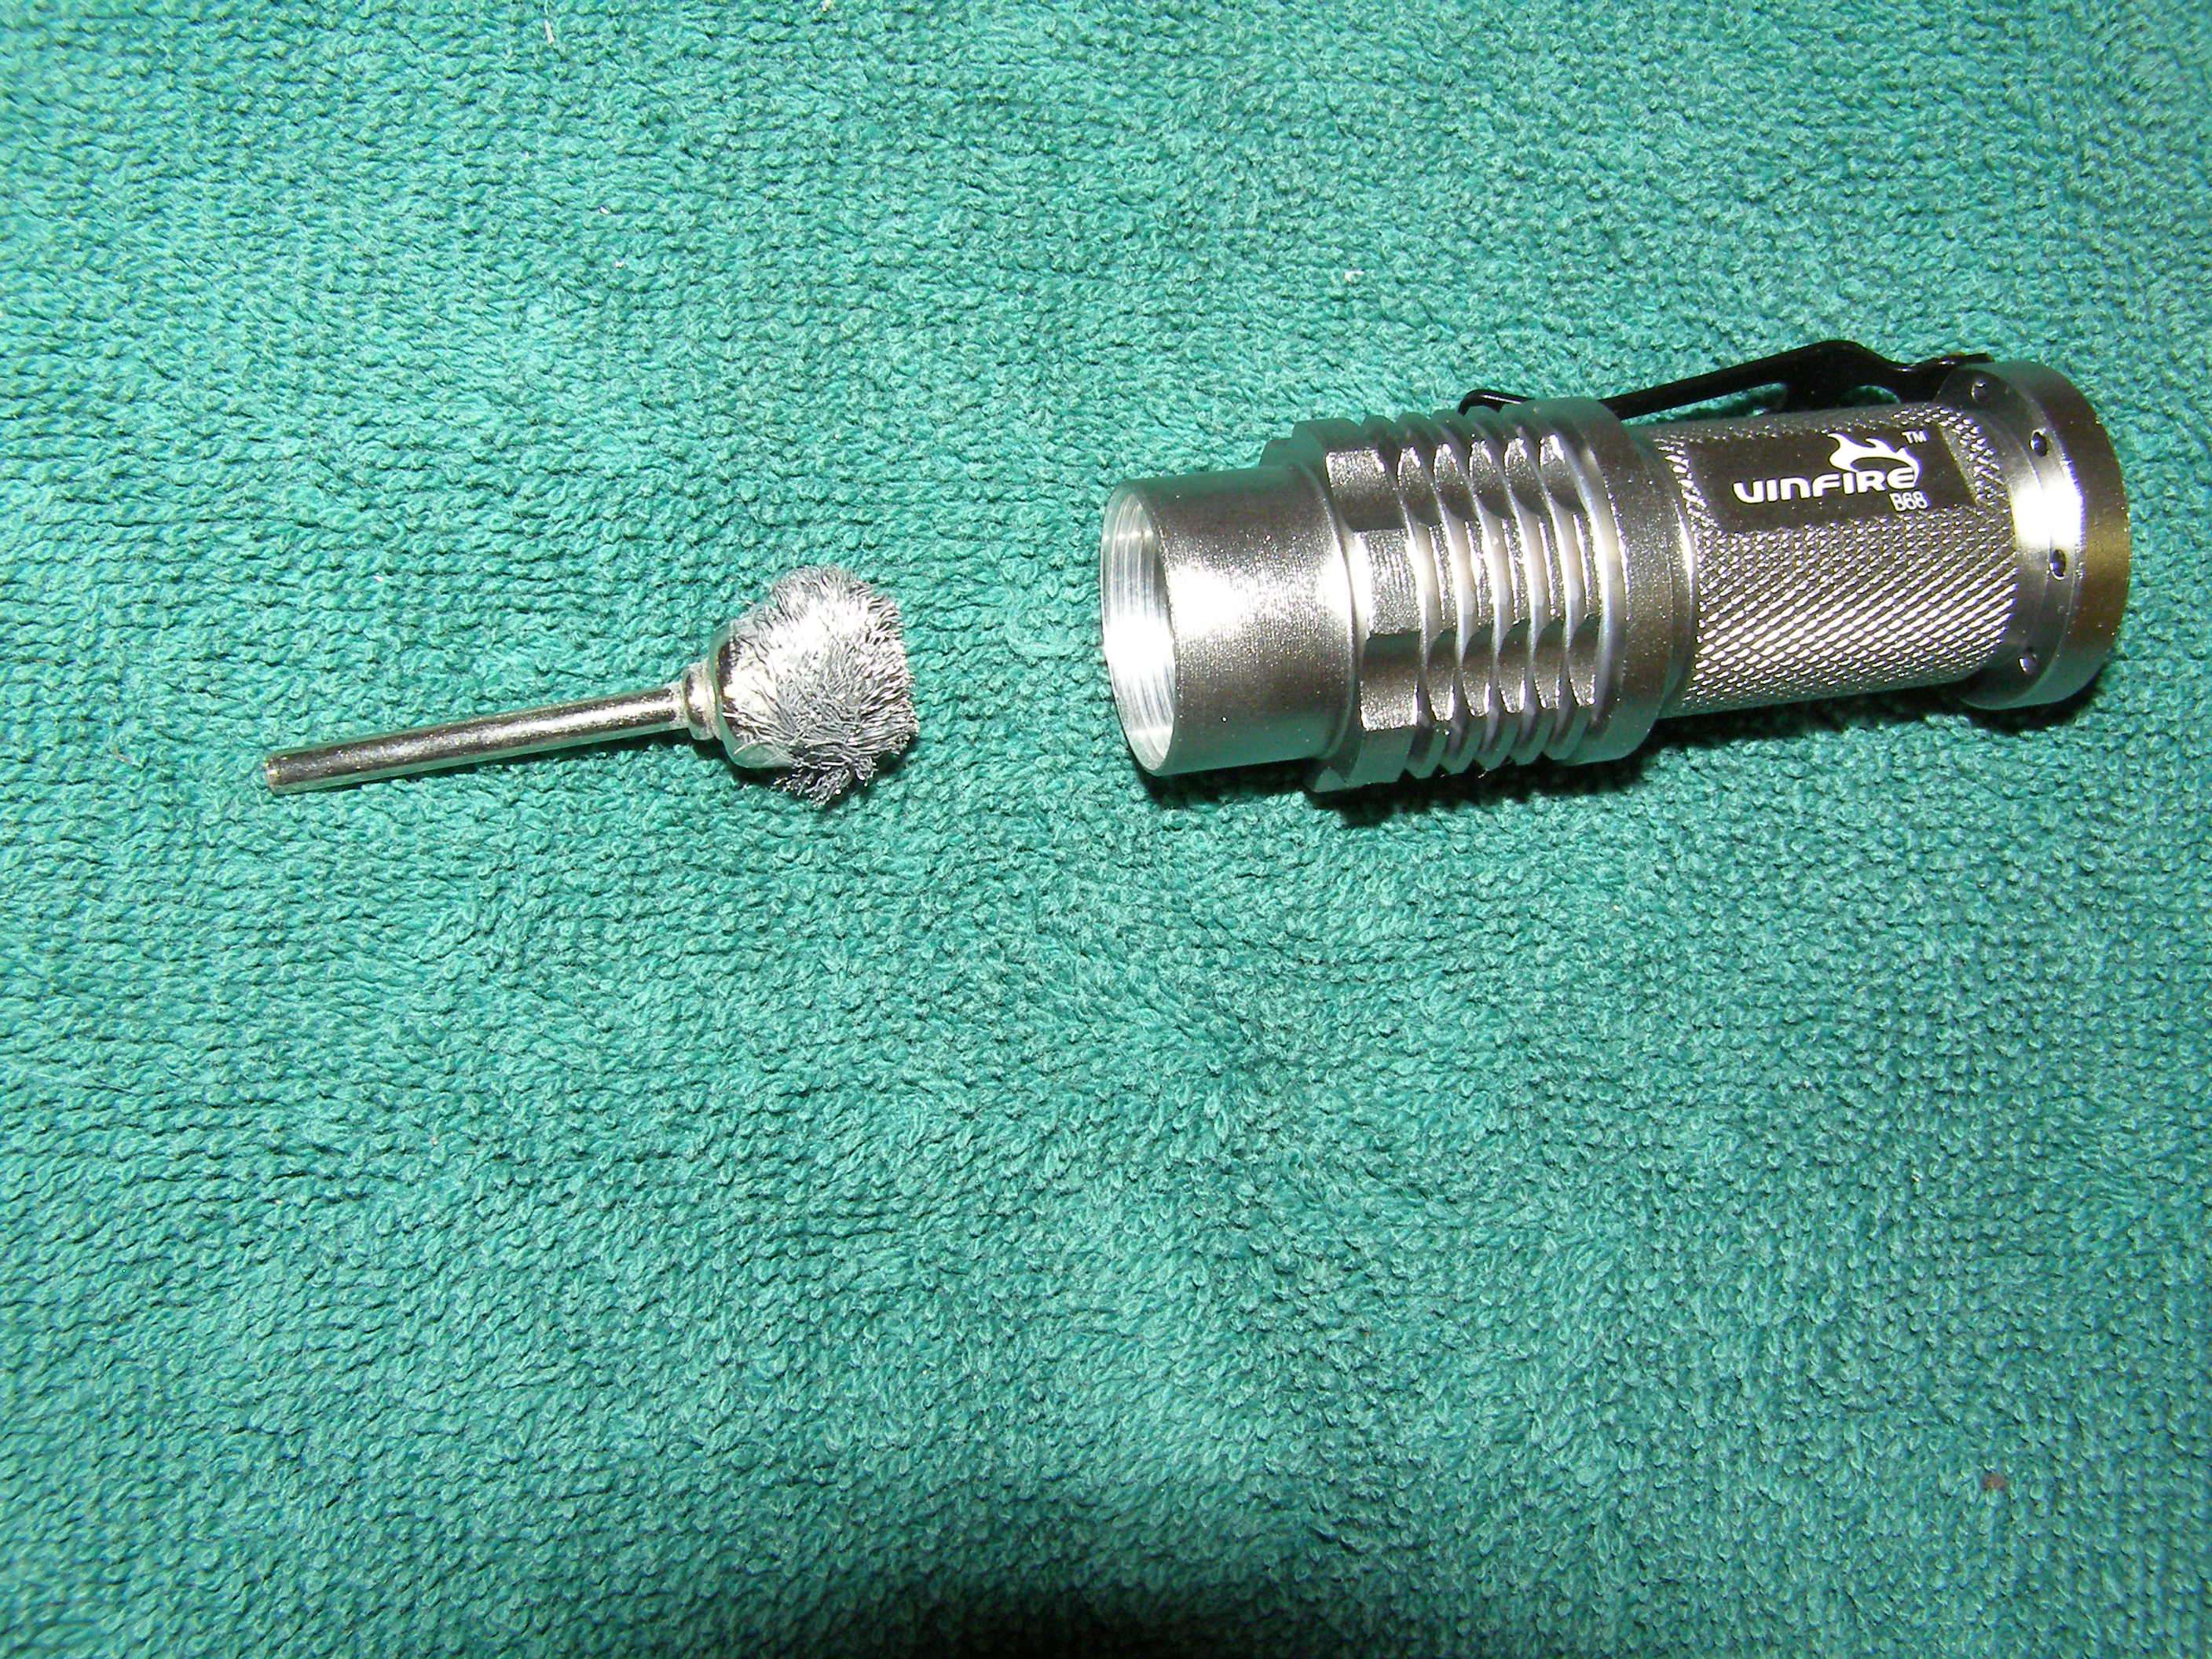
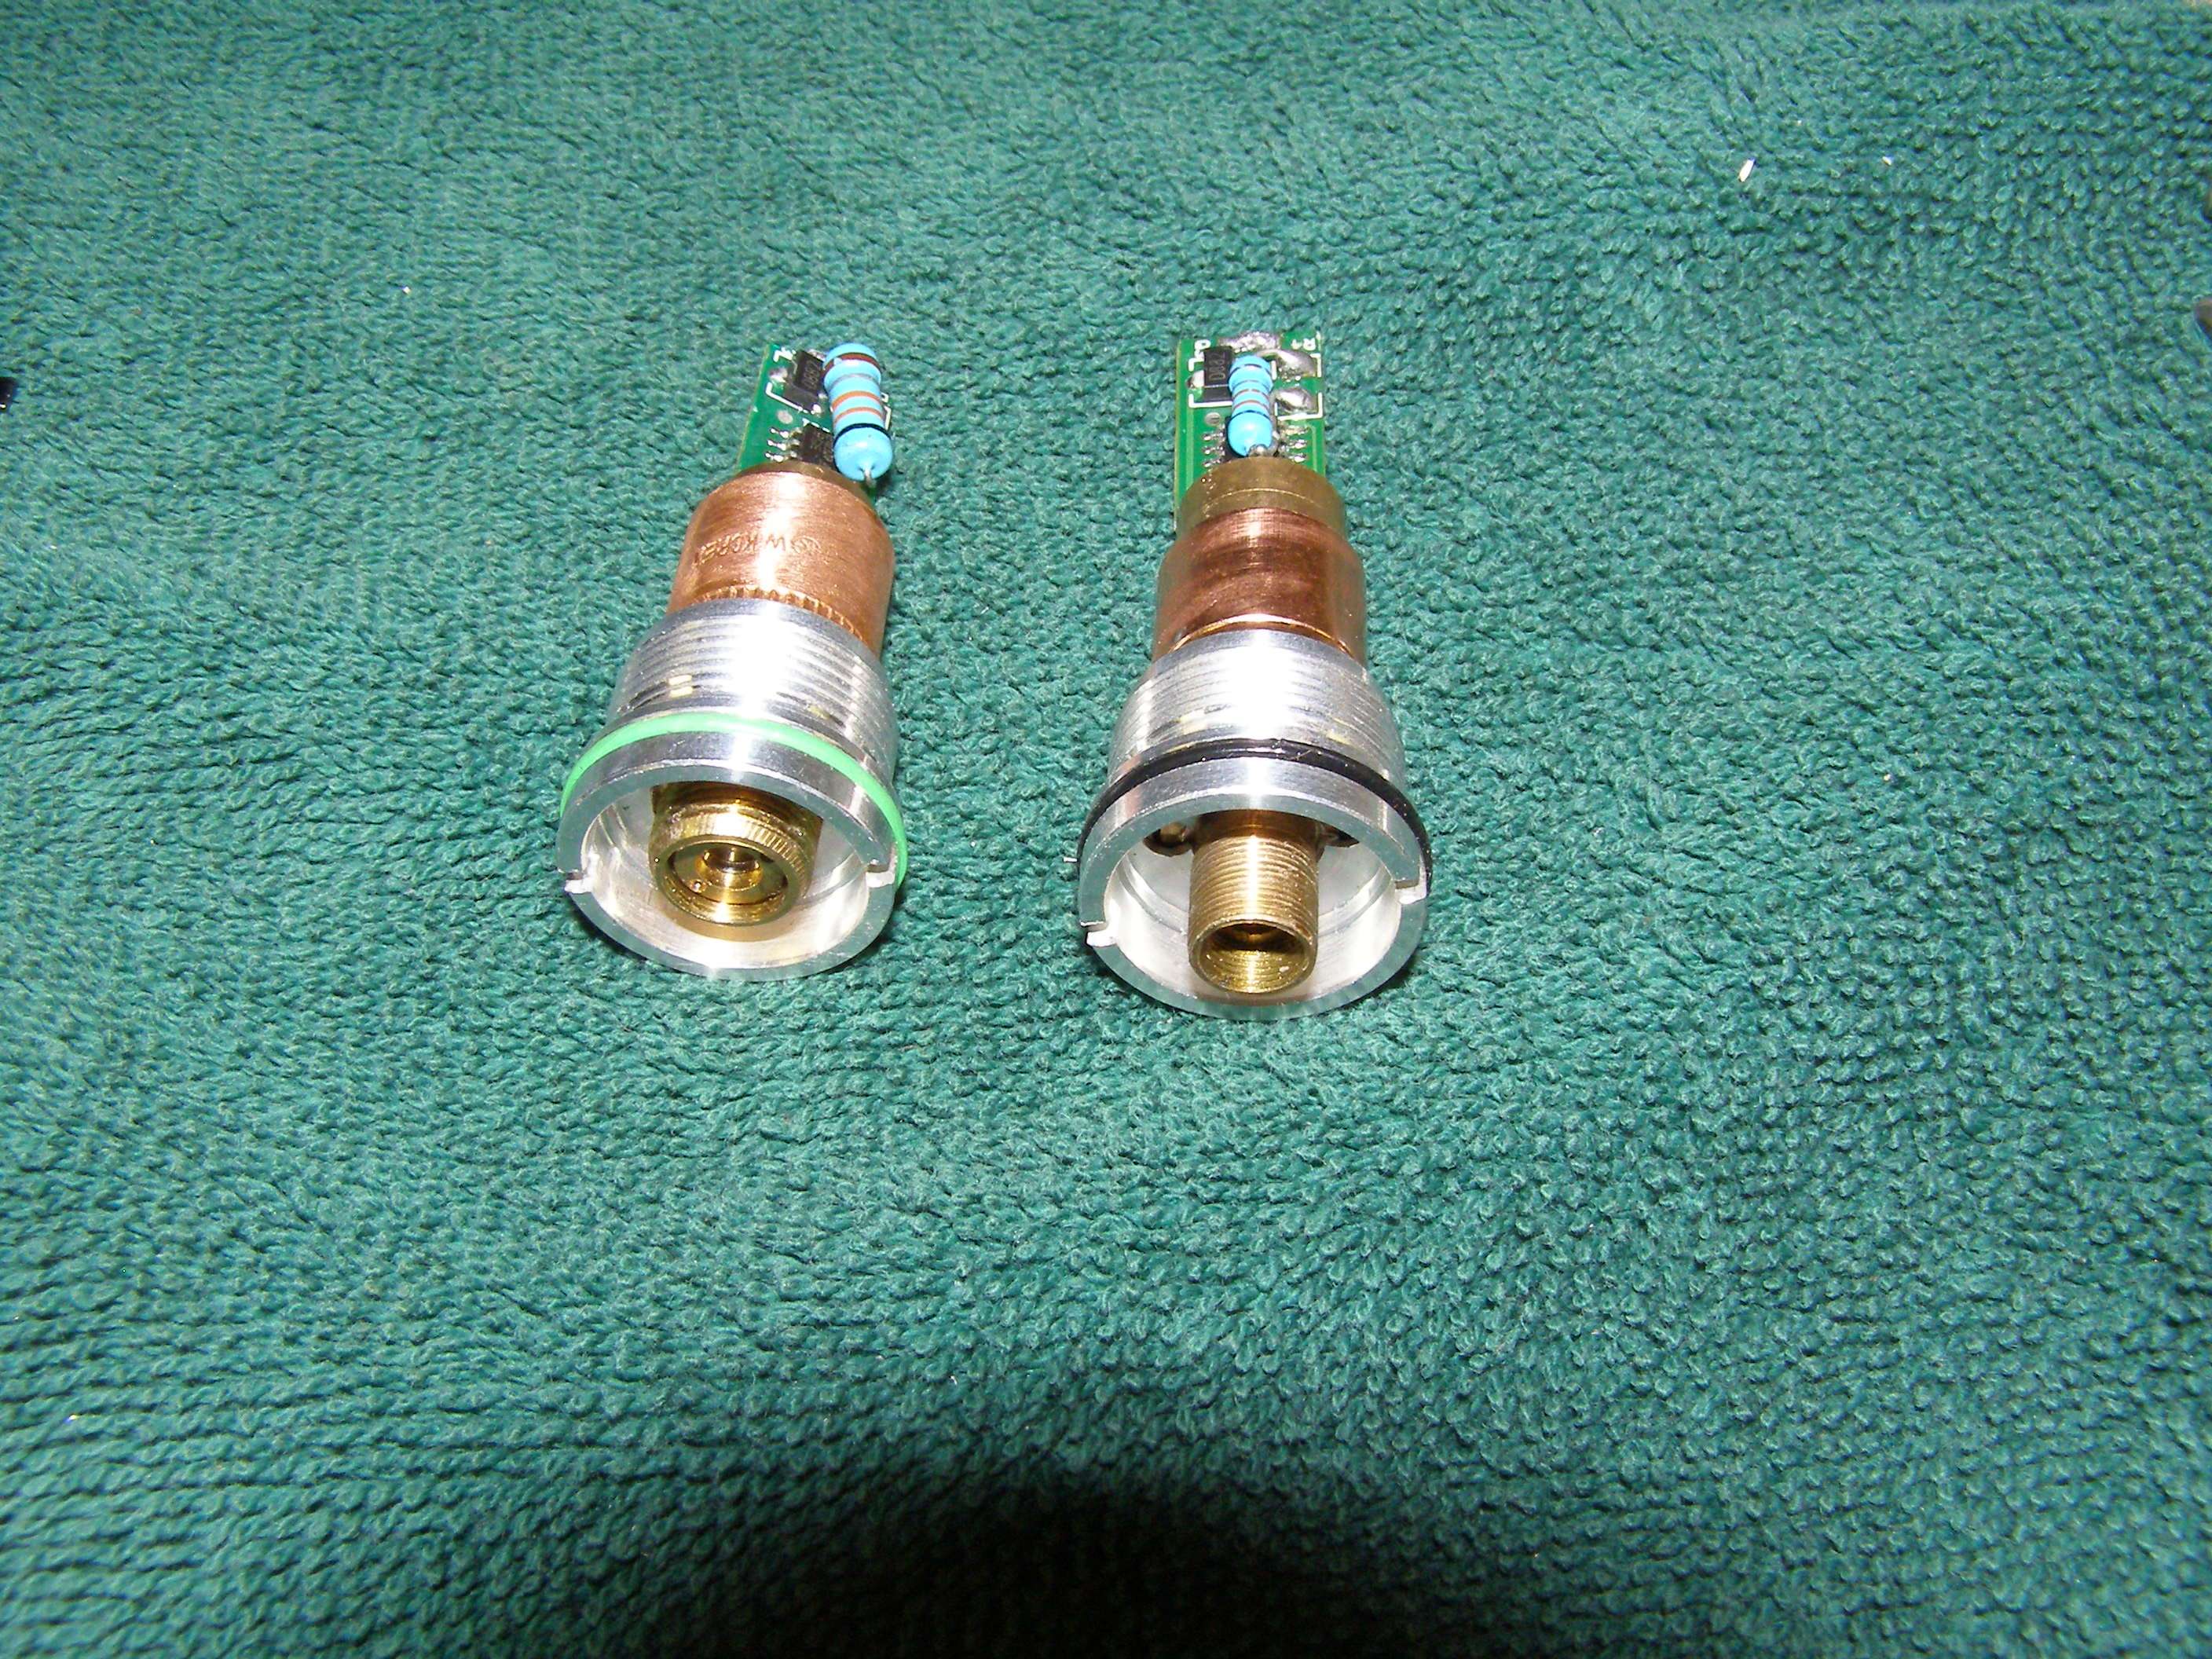
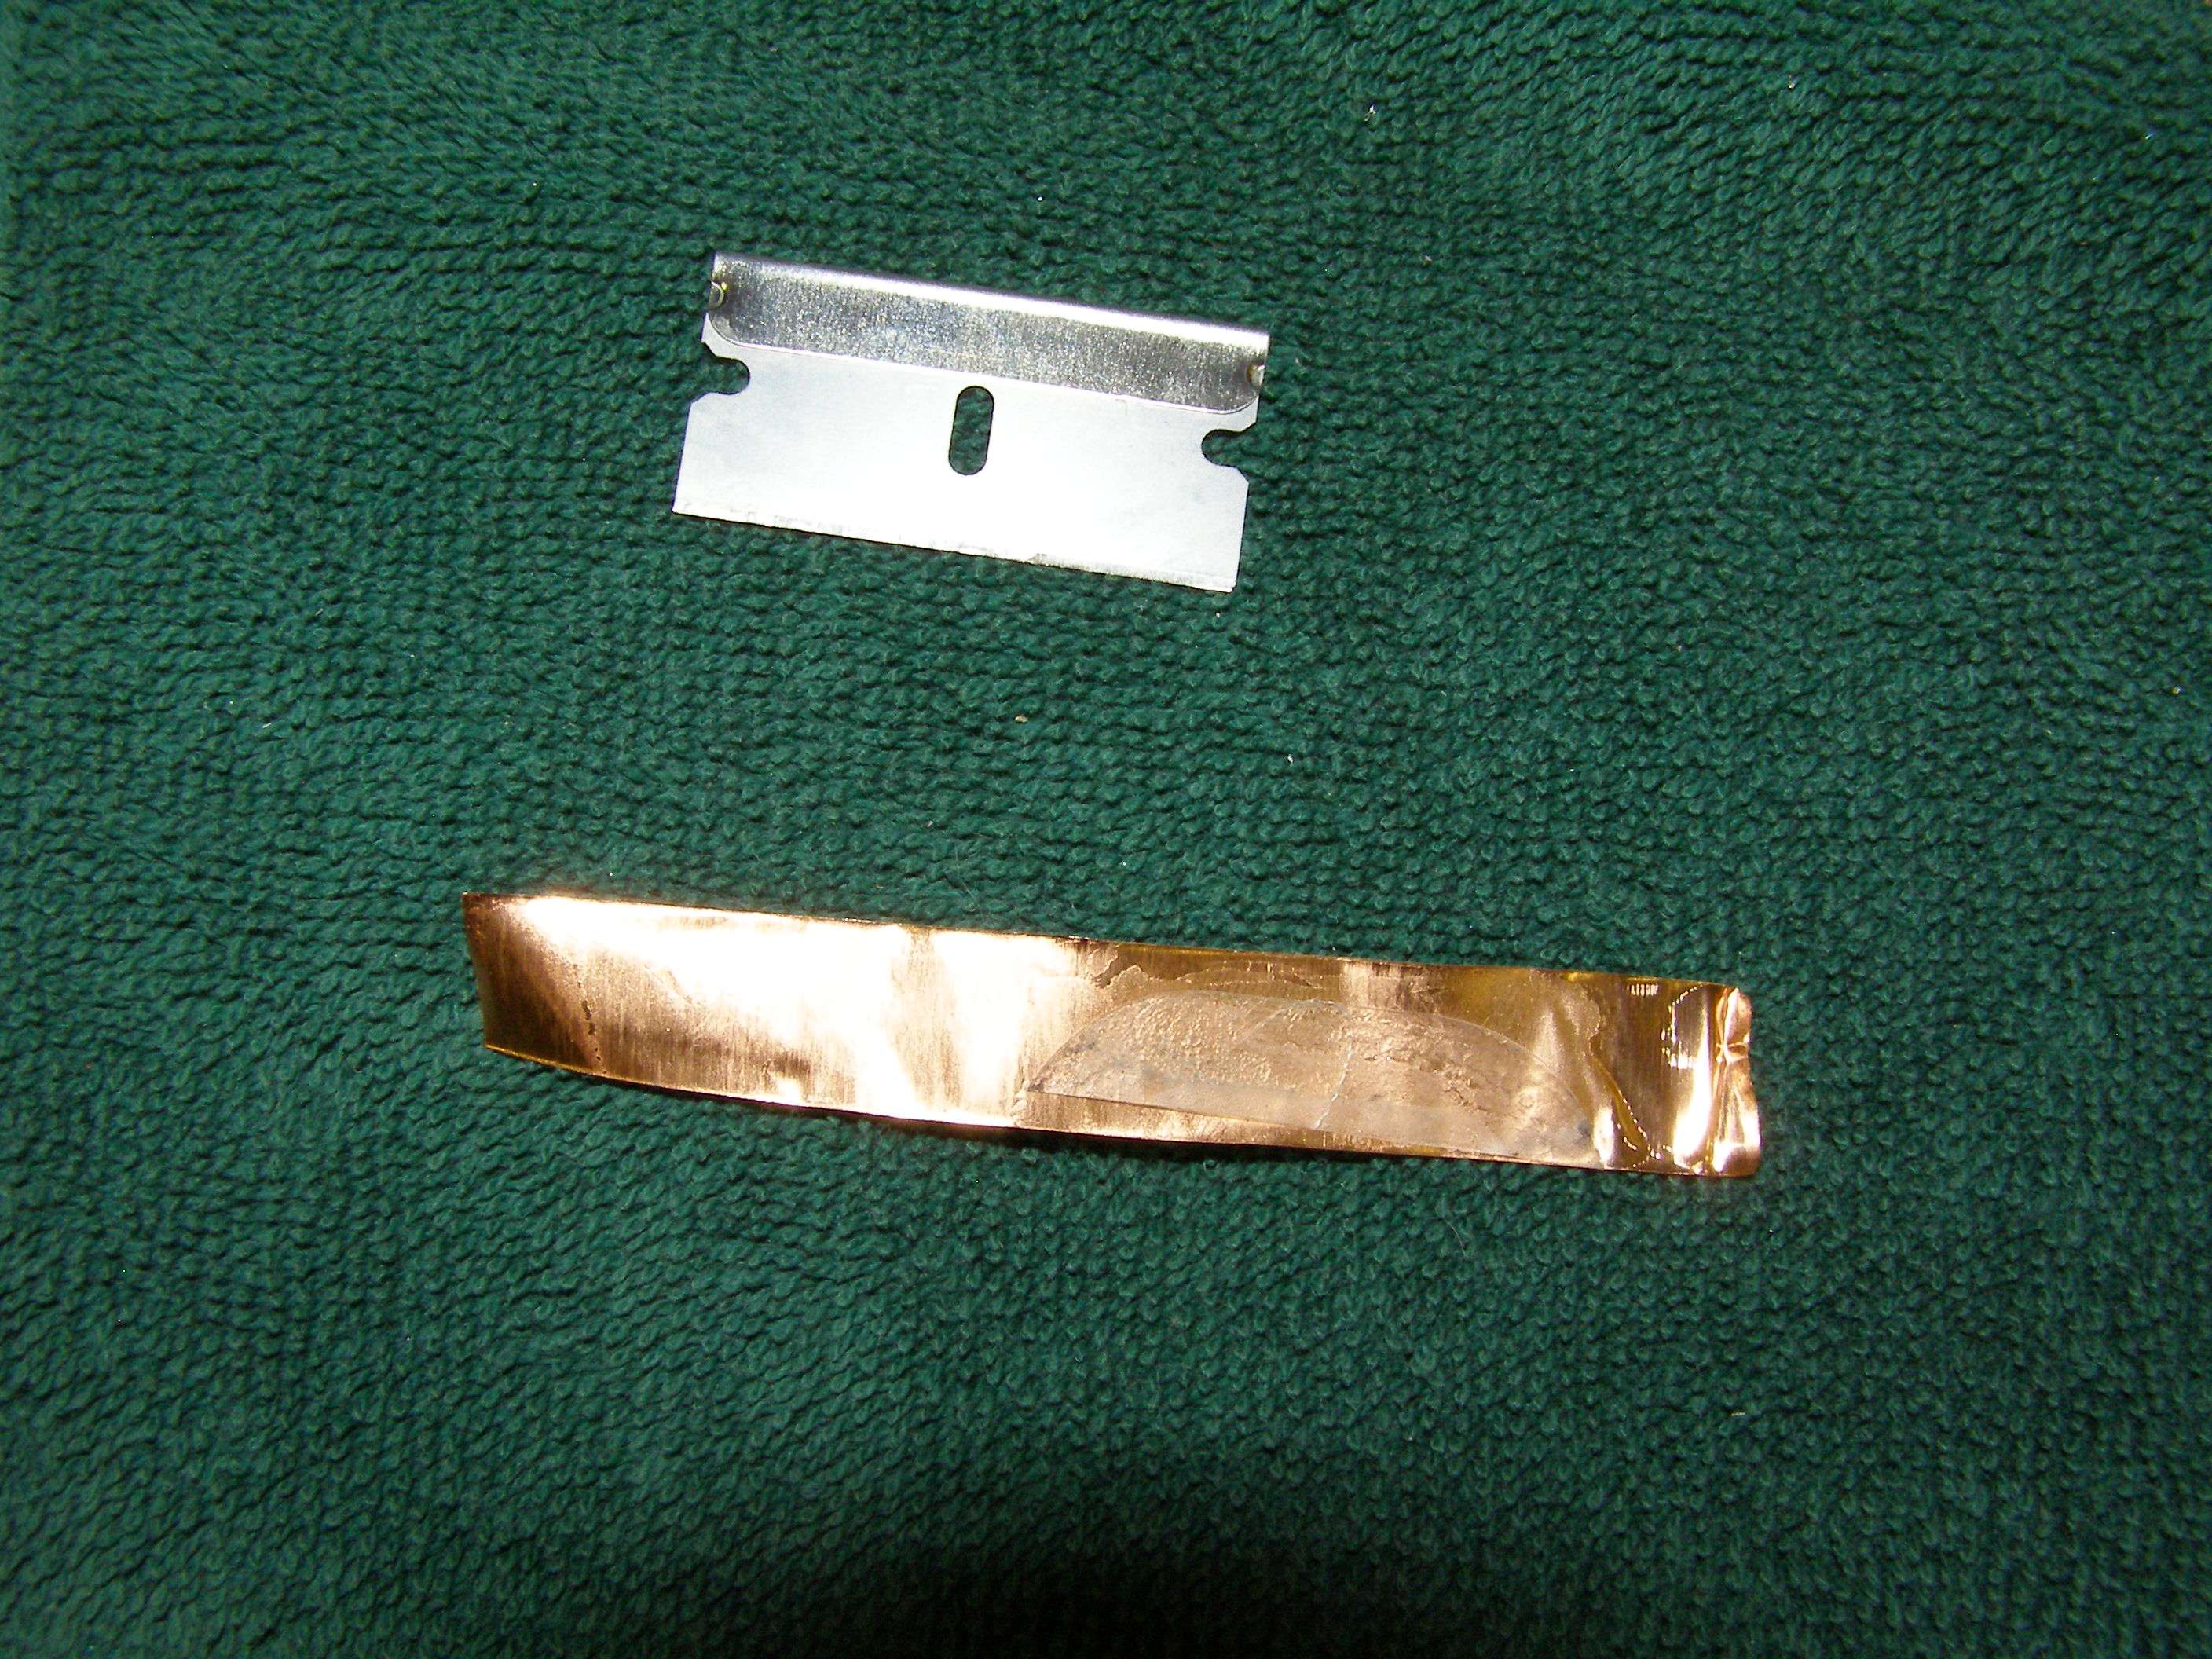
Here's your basic parts
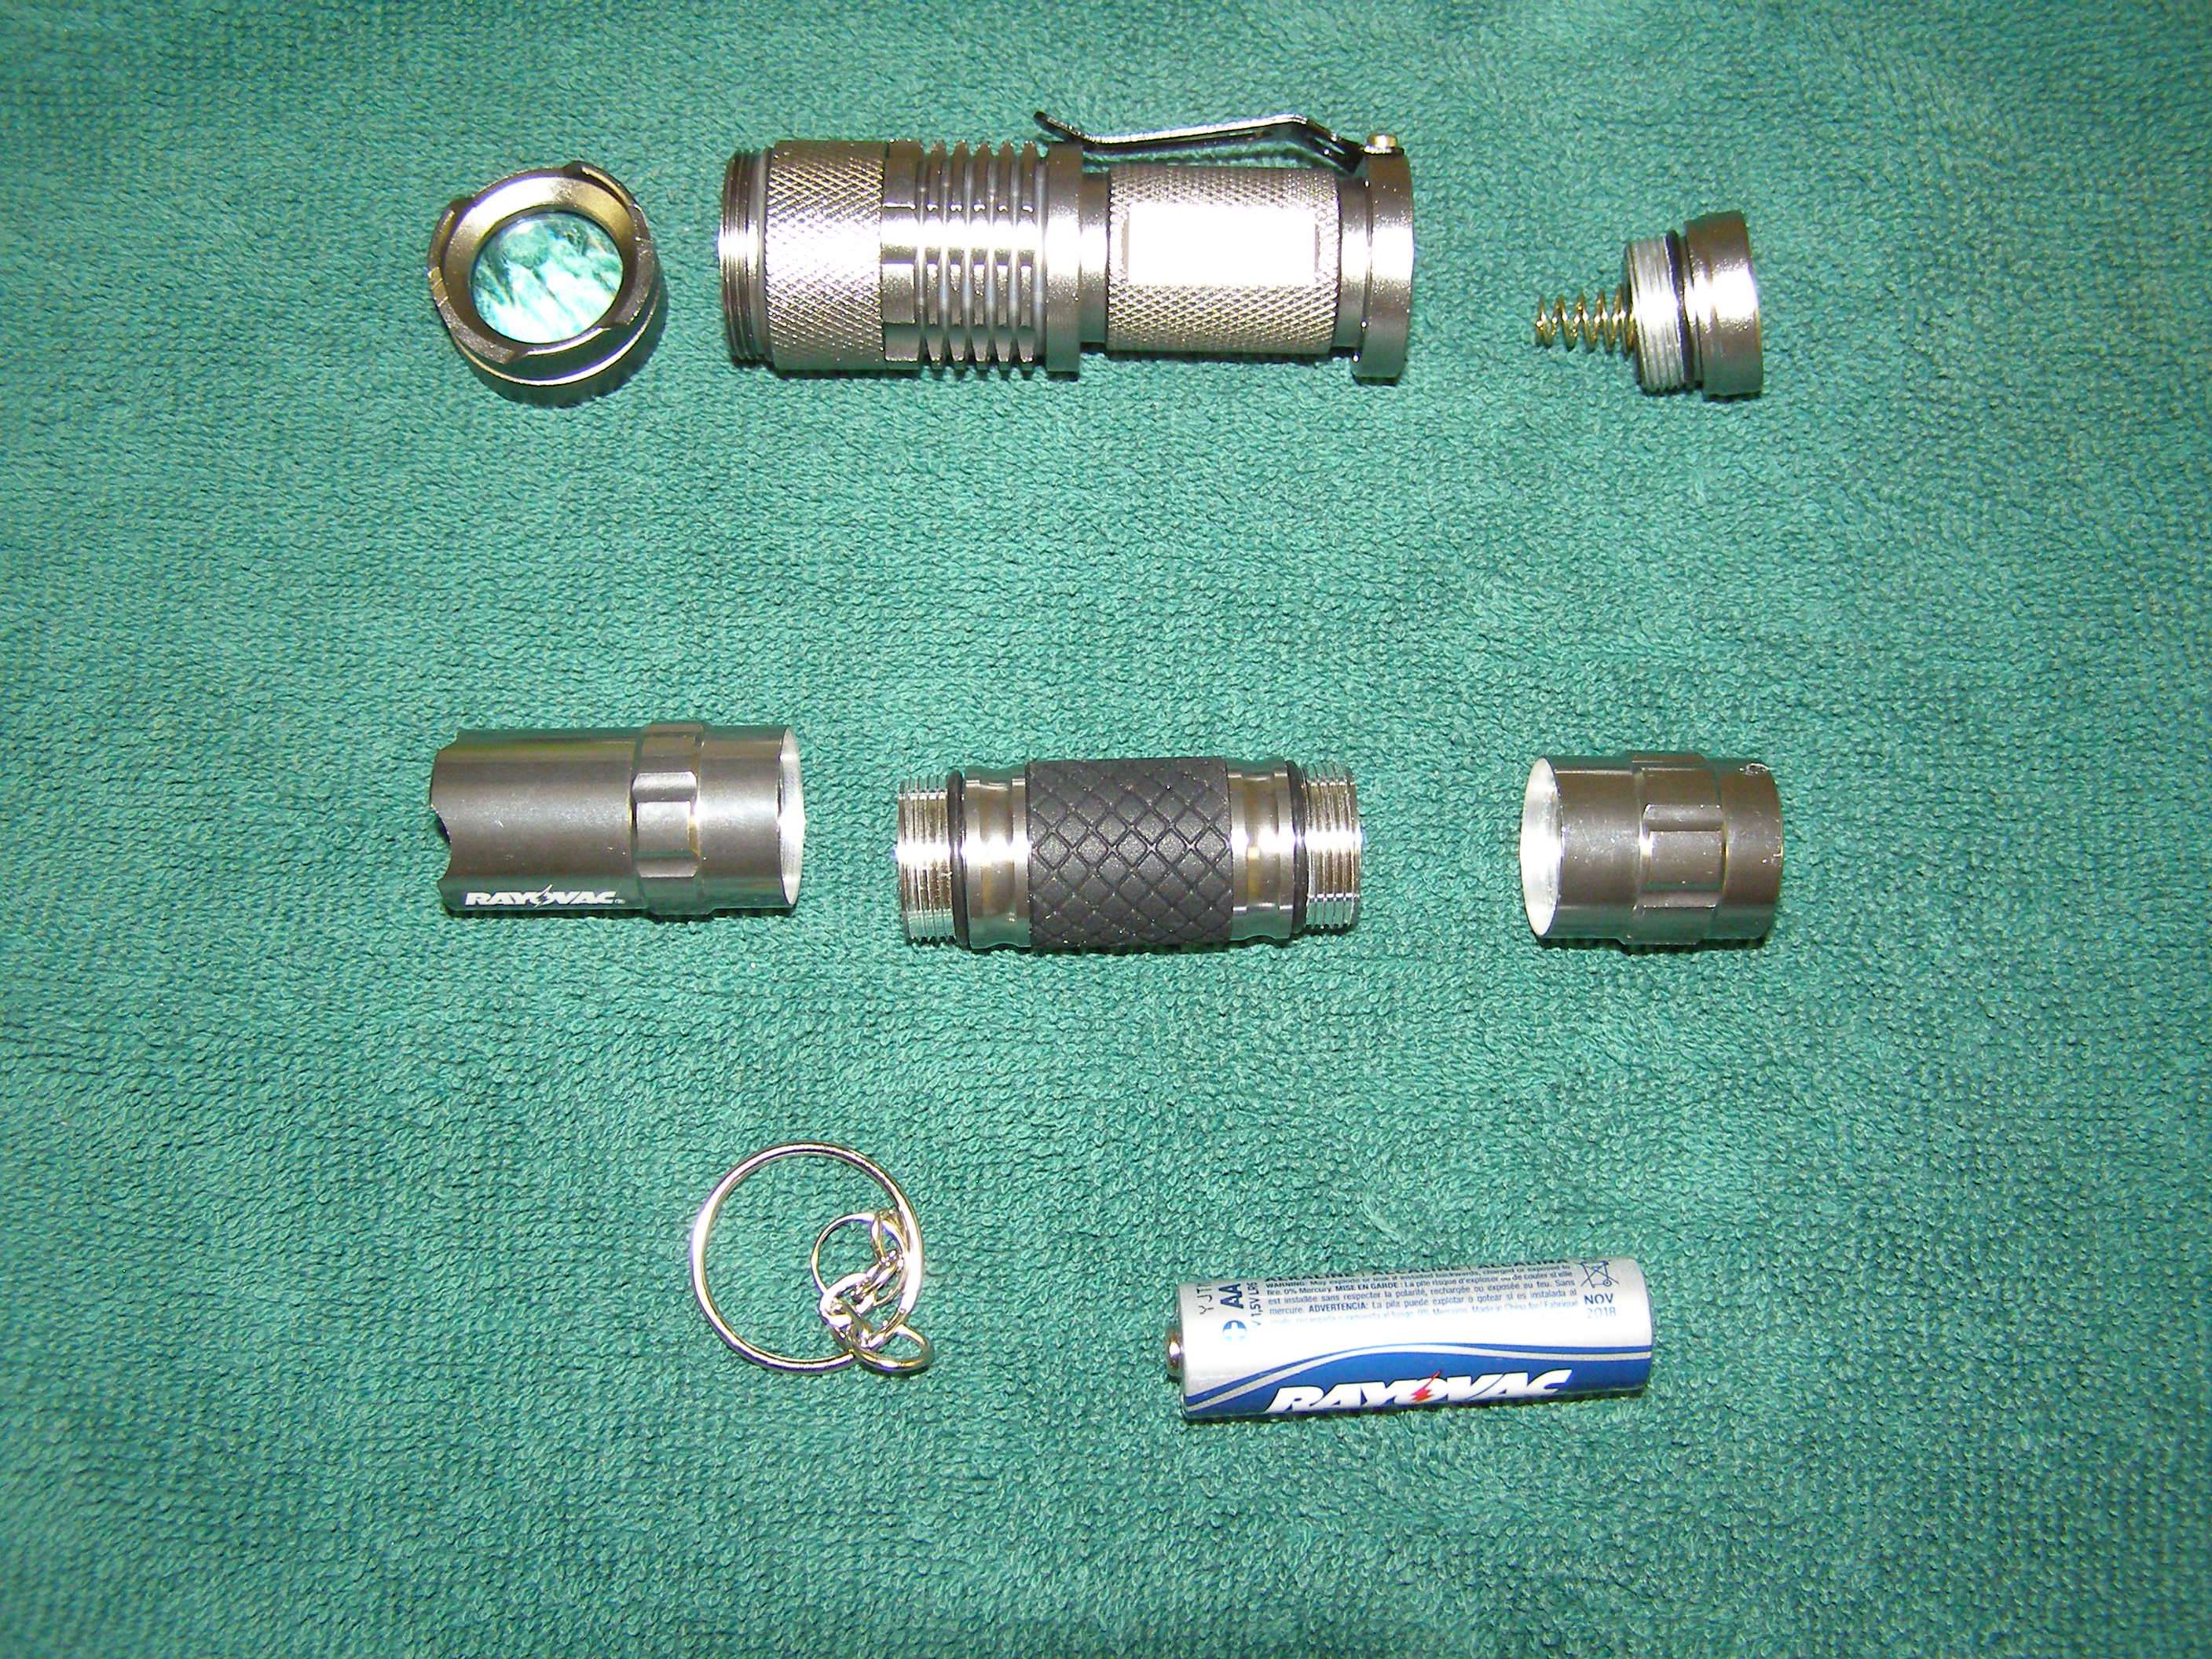
This is what you are going to use
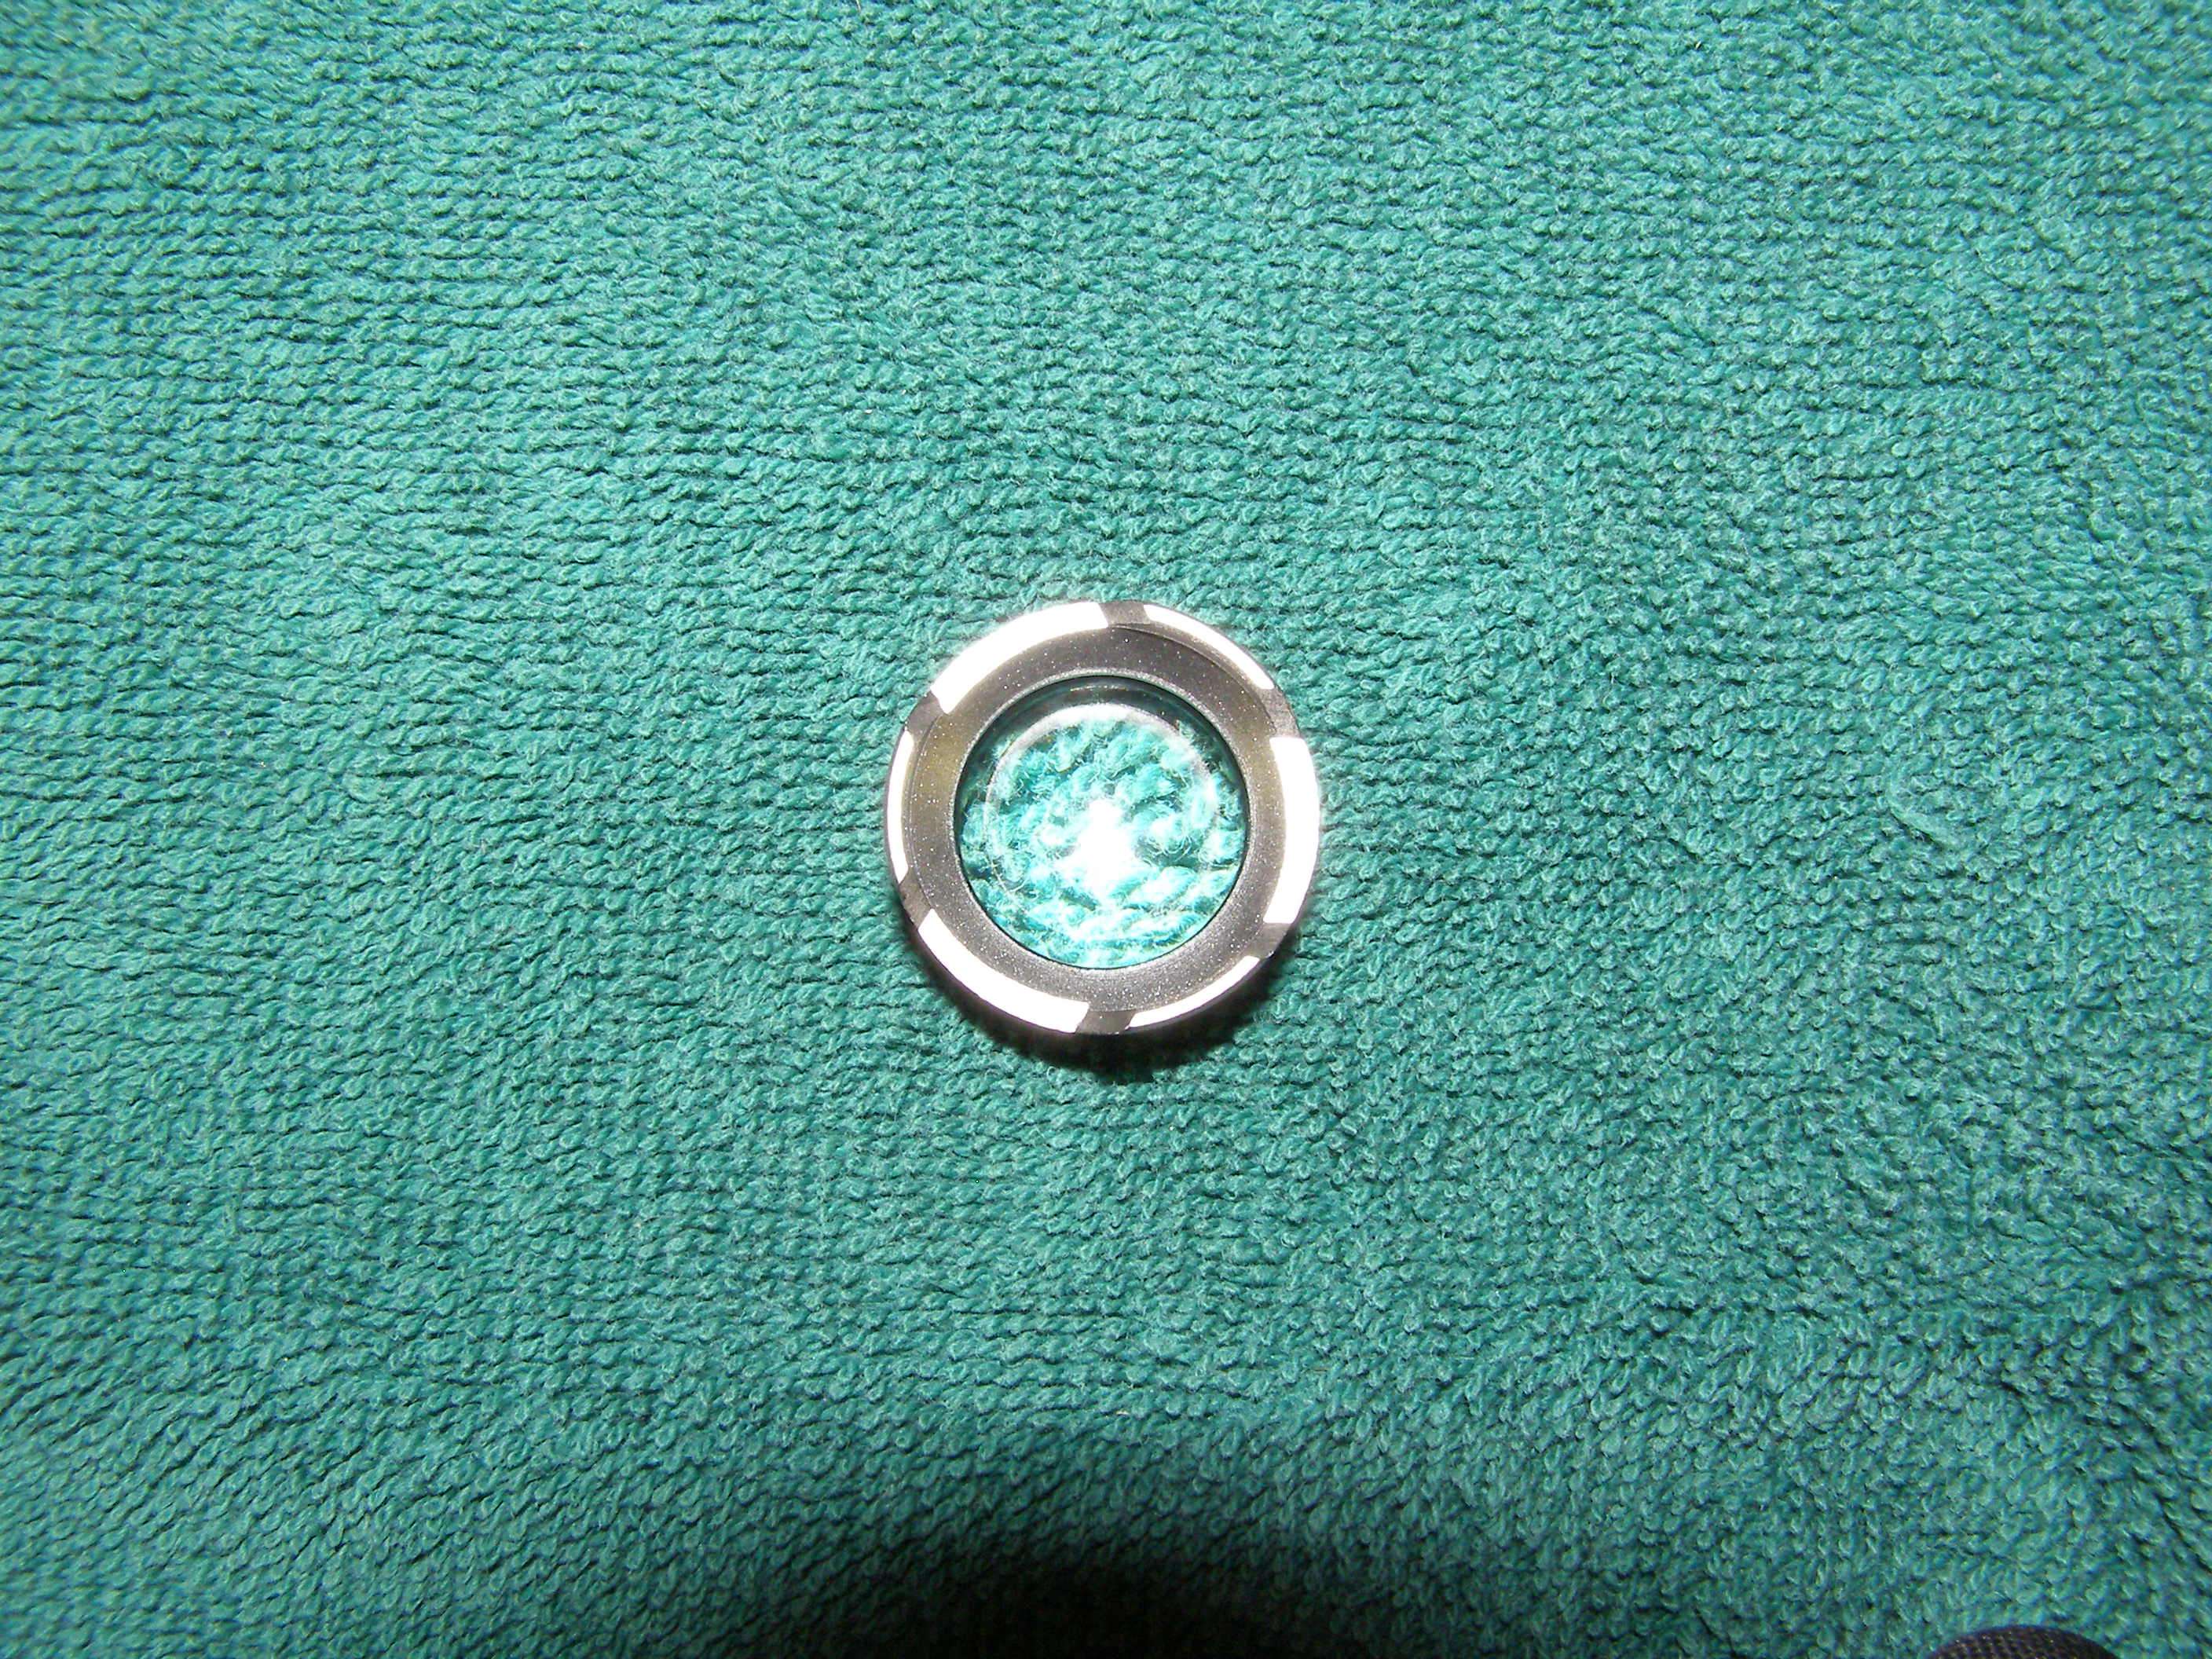
Pop the plastic lens out. Sometimes it is easy to push out and sometimes it is press fit hard and you will need to push really hard with something. I would try and not scratch the lens as you may want to later use it to basically turn your unit into a laser flashlight as it will give you a nice wide beam.
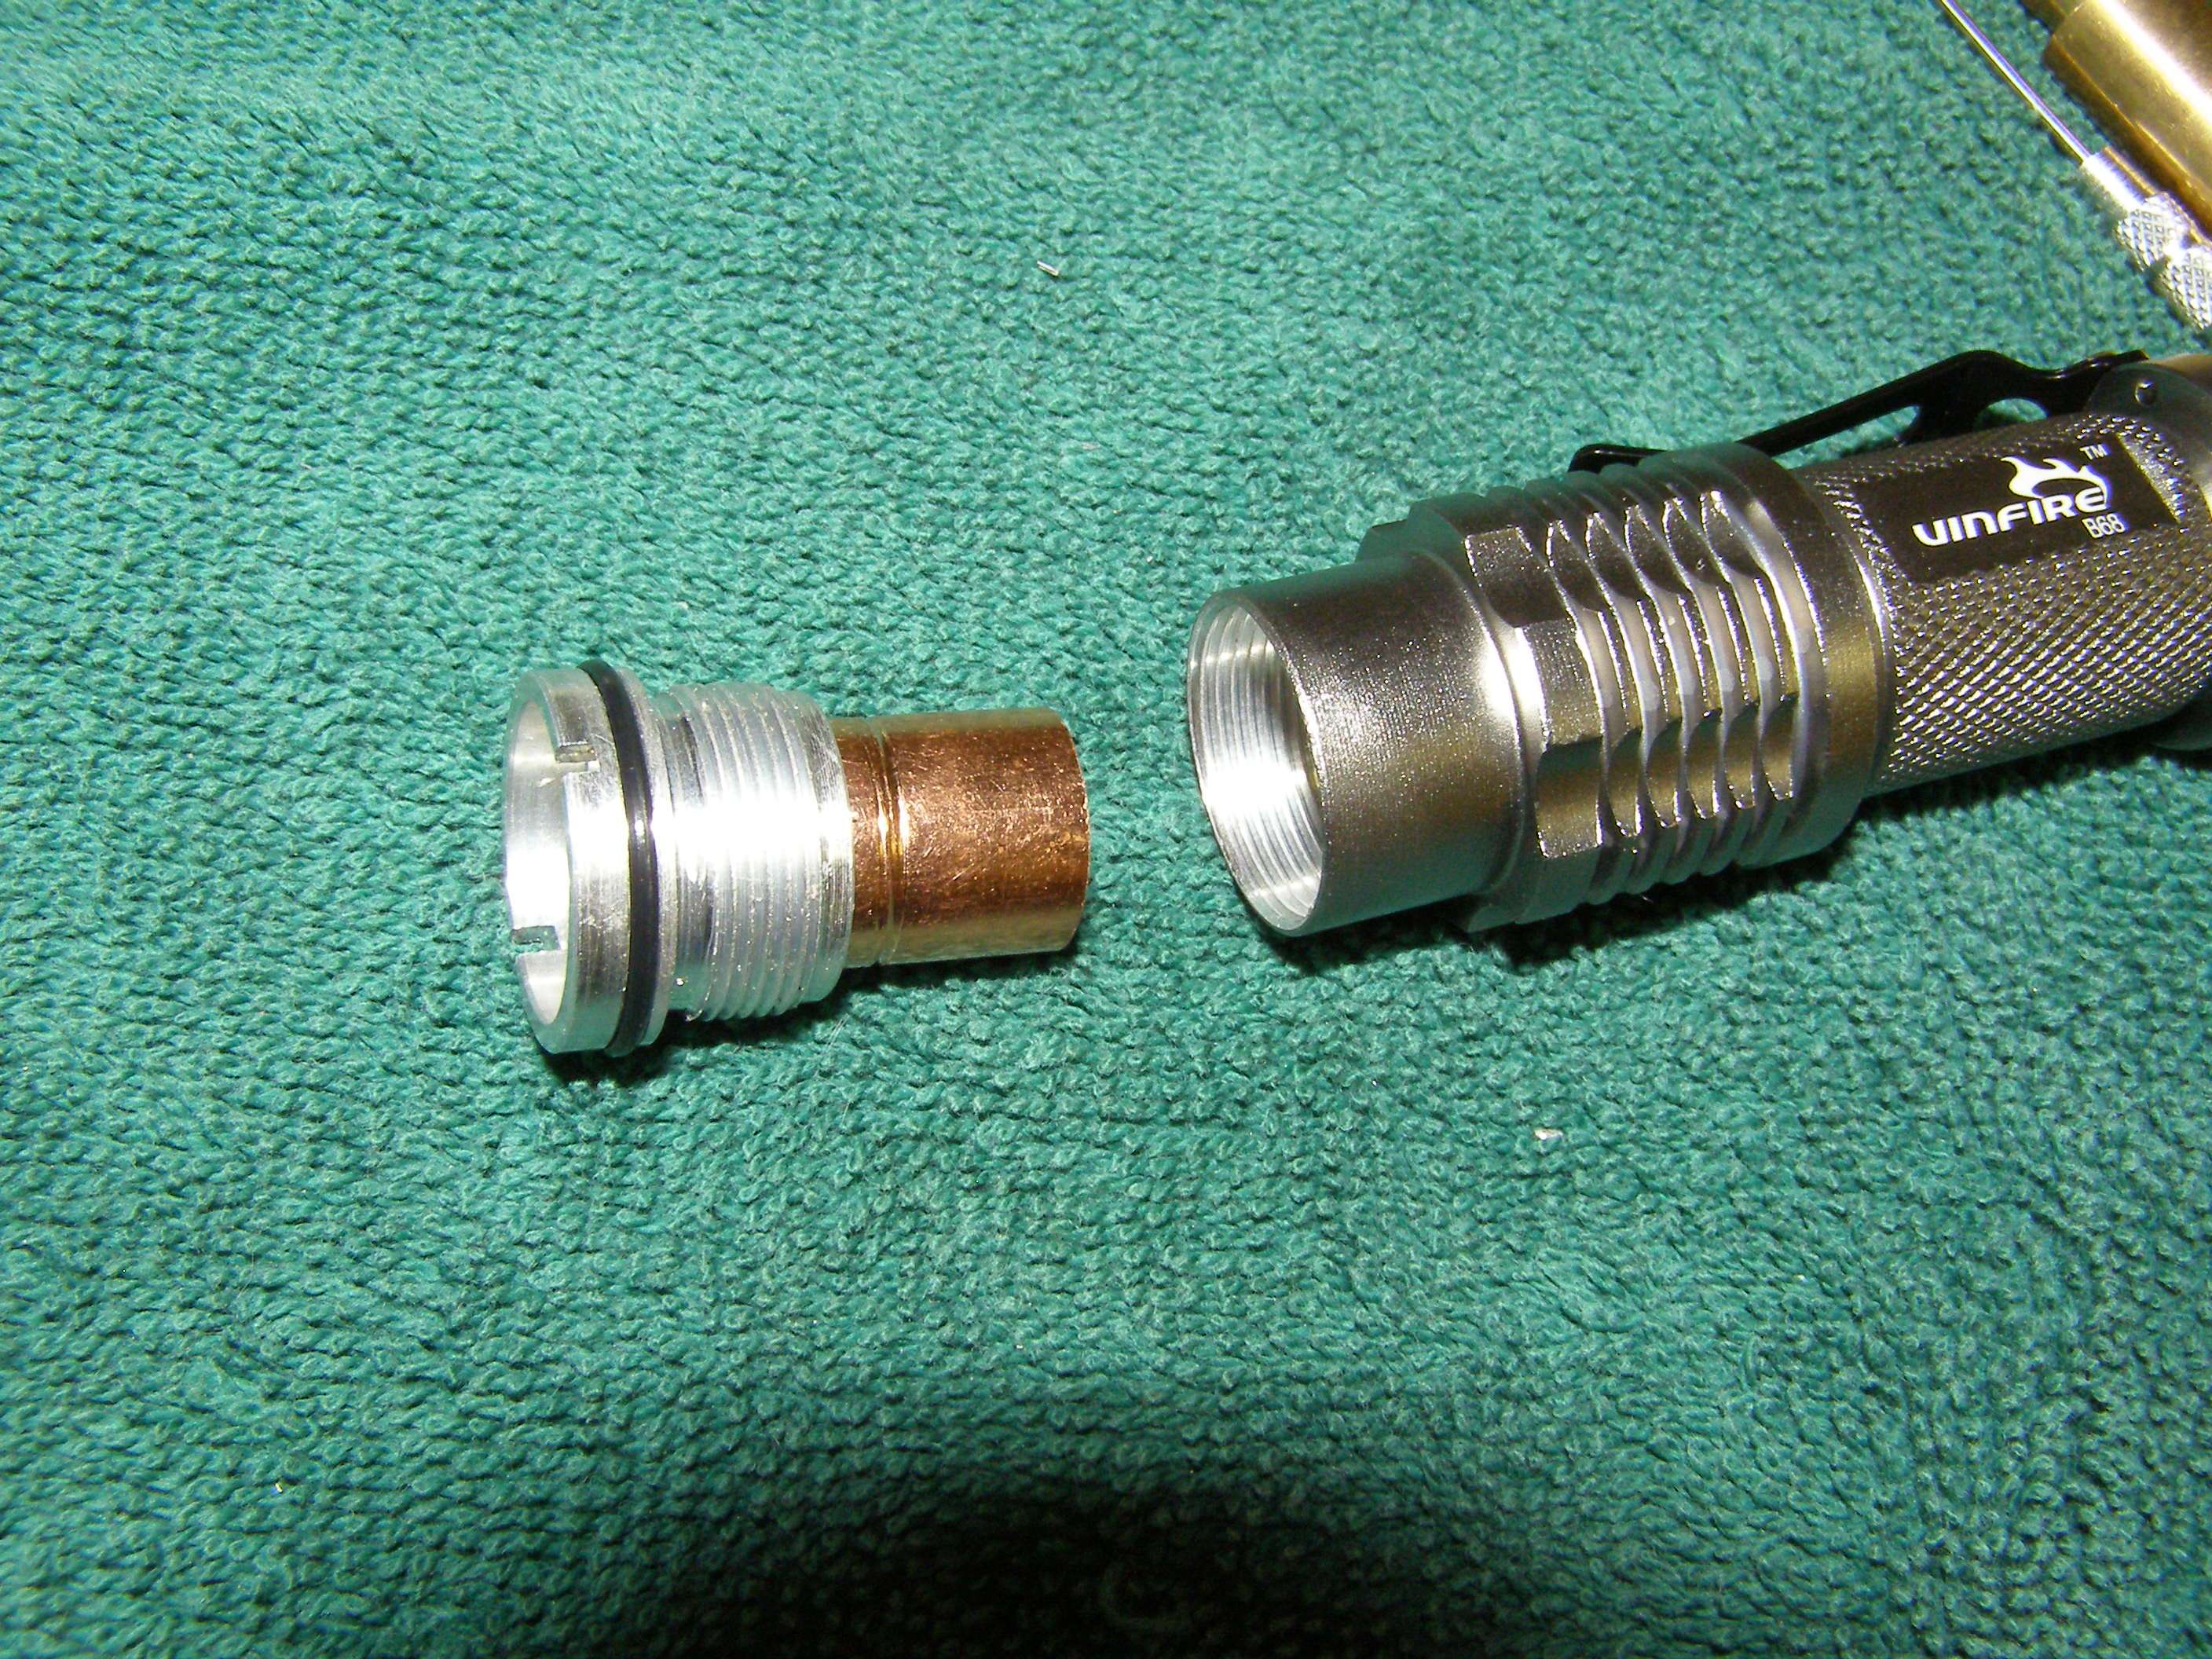
Take something that will fit in the grooves where the led is and turn CCW a turn to loosen it so you can then unscrew the whole top led section.

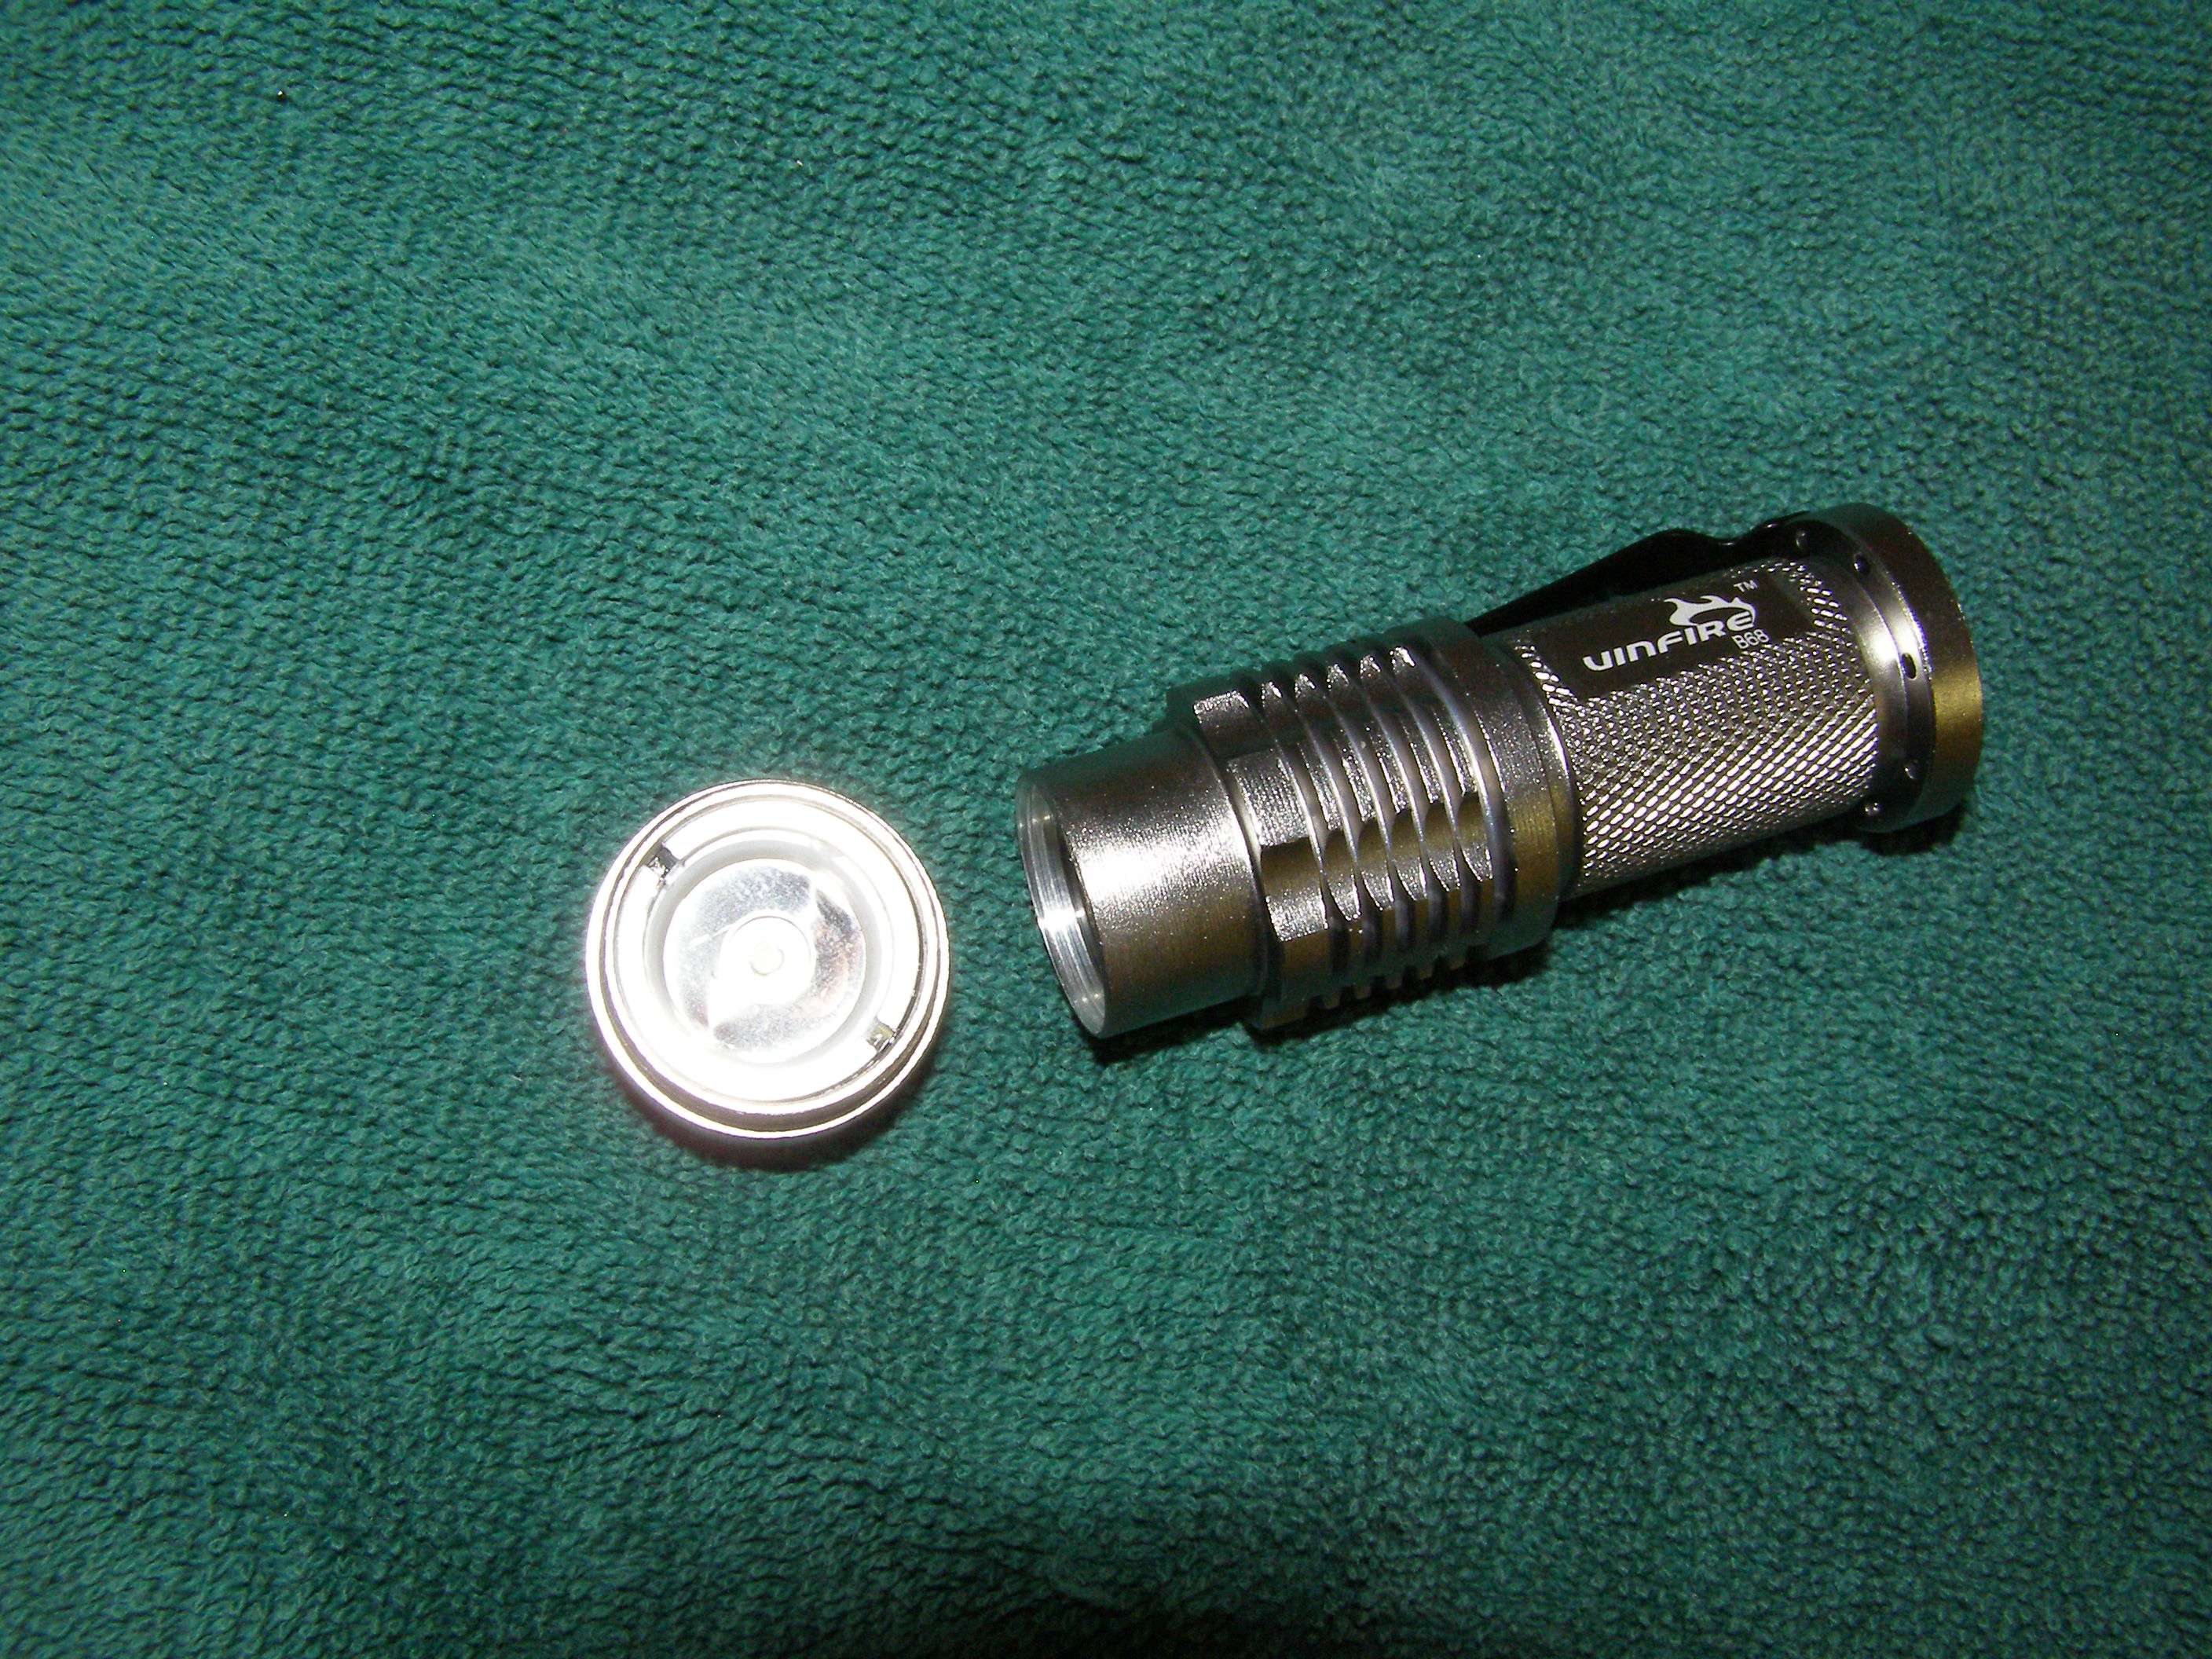
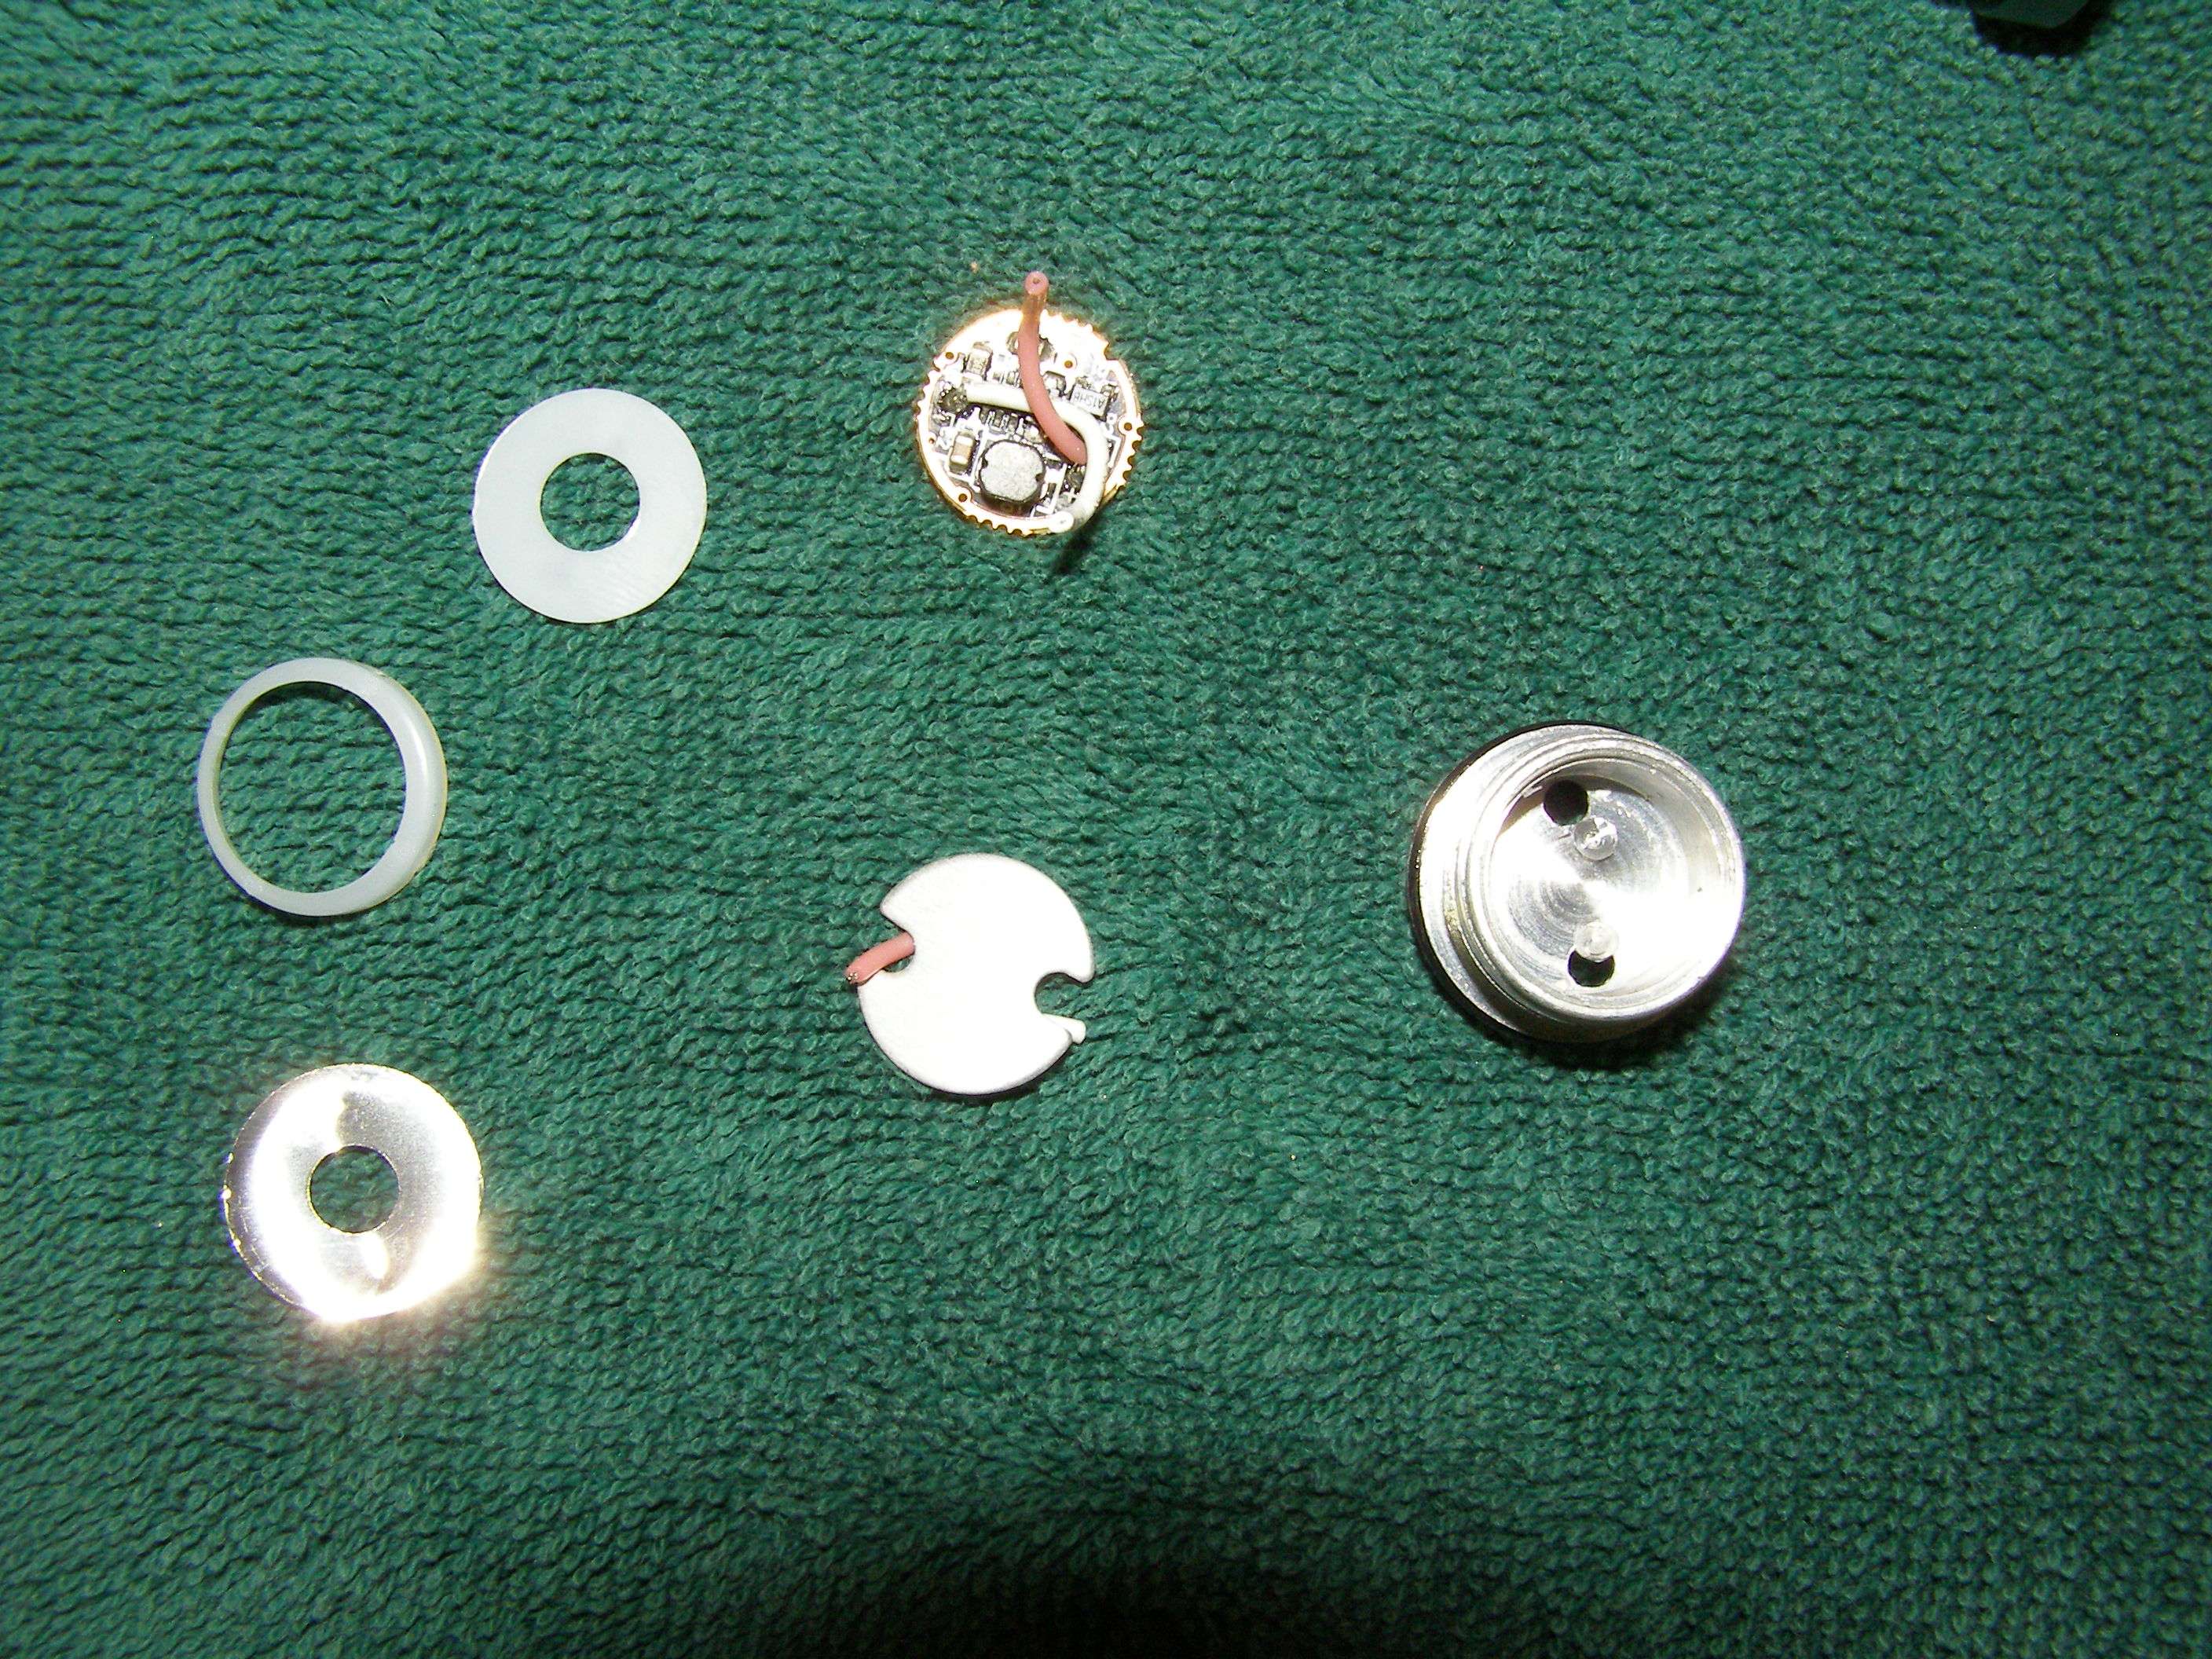
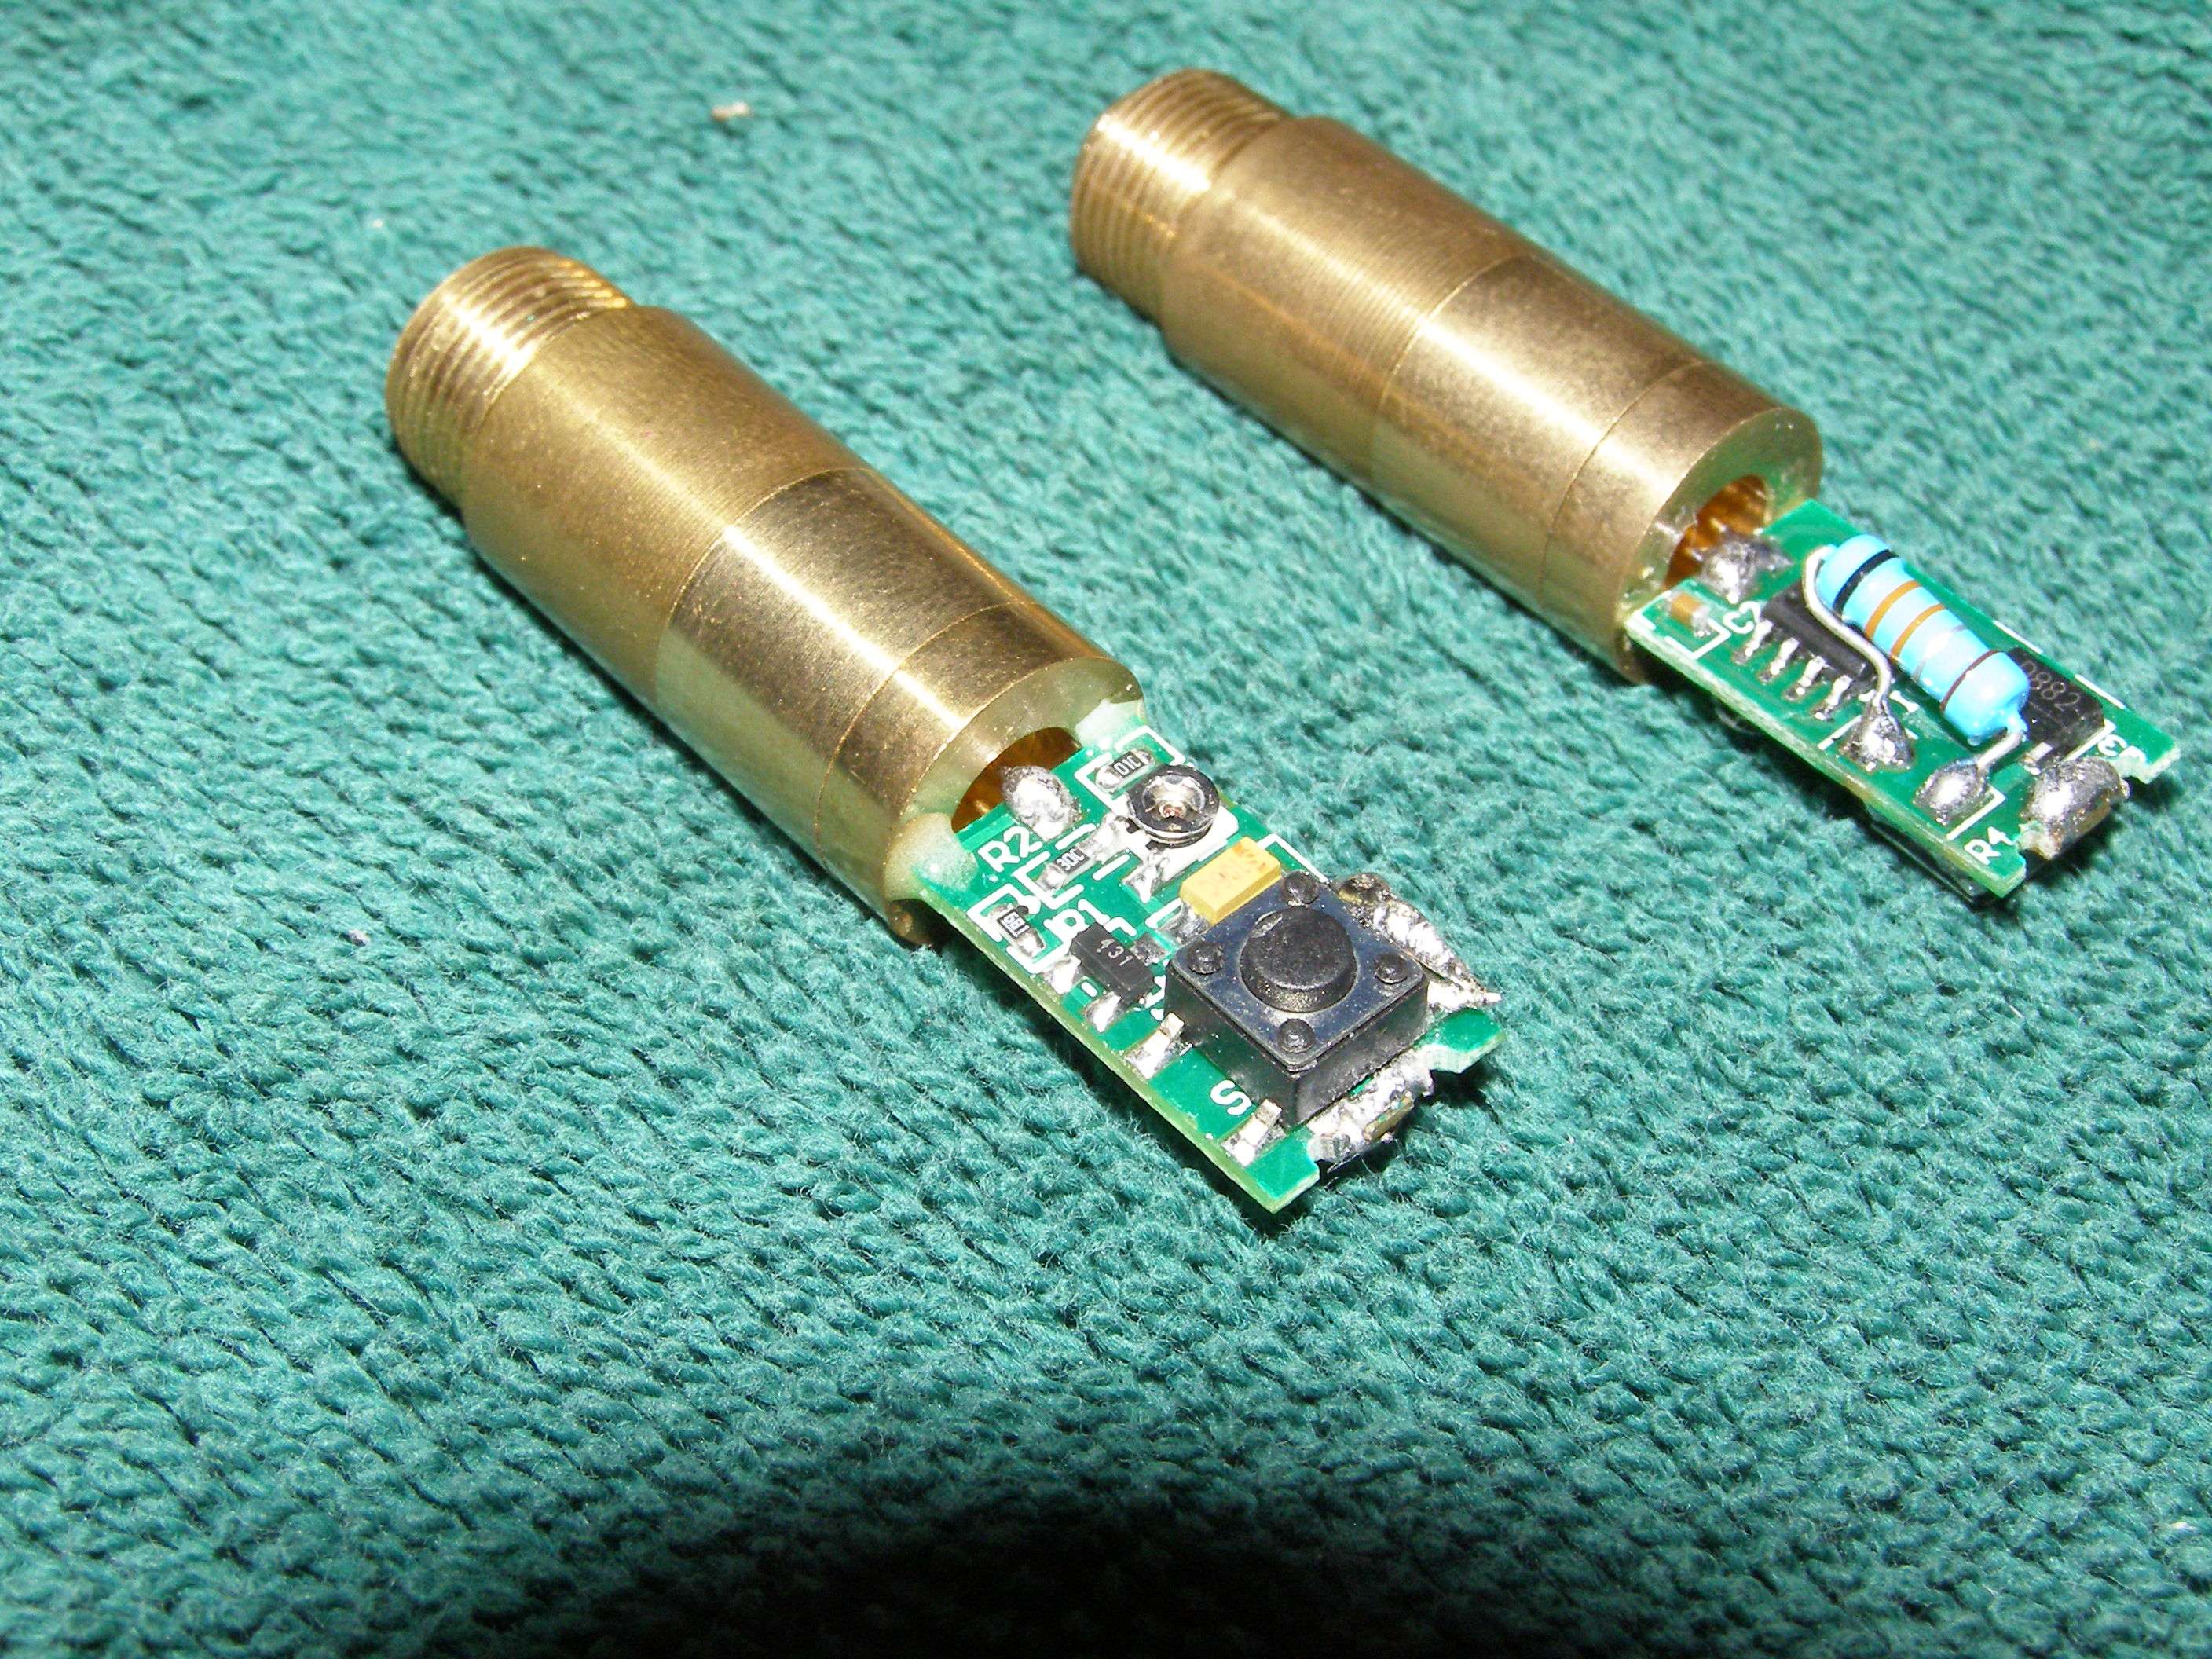
This is what you end up with
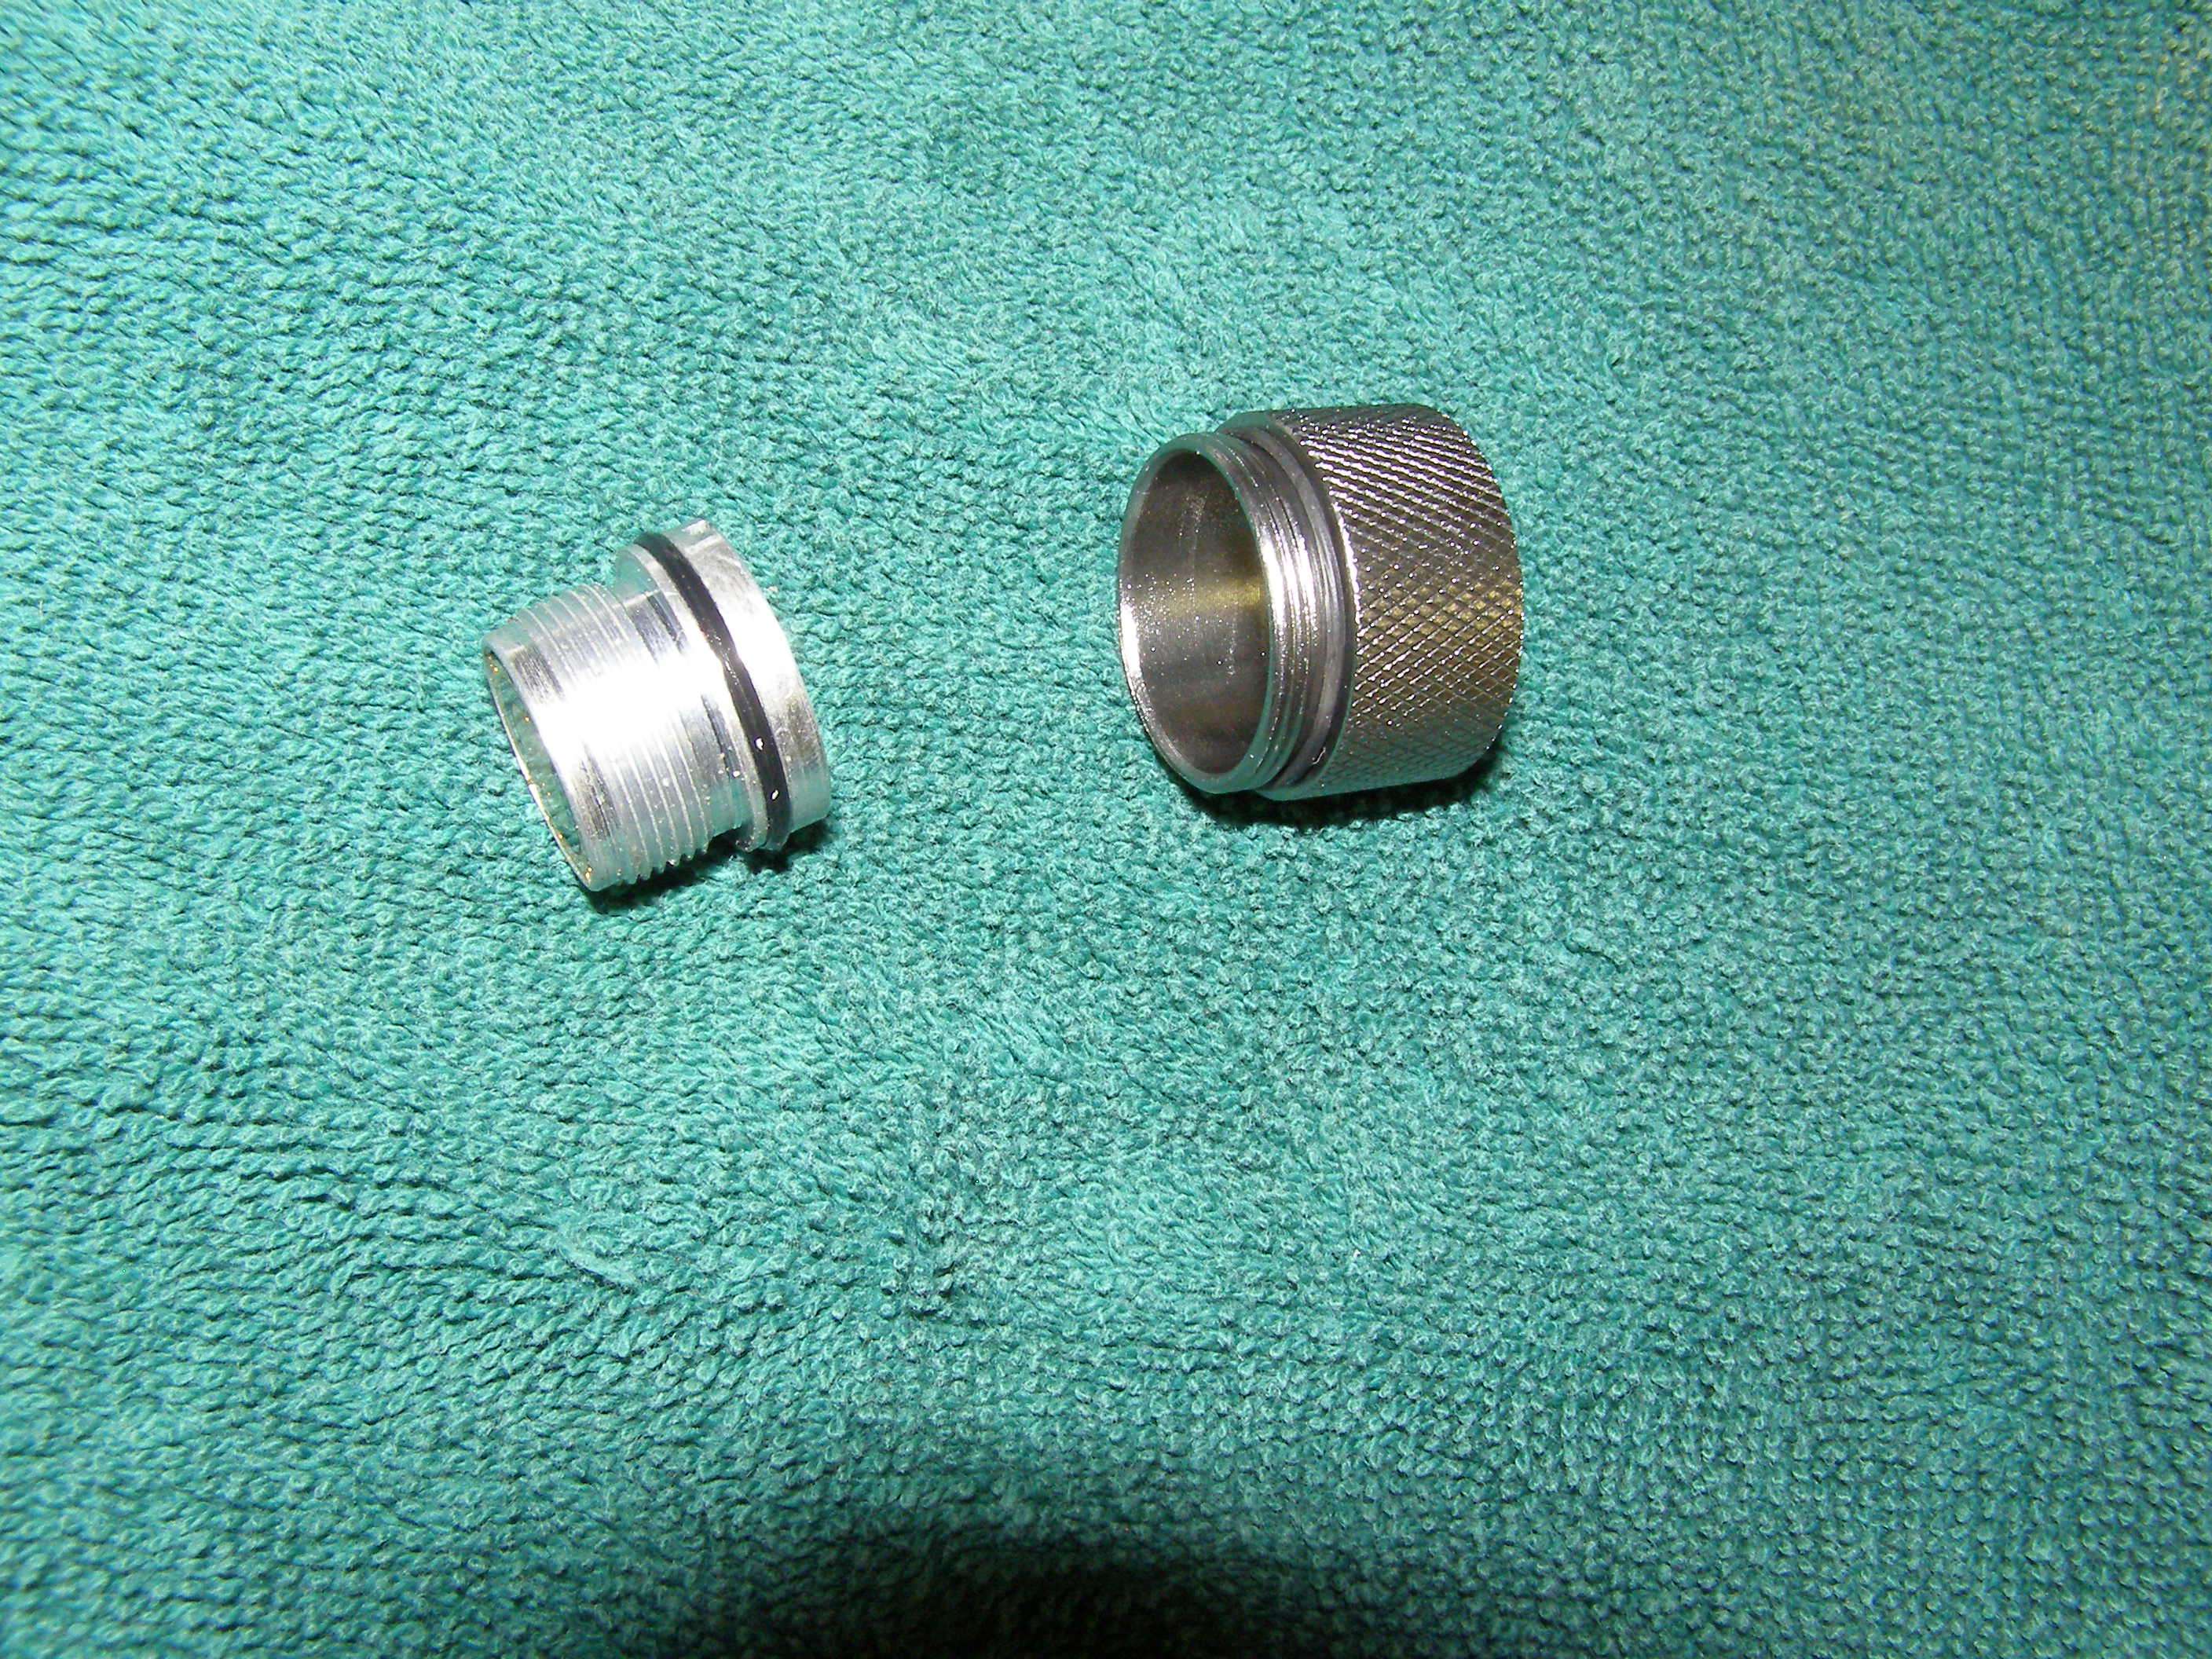
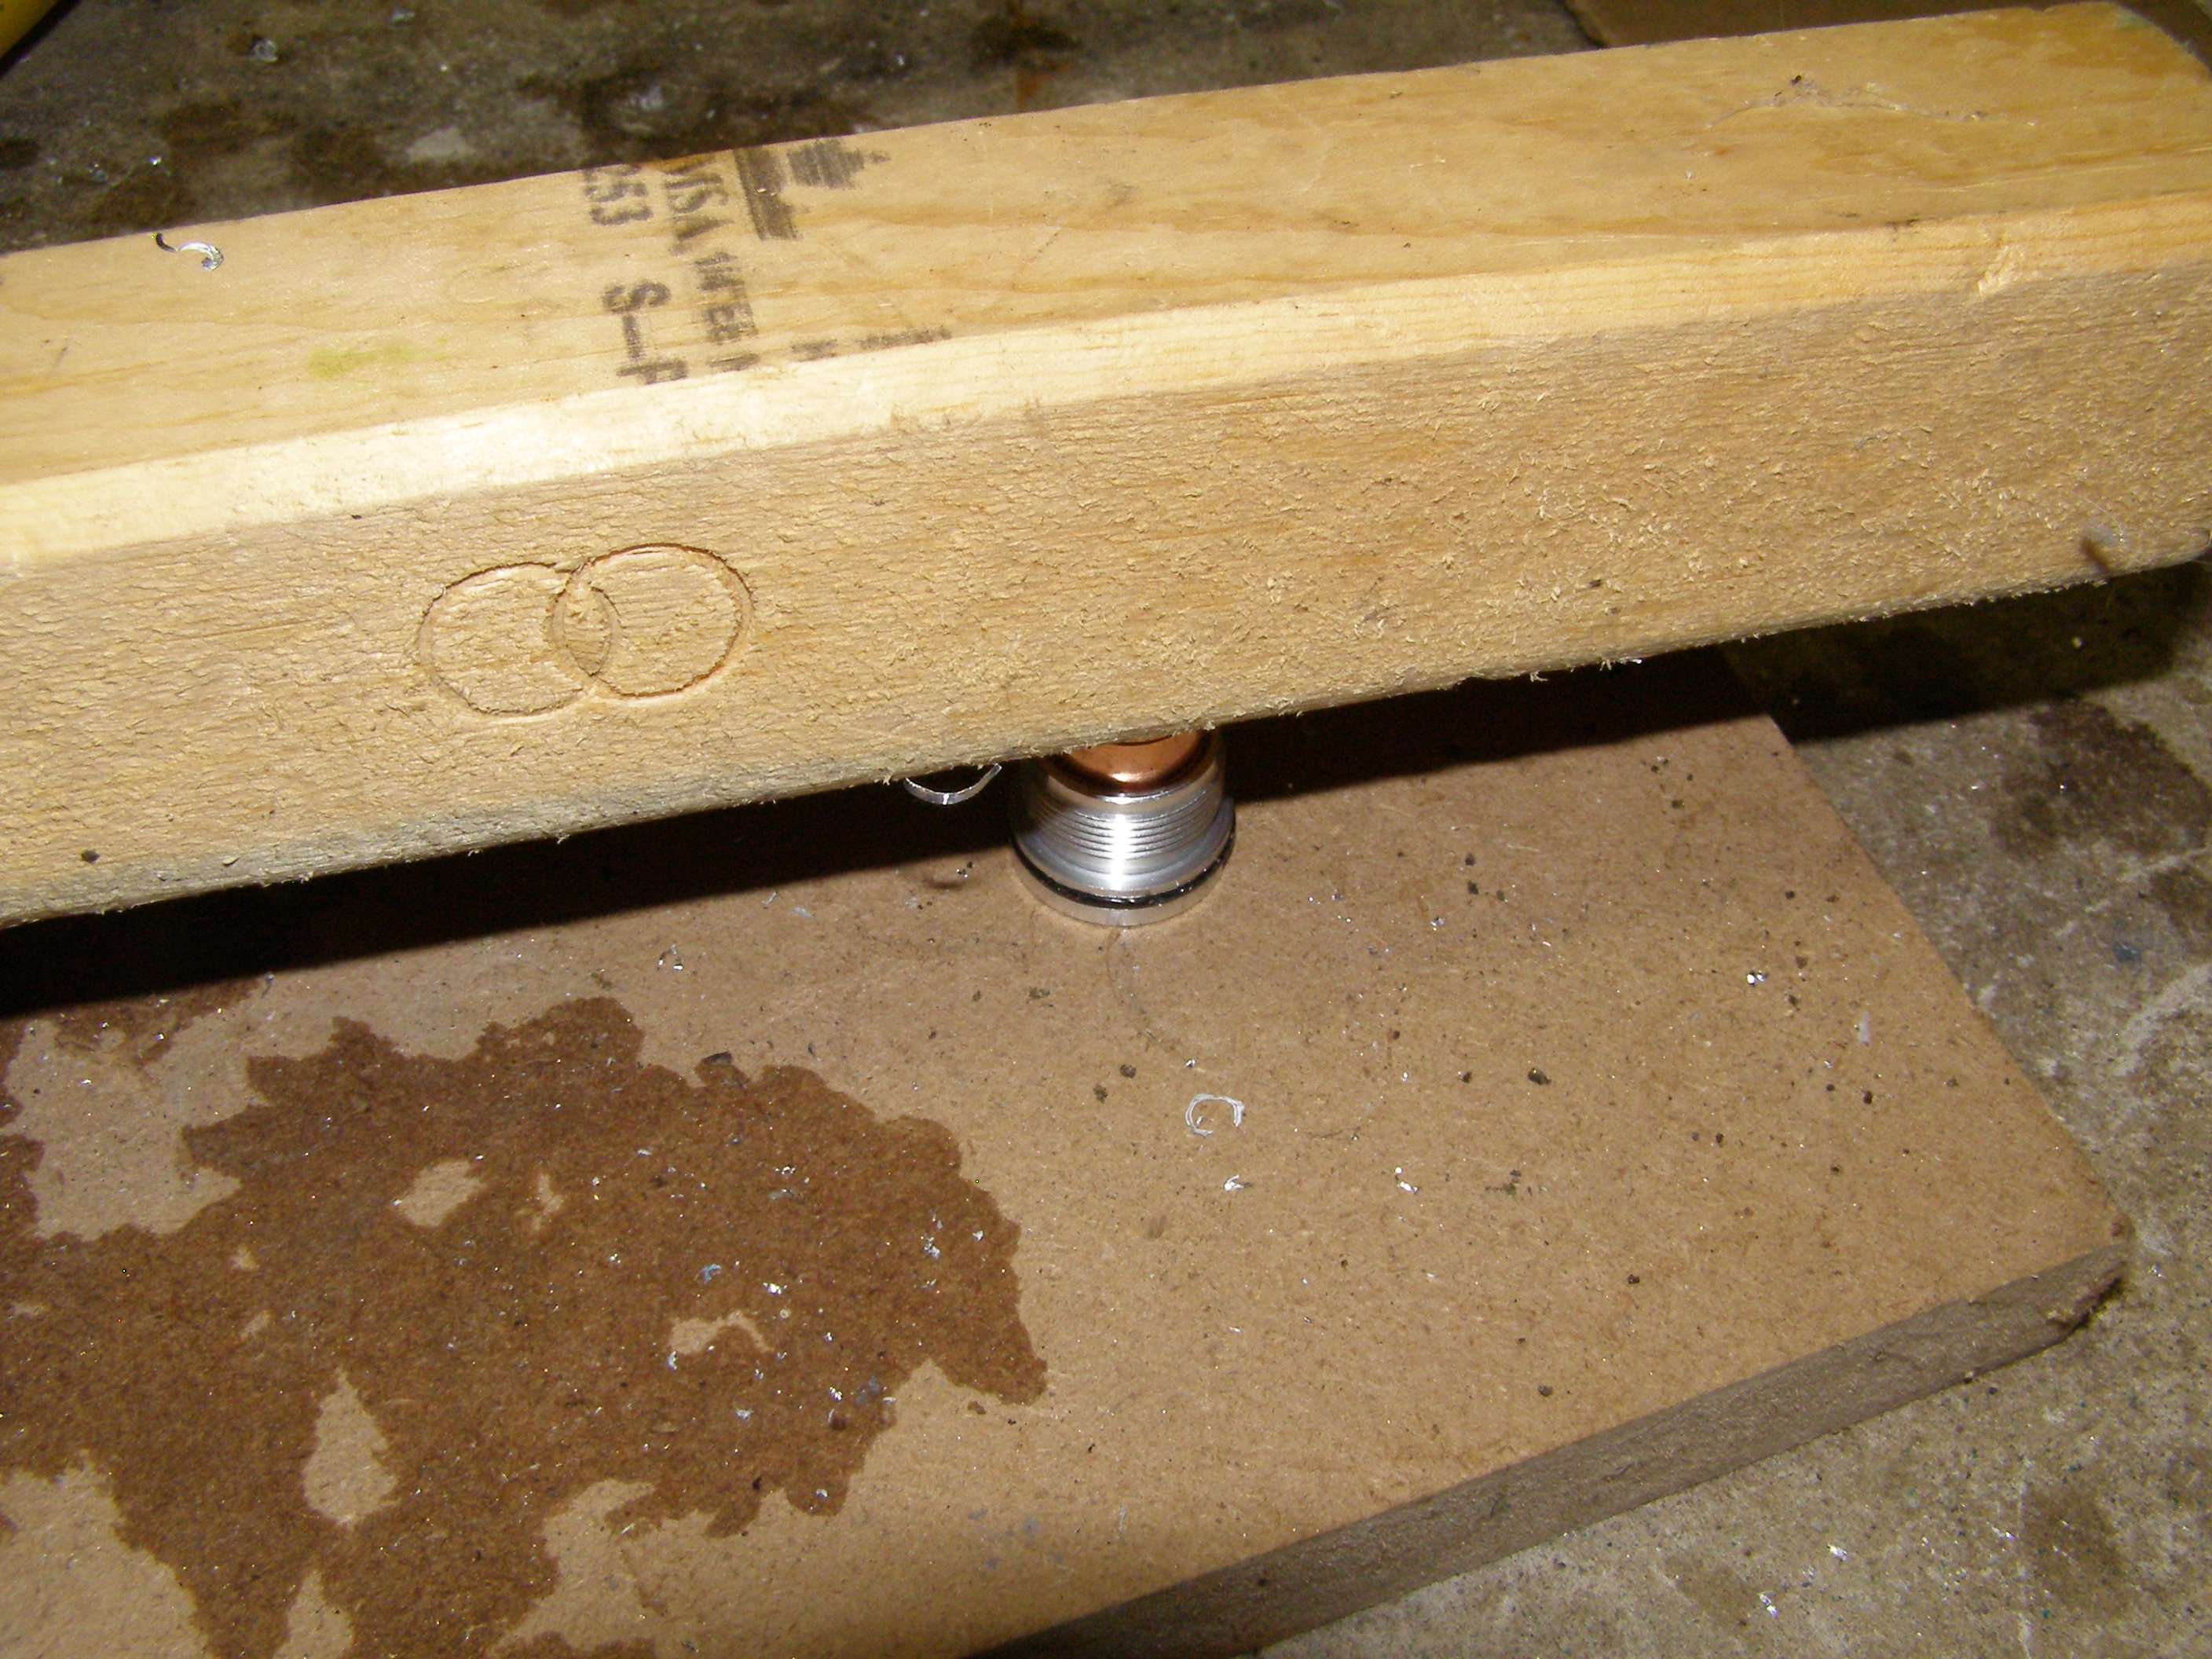
Press out the inner section. It is held in place with an o-ring. You will want the o-ring intact for reassembly later.
You can then disassemble the other parts as they are just pressed in.

Either cut the wires to the led or un-solder them so now everything is apart.
Now what I have been doing is using either a 5V or 3V Fasttech 532nm module that runs in the $5 range and are way overspec.
They are overspec to begin with but also have an adjustable pot. Thru a lot of experimentation I've found that the best setting for either one of them is about .43ma for the most output. It's easy for me to set them as I use a variable DC power supply set to 3.2V and tweak the pot CCW using a ceramic micro screwdriver and the power supply shows the ma draw. Most of the time that setting will result in quite a lot more output.
These modules have no issues running a standard 14500 cell at 4.2V peak. Have not blown a single one yet with that voltage. I would strongly warn about adjusting the pot with a something conductive as it is easy to slip and blow either the board or diode. I've had modules hit over 140mw with low IR. Take a look at any of my builds and all the ones with the yellow stickers are 100mw or above (actual number is the highest peak as I label for safety and not average output). As with almost any 532nm, stability and output is a crap shoot. The point is that I don't know of a better bargain out there for these modules and shipping is free regardless of whether you buy one or a 1000.
532nm is extremely impressive for someone who has never seen one before and I still get a kick out of them each and everytime.
Fasttech sells the ceramic screwdrivers ones for a bit over a $1 apiece and they have 8 different ones. If you would like to see many of my builds using these modules just check out the inexpensive build thread.

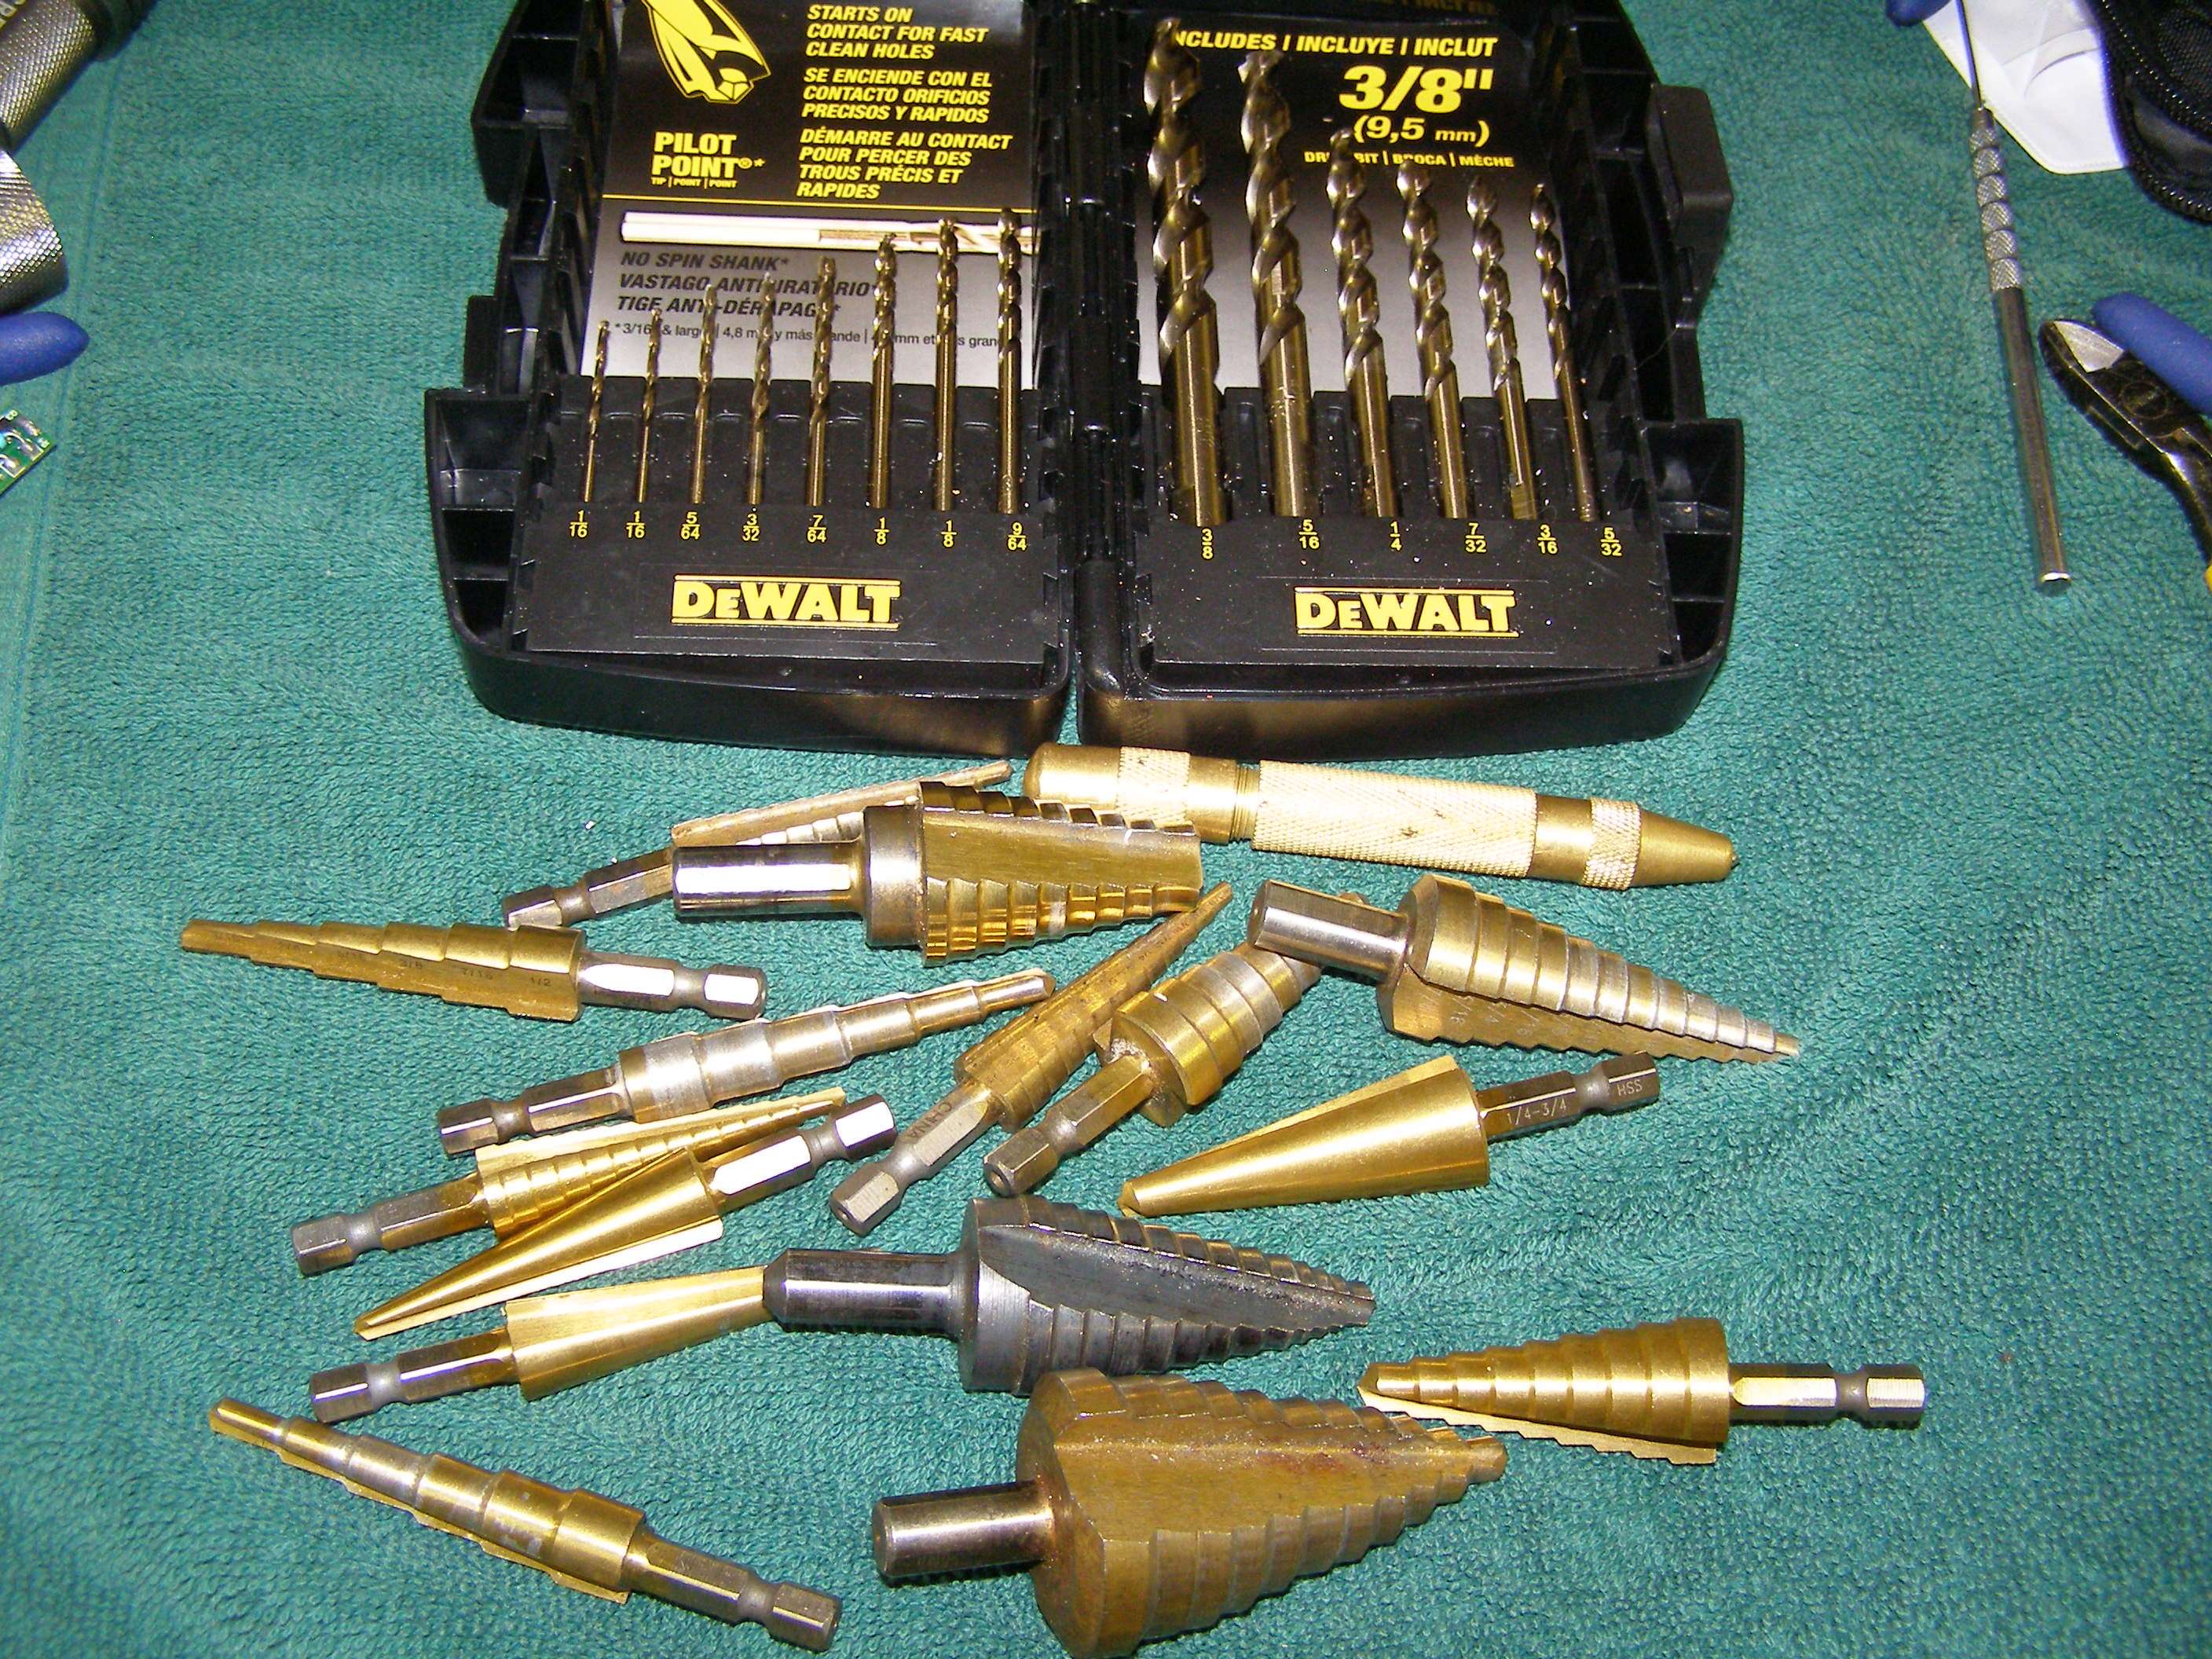
Some of the possible suspects for drilling holes. Would mention that drilling in aluminum is 100 times easier keeping the bit/piece wet with water.
Made a starter hole and then couple of bigger holes for either module. It is actually not critical from the way I build these to get the hole perfect because of how it will align as you will soon see (although you certainly have to make the hole so that the module won't be skewed to the side).

Now because the inside of the host is coated and won't conduct, you need to remove the anodizing or paint. I use a dremel with steel wire brush, stick it inside and let her rip. Good idea to do it outside or you're going to get a cloud of anodizing and aluminum so hold your breathe or wear a mask. Don't have to get it all out. Just a couple inches in.


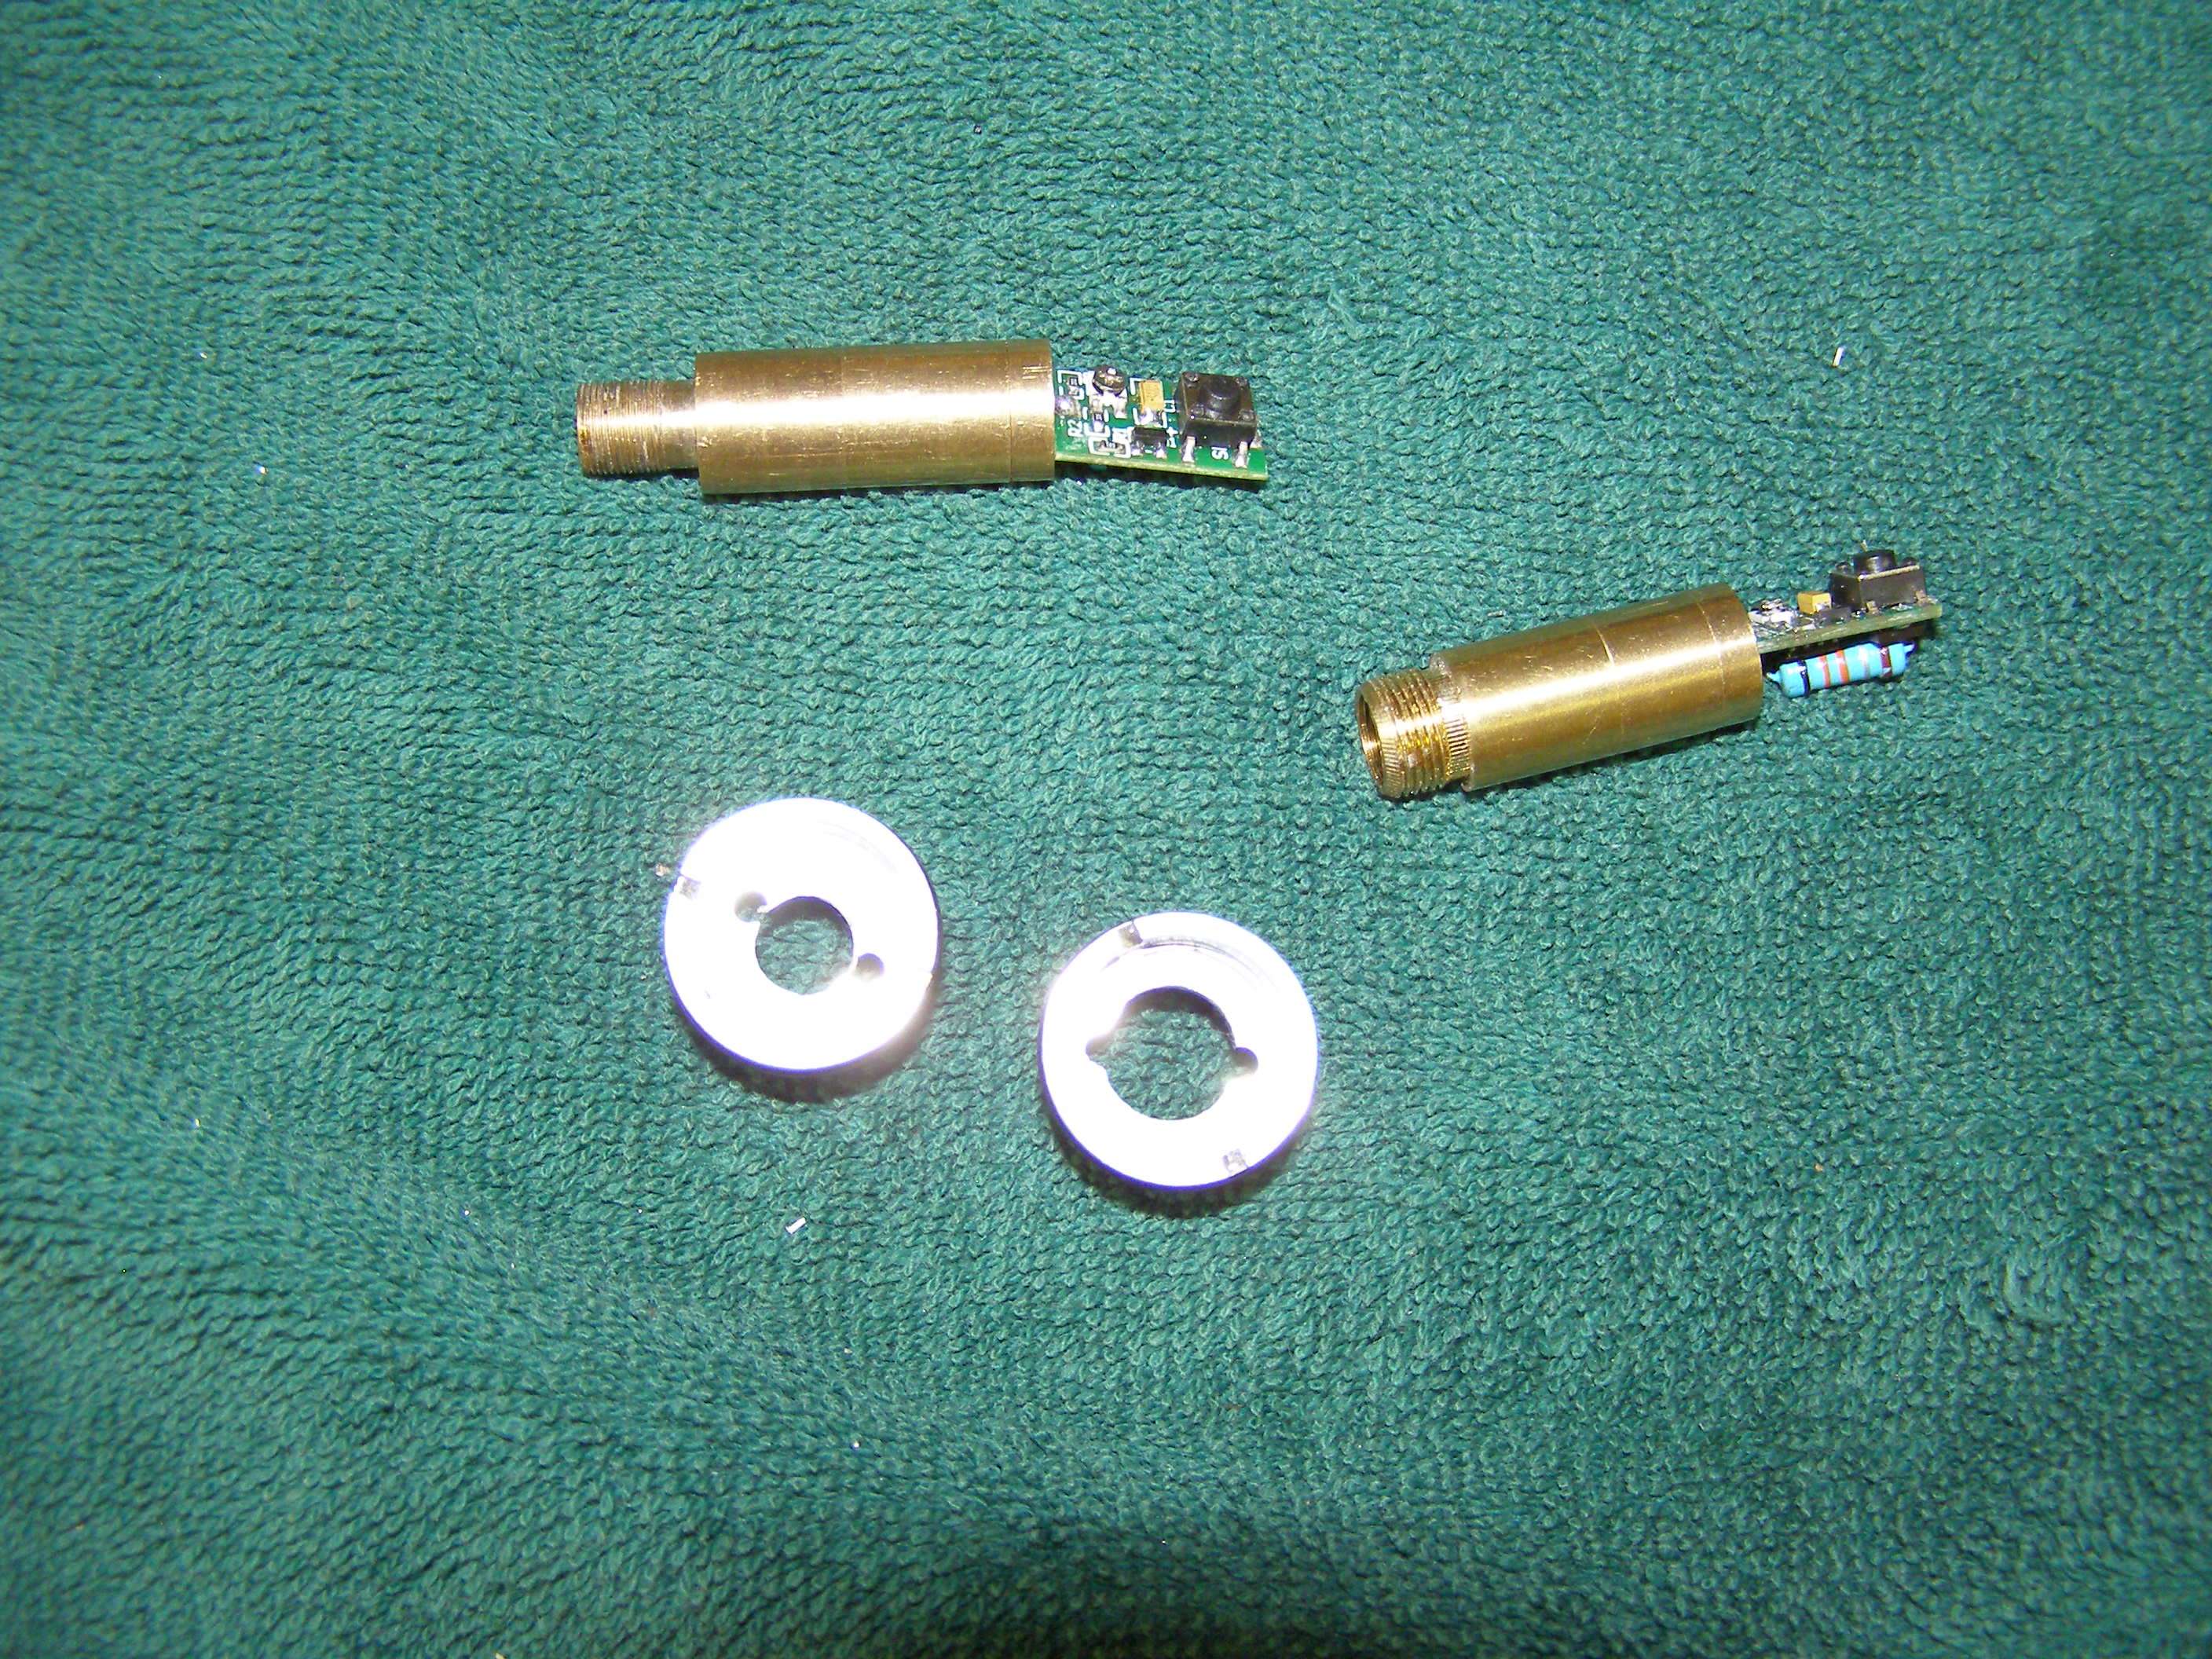
Now take a 1/2" copper coupling (cleaned). and it will fit inside the piece you drilled a hole in for the module.
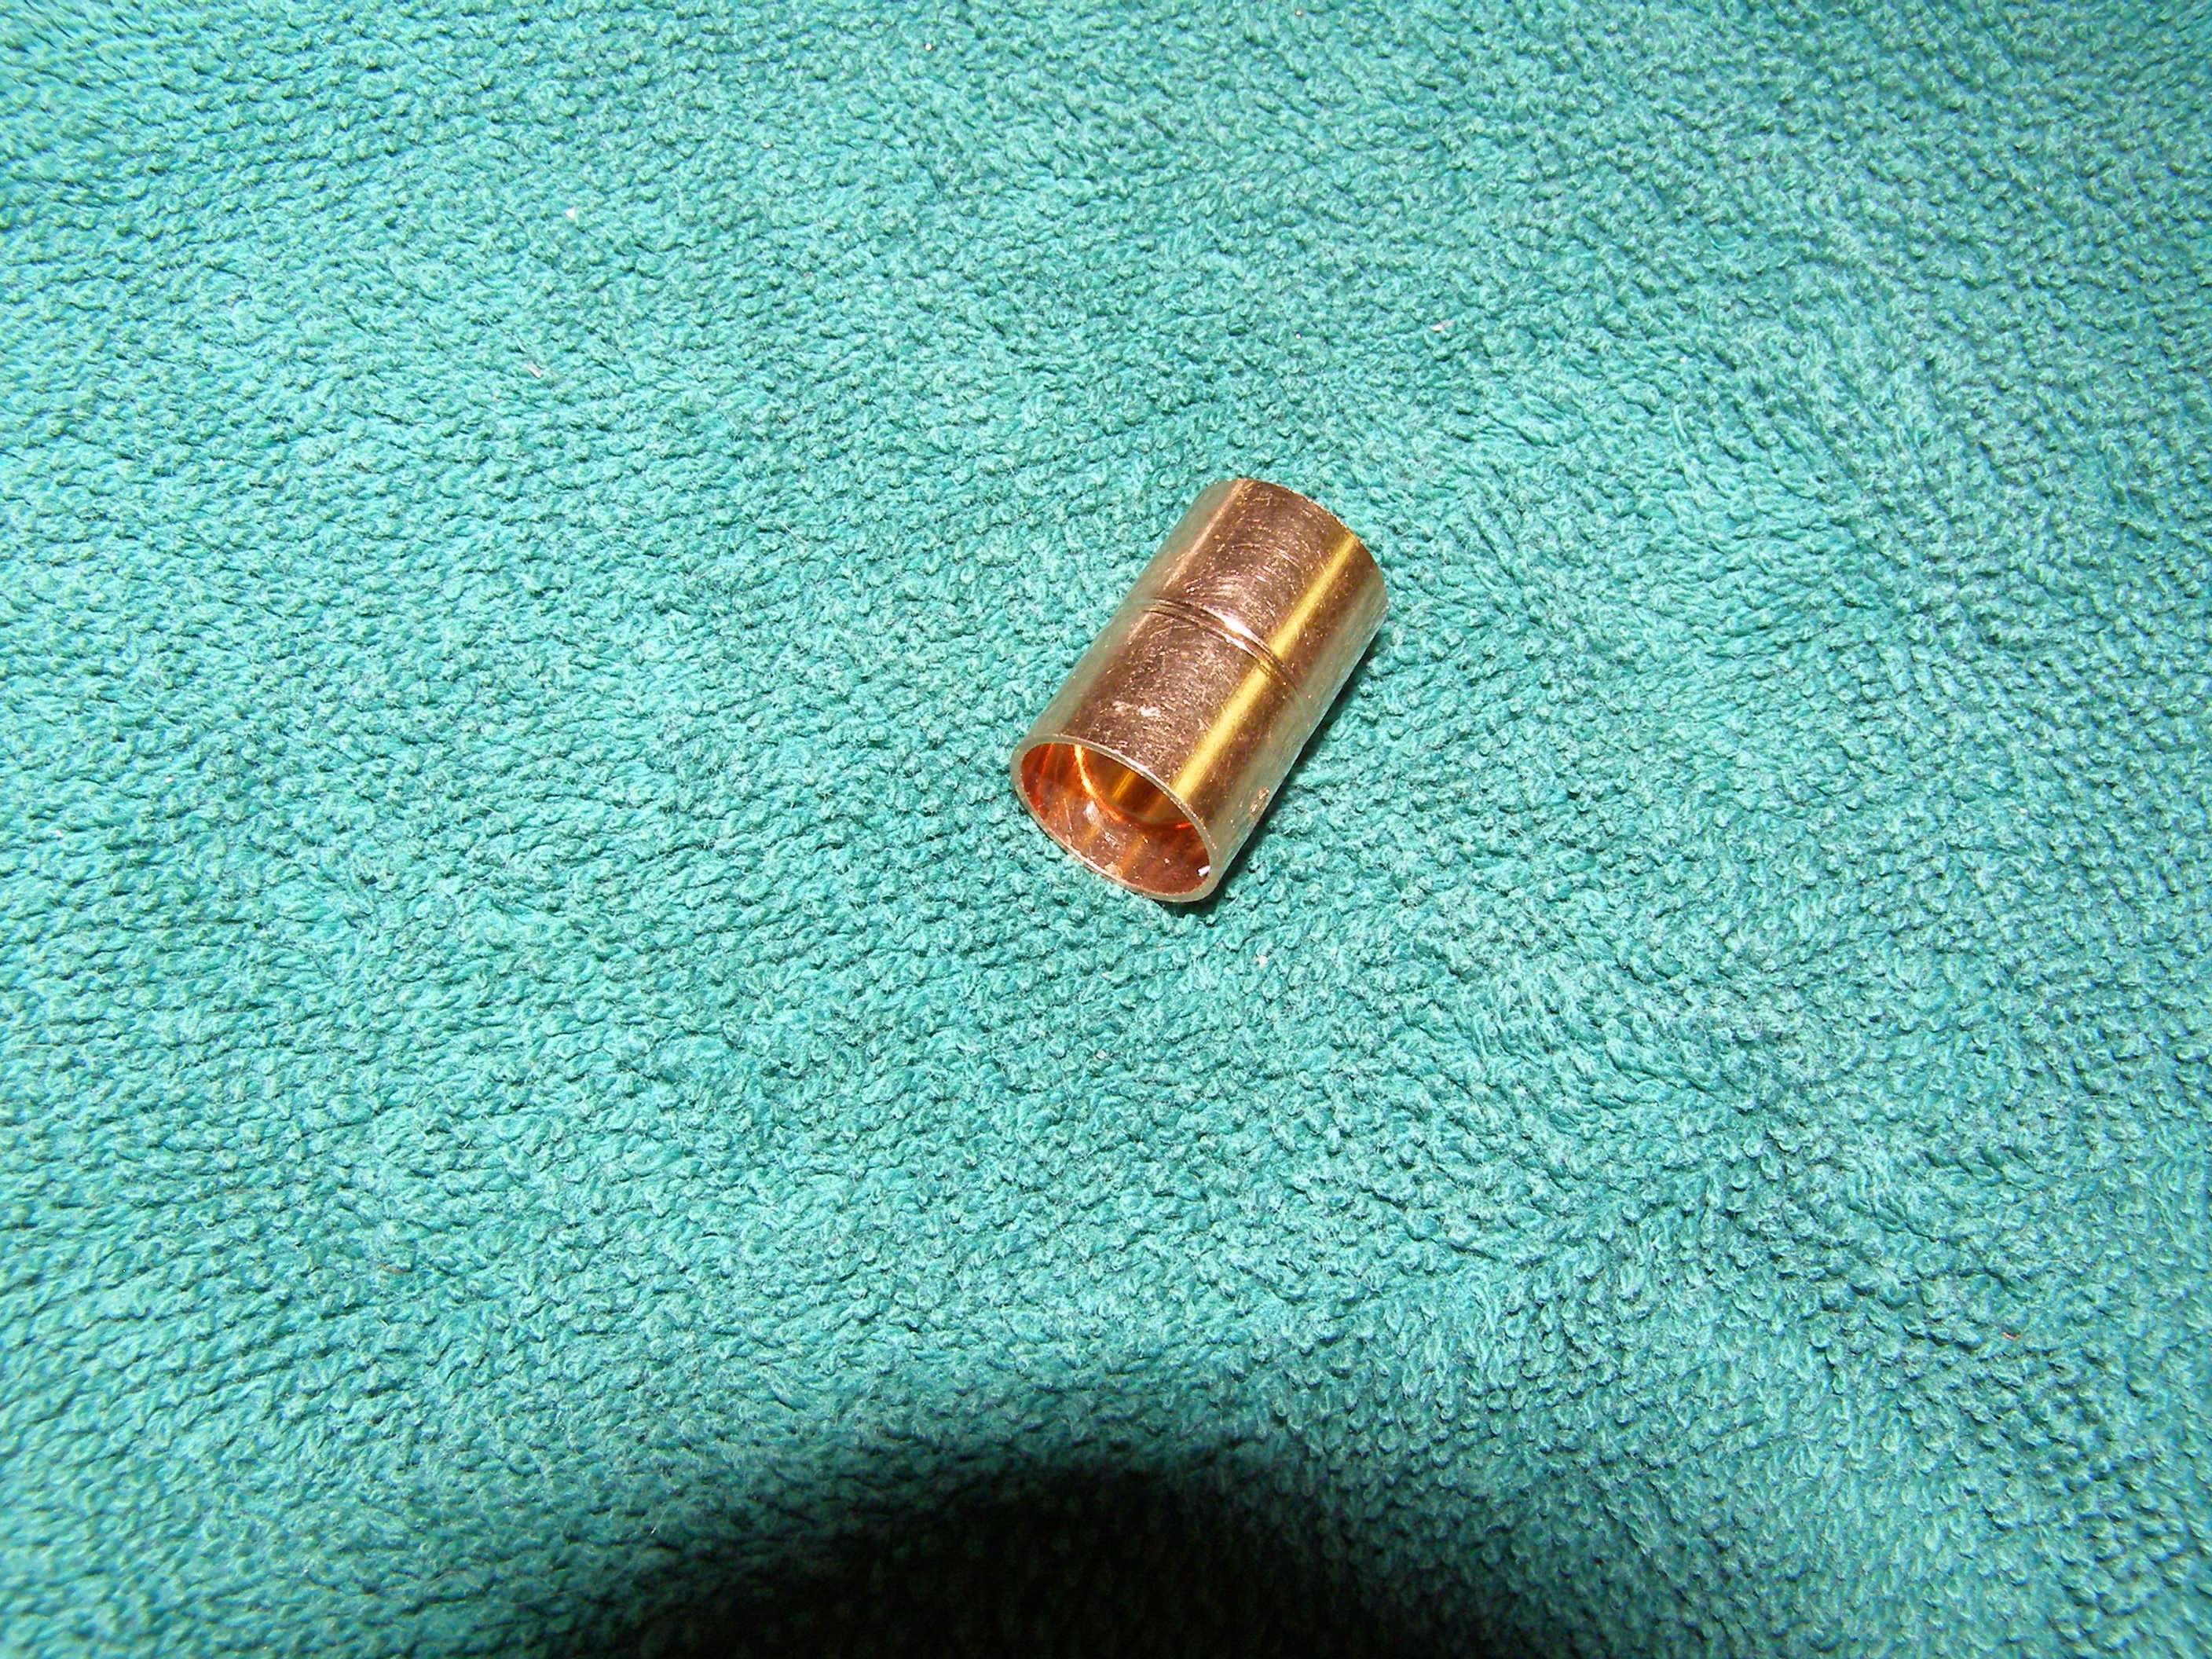

Not all couplings are created equal and sometimes you need to press it in.


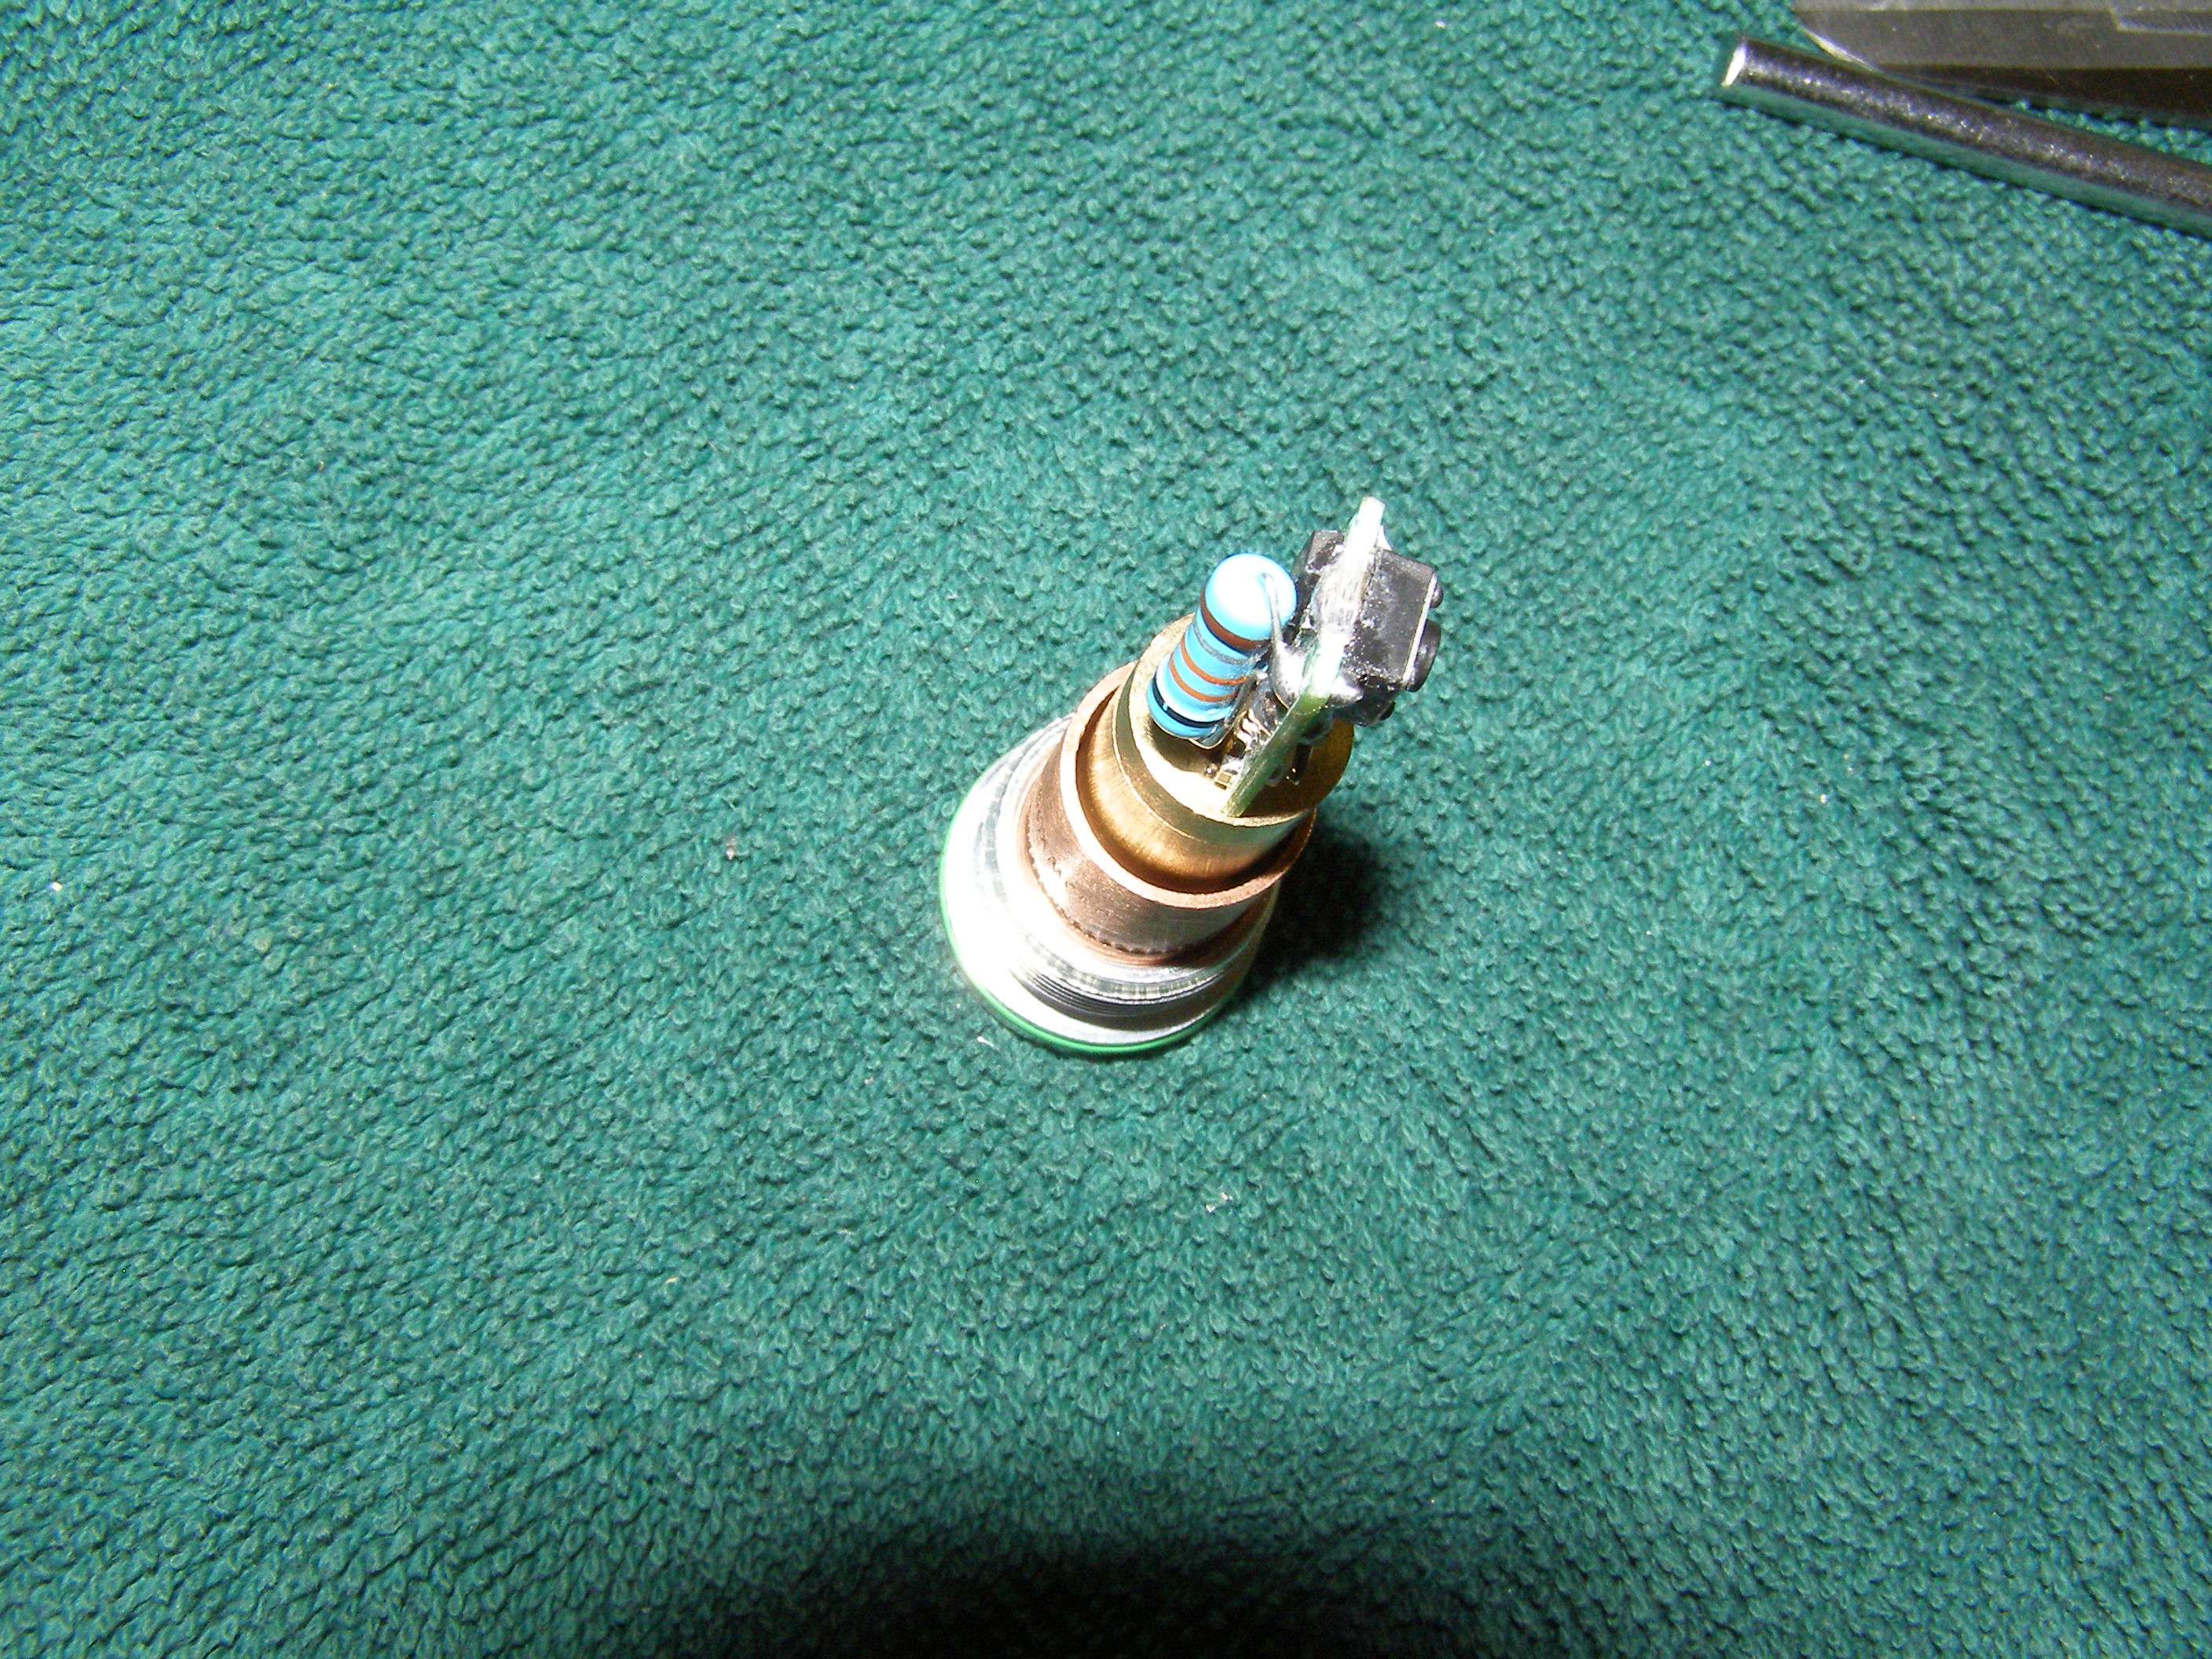
Would look like this if you stuck a module in it although the module will be loose at this point.
I've soldered across the 2 button solder points already so that when power is applied you don't need to push it in to get the laser on.
Also, I take my dremel cutoff wheel and notch either side of where I'm going to be soldering on a spring as it makes it MUCH easier to attach the spring to the solder that is already there. For an added conductivity bonus, when I solder the spring on I run a bead of solder from the switch over to the spring.
Something else I do that I should mention is when I get the modules, I mix a bit of epoxy and put some where the board contacts the brass to make it stronger as you are manipulating the module a lot while working with them and you will kick yourself when you twist the board and break a connection to the diode. What is most likely to happen is the side with the single diode module prong will break away from the board. This can be repaired by scraping the protective covering from the trace on the board and soldering to it.
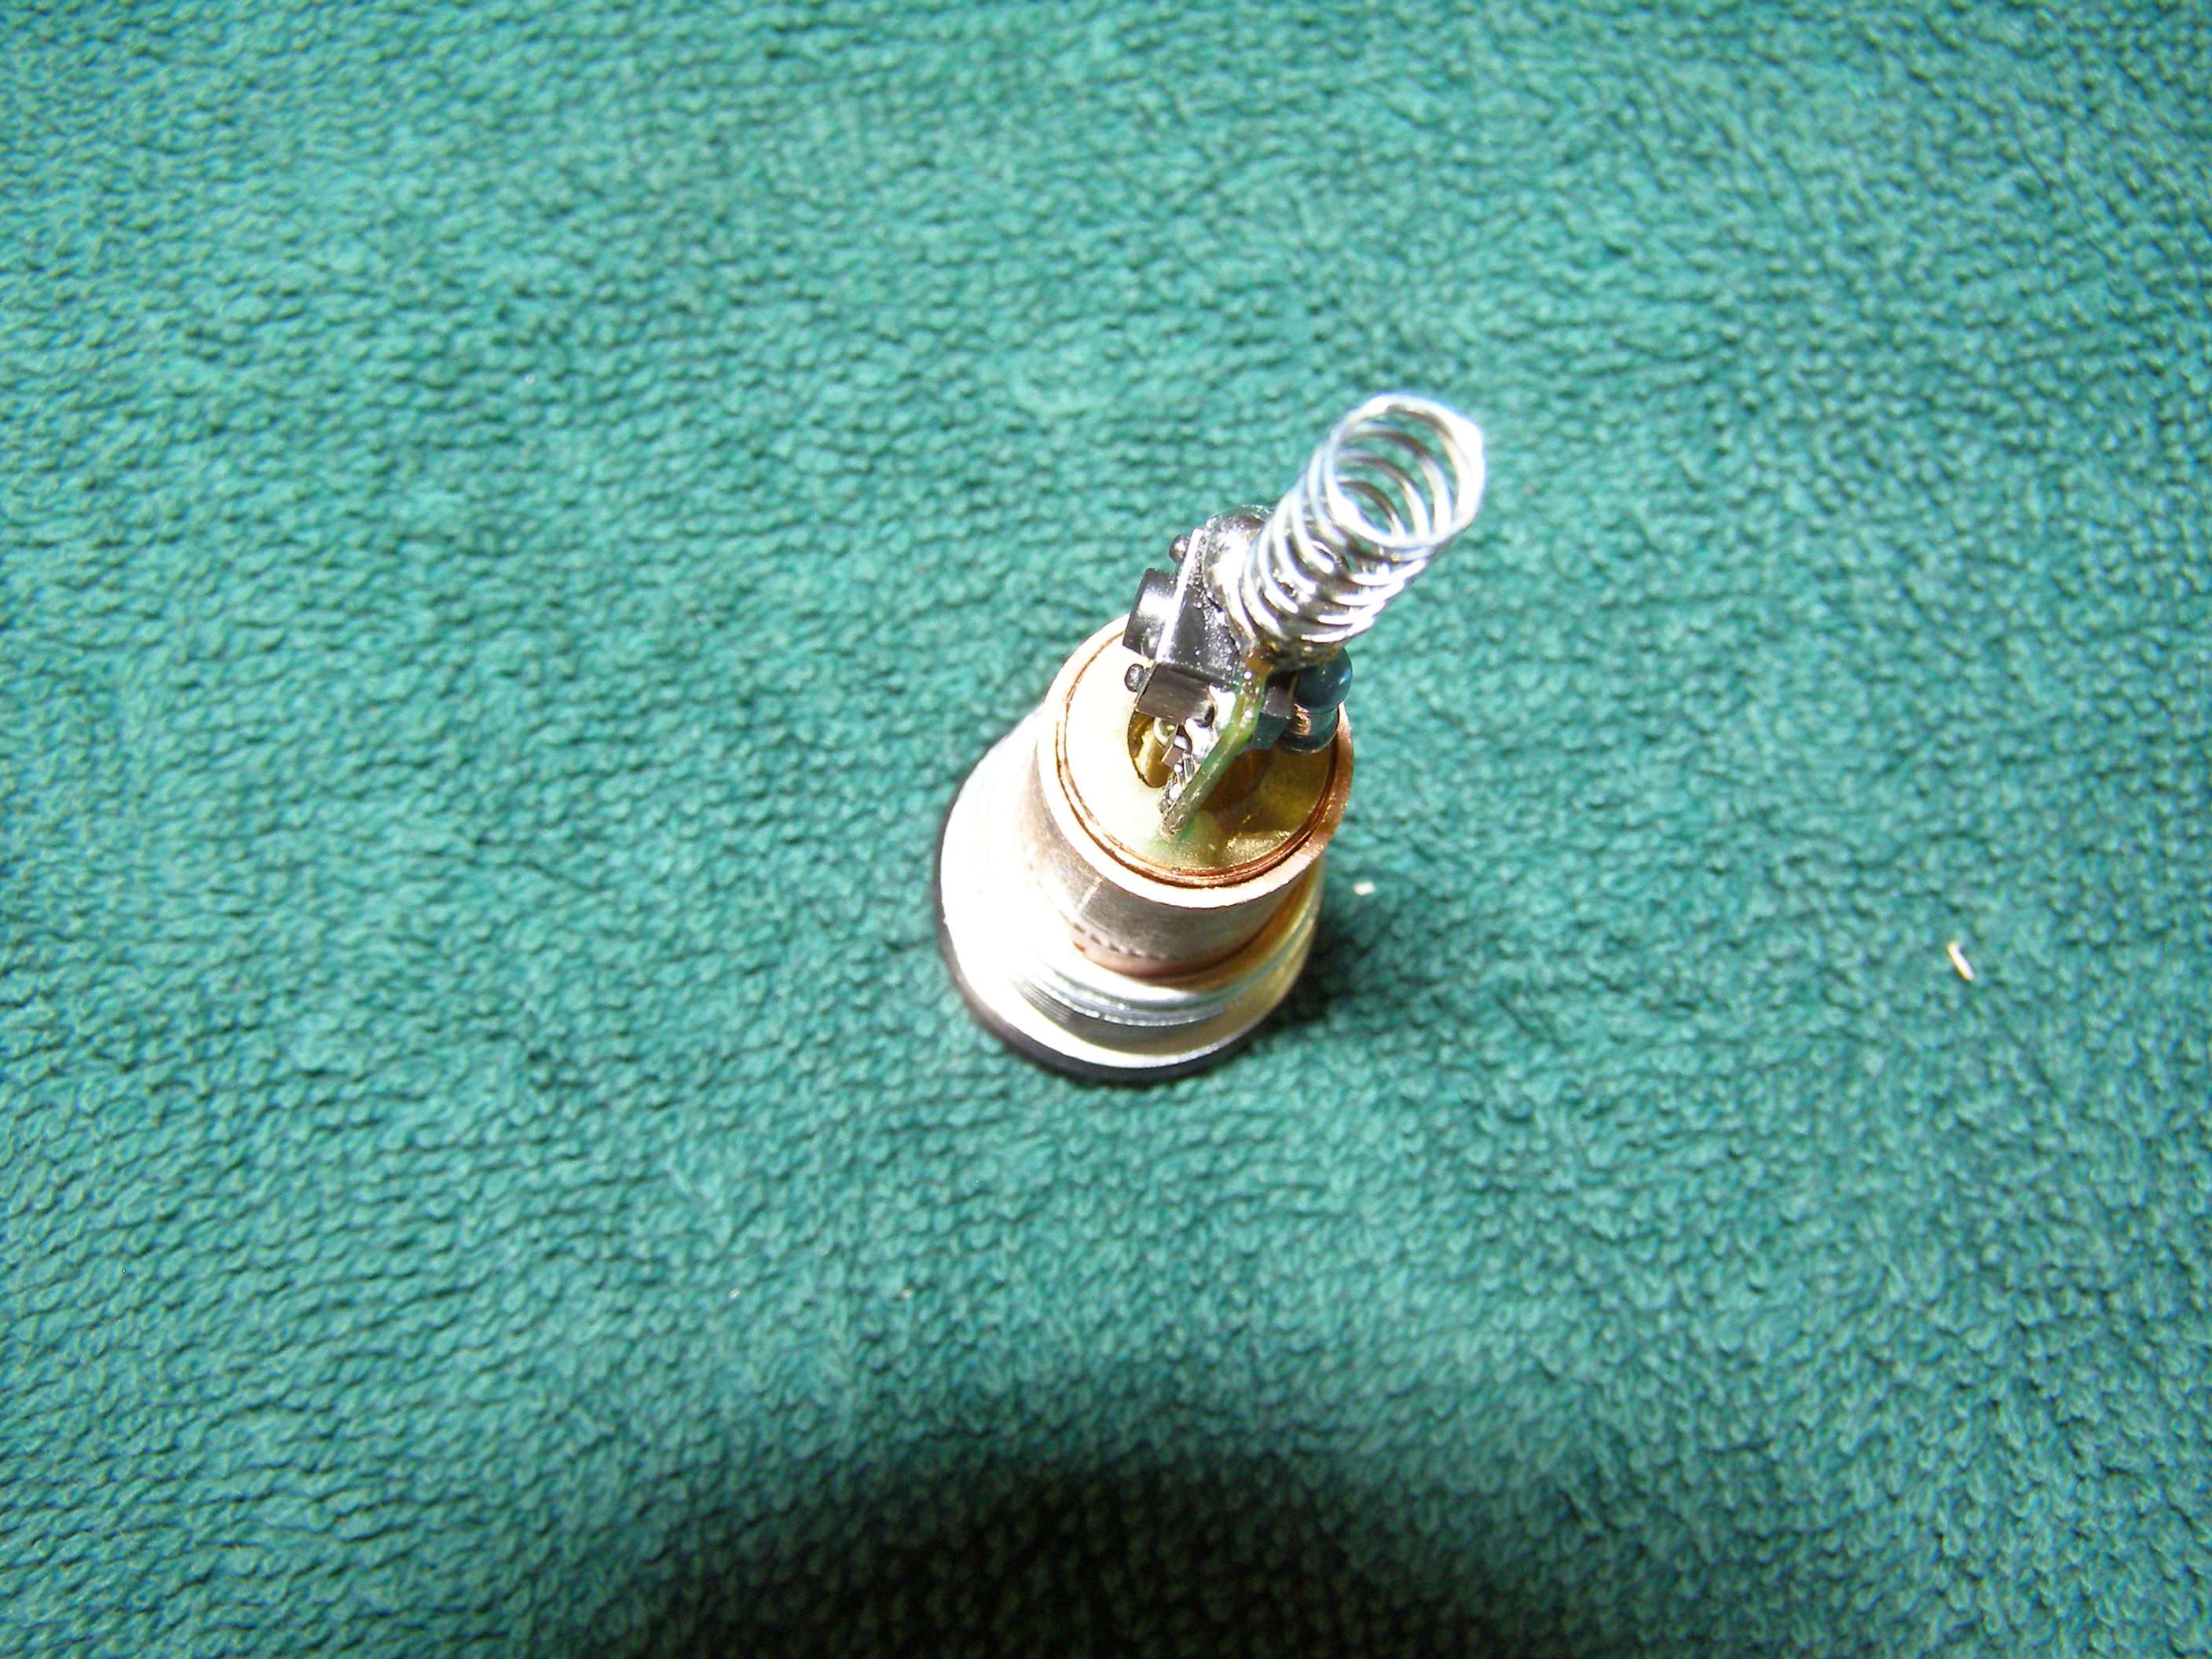
I figured out how long the spring has to be for good contact to the battery and soldered it on and then added a piece of heat shrink tubing on part of the spring and then over the whole board.


Now my secret ingredient for making things fit right and conduct is copper sheeting. This comes with an adhesive on one side so in order to use it wrapped around tight to itself you have to remove some of the adhesive for your initial conductivity. I do this with a razor blade. Scrape it off (somewhat of a pain) enough on the initial part so you have pure copper touching the other surface and then tightly roll it around itself. By using this thin copper and copper tubing pieces, you can make a custom heat-sink without having a machine shop. Would a machined piece e better? Absolutely would be great but I can't invest in the equipment necessary. I would greatly encourage everyone to utilize those here who can make all that awesome custom stuff! You could use copper wire or other things but what I use works for me. Keep in mind that I personally like finding my own way and using what I have and pushing myself to find ways to get around problems without having to rely on others so I can keep building a stupid number of different units. If I didn't find other ways, I wouldn't be able to build a 1/10th of my builds.
You can get copper sheeting like this at some hardware places but the problem is they usually want to sell you a big roll for $200. Better say up front that I don't have any to sell. You could certainly use other things like conductive wire or thin solder wire or whatever so you DON'T need the copper sheeting as there are plenty of other things out there that you could use to shove in between any spaces you need to make up for.

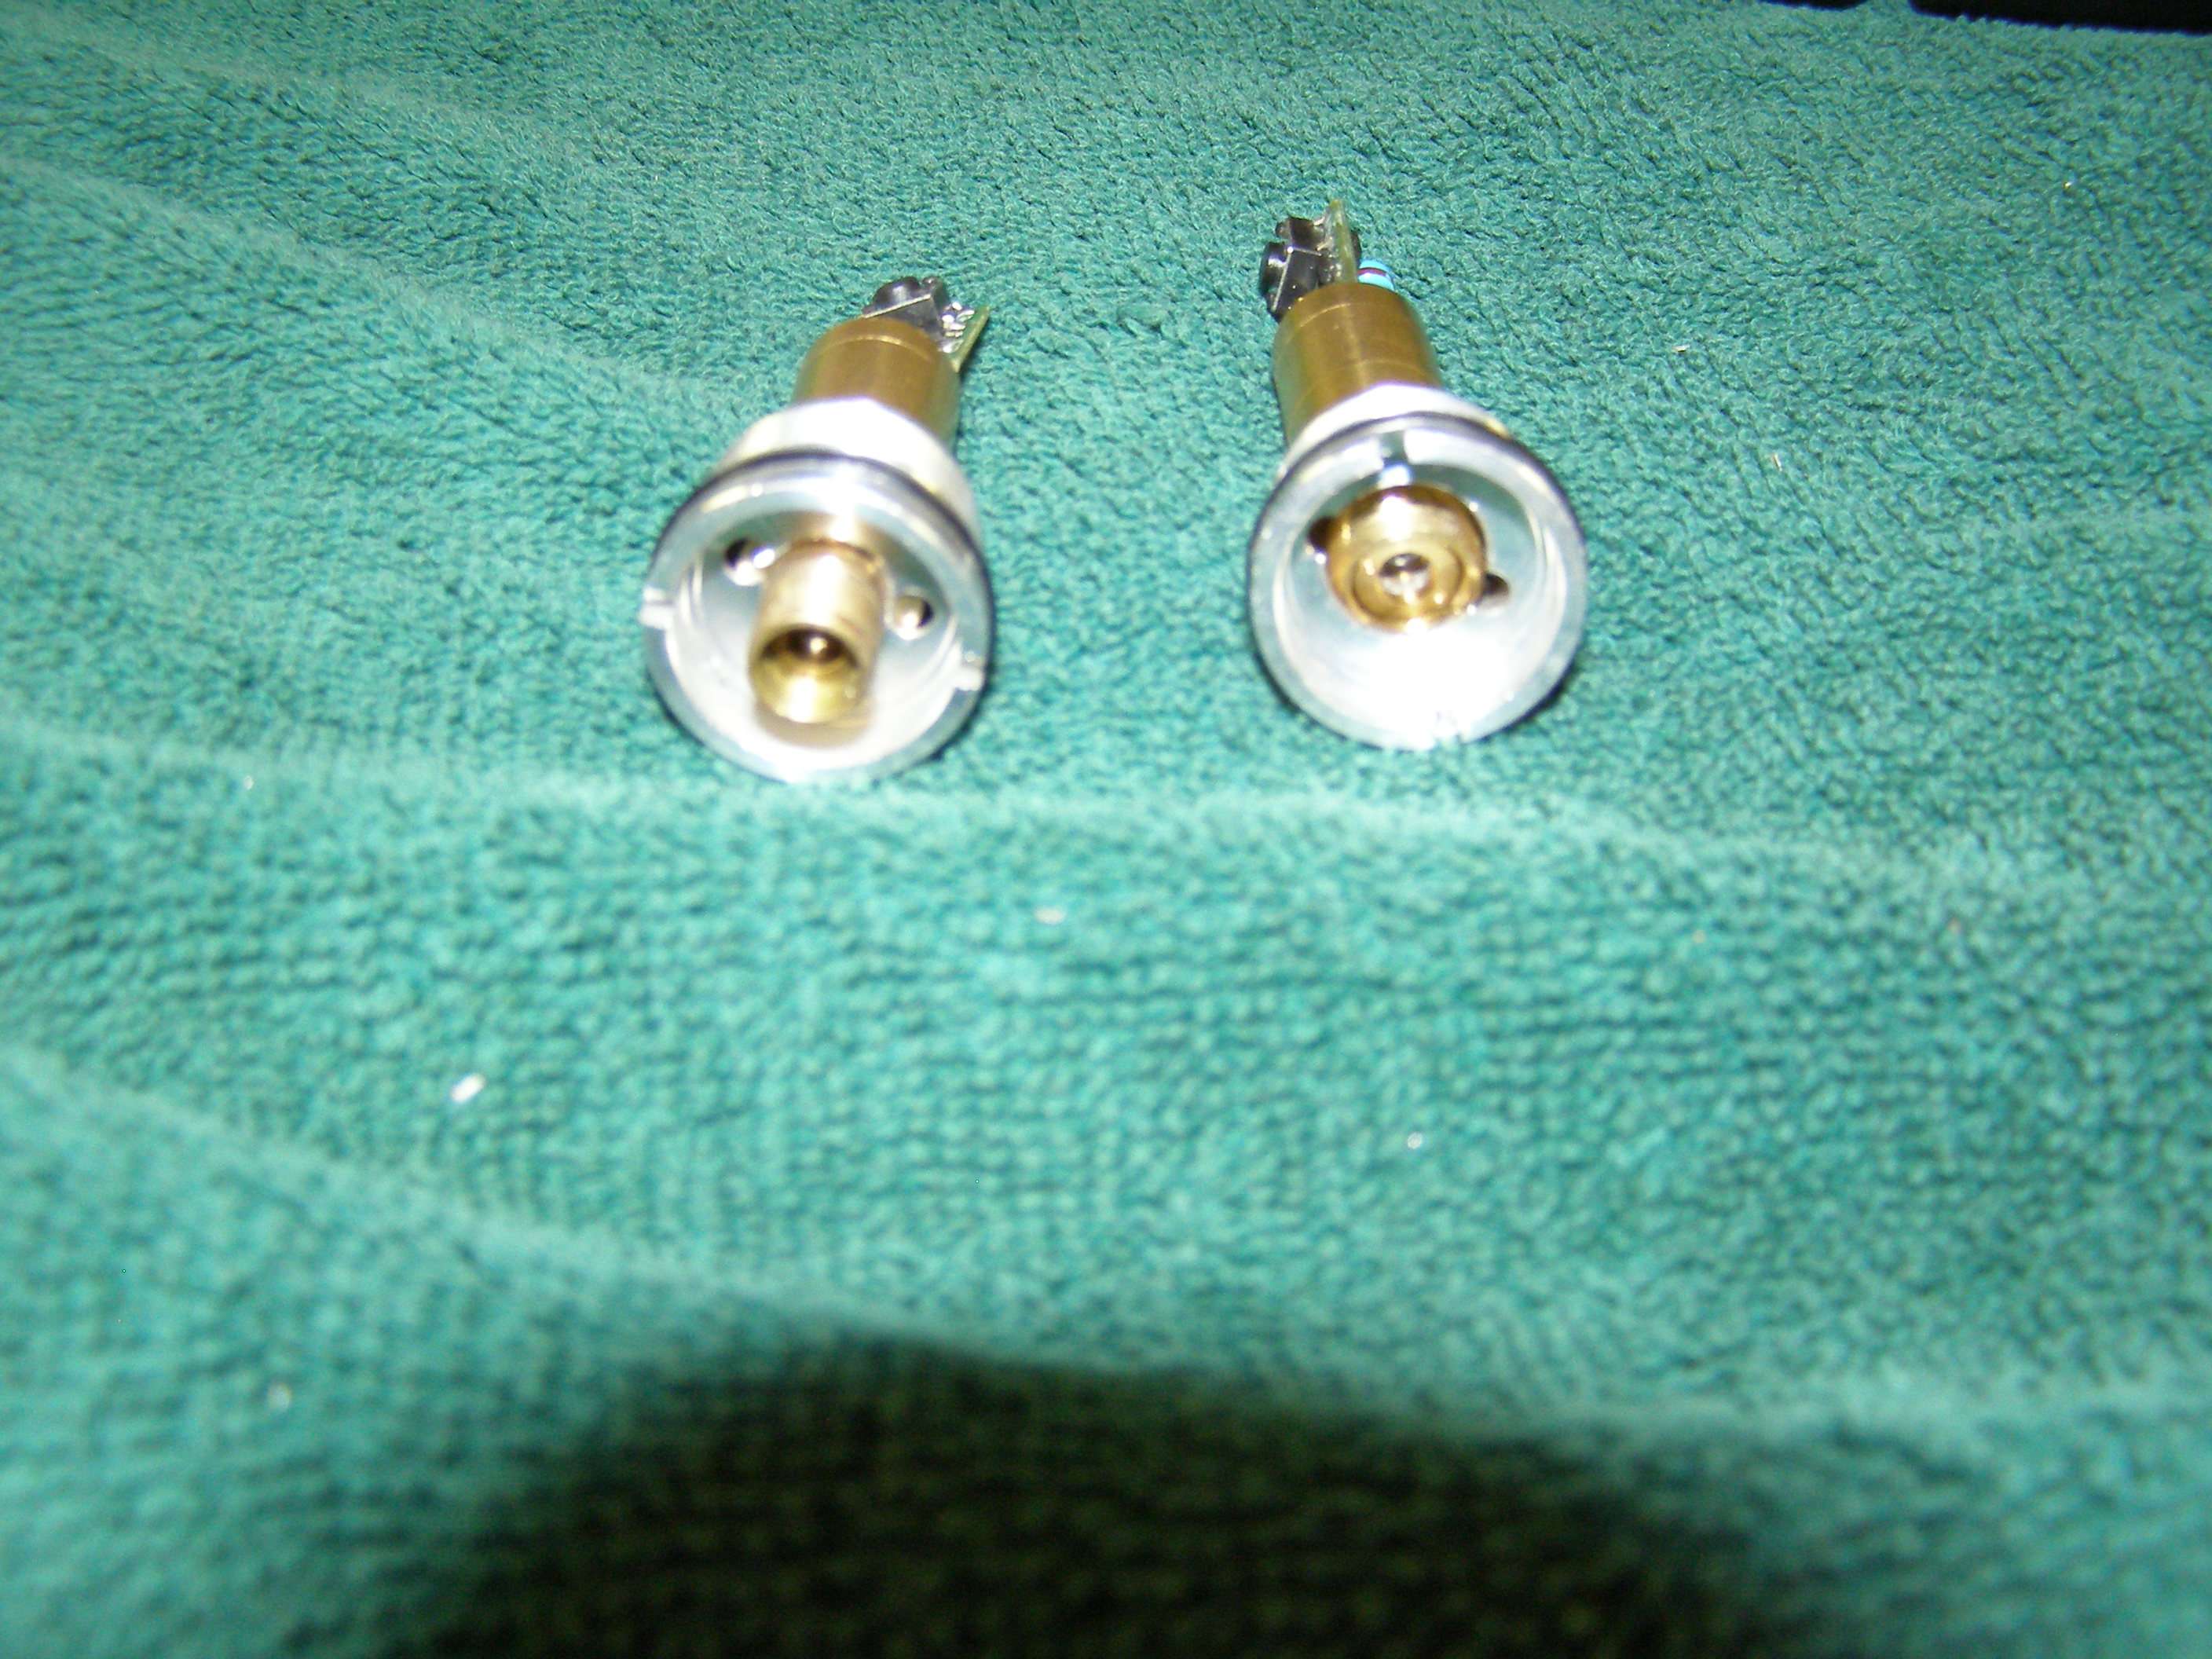
Don't know if you can see in this pic or not but I've wrapped a small piece of the copper around the module so it is quite tight when you push it into the copper coupling.
Now that you have that put together, you slide that whole piece into the piece that you pushed it out of and it will center itself because the o-ring is a snug fit once it is all put back together. You may or may not need to take a small piece of the copper and wrap it around the part of the coupling that fits inside the host for good conductivity. You can screw it down tight at this point.
What you see now from the other end is the spring and module with a lot of space around it. Found a great way to make up for it and provide a centered spring is to take a grommet that fits around the spring and touches the inside of the host.
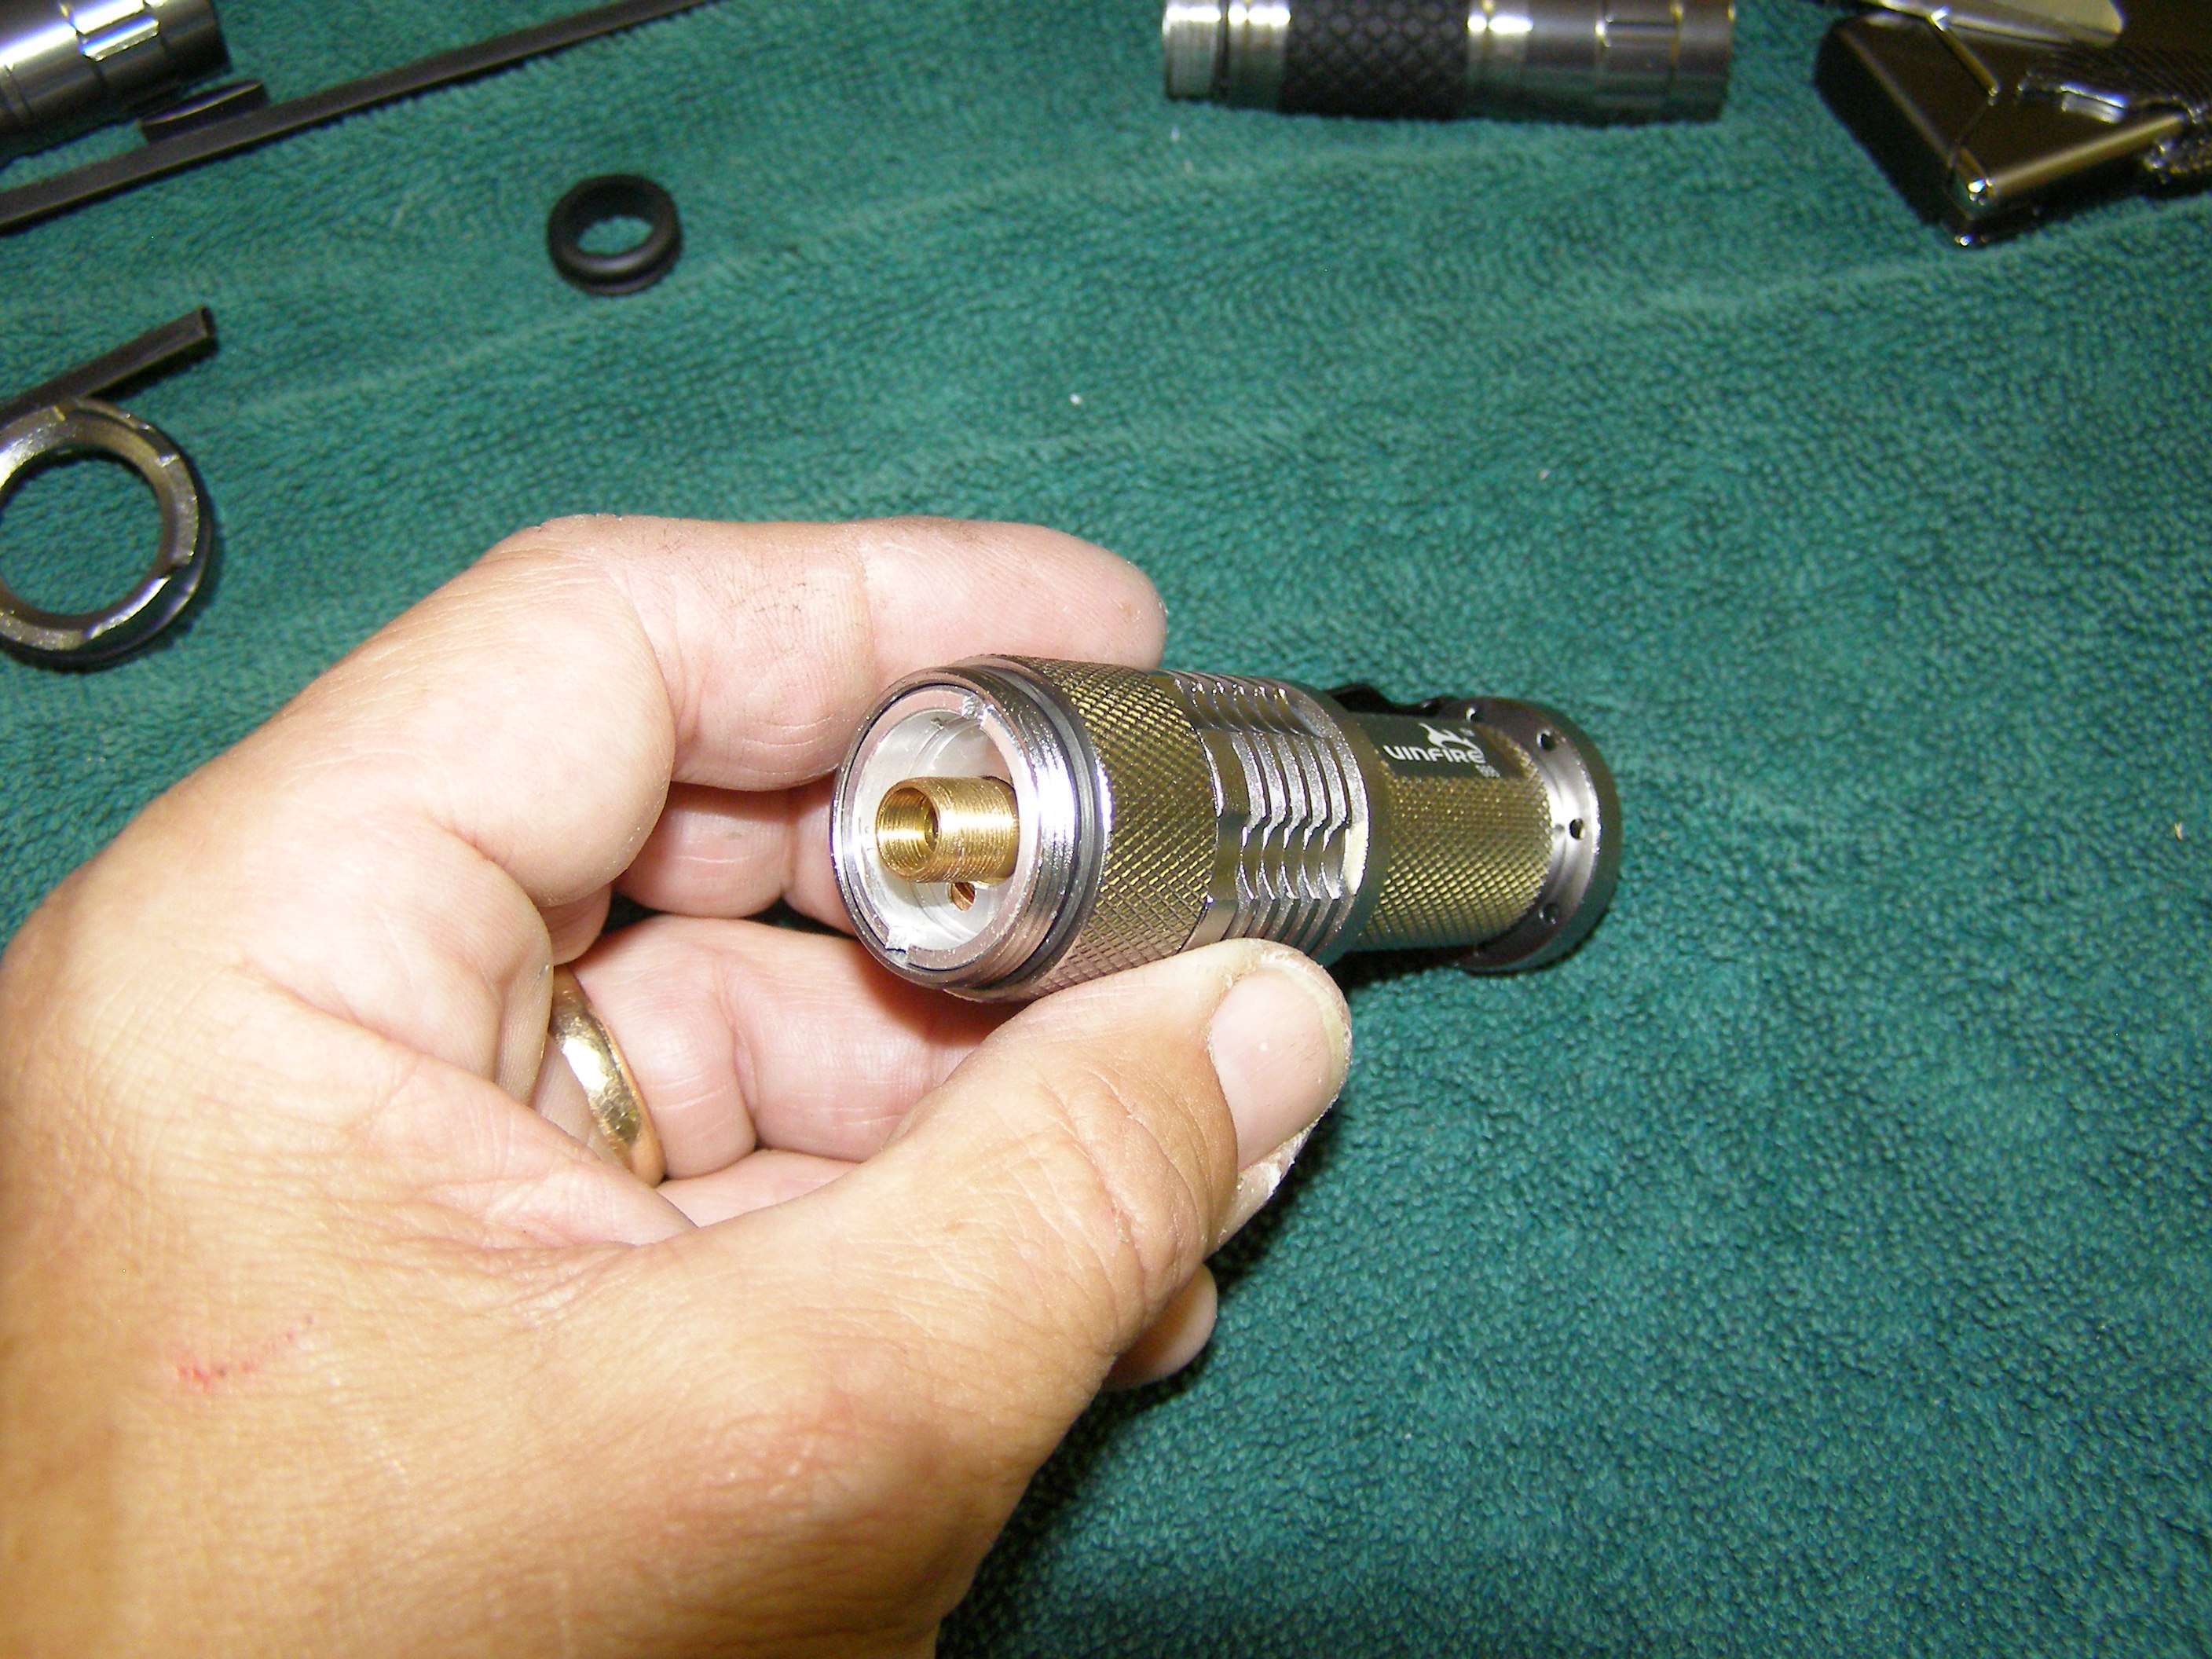
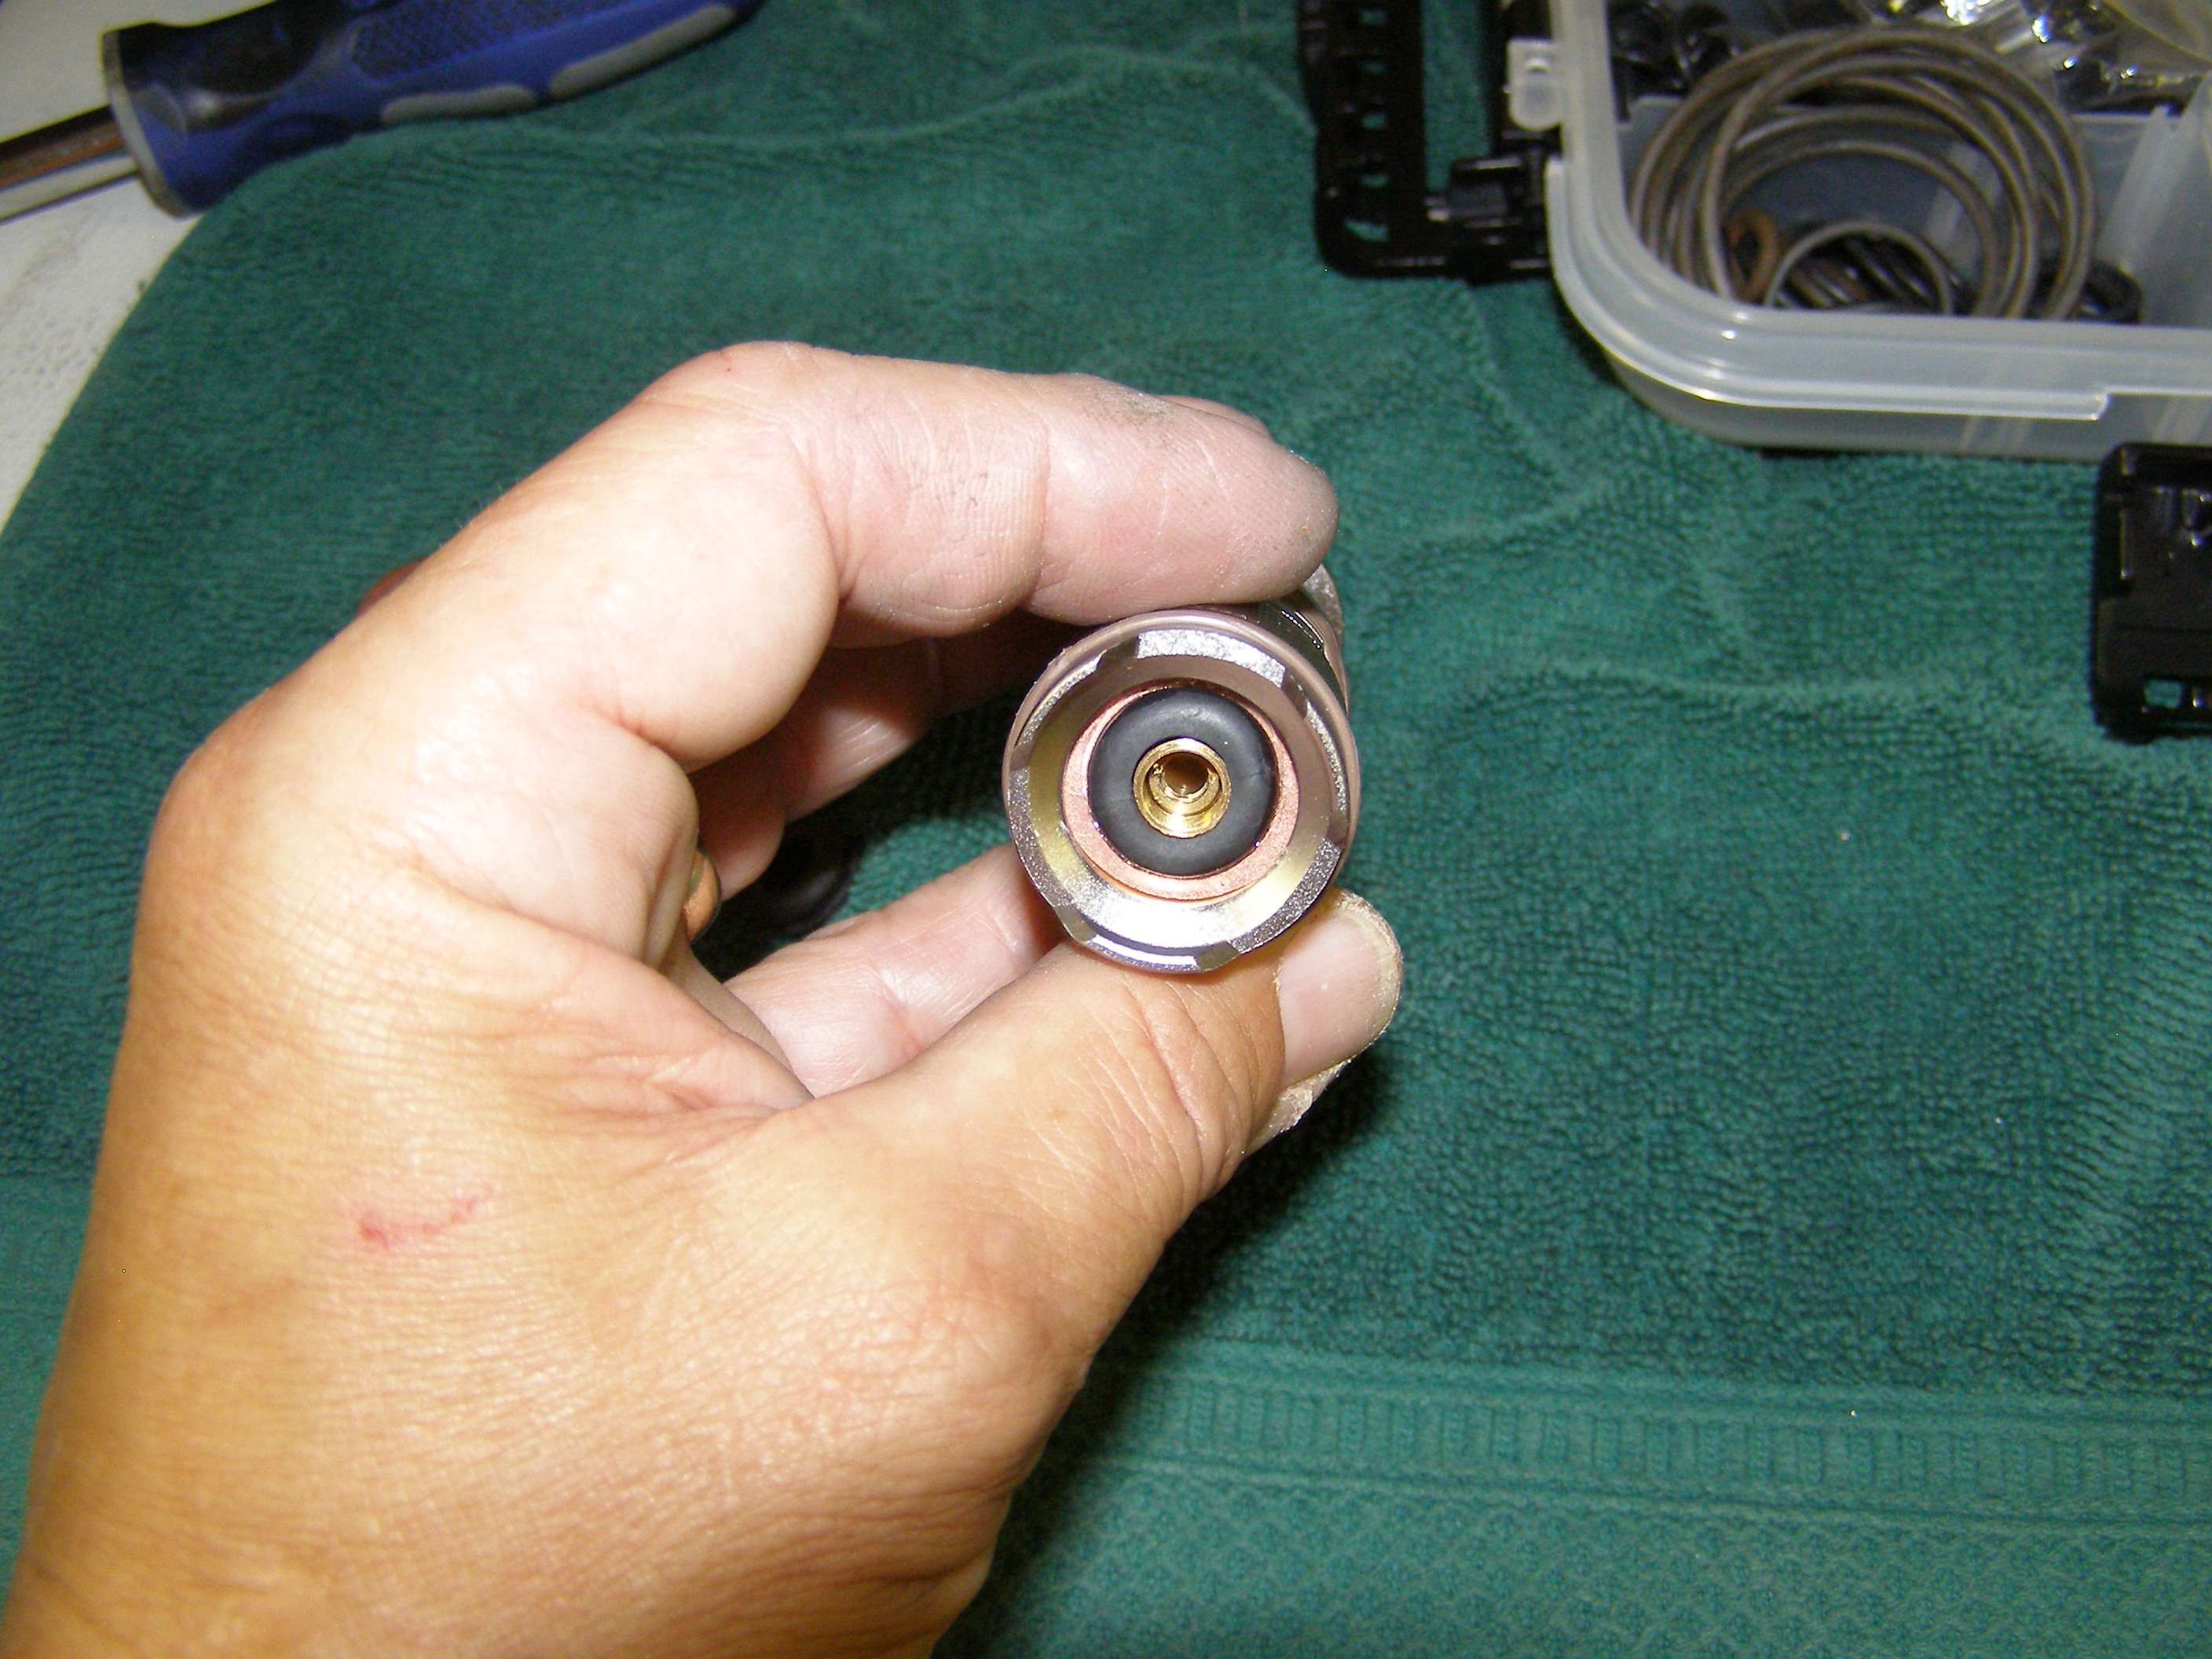
If you quit now this is basically what it would look like from the end depending upon how well you cut the hole for the module to stick thru. Just add a 14500 + to body/host or - to spring, screw it all together and you're done.

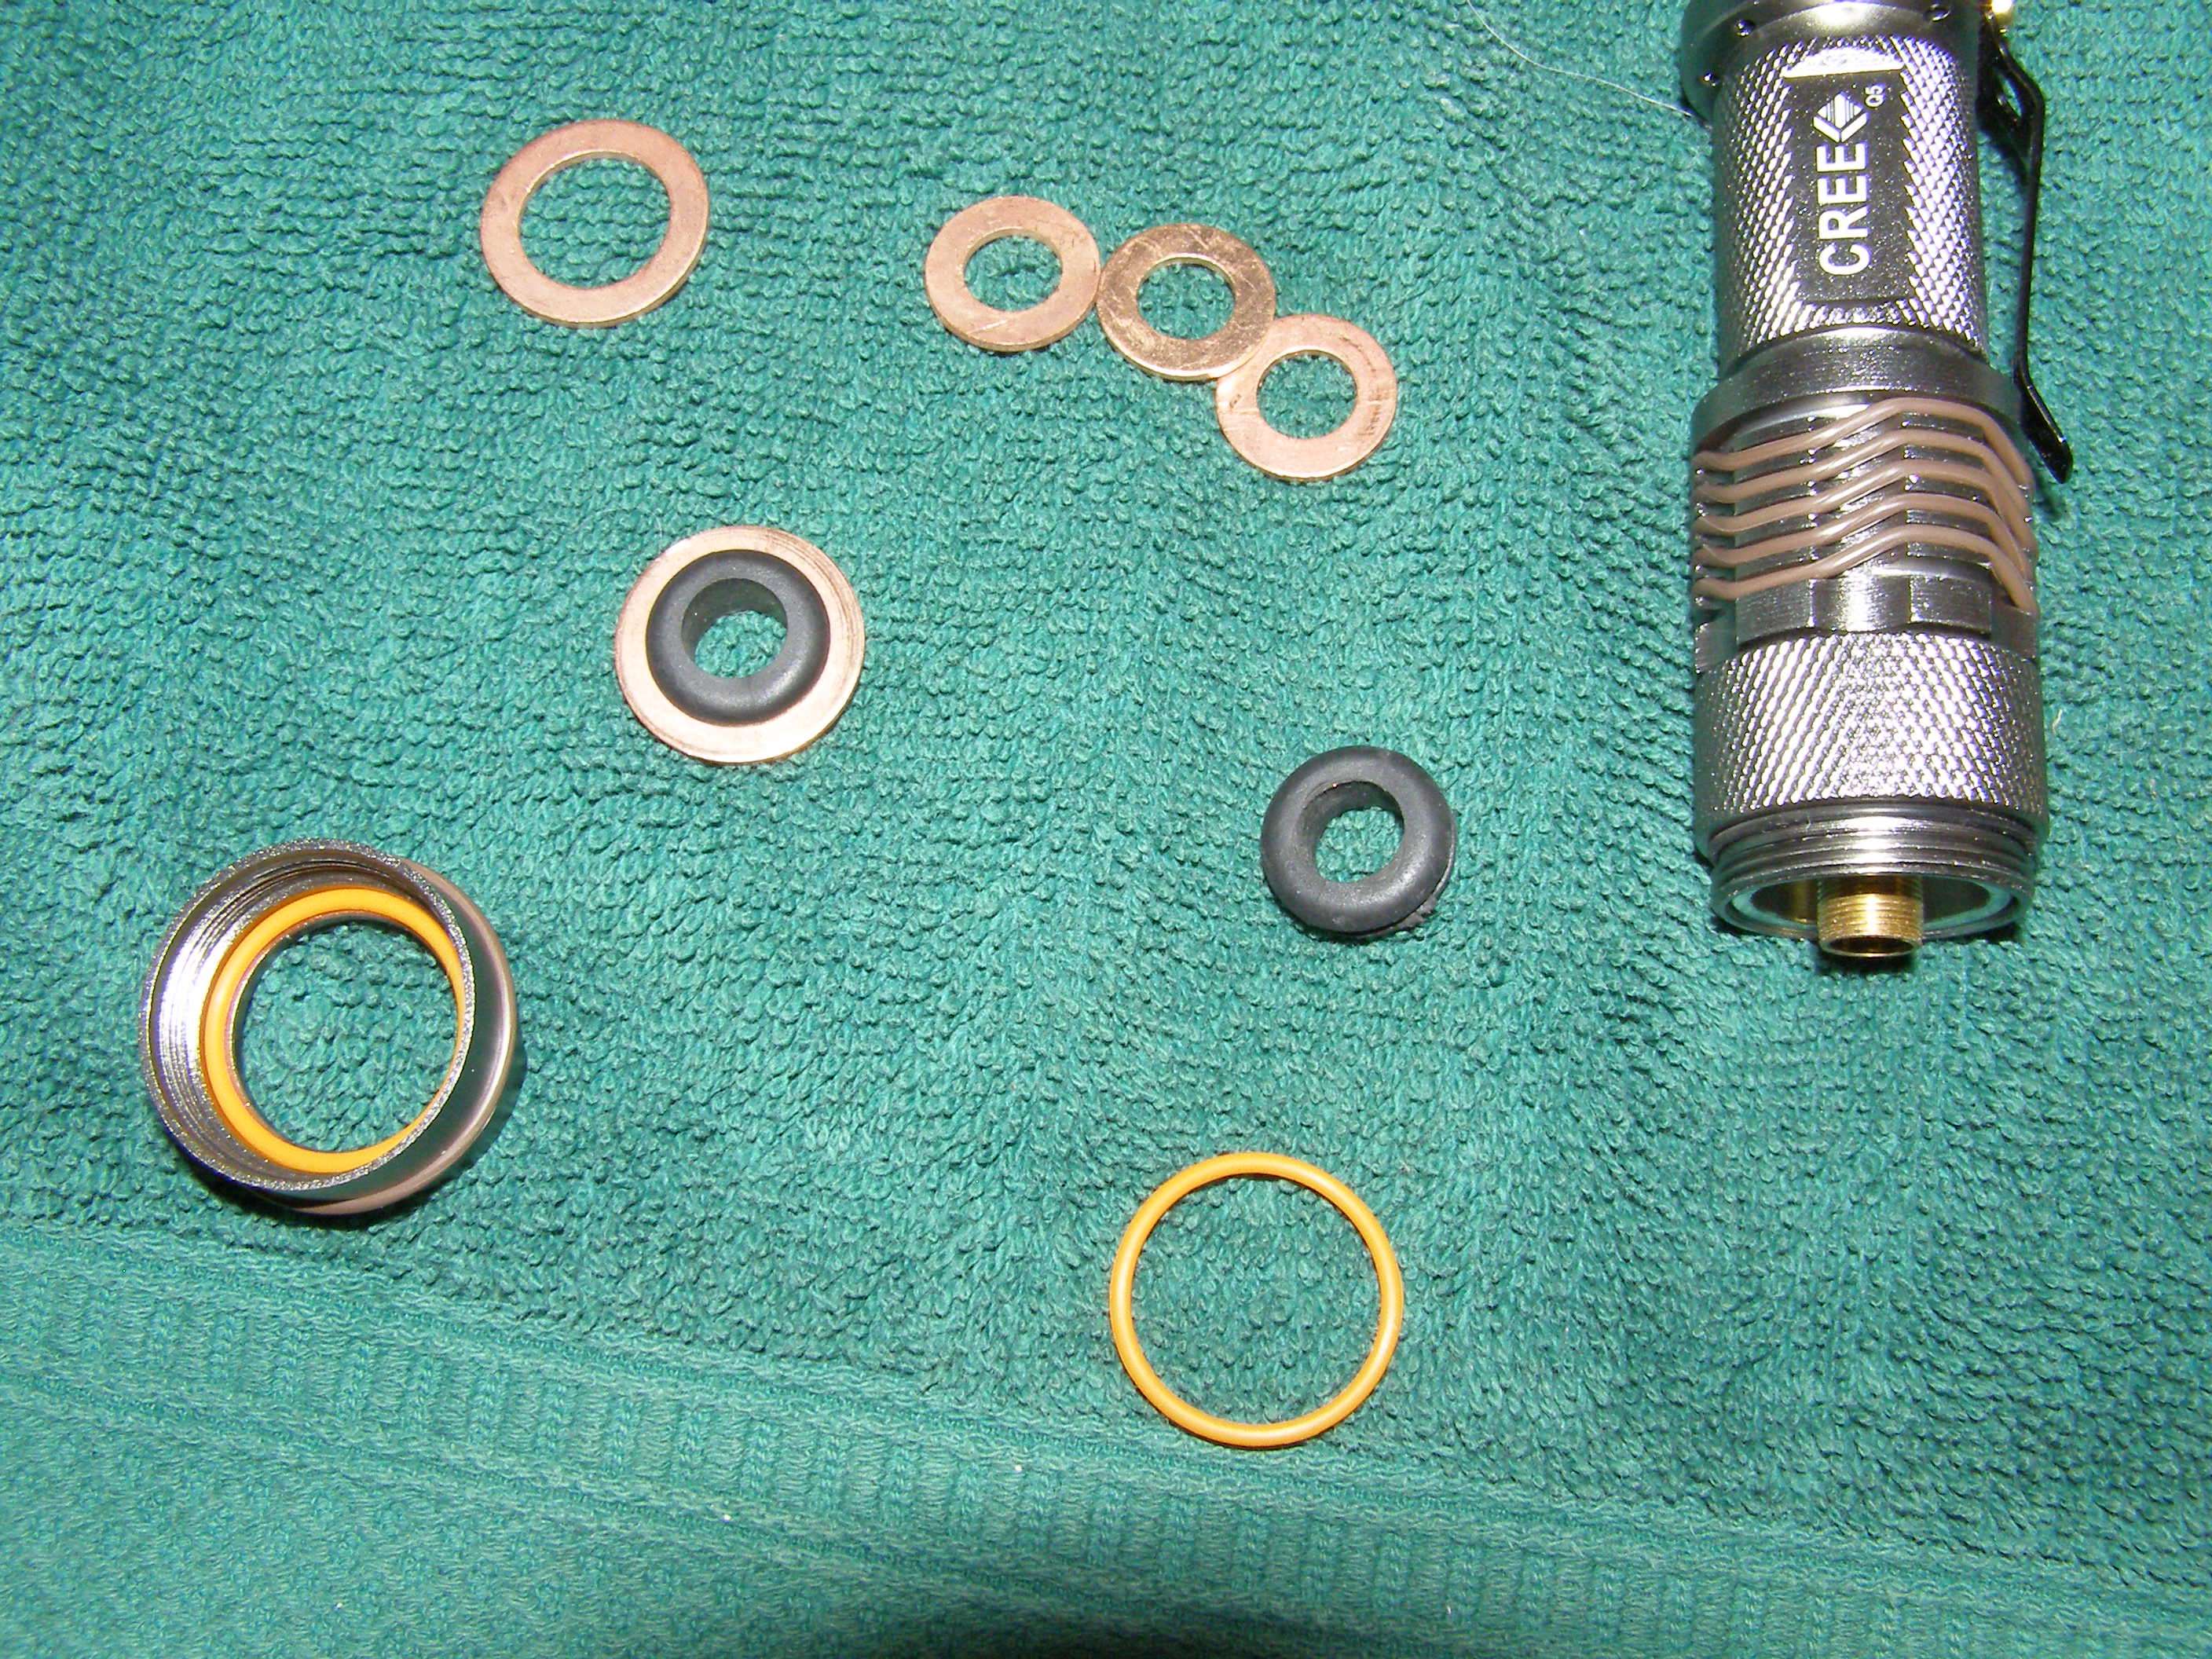
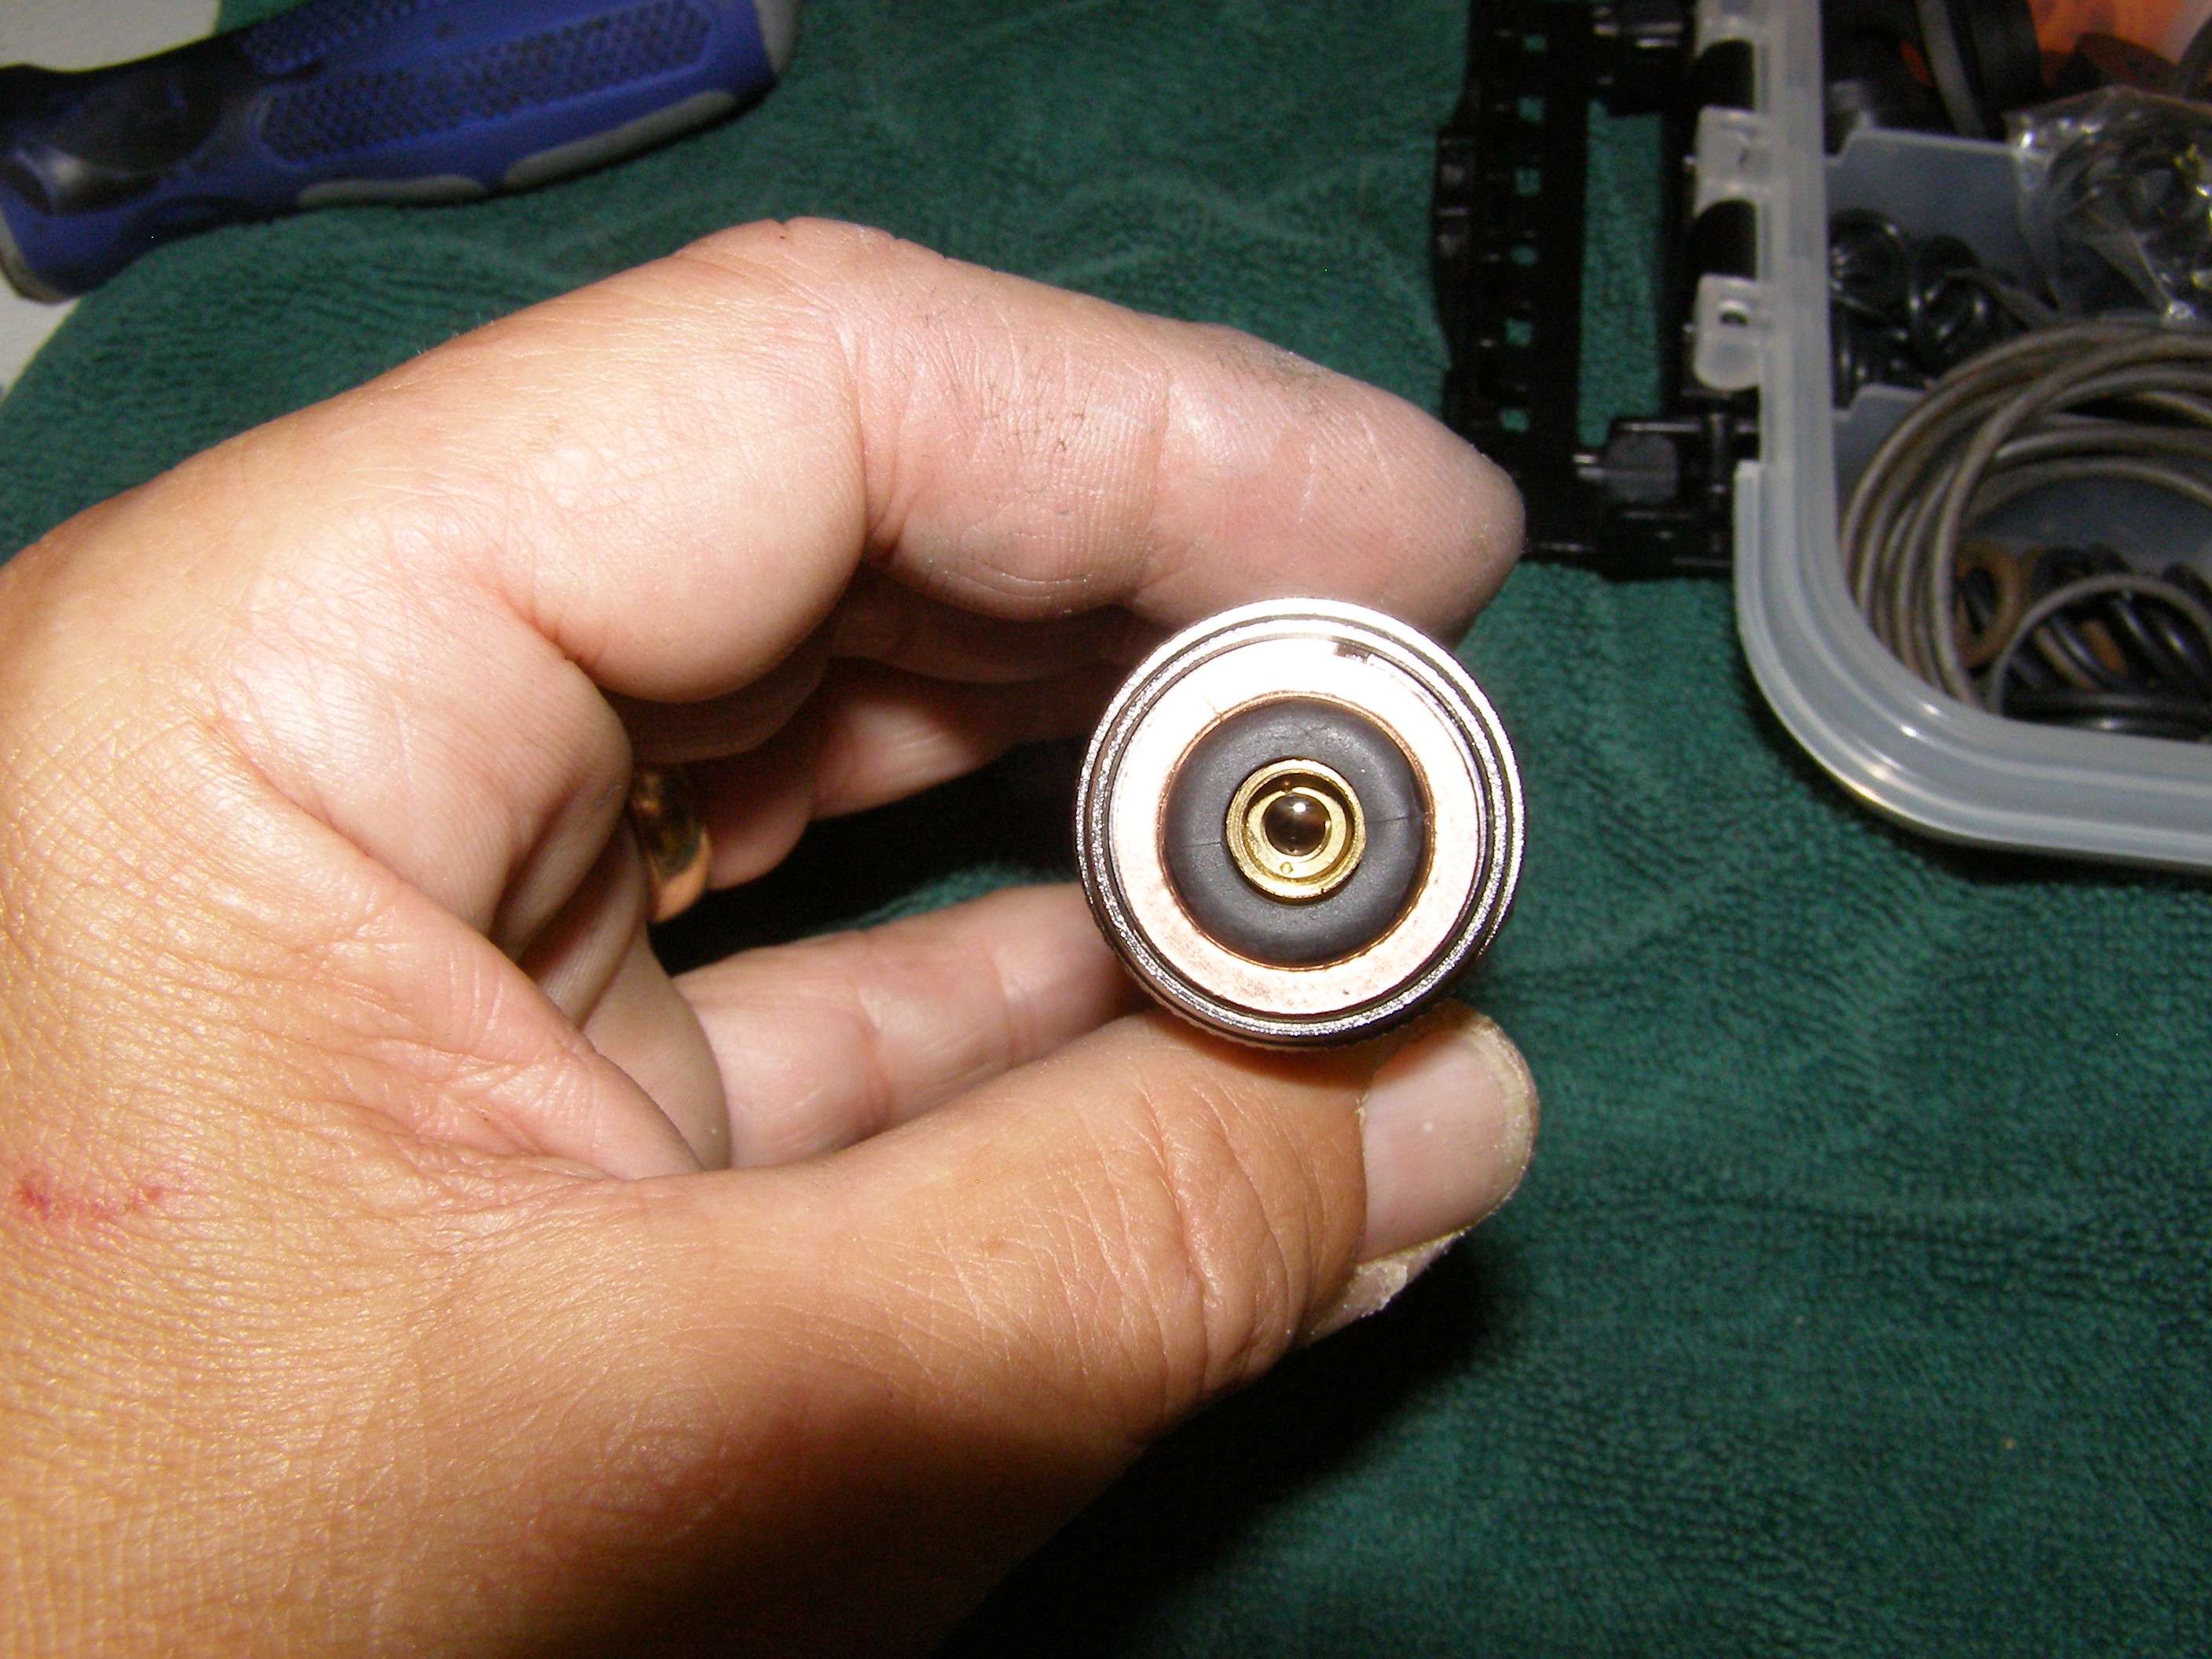
What I've done is dress them up with copper washers and grommets et...
I clean the copper that will show and then coat it with clear nail polish as it dries extremely quick
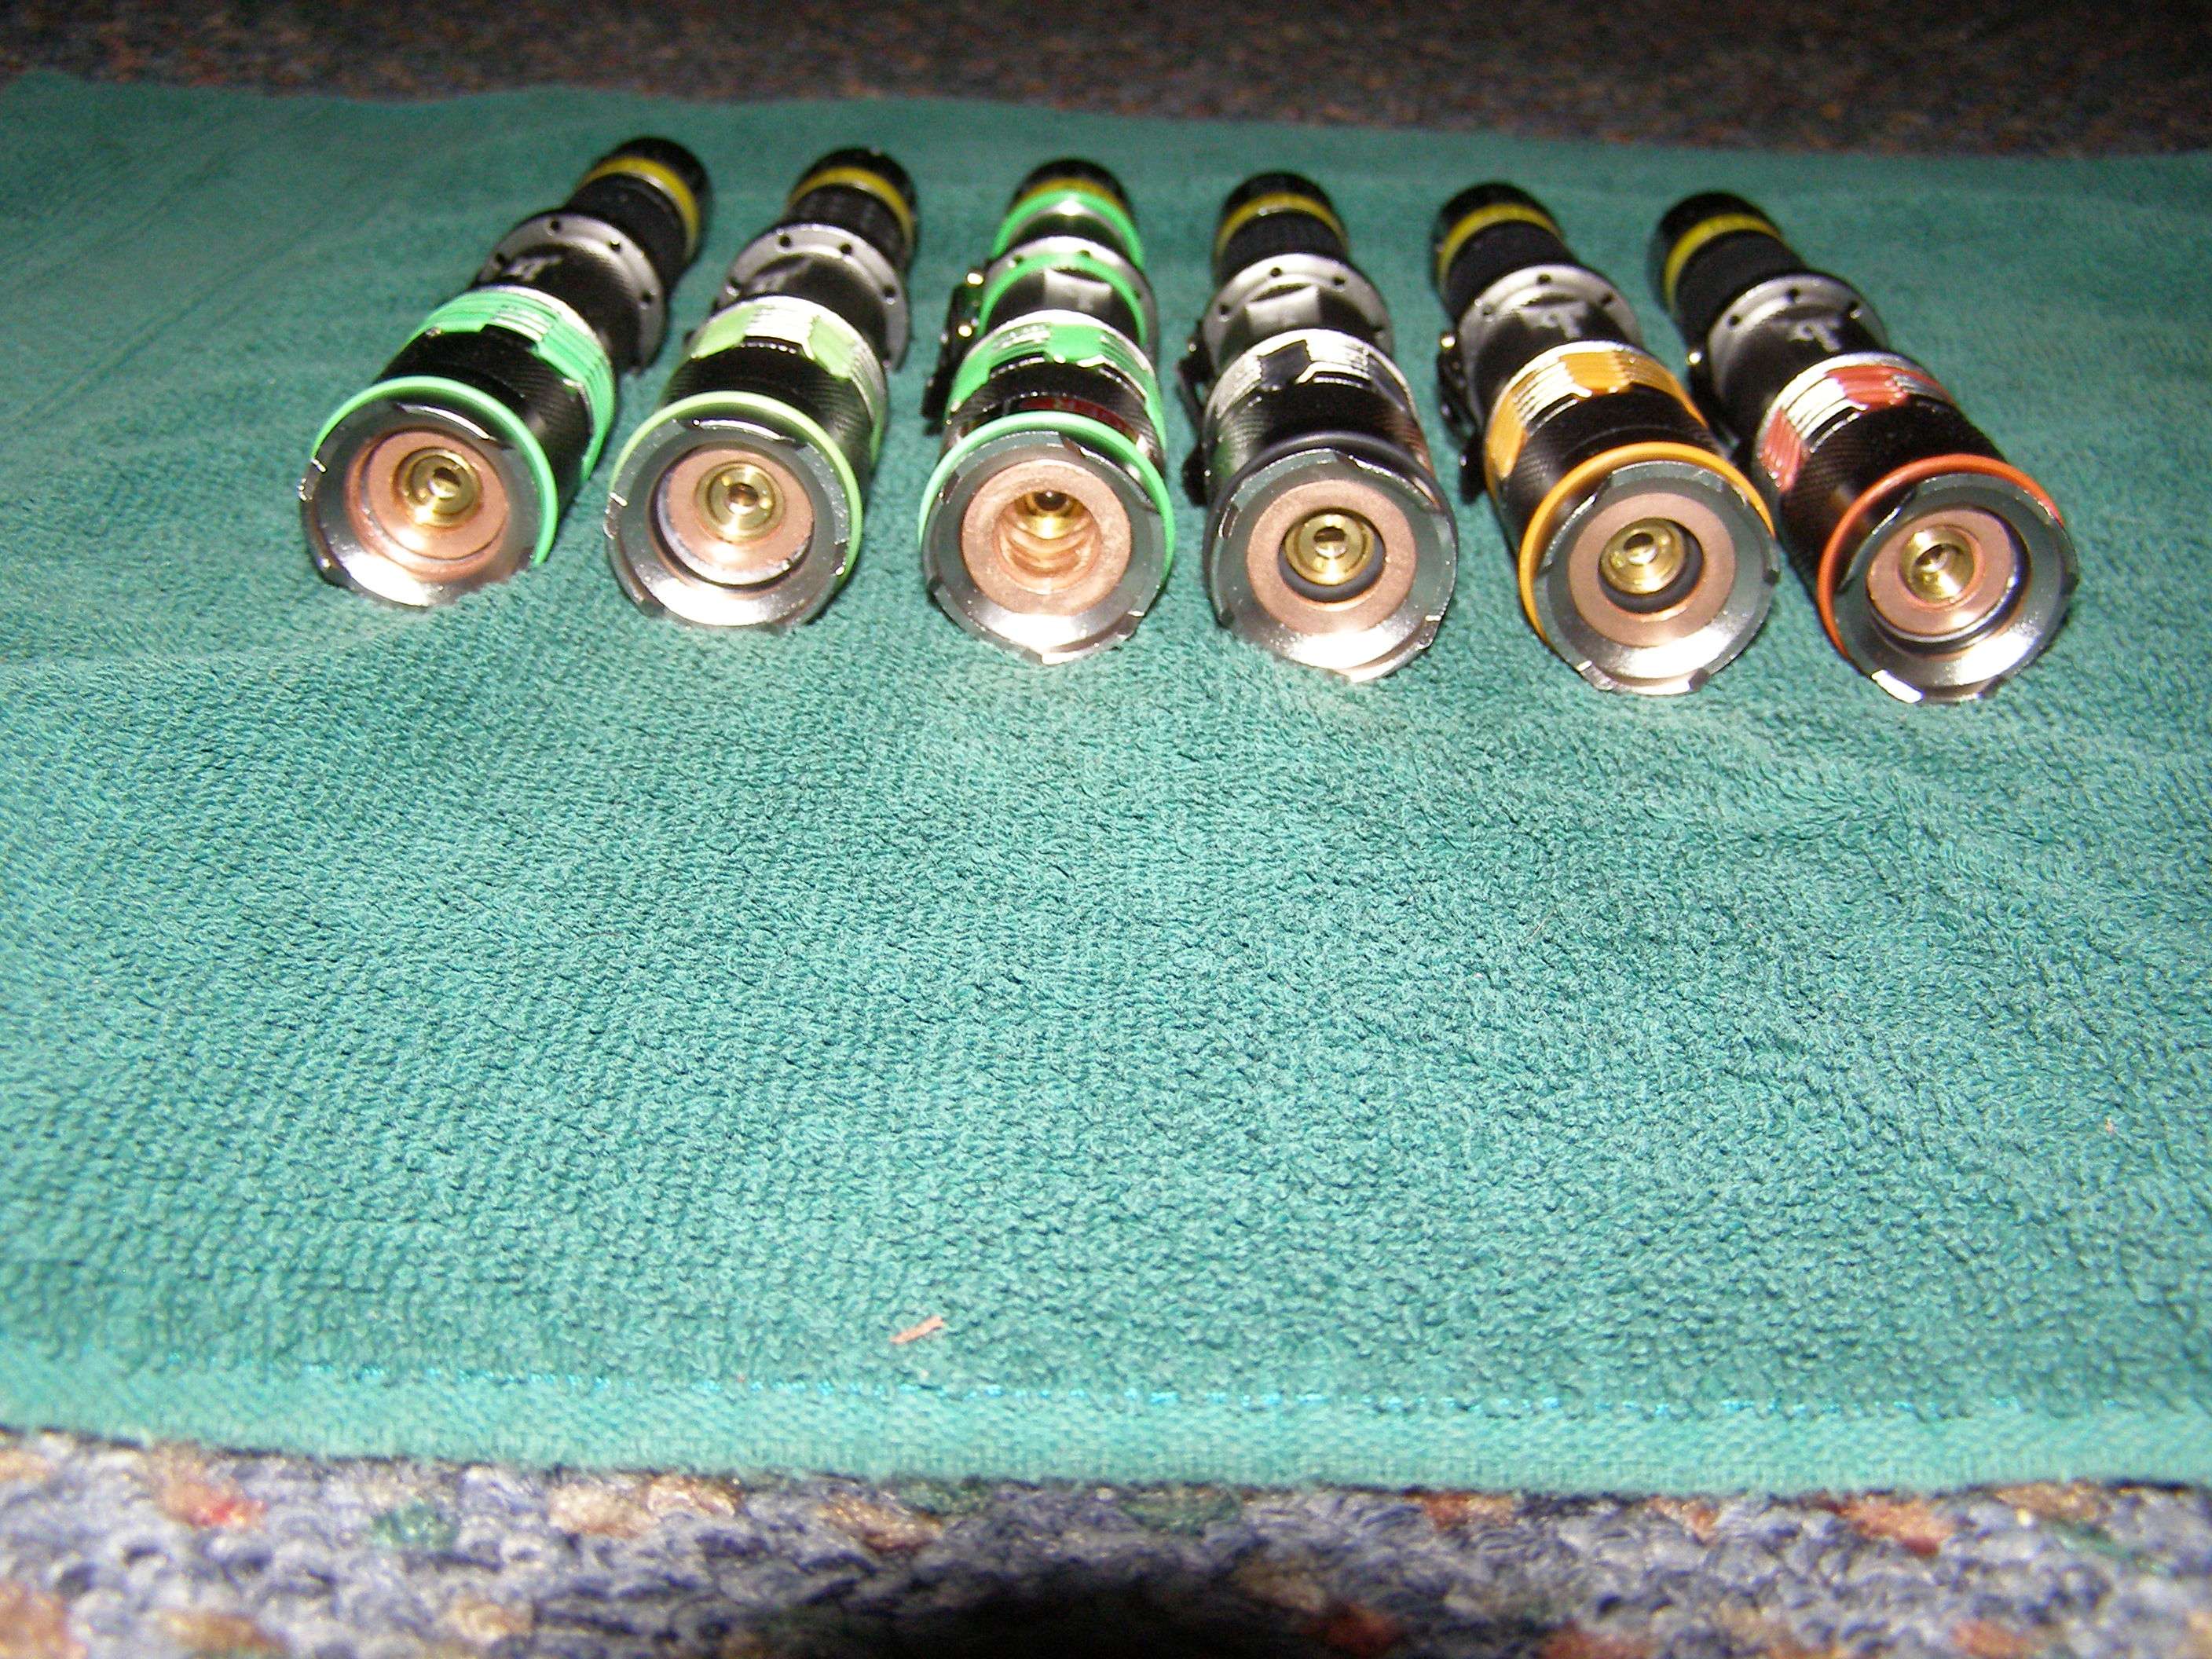
Play with different colored O-rings for whatever look you like.

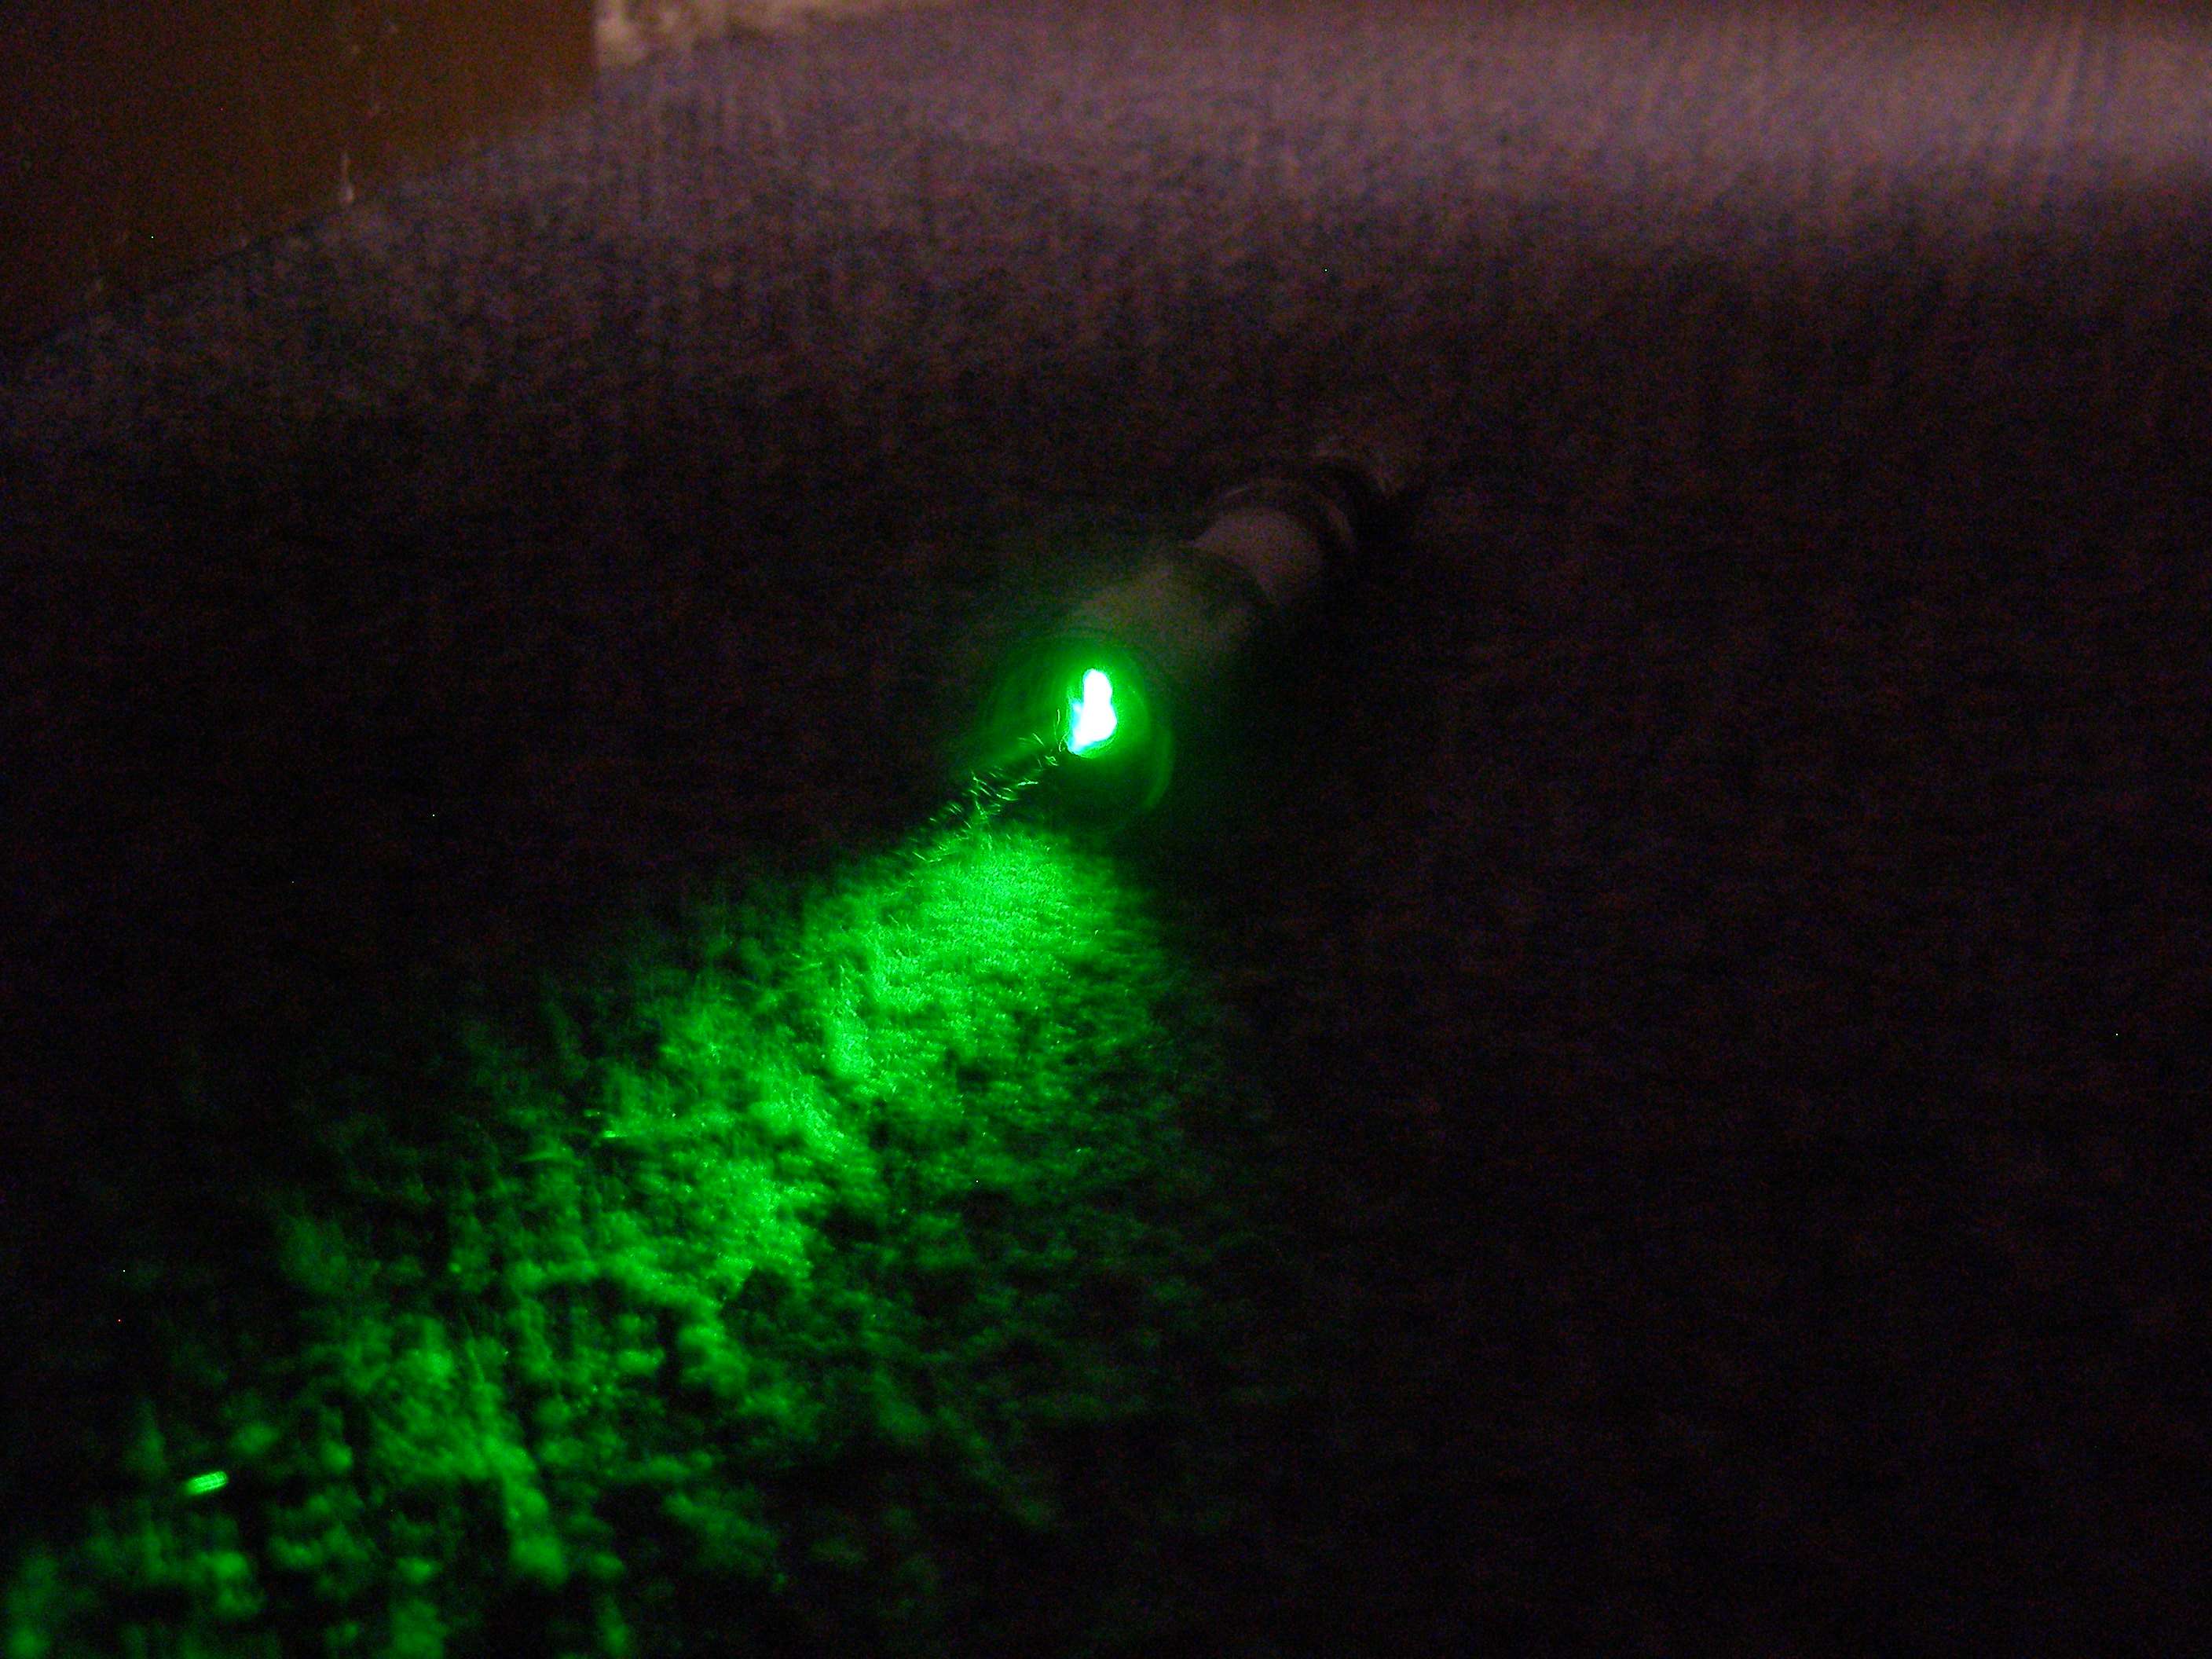

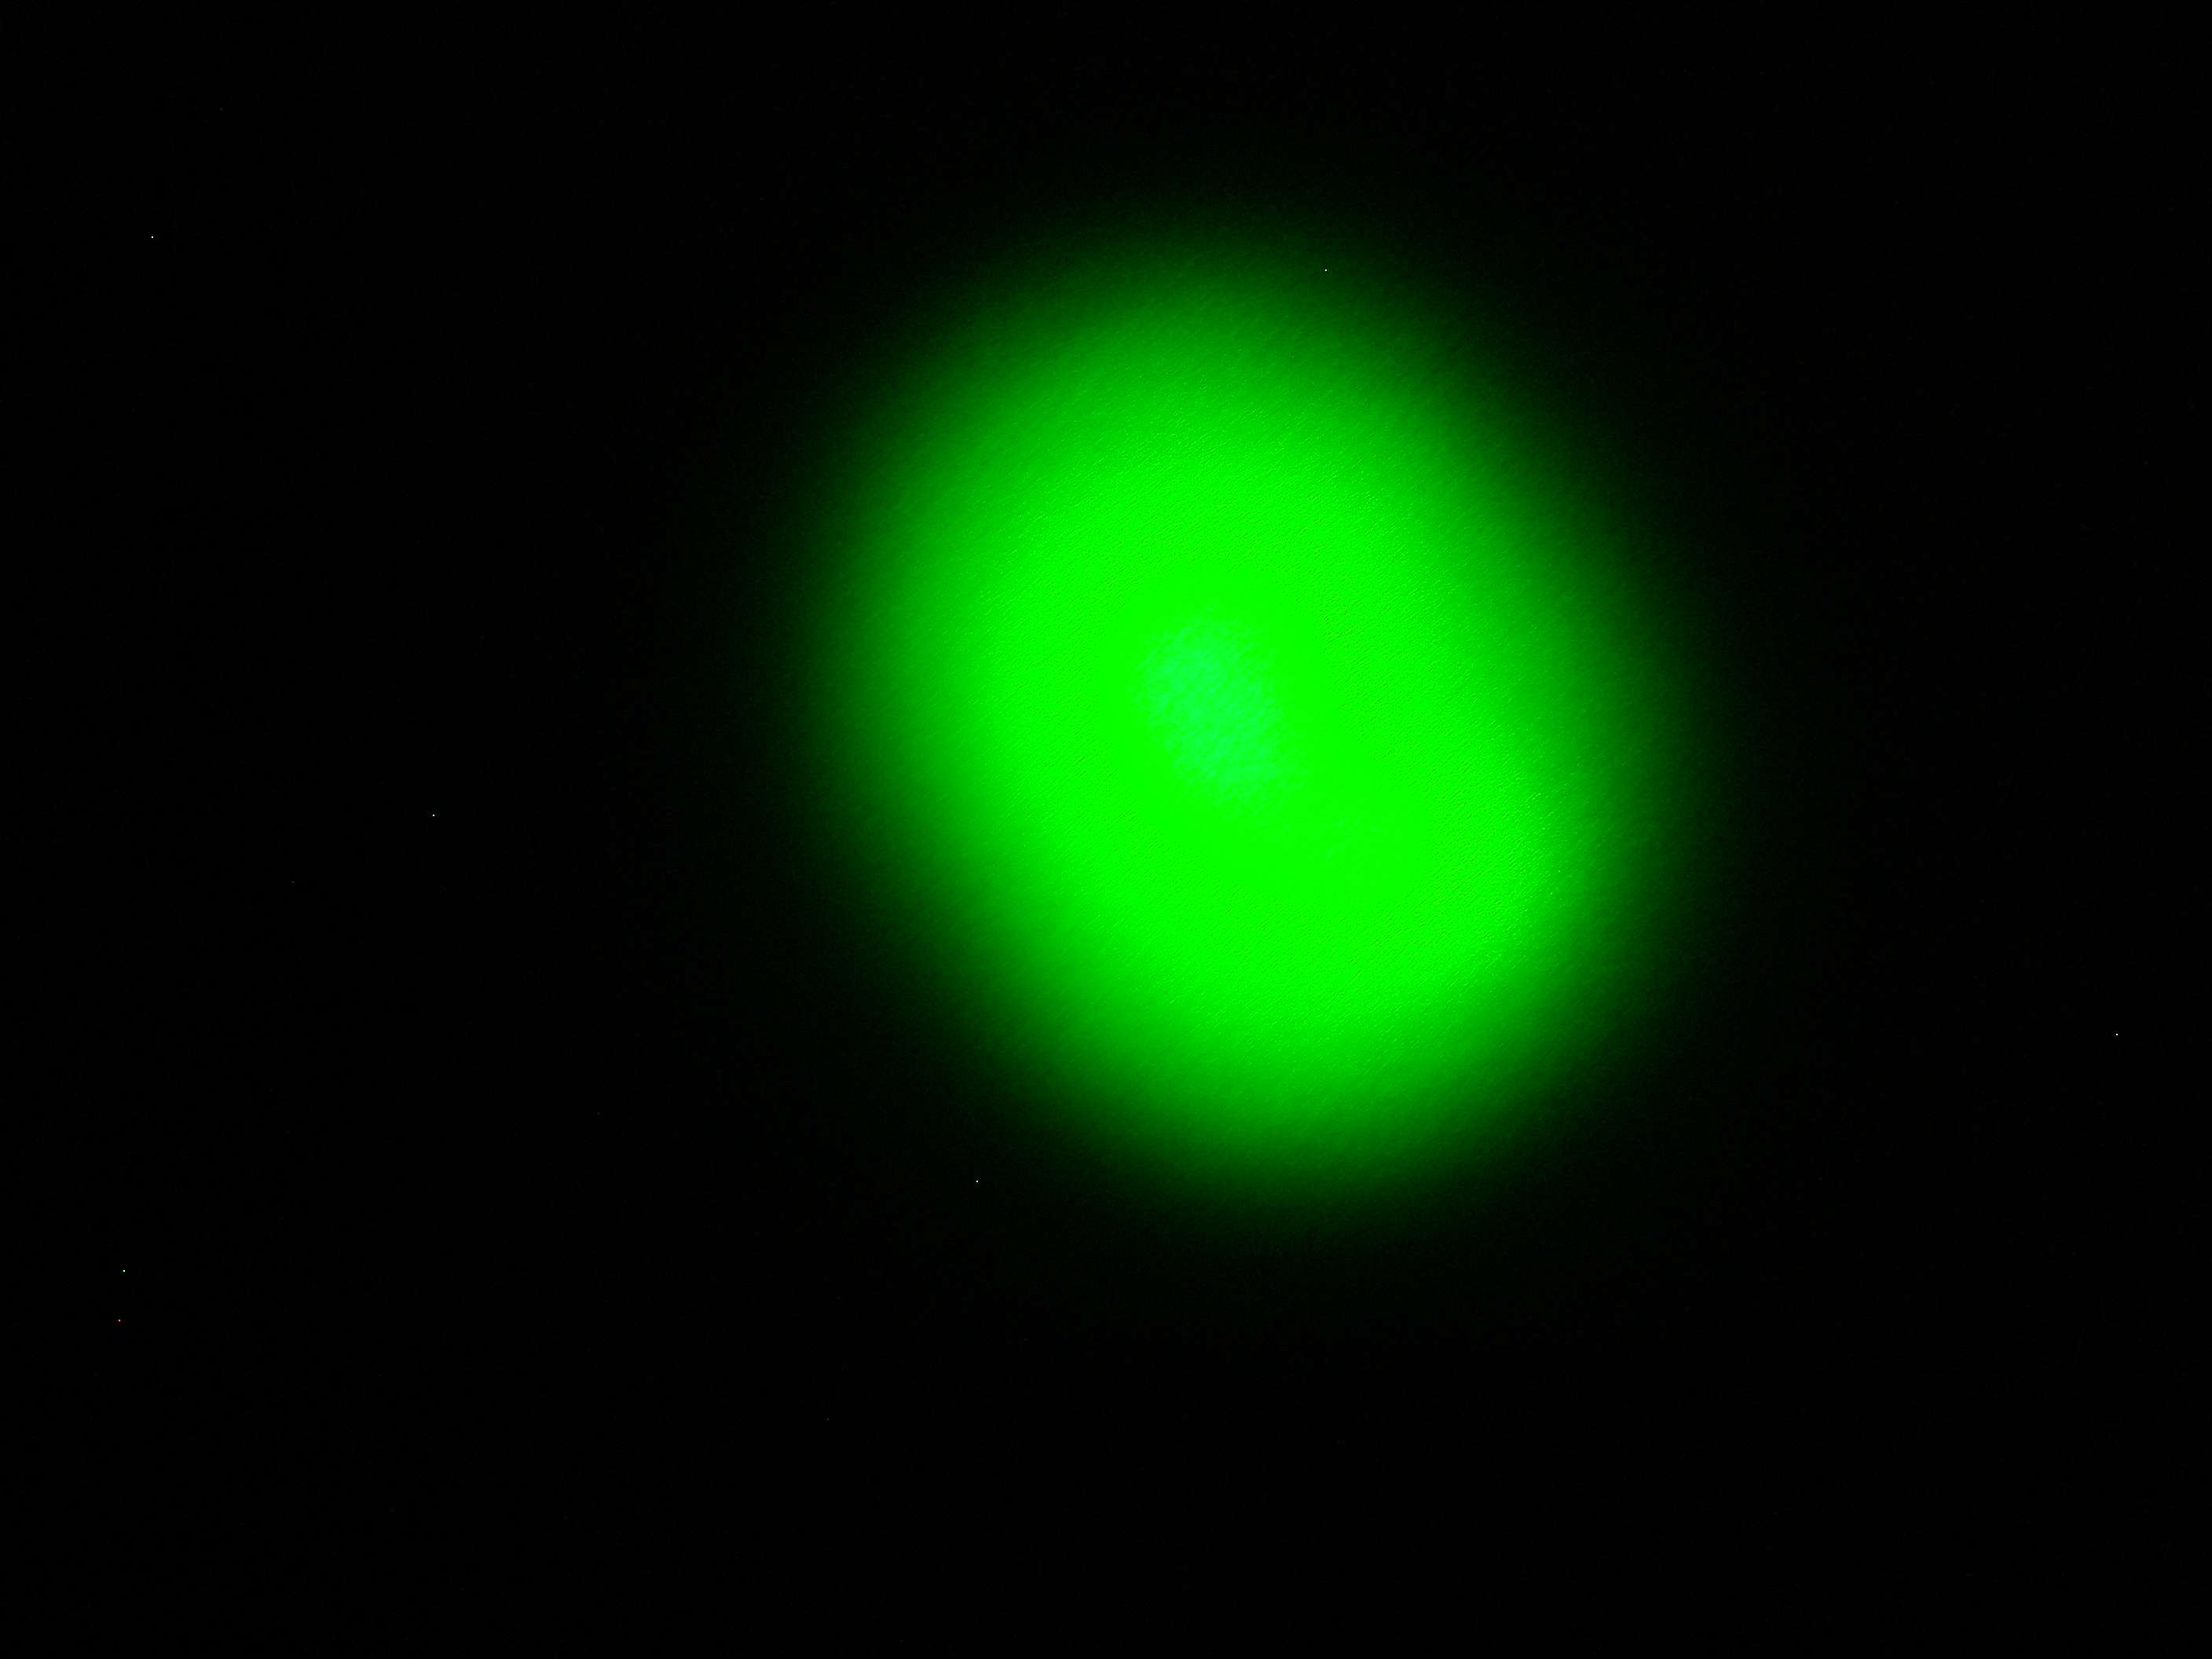
This is a pic of the beam/flashlight look when you put the plastic lens back into the top cap. You will have to pull/lengthen the head of the unit to fit it back in or the lens will touch the end of the module. I didn't measure how wide this is but I was about 15' from the projector screen and I think it was probably 3' diameter...
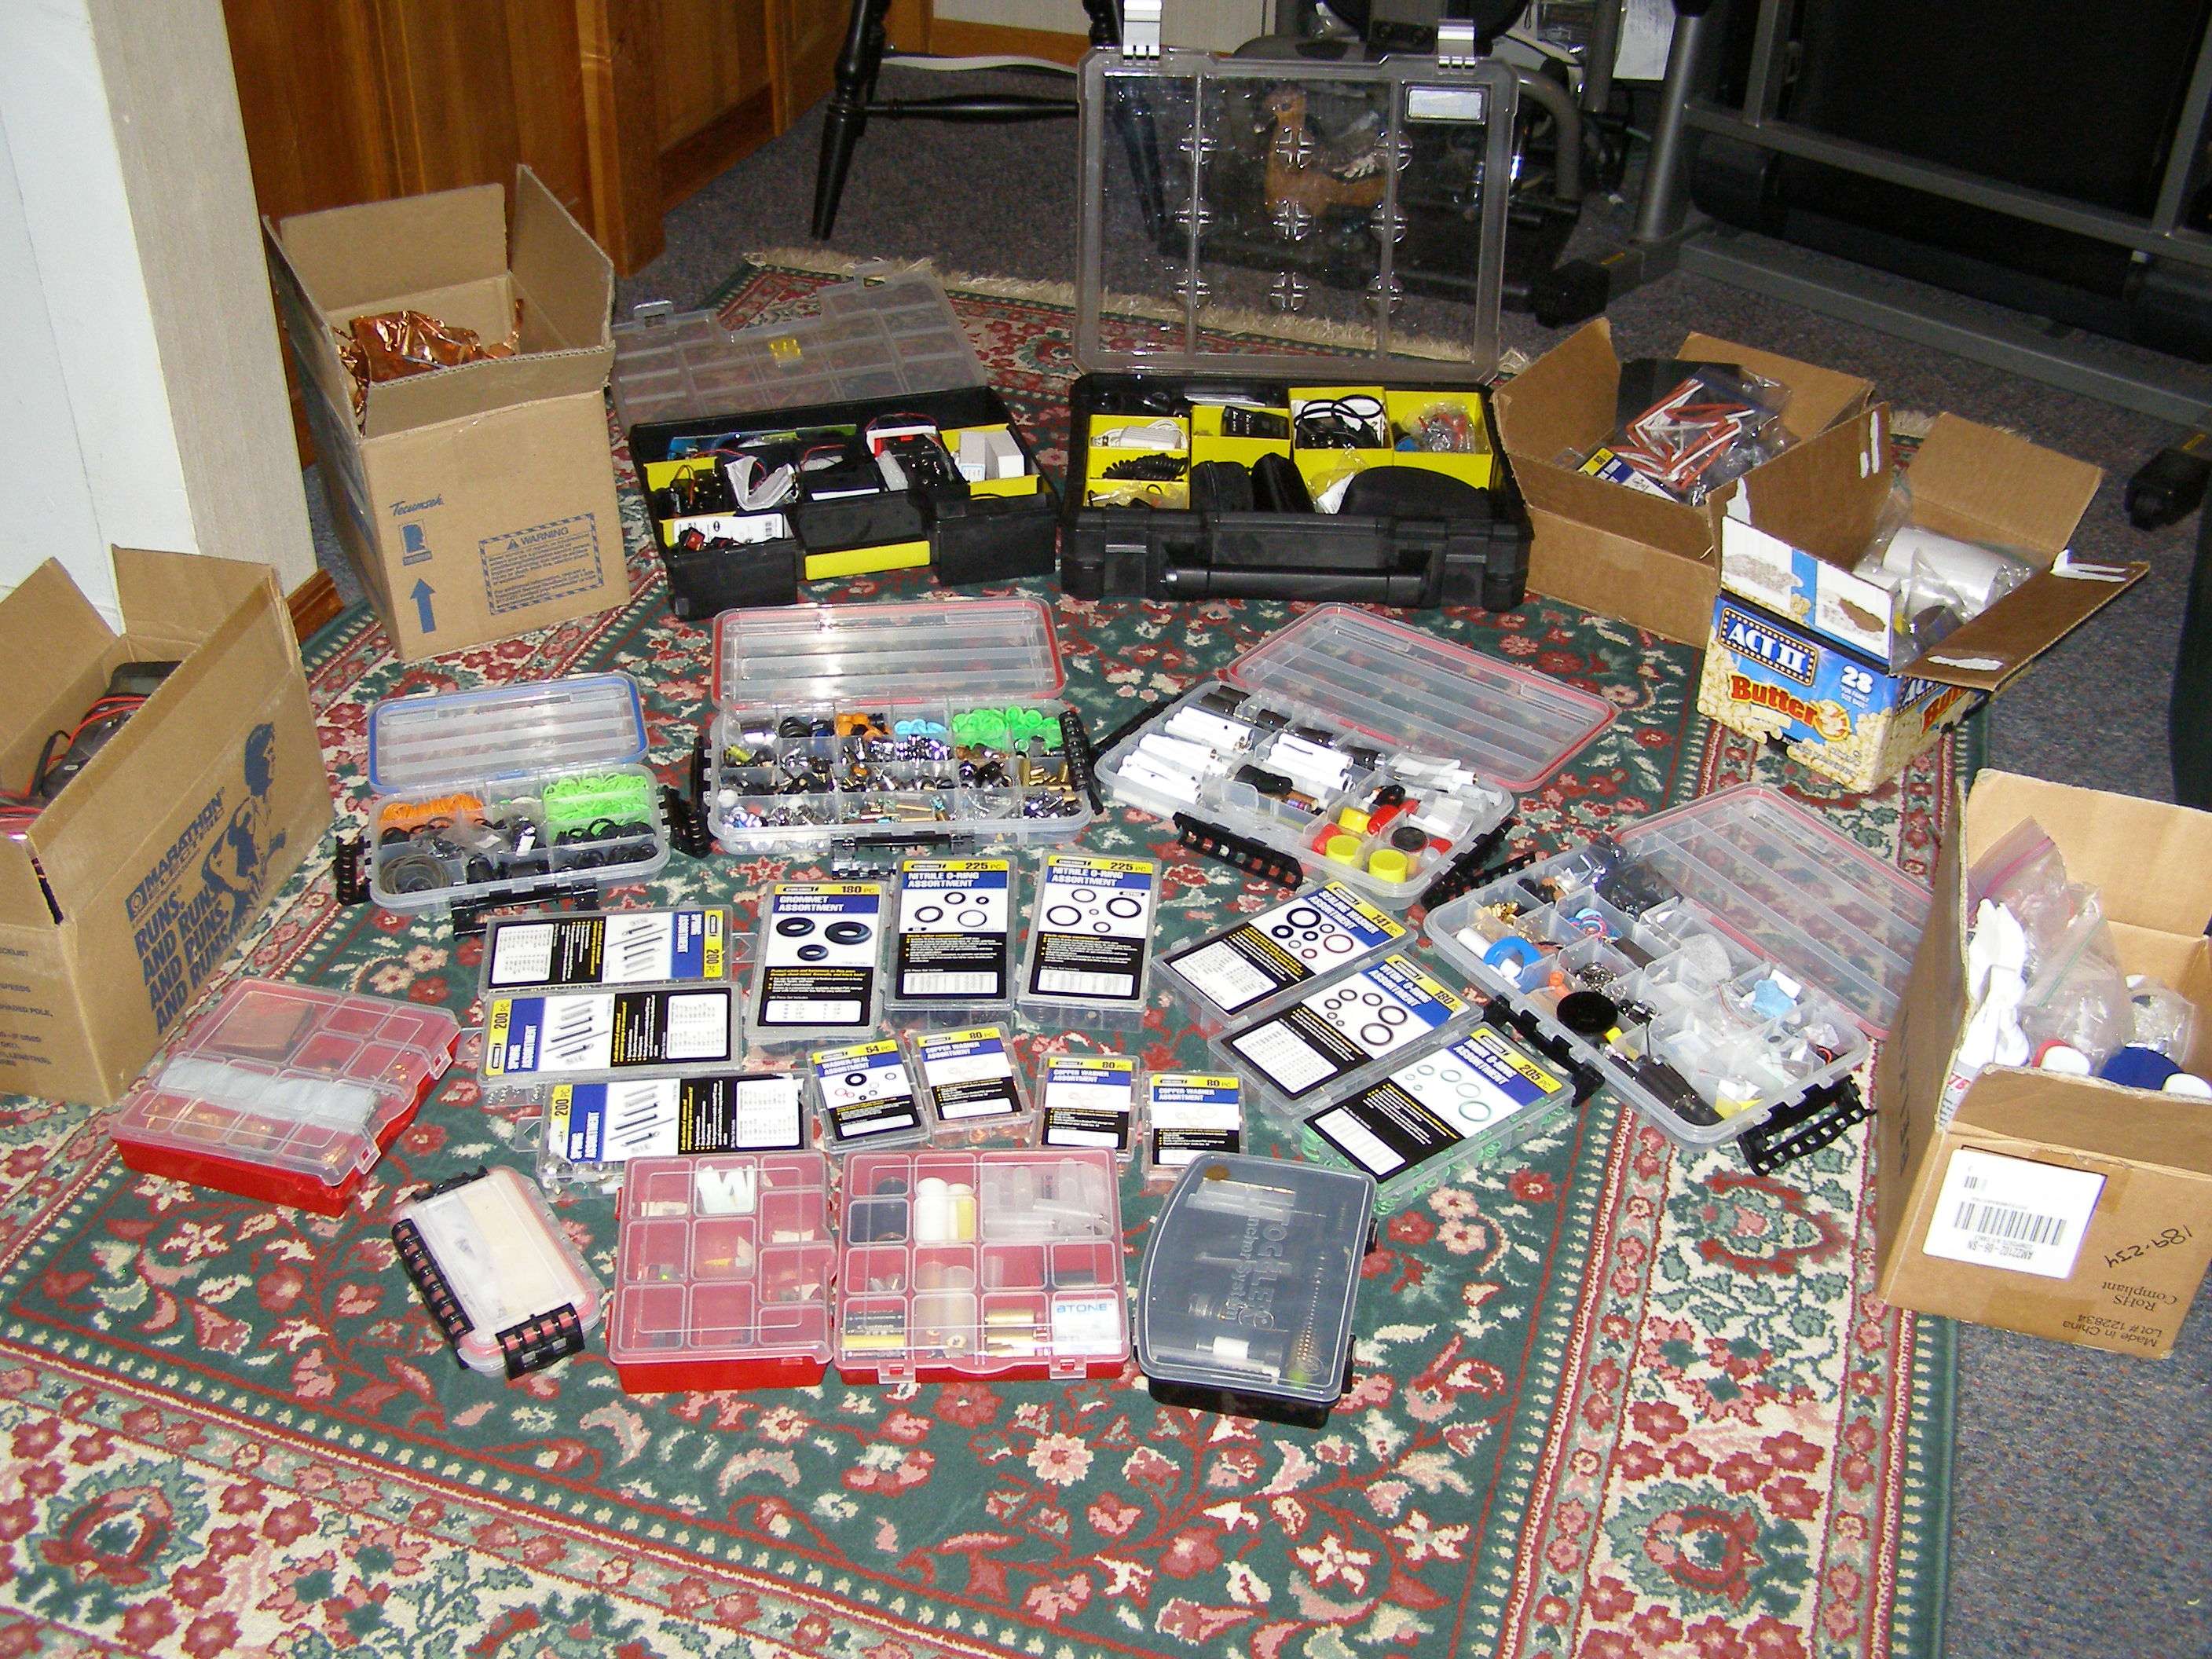
I have accumulated quite a good collection of pieces/parts from Fasttech and harbor Freight. Harbor Freight is great for kits like springs and O-rings, grommets and washers, heat shrink tubing etc...
What I recommend is to save all the stuff you remove from hosts/flashlights and put them in different containers as you never know when they will come in handy.
Some of my building supplies that I've picked up over time.
I was originally going to make some more of the "black ones" when some parts arrived and post this tutorial on my 1000th post but since I am in a hospital waiting room as my father is having a surprise 5 bypass surgery and just went into the OR I have time now.
This isn't about what you can buy from some of our resident pro builders (which I GREATLY admire and take my hat off too not to mention own some of their stunning work). This is thinking more out of the box on a shoestring budget old school style I've got no money or just want to challenge yourself to build something with a piece of string and some flip-flops
Well, maybe not that far out but I think you get the point. I've accumulated a ton of stuff to play around with my fun little builds so it's certainly not as hard for me to do this kind of stuff at this point. Hopefully this will encourage others to mess around and share with the rest of us interesting possibilities, solutions to build problems and other ways around issues we haven't thought of yet. I am a "tinkerer" and if you have ever taken a look at my inexpensive build thread you knew this already. The way I do this build allows you to take everything apart if you want.
Came across what I consider to be a great matchup between 2 different very inexpensive flashlights from 2 different sources. When I combined them I personally couldn't believe how cool they looked so without further ado let me reveal our players.
These $4 flashlights can be found at your local Walmart usually in 3 different locations in the store. Most of the time 2 of those locations is up at the registers right before you get into a checkout line at either end of the store and are in a kind of square/round battery center thing sitting in the middle of the floor. The black rubber hand grip can slide right off (it's not glued on).
The other source is Fasttech flashlight model B68 which comes in 4 different ways. You can get a black or silver version and either a single mode or 3 mode. The cost is <$5.50 for any version. Will say that currently the 3 mode versions have a 4 day wait period to ship right now. I hadn't noticed that it came in a black version so that's why I only had a couple black ones made so far. Ordered a lot more black ones. I try to make a bunch of them at once.
Now I realize some don't want to read this whole thing and would like to just see the results so here's a bunch of pics of possible end product.
The first pic shows 4 units just as 240lm 3 mode flashlights still.
Now here's the step by step for anyone interested. Keep in mind again that I am trying to keep cost to a minimum so there's no "custom" bought heat-sinks or anything like that.
Here's your basic parts
This is what you are going to use
Pop the plastic lens out. Sometimes it is easy to push out and sometimes it is press fit hard and you will need to push really hard with something. I would try and not scratch the lens as you may want to later use it to basically turn your unit into a laser flashlight as it will give you a nice wide beam.
Take something that will fit in the grooves where the led is and turn CCW a turn to loosen it so you can then unscrew the whole top led section.
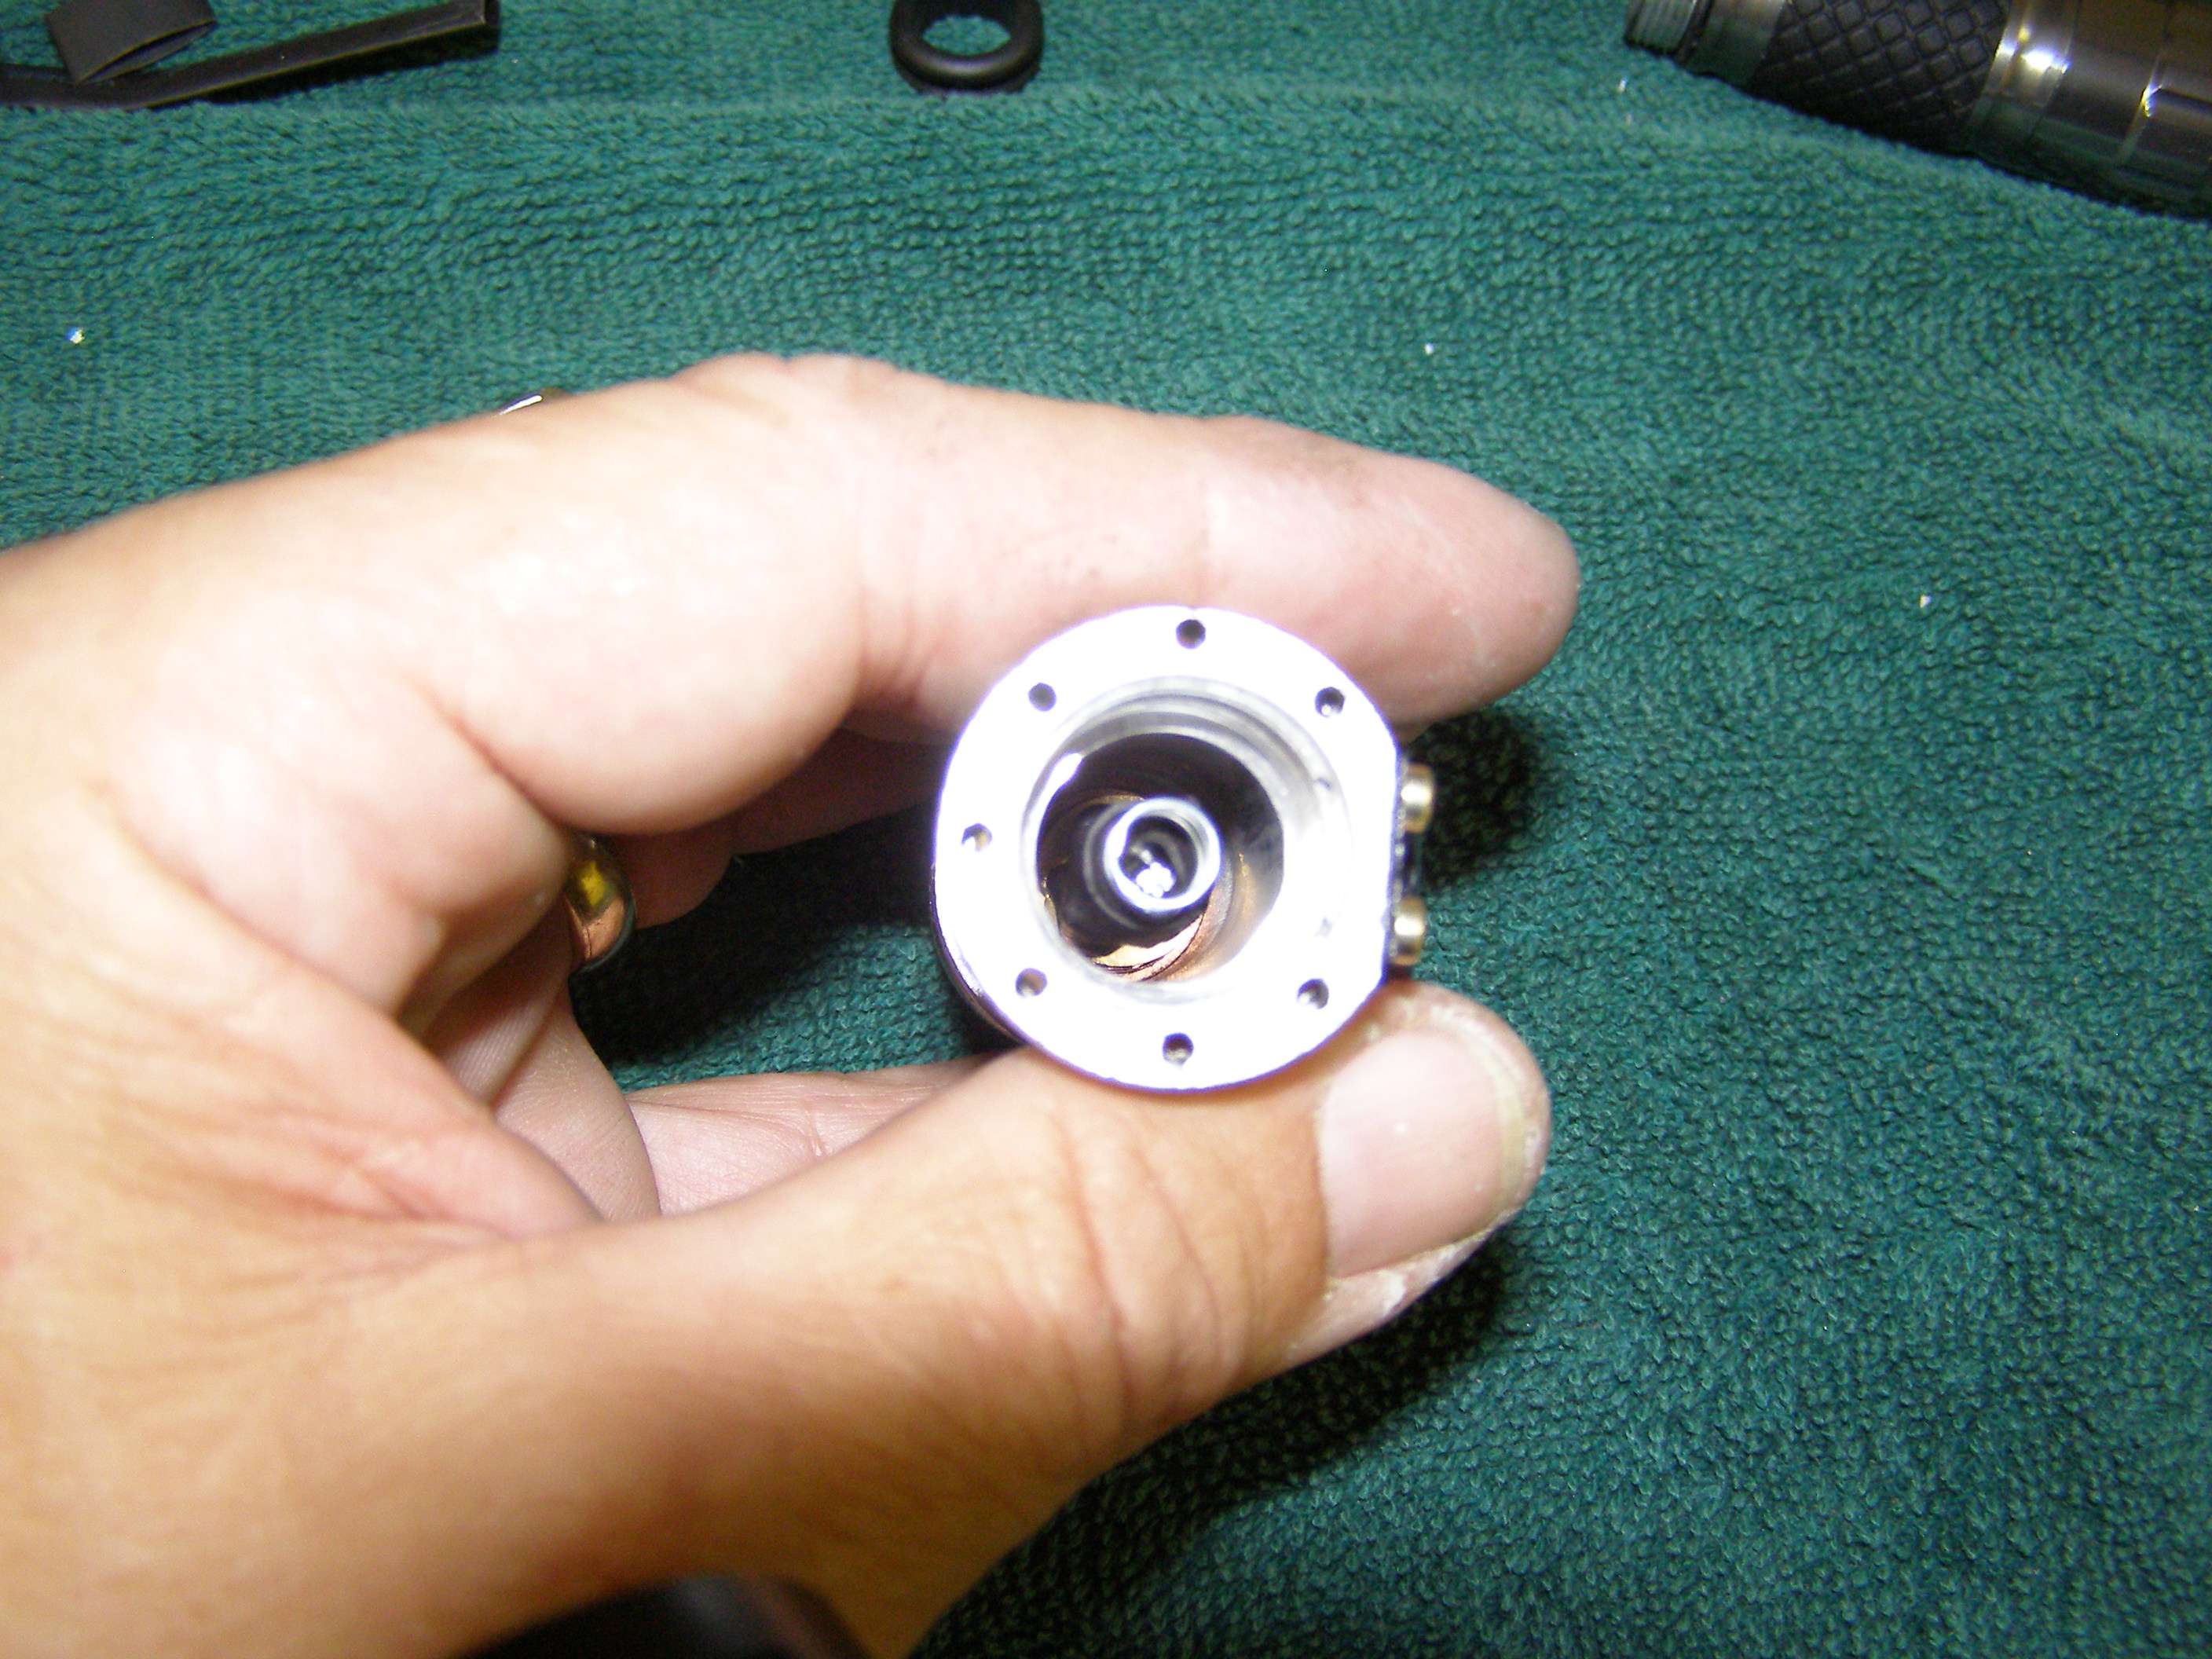
This is what you end up with
Press out the inner section. It is held in place with an o-ring. You will want the o-ring intact for reassembly later.
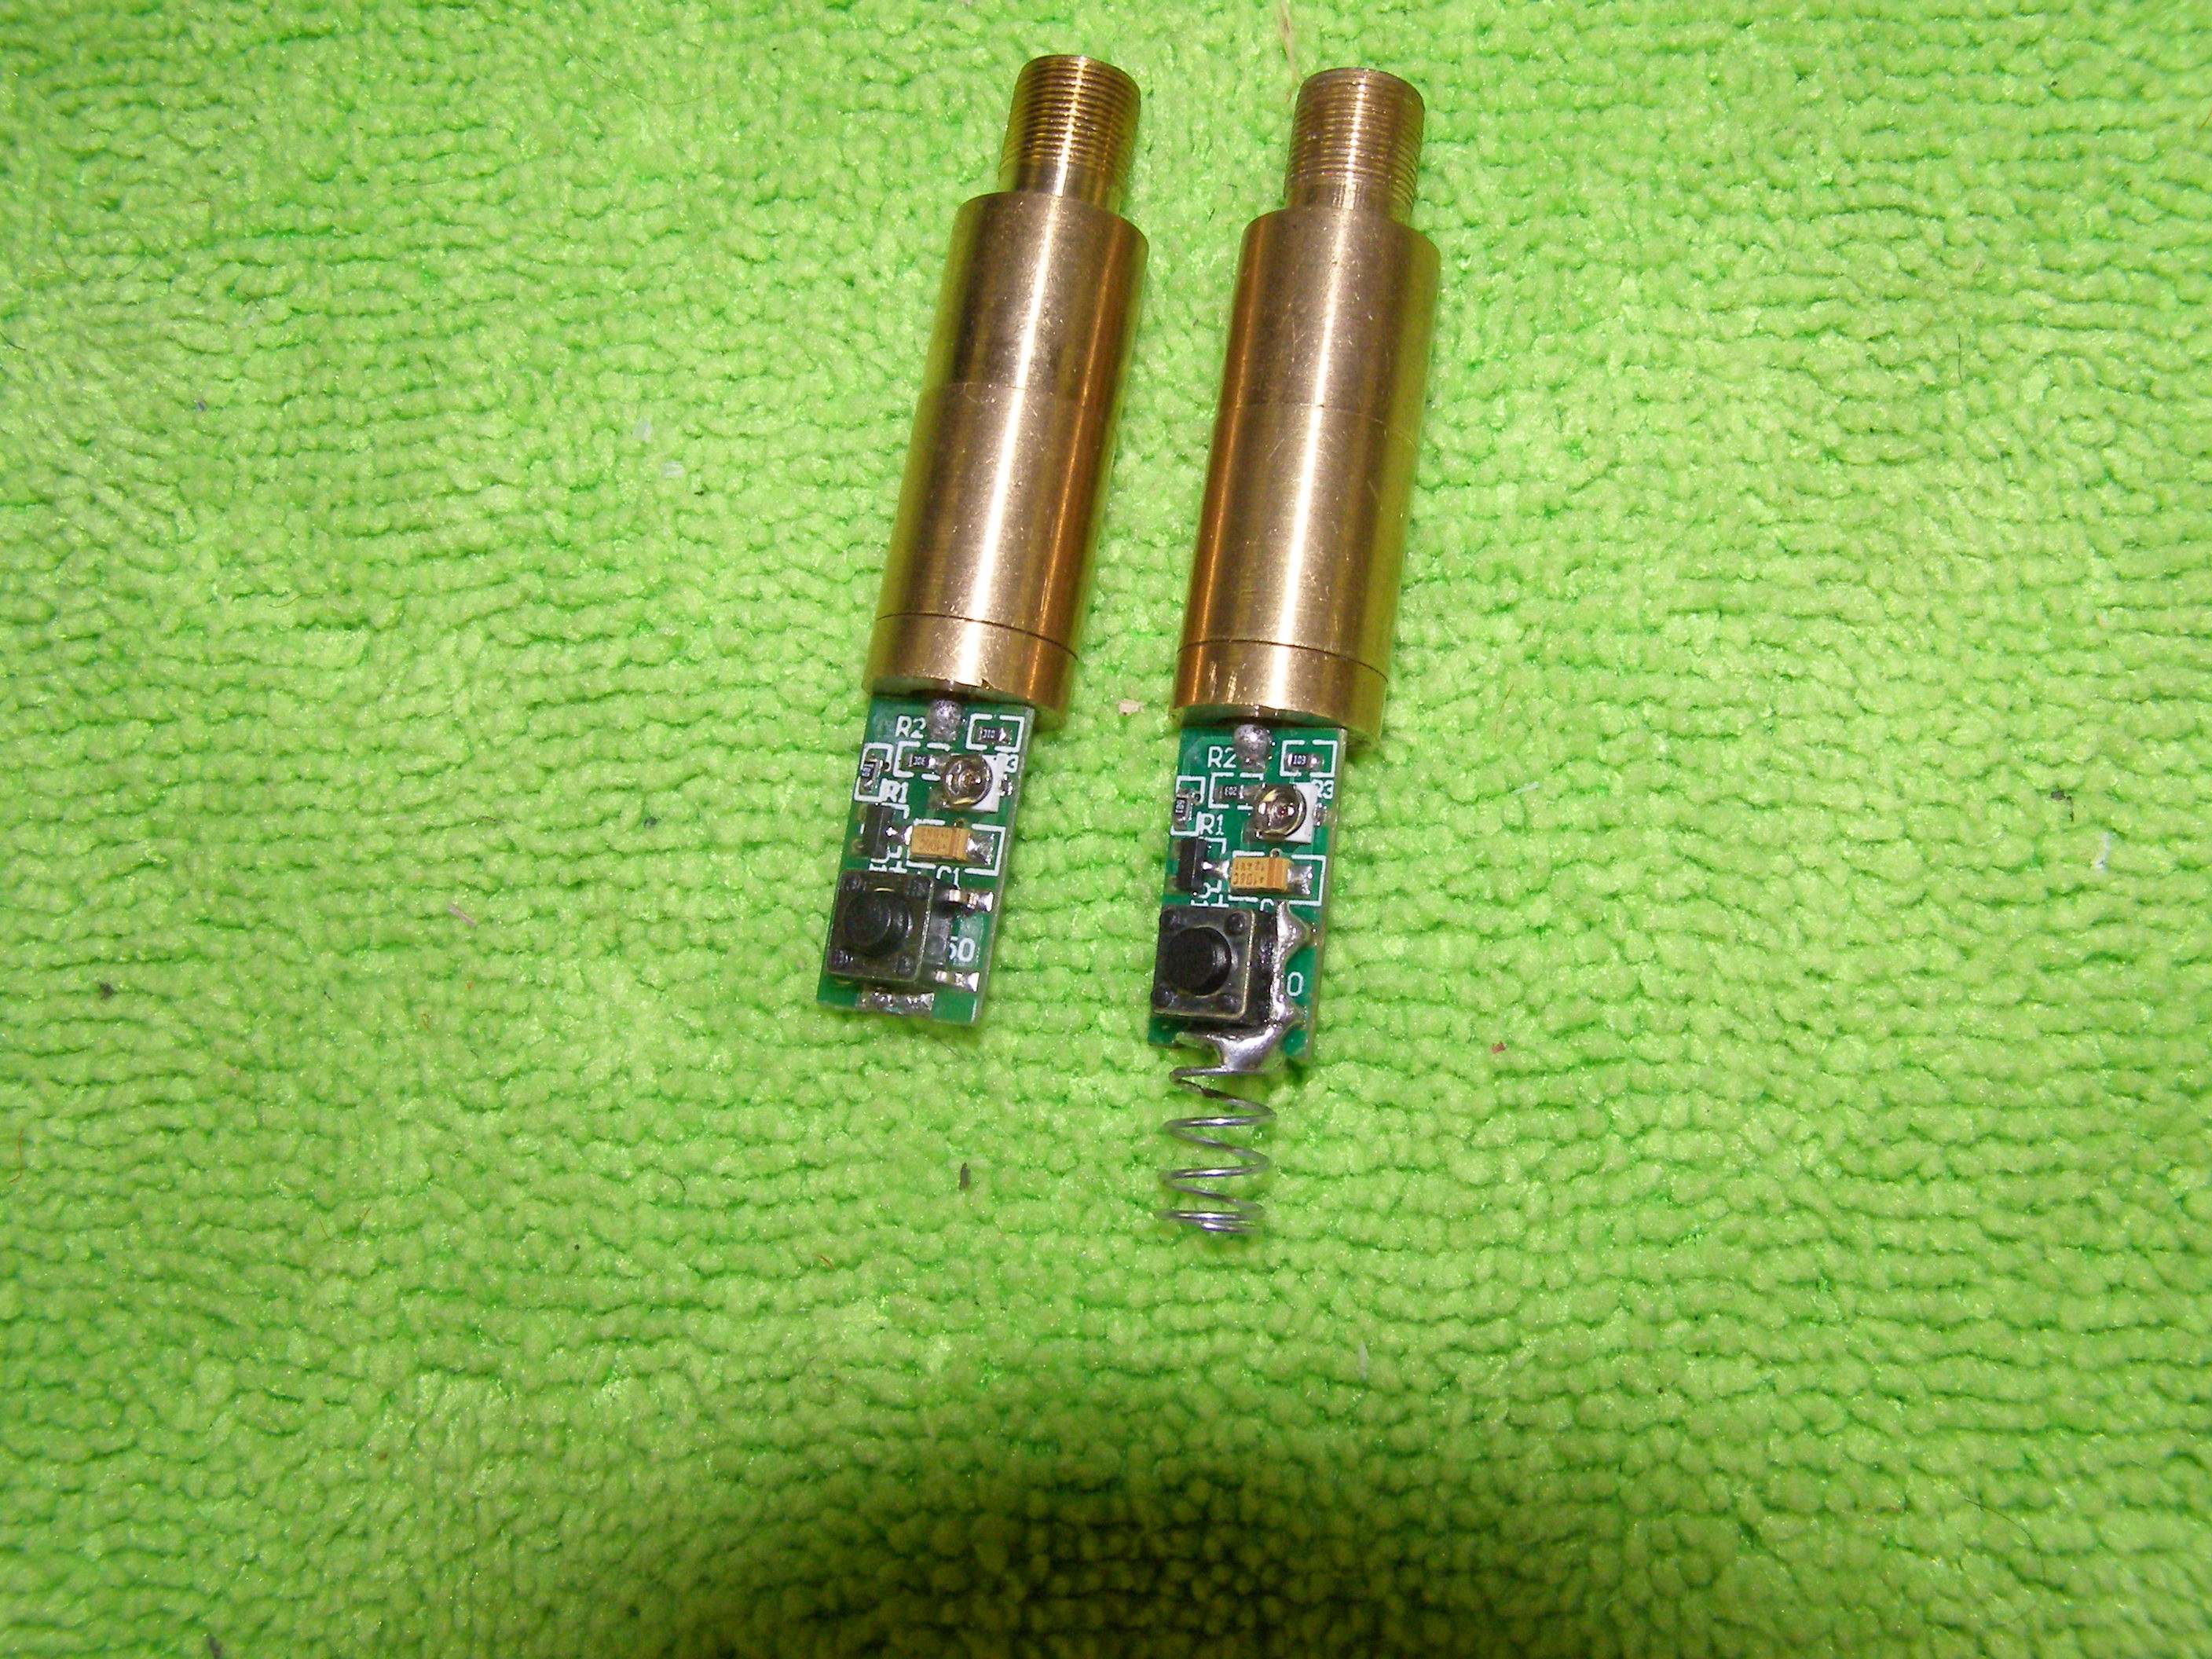
You can then disassemble the other parts as they are just pressed in.
Either cut the wires to the led or un-solder them so now everything is apart.
Now what I have been doing is using either a 5V or 3V Fasttech 532nm module that runs in the $5 range and are way overspec.
They are overspec to begin with but also have an adjustable pot. Thru a lot of experimentation I've found that the best setting for either one of them is about .43ma for the most output. It's easy for me to set them as I use a variable DC power supply set to 3.2V and tweak the pot CCW using a ceramic micro screwdriver and the power supply shows the ma draw. Most of the time that setting will result in quite a lot more output.
These modules have no issues running a standard 14500 cell at 4.2V peak. Have not blown a single one yet with that voltage. I would strongly warn about adjusting the pot with a something conductive as it is easy to slip and blow either the board or diode. I've had modules hit over 140mw with low IR. Take a look at any of my builds and all the ones with the yellow stickers are 100mw or above (actual number is the highest peak as I label for safety and not average output). As with almost any 532nm, stability and output is a crap shoot. The point is that I don't know of a better bargain out there for these modules and shipping is free regardless of whether you buy one or a 1000.
532nm is extremely impressive for someone who has never seen one before and I still get a kick out of them each and everytime.
Fasttech sells the ceramic screwdrivers ones for a bit over a $1 apiece and they have 8 different ones. If you would like to see many of my builds using these modules just check out the inexpensive build thread.
Some of the possible suspects for drilling holes. Would mention that drilling in aluminum is 100 times easier keeping the bit/piece wet with water.
Made a starter hole and then couple of bigger holes for either module. It is actually not critical from the way I build these to get the hole perfect because of how it will align as you will soon see (although you certainly have to make the hole so that the module won't be skewed to the side).
Now because the inside of the host is coated and won't conduct, you need to remove the anodizing or paint. I use a dremel with steel wire brush, stick it inside and let her rip. Good idea to do it outside or you're going to get a cloud of anodizing and aluminum so hold your breathe or wear a mask. Don't have to get it all out. Just a couple inches in.
Now take a 1/2" copper coupling (cleaned). and it will fit inside the piece you drilled a hole in for the module.
Not all couplings are created equal and sometimes you need to press it in.
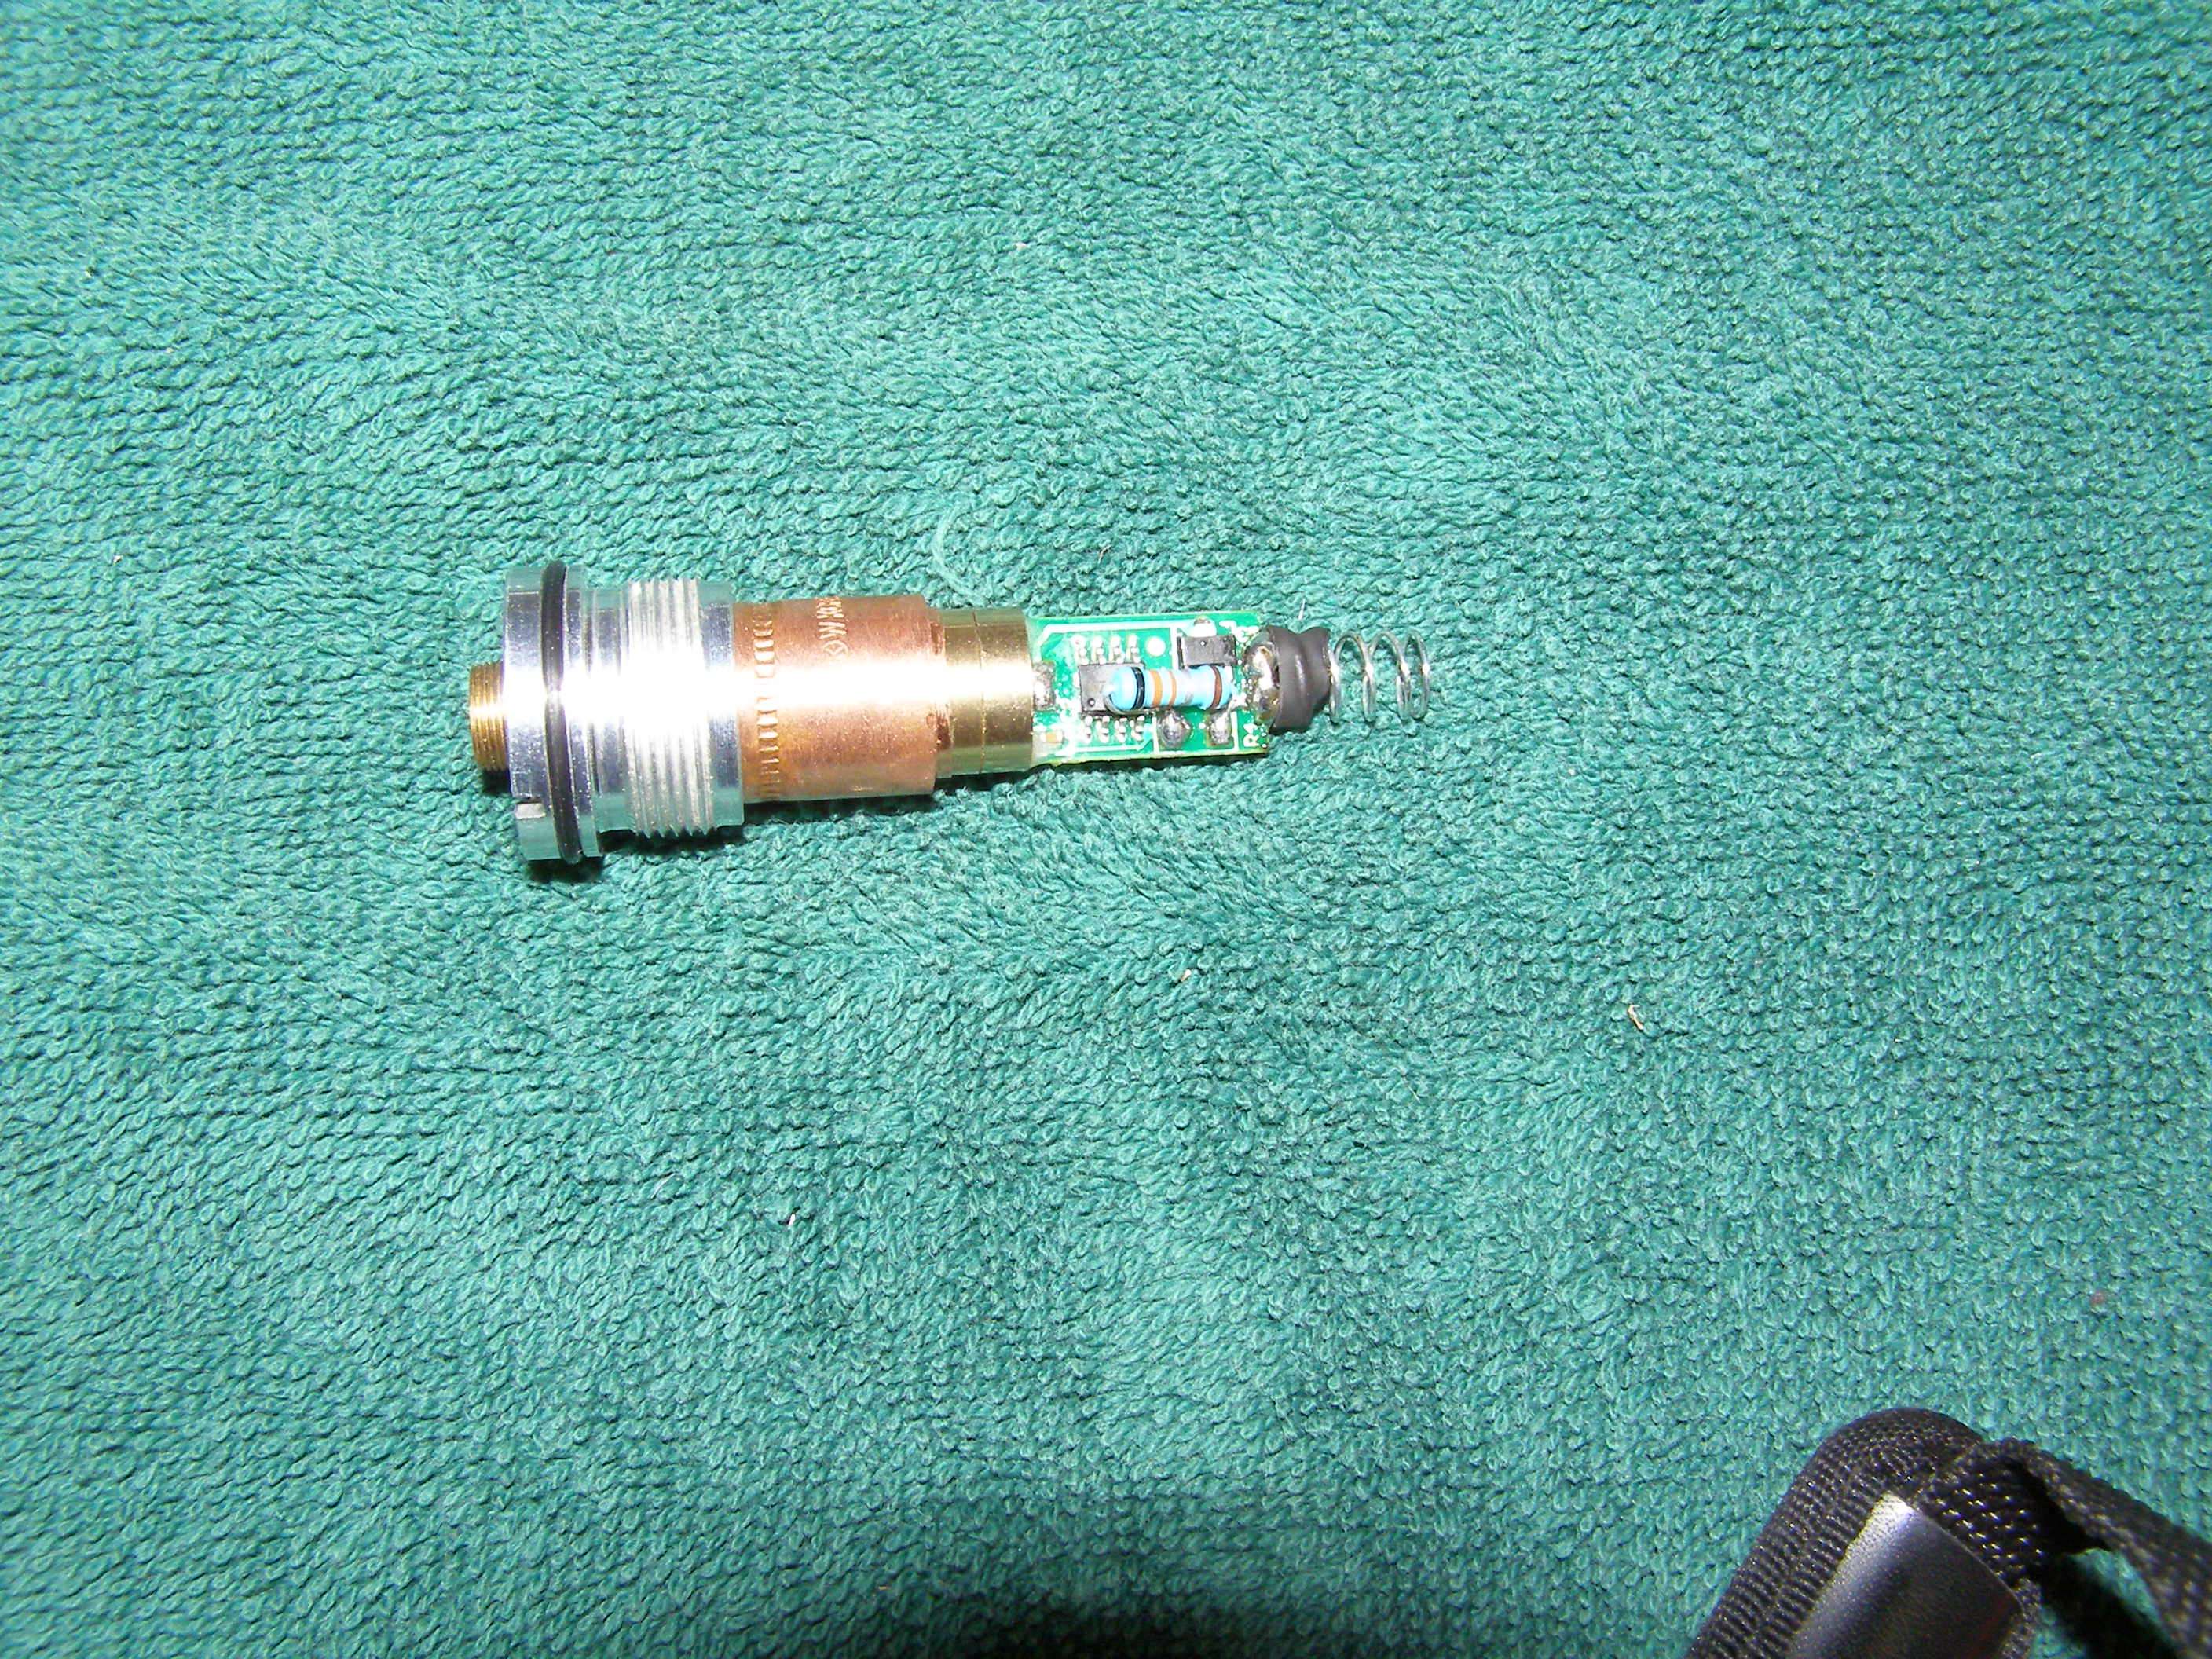
Would look like this if you stuck a module in it although the module will be loose at this point.
I've soldered across the 2 button solder points already so that when power is applied you don't need to push it in to get the laser on.
Also, I take my dremel cutoff wheel and notch either side of where I'm going to be soldering on a spring as it makes it MUCH easier to attach the spring to the solder that is already there. For an added conductivity bonus, when I solder the spring on I run a bead of solder from the switch over to the spring.
Something else I do that I should mention is when I get the modules, I mix a bit of epoxy and put some where the board contacts the brass to make it stronger as you are manipulating the module a lot while working with them and you will kick yourself when you twist the board and break a connection to the diode. What is most likely to happen is the side with the single diode module prong will break away from the board. This can be repaired by scraping the protective covering from the trace on the board and soldering to it.
I figured out how long the spring has to be for good contact to the battery and soldered it on and then added a piece of heat shrink tubing on part of the spring and then over the whole board.
Now my secret ingredient for making things fit right and conduct is copper sheeting. This comes with an adhesive on one side so in order to use it wrapped around tight to itself you have to remove some of the adhesive for your initial conductivity. I do this with a razor blade. Scrape it off (somewhat of a pain) enough on the initial part so you have pure copper touching the other surface and then tightly roll it around itself. By using this thin copper and copper tubing pieces, you can make a custom heat-sink without having a machine shop. Would a machined piece e better? Absolutely would be great but I can't invest in the equipment necessary. I would greatly encourage everyone to utilize those here who can make all that awesome custom stuff! You could use copper wire or other things but what I use works for me. Keep in mind that I personally like finding my own way and using what I have and pushing myself to find ways to get around problems without having to rely on others so I can keep building a stupid number of different units. If I didn't find other ways, I wouldn't be able to build a 1/10th of my builds.
You can get copper sheeting like this at some hardware places but the problem is they usually want to sell you a big roll for $200. Better say up front that I don't have any to sell. You could certainly use other things like conductive wire or thin solder wire or whatever so you DON'T need the copper sheeting as there are plenty of other things out there that you could use to shove in between any spaces you need to make up for.
Don't know if you can see in this pic or not but I've wrapped a small piece of the copper around the module so it is quite tight when you push it into the copper coupling.
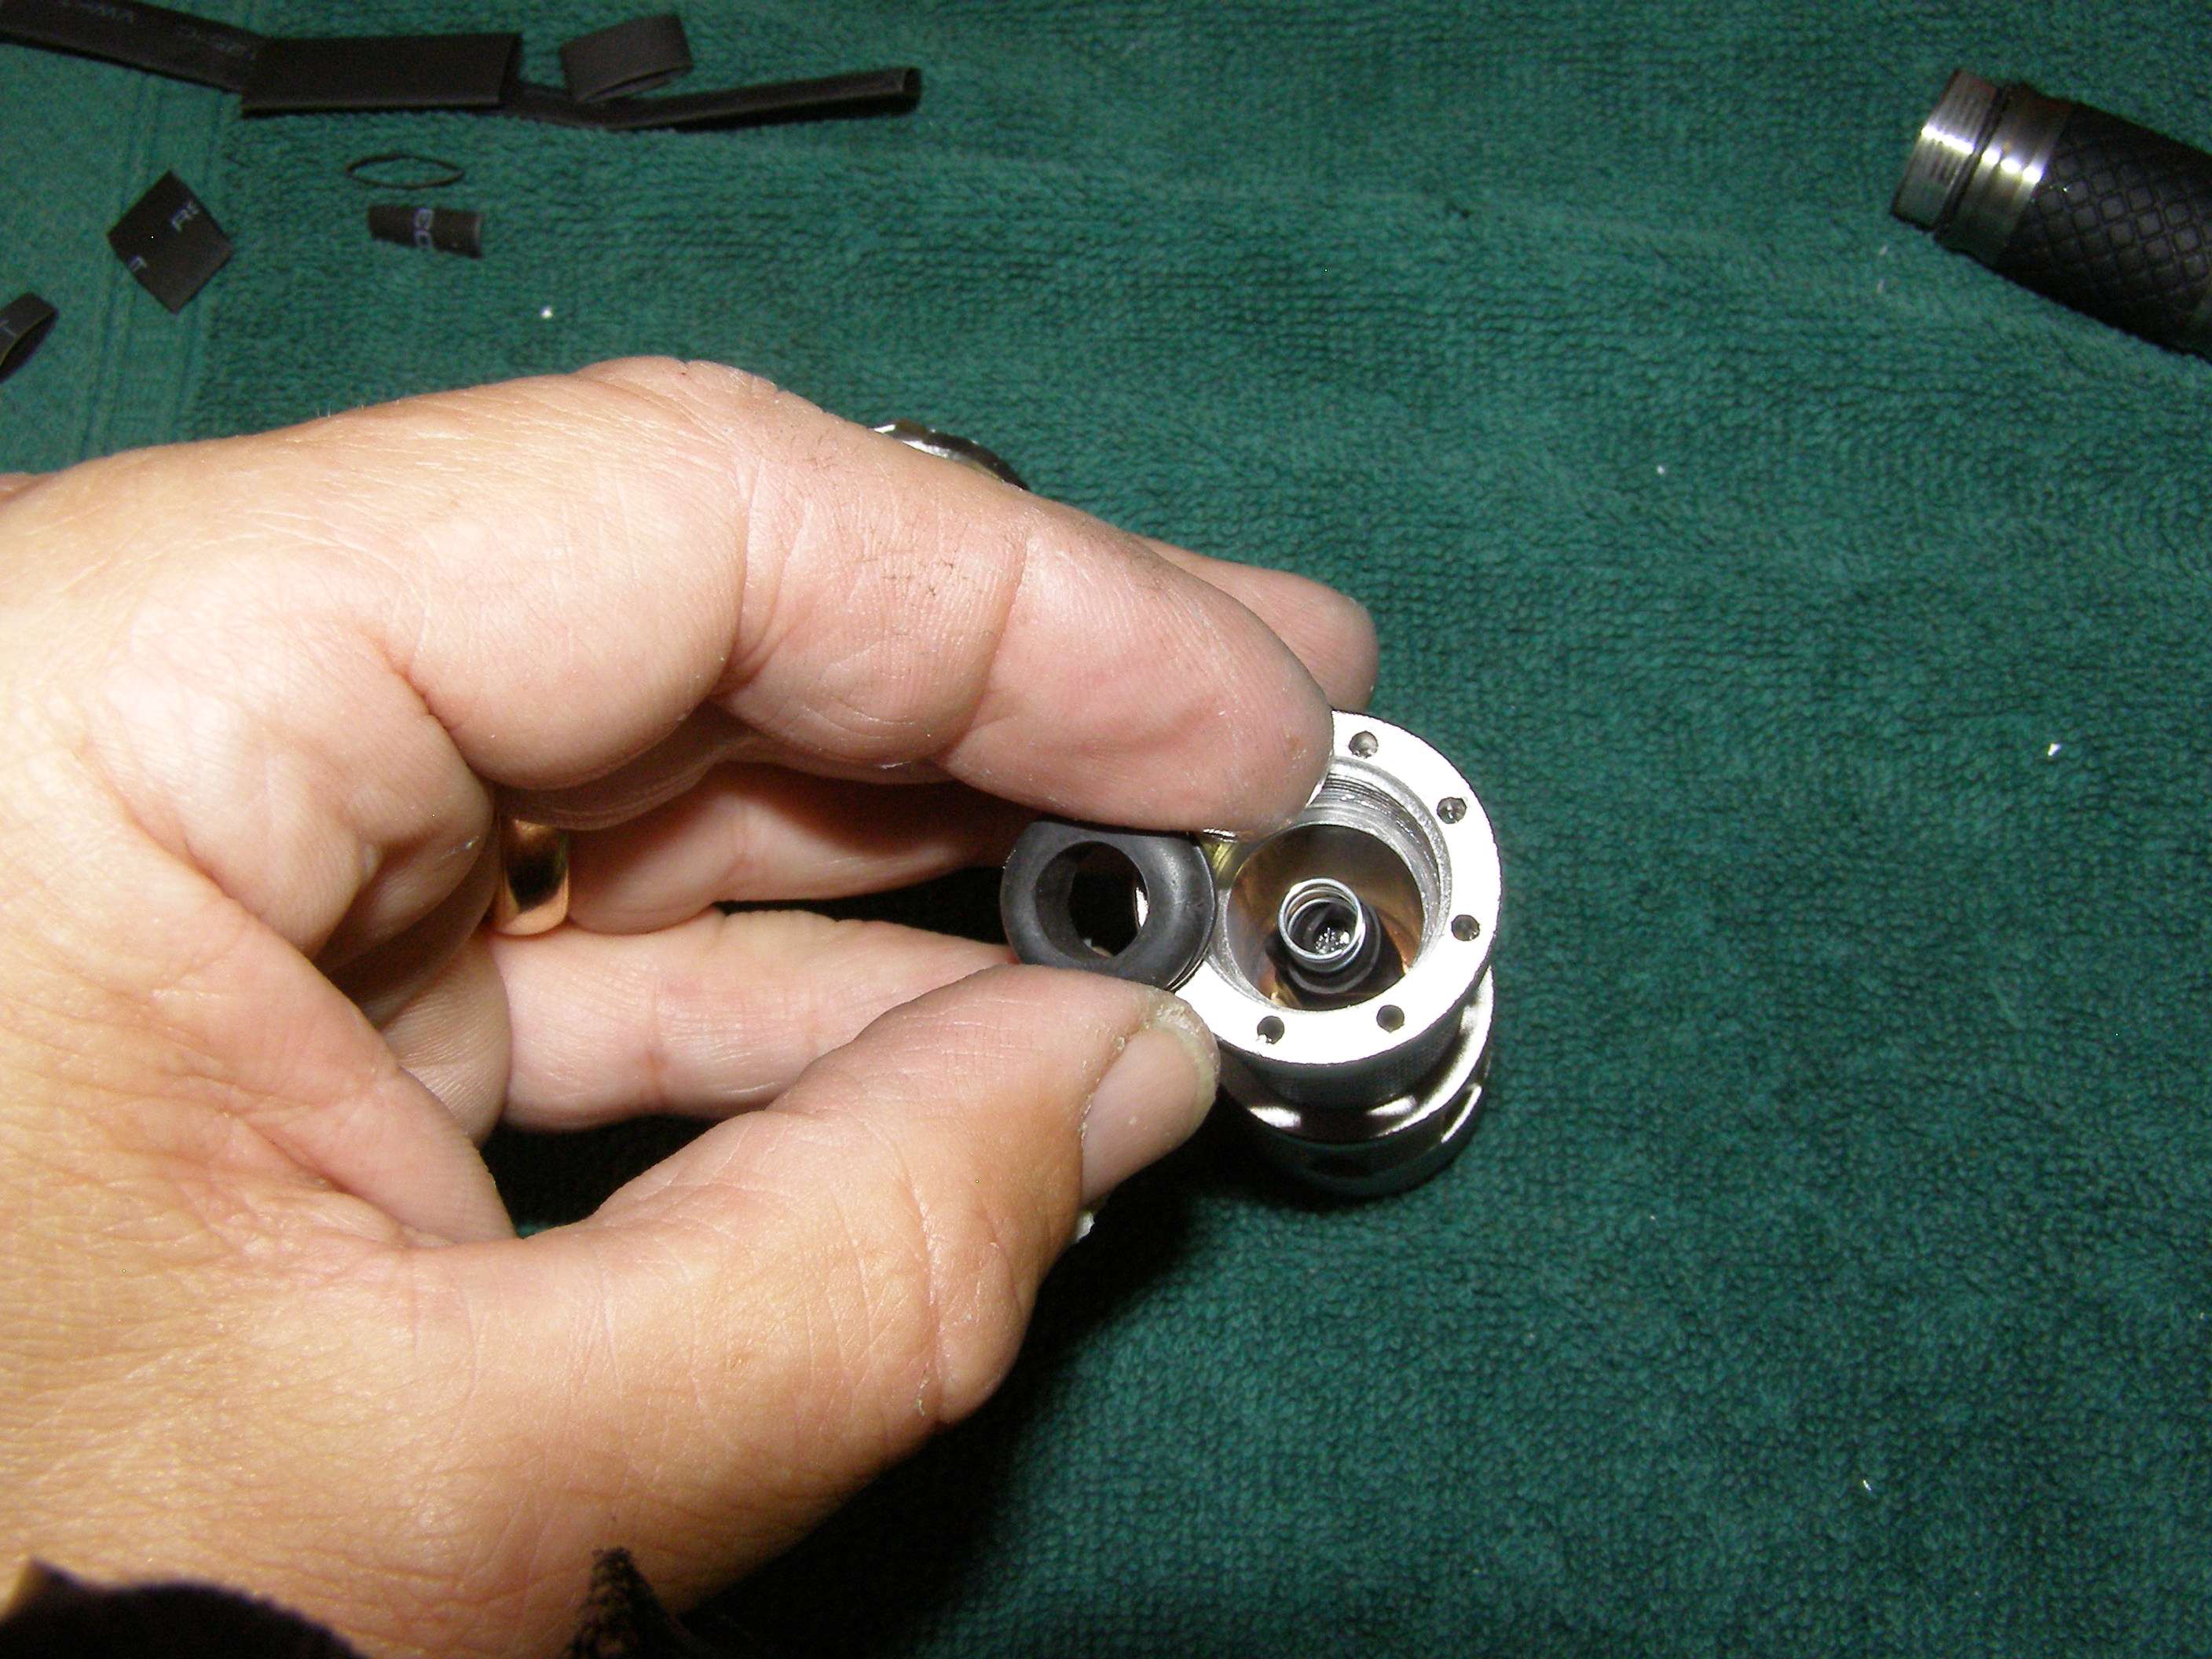
Now that you have that put together, you slide that whole piece into the piece that you pushed it out of and it will center itself because the o-ring is a snug fit once it is all put back together. You may or may not need to take a small piece of the copper and wrap it around the part of the coupling that fits inside the host for good conductivity. You can screw it down tight at this point.
What you see now from the other end is the spring and module with a lot of space around it. Found a great way to make up for it and provide a centered spring is to take a grommet that fits around the spring and touches the inside of the host.
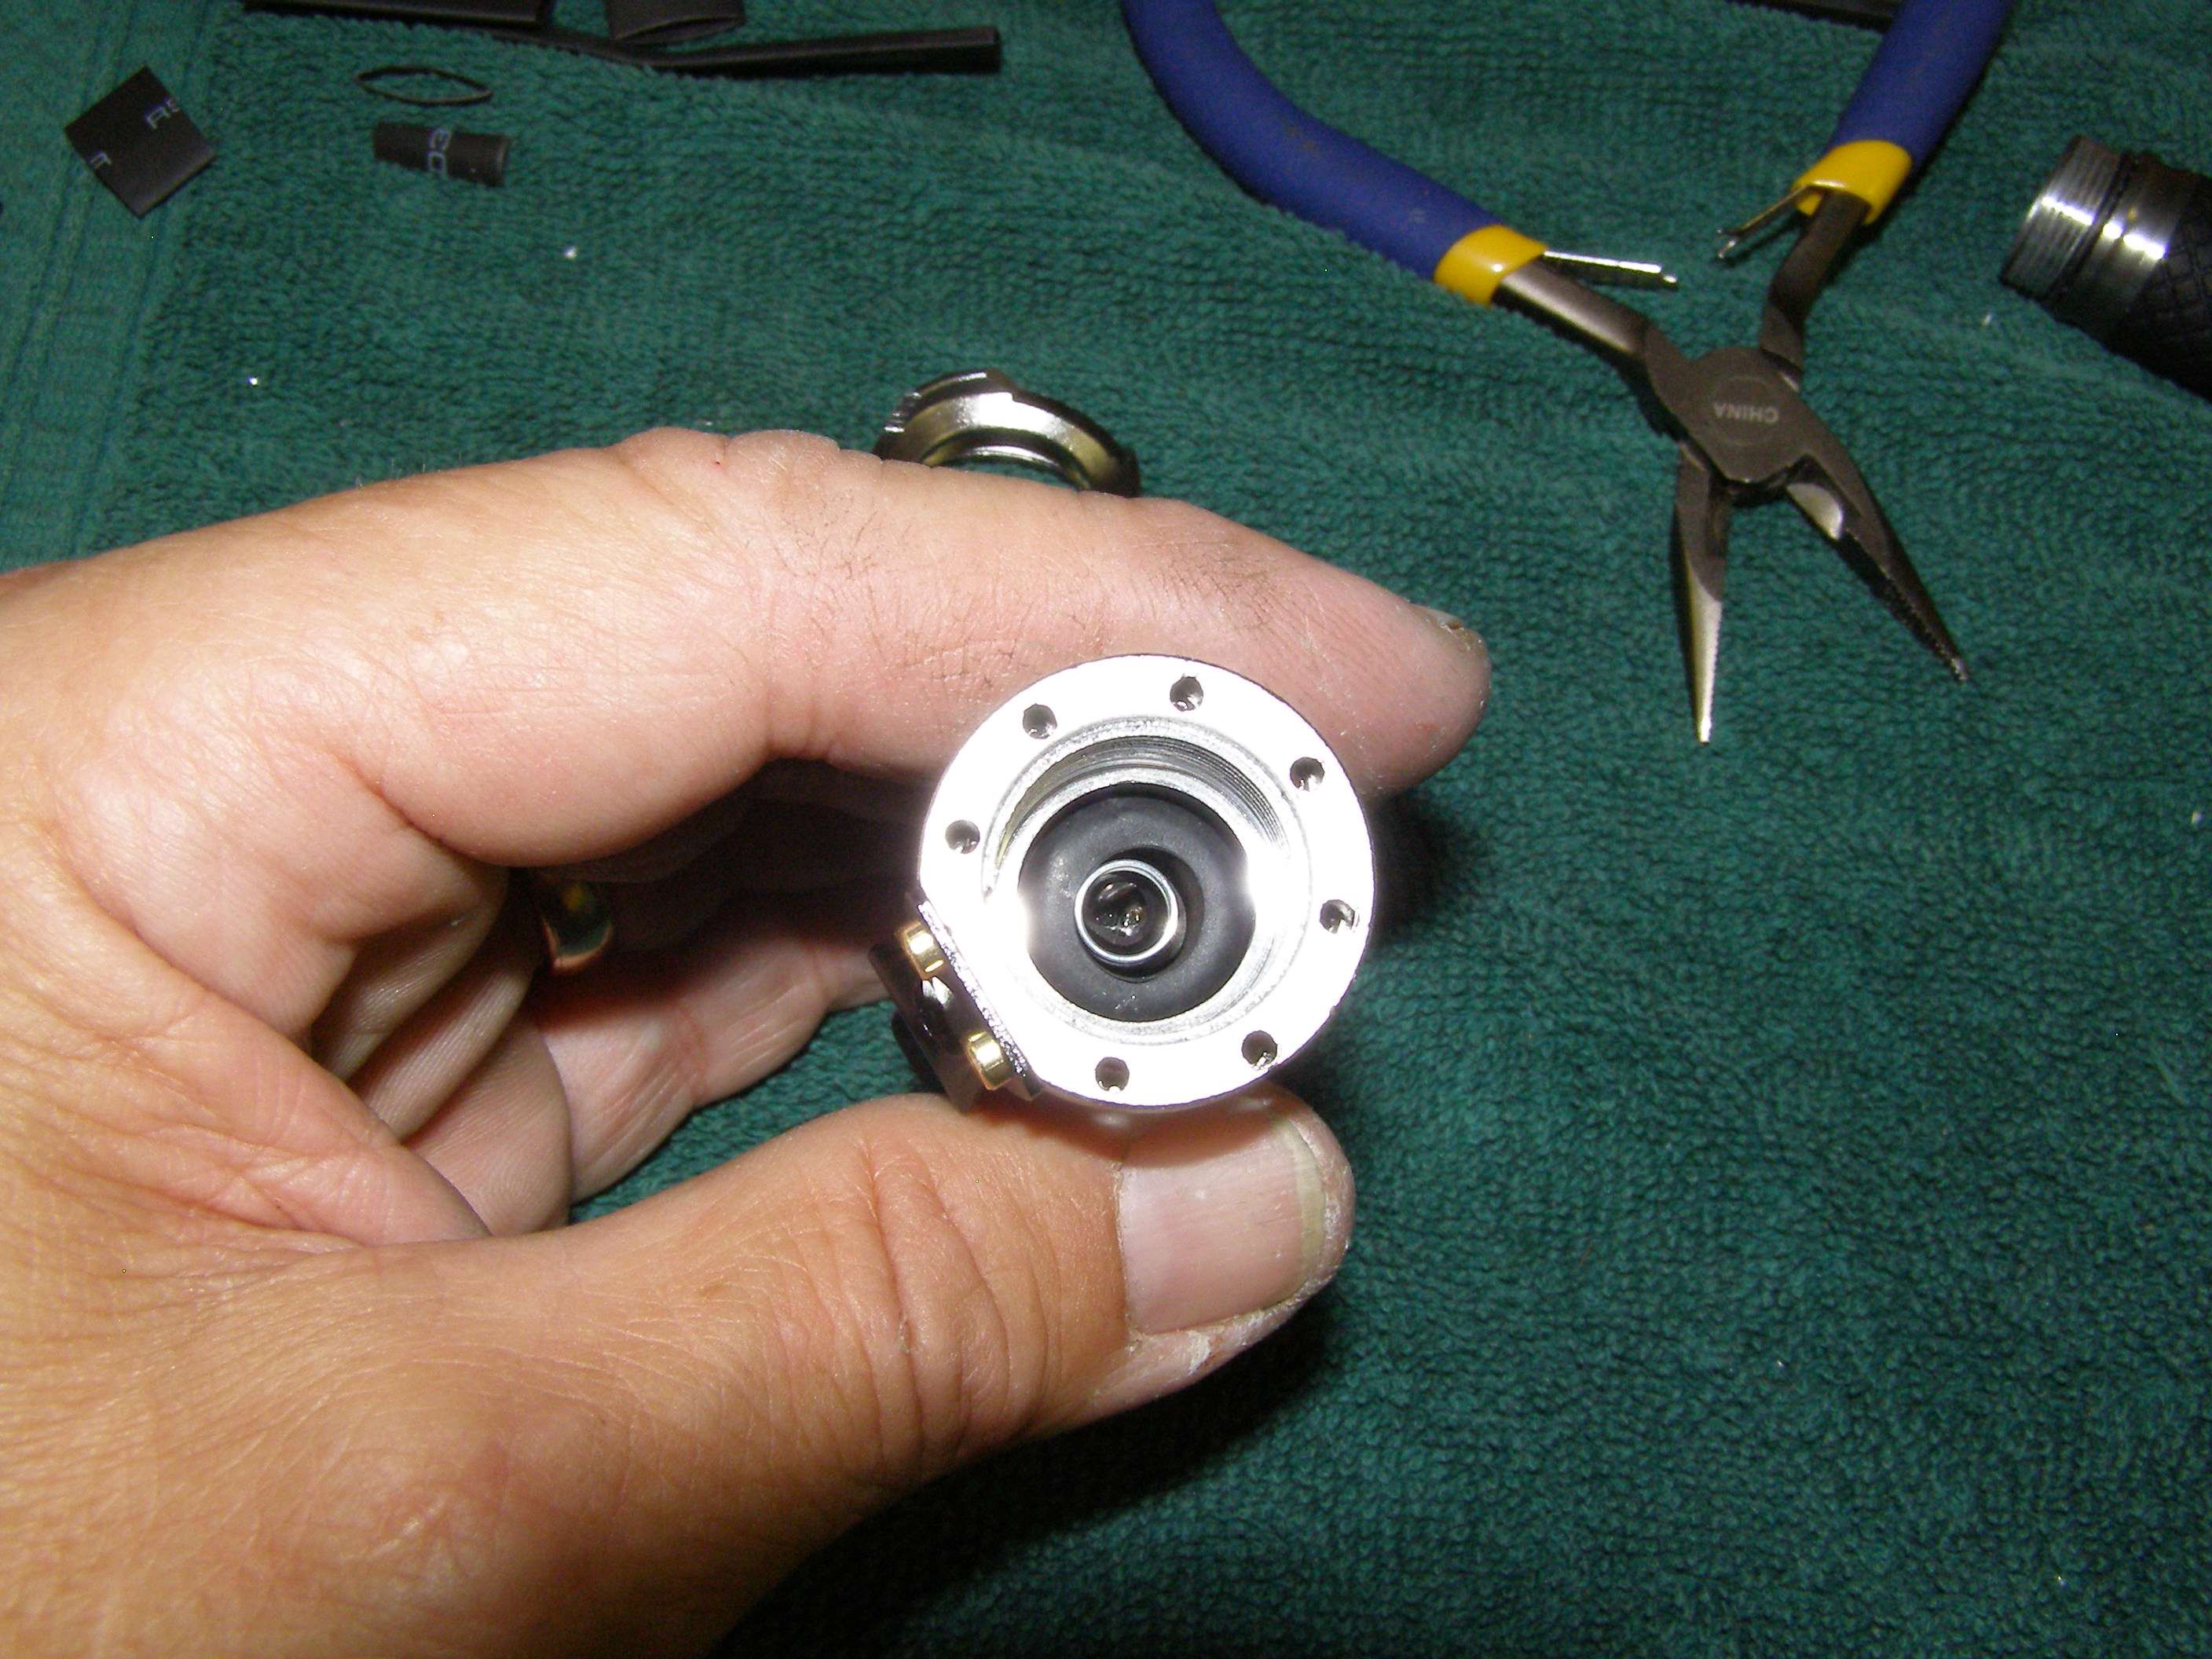
If you quit now this is basically what it would look like from the end depending upon how well you cut the hole for the module to stick thru. Just add a 14500 + to body/host or - to spring, screw it all together and you're done.
What I've done is dress them up with copper washers and grommets et...
I clean the copper that will show and then coat it with clear nail polish as it dries extremely quick
Play with different colored O-rings for whatever look you like.
This is a pic of the beam/flashlight look when you put the plastic lens back into the top cap. You will have to pull/lengthen the head of the unit to fit it back in or the lens will touch the end of the module. I didn't measure how wide this is but I was about 15' from the projector screen and I think it was probably 3' diameter...
I have accumulated quite a good collection of pieces/parts from Fasttech and harbor Freight. Harbor Freight is great for kits like springs and O-rings, grommets and washers, heat shrink tubing etc...
What I recommend is to save all the stuff you remove from hosts/flashlights and put them in different containers as you never know when they will come in handy.
Some of my building supplies that I've picked up over time.
Last edited:


")