Welcome to Laser Pointer Forums - discuss green laser pointers, blue laser pointers, and all types of lasers

Buy Site Supporter Role (remove some ads) | LPF Donations

Links below open in new window

FrozenGate by Avery

Boost driver ideas...

That's perfection! I really didn't imagine a solution to be found by the 4th page of this thread ;D

I guess I'll have to start ordering the components to try and throw one of these together.

what is the ideal temp. for the etching solution to be at? I've never etched my own boards before, but it doesn't look too hard to do.


Search google for "easy PCB fullnet", first indented result is the method I started with for circuit etching and even my first board came out well. I now use a laminator to tranfer instead of an iron, it seems to come out more evenly (especially at the edges of the board).

I also use HCl/H2O2 to etch. I just do it in my kitchen sink (but may be better to use a large container instead!) with a couple inches of hot water and my etching tub (a small plastic container) sitting in it. It heats up as you etch anyway, so you don't really have to heat it much. This solution etches MUCH faster than ferric chloride, so keep an eye on it and agitate constantly.

Etching boards takes a little practice to get right, but I think its possible to get very good results if you put in the effort.
 
Hey woop I made it double sided tryying to save as much room as possible.

For Solder paste, I melt solder into a huge ball then grind it down to fine dust and mix it with the paste that has no solder in it.

For etching PCB's go to home depot and buy 2 gallons of muriatic acid for 10$ and Mix 1 part muriatic acid with 2 parts hydrogen peroxide. But beware fumes are emmited and process must be done outside.
 
toked323 said:
Hey woop I made it double sided tryying to save as much room as possible.

For Solder paste, I melt solder into a huge ball then grind it down to fine dust and mix it with the paste that has no solder in it.

For etching PCB's go to home depot and buy 2 gallons of muriatic acid for 10$ and Mix 1 part muriatic acid with 2 parts hydrogen peroxide.  But beware fumes are emmited and process must be done outside.

DIY solder paste?  Sounds like too much work!  I use AmTech SynTECH paste and it works really well, is good for a year (most others expire after 6 months) and was only about $40 shipped for 250g, which is a lot!  Bad paste will clog syringe tips frequently and I have had very little problems with the amtech paste compared to the stuff from DX.

And I use the same etchant and I agree that it should be done outside or in a well ventilated area, with a mask, eye protection and gloves!
 
thats why i went for ammonium persulphate. its pretty much safe. no fumes not too bad to get on your skin. and you just buy the powder and mix it with water then pour it down the drain when your done etching. also it doesn't require much powder per board and it etches within 5min

i tried photo paper but couldn't find one that works. so i just used sticker backing paper, its a lot easier and doesn't require soaking and rubbing to get it off.

of course you could try using whatever materials you have. my parents are sign writers, so they have loads of sticker backing paper.

if anyone finds it too hard to make them i could probably post some out for $2 postage to US and maybe $3 each board
 
GooeyGus said:
That's perfection! I really didn't imagine a solution to be found by the 4th page of this thread ;D

I guess I'll have to start ordering the components to try and throw one of these together.

what is the ideal temp. for the etching solution to be at? I've never etched my own boards before, but it doesn't look too hard to do.
the circuit is basically the same as my 2xAA blueray driver just a different chip. its pretty straight forward

your supposed to keep ammonium persulphate solution at 75C for etching. higher makes it go faster lower makes it go slower
i bought the ammonium persulphate from dick smiths electronics (australia)
 
I've had good luck with coating the bare copper with shapie ink as a resist and then scratching out seperations. I'm trying to use a laser beam to do the scratching to automate the process!
 
DIY solder paste is easy takes about 2 minutes to grind down a 1inch ball with my automated stationary electric grinder.

Something strange happened today, i mixed my etching solution and left my bored in it for a few hours and it didnt etch at all.
 
toked323 said:
Would this transistor DMP2012SN help make B- and LD- one ? Its from cdanjos board

That's a MOSFET. He's using it as a reverse-polarity protection circuit. It's actually the exact design that I'm implementing into my driver starting next week, but with a different (higher efficiency and voltage) MOSFET. Instead of simply shorting a path for voltage to avoid the laser diode, it actually will disconnect (well, in a manner of speaking) one of the input leads and break the circuit entirely allowing no voltage to flow at all, preventing any damage to the laser diode and/or driver circuit.
 
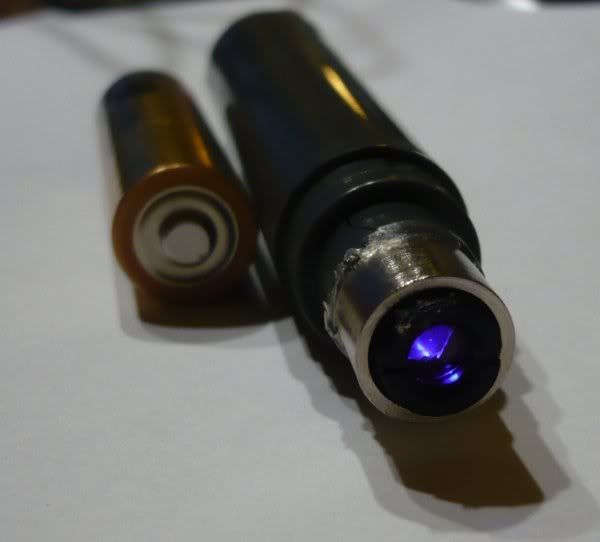
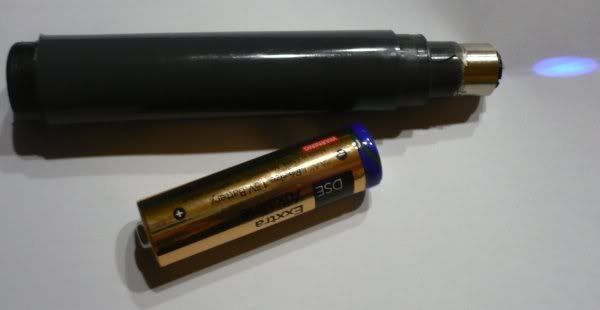
well. i put it in a 'case' and jammed a blueray on the end of it
the 'case' is a whiteboard marker. the only thing i could fit a AA in
its running at 21mA. i am going to boost it up to 30 when i can find the right resistor
P1020080.jpg

P1020079.jpg
 
lol ok it wasn't even lasing in that picture...
somehow the threshold changed from 20mA to 27mA :-?
anyway. got it running at 37.8mA using 22ohm and 33ohm resistors in parallel (13.2ohm total)
dvd and cd drives are a great source of smd resistors and stuff :D
 

Attachments

  • P1020090.JPG
    P1020090.JPG
    27.3 KB · Views: 206
Could somebody PLEASE post a regular schematic with standard symbols?!
I can't read that schematic, just post a regular one.

PLEASE!!!
 
If you cant read that, well then your screwed. It is very simple.

Anyways I am making one for a Blu-ray and one for a Red.
Still not sure on witch values to use for the resistors.
 
Get the datasheet for the tps61201 and it should be very simple to follow the traces. I did that yesterday with some paper and a pencil.
 
Bionic-Badger said:
Get the datasheet for the tps61201 and it should be very simple to follow the traces. I did that yesterday with some paper and a pencil.
you mean tps61200 right? the tps61201 is pre set at 3.3V
which one did you trace? mine or toked's
here is the schematic for mine
 

Attachments

  • woopschem.PNG
    woopschem.PNG
    22.2 KB · Views: 256


Back
Top