Welcome to Laser Pointer Forums - discuss green laser pointers, blue laser pointers, and all types of lasers

Buy Site Supporter Role (remove some ads) | LPF Donations

Links below open in new window

FrozenGate by Avery

Which is better?

I replaced the 47µF cap with 1µF and the phr diode was dead at start up. Coincidence?

The diode had a long life at 135mA, and while replacing the cap the diode was shorted...


The resistor next to the pot is to make sure you can't over do the pot.

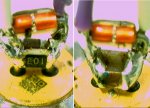
Don't think really ..... i keep on my LD a 100n (100 nanofarad, 0,1 microfarad), a diode 1n4148 and a 10 Kohm always soldered between the pins, stored or working (c and r both smd), and never lost one for ESD ..... i fried some of them for overtemp or too much current, but never from ESD nor spikes ..... maybe really a coincidence ?


Well it lasted for about 6 months of hard usage at 135mA which is pretty good for a phr. Maybe it was just torn and gave up, but I can't tell. I like your ESD protection and will use that from now on. ;)
 
Undoubtedly at that current it was probably shot.. HIMNL9s ESD sircuitry is good, except the resistor is probably a tad bit of overkill, but better safe than sorry. The capacitor covers most spikes, the diode protects against reverse polarity, the resistor protects against accidental capacitor discharge.. This is the standard protection and filter method for these drivers. I wouldn't be caught dead without at least the capacitor.
 
Well, i choosed 10K resistor cause it's a safe value, and at the usual voltage of the diodes, don't draw any significant current (like, 0,5mA at 5 V :)) ..... and using SMD, i can just left them (r and c) always on the diodes, cause they practically don't take space, and just add the diode and wires when i need them (just cause, as far as i know, there's no 1n4148 diodes in the same size of r and c chips, otherwise i was putting also them in permanency on the LD's ..... the one in the pic are the smallest ones i've found, and still are the double of the smd components, LOL)
 

Attachments

  • esdprot.jpg
    esdprot.jpg
    289.7 KB · Views: 107
That's definitely a great way to do it. The closer those components are to the LD the better the protection.
 
Anything worth doing is worth over doing... I've updated the circuit a little, any comments are welcome.
bc3376-2-1-1.jpg


Dots:
Red = bc337 NPN transistor
Orange = LM317 voltage regulator (DDL style)
Yellow = CNY17-3 opto isolator
Green = RGB LED IC, common anode (+).
Dark green = Red LED
Turquoise= 1N4007 diode
Dark Blue = 1N4148 diode
Violet = 1 kohm resistor
Magenta = 470 ohm resistor
Pink = 470 ohm resistor. Not needed with the "BigClive-kit"
Brown = laser diode
Gray = +12V


Squares:
Red = 470µF 16V electrolytic capacitor
Orange = lasing threshold resistor (around 50 ohm, 2W for green, 560 ohm 1/4W for red/violet). Some experimenting needed.
Yellow: on/off toggle switch
Green = max current resistor for laser diode (use ohm's law to find your value)
Dark green = 560 ohm resistor
Turquoise = 100 ohm pot
Dark blue = 10 kohm resistor
Violet = 1µF 50V electrolytic capacitor
Magenta = 100nF ceramic capacitor
Brown = 10 kohm pot (sensitivity adjust)
Gray = ground (negative)
 
Your on/off switch bypasses the transistor. Is that intentional? Also, I'd ditch the parallel diode and capacitor with the purple square and teal circle. It's redundant and will just kill your modulation rate. At the input of the circuit there are some capacitors and resistors. Why are they there? Just a 10uF 16v should be sufficient for input protection. The only reason I ask is that in most cases simplicity is a good thing. If you're designing a circuit and you discover you can safely do without part of it, do so. It will save you money and time every time, and improve the efficiency of the circuit in many cases. When you "over-engineer" in electronics, do it by underdriving components, conditioning power to improve signal clarity, and providing ample power sources and cooling.

Only offering constructive criticism..
 
Last edited:
Damn you I'm colour blind! :)

I can't wait to see pics of your not-so-little project!!
 
I will post pics, just a little more work to do.

The switch does bypass the transistor, yes. I think your constructive criticism is very helpful, I removed the cap and diode, as well as the 470µF cap. That one really seemed overkill.
 
Ok now it looks like this:

bc3376-2-4.jpg


Or in the real world (still not quite finished):
P6200025.jpg

P6200024.jpg


The LEDs indicate: external power, key turn, lasers live, red on, red modulation (same for green and violet), and finally a RGB LED that represents the actual colour being emitted by the laser.
P6200027.jpg

P6200028.jpg

P6200029.jpg

P6200030.jpg

P6200031.jpg

P6200032.jpg

P6200033.jpg

P6200035.jpg

P6200038.jpg

P6200026.jpg

P6200039.jpg

P6200040.jpg

P6200020.jpg

P6200016.jpg


The beam is ~2mm in diameter @ aperture.
P6200014.jpg


Phr sled:
P6200001.jpg

P6200003.jpg

P6200013.jpg


My fav pic:
P6200011.jpg

P6200010.jpg

P6200009.jpg

P6200006.jpg
 
Last edited:
Oh my freaking god that is AWESOME!!!


Shoop Da Whoop!!!

What did you use for the 3 lasers? (as in company + powers, etc. etc.)
 
the wooden box is shades of Thomas A. Edison for sure ! I love it !!! :bowdown: can it make many colors ? lets see more beam shots. with the PWM you should be able to get thousands of colors. I can't wait to see the next thing from you the spyro was a gas whats next, wow !!! have a great day all !!! Pyro...:eg:
 
Yeh I love those lights! The lasers are the same as before: LCC red with phr lens, phr blu with phr lens, and DX 35mw module (is outputting around 75mW!). Total output is probably over 300mW, makes white receipts to ember without a lens.

More pics and vids here http://laserpointerforums.com/f48/rgv-labby-first-run-32923.html

I demand these are mass produced. That configuration seems cheap enough. I'm starting to think the PCB construction and wooden box + LEDs were more expensive than the lasers themselves..


Back
Top