Welcome to Laser Pointer Forums - discuss green laser pointers, blue laser pointers, and all types of lasers

Buy Site Supporter Role (remove some ads) | LPF Donations

Links below open in new window

FrozenGate by Avery

The XBOX 360 HD-DVD high power laser thread

Im having big trouble getting this diode out of the heatsink, i've tried sawing and using the screwdriver to split it but to no evail, can someone please help? BTW this is on the infrared for practice but its exactly the same heatsink.


It is going to work very good from 3xAAA. It would even work from 2xAAA, but not that long. Dr_Lava's driver is an amazingly good driver!

You can not measure the mW coming out of the driver. You can only measure the mA coming out.

A dummy load would be a good idea. You could use 5 1N4007 diodes as a dummy load and measure the current in series. This means you have to chose a high enough current measuring range on your DMM (higher than the highest current coming from the driver) and then pass this current through the DMM and into the dummy load. (On most DMMs you have to plug the red probe into a different socket.)

The DMM will then show the current, and when you turn the pot, this current will change. You will probably want to set the current to 90mA or less.

When the current is set, you have to connect just the dummy load to the driver alone, without the DMM in between. Then use the voltage measuring range of the DMM to measure the voltage across the dummy load. If the voltage across the dummy load is higher than 2.4V you are good to go. If the voltage should be lower, the driver will not be working properly, and the current will not be set correctly. If it is at least 2.5V or more, it is good.

You can disconnect the dummy load from the driver, short the driver output for a few seconds (to discharge any capacitors) and then you can solder your diode to the driver.

And then you are done. The current will be the same as it was through the dummy load, even if the voltage will be different.


Another, faster possibility is to first set the pot to the lowest possible current setting, solder the diode directly to the driver, but put a 1 Ohm 1% resistor in between.

Then you turn it on, and measure the voltage drop across the 1 Ohm resistor. The voltage drop ACROSS a 1 Ohm resistor in mV is the same as the current THROUGH the resistor in mA.

Then you slowly turn the pot until you reach the desired current. If you want 90mA, you have to turn the pot carefully and slowly, untill you measure 90mV voltage drop across the 1 Ohm resistor.


In this case your laser is now already working. You can then remove the resistor, short the output for a few seconds just in case, and solder the diode directly. Or you can leave the resistor in, in case you ever want to adjust the current again. The 1 Ohm resistor will not influence the operation of the driver in any way. The battery life would be a little bit shorter, but you wouldn't even notice this.


What you should NOT do under any circumstances is power up the driver without a load. You also shouldn't make temporary connections between your laser diode and the driver. It should be soldered there permanently. Otherwise, if it disconnects temporarily and reconnects again while the power is on, the driver can kill your diode (by charging a capacitor to a high voltage) or the driver can even kill itself if powered up without a load.

Most of this is in the instructions you will get with your driver btw...
 
cbrian4 said:
Im having big trouble getting this diode out of the heatsink, i've tried sawing and using the screwdriver to split it but to no evail, can someone please help? BTW this is on the infrared for practice but its exactly the same heatsink.

It is a painfully slow process, and even tho i extracted many diodes in the past, i was actually scared a bit here.. :)

You need to put a tiny piece of tape over the window, so no small chunks get in there.

I use diagonal cutters, and slowly and carefully cut through it. I was hoping to cut it on one side and bend it appart, but i ended up getting it off in several small pieces...

Just be careful, and go slow, so you don't damage the can, or the window could fall off and then you would have to open-can it, which is going to be even harder.

I guess i'll be able to do it better and faster next time... I'm gonna try to cut from two sides opposite of each other, and then break it appart using two pliars holding it from each side, with something soft for the diode to land on.
 
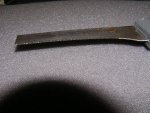
I use an old kitchen knife that broke a long time ago (I'm a pack rat). :) It works like a mini saw because of its serrated edge. Just keep after it until you are all the way through and then spread it with a mini screwdriver. ;)
 
Hmm, that is actually a good idea!

The metal is soft enough and the knife would go through very slowly! Less dangerous than a hacksaw....
 
IgorT said:
...
Just be careful, and go slow, so you don't damage the can, or the window could fall off and then you would have to open-can it, which is going to be even harder.
...

Why would you need to make it open-can if the window falls off? What does the window actually do anyways besides protect the rest of the diode?
 
the window can rattle around causing bad beam quality or even damage the fragile diode chip
 
Kay i've extracted it, but i have no module for it, i know im stupid, but i wrapped it lightly in foil for storing is this okay?
 
laser_freak said:
Why would you need to make it open-can if the window falls off? What does the window actually do anyways besides protect the rest of the diode?

The window would fall in not out, because it is glued to the can from inside..

Just like MarioMaster said, this could cause MANY problems. You really don't want something to be moving around in there. It could also get lodged at an angle, deflecting the beam or the edge of the window with the glue could be in the opening and obstruct the beam.
 
cbrian4 said:
Kay i've extracted it, but i have no module for it, i know im stupid, but i wrapped it lightly in foil for storing is this okay?

Yeah, it will be fine. It's good, that it's protected from dust and the foil protects it from ESD. Altho it is hard to kill a diode with ESD if the static has nowhere to go to (no discharge path). If you power a driver with a PSU on the other hand, you can just touch the diode, and it can die.
 
cbrian4 said:
Kay i've extracted it, but i have no module for it, i know im stupid, but i wrapped it lightly in foil for storing is this okay?
That's a great way to store it. ;) Keeps all that yucky ESD away.
 
Yeah i live in arizona and its usually bone dry here. But today its raining and humid so i decided that this was the best day to extract them because im much safer from esd. I also do all my work barefoot in the garage, this is a good way to ground yourself right? Its concrete.
 
lol, well it can't hurt. I know if the ground is at all damp and you're barefoot you will be grounded much better than it you're wearing rubber soled shoes.

{edit} Perhaps this is why I've never lost a diode to ESD - I'm usually barefoot when working on them. This includes winter days in January (I live in Wisconsin) when the air is so try you can develop a massive charge just walking ten feet across the room. In the summer static is rarely a problem.
 
Hey, thanks for all the info, IgorT! I suppose I should have waited for the driver before posting, but I seem to be sort of excited to be moving forward on this little project. I have a fair assortment of mineral specimens and many will fluoresce with a blu-ray. I have been attempting to wade through all the information here in the forum but it is a lot to take in - really TMI. One more dumb question - and if it's in the instructions with the lavadrive, just ignore me. The dummy load of 5 1N4007 silicon diodes: is that wired series or parallel? I'll start looking through the forums to see if I can dredge this up myself... Thanks again,

JeffP


Back
Top