Welcome to Laser Pointer Forums - discuss green laser pointers, blue laser pointers, and all types of lasers

Buy Site Supporter Role (remove some ads) | LPF Donations

Links below open in new window

FrozenGate by Avery

The "Purple pHaze" 3W of Purple

WOW Bob this is coming out amazing!:bowdown:

Any more progress.?

You have some of the most unique designs ever and i love it. True one-off. I bet with that solid copper plate it will run for a while. its like a portable lab unit.:D.


Keep up the outstanding work.!

Any Action shots yet.?

:beer:

Well....Thank you Angelos !!! Coming from our #1 LD Driver designer....and primo builder of one-off's also !!! That means a lot !!!

I strive to go toward the " Undiscovered Country "....and I feel my offerings are a possible guide/springboard for others to follow !!!

We are all inspired by each others passion and excellence !!!

As you well know...I promote the Combiner Class....whenever possible....and the use of optical correction/adaption to forge our beams to a more perfect level....not perfect....but better. Optics do have their limits...but they do help !!!

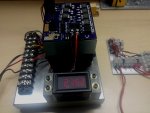
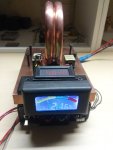
As to the Purple pHaze status....well...some progress !! I have just mounted your X-Load Driver test board...See the attached pic !!!

Clearly....I build things...well....stout....with very thick metal plates !!

With the X-Board mounted....I will now verify my Lasereer driver current setting.....and then finally on to First Light !!!

I have been extremely busy with a new job as of late.....hard to teach an old dog new tricks !!!....and this has slowed my progress....but....the Purple pHaze will come to life !!!

Thank you again for your kind comments !!!

Bob:thanks::thanks::thanks:
 

Attachments

  • X Load.jpg
    X Load.jpg
    70.3 KB · Views: 165
Last edited:
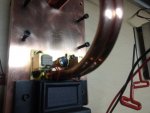


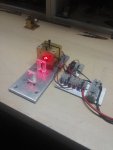
Well... I checked the drivers with the Lazerer X-Load....Spot on !! The Red driver is set at 1.125A. This current is over spec....but...reasonable !!!

Hooked up the driver mounted to the mount sub assembly plate. Tested with a Oclarro Red.... mounted in one of my custom LD mounts used for projector units.

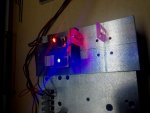
First light Red....See pics....Now...on to Blue.

As u can see...with this temporary set-up...the beam is being corrected by a set of Cylindrical lenses. This is as it will be on the finished unit...with two(2) sets of Cylindrical lenses...one(1) set each for the Red and Blue beam.

I know this is going painfully slow....but this is due my new job demands !!

And...lessons learned on this platform...may be applied to the new NUBM44
:san::san::san::san::san::san::san:

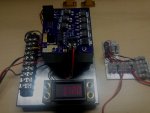
Added pics of X-Load in operation....Perfection !!!

Note: Did some very quick set-up combining the 9mm 445 LD with the Cylindrical lenses...very odd results !!!
Not what I expected !!! Basically...unless I have the set up wrong....the Cylindricals generate a line ????....Things look really good with either NO correction....or Anamorphic prisms on the Blue beam !!!

Will experiment more and report back !!!! The Anamorphic prism's do reduce the divergence some....but ...really.....the goal here is to have both beams...as matching as possible.....so....for now....it looks like the Blue will need no correction....and the Red will need the typical Cylindrical lenses to tame it !!! That is just fine with me !!!

Will update as I experiment ! The lens on the 9mm is the O-Like glass....very close to the G2...but clips the sides a bit !!!....which of course losses a small amount of power. I will try the G2 to see what that does... ???

7.1.2015 Update I ...Still no success with the Cylindrical's on the Blue LD....Perhaps I have the radial orientation 90 degree off...more experimentation !!

7.1.2015 Update II .....Well....it is difficult to see....but we have purple light !!! A little too much Red...but...I expected that !!
So...Need more blue !! Hmmmmm.....Perhaps....the new blue Bad Boy !!!!!with a splash of red !!!!

Very, very bright !!! Beams are not yet combined....just running side by side and aligned at the Farfield target....this was done to see the resultant color !!! Looks purple to me !!

Will now go on to do the actual beam combining !!! Pass the Popcorn !!!
 

Attachments

  • Purple pHaze Red first light a.jpg
    Purple pHaze Red first light a.jpg
    80 KB · Views: 144
  • Purple pHaze Red first light b.jpg
    Purple pHaze Red first light b.jpg
    98.6 KB · Views: 158
  • X-Load with Red Driver.jpg
    X-Load with Red Driver.jpg
    158.3 KB · Views: 126
  • X-Load with Blue Driver.jpg
    X-Load with Blue Driver.jpg
    169.1 KB · Views: 115
  • Purple pHaze initial rough optics set up 1.jpg
    Purple pHaze initial rough optics set up 1.jpg
    193.4 KB · Views: 163
  • Purple pHaze Farfield Initial trial 1.jpg
    Purple pHaze Farfield Initial trial 1.jpg
    82 KB · Views: 141
Last edited:
A little thought regarding the LD engines that might be used on the Purple pHaze.....The NUBM44 may be an excellent replacement for the current 9mm 445 !!!

IF this LD is a true 460~462nm....then it will have much improved luminosity vs. the 445nm !!! And....6 or 7 watts....My choice is simple...the NUBM44 !!!!!!

If I want more of a deeper Purple....either turn down the Red....or give the Blue a major blast with the NUBM44 !!! Looks lika no-brainer to me !!!! Hmmmm....Like baking a cake !!! Blue......with a dash of Red......makes a Royal Purple....I predict !!!

AND...I am changing my mind on what optical correction will likely be called for on the NUBM44.....A simple set of Anamorphic prisms !!!
The A-prism's are more simple to set up, more compact....but do cause a little more power loss...like 3% vs. the 1% of the C-lenses....anyway.....

I will stick with the 9mm 445 for now at 2W.....but once my experiments are complete with the NUBM44......I will likely evolve toward that !!! Exciting times !!!:wave::wave::wave:

7.4.2015....in experimenting a bit more....the color with 2W 445nm blue and 1W 638nm Red is a beautiful.... exceedingly bright purple....Perhaps 7W of blue vs 2W of blue would be a bit much !!! Dunno !!! ???? This ratio between Red and Blue comes down to a matter of preference !!! Plain and simple ......Red + Blue = Purple.....and a lot of it at these PO levels !!

My current experiments have the Red beam passing thru a set of 6X Cylindrical optics and the 9mm Blue beam passing thru a set of Anamorphic prism's !!! To my eye....this combination delivers a very, very close farfield beam geometry ( The spots are the same size).....exactly what one would want when mixing two different color beams !!!

And....the typical disclaimer....NO optical alignment is perfect......so.....we can achieve fairly good alignment....perhaps one click distant....past that....well.....overall individual beam divergence will wash the beams together anyway....so.....who cares !!!
 
Last edited:

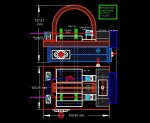
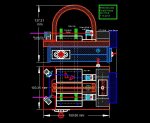
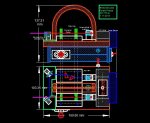
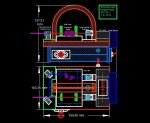
See updated drawing showing the new arrangement .... incorporating the
Anamorphic Prism set ( drawn in Red). Pictures help to visualize things !!
:D:D:D

Perhaps.....just perhaps....if I end up using the NUBM44 on this build....I could convince Angelos to build a 5A driver with a hook-up to use an external pot....Sooooo....one could have ....er....ah...an adjustable range of colors.....maybe ??? Just pisses me off to turn the power down !!!! Need to finish the basic build first !!!!!:san:

Note...added pic....in the home stretch now !!!:drool:

Note.....added two (2) more pics !!! Lotsa Purple !!! You bet !!!
One pic shows the beams .....both Red and Blue hitting the same spot at 25'
...and the other pic shows the beams....side by side...not yet combines !!!
 

Attachments

  • Purple Phase V778 B.JPG
    Purple Phase V778 B.JPG
    97.4 KB · Views: 114
  • New optics set up  Purple pHaze 778 B.jpg
    New optics set up Purple pHaze 778 B.jpg
    133 KB · Views: 115
  • Purple pHaze 778 beams combined at FF.jpg
    Purple pHaze 778 beams combined at FF.jpg
    63.6 KB · Views: 125
  • Purple pHaze 778 beams side by side.jpg
    Purple pHaze 778 beams side by side.jpg
    79.1 KB · Views: 131
Last edited:
Update...Optic alignment is just a PITA...just takes much time...We now have a super bright Purple beam !!!....Beam shots this week !! maybe !! :D:D:D

Update II.....Did more alignment....got the beams combined....see the last three (3) new pics !

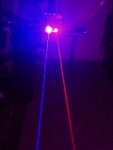
...Pic PH alignment 4 shows the beam-on-beam overlay....a beautiful purple needle ( The camera does not pick up the Purple beam color well....but...look at the reflection scatter off the target area...a nice Purple glow !!! )
!!! The last pic ( PH alignment 6) shows the combined beams...on the Far field target at 25' (7.6M) distant. Both beam geometries are very, very close in size....and although the pic does not show the blue too well....the target beam has some Red wings up and down ( as u can see)....and the Blue beam has some slight horizontal...left/right wings....although these can be seen by eye....the camera did not pick them up !!....and this forms a Red-Blue Cross +
Looks neat !!!

SO...Concept proven.....now....on to the permanent wiring and finishing things up !!! I will hate to see this project end !!!
But the " Cyann Cannon " project awaits.....as does the machining work for the correction optics for the NUBM44 unit....it just never ends !!!!!!!

Note...Terrawatt the Laser dog in Pic4/lower left corner of the pic.....She also loves lasers !!! And...she is a " Coherent Canine " too boot !!!...hahaha
 

Attachments

  • PH alignment 1.jpg
    PH alignment 1.jpg
    180.2 KB · Views: 147
  • Purple Phase V778 C.JPG
    Purple Phase V778 C.JPG
    92 KB · Views: 108
  • PH alignment 3.jpg
    PH alignment 3.jpg
    103.6 KB · Views: 131
  • PH alignment 6.jpg
    PH alignment 6.jpg
    64.1 KB · Views: 132
  • PH alignment 4.jpg
    PH alignment 4.jpg
    75.9 KB · Views: 144
  • PH alignment 5.jpg
    PH alignment 5.jpg
    49.6 KB · Views: 160
Last edited:
Well....Yet another update !!! Optics are a demanding Task Master !!!

I have had to move some components around to compensate for the somewhat wide Near Field width of the Red beam. As this Red beam passes thru the Dichroic Mirror....the beam width is amplified due the fact that the beam is on a diagonal.

So...we have a challenge to fit the full Red beam width on the area available of the Dichroic Mirror. It fits....but with little room to spare !!!

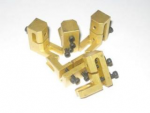
Note new position of the two (2) adjustable mounts...one mount positions the bounce mirror and the other mount positions the Dichroic Mirror.

The mounts are now on a 45 deg angle to the unit centerline.....whereas B4...they were parallel with the unit front.

See the attached new drawing 778 E. I realize these are very small details....but when working with optics....very small details have a major impact on alignment and final performance. :san::san::san:
 

Attachments

  • Purple Phase V778 E.JPG
    Purple Phase V778 E.JPG
    92.1 KB · Views: 106
Last edited:
I didn't expect it to look as link as it does- or is that just the camera? Either way the whole thing is pretty darn neat!

Now if only SOMEONE would finish the cyan cannon...:D
 
set
I didn't expect it to look as link as it does- or is that just the camera? Either way the whole thing is pretty darn neat!

Now if only SOMEONE would finish the cyan cannon...:D

Eeeee....Ahhhh...." link " ???? You likely mean pink....Well....to me....an
" unbiased " self-proclaimed Optical Wizard...:san::san: It does look kinda like a Purple Pink !!!

I suppose... " Purple Pink " is also identified as " Magenta ".....which is a member of the " Purple " family. This color/hue is produced when the Blue driver is at 1.5A. Turning up the Blue driver..to 2A..gives more a ...well....Lavender hue....almost toooo many Photons for the eye to handle....never thought I would say that !!! I have not decided at what level to set the Blue driver.

Mattronium said it would come out "Magenta"....well....he was right...it all depends on what proportion of Red:Blue one set's the drivers at !!!
For now...I really like Magenta !!!...Hmmm...Color perception is likely a dual function of both intensity and hue !!! Look at our single color units...different power outputs do alter the perception of color....maybe that is called " Saturation " ??? Dunno ???

Intensity, Hue, Saturation....all aspects pretty much " Outta my Wheelhouse " !!!!....But.... while these builds are somewhat advanced...for the Hand Held platform.....they are not that difficult.....and they sure are open up the field of possibilities....AND...

Both the pioneering work of FlamingPyro's "White Fusion" and the Multimode's three (3) color unit were leading the pack in this area ...years ago !!!
See http://laserpointerforums.com/f40/rgb-hand-held-laser-77311.html and see
http://laserpointerforums.com/f40/white-fusion-time-machine-s-coming-70898.html

We all just build on each other's addition to our hobby !! And I give complete credit to the above members for inspiration to my work !!

YES....The " Cyan Cannon " will be the next to do !!! Lessons learned on this unit will apply to the Cannon !!!

And....yes....the build is very neat !! Thanx Spaz !!

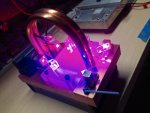
Note: Added most recent CAD render
 

Attachments

  • Purple Phase V778 G.JPG
    Purple Phase V778 G.JPG
    92.4 KB · Views: 92
Last edited:
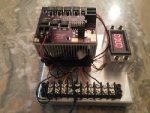
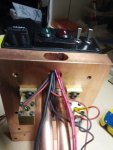
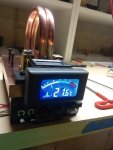
More progress...Wired up the Temp.Meter and the VDC Meter. The temp probe is inserted into the main Copper slab....set between the two (2) LD mounts.
The VDC meter monitor's the LiPo voltage.. Below a certain voltage, the LiPo cells need a recharge.
See the pics. Losta wires !! You bet !! But...at least progress is on-going !!!:thanks::thanks::thanks: for watching !!!
 

Attachments

  • Meter wiring in progress 1.jpg
    Meter wiring in progress 1.jpg
    111.7 KB · Views: 105
  • Temp Meter on line 1.jpg
    Temp Meter on line 1.jpg
    104.6 KB · Views: 109
  • Temp Meter and LiPo VDC on line 2.jpg
    Temp Meter and LiPo VDC on line 2.jpg
    95.5 KB · Views: 85
  • Mounts on board 1.jpg
    Mounts on board 1.jpg
    153.6 KB · Views: 92
  • Purple PHaze as Built Wire Schematic 8 .JPG
    Purple PHaze as Built Wire Schematic 8 .JPG
    43.2 KB · Views: 104
Last edited:
Just a little lesson learned....the hard way. See the attached pic's !! The first time I mounted the 10mm x 20mm special Dichroic mirror.....for some unknown reason....I mounted the 1mm thick mirror to the Brass flexmount ....to the small bevel corner of the Flexmount...see the as labled " NOT Correct". This is how I mounted thew Dichroic mirror....the first time !!!

Perhaps I did this for looks...as to keep the long edge of the mount...parallel to the CU base....Well...there was a little problem.

When you mount the ....very thin....mirror to the bevel edge of the mount....if you look at it....RIGHT below the mirror is where one must tighten down the bolt which attaches the mount to the CU base.

This was a bad plan !! For....one of the times I was adjusting the mount....the Allen Head T-Wrench put just a little pressure on the fragile and thin Dichroic mirror....no surprise...S N A P !!!

Well....If anyone ever uses the Flexmount to mount a Dichroic Mirror....or even just a Front Surface steering mirror.....always.....mount the optic as shown in the upper pic....labled " Correct "

In the " Correct " method....the bolt is now out in front of the optic !!! NOT underneath !!....so....one can get to it....and not damage the optic above when the bolt that secures the mount to the base is tightened down !!!

And... use just a drop of two (2) part clear epoxy to attach the optic to the mount....you really do not need anymore....and more just makes a mess !!!!

Just a few building tips....for handling and mounting the optics. It can be a challenge !!!....but....the use of an adjustable mount....like the Flexmount... is absolutely necessary. The optics must be adjusted in very, very small distances !!! VERY SMALL....perhaps .01mm movement.....for this is what it takes to align the beams........again...NOT perfect....but....within the first thousand feet....things appear perfect !!! :D:D:D:D:D:D:D

Note...Waiting for the replacement 10 x 20 GBR Dichroic Mirror from Stanwax Lasers (located in England ) now.
Note...Optic now ( 7 25 2015) in Chicago....headed to Michigan.
 

Attachments

  • Correct Dihroic Mirror mounting  V2.JPG
    Correct Dihroic Mirror mounting V2.JPG
    43.9 KB · Views: 95
  • Purple Phase V778 I.JPG
    Purple Phase V778 I.JPG
    89 KB · Views: 100
  • Flexmount pic 1.png
    Flexmount pic 1.png
    66.9 KB · Views: 99
Last edited:
  • Like
Reactions: Ash
Thank you, I am about to try mounting to one in a couple of weeks.
 
Thank you, I am about to try mounting to one in a couple of weeks.

You're welcome. I cobbled together a jig to clamp the Brass Flexmount unit . This Jig will hold the Flexmount during the epoxy attachment process.

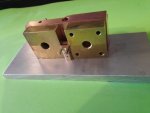
Basically, turn the Flexmount up side down....and....place it on an Aluminum plate....with a backstop (Copper bar) so the mount is setting with the feet up and pointed away from the backstop.

Then...take any stock. ( Brass blocks in this case)..and place a piece on the left....and on the right.....so now....the mount is boxed in on three (3) sides. Epoxy all pieces together to make the jig.

This method captures the mount ...but allows an optic to be epoxied to the remaining exposed face.

See pic of the Jig. This method will deliver a proper alignment between the mount and the dichro mirror/bounce mirror/ or PBS Cube.

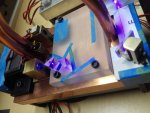
Also see pic of Anamorphic Prism positioning/alignment. Yes....simple thin strips of tape serve to temporarily mark the optics approx. best positions. The epoxy procedure is done...live. This means the 445 LD is set at the lowest power level and still be able to see the beam strike an Acrylic target block.

A small amount of epoxy is applied, and the optic placed. While the epoxy is setting ( 5min cure time)....final alignment is done. This procedure gets the beam line close. The final adjustment of the Flexmount/bounce mirror sets the optimal beam pitch and yaw.

Just some little details that may help someone to tackle the Combiner Class assembly !! I believe it is the practical tips that should illustrate the way to put all these components together. If I can show the way I do it...possible others may follow....and or find a better way !!

Oh...and just received my GBR Dichroic mirror....Thank you Rob from Stanwax !!! :thanks::thanks:

The show is back on da road.
 

Attachments

  • Flexmount Epoxy Jig.jpg
    Flexmount Epoxy Jig.jpg
    146.3 KB · Views: 99
  • Anmorphic positioning and epoxy task.jpg
    Anmorphic positioning and epoxy task.jpg
    208.9 KB · Views: 104
Last edited:
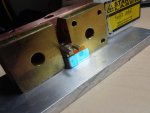
Update: GBR Dichro mounted to Flexmount , See pic.

Small steps....small steps !:san::san::san:

Jig works good. This build sure is taking time !!

Hope you enjoy the protracted unfolding !! But...the build is a learning experience. Problems have arisen....and technical work-arounds have been employed. Almost all builds proceede in this fashion...Ya gotta break a few eggs....to make an omelet. !!

The concept is proven....the beam looks great....now.....just to stuff it all in da box !!! :o:o:o
 

Attachments

  • Dichro Mirror RGB 10 x 20mm.jpg
    Dichro Mirror RGB 10 x 20mm.jpg
    191.6 KB · Views: 113
Last edited:
And the build saga goes on...and on......and on !

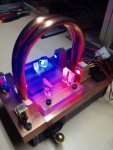
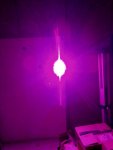
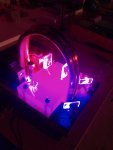
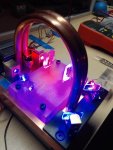
See the attached pics for some good Purple Glow !

I am also using this thread as a primer on some assemble details for optics.
Perhaps they will be of use to some members !

The Combiner Class build's rely on optics. Optics demand mechanical mounting and the capacity to be brought into alignment.

Some may be put off by this task. Do not be ! While it requires patience and accuracy...it is relatively easy to do. You may have to hack together a jig. No big deal. Masking tape is also a wonderful thing !!! I use it alot !

To this end;

1) Use epoxy as little as possible when attaching optics to their mount (Flexmount, Newport MM1, ect).

2) When attaching a FS mirror or Dichro mirror, attach to the surface opposite the bolt adjustments on a Flexmount unit.

3) When attaching the Dichro mirror, shift the Mirror full to one side as to make available the most area for the beam to pass thru. Remember, on a diagonal,(where the beam hits the Dichro at a 45 degree angle) the wider beam of the P73 or 63193 LD is spread out. You will need to have the max. surface area of the dichro exposed for a wider beam to fit on it.

4) Maybe build a Jig to help with optics positioning/alignment during the epoxy attachment process, especially for the FS and Dichro mirror.

5) Take your time and Be organized !!!

6) On the FS mirror...the silvered side ( the front surface) is where the beam should strike.

7) On the Dichro Mirror, the coated side is where the reflected beam should strike.

8) Flexmount units have a total of four (4) very small , metric bolts on the back side. These bolts are divided into two (2) sets...an upper set and a lower set. The lower set are used to adjust the mount yaw ( movement left ~ right ). The upper set are used to adjust the mount pitch ( movement up ~ down). It is a simple and elegant design which is used to achieve very, very small movements of the optics attached to it.

Just a few tips that I have figured out over time ! Perhaps other's will add to this list !!

Anyway...Enjoy !! Building is Great fun....and has some unknown's...and some challenges !!! But, The end result will be something you can take great pride in !!
 

Attachments

  • Purple pHaze Purple Glow 1.jpg
    Purple pHaze Purple Glow 1.jpg
    91.5 KB · Views: 104
  • Purple pHaze Purple Glow 2.jpg
    Purple pHaze Purple Glow 2.jpg
    135.5 KB · Views: 103
Last edited:


Back
Top