Welcome to Laser Pointer Forums - discuss green laser pointers, blue laser pointers, and all types of lasers

Buy Site Supporter Role (remove some ads) | LPF Donations

Links below open in new window

FrozenGate by Avery

Laser build questions

q3434

0
Joined
Jul 14, 2016
Messages
7
Points
0
Hey I'm looking at this post (link) and I want to use it as a guide to build my own laser. I'm trying to make sure I've covered all of the items I'll need.

- A140 1.5W, 445nm, 5.6mm diameter diode from ABarnett (link)
- Bargain No-Diode Host Bundle from Survival Laser USA (link)
- 12mm Diode Module & Focusing Ring for 5.6mm Diodes from Survival Laser USA (link)
- 445nm AR Coated Standard Glass Lens Assembly from Survival Laser USA (link)

Are these all the items I'll need for my laser aside from batteries, charger, and goggles?

Also, regarding the host bundle, I read that a 1.25A driver is good for 1W of power. If I wanted to get the full potential out of my 1.5W diode, should I go with a 1.5A or 1.8A driver instead? Would I need the standard aluminum driver pill or would I need a drilled one?

Thanks so much for any advice you can give. These parts would cost about $50, and the similar spec Survival Laser 1.4 445nm Laser is about $100, so I could save a good deal it looks like.

- Russ :beer:

1.25 would probably keep your diode alive longer, and anything greater than 1.8A would cause the diode to thermal runaway.

On my A140 build in the LED Flashlight host, I am running at 1.25A but I have no LPM so I can only estimate right at/over 1W output.


In my opinion, you should ask ABarnett about his M140 diode, i believe they are the same price as the A140 and with a 1.8A X-Drive can make 2w+ output!
 
Last edited:
Hey I'm looking at this post (link) and I want to use it as a guide to build my own laser. I'm trying to make sure I've covered all of the items I'll need.

- A140 1.5W, 445nm, 5.6mm diameter diode from ABarnett (link)
- Bargain No-Diode Host Bundle from Survival Laser USA (link)
- 12mm Diode Module & Focusing Ring for 5.6mm Diodes from Survival Laser USA (link)
- 445nm AR Coated Standard Glass Lens Assembly from Survival Laser USA (link)

Are these all the items I'll need for my laser aside from batteries, charger, and goggles?

Also, regarding the host bundle, I read that a 1.25A driver is good for 1W of power. If I wanted to get the full potential out of my 1.5W diode, should I go with a 1.5A or 1.8A driver instead? Would I need the standard aluminum driver pill or would I need a drilled one?

Thanks so much for any advice you can give. These parts would cost about $50, and the similar spec Survival Laser 1.4 445nm Laser is about $100, so I could save a good deal it looks like.

- Russ :beer:

Just a comment on this. I've never bought from Survival Laser so I couldn't tell from the pics what you need.

In general, you need the diode, housing, heatsink, driver, lens, host, batteries. All need to fit together properly. Usually a full aixiz housing is used

If you are trying to save money, it probably won't happen on the first couple you do. Problems come up and you make mistakes that cost more than buying pre-built

However, after you have built a few and know what works you will, plus its nice to be able to say you built it :)

Personally, I've bought some and built some. I prefer the ones I've built, but experience is expensive!
 
  • Like
Reactions: GSS
Thanks for the feedback. I decided that I'm gonna go with the M140 because it's just a few more bucks. ABarnett suggested going with a higher current than 1.5A, so it sounds like the best thing is to go with a 1.8A driver. What do you think? Will that high of a current degrade the diode quickly?

Now I just need to figure out if I need a drilled aluminum driver pill, whatever that means. I'll be doing more research, but any pointers are welcome.

Maybe, just maybe, I can nail this $50 1.5-2W laser on the first try. Fingers crossed
 
Last edited:
Thanks for the feedback. I decided that I'm gonna go with the M140 because it's just a few more bucks. ABarnett suggested going with a higher current than 1.5A, so it sounds like the best thing is to go with a 1.8A driver. What do you think? Will that high of a current degrade the diode quickly?

Now I just need to figure out if I need a drilled aluminum driver pill, whatever that means. I'll be doing more research, but any pointers are welcome.

Maybe, just maybe, I can nail this $50 1.5-2W laser on the first try. Fingers crossed

AFAIK you don't need the drilled driver pill, as the regular driver pill works but you do solder the driver to a brass ring with that particular kit (i think anyway...) You can run the M140 @ 1.8A output safely and get 2W+ but if you wish to be "safe" and run @ 1.5A that is fine as well.

http://laserpointerforums.com/f51/installing-testing-sl-sd-1-dx-26110-driver-c6-pill-86327.html

Also, I know 50$ sounds good, but you should also consider a upgraded copper heatsink for that host and power output (add 14-16$) although not required it may increase the duty cycle a bit. I have read other guys on here saying their M140s are getting quite warm in 30-60 seconds in the S4 host.

Although it's only speculation; I'd say the extended and tapered copper heatsink would perform better than the stock aluminum one at that power output.
 
I've had a really great discussion with forum member Philipd7 (link), who has been a tremendous help. I asked him if we could move our discussion to this thread so others may have the benefit of his experience.

If his comments helped you in any way, please add to his reputation!

Here is our previous discussion:

Philipd7 said:
Hey, congrats on your build idea!
All of those parts you linked are great, I use them when I build these C6 builds all the time.

Also, I am assuming you can solder because you will need to make 5 total connections. Remember to put a glob of solder on the bottom of the pill like in this video: (at 1:35)
https://www.youtube.com/watch?v=BYuvHFiyfoQ
Please remember to put leads on the diode pins instead of just connecting the driver leads to the pins directly. I do this just to be safe.
Another thing to remember is to be careful screwing the host together once everything is connected. It is easy to pull the diode pins out by twisting the wires.

About the pill, you don't need it drilled out. there are 2 holes in the pill for each lead already. Drilling it out is for using different drivers that don't fit or using a driver heatsink.
BTW, you're gonna need to use plyers to get the driver and ring into the pill. (or at least I needed them).

For the driver, you can refer to this link to see what current puts out what power:
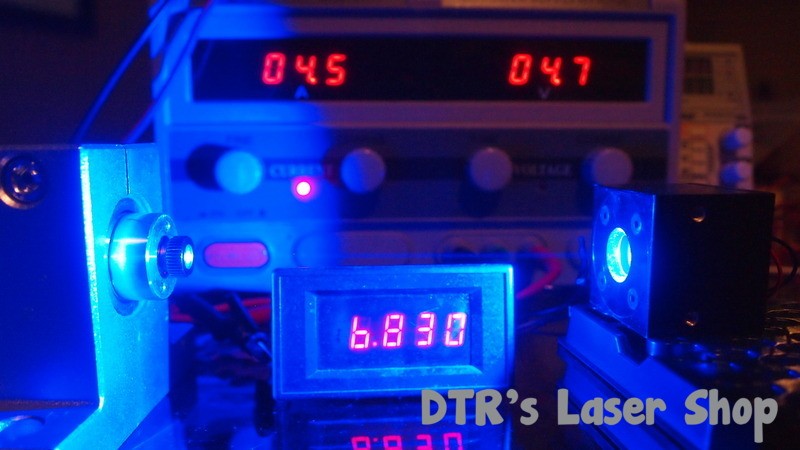
https://sites.google.com/site/dtrlpf/home/diodes/445nm-h1650-diodes
It looks like 1.5A will put out about 1.4watts to 1.5 watts with the lens you chose.
1.8A will put out about 1.6 watts to 1.7 watts. This is a decision you have to make.
Keep in mind a higher current will shorten the life of the diode. But tbh, it dosent matter with this diode because they are dirt cheap. Also, don't get the impression that it's only going to live a month or so. My laser at 1.8A is still running well since December 2015, so dont be scared to go for that higher current.

Also, use the discount code LPF445 at survival lasers. I think it is 10% off, but im not sure... it might be 15%.

Also, for an extra $12, you can get a much longer duty cycle with the copper heatsink. I have the normal aluminum one, and it lasts about 1 min and 15 sec to 1 min and 30 sec depending on the temperature outside.

Use 2 batteries (16340s), and positive end in first.

Another big thing you can't forget is to cover the solder connections in heatshrink or electrical tape.

My review for the m140s in c6 hosts might help:yh:
http://laserpointerforums.com/f52/1-5-watt-445nm-c6-build-96840.html

I hope I helped! Just remember, you can always build a laser yourself for less than it costs to buy one. :beer:


q3434 said:
Wow, thanks a ton for this great info! Yep I can solder alright, and I know to be careful to not let the diode turn when I screw it all together. As for the driver leads, I'm thinking about what gauge I can use (better too thick than too thin). I saw those pictures of the different currents, but it didn't click in my mind at the time. Now I think I get it.

What makes the laser only last a minute and a half? Does it get too hot to hold, or is there some circuitry that shuts off the laser?


Philipd7 said:
About the time you can use it, its called a duty cycle and it is how long you can operate a laser consistently before it gets too hot. If it is too hot to hold, you are REALLY beating up that diode lol. So, I stick to 90 seconds so the diode lives longer. Copper heatsinks transfer heat better because they are a better conductor, therefore making your duty cycle longer. Also, the bigger the heatsink, the better the heat transfer, so the longer you can operate the laser before it gets too hot.
For example, I am building a 7 watt laser. This laser diode puts out a TON of power, so it heats up really fast. So, I have to build it in a host that has a HUGE heatsink. (Maglite to be specific).

I have some copper wire thats really stiff, so when the wires bent to put it into the host, it resisted the bend, which resulted in the wire popping off the pin. So, from here out, I use the same wire that DTR uses, which is flexible, but not too thin. I believe it is the same wire that Flamin Pyro sells:
http://laserpointerforums.com/f64/b...sulated-wire-heatshrink-62137.html#post882526

About the pictures on DTR's site, he puts them on there so you can see what current makes the diode put out what power (in watts).
For example, say I want to do a NUBM44 build. I check his tests of the NUBM44 to see what to run the diode at.
https://sites.google.com/site/dtrlpf/home/diodes/6w-nubm44-445nm-laser-diode
Say I want to have a power of around 7 watts. I would look at the picture that shows 7 watts, (the closest is 6.8 on his tests).
b2d0Cx.jpg

Then, I look at how many amps are used in the picture.
The amps are on the top left in red.
It says 4.5 amps.
Now I know that if I use a driver that is set to 4.5 amps, my laser should put out about 6.8 watts.

Keep in mind he uses a G2 lens. so, If I wanted the same power he had, I would need to use the same lens. What im getting at is that if u use a 3 element lens, there is a drop in the power because it goes through 3 lenses. In a G2 lens, there is 1 (I think) lens that the beam goes through, resulting in less power loss. So, if you are using DTR's images to decide what current to use, just remember that the power with a 3 element lens will be about 30% less than a G2.

Wow, thats a lot of info:D I hope im not boring you.

I hope this makes sense:wave:
I hope this helps too:)
 
Last edited:
Hi Q,
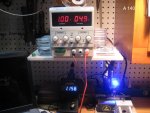
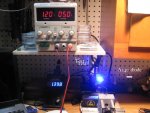
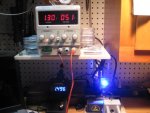
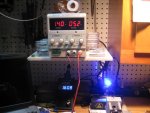
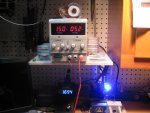
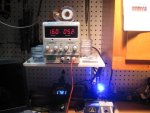
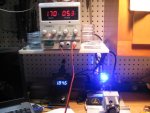
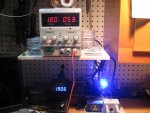
in order to clarify about the A140's from Mr. barnett the only thing that i have to say is that they are awesome diodes. For a driver setting here are some pics of a test i did with his diodes nothing but outstanding . Oh buy the way i purchased many and i am very satisfied..So there you have it A140's from 1A to 1.8A's

Rich:)
 

Attachments

  • IMG_1900.JPG
    IMG_1900.JPG
    170.3 KB · Views: 51
  • IMG_1901.JPG
    IMG_1901.JPG
    173.1 KB · Views: 53
  • IMG_1902.JPG
    IMG_1902.JPG
    162.3 KB · Views: 50
  • IMG_1903.JPG
    IMG_1903.JPG
    169.1 KB · Views: 54
  • IMG_1904.JPG
    IMG_1904.JPG
    165 KB · Views: 50
  • IMG_1905.JPG
    IMG_1905.JPG
    171.1 KB · Views: 43
  • IMG_1906.JPG
    IMG_1906.JPG
    173.6 KB · Views: 51
  • IMG_1907.JPG
    IMG_1907.JPG
    177.3 KB · Views: 47
Last edited:


Back
Top