Welcome to Laser Pointer Forums - discuss green laser pointers, blue laser pointers, and all types of lasers

LPF Donation via Stripe | LPF Donation - Other Methods

Links below open in new window

ArcticMyst Security by Avery

Tutorial - How to clean & 'varnish' a Copper Host for a permanent beautiful finish.

Joined
Apr 6, 2014
Messages
2,436
Points
113
Tutorial - How to clean & 'varnish' a Copper Host for a permanent beautiful finish.

Here's a step by step tut on cleaning and varnishing copper hosts for a beautiful permanent shiny finish.

You'll need:

  • White Vinegar
  • Table Salt - two table spoons full
  • Baking Powder - two table spoons full
  • Two glass bowls
  • Luke warm water
  • Clear Gloss or PCB Lacquer in a can
I started off with the Copper Hosts a little tarnished (they weren't too bad).

IMG_4676.JPG


Next add two heaped table spoons of table salt into a bowl deep enough for the hosts to sit in. (I used Kirkland's pink Himalayan Salt from Costco, yes we have Costco here too :yh:).

IMG_4678.JPG


Add the vinegar to the bowl making sure there's enough to fully submerse and cover the hosts.
Stir the vinegar and salt well till it dissolves properly.
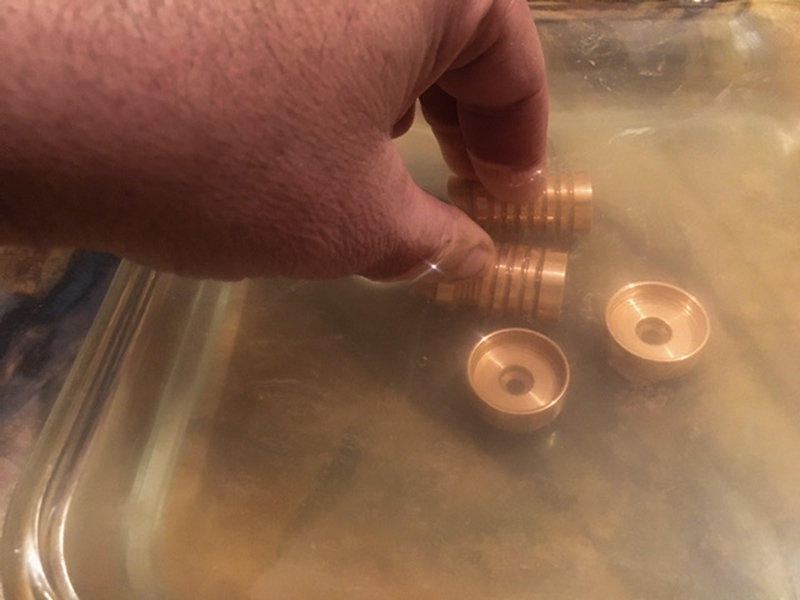
Then place your hosts in the solution.

IMG_4691.JPG


Keep stirring and agitating to solution, rotating the hosts every so often to get an even exposure on all surfaces of the hosts.

IMG_4692.JPG


Leave the hosts in the solution for a period of between 5 to 15 minutes depending on how much tarnish there's on the copper.
I left mine in there for 10 minutes.

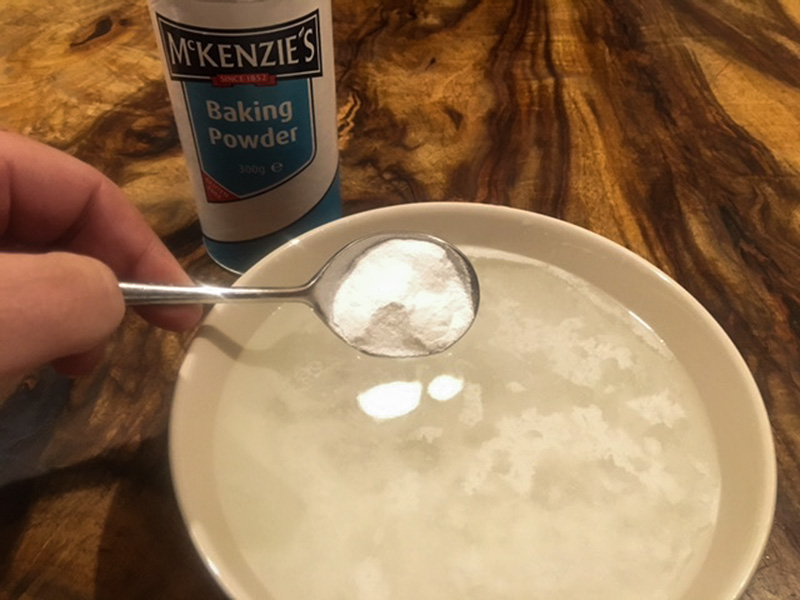
While the hosts are in the vinegar solution, prepare the baking power solution in another bowl.
The baking powder solution is used to stop the acidic reaction on the copper once you take out the hosts from the vinegar solution.
Add two heaped table spoons of baking powder into some luke warm water in a separate bowl and mix thoroughly.

IMG_4693.JPG


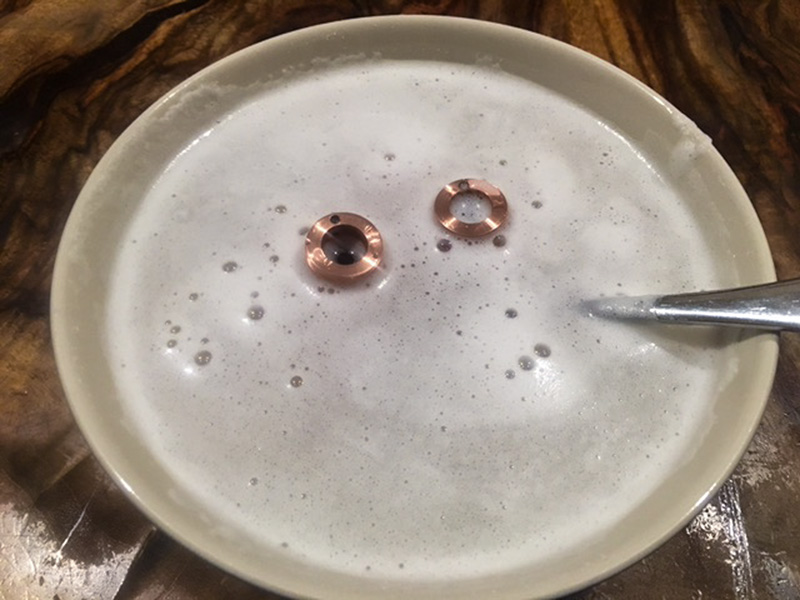
Take out the hosts from the vinegar solution once the time expires and quickly rinse off in cold running water then place them directly into the prepared baking powder solution and leave in there for 2 minutes.

IMG_4694.JPG


Once that's done rinse off the hosts once again under running water and thoroughly dry the hosts.

The result is a nice new shiny host ready for varnishing, a big difference from the start.

IMG_4696.JPG


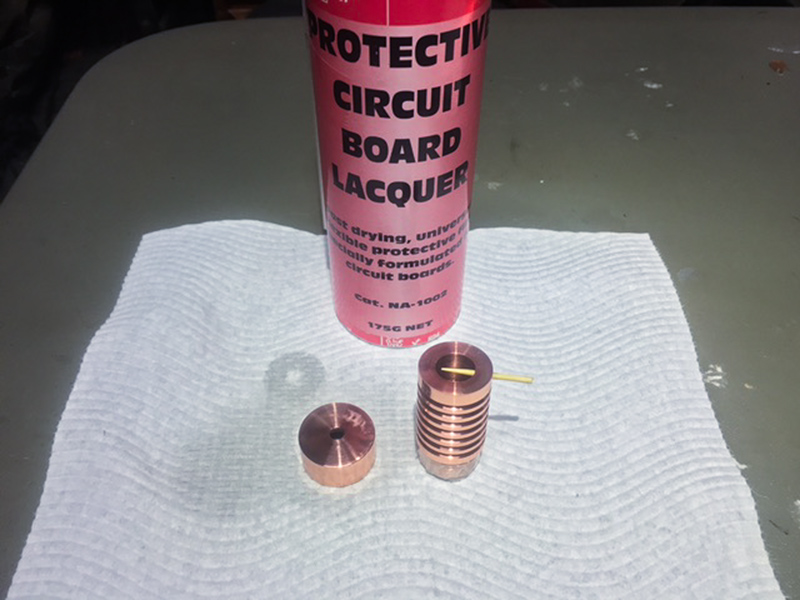
Now prepare your hosts for varnishing.
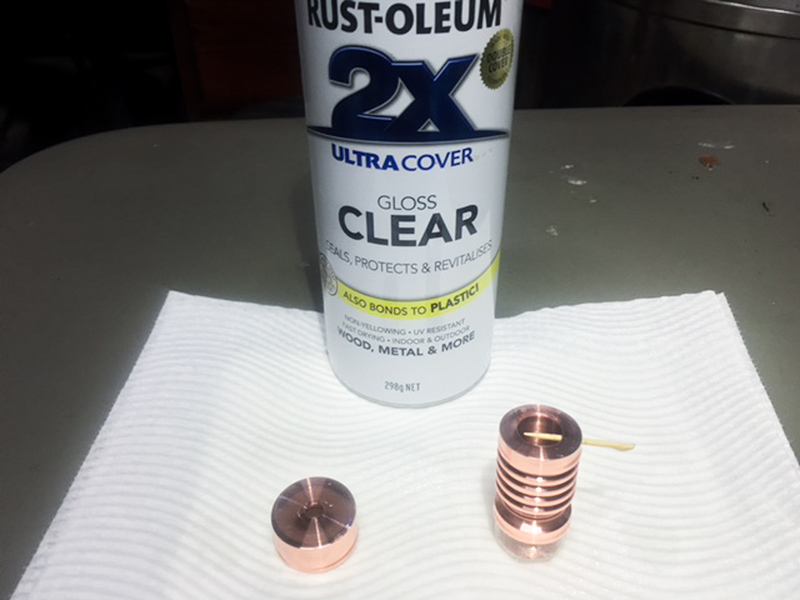
I taped the threads so that I don't get any varnish on them.
Also I place toothpicks in the grommet holes to stop any varnish entering in and to make it easier to handle the hosts once they're varnished.

IMG_4706.JPG


Now I wanted to try both the Rust-olium Clear Gloss (thanks for the heads-up on this one Billy - badboybilly) and the PCB Lacquer to see which one works best.
I used the Rust-olium on the 'Deep Groved' Copper host from Rich and the PCB Lacquer on the 'Even Grooved' Copper host again from Rich.

IMG_4713.JPG


IMG_4711.JPG


I found that both gave excellent results.
The only difference was that the PCB Lacquer dried in half the time, around 10 minutes compared to the Rust-olium which took 20 minutes.
I left them to dry overnight.
The results were identical in the end so it's up to you to choose which one you'd prefer to use.

And finally, the result, ready to build.

Stunning !!

IMG_4715.JPG


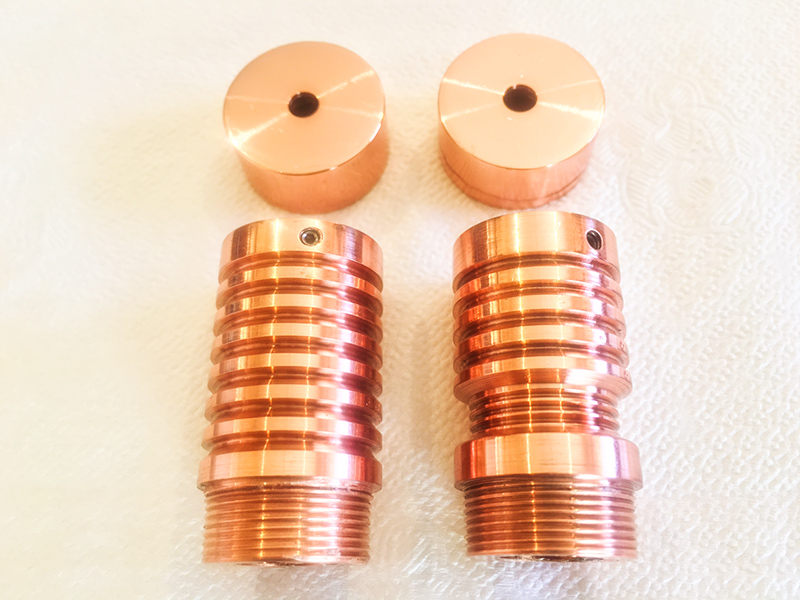
Hope you enjoyed and found this tutorial helpful.

RB

:beer:


Joined
Dec 11, 2015
Messages
1,628
Points
113
Re: Tutorial - How to clean & 'varnish' a Copper Host for a permanent beautiful finis

Very nice Andrew, definitely going to try this some time. Did you just do one coat of the lacquer? Was the coating light or heavy?
 

Benm

0
Joined
Aug 16, 2007
Messages
7,896
Points
113
Re: Tutorial - How to clean & 'varnish' a Copper Host for a permanent beautiful finis

This looks very nice indeed!

One thing on my mind though is 'why'?

For cooling perfornace it makes things worse - the varnish is an insulating layer, albeit very thin, while the natural oxidation on copper is a good thermal emitter and very very thin.

A better suitable alternative would be an alloy like nordic gold, which is about 89% copper, 5% aluminium, 5% zinc and 1% tin or so. This is the gold-colored metal used in euro coins (10/20/50 cents, and part of 1 and 2 euro coins), though i'm not sure how well available it is as machine stock. It certainly is not an expensive alloy considering the metals used to make it.

It's nice stuff that doesn't tarnish much, and if it does can be quite easily shined with just a piece of cloth.
 
Joined
Apr 6, 2014
Messages
2,436
Points
113
Re: Tutorial - How to clean & 'varnish' a Copper Host for a permanent beautiful finis

Very nice Andrew, definitely going to try this some time. Did you just do one coat of the lacquer? Was the coating light or heavy?
Thanks EP, yep, just one coat but it was medium cover.
Not light but not too much that it dripped, if that makes sense.
I just made sure I hit the whole host evenly from all side in one continuous pass.

RB

This looks very nice indeed!

One thing on my mind though is 'why'?

For cooling perfornace it makes things worse - the varnish is an insulating layer, albeit very thin, while the natural oxidation on copper is a good thermal emitter and very very thin.

A better suitable alternative would be an alloy like nordic gold, which is about 89% copper, 5% aluminium, 5% zinc and 1% tin or so. This is the gold-colored metal used in euro coins (10/20/50 cents, and part of 1 and 2 euro coins), though i'm not sure how well available it is as machine stock. It certainly is not an expensive alloy considering the metals used to make it.

It's nice stuff that doesn't tarnish much, and if it does can be quite easily shined with just a piece of cloth.
The 'why' is purly for asthetic purposes.
Also for these hosts, the duty cycle is already limited so it wont make a difference, you don't run them for more than 30 sec at a time so the varnish won't make a difference.
Also one of these is to host the new N505nm 35mW so no problem there.
The other will be for the beautiful N465nm 4w so already the duty cycle will be low and the varnish won't affect it, common sense will need to be used not to overrun on the Duty Cycle on that one.

I've already got the NUBM07E 465nm in another unvarnished unit so I'll compare them for you whence finished.

Also, I find just spraying a varnish from a can easier, quicker and cheaper than chasing nordic gold from someone willing to produce it for me.
Copper also shines up nicely with a Jewellers' cloth, I use it all the time on my other builds.

:)
 
Last edited:
Joined
May 30, 2016
Messages
964
Points
0
Re: Tutorial - How to clean & 'varnish' a Copper Host for a permanent beautiful finis

Sticky this please.
Also interested in enamel as another alternative.
 

Benm

0
Joined
Aug 16, 2007
Messages
7,896
Points
113
Re: Tutorial - How to clean & 'varnish' a Copper Host for a permanent beautiful finis

The 'why' is purly for asthetic purposes.

Okay, no problem with that ;)

I suppose there is a market out there for people that fancy nice looking lasers.

When it comes to hihger powered lasers i have my objections to limited duty cycles though. In my opinion a welll built laser can operate 24/7 unless there is a specific application that procludes it for good reasons.
 

Encap

0
Joined
May 14, 2011
Messages
6,110
Points
113
Re: Tutorial - How to clean & 'varnish' a Copper Host for a permanent beautiful finis

Sticky this please.
Also interested in enamel as another alternative.

The Rust-oleum 2X ultra cover gloss clear, is enamel.

Rust-oleum makes few colors and a clear gloss speciality lacquer spray but it says "Lacquer" boldy on the can.
 

BobMc

0
Joined
Apr 23, 2016
Messages
3,685
Points
113
Re: Tutorial - How to clean & 'varnish' a Copper Host for a permanent beautiful finis

Man those turned out real shiny. :gj:
Nice step by step. :thanks:
 
Joined
Apr 6, 2014
Messages
2,436
Points
113
Re: Tutorial - How to clean & 'varnish' a Copper Host for a permanent beautiful finis

Sticky this please.
Thank you dden. :beer:

The Rust-oleum 2X ultra cover gloss clear, is enamel.

Rust-oleum makes few colors and a clear gloss speciality lacquer spray but it says "Lacquer" boldy on the can.
Yes, the can I used didn't mention enamel on it but it does say "Clean Up using Mineral Turpentine".

Man those turned out real shiny. :gj:
Cheers Bob.
I plan on using Eagle Pair OD5 when the lasers are on and OD6+ when they're off. :crackup:

RB
 
Joined
Sep 20, 2013
Messages
17,252
Points
113
Re: Tutorial - How to clean & 'varnish' a Copper Host for a permanent beautiful finis

That was very good, Andrew. I personally don't use the baking soda, but the reduction reaction from dilute acetic acid isn't that vigorous and can be stopped by just removing the acid. I doubt that the insulation by a thin coat of clear coat will have a disproportionate effect on the copper's ability to wick heat into the air. You will probably come to this conclusion once you've built with them. I personally love not having to polish my copper hosts all the time. Thanks for sharing this with us. :)
 
Joined
Mar 5, 2015
Messages
1,336
Points
113
Re: Tutorial - How to clean & 'varnish' a Copper Host for a permanent beautiful finis

Awesome man, thanks for taking the time to do this, they came out very nice and shinny, I might start doing more copper builds know, Thanks Andrew!
 

BobMc

0
Joined
Apr 23, 2016
Messages
3,685
Points
113
Re: Tutorial - How to clean & 'varnish' a Copper Host for a permanent beautiful finis

Cheers Bob.
I plan on using Eagle Pair OD5 when the lasers are on and OD6+ when they're off. :crackup:

RB

Too funny, thanks for the morning chuckle. :crackup:
 

GSS

0
Joined
Apr 28, 2015
Messages
5,053
Points
113
Re: Tutorial - How to clean & 'varnish' a Copper Host for a permanent beautiful finis

Kinda glad I can't post pic's:whistle: RB the one you gave me, well lets just say it has more finger prints on it than the files at the FBI:shhh:
I have the vinegar, salt and a can off ACE clear gloss handy..Its enamel though but still going to try it:)
 
Joined
Apr 6, 2014
Messages
2,436
Points
113
Re: Tutorial - How to clean & 'varnish' a Copper Host for a permanent beautiful finis

Kinda glad I can't post pic's:whistle: RB the one you gave me, well lets just say it has more finger prints on it than the files at the FBI:shhh:
I have the vinegar, salt and a can off ACE clear gloss handy..Its enamel though but still going to try it:)
I'm disappointed Pete.
I wish I knew of all this when I first built your one (and mine), I would've done it first on those hosts but I didn't know this technique.
It was Paul and Billy that gave me the heads-up recently so now I'll be doing it with all of them.

Awesome man, thanks for taking the time to do this, they came out very nice and shinny, I might start doing more copper builds know, Thanks Andrew!
You should start doing more copper builds Billy, it would be awesome to see what you would create mate.

I doubt that the insulation by a thin coat of clear coat will have a disproportionate effect on the copper's ability to wick heat into the air. You will probably come to this conclusion once you've built with them. I personally love not having to polish my copper hosts all the time. Thanks for sharing this with us. :)
Agreed Paul, I know a thin coat of varnish won't affect the sink capabilities of these hosts, it's just too thin to make a significant difference.
You can barely discern that it's even on there and as I said you wouldn't run these on a high duty cycle anyway, the hosts are 'tiny'.
I'm looking forward to not having to polish up my other hosts either from now on (see below).

When I first joined LPF back in 2014, I managed to snag a couple of Copper builds from Blord.
They look and feel so beautiful and probably a collector's item of sorts by now.
The one on the left is the Copper Cypreus II 200mw 638nm (unlimited duty cycle) and the one on the right is the Copper Cypreus II 3w 445nm.
As you can see they are tarnished quite badly so now I think I'll revitalise these ones and give them the treatment too.
Stay tuned.

RB

IMG_4719.JPG
 

BowtieGuy

0
LPF Site Supporter
Joined
Oct 14, 2012
Messages
6,090
Points
113
Re: Tutorial - How to clean & 'varnish' a Copper Host for a permanent beautiful finis

Thanks EP, yep, just one coat but it was medium cover.
Not light but not too much that it dripped, if that makes sense.
I just made sure I hit the whole host evenly from all side in one continuous pass.

RB


The 'why' is purly for asthetic purposes.
Also for these hosts, the duty cycle is already limited so it wont make a difference, you don't run them for more than 30 sec at a time so the varnish won't make a difference.
Also one of these is to host the new N505nm 35mW so no problem there.
The other will be for the beautiful N465nm 4w so already the duty cycle will be low and the varnish won't affect it, common sense will need to be used not to overrun on the Duty Cycle on that one.

I've already got the NUBM07E 465nm in another unvarnished unit so I'll compare them for you whence finished.

Also, I find just spraying a varnish from a can easier, quicker and cheaper than chasing nordic gold from someone willing to produce it for me.
Copper also shines up nicely with a Jewellers' cloth, I use it all the time on my other builds.

:)


Nice work RB, these babies will look good for a long time. :yh:
I've been clear coating my copper heatsinks for years, and my first one from 2012 still looks just like it was just made!

Another thing to note, is that unlike these beauties you have here, many copper heatsinks are only partially visible on a completed build, so a protective coat of clear on only the visible portion still allows direct contact between the heatsink and host, or heatsink to air.
:gj:
 
Joined
Jan 29, 2014
Messages
12,031
Points
113
Re: Tutorial - How to clean & 'varnish' a Copper Host for a permanent beautiful finis

RB Astro! Damn it to hell! I've been trying to snag one of those copper hosts too but the price was too high for my cheap back side. You and I love quality, I see that.


Top