Welcome to Laser Pointer Forums - discuss green laser pointers, blue laser pointers, and all types of lasers

LPF Donation via Stripe | LPF Donation - Other Methods

Links below open in new window

ArcticMyst Security by Avery

What's the best method for soldering onto solid copper heatsink?

Joined
Apr 6, 2014
Messages
2,436
Points
113
Need your advice guys.
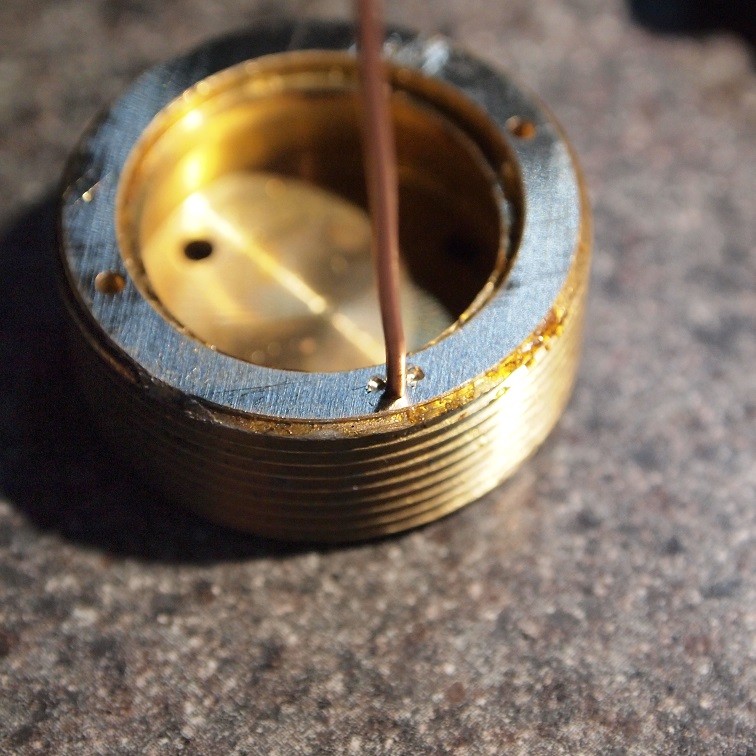
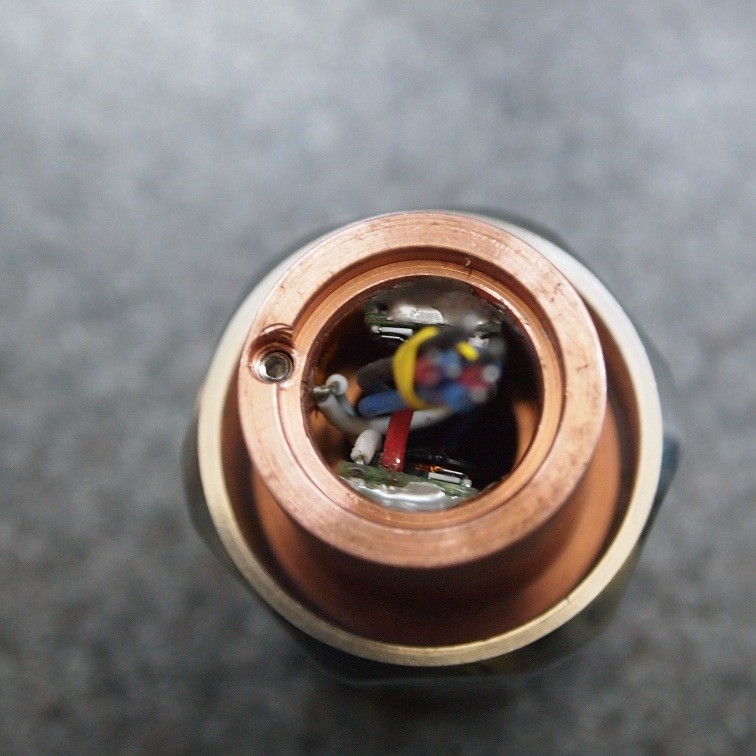
I need to resolder the driver "ground" back onto the solid copper heatsink.

I bought the unit and it worked but I keep having to resolder the driver onto the copper heatsink for good 'ground' contact.

It seems the solder doesn't stick well to the solid copper.

I'm scared to apply too much heat and solder to it in case I do damage.
I plan to give the copper heatsink a good clean and apply some cleaning 'flux' before I attempt to re-solder it again.

Is it safe to use a high grade solder containing 96% tin, 4% silver?
This requires high heat, so worried it will do damage to the components.

Any help appreciated.
Andrew

:confused:


Joined
Aug 16, 2013
Messages
971
Points
43
A few have tried this including myself and it doesn't work well. The copper simply absorbs too much heat and quenches the solder before it melts. Try threading a screw in somewhere to clamp down on your ground lead.

What copper heat sink do you have? Tell me about the laser.
 
Last edited:
Joined
Feb 28, 2009
Messages
1,384
Points
0
You can try lightly sanding the area but you are going to have to get a copper very hot to make it stick. Another thing you can do if you have the room is to drill a small hole where you can stick the wire in and then push something into the hole with the wire like a Toothpick and brake it off even with the hole so the wire makes good contact.
 

rhd

0
Joined
Dec 7, 2010
Messages
8,475
Points
0
There's an easy solution.

Put the heatsink on your stove burner. Get it really hot first. Then solder.

Works for copper heatsinks, but not aluminum (you need special solder for that)
 
Joined
Apr 6, 2014
Messages
2,436
Points
113
A few have tried this including myself and it doesn't work well. The copper simply absorbs too much heat and quenches the solder before it melts. Try threading a screw in somewhere to clamp down on your ground lead.

What copper heat sink do you have? Tell me about the laser.
Thanks D.W.U.
It's the Rick Trent copper heat sink.
Beautiful hunk of copper but it does it's job too well and hard to solder.

You can try lightly sanding the area but you are going to have to get a copper very hot to make it stick. Another thing you can do if you have the room is to drill a small hole where you can stick the wire in and then push something into the hole with the wire like a Toothpick and brake it off even with the hole so the wire makes good contact.
Thanks E.
Yes a great idea about the small hole, I'll have a think.

There's an easy solution.

Put the heatsink on your stove burner. Get it really hot first. Then solder.

Works for copper heatsinks, but not aluminum (you need special solder for that)
Hi rhd,
Wife won't be too happy I'm cooking copper on her stove. :crackup:
Thanks I may have to do that if all else fails, I'll do it on a portable stove burner.

:wave:
Many thanks, I'll keep you updated.

Andrew
 
Joined
May 4, 2009
Messages
5,443
Points
113
As the others said you will have to get it really hot before you can solder to it, here is what I do in cases like that it works for aluminum brass or copper heat sinks.

Drill a small hole in the heat sink only a few thousands bigger than a piece of solid copper wire something in the 22 gauge range so you'll need a small drill bit.

Cut the solid conductor to an appropriate length for your build then you solder a piece of stranded wire to one one of the solid conductor and stick the other end in the hole
you have drilled into your heat sink then get a small center punch and dimple the heat sink above or beside the wire till it grabs the wire, now you have a good ground, then
hook the stranded wire to your driver.

See the wire and the dimples made by the center punch.


An other way would be to drill and tap a hole and at the bottom of that hole you drill a cross hole to put the
ground wire into then a set screw can screw down on the ground wire.


Hope this helps please let me know how it works out for you :)
 
Last edited:
Joined
Apr 6, 2014
Messages
2,436
Points
113
...
Drill a small hole in the heat sink only a few thousands bigger than a piece of solid copper wire.
...
Cut the solid conductor to an appropriate length for your build then you solder a piece of stranded wire to one one of the solid conductor and stick the other end in the hole.
...
then get a small center punch and dimple the heat sink above or beside the wire till it grabs the wire, now you have a good ground.

Hope this helps please let me know how it works out for you :)
Excellent, more great ideas.
Thanks Mr Pyro King!

I will see things go.

:wave:
 
Joined
Aug 14, 2013
Messages
2,655
Points
63
Press out the diode, remove the driver, and
use a torch as though you were soldering a
pipe. Flux will be absolutely necessary.
Surface prep is just as important. The
copper must be shiny and clean.
 
Joined
Apr 6, 2014
Messages
2,436
Points
113
Thanks for all your replies, that's why I love this place.
ATM I have cleaned the copper, fluxed it and resoldered the area.
There's no space to do any mods because the thread is right on the edge of the copper which screws into the host.
I'll see if I can post some pics.
Seems to be holding atm, I'll keep you updated.

Would a conductive epoxy/glue work for the application?
I thought of using conductive epoxy, I bought some just in case but I won't use it unless I have to.


Press out the diode, remove the driver....
I'd love to but my skills aren't upto it yet.
Once I get a bit more experience and knowledge I'll try that.
:)
I agree with Jeff as long as you don't have a space issue I would drill a small hole in the back of the heatsink...
Thanks DTR, yes space is limiting me on this.
BTW I'll be putting an order in soon for some parts, as I get some confidence for my first build.

Many thanks once again everyone.

:thanks:
 
Joined
Oct 14, 2014
Messages
17
Points
0
I've only built one laser this far but my full time job is building flashlights so I've done this a few times. What I've found works best on really large sinks is to heat the whole thing on the stove (we have a solid glass cooktop) then get yourself a nice little puddle of low melting point solder built up, after it cools you can heat the solder back up with your iron without needing to heat the entire Cu sink. Usually I drill a small divot to hold the pool of liquid solder exactly where I want it.
 
Joined
Apr 6, 2014
Messages
2,436
Points
113
Just an update:
I've re-soldered it as best I could without overheating it.
It's working atm so I'm happy to leave it as is.
If it fails again I may have a try with conductive epoxy.

As you can see there's no room for soldering the driver right around or beyond the lip since this is the thread that screws into the host.

I'll keep your suggestions in mind as my skills improve but atm I'm not confident enough to pull it apart and re-work it.

Thanks again.
Andrew

PS. sorry for the lousy photos, didn't use my DSLR but my phone. :(

art1.jpg


art3.jpg


Top