

- Joined
- Aug 25, 2010
- Messages
- 533
- Points
- 63
Dear forum, how are You?
I haven't forgot You, I could never do it
Simply I was busy to build a special handheld laser, and this time I have overstepped myself.
The result has exceeded all my expectations ... in a few words, I created something simply perfect!
Now, before you drool up to the last drop of saliva , some infos about this ambitious project.
This time I have build every metal part of this laser: the main body, the turret and the lens holder,
and I have modified other parts like the Sanwu Spike battery compartment.
I learned how to use lathes and CNCs, at least for what I need to build.
This 13-months project was really a pain in the ass, especially the optic parts: beam elevation, beam
axis and collimation were the main concerns of this project.
An unusual bizzarre corrective optics combination was also used to guarantee a tiny beam to avoid
beam truncation due to the input beam diameter limitation of the 10x variable magnification Linus
beam expander.
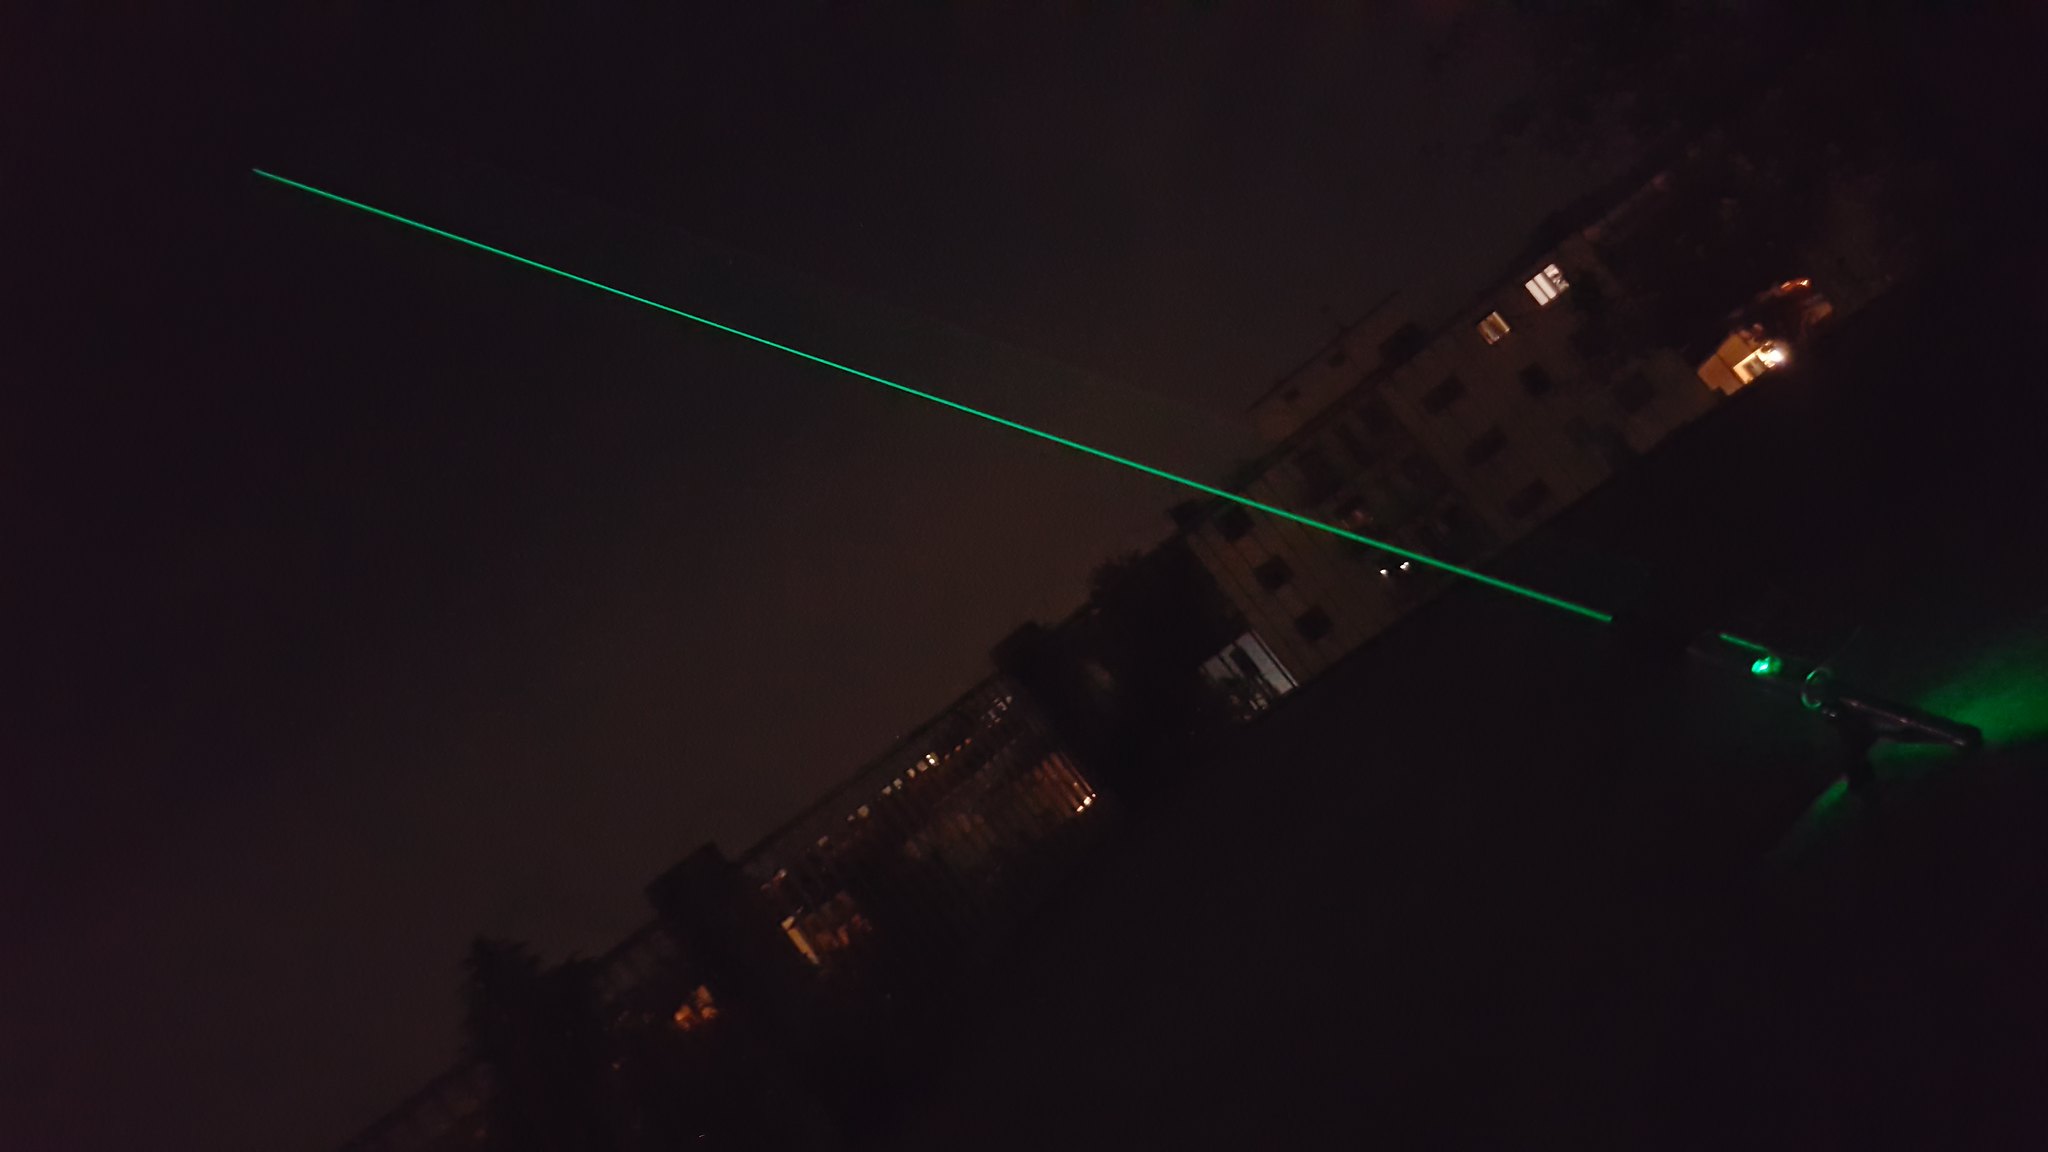
A very nice suprise was that I obtained an awesome output power of more than 1500 mW after
three corrective optics and a Linos beam expander that mount other 4 lenses inside!
Probably the high efficient blackbuck driver set at 2.4A with three cells configuration has could
squeeze from the diode every tiny drop of green juice
The massive heatsink system (20mm copper heatsink plus a generous brass turret plus a lot of
body aluminum) permit to have an extended duty cycle: after two minutes the turret is sligthly
warm and the body is completely cold, so 3/4 minutes may be the sweet spot.
In the worst case the probe will interrupt the current to preserve the diode.
Well, here is, step by step, the whole odyssey:
The shiny polished aluminum host:


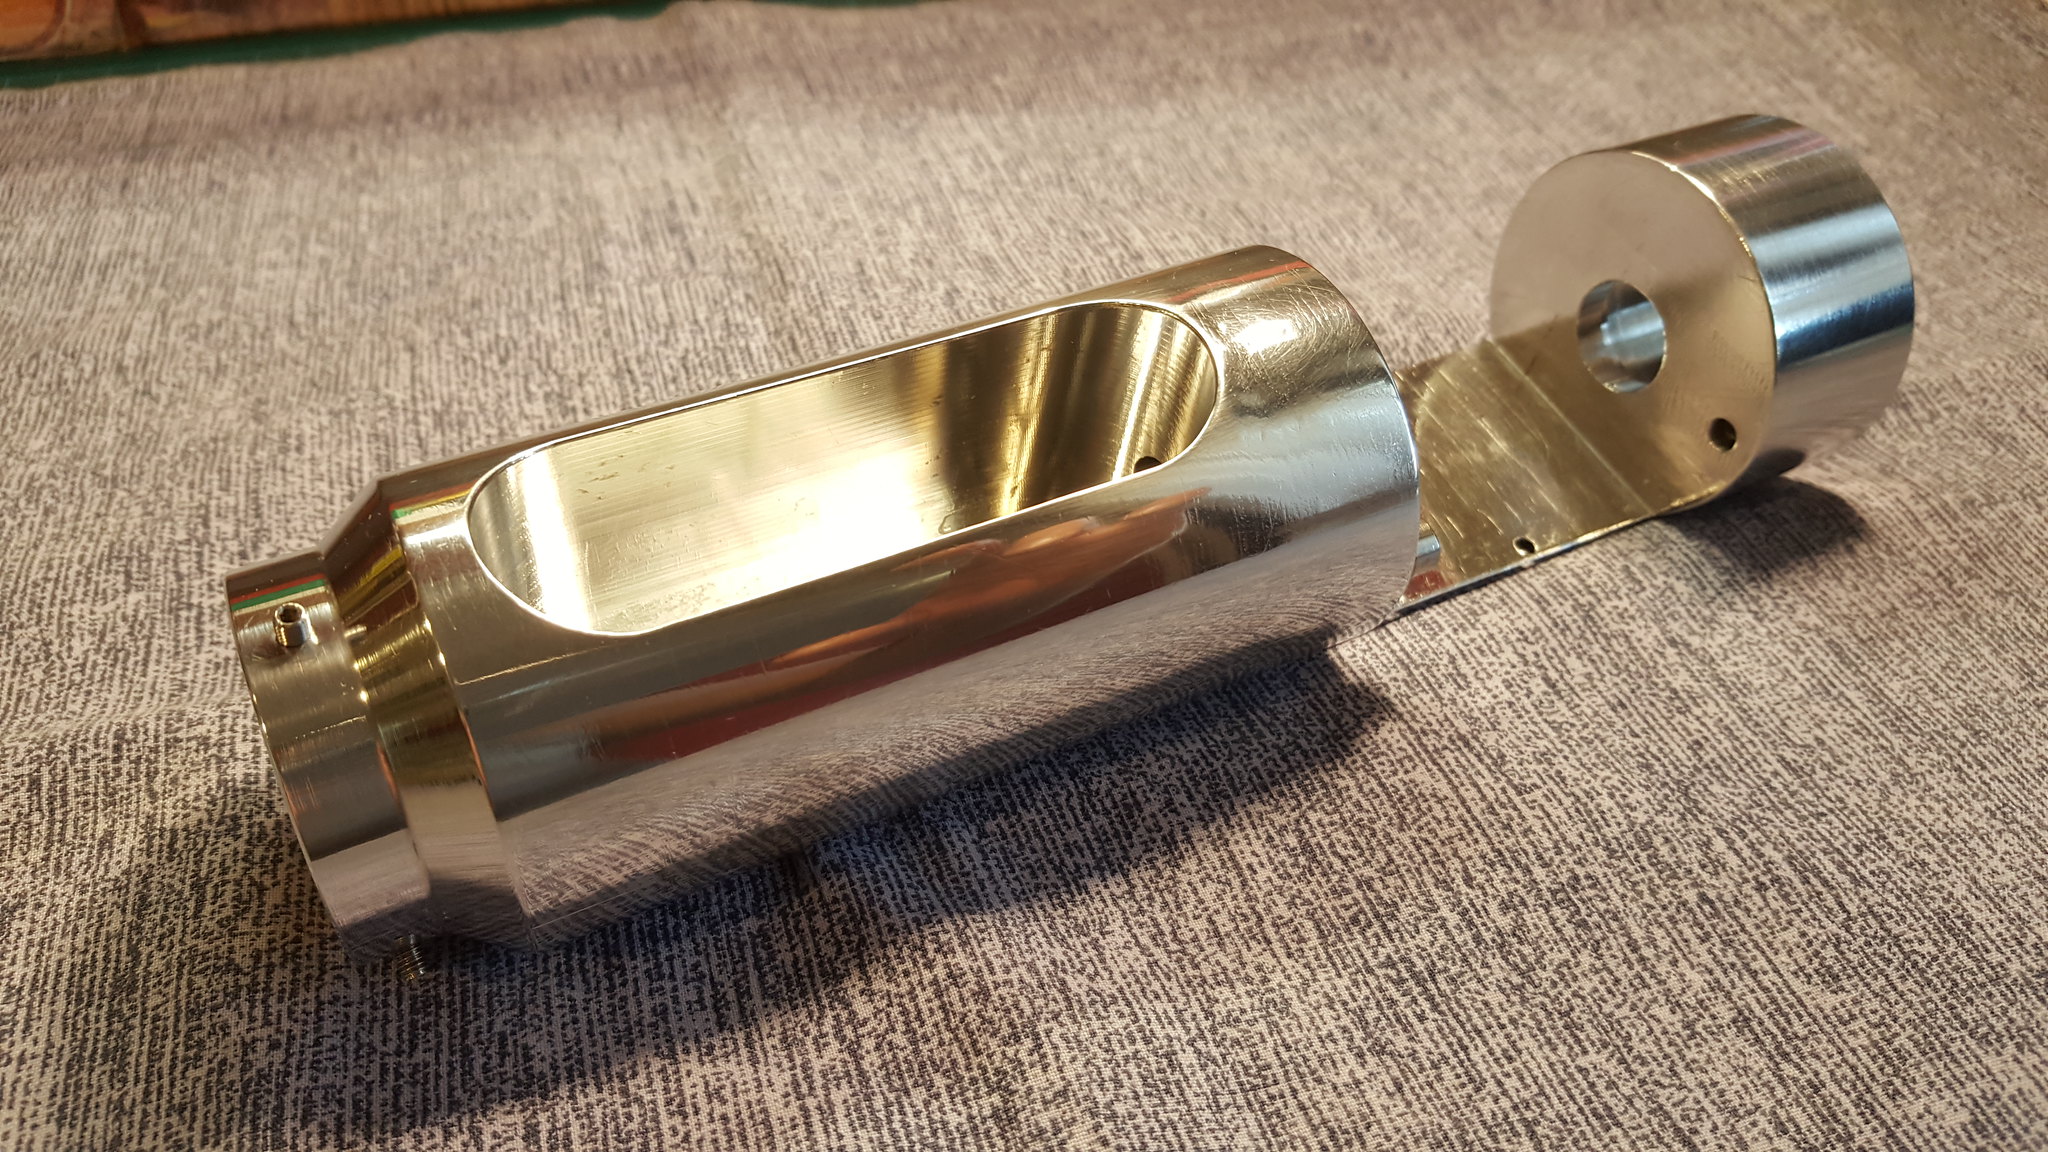

I had to create a through hole to make the internal hole for the negative path, afterwards I screwed a grain
to plug the unnecessary hole:

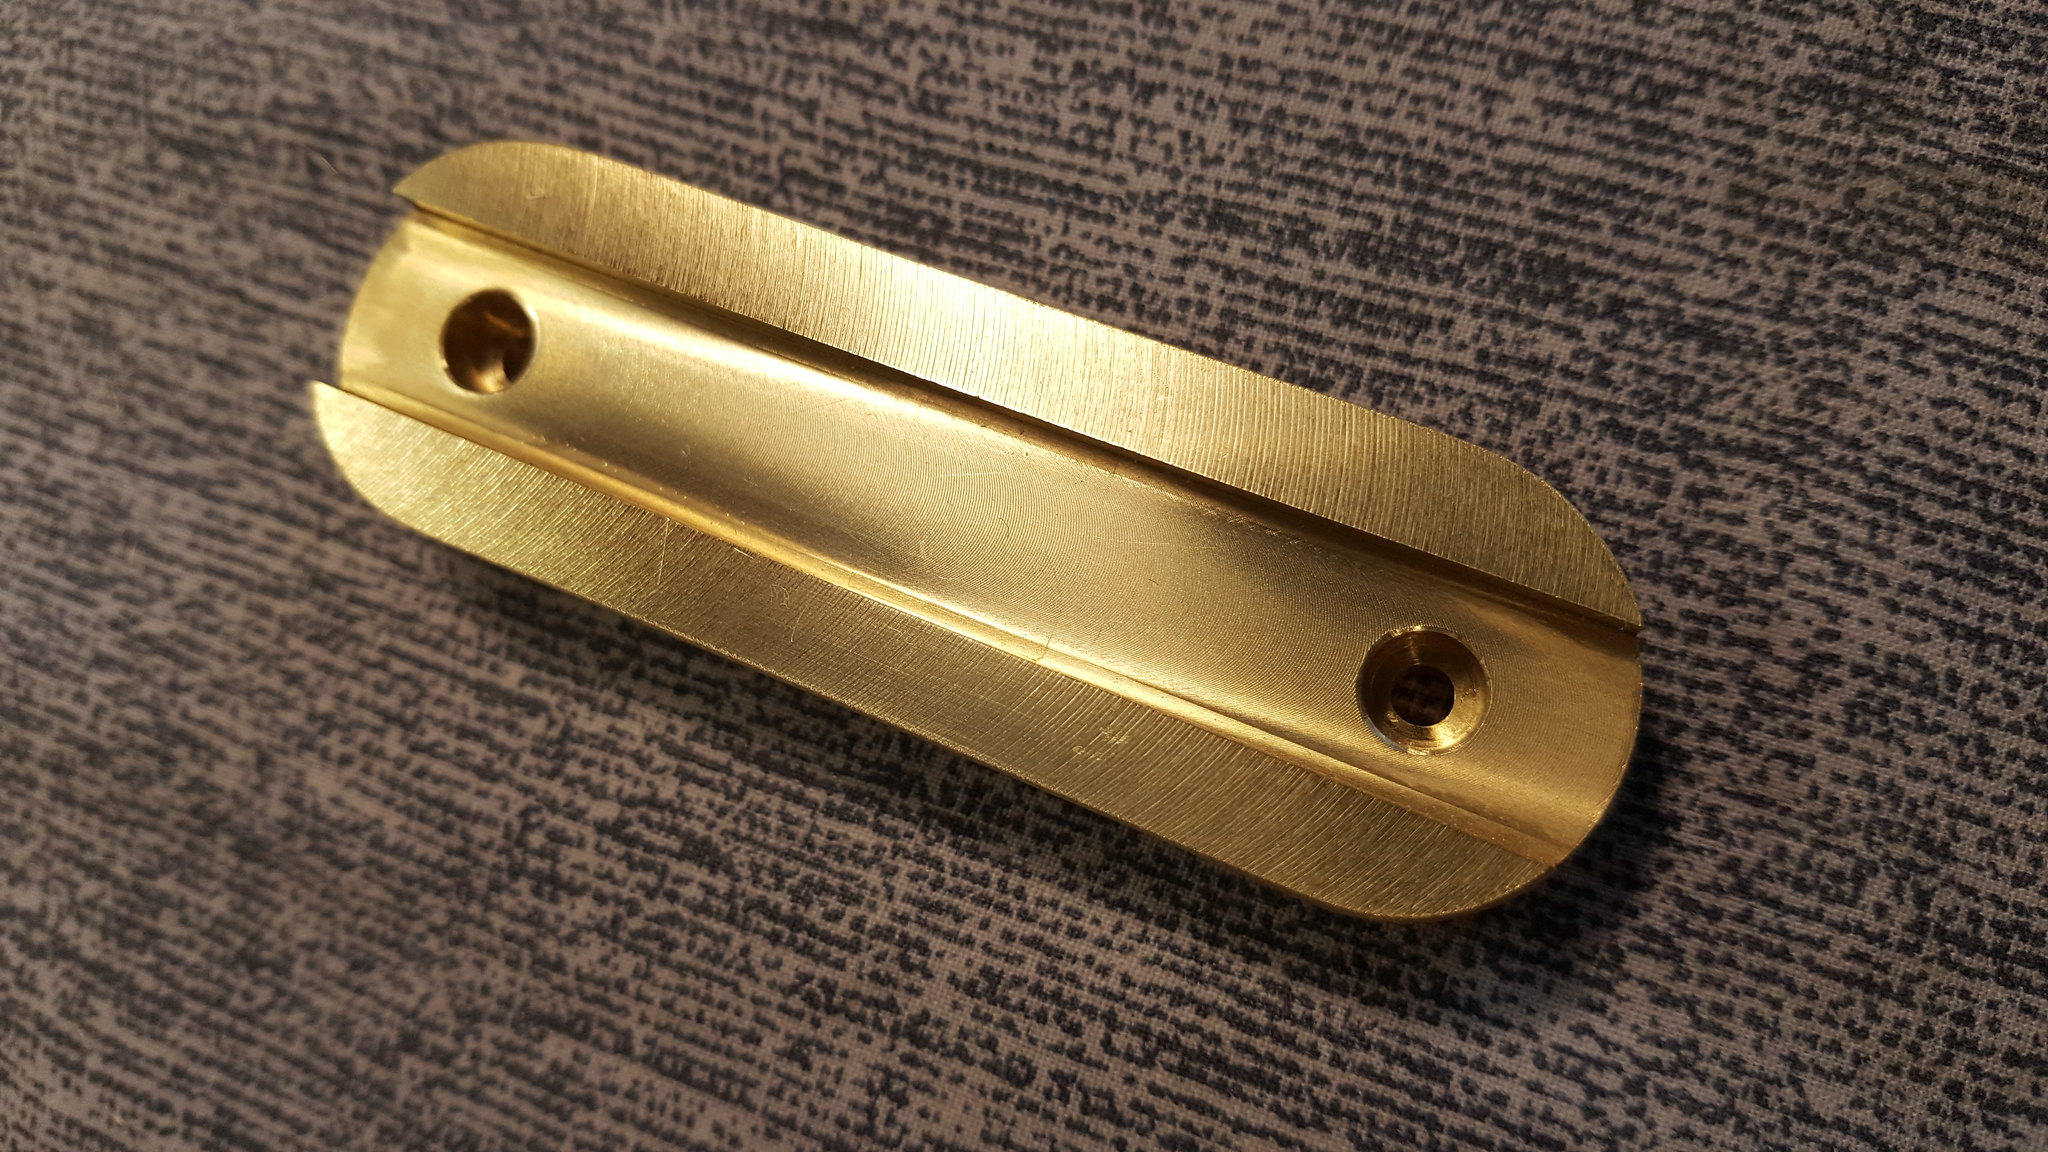
The brass turret:

The 520nm diode pressed into a 20mm copper module:

Turret mounted:

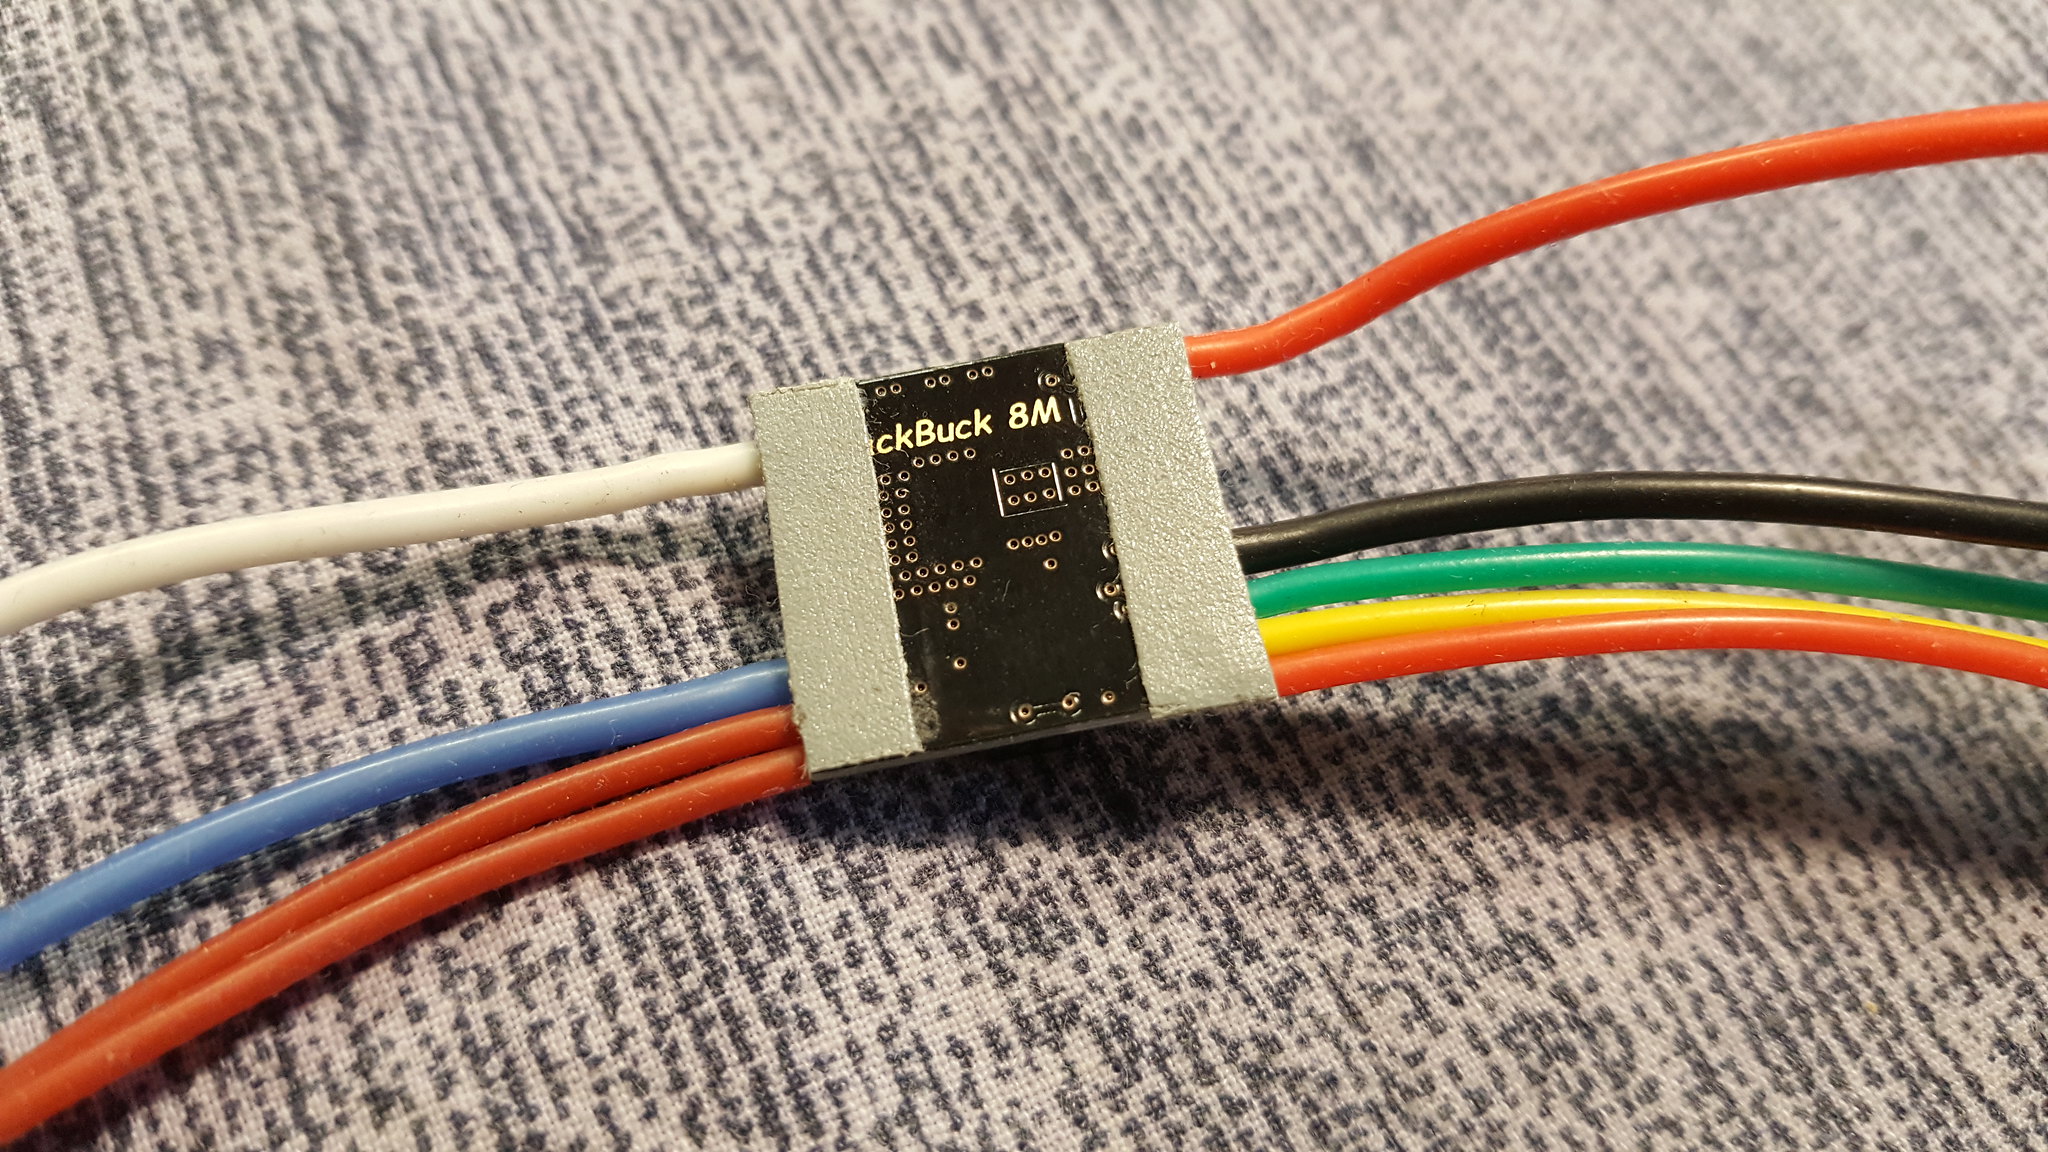
Blackbuck driver set at 2.4A:

In the past I suffered a bad short between the tin spots and the aluminum
host, so I have insulated the spots with two small pieces of insulating tape:
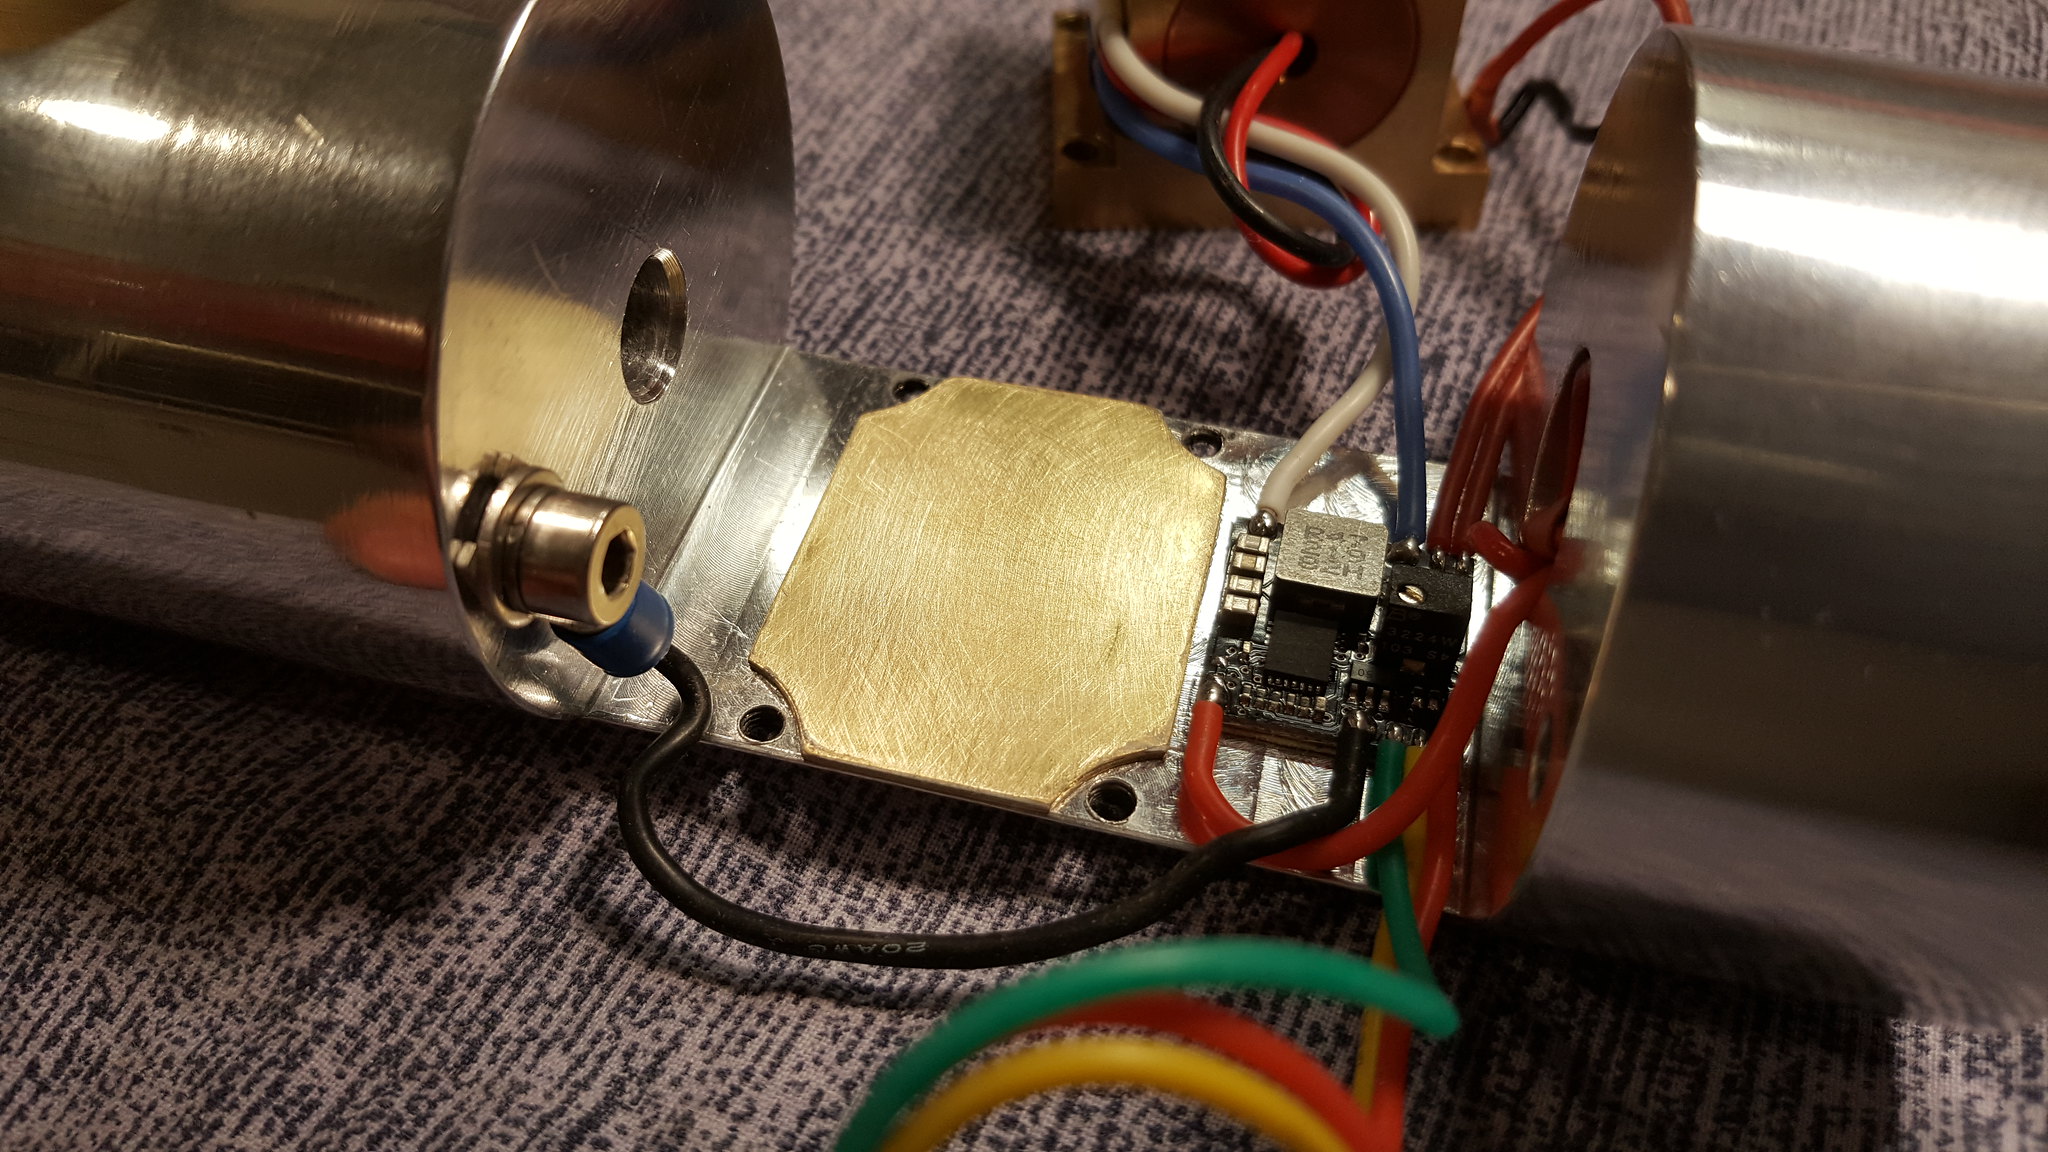
Driver glued with Arctic Alumina thermal adhesive:

Flaminpyro's pill firmly inserted:

Since the negative contact around the pill was weak and imperfect, I preferred
to create a solid path making an hole with a screw in the host and tightening
well the faston where I have soldered the negative wire:

Positive and negative wires soldered:

Driver switch cables shortened and soldered. Third unused cable insulated:

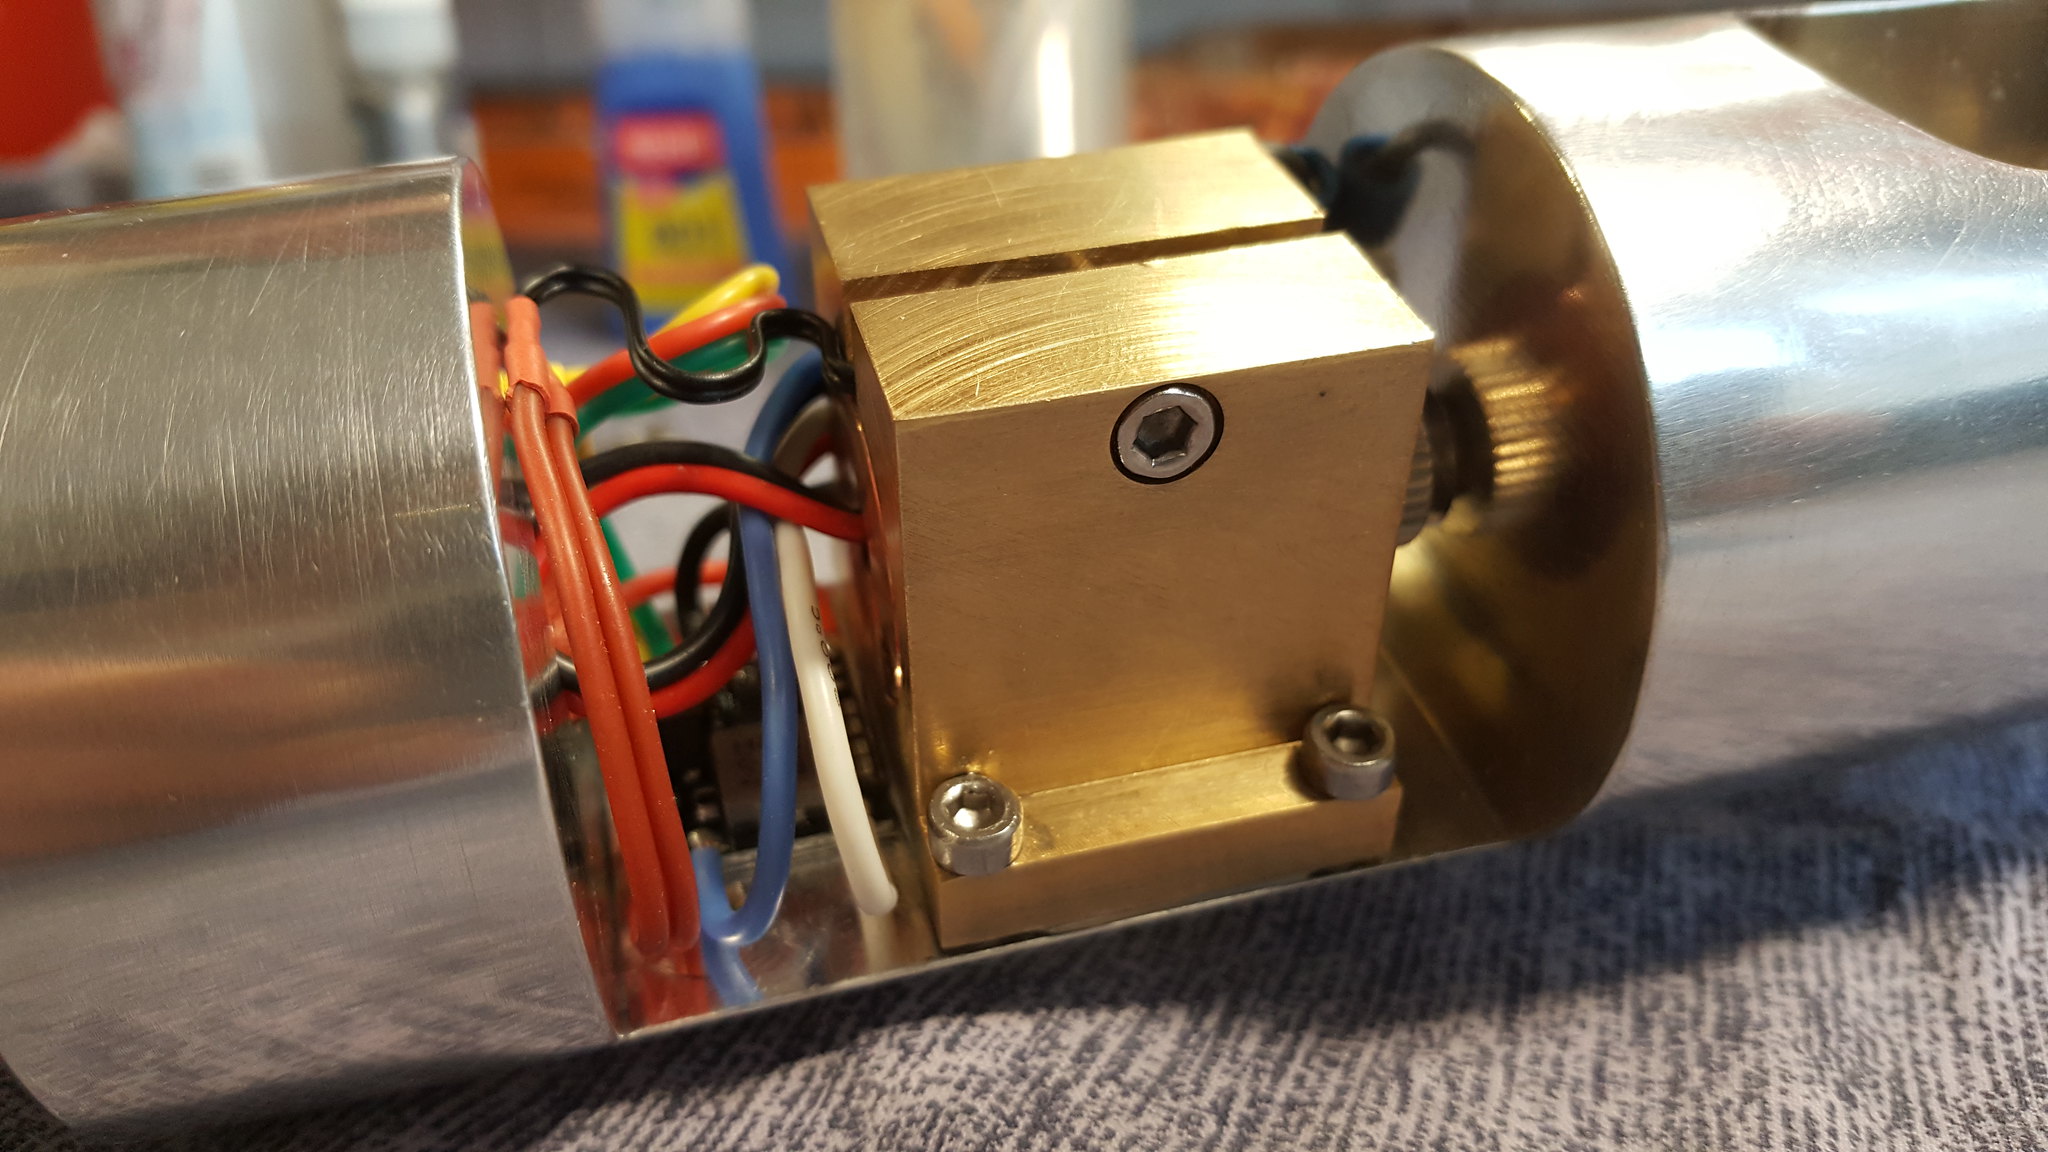
And now the first issue: the beam elevation was wrong, so I created a perfectly
flat thin foil of brass to elevate the beam to the correct height:
Putting Arctic MX4 thermal compound to maximize heat transfer:

I haven't forgot You, I could never do it
Simply I was busy to build a special handheld laser, and this time I have overstepped myself.
The result has exceeded all my expectations ... in a few words, I created something simply perfect!
Now, before you drool up to the last drop of saliva
, some infos about this ambitious project.This time I have build every metal part of this laser: the main body, the turret and the lens holder,
and I have modified other parts like the Sanwu Spike battery compartment.
I learned how to use lathes and CNCs, at least for what I need to build.
This 13-months project was really a pain in the ass, especially the optic parts: beam elevation, beam
axis and collimation were the main concerns of this project.
An unusual bizzarre corrective optics combination was also used to guarantee a tiny beam to avoid
beam truncation due to the input beam diameter limitation of the 10x variable magnification Linus
beam expander.
A very nice suprise was that I obtained an awesome output power of more than 1500 mW after
three corrective optics and a Linos beam expander that mount other 4 lenses inside!
Probably the high efficient blackbuck driver set at 2.4A with three cells configuration has could
squeeze from the diode every tiny drop of green juice
The massive heatsink system (20mm copper heatsink plus a generous brass turret plus a lot of
body aluminum) permit to have an extended duty cycle: after two minutes the turret is sligthly
warm and the body is completely cold, so 3/4 minutes may be the sweet spot.
In the worst case the probe will interrupt the current to preserve the diode.
Well, here is, step by step, the whole odyssey:
The shiny polished aluminum host:
I had to create a through hole to make the internal hole for the negative path, afterwards I screwed a grain
to plug the unnecessary hole:
The brass turret:
The 520nm diode pressed into a 20mm copper module:
Turret mounted:
Blackbuck driver set at 2.4A:
In the past I suffered a bad short between the tin spots and the aluminum
host, so I have insulated the spots with two small pieces of insulating tape:
Driver glued with Arctic Alumina thermal adhesive:
Flaminpyro's pill firmly inserted:
Since the negative contact around the pill was weak and imperfect, I preferred
to create a solid path making an hole with a screw in the host and tightening
well the faston where I have soldered the negative wire:
Positive and negative wires soldered:
Driver switch cables shortened and soldered. Third unused cable insulated:
And now the first issue: the beam elevation was wrong, so I created a perfectly
flat thin foil of brass to elevate the beam to the correct height:
Putting Arctic MX4 thermal compound to maximize heat transfer:
Last edited:


")
")


") . Awesome thread too.
. Awesome thread too.