- Joined
- Aug 16, 2013
- Messages
- 966
- Points
- 43
Preface
This experiment/build has evolved and evolved over time in many different directions. First the idea of the host, I welded it at work on lunchbreak, then I moved onto the batteries and driver. The next and final step was cooling this system. I have no formal experience here but I am always willing to experiment and learn :na: In this thread I will discuss:
-the build of the host
-My choice for ethanol
-The coolent system a trial run for a wavelength Shift in a future build.
I did this with limited means so it's more of a proof of concept theory not a true experiment like I wanted to do. I would need:
-an Ophir head to measure wattage and plot values over time.
-A spectrometer to measure WL shift.
-the proper thermometer to measure sub zero temperature!
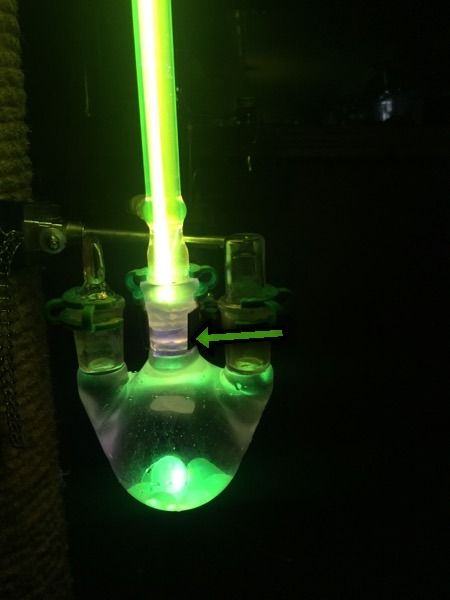
Here is where I will start!
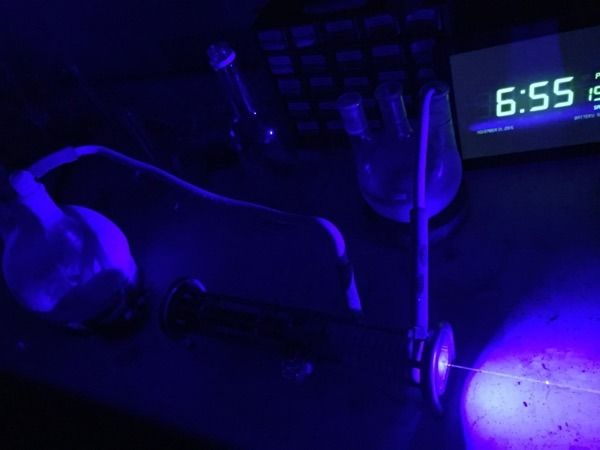
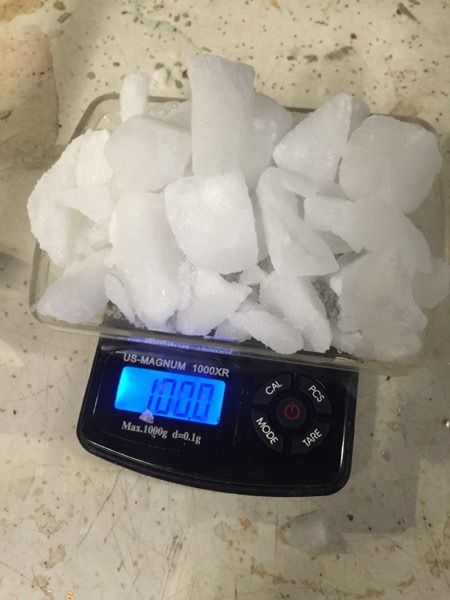
While NOT technically considered "super cooling" as that would imply I altered the nucleus of a Crystaline structure of a liquid to prevent the transition into a solid. I did cool down liquid ethanol to approximately -60C(-75F) via MULTIPLE dry ice baths in a 2000mL flask. (I say approx. because my thermocoupling died. And a regular thermometer bottoms out at -20c) the ambient temperature was 3C. I picked up 10 LBS at the super market and started dumping ice in the flask. 100 grams at a time. Dry icy expands very rapidly especially in an ethanol bath. 100grams at a time was a good way of maintaining pressure and temperature. I pre-cooled the ethanol before hooking up the laser's coil because the dry ice to tepid ethanol is quite violent. I prefer pellet type dry ice but what I got were solid blocks I had to smash with a hammer. :cryyy:
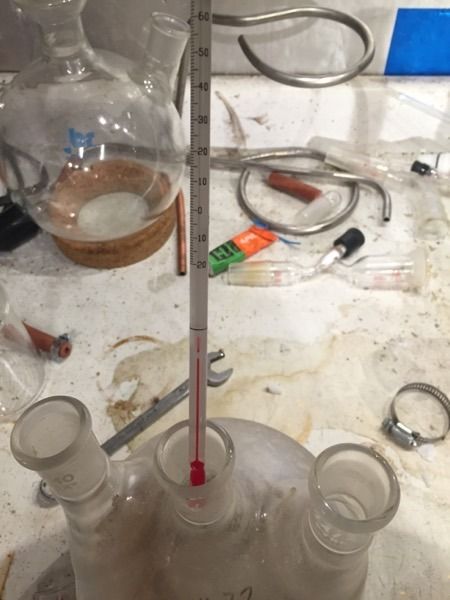
The only thermometer I have tapped out. And broke as well...
INSULATED GLOVES ARE A REQUIREMENT WHEN HANDING COOLED ETHANOL
Host construction
Without the coolent system it's actually portable!
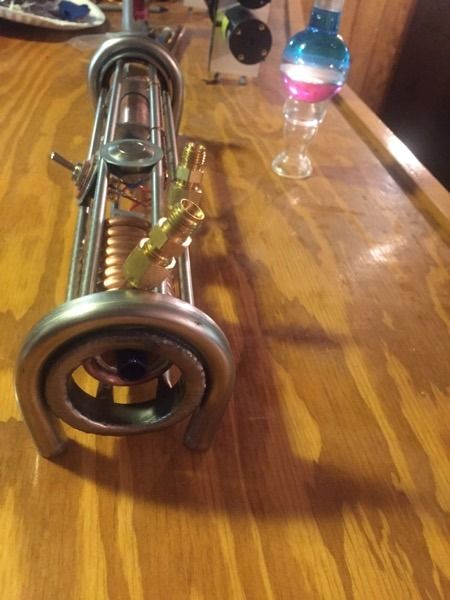
I welded schd 10 stainless pipe rings 1.5"rings and 2" rings to sandwich 6 1/8th inch SS tubes.
Well, it was kinda like building a ship in a bottle until I cut one of the tubes. There is a small stainless wire the slides up and down. As long as there is tension on the tubing the "Pin" will always stay in place. (See photo below regarding this pin) the benefit here is the host can be worked on and I can swap diode modules.
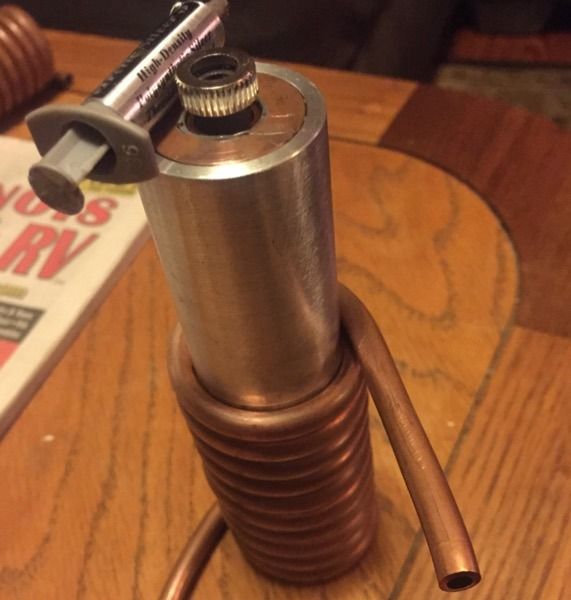
One purpose of this experiment was to cool a powerful laser head that has a copper core, aluminum body and copper tubing coiled around the body with a thermal paste to increase conductivity. The module itself was custom made by Ehgimus! Thank you friend :beer:
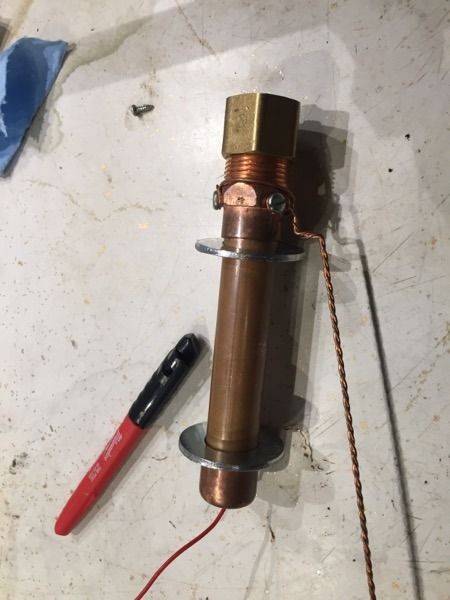
Battery tube- 3/4in copper tube with male threads for a brass cap. This holds the negative spring and at the top is the positive battery contact. Very low resistance here.
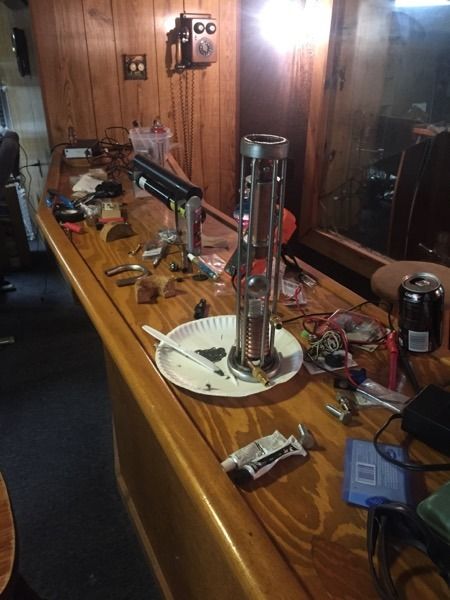
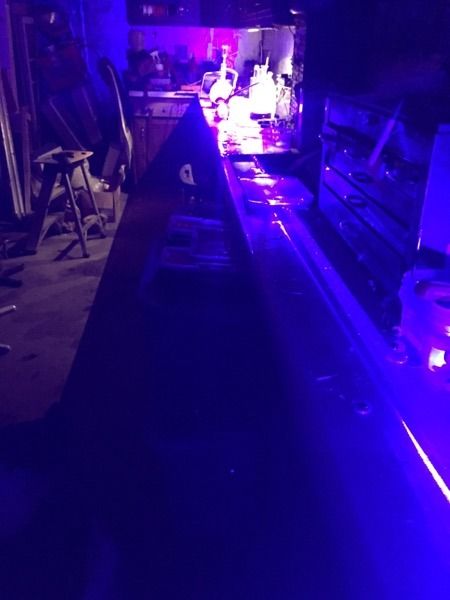
Working at the bar literally? Am I the only one who has a work space like this?
I have the HeNes in the back for encouragement.
The internals
Two switches a momentary and a toggle on/off. The on/off has a protective covering when I actually start lasing.
Buck driver set to 5amps
G2 lense
2x 18650 LG he2 batteries. 26650 would have been ideal but I didn't actually have two on hand.
Looking back I would have built this with bigger batteries...no brainier.
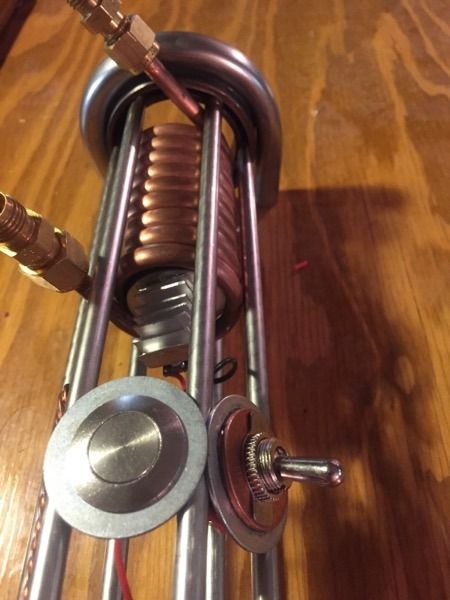
The bypass.
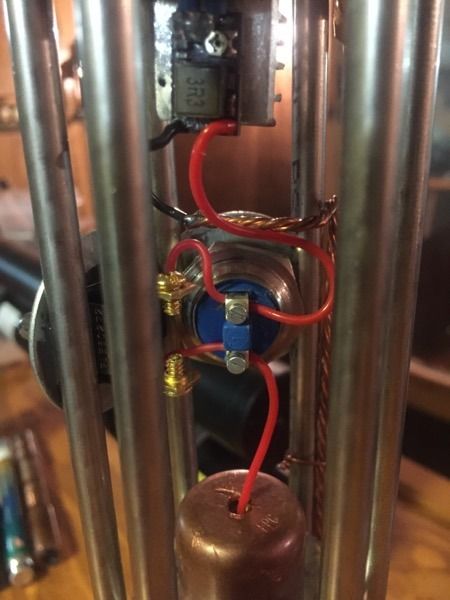
With the host complete its time to address cooling this beast.
Where was I?
Cooling
What's your first choice if you wanted to cyro cool a laser. Liquid nitrogen.
I have access to liquid nitrogen and argon at work but what I don't have is a vacuum flask to transport this. Anddd I'm not about to put this in a pop bottle so I had to explore cheap options that were available to me.
Dry ice and ethanol.
Dry ice was used because its temperature where it sublimates is -78.5C
Ethanol was used because of its extremely low freezing point. -114C.
I estimate the efficiency to be close to 80% regarding the solid CO2 to the ethanol which maybe a little generous.
Therefore there is no way the alcohol could freeze and it would maintain its viscosity.
Pumping the ethanol through the coil was tricky because most mechanical pumps would freeze up so I sealed the flask and allowed the sublimating solid CO2 to build pressure forcing the cold ethanol through the stem into the coil. I control the pressure from a valve on the flask which controlled the flow rate. safety glasses were a requirement because the flask could have blown up!! This is a noncyclical system. The spent ethanol was discharged into the reservoir then back into the main flask(here vv)with 100g of additional dry ice.
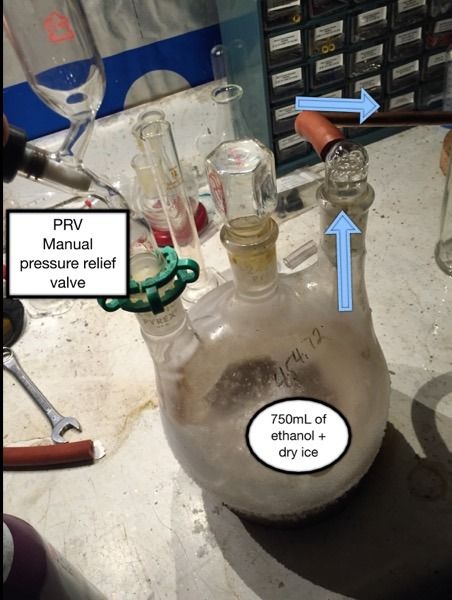
(Interesting note: ethanol's PH is just a hair over 7. [7.33 to be exact.] After all the dry ice the carbonated ethanol measured a ph of 5.5. from slightly basic to acidic!)
To be honest I wasn't sure what would happen. I'm Familar with how steam expands and contracts but never low low temps.
The coil
In this photo there are two different colored arrows. The black and magenta arrows show solid arctic alumina epoxy. Those two points are fixed. The blue arrows denote "loose" coiling; this allows for expansion and contraction when the laser module cools/warms arctic silver 5 grease was used here to maintain conduction.
The circle shows where I actually epoxied an AL heat sink for the driver! I'd say it's working!
Important note: moisture here on the driver was a concern. I used canned air to blow away any accumulation.
The brass tubing connectors were ditched. Hose and hose clamps worked perfect because there was no real pressure...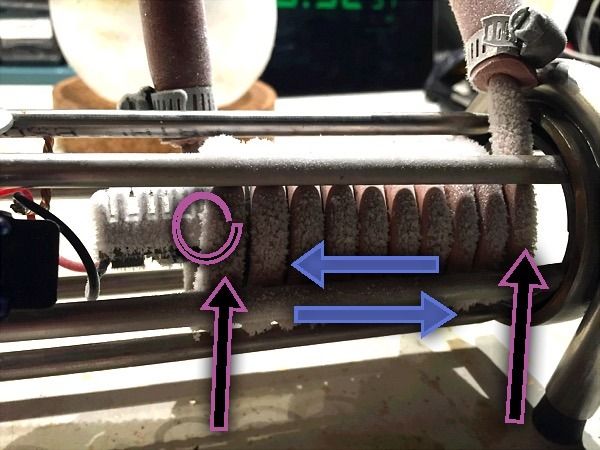
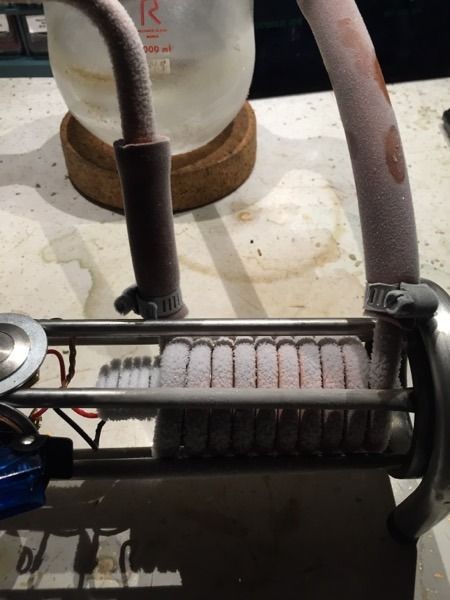
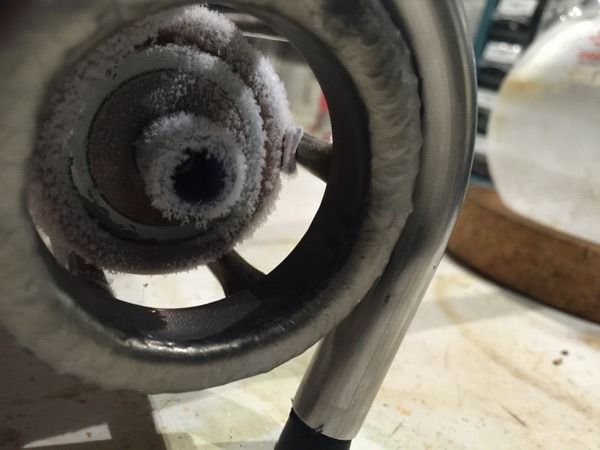
Up and running- OD 5+ glasses used here. I set the valve to a trickle and made various notes and photos.
Hmm something I did not account for, condensation on the optics. I didn't notice any difference in beam profile but in the future it might need to be considered. The ambient room temperature was a chilly 3C so that might have helped.
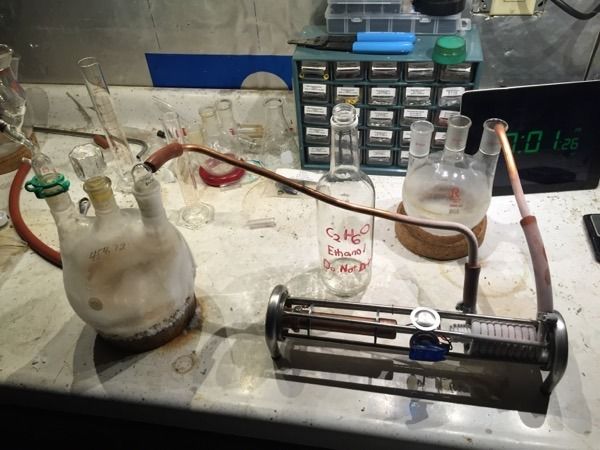
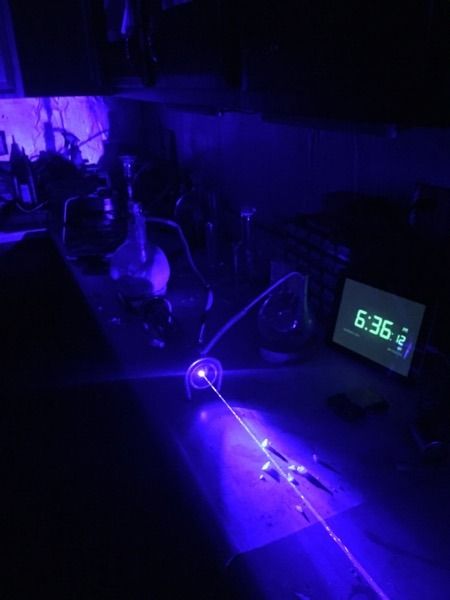
Let's get to some beam shots.
Conclusion.
Well folks it's been a fun build. 6 weeks id say working on it on and off.
Was I successful? I'd say the system worked, there were some things that I would have measured if I could have but I lack the tools. For now I will be happy with this..
I have read blue doesn't shift like the red 638s and that will be what I will try next . What did the color look like? Kinda hard to judge because you shouldn't be looking at 7 possible watts! However with the diode being pushed it's likely that it only shifted back to 445 and that's what it appeared to be.
Maybe a mit 500 will be a better choice and if you toast it It's not a pricy.
If you have read this far down appreciate your time. Comments, concerns, constructive criticism always welcome.
Jefferson
This experiment/build has evolved and evolved over time in many different directions. First the idea of the host, I welded it at work on lunchbreak, then I moved onto the batteries and driver. The next and final step was cooling this system. I have no formal experience here but I am always willing to experiment and learn :na: In this thread I will discuss:
-the build of the host
-My choice for ethanol
-The coolent system a trial run for a wavelength Shift in a future build.
I did this with limited means so it's more of a proof of concept theory not a true experiment like I wanted to do. I would need:
-an Ophir head to measure wattage and plot values over time.
-A spectrometer to measure WL shift.
-the proper thermometer to measure sub zero temperature!

Here is where I will start!
While NOT technically considered "super cooling" as that would imply I altered the nucleus of a Crystaline structure of a liquid to prevent the transition into a solid. I did cool down liquid ethanol to approximately -60C(-75F) via MULTIPLE dry ice baths in a 2000mL flask. (I say approx. because my thermocoupling died. And a regular thermometer bottoms out at -20c) the ambient temperature was 3C. I picked up 10 LBS at the super market and started dumping ice in the flask. 100 grams at a time. Dry icy expands very rapidly especially in an ethanol bath. 100grams at a time was a good way of maintaining pressure and temperature. I pre-cooled the ethanol before hooking up the laser's coil because the dry ice to tepid ethanol is quite violent. I prefer pellet type dry ice but what I got were solid blocks I had to smash with a hammer. :cryyy:

The only thermometer I have tapped out. And broke as well...
INSULATED GLOVES ARE A REQUIREMENT WHEN HANDING COOLED ETHANOL

Host construction
Without the coolent system it's actually portable!
I welded schd 10 stainless pipe rings 1.5"rings and 2" rings to sandwich 6 1/8th inch SS tubes.
Well, it was kinda like building a ship in a bottle until I cut one of the tubes. There is a small stainless wire the slides up and down. As long as there is tension on the tubing the "Pin" will always stay in place. (See photo below regarding this pin) the benefit here is the host can be worked on and I can swap diode modules.

One purpose of this experiment was to cool a powerful laser head that has a copper core, aluminum body and copper tubing coiled around the body with a thermal paste to increase conductivity. The module itself was custom made by Ehgimus! Thank you friend :beer:

Battery tube- 3/4in copper tube with male threads for a brass cap. This holds the negative spring and at the top is the positive battery contact. Very low resistance here.

Working at the bar literally? Am I the only one who has a work space like this?
I have the HeNes in the back for encouragement.

The internals
Two switches a momentary and a toggle on/off. The on/off has a protective covering when I actually start lasing.
Buck driver set to 5amps
G2 lense
2x 18650 LG he2 batteries. 26650 would have been ideal but I didn't actually have two on hand.
Looking back I would have built this with bigger batteries...no brainier.

The bypass.

With the host complete its time to address cooling this beast.
Where was I?
Cooling
What's your first choice if you wanted to cyro cool a laser. Liquid nitrogen.
I have access to liquid nitrogen and argon at work but what I don't have is a vacuum flask to transport this. Anddd I'm not about to put this in a pop bottle so I had to explore cheap options that were available to me.
Dry ice and ethanol.
Dry ice was used because its temperature where it sublimates is -78.5C
Ethanol was used because of its extremely low freezing point. -114C.
I estimate the efficiency to be close to 80% regarding the solid CO2 to the ethanol which maybe a little generous.
Therefore there is no way the alcohol could freeze and it would maintain its viscosity.
Pumping the ethanol through the coil was tricky because most mechanical pumps would freeze up so I sealed the flask and allowed the sublimating solid CO2 to build pressure forcing the cold ethanol through the stem into the coil. I control the pressure from a valve on the flask which controlled the flow rate. safety glasses were a requirement because the flask could have blown up!! This is a noncyclical system. The spent ethanol was discharged into the reservoir then back into the main flask(here vv)with 100g of additional dry ice.

(Interesting note: ethanol's PH is just a hair over 7. [7.33 to be exact.] After all the dry ice the carbonated ethanol measured a ph of 5.5. from slightly basic to acidic!)
To be honest I wasn't sure what would happen. I'm Familar with how steam expands and contracts but never low low temps.
The coil
In this photo there are two different colored arrows. The black and magenta arrows show solid arctic alumina epoxy. Those two points are fixed. The blue arrows denote "loose" coiling; this allows for expansion and contraction when the laser module cools/warms arctic silver 5 grease was used here to maintain conduction.
The circle shows where I actually epoxied an AL heat sink for the driver! I'd say it's working!
Important note: moisture here on the driver was a concern. I used canned air to blow away any accumulation.
The brass tubing connectors were ditched. Hose and hose clamps worked perfect because there was no real pressure...


Up and running- OD 5+ glasses used here. I set the valve to a trickle and made various notes and photos.
Hmm something I did not account for, condensation on the optics. I didn't notice any difference in beam profile but in the future it might need to be considered. The ambient room temperature was a chilly 3C so that might have helped.


Let's get to some beam shots.


Conclusion.
Well folks it's been a fun build. 6 weeks id say working on it on and off.
Was I successful? I'd say the system worked, there were some things that I would have measured if I could have but I lack the tools. For now I will be happy with this..
I have read blue doesn't shift like the red 638s and that will be what I will try next . What did the color look like? Kinda hard to judge because you shouldn't be looking at 7 possible watts! However with the diode being pushed it's likely that it only shifted back to 445 and that's what it appeared to be.
Maybe a mit 500 will be a better choice and if you toast it It's not a pricy.
If you have read this far down appreciate your time. Comments, concerns, constructive criticism always welcome.
Jefferson
Last edited:


