Welcome to Laser Pointer Forums - discuss green laser pointers, blue laser pointers, and all types of lasers

LPF Donation via Stripe | LPF Donation - Other Methods

Links below open in new window

ArcticMyst Security by Avery

I have my diode, now where do I plug in teh batts

Joined
Oct 22, 2007
Messages
12
Points
0
I just extracted my 16X burner diodes...
Can I just plug in a couple AA, some resistors, and a coil of wire around an oatmeal box to protect from spikes? I keep reading things about capacitors in parallel to keep the power from spiking. This makes no sense to me! What does this have over a simple coil of wire? I was thinking of following the diy driver guide but it's so complicated! Can't i just plug it into the wall and think happy thoughts?

Seriously though, are there any comments on alternative ways to drive a diode? Why should I use the LM317 will it magically improve power economy? Is it good with fried rice?

If I do follow the diy driver tutorial, do I need a breadboard? Are there different kinds of breadboards or is it whatever matches my wallpaper?

I'm not INSANE, just excited about lasers.
-travis


Lee

0
Joined
Oct 10, 2007
Messages
43
Points
0
Re: I have my diode, now where do I plug in teh ba

It sounds like you're in a good mood to fry your diode. If you really are excited about making your laser last long, you will take care to make it happy with a good driver. For SenKat's GB diode, a 47uf capacitor in parallel and 1 ohm resistor in series will do.

You shouldn't need a breadboard if you are proficiently skilled at soldering all the little components together.

The capacitor does exactly what you said: protect from voltage spikes. If yours isn't protected, you just may wake up to a dead diode.
Good luck
 
Joined
Sep 7, 2007
Messages
634
Points
0
Re: I have my diode, now where do I plug in teh ba

Lee that also depends on the input voltage he plans on using. With 2 AA batteries a 1 ohm probably would be around 180-200 mA. This isnt bad but keep in mind heat will be somewhat an issue at that current. Antelrope what I would do in your case is buy a 25 ohm rheostat from radioshack and put that in series with your LD and also use the 47 uF capacitor in parallel then start at the pots maximum resistance and work your way down. you should also have a DMM to monitor the current. I would stop when you get to 160 mA. This is a safe and comfortable zone for these diodes. It still burns really well at 160 mA. Well I hope I helped you. ;)
 

Gazoo

0
Joined
Jun 9, 2007
Messages
3,206
Points
38
Re: I have my diode, now where do I plug in teh ba

You can't just say 2 batteries either...you need to specify...Alkaline, Nimh, or Lithium.... ;)

A tiny variance in voltage makes a big difference in the amount of current applied. This is why I don't like running without a regulator. Granted, a common regulator requires more voltage, but this can be accomplished my using Li-Ion batteries.
 
Joined
Oct 22, 2007
Messages
12
Points
0
Re: I have my diode, now where do I plug in teh ba

Death angel, thanks for telling me what current is safe, I was worrying about how to find that out without blowing out one of my diodes.
If I know my voltage (measured with multimeter) and I know my resistance, I think I can estimate my amperage...Assuming I'm using a six volt battery and I want 160 milliAmps, then 6volts/.00160amps=3750ohms. What I still don't understand is why the capacitor instead of a self inductance coil. Wouldn't a coil be better since the cap could spike your diode if a connection goes loose? I'm really not sure how capacitors work though because i haven't gotten to that part in my electronics book.
 
Joined
Oct 22, 2007
Messages
12
Points
0
Re: I have my diode, now where do I plug in teh ba

My math must be way off! Is 160mA really .160 amps? meaning I want 37.5ohms?
 
Joined
Sep 11, 2007
Messages
43
Points
0
Re: I have my diode, now where do I plug in teh ba

ant: These GB diodes are the closest thing we have to a known quantity, and people are getting a pretty good feel for what they can do and what kind of abuse they will take. Unless the cost of getting more diodes is negligible for you (not to mention the wait!) I would definitely err on the side of caution.

The capacitor is sort of a "store and forward" device for voltage. It takes in the voltage on one side, and passes it out the other, storing a small amount in the dielectric between the two charged plates. By placing it across the diodes, you are giving the voltage spikes a nice safe place to go, instead of through your LD.

You are right that there is a chance of discharging a lot of volts if the capacitor is disconnected. This is why it's advised to solder the cap directly across the LD's pins immediately. Be sure to do this while it's discharged, and also add any other components at the same time so you don't disconnect the cap while soldering other bits.

Another good item to attach directly across the LD's pins is a standard silicon diode (anything 1N400X should do, i got a pack of 1N4001's for like 2 bucks at radio shack). Install this diode "backwards" across the laser diode (the side of the 1N400X diode with the grey stripe (negative) should go to the LD's positive pin. This addition keeps current from ever flowing backwards into the laser diode by providing a low resistance path for reverse current, avoiding the LD.

The voltage regulator (which is being used as a current regulator) is somewhat optional, the main reason for including it is that, as the LD heats up, its internal resistance goes down, which will cause current to start creeping up. Having the LM317T in series will pinch off the voltage as needed to keep the current nice and steady. If you end up mounting your laser in a 1W LED flashlight (like the Dorcy Mini) it already has some sort of current regulation built in, so you just need to worry about the capacitor, diode, and an inline resistor to fine-tune the current to exactly what you want.

A couple other things: While you can certainly calculate the amperage of your circuit as V/R, a simpler way would be to measure it directly. Set your Multimeter to the 10a scale (making sure the positive probe is moved to the 10a slot). Disconnect your power source, and disconnect the LD's positive pin from the circuit. Use the two probes on your multimeter to bridge the LD's positive pin back to where it was plugged in. I would strongly suggest using aligator clips for this. Your multimeter is now inline to the circuit and will measure the amps flowing into your LD in real-time. Reconnect the battery source and you're good to go.

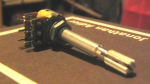
As Death Angel said, the best thing you can do is set up your amp meter, get a 25 ohm potentiometer, put it in series with another tiny resistor (1-10 ohms) as a safety net (so R can't reach 0 when you crank the pot all the way down). Then you can just fine tune the amperage to whatever suits your needs. Once you've got it how you like it, measure the ohms across the potentiometer and replace it with a standard resistor of the same value.

Really, I can't stress enough how important these extra components are for the life of your diode. Whoever put out the howto on running a LD in a mini-mag flashlight with no protective circuitry really did a disservice to all the hobbyists out there getting started, and probably has caused a lot of grief and dead diodes.

Hope this helps. I almost went the gung-ho route myself until I realized just how much diode life you'd be sacrificing (and always the possibility of insta-frying it). I just realized I repeated half of Daedal's driver thread. Thanks Daedal :)

Hope it was useful anyway.

-burnsy
 
Joined
Oct 22, 2007
Messages
12
Points
0
Re: I have my diode, now where do I plug in teh ba

I went ahead and ordered the dorcy, current limiter, and aixiz module. I am still very much on the fence about the capacitor but it sounds like it has worked for everyone else! I don't have a multimeter. I suppose i should get one. Are they all very similar? Thanks for summarizing the driver article, the original thread is waaay to long for me. :cool:
 
Joined
Oct 22, 2007
Messages
12
Points
0
Re: I have my diode, now where do I plug in teh ba

I found this dial inside an old stereo, on it is marked 931n 10k(ohm)3bx2. Is this a rheostat between 0 and 1000 ohms? It has six pins...what are they all for?
 

Attachments

  • rheostat.png
    rheostat.png
    715.1 KB · Views: 118

JECS

0
Joined
Oct 15, 2007
Messages
202
Points
0
Re: I have my diode, now where do I plug in teh ba

they can be used for lots of things. like controlling multiple things at the same time.best thing to do is stick the multimeter to 2 pins and just turn it up and down and see if the resistance will go from 0 to whatever. the pins could also be at different intervals to limit the resistance to certain settings ie 0-10k or 100-1k etc etc
 
Joined
Jul 27, 2007
Messages
3,642
Points
63
Re: I have my diode, now where do I plug in teh ba

antelrope said:
I found this dial inside an old stereo, on it is marked 931n 10k(ohm)3bx2. Is this a rheostat between 0 and 1000 ohms? It has six pins...what are they all for?

you wouldn't want to use that as it's not designed for high currents that the diode would be pulling, also 10kohm means it goes from 0-10,000 ohms. Also it has 6 pins because it's actually two variable resistors on top of eachother
 

Things

0
Joined
May 1, 2007
Messages
7,517
Points
0
Re: I have my diode, now where do I plug in teh ba

it is what they call a "double gang" pot, basically it is two pots in one.
 
Joined
Jul 24, 2007
Messages
2,749
Points
0
Re: I have my diode, now where do I plug in teh ba

....sometimes used for balancing left and right channels on your stereo, as one side comes up the other side goes down......

Regards rog8811


Top