Welcome to Laser Pointer Forums - discuss green laser pointers, blue laser pointers, and all types of lasers

LPF Donation via Stripe | LPF Donation - Other Methods

Links below open in new window

ArcticMyst Security by Avery

First Build Of Powerful Laser

Joined
May 27, 2013
Messages
50
Points
0
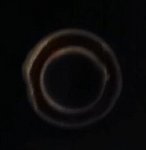
Yeah, i will try it. I tried to fit it in with the glue on and id didnt get past the threads inside the lens holder core. Should the lens fit in closer to the diode side or the focus ring side?


Joined
May 27, 2013
Messages
50
Points
0
As I was using an exacto knife, I was pressing against the glue at an angle(outwards). I Wasn't pressing too hard. But as you can see in the photo, I believe I might have chipped the lens(I really hope I didn't) or is it just the glue that chipped off(with my belief that the glue is the non shiny collar around the flat side of the lens. I had to use low light or else you couldn't see the edges of the lens then I zoomed in by approximently 3.0x.

EDIT: This is the flat side of the lens with the bulge part of the lens sticking out(lying down on a soft surface)
 

Attachments

  • IMAG0564-1.jpg
    IMAG0564-1.jpg
    26.7 KB · Views: 103
Last edited:
Joined
Jul 8, 2012
Messages
1,772
Points
0
Sorry that picture isn't enough to tell you much. Its possible even if it did chip that it may not effect the output though. To chip the lens though you would probably have been using way too much force XD
 
Joined
May 27, 2013
Messages
50
Points
0
So i put the lens in the lens holder(as i assumed correctly) and hooked up only 1 of the battery to the 2 leads and i shined it outside(at night) and what it lloked like was a dash(-) a straight unfocused line. I couldnt focus it any more to make it more focused. The design of the beam sorta looked like a longated rectangle.
 
Joined
Jul 8, 2012
Messages
1,772
Points
0
Then you have the lens backwards. The flat side needs to face the diode.
 
Last edited:
Joined
Jan 8, 2009
Messages
3,145
Points
83
Ok first of all I will say that after all the time spent on this build thread I would request it to be a sticky by now after 4 months on one build... I am amazed at the detail and input that has been given by the players in this thread it is commendable and odd at the same time. I have been here quite awhile and never seen a thread spread over such time or on many other forums that could be grouped as such as our fine forum here. I would ether request you finish this build and post pictures of this epic build or stickie this sucker before I die of old age. I'm sorry for posting in this manner, but I'm at a crossroad as I try to wrap my mind around one 4 month 445nm simple build. Now if you live in Antarctica I appologize. -jander6442.
 
Joined
May 27, 2013
Messages
50
Points
0
Ok, i will flip the lens around. I sorta have to shake the lens holder in order to get the lens in more. Does this mean more of the glue should come of?

And for jander6442, I never meant for this to go for this long as most of the time i can only work on it on weekends and i also want to make sure i have everything down to the inch.
 
Joined
Jul 8, 2012
Messages
1,772
Points
0
Sounds like there is still some glue on the lens but it doesn't really matter. If it works it works.
 
Joined
May 27, 2013
Messages
50
Points
0
0


Here is the general output of the laser beam. It is approx. 12 feet in distance from where I am standing. I made sure the lens is facing the right way and is as far down and it can go. (I have only 1 battery hooked up to it)
 
Joined
May 27, 2013
Messages
50
Points
0
0


So i tested the driver/battery contact by hooking up an incadesent lightbulb to the 2 terminals(ended up blowing the bulb) but the driver works for sure.

I then soldered on the 2 leads (the red going to the driver board which has labeled "out +" and i hooked up the black wire going to the part on the driver board labeled "out -") and i put the host all together and nothing, i made sure the batteries where facing the right way and nothing.

I had fixed the focusing problem as well and as you can see, im not a got solderer.
 
Joined
Jul 8, 2012
Messages
1,772
Points
0
I'm not sure what you did when you desoldered the driver which could make a huge difference since I dont know if you removed everything or not. Besides that, the terminals on the driver board that came with the flashlight are no longer valid and will not work for the laser driver. If you post a detailed(as close and sharp as possible) picture of both sides of the contact board I should be able to show you where to solder the laser driver to.
 
Last edited:
Joined
Mar 13, 2013
Messages
315
Points
0
One pole is modulated and one is constant. IF it's good built the case pole is constant, because than there was no need to isolate the LED from the host (maybe you remember if it was isolated or not).

The best way IMO would be if you measure where your poles are with a DMM.
If you haven't got one. You could test which pole is missing by connecting your wires directly to the poles for the case pole you can easiely put the wire for your case pole between driver and pill /brass ring and solder it to the outer contact ring.

Then you can be sure that you've got your case pole if it works then great if not the other pole is missing.To find this pole on your board you need a DMM or maybe high res pictures for us to tell you. If both is not possible you can try the ghetto way and carefully drill a hole trough the middle of the board and stick the wire through with isolation on the wire remaining inside board and solder it on the contact in the middle.
 
Joined
Jul 8, 2012
Messages
1,772
Points
0
A DMM is the best route for finding the polarity of the contact board but not many people have them. It is however a basic tool I suggest to have even if you only think you are going to build a single laser. Even a cheap one would work fine.

Anyway, just get dropbox and use that to host your pictures and link directly to them.


Top