Welcome to Laser Pointer Forums - discuss green laser pointers, blue laser pointers, and all types of lasers

Buy Site Supporter Role (remove some ads) | LPF Donations

Links below open in new window

ArcticMyst Security by Avery | Browser Hide by Avery

Atlantis DIY Laser Power Meter

Joined
Nov 1, 2015
Messages
13
Points
3
Hi Guys

I am building a laser power meter based around an arduino uno and a 16x2 shield and with an external adc commonly found ads1115. i am using a 10mm tec with a pre amp composed of FET's to reduce noise.

At the moment it is very basic but i shall add more features to it. the best thing is that i shall donate it to this forum as as anyone can build it easily.

pic's to follow !


OK so as promised ! here are the basic setup

arduino with lcd shield and external adc !

Software so far is capable of
1 select between internal adc 10bit resolution or external 16bit resoltuion
2 calibrate the tec with a know source
3 initialise the serial port for data logging
4 initialise the lcd and show all the info
5 read in real time and output to both lcd and serial

to do

add a keyboard menu
have option to switch from tec to ophir sensors
have option to calibrate at user request
have option to switch from internal to external sensor.

If you would like to add a feature just drop a msg here ! il try and add it time permitting!

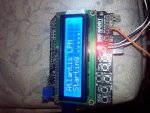
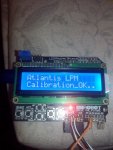
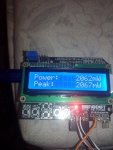
here's a few initial photos !
 
Last edited:
OK so as promised ! here are the basic setup

arduino with lcd shield and external adc !

Software so far is capable of
1 select between internal adc 10bit resolution or external 16bit resoltuion
2 calibrate the tec with a know source
3 initialise the serial port for data logging
4 initialise the lcd and show all the info
5 read in real time and output to both lcd and serial

to do

add a keyboard menu
have option to switch from tec to ophir sensors
have option to calibrate at user request
have option to switch from internal to external sensor.

If you would like to add a feature just drop a msg here ! il try and add it time permitting!

here's a few initial photos !

edit / here are the photos
 

Attachments

  • IMG_20151207_170116.jpg
    IMG_20151207_170116.jpg
    199.5 KB · Views: 612
  • IMG_20151207_170453.jpg
    IMG_20151207_170453.jpg
    95.9 KB · Views: 570
  • IMG_20151207_170456.jpg
    IMG_20151207_170456.jpg
    96.3 KB · Views: 223
  • Like
Reactions: ARG
Could you post some more information and images on the TEC you are using, and how you are calibrating that?

The arduino stuff is obviously nice but at this point just a digital readout of an analog voltage, unless you're doing some nifty signal processing in there. There are some tricks to get a bit more out of those internal 10 bit DAC's if you need to and speed is not that much of an issue. With a bit of noise insertion and averaging of 16 samples you can get 2 additional bits which would be sort of practical to have when you want to read up to 2 watts in 1 mW increments.
 
Last edited:
Could you post some more information and images on the TEC you are using, and how you are calibrating that?

The arduino stuff is obviously nice but at this point just a digital readout of an analog voltage, unless you're doing some nifty signal processing in there. There are some tricks to get a bit more out of those internal 10 bit DAC's if you need to and speed is not that much of an issue. With a bit of noise insertion and averaging of 16 samples you can get 2 additional bits which would be sort of practical to have when you want to read up to 2 watts in 1 mW increments.


Hi
I am using a 10x10mm tec, on it i mounted two known resistors and wired them to a relay. when the meter is booting, the resistors are allowed to warm the tec and readings are taken, this way the meter will take the time taken to get the theoretical reading and use that to show the actual final reading. as an adc i am using the ads1115 type it has 16 bits resolution. at the moment i am conducting some tests and as soon im done i will post my design on here !
 
Looks great. Can you tell me what power range it will read? Also what is the overall size of your build. TIA
 
In the default mode, the setting is +/-6.144 volts.

Thus the value of 32767 would represent a value of 6.144 volts.

Dividing 6.144 volts by 32767 yields a scale factor of 0.1875 mV per bit. This is a significant improvement over the Arduino ADC which resolution of approximately 5 mV per bit. In fact, its about 26 times better!

The PGA setting of +/- 6.144 range can be a little misleading as it seems to infer that you can measure voltages that high. You can’t.

Instead, the maximum measurable voltage is established by the supply voltage to the chip. Specifically, the maximum measurable voltage is 0.3 volts more than the supply voltage.

this means that the maximum readable voltage is 5.03v converting that to millivolt per milliwatt thats 5030 mv ir round 5 watts, for bigger power i could use a larder supply say 10v to read 10v but i have to test this, my 1st aim is to measure up to 5 watts.
 
I'm sure you'll get the adc and scaling to work well, even if it requires an external DAC (16 or even 18 bit types are not that expensive anyway).

I like the solution with heating resistors to calibrate the TEC. I've tried something similar for lower power use (sensing temperature difference across a blackened metal strip). How do you do this with the TEC though? With the strip i had the heating resistor on the back, and the laser target on the front. With a TEC you only have one surface to heat. Do you just shine the laser onto the resistors, or use some nifty mechanism?

One solution i though of was using 2 identical TEC's, mounted on the same heatsink, symetrically. One TEC would be the laser target, the other be shielded from light but have a small, flat, SMD resistor on it. By a control loop you could make sure the TEC with the heating resistor has the same voltage (and hence temperature gradient) that the one the laser is shining on. You could them simply measure the power dissipation in the resistor (current and voltage) to work out the exact thermal power.

This would depend on precise mounting and the tec's being identical though - i'm not sure how feasible/accurate that would be.
 
I'd love to see the final product with guides. I'm interested in building an LPM for low power 5mw builds. Beyond Eyesafe I don't care what the output is. Safe is safe and unsafe is unsafe.
 
I'm not sure the approach with the TEC's is that suitable to low power lasers - if you are looking for 5 mW you might be just as well off using a coherent lasercheck or similar optical device (as long as you know the wavelength and it doesnt leak IR).

I think the TEC solution will probably be good in the 50 mW to 1 watt range, possibly higher if the surface can be coated with something that can handle the energy density of such lasers.

With the mimicing loop design you could get decent results on lower power levels, as long as you can get very similar tec's or other sensing components and built things very similarly.

The upside of such a design is that it requires no calibration source other than a good voltage and current meter, as long as you can get a durable nonreflective coating onto the tec. Obviously all materials are somewhat reflective, but if you can predict that you can compensate for it in software. Don't expect miracles at all, but then again, if you have something that is 10% accurate from 50 to 1000 mW and has consistent results, no worries :)

Aren't those quite a bit more expensive? Is there a cheaper option for low power?
 
I'm not sure the approach with the TEC's is that suitable to low power lasers - if you are looking for 5 mW you might be just as well off using a coherent lasercheck or similar optical device (as long as you know the wavelength and it doesnt leak IR).

I think the TEC solution will probably be good in the 50 mW to 1 watt range, possibly higher if the surface can be coated with something that can handle the energy density of such lasers.

With the mimicing loop design you could get decent results on lower power levels, as long as you can get very similar tec's or other sensing components and built things very similarly.

The upside of such a design is that it requires no calibration source other than a good voltage and current meter, as long as you can get a durable nonreflective coating onto the tec. Obviously all materials are somewhat reflective, but if you can predict that you can compensate for it in software. Don't expect miracles at all, but then again, if you have something that is 10% accurate from 50 to 1000 mW and has consistent results, no worries :)

Hi,

Low power does not require a calibrated sensor, you just need a sensor that is sensitive for low power. I am aiming my meter in the range of 3 watts max as for minimum i need to test it with some low power lasers that i am waiting in the post !

As regards the project Atlantis, i got the internal and external routines going ok and now can auto tune itself with a marginal error of 2%. next i want to do some tests with my 450nm m140 diodes i ordered. the display is working too showing the actual calculated power and the peak power. as soon i sort this out i want to work on the setup menu..

I was thinking of doing two variants a lite and a pro version .. but this is far for now ..

let's get working ! time flies when i'm having fun !
 
It depends on what you think is expensive or cheap. $70 for a laser power meter is cheap in my book, but this is very limited in power handling, and i'm not sure about accuracy. It also is a retail price, i'm sure the total cost of parts for that meter are much lower than $70.

I think that the LPF commnity would mostly like to see a LPM that can handle more power, ideally up to 10 or 20 watts. It would be a challenge to find/build any affordable sensor that even survives that, but it's a goal that can be worked towards.

TEC's seem like a logical choice here since they are at least available at such power levels, but you cannot just point a 5 mW, 5 mm beam diameter laser at one, that will probably burn the surface.

What could work in my mind is getting the tec, and affixing a layer of anodized aluminium on the side that takes the laser light. This could be something the size of the tec, and perhaps 0.5 to 1 mm thick. This adds a LOT of thermal mass to the system, and the only way to get such a system to respond and acceptable speed is to use a power-following, unlit, identical tec heated by a resistor.

I'll be abroad for a well over a month from xmas and will not be able to do any practical work on this, but i could after. If you have any good options for the TEC or anodized aluminium material in mind i'd love to hear details.


Back
Top