Welcome to Laser Pointer Forums - discuss green laser pointers, blue laser pointers, and all types of lasers

LPF Donation via Stripe | LPF Donation - Other Methods

Links below open in new window

ArcticMyst Security by Avery

7A75 corrected w/3XBE

Joined
Jul 10, 2015
Messages
9,896
Points
113
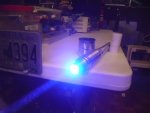
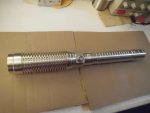
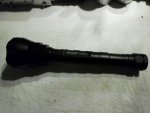
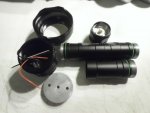
I was thinking about doing a corrected 7A75 and thought I would put it in this host I had, it was going to hold a nubm44 but I would need to have used a Sanwu G2 in order to get the beam to fit within the 3XBE output lens after correction with a 6X c-lens pair and expansion by the beam expanders input lens, also the 44 likes a substantial heat sink as I like a long duty cycle and the 2 cell tube I have for this head butts up well to the center section moving heat better than the 3 cell tube, so I used a DTR G2 and a 7A75 diode driven at 4.0a via SXD so the corrected beam would work with the 3XBE, it makes a nice beam without the beam expander and quite a tight hot spot across my yard with the beam expander, here's are a few pics
Note : The host was made by Trin


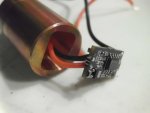
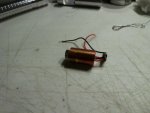
I had scored some 7A75 diodes at auction and pressed one into a DTR 20mm copper module.
63525
63526

Thermal putty to avoid any shorting to the case.
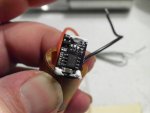
63527

8 pin chip is thermally bonded to the case with Artic Alumina
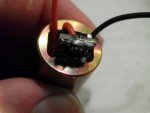
63528

C-lens pair aligned in host center section but not yet glued in place.
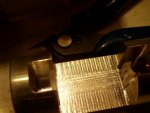
63529


Center section during c-lens alignment, this is without the beam expander.
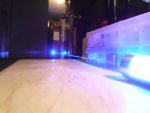
63530

With BE
63532

I can ( with the batteries removed ) look down the barrel and see all the lenses all the way back to the diode, it looks neat but my camera wont or I can't make it focus well enough to capture it as I see it with a strong backlight behind me.
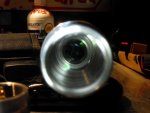
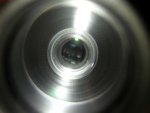
63533
63534

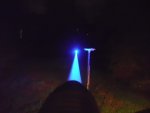
Across my backyard with the 3XBE
63535
 
Last edited:


Joined
Jul 10, 2015
Messages
9,896
Points
113
The 7A75 spot across my yard with a G2 and the 6X c-lens pair is about the same size as a M-140 with a 3 element, with the 3XBE it's about 1/3 of that, well 1/3 the height by 1/3 the width so 1/9 the area but still a small rectangle, it ignites my favorite target a popsicle stick @ 5 meters and across my yard like a champ.

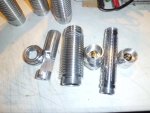
The center section came with the hosts, they were made by Trinh, I'm sure he can make more if you want one, it has a pocket in the end for the 3XBE but know that not all diodes will be perfectly aligned to the backing plate and the diode may not seat perfectly perpendicular so you will have to adjust your alignment out of the lens barrel thread slack, it's this thread slack that can also add to misalignment, so what I do is I use a copper module end to lock down my lens focused to infinity and after I set the spot/bar that looks like a line at my 15 foot mark so that it's parallel to my optics shelf, that's when I go back and adjust that slack to center the beam in the beam expanders threaded hole and I always check with the beam expander in place before I bond the c-lenses with UV curing adhesive, it just takes a little patience and fit/refit to get it right.

These are the c-lenses I used > https://www.ebay.com/itm/Cylindrica...ash=item36460c9209:g:MQQAAMXQUmFSkuyf:rk:1🇵🇫0

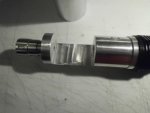
Here's a couple pics of the host and center section, there's a tail switch and center switch both are latching.

63536

63537
 
Last edited:
Joined
Jun 14, 2017
Messages
452
Points
63
I like it!! Nice work. I wanna do a corrected MM red so badly. Big square red beam. I bet it’s an awesome burner😍
SGD🍻
 
Joined
Feb 25, 2010
Messages
1,643
Points
113
Superb Build RC !!!! Good to see this nicely machined C-Lens section put to use....AND a BE to boot !!! This combination is very challenging.....for...as you well know....the beam MUST enter the BE....spot on !!! Correct Pitch, Yaw and X/Y location !!! This demand is more challenging when we go from LD ==> C Lens ===> Beam Expander....more components to align = More PITA !!! Sigh !!

And...yes...this is where a rogue LD.....with a less than perpendicular relationship between Case back and beam path comes into play !! Remember ALL the special designs that were being discussed back in 2018 regarding ....er…."Adjustable LD Mounts"...only problem.....they take space !!!!

It sure would get expensive....to go thru several LD's....just to cull one (1) good one !!! This was one of the reasons....regarding the CHC build....I bundled the LD's and C-lens on a separate Ally plate.....which could THEN be adjusted to propagate the beam correctly into the BE optics !!

Anyway....looks like you were fortunate.....and your LD was a good one !!! Nothing can replace Good Luck....and extreme attention to detail !!

Very clean build !!! And....like I said.....ALL the Bells and Whistles !!! Congrats !!!!!!

CDBEAM
 
Joined
Jul 10, 2015
Messages
9,896
Points
113
Thanks CDBEAM and everyone it is a lot of fun to be able to concentrate the energy a good bit further than the desktop and I really like the look of a good beam or a beam that looks wide up close and tight far field and this one does that very well.
That's not to say that I don't enjoy my 1w 520/525 lasers, but that far field line just looks wrong to me, I think I want to correct some 1w greens, maybe try out a prism pair. :)
 
Last edited:
Joined
Feb 25, 2010
Messages
1,643
Points
113
Hmmmm….I have found Prism Pairs ....er….ah.....wanting !!! They suck up too much optical power... at any decent magnification factor.....IMNSHO....stick with a 6X pair of C-Lenses !! I have correct several NDG7475 builds with C-Lenses.....It works really good !!!:geek:
 
Joined
Sep 20, 2013
Messages
17,410
Points
113
Techhood is really proud of their C lenses at $55 a pair. I also noticed you had the two C lenses almost as far apart as they would go in this host, of which I have one, too. I haven't decided yet which diode I want to use in mine. I am thinking of other possibilities than the NUBM44 diode. This might be a better option. Thanks.
 
Joined
Jun 3, 2007
Messages
2,560
Points
113
The 7A75 spot across my yard with a G2 and the 4X c-lens pair is about the same size as a M-140 with a 3 element, with the 3XBE it's about 1/3 of that, well 1/3 the height by 1/3 the width so 1/9 the area but still a small rectangle, it ignites my favorite target a brown bag in my fire pit @ 5 meters like a champ.

The center section came with the hosts, they were made by Trinh, I'm sure he can make more if you want one, it has a pocket in the end for the 3XBE but know that not all diodes will be perfectly aligned to the backing plate and the diode may not seat perfectly perpendicular so you may have to try several diodes in modules to get 1 that aligns well if you want to add the beam expander along with the c-lens pair because the BE magnifies any misalignment, this one comes out very close to perfectly center on the beam expanders output lens, but others I tried before did not.

These are the c-lenses I used > https://www.ebay.com/itm/Cylindrica...ash=item36460c9209:g:MQQAAMXQUmFSkuyf:rk:1🇵🇫0

Here's a couple pics of the host and center section, there's a tail switch and center switch both are latching.

View attachment 63536

View attachment 63537
Nice beam shots but all that work you did without actually showing what the beams cross section looks like corrected somewhat defects the purpose of this thread. Take some time and a few photos of the beams cross section. Preferably some photos of the spot a some distance. And perhaps some photos of the uncorrected beam for comparison.
 
Joined
Jul 10, 2015
Messages
9,896
Points
113
Nice beam shots but all that work you did without actually showing what the beams cross section looks like corrected somewhat defects the purpose of this thread. Take some time and a few photos of the beams cross section. Preferably some photos of the spot a some distance. And perhaps some photos of the uncorrected beam for comparison.


Techhood is really proud of their C lenses at $55 a pair. I also noticed you had the two C lenses almost as far apart as they would go in this host, of which I have one, too. I haven't decided yet which diode I want to use in mine. I am thinking of other possibilities than the NUBM44 diode. This might be a better option. Thanks.

When I use the end of a 12mm copper module to lock down my DTR G2 focused to infinity I can cheat out in the lens thread slack any slight diode misalignment as Chris was thinking about doing with set screws but I simply use the copper end to lock down my adjustment, it takes a bit of fit and refit but it needs to be done to center your beam, also I butted that 12mm copper end up to the output hole in the center section so that I can use both the set screws in the top of the center section to hold the 20mm copper module with diode shelf milled out as the 20mm shelf back halves are slightly longer when you get the one with the milled out shelf.
The output hole is a design that has no future as is the module only fitting in from the back, when I make heat sinks now I let the 20mm module hole run all the way through, that makes it a lot easier so you don't have to take the module in and out and it only comes out the back side so this adds to the difficulty when tuning, I recommend a traditional style heat sink.
 
Last edited:
Joined
Dec 15, 2014
Messages
6,782
Points
113
Hi Red,
Wow nice work on the corrected beam for that diode came out great. You have the knack for these corrected builds , nice clean work to .
Rich:)
 
Joined
Jul 10, 2015
Messages
9,896
Points
113
Thanks Rich, I find it rewarding to extend the " fun range " and tighten up the far field spot, here's that last heat sink you made for me, I put in a nubm44 and SXD doing 4.5a with a 6X c-lens pair and 3X beam expander.

Note: These 12x T6 flashlights ( Look for bargains at Ebay about 35-40 dollars ) are nice to build with and you can use 2 or 3 18650 or 26650

Also you can remove the parts from the springboard/driver and connect your wires to it so you don't need to buy anything else, the screw in heat sink is thick giving you a nice mounting point and the host is sturdy as well.

6399263993


Sorry I didn't feel like doing a build thread as I didn't take any other build pics so I will just add it here, it's a real flamethrower and these are getting easy to build so next I am going to do some 2 x 44 PBS combined and 6X corrected with a beam expander builds and maybe soon we will see some new bigger badass monster diodes. :D

639896399063991
 
Last edited:
  • Wow
Reactions: GSS
Joined
Dec 15, 2014
Messages
6,782
Points
113
Hi Red,
All I can say is wow that's a real killer build, cant get over the beam being so tight at that distance . Thats a keeper must weigh a lot but who cares about that . I enjoy the larger hosts that hold a massive sink , but the corrections are outstanding . Great job buddy glad the sink worked out well .
Rich:)
 
Joined
Jul 10, 2015
Messages
9,896
Points
113
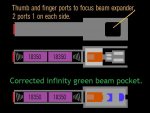
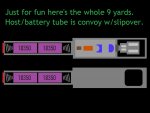
Thanks I enjoy them a lot and I would like to build a reasonably compact 1w 520 with correction or at least an enclosed beam expander to make it pocket carry friendly because the far field spot of a 1w 520/525 looks so much better when it's not a long line/bar, the 3X beam expander cleans it up nicely but if I did a C-lens correction only then it would be fixed focus with a nice looking beam so that's also an option, no real reason to do a compound ( corrected and beam expander ) on a 1w but just corrected would look good and so does adding just the beam expander.

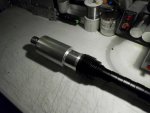
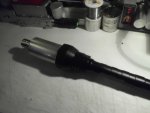
Also I have recently been using the 20mm copper modules with driver pocket and I must say I really like them, 20mm DTR copper module with driver pocket shown.

HOST/BATTERY TUBE IS A CONVOY WITH A SLIP OVER.........:D

64004
64005
 
Last edited:
Joined
Dec 15, 2014
Messages
6,782
Points
113
Hi RED,
Awesome concept buddy for a 520/1W , Oh I sent you an email I have a custom made tap for the Sanwu BE made for me and it threads on like butter. And that slipover cover would be really nice and hide the BE .

Rich:)fullsizeoutput_b5d.jpegfullsizeoutput_b5e.jpegfullsizeoutput_b5c.jpeg
 

GSS

0
Joined
Apr 28, 2015
Messages
5,069
Points
113
:eek:Just what Red needs more Beam Expander's after seeing that new custom tap:devilish:..
Oh no the horror!!:whistle:


Top