- Joined
- Sep 16, 2007
- Messages
- 3,660
- Points
- 113
Thanks for looking at my latest creation.

When the 593 nm modules became available, I snagged a few, immediately put one in a chrome pen, and inspected the modules to assess their potential.
I noticed that the collimator is plastic, which makes it a static dust magnet and is easily scratched. They also lack an IR filter, which makes it inconvenient to get an accurate power measurement. During testing, I found that they have a narrow temperature range where they perform optimally and the behavior of these modules as they warm up varies. Each of my modules has a different "personality."
With this project, I had a few goals:
1. Add an IR filter.
2. Replace the plastic collimator with a glass anti-reflection coated optic.
3. Provide ample thermal mass for stable operation.
4. Make a cool laser in my artistic style.
Bill of Materials:
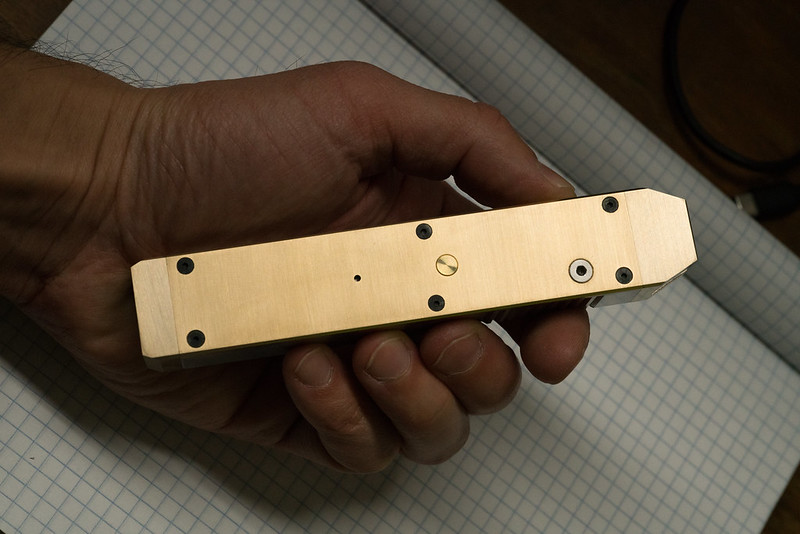
I machined all parts from brass, aluminum, and aluminum-bronze bar stock and chose alloy steel and stainless steel hardware.
1. Main body (6061 aluminum) - houses battery and electronics
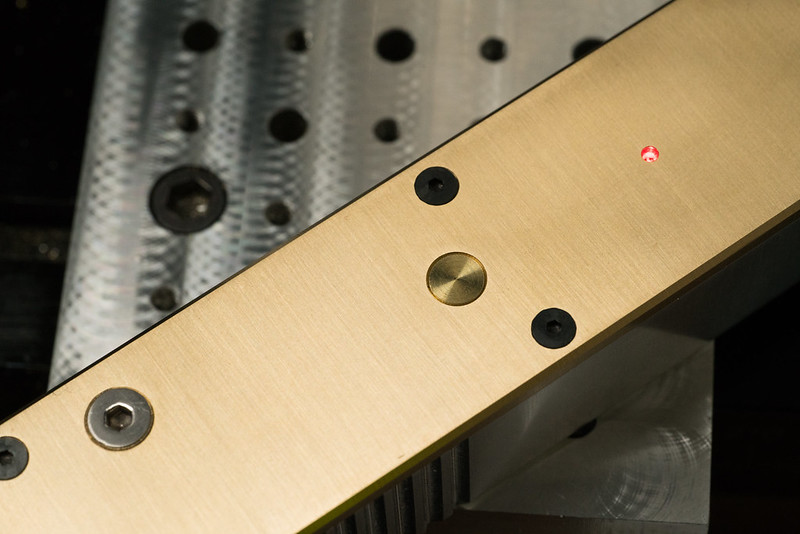
2. Cover plate (architectural brass) - laser and optics assembly is bolted to this plate
3. Head and tail caps (aluminum-bronze) - mainly aesthetic, adds weight and reduces ingress of dust
4. Button (brass rod) - just a little button turned on the mill (I don't have a lathe)
5. Hardware: metric screws, various
Off the shelf parts:
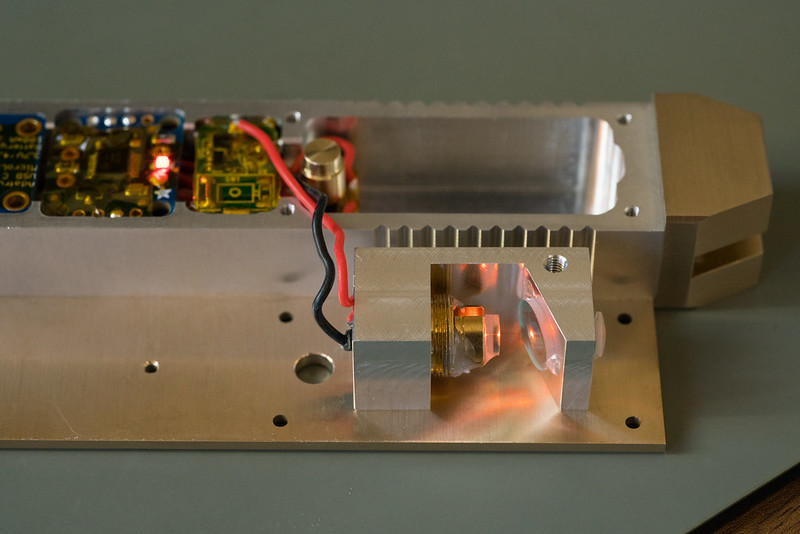
1. Adafruit USB-C charging board
2. Adafruit mosfet switch board (for click-on/click-off functionality)
3. 500 mAh LiPo battery (generic)
4. The laser module
The optics:
1. N-BK7 glass lens 6 mm diameter 15 mm focal length AR coated 350 - 700 nm
2. Unknown glass 9.5 mm diameter IR cut filter AR coated 440 - 620 nm

Specs and Details on functionality:
The laser alignment is adjustable on two axes. Rotating the module adjusts for vertical alignment and swiveling the laser and optic assembly on the cover plate adjusts horizontal alignment. This simple design allows precise alignment. I am able to get the laser within 0.5 degrees from center alignment relative to the laser body. Practically, it's not worthwhile to chase down that last half degree of misalignment.
The laser charges with USB-C. A red LED visible from the side indicates charging; a green LED indicates the laser is fully charged.
The switch board also has an LED indicator light that is activated when the laser is powered on. This is useful because when cold, the module does not lase until its warmed up, so the activation indicator will let me know that the laser is powered on even if it's not emitting laser light.
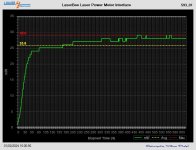
See the power graph below. I used my brand new Laserbee 3.7W power meter with the data logging software to measure the laser's power.
The laser is very stable above 25 mW over the measurement period of 10 minutes and reaches a peak of 29 mW.
I haven't yet measured divergence but it looks like it's close to 1.5 mRad, typical for DPSS lasers in this configuration.
Beam quality of this particular module is quite good, near TEM00. Mode hopping is not a big problem for this module.


I still have a little work to do on this laser. I need to machine the stainless screw holding the laser assembly to the brass plate so that it sits flush (the stock hardware tolerances are not great) and I have a home-made silicone plug for the USB-C charging port curing as I write this. The plug is made with orange glow-in-the-dark powder, so it should be pretty cool.


Thanks for reading. Please let me know what you think of my work.
If you'd like to see some of my other recent projects, check the links below:
589 nm custom build
561 nm handmade build
If you like my work, keep an eye out for my posts in the future. I've got a few other really cool projects in the works including:
Optical beam correction for 1.2 W 532 nm laser diode
Optical beam correction for NUBM0F laser diode
Very limited production run of compact hosts
& more...

When the 593 nm modules became available, I snagged a few, immediately put one in a chrome pen, and inspected the modules to assess their potential.
I noticed that the collimator is plastic, which makes it a static dust magnet and is easily scratched. They also lack an IR filter, which makes it inconvenient to get an accurate power measurement. During testing, I found that they have a narrow temperature range where they perform optimally and the behavior of these modules as they warm up varies. Each of my modules has a different "personality."
With this project, I had a few goals:
1. Add an IR filter.
2. Replace the plastic collimator with a glass anti-reflection coated optic.
3. Provide ample thermal mass for stable operation.
4. Make a cool laser in my artistic style.
Bill of Materials:
I machined all parts from brass, aluminum, and aluminum-bronze bar stock and chose alloy steel and stainless steel hardware.
1. Main body (6061 aluminum) - houses battery and electronics
2. Cover plate (architectural brass) - laser and optics assembly is bolted to this plate
3. Head and tail caps (aluminum-bronze) - mainly aesthetic, adds weight and reduces ingress of dust
4. Button (brass rod) - just a little button turned on the mill (I don't have a lathe)
5. Hardware: metric screws, various
Off the shelf parts:
1. Adafruit USB-C charging board
2. Adafruit mosfet switch board (for click-on/click-off functionality)
3. 500 mAh LiPo battery (generic)
4. The laser module
The optics:
1. N-BK7 glass lens 6 mm diameter 15 mm focal length AR coated 350 - 700 nm
2. Unknown glass 9.5 mm diameter IR cut filter AR coated 440 - 620 nm

Specs and Details on functionality:
The laser alignment is adjustable on two axes. Rotating the module adjusts for vertical alignment and swiveling the laser and optic assembly on the cover plate adjusts horizontal alignment. This simple design allows precise alignment. I am able to get the laser within 0.5 degrees from center alignment relative to the laser body. Practically, it's not worthwhile to chase down that last half degree of misalignment.
The laser charges with USB-C. A red LED visible from the side indicates charging; a green LED indicates the laser is fully charged.
The switch board also has an LED indicator light that is activated when the laser is powered on. This is useful because when cold, the module does not lase until its warmed up, so the activation indicator will let me know that the laser is powered on even if it's not emitting laser light.
See the power graph below. I used my brand new Laserbee 3.7W power meter with the data logging software to measure the laser's power.
The laser is very stable above 25 mW over the measurement period of 10 minutes and reaches a peak of 29 mW.
I haven't yet measured divergence but it looks like it's close to 1.5 mRad, typical for DPSS lasers in this configuration.
Beam quality of this particular module is quite good, near TEM00. Mode hopping is not a big problem for this module.


I still have a little work to do on this laser. I need to machine the stainless screw holding the laser assembly to the brass plate so that it sits flush (the stock hardware tolerances are not great) and I have a home-made silicone plug for the USB-C charging port curing as I write this. The plug is made with orange glow-in-the-dark powder, so it should be pretty cool.


Thanks for reading. Please let me know what you think of my work.
If you'd like to see some of my other recent projects, check the links below:
589 nm custom build
561 nm handmade build
If you like my work, keep an eye out for my posts in the future. I've got a few other really cool projects in the works including:
Optical beam correction for 1.2 W 532 nm laser diode
Optical beam correction for NUBM0F laser diode
Very limited production run of compact hosts
& more...


