- Joined
- Feb 18, 2012
- Messages
- 796
- Points
- 28
Good day ladies and gentlemen, brothers and sisters, comrades, friends...
I was thinking the other day, that someone needs to fill in the vacuum of Moh's departure. So I thought of a JAD kit idea, with a little twist I just finished the build I came up with and am actually excited to show you guys
It's a heavy-duty C6, I initially dubbed it the "Dark Knight" but I think "JAD V2" would suffice better, as I'm going to offer this as a kit. Moh had much more practical naming schemes than me
Specifications
Build: A planned kit, to be available soon
Wavelength: mainly for high-powered 445nm builds
Output: will be available from 1.6A to 1.85A (or shoot me some ideas what currents I should offer)
Material: Cu & Al
Weight: 127.8g
Driver: fmt-drv
A Pictorial Walkthrough
I start with a CREE driver for battery contact
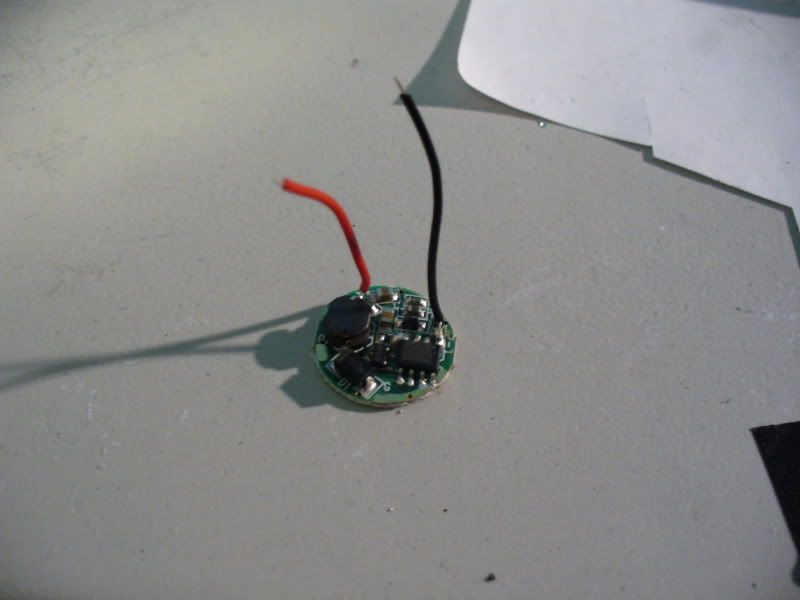
Removed smd components
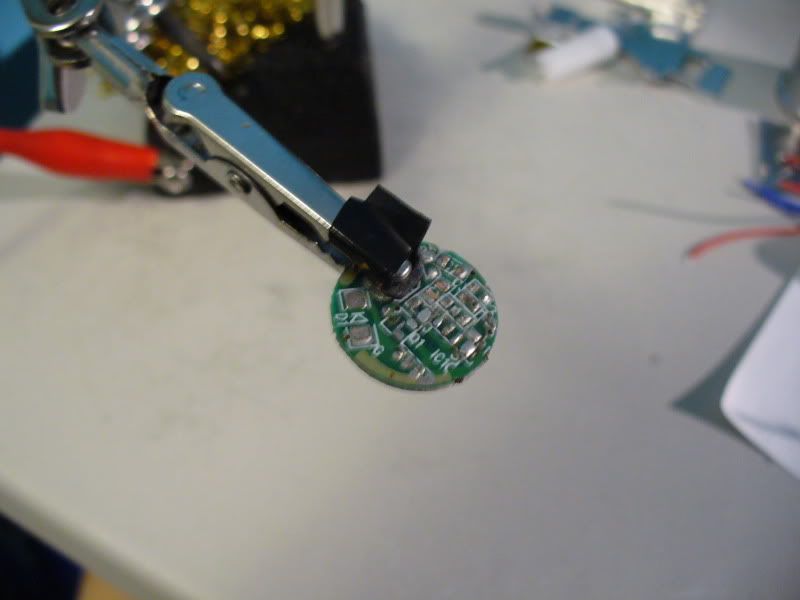
A look at the fmt-drv and thinking how to fit it in this build. I soon found that it justtt snugly fits inside the C6 pill. Awesome!
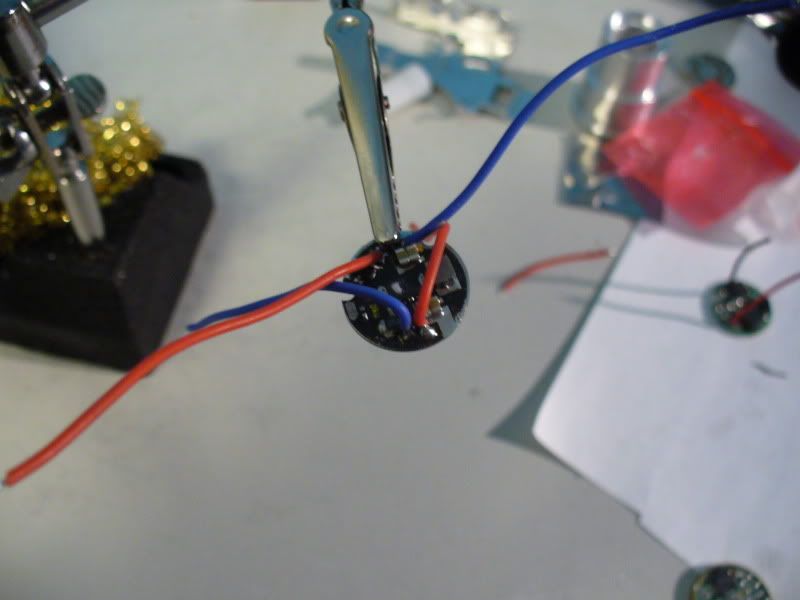
I drilled a hole through the pill so the holes properly line up with the driver board's holes, and the wires can slip through nicely
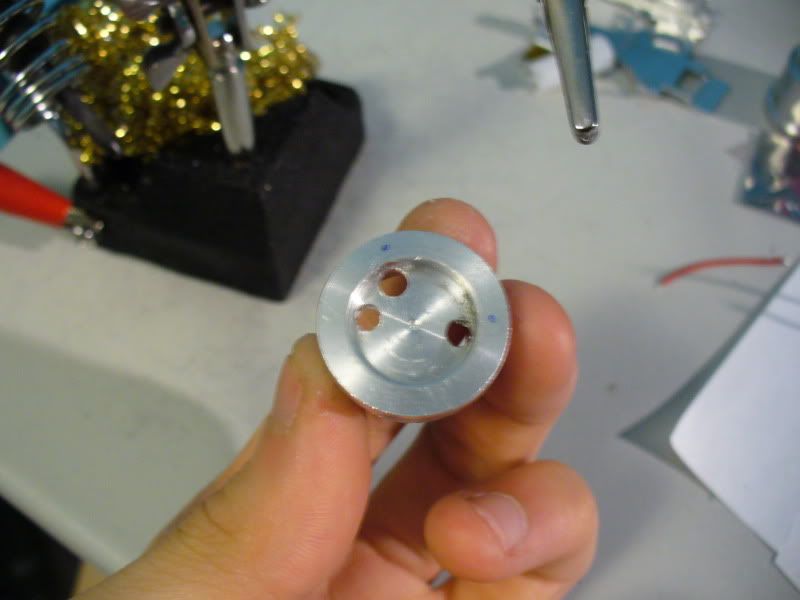
Spread some thermal compound inside the pill, so the driver can be heatsinked directly to it.
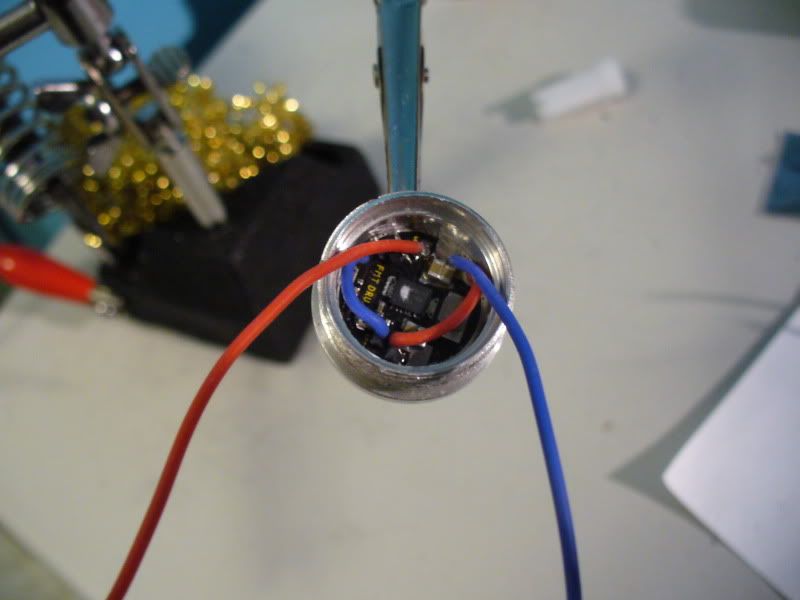
As usual, I heatsink the IC with a small aluminum chip (I always like to do this to ensure stability, even though this driver doesn't produce a lot of heat)
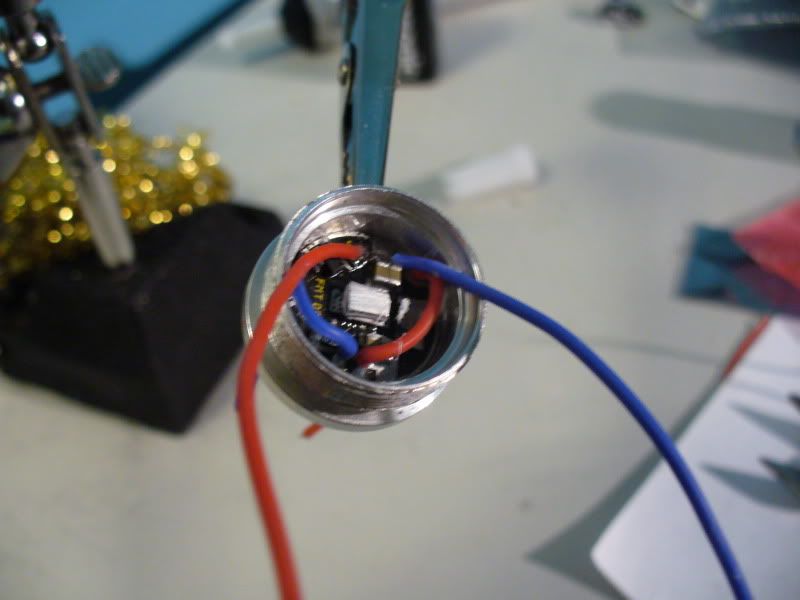
Then I soldered the battery contact to the brass ring, tested the board for continuity for the positive and negative path to the boost driver and electrically isolated all the other areas with electrical tape:
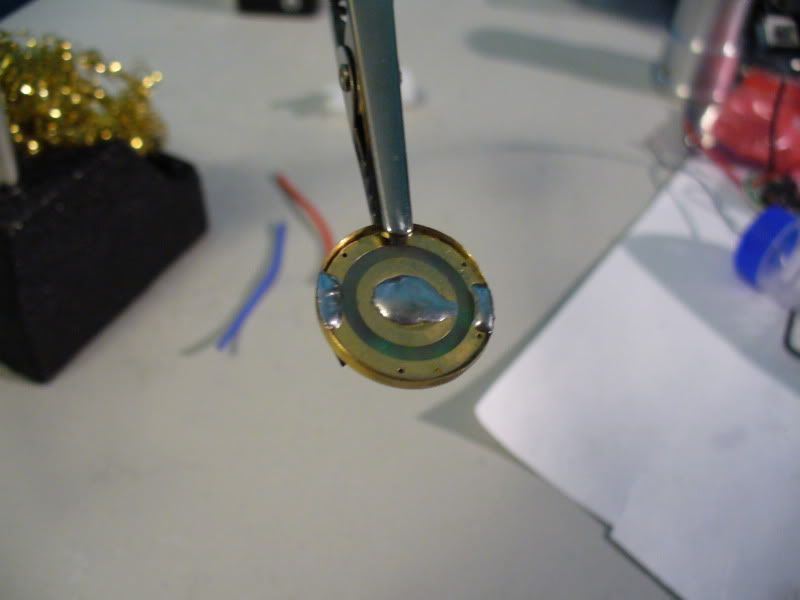
^**it's important that the center positive contact is soldered with a little mound like that, because some 18650 batteries like the NCR18650a have a flat top positive contact. W/o the solder mound, the NCR18650a's positive end won't make contact with the board.**
Next I solder the leads to the contact board then covered the joints with electrical tape to ensure total isolation from the neighbouring driver when pressed into the pill
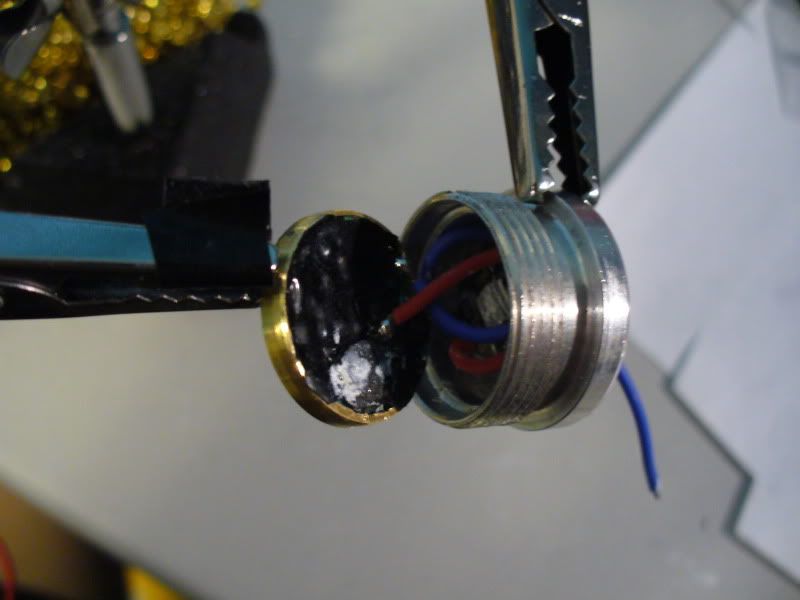
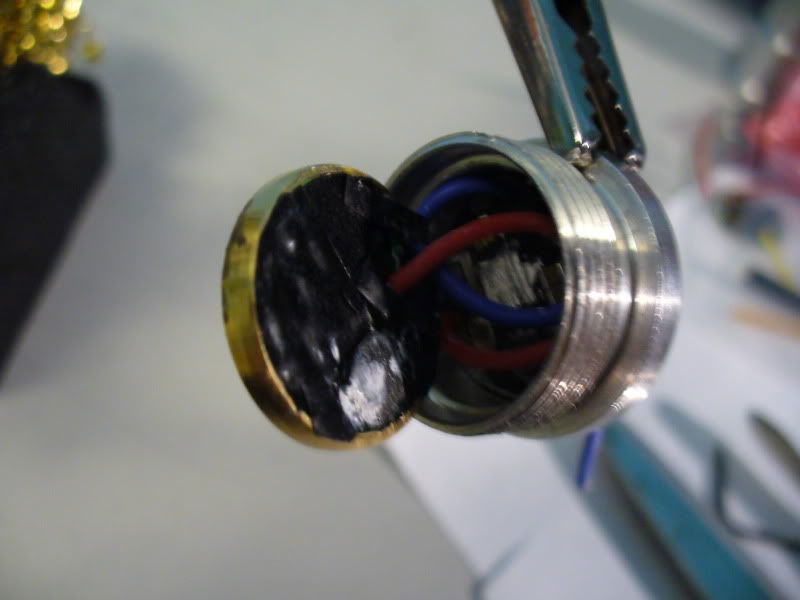
The pill portion is done
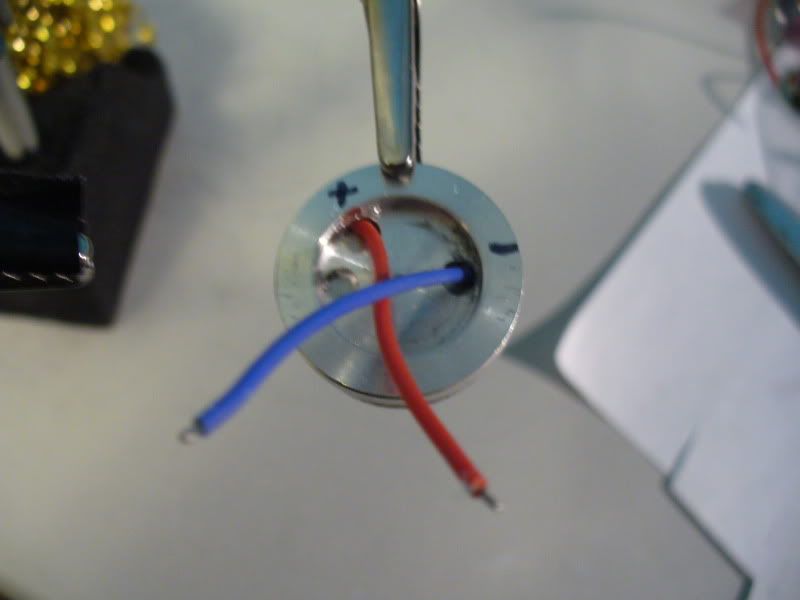
Well.. not just yet haha. As usual, I wanted more heatsinking, so I grabbed a copper RAM heatsink and ground it down half in height as well as made some space on the sides of the copper sink for wires which will be coming out of the pill
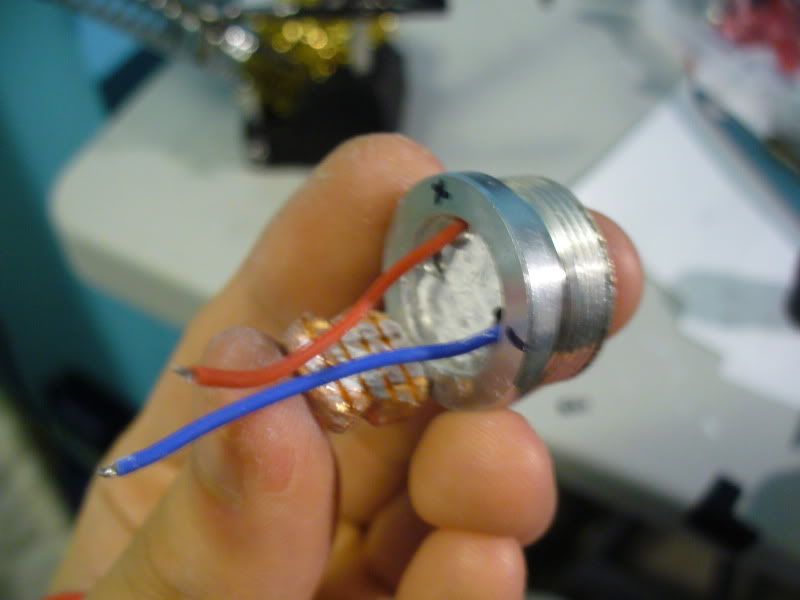
This is how I designed the heatsink to sit on top the copper RAM heatsink so the entire pill-heatsink is thermally connected. This part, it was important that the copper sink's holes provide enough room for the wires or they'll get pinched.
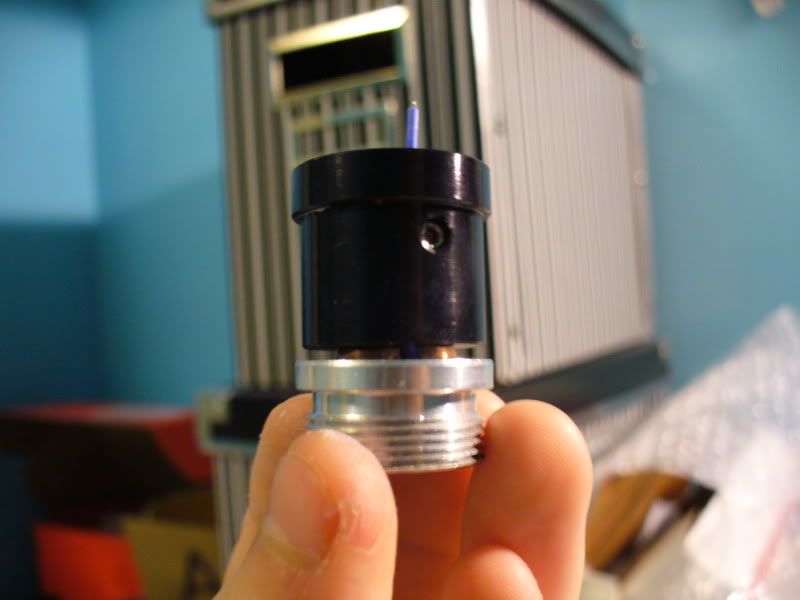
Completed Pill
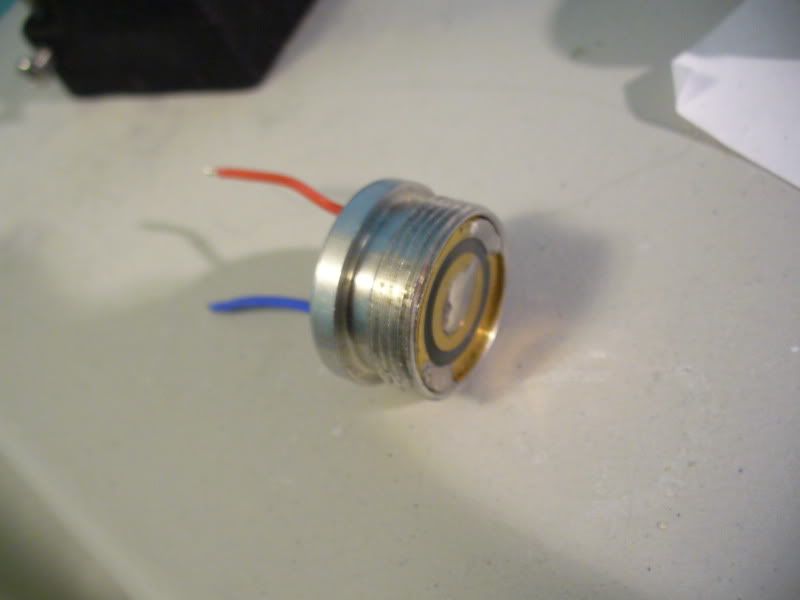
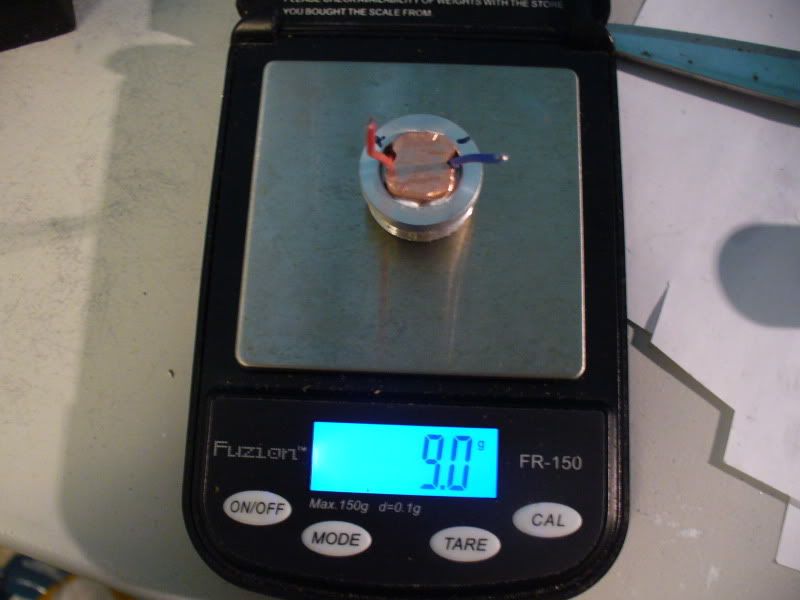
So this was an interesting bit.. I was digging through some of my old stuff and found a mini-scale! Out of curiosity, I wanted to find out the weight of the assembled pill, so i weighed it and it came out to be exactly 9.0g, which is an amazing coincidence for me because 9 has always been my favourite number. This gave me some serious goosebumps.
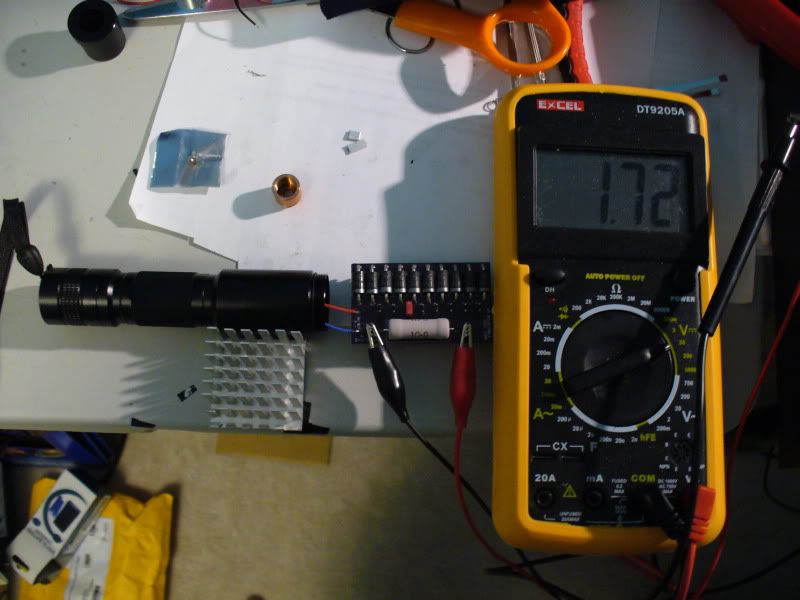
Anyway this part onwards have nothing to do with the JAD kit, but I wanted to test the driver anyway so I completed the build. I tested the setup on a test load and it's driving 1.72A to the diode. All looks good
Prepped the diode & soldered connections and of course heatshrunk the exposed wires
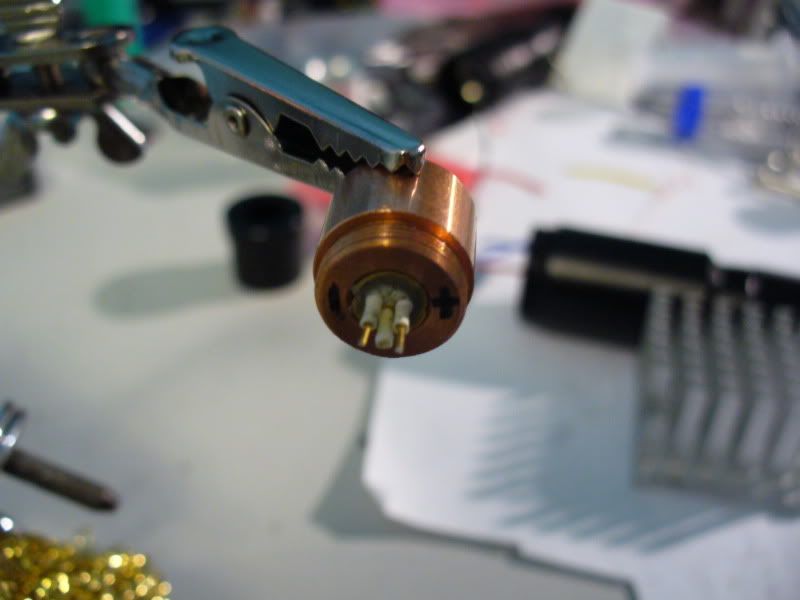
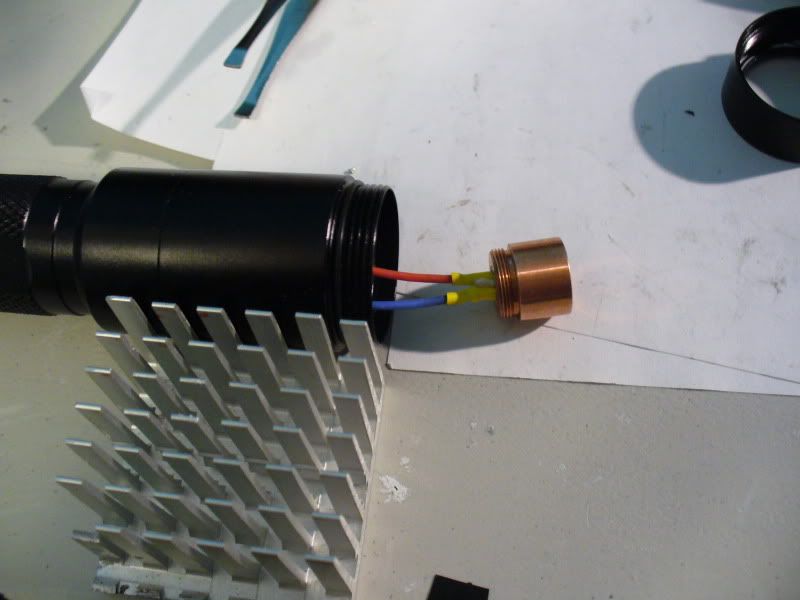
Then I prep the copper sink and module with Arctic Silver Ceramique 2, the Al heatsink will fit over the module and press into the copper sink
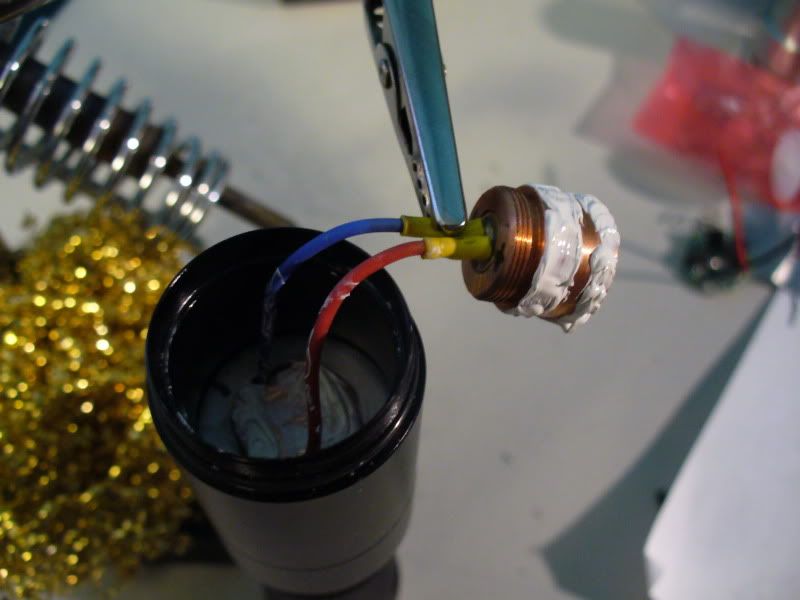
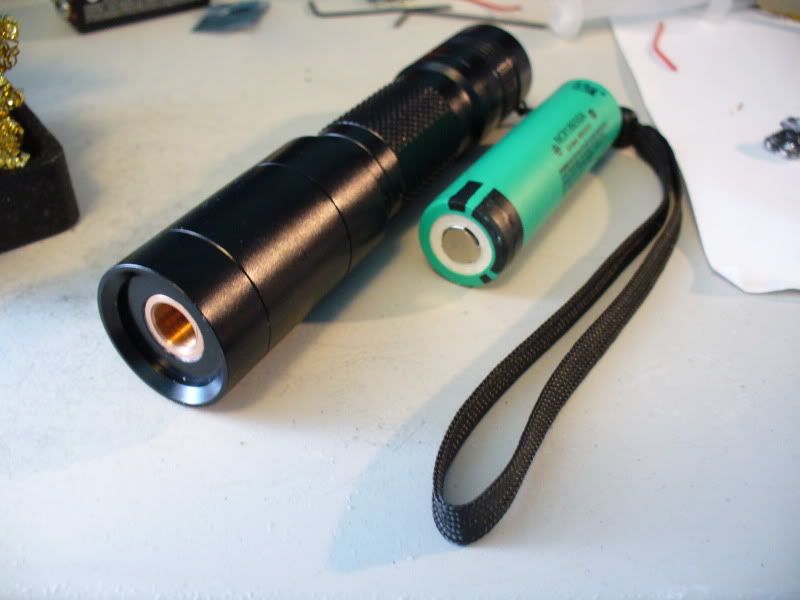
Completed
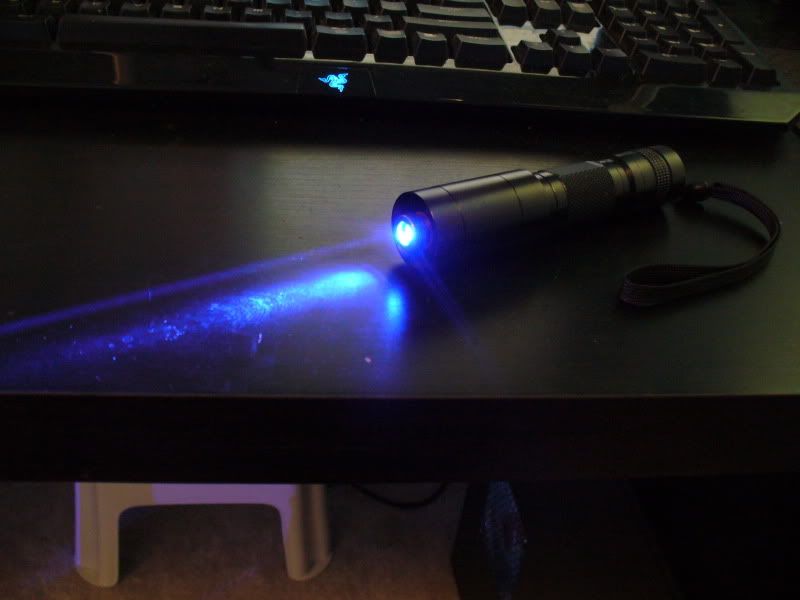
Quick Beamshot
My Thoughts
Alright so that's a little walkthrough of my "heavy-duty" C6 build. Couple of things: unlike with a linear, I notice the driver portion of this laser barely gets warm, which is good so the sinks can absorb more heat from the diode. It's a very stable setup, I ran it for just over 3 minutes and thermal protection still didn't kick in; I wasn't willing to push it any longer. Feel-wise, this build feels more solid and heavy than a standard C6.
The Benefits of this Setup
The great thing about this setup is that it is regulated by a single boost driver and able to achieve high currents like 1.7 or 1.8A without the use of dual drivers, which take up a lot of space and are less efficient. Powered by a 18650 battery (I use an NCR18650a) it has 2.2X more battery capacity than a 2x16340 setup. Furthermore, this boost is more efficient than a linear (~80% vs ~50% efficiency), so I'm expecting close to 3x longer runtime from this heavy-duty C6 vs a linear-driven C6. Being more efficient, it also produces less heat, so I'm expecting longer duty cycles as well, which is a valuable trait for such a compact build. I will do more testing to get a feel for the duty cycle but it should fair pretty well.
I went with a CuAl module-heatsink setup, because my theory is that the copper module does an excellent job extracting heat from the diode and transferring it unto the Al heatsink; the Al heatsink then dissipates the heat quickly (quicker than copper).
So.. that's that
The Kit
I would like to offer this as a "JAD V2" kit, I think I will only make a few of these though, depending on interest. So you guys let me know if you'd be interested I plan to have a few in stock in about 1-2 weeks, but I'll start to take pre-orders now. Just PM me with your choice of current from 1.6A to 1.85A.
So yipeedeeday! I feel real great after finishing this build , and now I'm going to enjoy this laser for awhile, then LPM it. It should be hitting around 1.8W with a 3-element lens, but I'll get back to that
Cheers everyone :beer:
I was thinking the other day, that someone needs to fill in the vacuum of Moh's departure. So I thought of a JAD kit idea, with a little twist
It's a heavy-duty C6, I initially dubbed it the "Dark Knight" but I think "JAD V2" would suffice better, as I'm going to offer this as a kit. Moh had much more practical naming schemes than me
Specifications
Build: A planned kit, to be available soon
Wavelength: mainly for high-powered 445nm builds
Output: will be available from 1.6A to 1.85A (or shoot me some ideas what currents I should offer)
Material: Cu & Al
Weight: 127.8g
Driver: fmt-drv
A Pictorial Walkthrough
I start with a CREE driver for battery contact

Removed smd components

A look at the fmt-drv and thinking how to fit it in this build. I soon found that it justtt snugly fits inside the C6 pill. Awesome!

I drilled a hole through the pill so the holes properly line up with the driver board's holes, and the wires can slip through nicely

Spread some thermal compound inside the pill, so the driver can be heatsinked directly to it.

As usual, I heatsink the IC with a small aluminum chip (I always like to do this to ensure stability, even though this driver doesn't produce a lot of heat)

Then I soldered the battery contact to the brass ring, tested the board for continuity for the positive and negative path to the boost driver and electrically isolated all the other areas with electrical tape:

^**it's important that the center positive contact is soldered with a little mound like that, because some 18650 batteries like the NCR18650a have a flat top positive contact. W/o the solder mound, the NCR18650a's positive end won't make contact with the board.**
Next I solder the leads to the contact board then covered the joints with electrical tape to ensure total isolation from the neighbouring driver when pressed into the pill


The pill portion is done

Well.. not just yet haha. As usual, I wanted more heatsinking, so I grabbed a copper RAM heatsink and ground it down half in height as well as made some space on the sides of the copper sink for wires which will be coming out of the pill

This is how I designed the heatsink to sit on top the copper RAM heatsink so the entire pill-heatsink is thermally connected. This part, it was important that the copper sink's holes provide enough room for the wires or they'll get pinched.

Completed Pill

So this was an interesting bit.. I was digging through some of my old stuff and found a mini-scale! Out of curiosity, I wanted to find out the weight of the assembled pill, so i weighed it and it came out to be exactly 9.0g, which is an amazing coincidence for me because 9 has always been my favourite number. This gave me some serious goosebumps.

Anyway this part onwards have nothing to do with the JAD kit, but I wanted to test the driver anyway so I completed the build. I tested the setup on a test load and it's driving 1.72A to the diode. All looks good

Prepped the diode & soldered connections and of course heatshrunk the exposed wires


Then I prep the copper sink and module with Arctic Silver Ceramique 2, the Al heatsink will fit over the module and press into the copper sink

Completed

Quick Beamshot

My Thoughts
Alright so that's a little walkthrough of my "heavy-duty" C6 build. Couple of things: unlike with a linear, I notice the driver portion of this laser barely gets warm, which is good so the sinks can absorb more heat from the diode. It's a very stable setup, I ran it for just over 3 minutes and thermal protection still didn't kick in; I wasn't willing to push it any longer. Feel-wise, this build feels more solid and heavy than a standard C6.
The Benefits of this Setup
The great thing about this setup is that it is regulated by a single boost driver and able to achieve high currents like 1.7 or 1.8A without the use of dual drivers, which take up a lot of space and are less efficient. Powered by a 18650 battery (I use an NCR18650a) it has 2.2X more battery capacity than a 2x16340 setup. Furthermore, this boost is more efficient than a linear (~80% vs ~50% efficiency), so I'm expecting close to 3x longer runtime from this heavy-duty C6 vs a linear-driven C6. Being more efficient, it also produces less heat, so I'm expecting longer duty cycles as well, which is a valuable trait for such a compact build. I will do more testing to get a feel for the duty cycle but it should fair pretty well.
I went with a CuAl module-heatsink setup, because my theory is that the copper module does an excellent job extracting heat from the diode and transferring it unto the Al heatsink; the Al heatsink then dissipates the heat quickly (quicker than copper).
So.. that's that
The Kit
I would like to offer this as a "JAD V2" kit, I think I will only make a few of these though, depending on interest. So you guys let me know if you'd be interested
So yipeedeeday! I feel real great after finishing this build
Cheers everyone :beer:
Last edited:


