Welcome to Laser Pointer Forums - discuss green laser pointers, blue laser pointers, and all types of lasers

How to Register on LPF | LPF Donations

Soldering 1N5404 diodes

Joined
Sep 22, 2010
Messages
1,360
Points
48
I feel stupid for asking this but has anyone else had problems soldering these damned things together? I've never had problems like this soldering things together before. I cleaned the leads, fluxed, then tried to solder but it just didn't stick. I kept getting cold joints that would snap as soon as I'd remove the alligator clip that I used to hold the leads together. The only thing I could think of was maybe I wasn't applying enough heat but when I touched one of the diodes it was extremely hot to the touch and I didn't know how much heat they can take and didn't want to damage them. I'm about ready to file the end of the leads down to fit in my breadboard. That or look for a prebuilt one.


Your alligator clip is to close to the joint and it's wicking the heat away would be my 1st guess. These diodes can take a fair amount of heat before damage.
 
More Heat is needed. There leads are thick so you need to leave your soldering iron on them a little longer before you bring your solder into the picture.

Try putting a little solder on your iron this will help transfer the heat better, wait a little longer then you are now then touch the solder to the leads of the diodes. This should solve your problem.

I just made another testload last night but i was not having no issue with them and Ive made 3 so far. Iam using a 40Watt Iron.
 
I just made one too ... it did take a little longer than usual for the solder to wick up into the PCB hole. Those leads are massive.

 
Thanks for the info. I figured it was lack of heat. I have a variable temp 50w weller that I normally keep it at about 650-700F to keep the time the iron is in contact with the components at a minimum. I'll try bumping it to around 725-750.

jib-

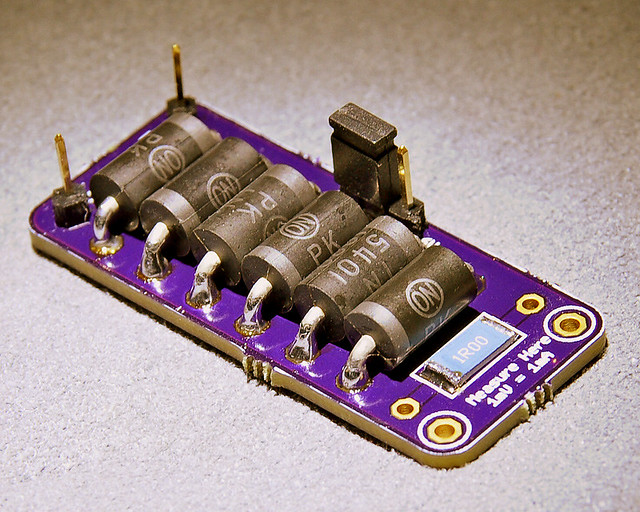
I really like that test load. Where'd you get that if you don't mind me asking.
 
Thanks, it's a PCB I designed and had made.

Nice looking job there. I threw mine together with some stuff I found laying around.

fojbtl.jpg
 
Well for those who voted "apply more heat dumb ass!" you were right. I upped the heat to about 725-730F (no digital display) and used my wider tip with a solder blob to apply heat from the bottom of the joint. After about 1-2 seconds the rosin flux would liquify and flow nicely signaling it was time to apply the solder which also flowed nice and smoothly. A couple joints look like a vampire did them where the solder flowed into the alligator clips. The divots it left look like teeth marks.

Now I can test my flex drive to see if I killed the thing or not.
 
A little late to do any good, but still a good thing to remember when soldering component leads together is to make a sound physical joint first; twist ( of cup, wrap one around the other) the leasd before soldering. another thing that I try to do is pre-tin the joining surfaces (coat with a little solder) first, if possible. otherwise, try scraping any oxidation off the leads where you will be soldering. Then use the alligators as heat sinks between the joint and the component bodies. and finally, apply heat a few seconds before applying solder (always solder a hot joint, NEVER apply solder then heat the joint to melt it). All of the above not always possible, but using as many as possible reduces cold joints and damage to components.
If you are an experienced solderer and I have overstepped my bounds, my apologies.
If you are relatively new to soldering techniques, this is your free lesson in soldering 101. Either way, good luck in your projects.
Splat


Back
Top