

Gabe
0
- Joined
- Jan 10, 2015
- Messages
- 1,147
- Points
- 83
Hey everyone! Here I have a little show n tell/story for you guys! So recently, I started investigating how lasers are put together, in anticipation of an upcoming build. In my opinion, the best way to learn about something is by either metaphorically, or literally, dissecting it. By taking it apart, looking at the pieces, seeing how they work together, just seeing what makes it 'tick'. So that's what I did, I took apart some of my lasers, even swapped a few hosts here and there. And even though I lost two of my lasers (rip in peace), I gained some great knowledge. It's the only way you can become a true master in something, by passionately learning.
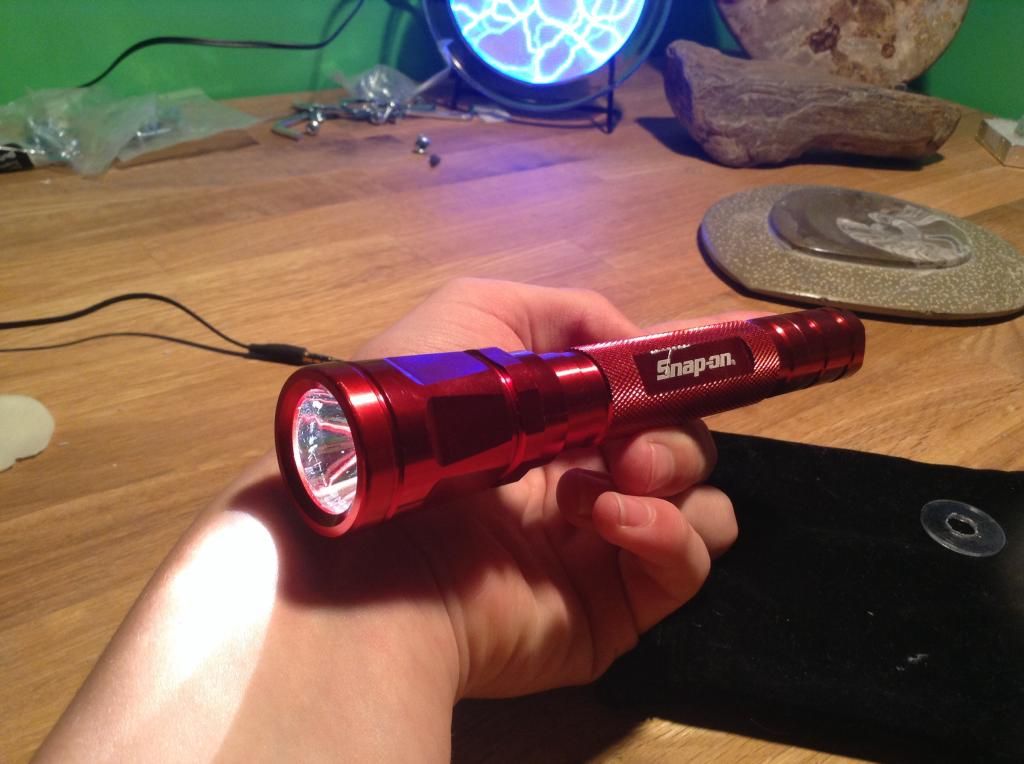
Anyway, a while ago I investigated a nice aluminum flashlight, a pretty generic led one, but I have a thing for it. This is what it looks like:
It has a nice clicky tailcap too.

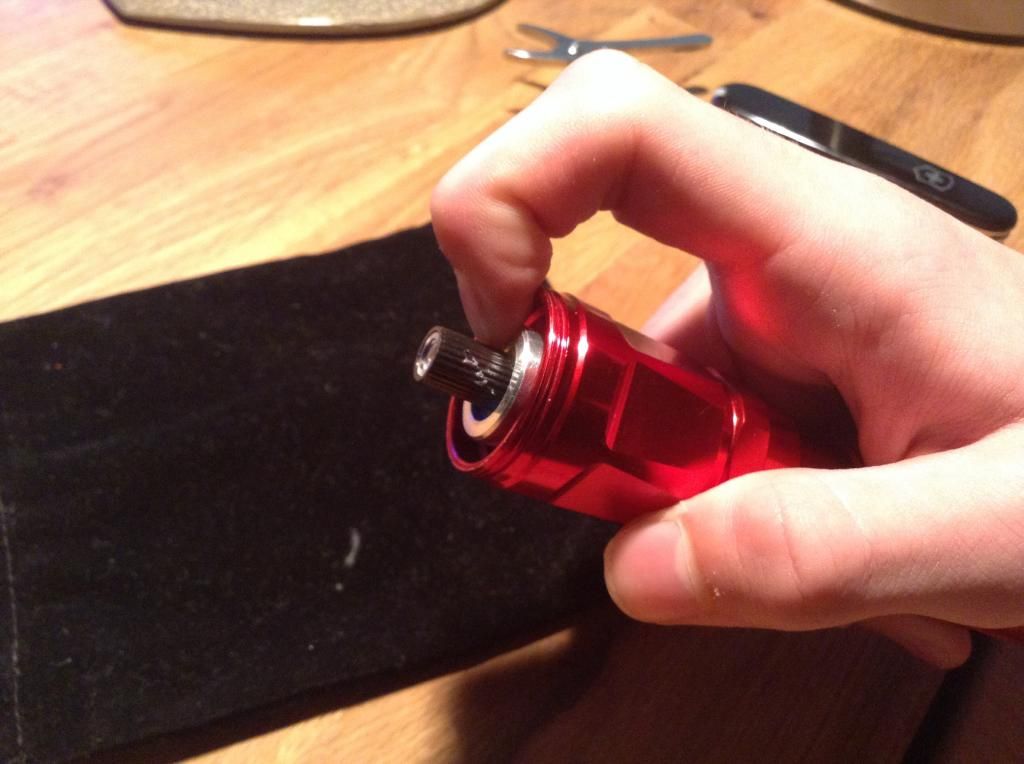
I also had a little ~40mW China laser, fairly bright. So just tonight I took them both apart again, and I noticed something quite lovely. The laser module was in its own heat sink, like this:
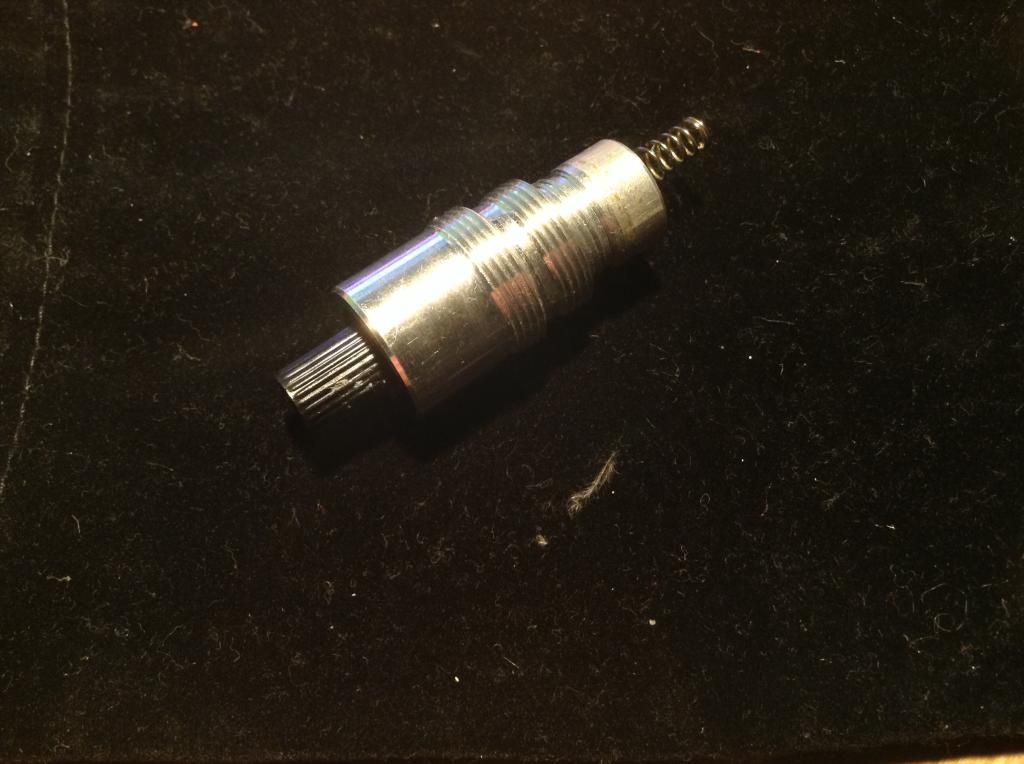
The actual module and driver are fit snug inside the aluminum.
I took out the led and plug thingy, and noticed, the deepest the heatsink could slide into the front was just the right amount of distance to push the spring up against the battery!
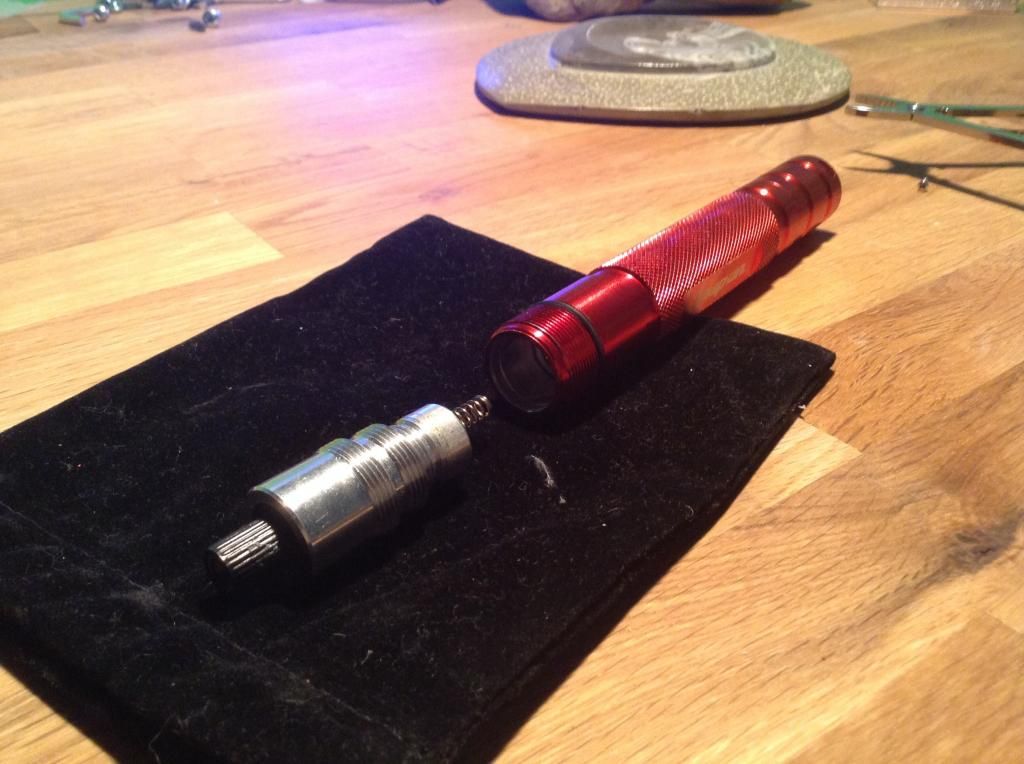
The farthest it can be pushed in:
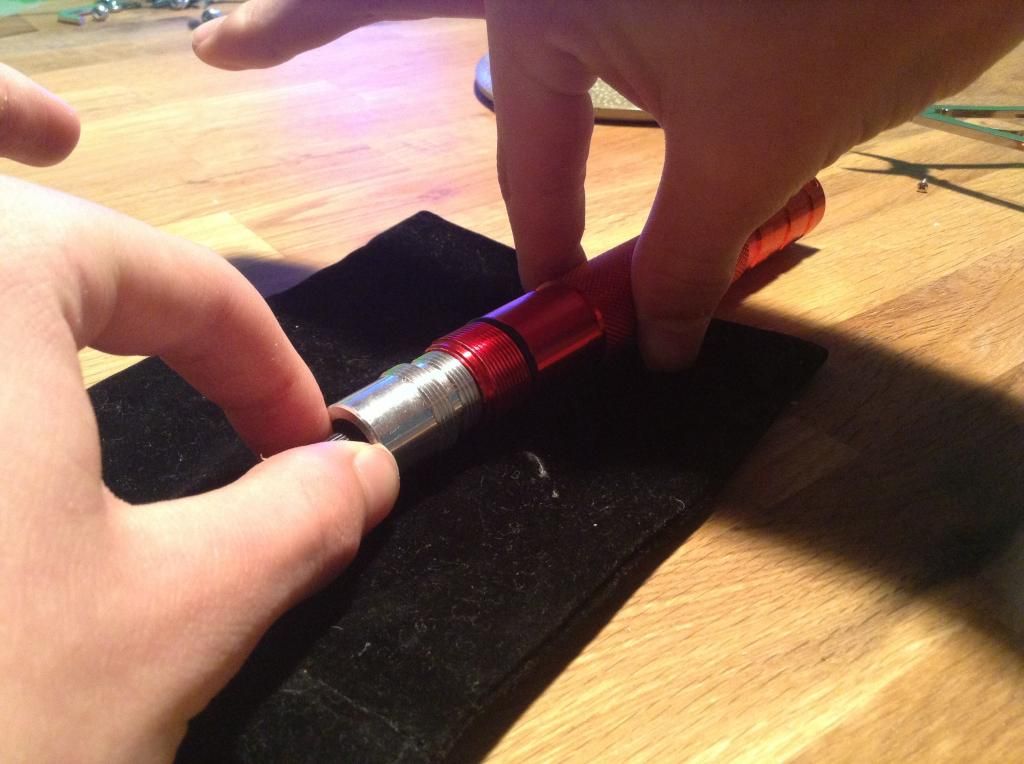
And the miracles keep coming! I saw that if I screwed the head back on, and pushed the module down as far as it could go again, the top of the heatsink is flush with the tip of the head!!
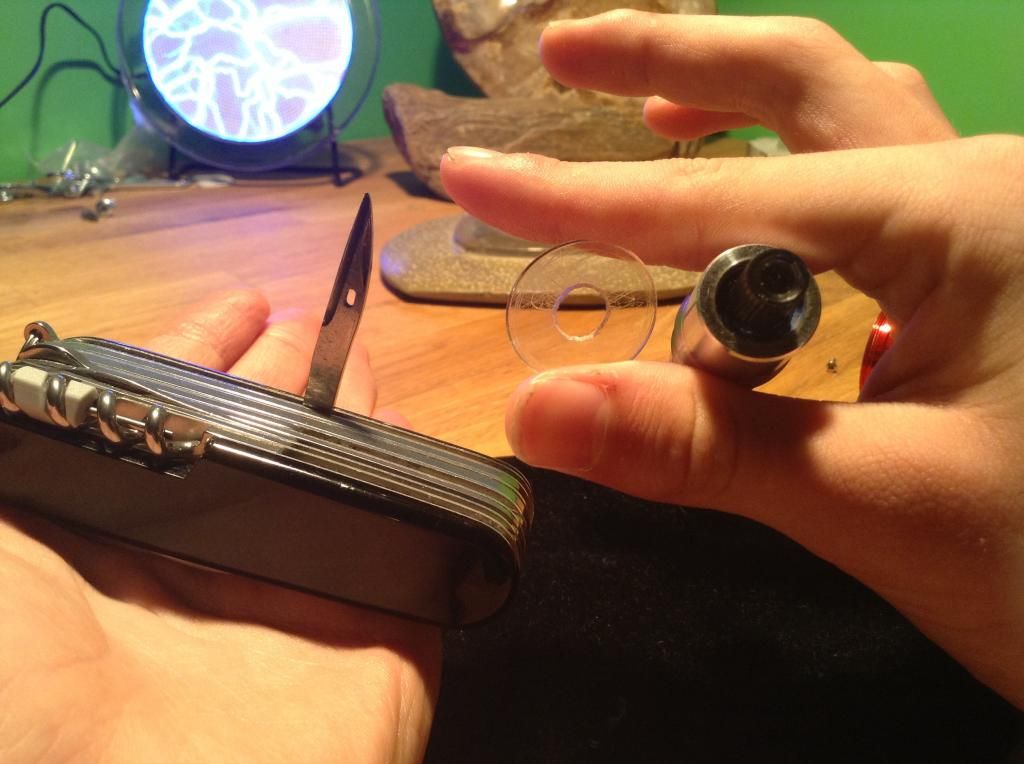
And the perfect solution came to me... Since the heatsink is flush with the top, and it's wider than the lens that sticks out, I could drill a hole in the clear plastic lens thingy that was part of the flashlight, slide the laser lens through that, and screw everything back on! And that I did. Using my trusty and beloved Swiss Army Knife, I got a fairly centered hole in the plastic. (This was the most painstakingly tedious part :/ )
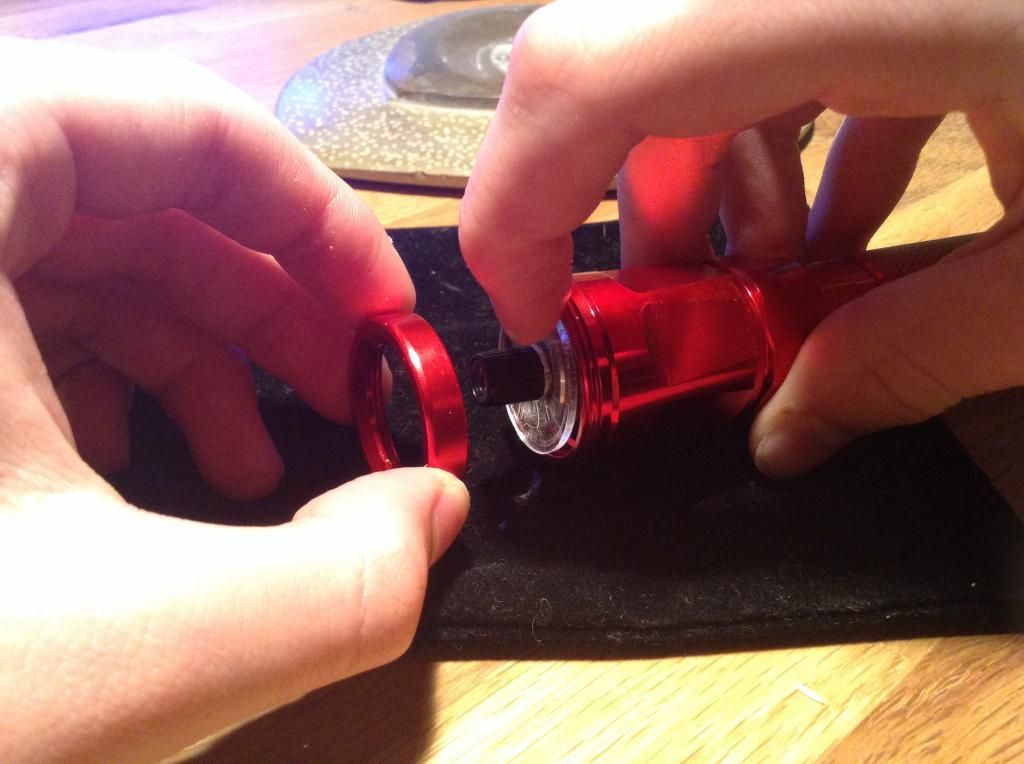
The lens fit snugly inside the hole. The final part was to screw on the bezel, and put in the batteries!
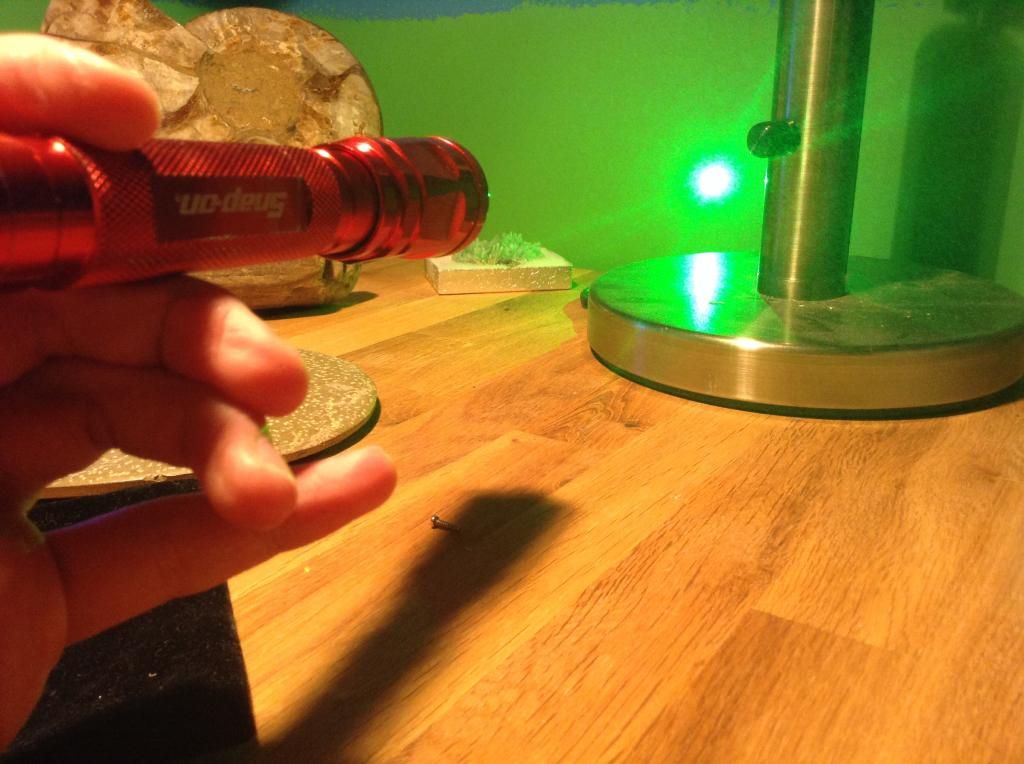
And I must say, to me it's beautiful. I especially love how the clear plastic gives you a window into the heatsink area! It's still operated by the clicky switch,and I thankfully see no difference in brightness between the two AA batteries, and the 16340 that was powering it before.

Sadly, conditions aren't right for a beamshot
And while I'm sure vets and noobs alike are looking at this, shrugging their shoulders and thinking "meh...", this might be the thing that I'm most proud of that I've made myself! The fact that it came together so nice in just one night makes me so happy .
I guess the point of this post is not only to share, but to tell beginners to not be afraid to get curious or creative. Surely, great things will come of it!
Thanks for reading! :beer:
-Gabe
Anyway, a while ago I investigated a nice aluminum flashlight, a pretty generic led one, but I have a thing for it. This is what it looks like:

It has a nice clicky tailcap too.

I also had a little ~40mW China laser, fairly bright. So just tonight I took them both apart again, and I noticed something quite lovely. The laser module was in its own heat sink, like this:

The actual module and driver are fit snug inside the aluminum.
I took out the led and plug thingy, and noticed, the deepest the heatsink could slide into the front was just the right amount of distance to push the spring up against the battery!

The farthest it can be pushed in:

And the miracles keep coming! I saw that if I screwed the head back on, and pushed the module down as far as it could go again, the top of the heatsink is flush with the tip of the head!!

And the perfect solution came to me... Since the heatsink is flush with the top, and it's wider than the lens that sticks out, I could drill a hole in the clear plastic lens thingy that was part of the flashlight, slide the laser lens through that, and screw everything back on! And that I did. Using my trusty and beloved Swiss Army Knife, I got a fairly centered hole in the plastic. (This was the most painstakingly tedious part :/ )

The lens fit snugly inside the hole. The final part was to screw on the bezel, and put in the batteries!

And I must say, to me it's beautiful. I especially love how the clear plastic gives you a window into the heatsink area!
It's still operated by the clicky switch,and I thankfully see no difference in brightness between the two AA batteries, and the 16340 that was powering it before. 

Sadly, conditions aren't right for a beamshot
And while I'm sure vets and noobs alike are looking at this, shrugging their shoulders and thinking "meh...", this might be the thing that I'm most proud of that I've made myself! The fact that it came together so nice in just one night makes me so happy
. I guess the point of this post is not only to share, but to tell beginners to not be afraid to get curious or creative. Surely, great things will come of it!
Thanks for reading! :beer:
-Gabe


