Welcome to Laser Pointer Forums - discuss green laser pointers, blue laser pointers, and all types of lasers

LPF Donation via Stripe | LPF Donation - Other Methods

Links below open in new window

ArcticMyst Security by Avery

Portland, Or. area help for my 1st build.

Joined
Nov 4, 2014
Messages
1,146
Points
63
Hey LPF,
Here is the situation. I just ordered 2 Kryton Groove hosts seen here. To build a 1w 520nm from DTR seen here, with the X-drive driver. From my research I think I will be needing a 520nm AR Coated Three Element Glass Lens since I am going for beam quality not burning stuff.

My concerns are this. I have never built a laser and this host doesn't seem like its as cut and dry as others I have read about. From watching the tutorial It looks like I need to build a modified ground lead and solder a heat sink on the driver. I did a search for these and didn't find anything that clearly explained how to do this enough that I feel confident to go for it alone. Considering the cost of this diode I would like some help with the build.
Is there anyone in my area that is willing to help me with my first build? I can compensate you for your time or buy beers and pizza ext.

The second Kryton is a 5.6mm and I will be building a 462nm 2W at a later time hopefully on my own after having some help on the first build.


Joined
Sep 22, 2014
Messages
49
Points
8
Hey LPF,
Here is the situation. I just ordered 2 Kryton Groove hosts seen here. To build a 1w 520nm from DTR seen here, with the X-drive driver. From my research I think I will be needing a 520nm AR Coated Three Element Glass Lens since I am going for beam quality not burning stuff.

My concerns are this. I have never built a laser and this host doesn't seem like its as cut and dry as others I have read about. From watching the tutorial It looks like I need to build a modified ground lead and solder a heat sink on the driver. I did a search for these and didn't find anything that clearly explained how to do this enough that I feel confident to go for it alone. Considering the cost of this diode I would like some help with the build.
Is there anyone in my area that is willing to help me with my first build? I can compensate you for your time or buy beers and pizza ext.

The second Kryton is a 5.6mm and I will be building a 462nm 2W at a later time hopefully on my own after having some help on the first build.


Love to help you out but I'm like 2.5 hours away, I am building my kryton with 445. 9mm diode with a 2.4a xdrive. I'll be building it tomorrow evening and I'll post some pictures so you can use it for a reference.
 
Joined
Nov 4, 2014
Messages
1,146
Points
63
Love to help you out but I'm like 2.5 hours away, I am building my kryton with 445. 9mm diode with a 2.4a xdrive. I'll be building it tomorrow evening and I'll post some pictures so you can use it for a reference.

That would be great! The part I am most curious about the build is the heatsink on the driver and how you attach the ground lead to the host. Thanks
Jeff
 
Joined
Sep 7, 2007
Messages
634
Points
0
Most hosts are case negative. If your driver is continuous ground then what you will need to do is bridge the case pin and the negative pin of the diode together. This will supply your driver with the negative from the case of the host. If the driver is not continuous ground then you simply solder a jumper wire from case pin of diode to the drivers negative input side. No worries you will be fine. It seems scary but once all your components are in front of you it will be just fine.
 
Joined
May 25, 2013
Messages
534
Points
28
Do you think the Kryton Groove will be sufficient for the 520nm Diode, They put out alot of heat?
well unless you are going to be very sensible with your duty cycles?
I guess im just worrying on your behalf because if i had that diode i would go a bit silly with some big chuck of copper in a Big host
 
Last edited:
Joined
Sep 7, 2007
Messages
634
Points
0
A 520 will be just fine in a Kryton. I believe those hosts are direct diode which means the diode gets pressed directly in the host's head/heatsink. Much more efficient at heat transfer than having the diode in a module and secured with set screw.
 
Joined
Nov 4, 2014
Messages
1,146
Points
63
Most hosts are case negative. If your driver is continuous ground then what you will need to do is bridge the case pin and the negative pin of the diode together. This will supply your driver with the negative from the case of the host. If the driver is not continuous ground then you simply solder a jumper wire from case pin of diode to the drivers negative input side. No worries you will be fine. It seems scary but once all your components are in front of you it will be just fine.
Thanks for the encourgment. I was hoping that things might make more sense once I am holding the hosts and parts in my hands.

Do you think the Kryton Groove will be sufficient for the 520nm Diode, They put out alot of heat?
well unless you are going to be very sensible with your duty cycles?
I guess im just worrying on your behalf because if i had that diode i would go a bit silly with some big chuck of copper in a Big host
ThTs a good question. I sure hope it will be okay. I told the seller what I was planing on put in it and I saw he had built a 1.4w 520 in one.
 
Joined
May 4, 2009
Messages
5,443
Points
113
There is a bit of a problem as I see it any way with the Kryton host as you have to press the diode into the head which is good but then you solder
the driver onto the LD and a spring onto the driver now if you don't support all that with some kind of bracing then the battery is going to be
putting pressure on the driver and the laser diodes leads all the time now think about if you bump it forward and there is maybe a force of 100
pounds put there.

I have solved this in the past by using thermal epoxy and aluminum blocks>


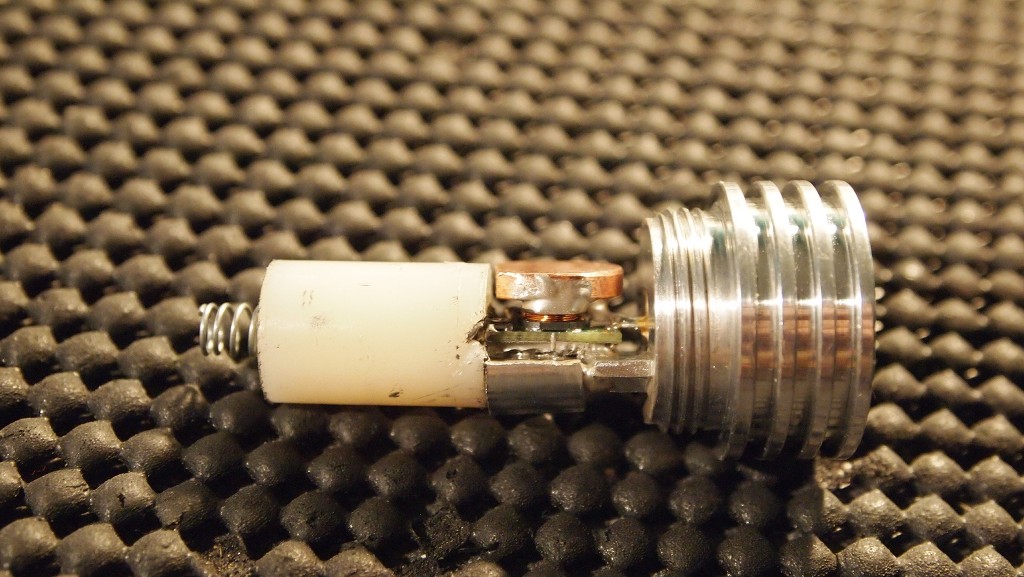
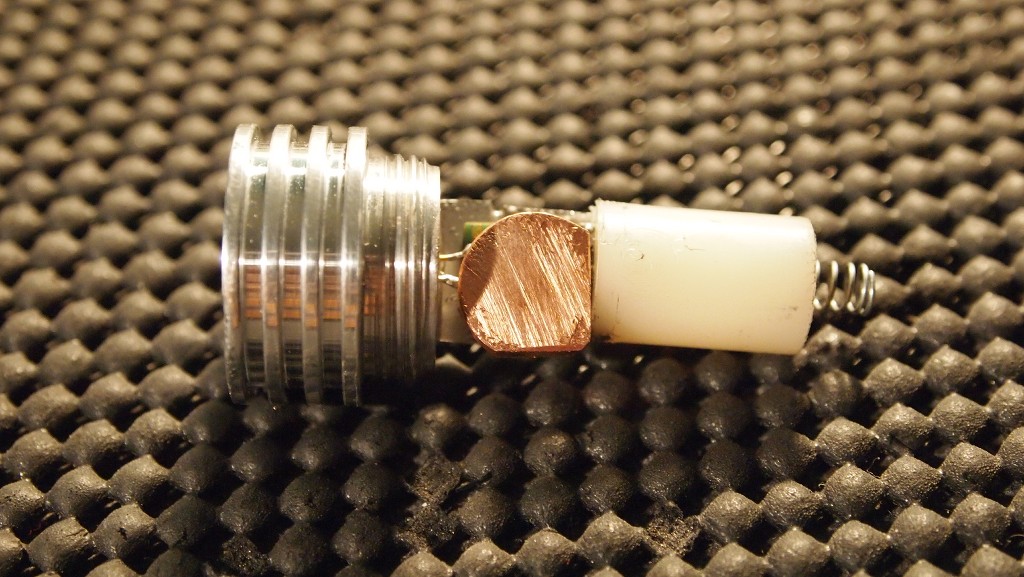
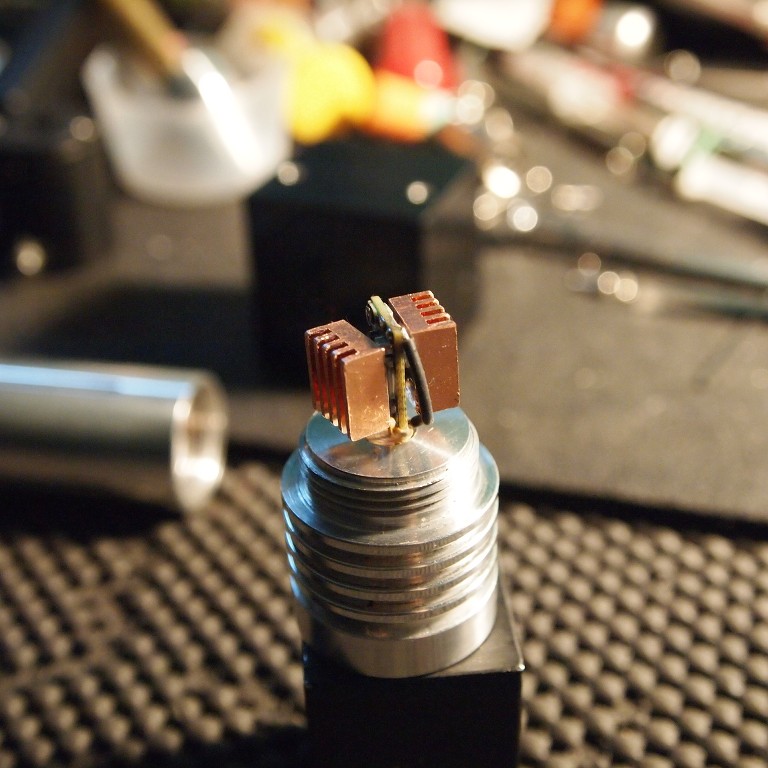
an other way to heat sink a HP driver.


I need to make a spacer that goes up against the front and surrounds the driver and then holds a contact board for the power connection, this will
take all the pressure off the LD's leads and the driver and it can also be used a a heat sink for the driver :D
Yep I need to make some of them :thinking:
 
Last edited:
Joined
Mar 11, 2009
Messages
898
Points
0
I have solved this in the past by using thermal epoxy and aluminum blocks>

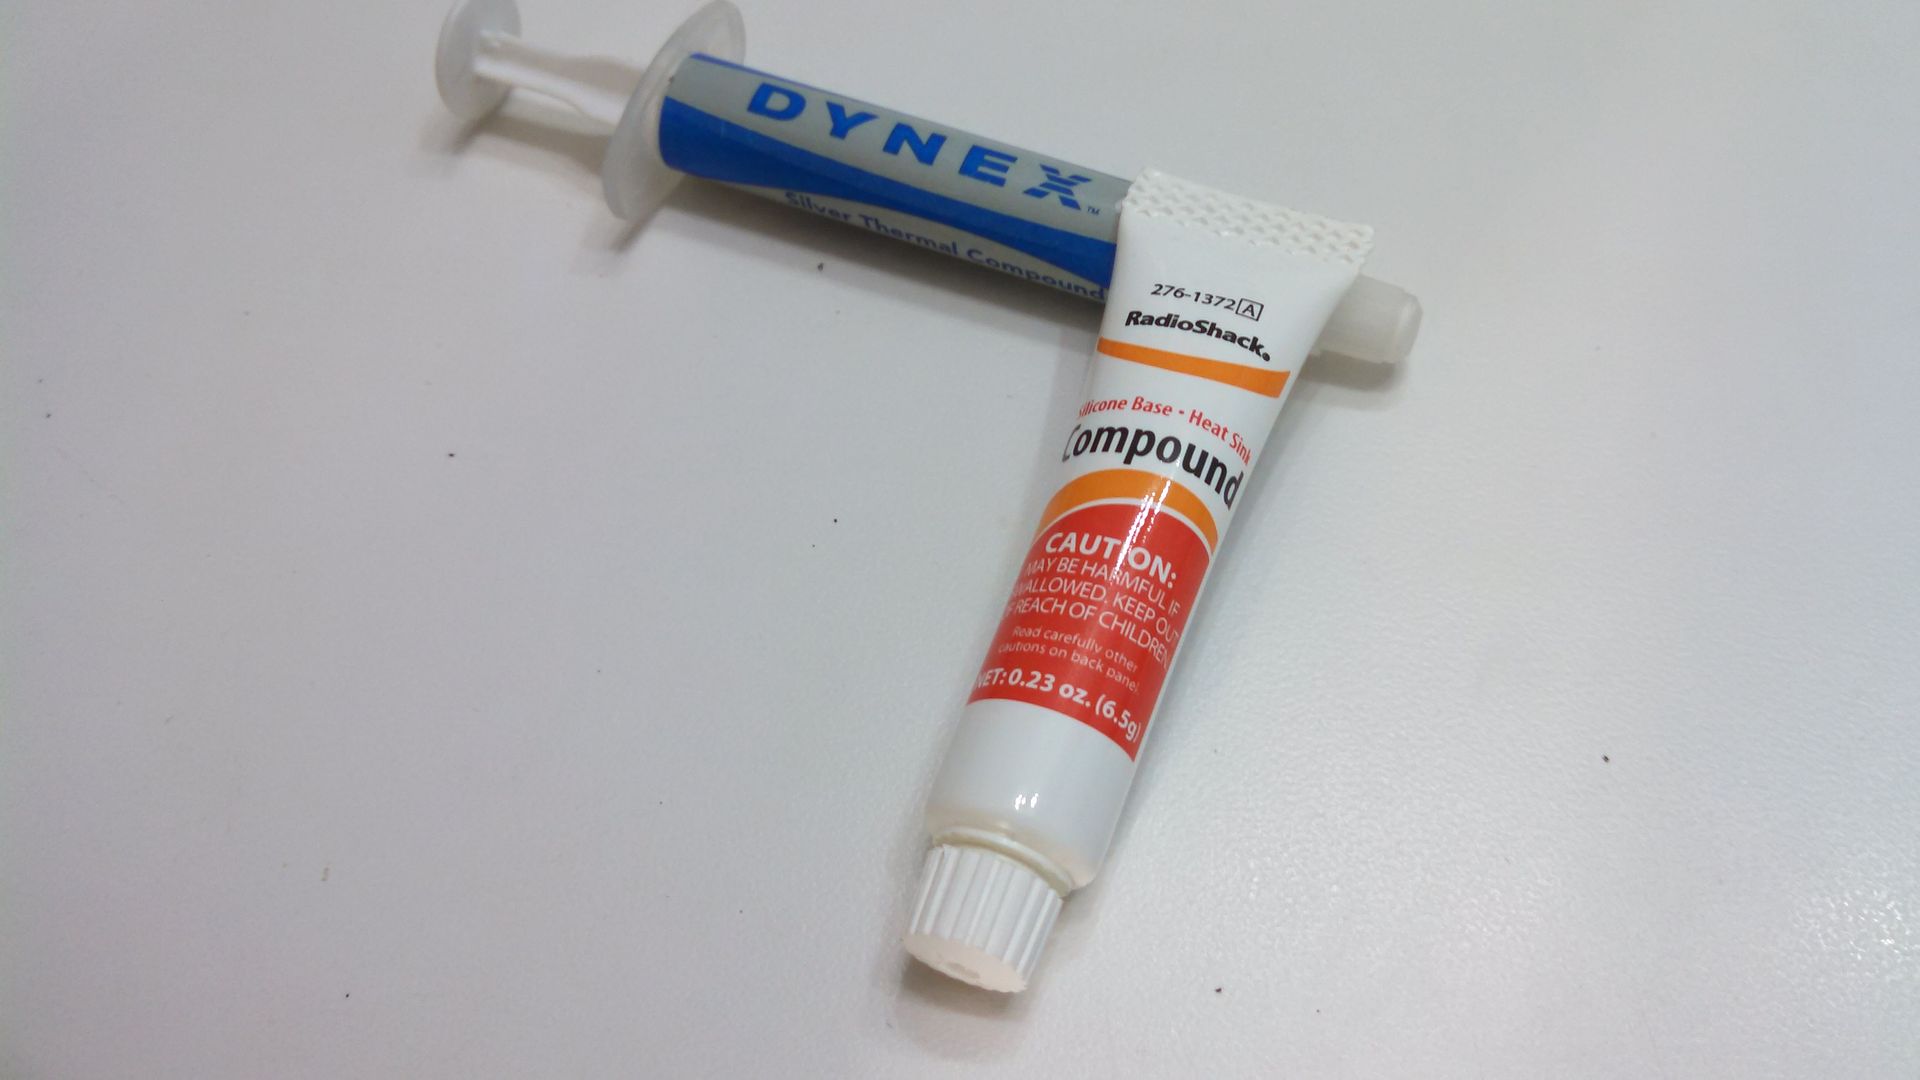
Sorry to go off subject. "Where do you find or what is thermal epoxy? I cannot figure out what you guys use to attach drivers and such to host or whatever. Stores only have thermol compound and thermal paste and that stuff never dries and just sits there. I've been trying to attach a driver but gave up and don't use the laser and considering leaving the hobby because I struggle to find answers or solutions to simple tasks and asking brings out the "use the search bar" hammer. Thanks to anyone who has an answer.
 
Joined
Mar 11, 2009
Messages
898
Points
0
Thanks BowtieGuy I also bought that same stuff. I added some to a heatsink/driver build almost 2 months ago and stuff is still wet and pliable and was thinking there must be something else. I also put some into my new Ehgmus host I bought a few weeks ago and it won't stick or dry after over a week of dry time. Different results for different folks.

These are the 2 that I have tried

IMG_20141209_090944_370.jpg
 
Last edited:
Joined
Feb 18, 2013
Messages
744
Points
28
Thanks BowtieGuy I also bought that same stuff. I added some to a heatsink/driver build almost 2 months ago and stuff is still wet and pliable and was thinking there must be something else. I also put some into my new Ehgmus host I bought a few weeks ago and it won't stick or dry after over a week of dry time. Different results for different folks.

The thermal epoxy should have came with two tubes that you mix together. In your pic, the orange and white is thermal compound, which doesn't harden.

Every epoxy I've used had two tubes, resin and hardener, that you have to mix together and apply before it hardens.


@nwfreefly, with my kryton build I epoxied the spring to a piece of plastic with a hole in the center (after soldering the positive lead to it) and epoxied that into the host.

I also used these for driver heatsinking. I think I saw these pads linked in the GB thread for the krytons. Their also nice for filling in the space.
 
Joined
Sep 10, 2014
Messages
1,054
Points
83
Portland Oregon here SE! im a newb but ive been starting some build of my own. maybe we could colab on a project hehe!
 
Joined
Nov 4, 2014
Messages
1,146
Points
63
@nwfreefly, with my kryton build I epoxied the spring to a piece of plastic with a hole in the center (after soldering the positive lead to it) and epoxied that into the host.

I also used these for driver heatsinking. I think I saw these pads linked in the GB thread for the krytons. Their also nice for filling in the space.

Those are a pretty inexpensive solution. cool beans. I also saw Flaminpyros copper driver heat sinks. I think i will pick up some of those for my Krytons. he has been gracious enough to help me with these builds


Portland Oregon here SE! im a newb but ive been starting some build of my own. maybe we could colab on a project hehe!
Awesome, good luck on your builds. At the very least we should get together for some laser action in a dark field outside the city and try out each others newbiness builds lol!
 
Joined
Oct 26, 2007
Messages
5,438
Points
83
I'd get an X-blank or make your own (not sure who sells them anymore) and put that in the battery compartment rather than relying on a spring fixed to a reinforced driver. I do like how FP heatsinked the driver to the head though.

Perhaps just thermal-glue a copper heatsink or some copper pennies (before 1983) to the drive and then glue them to the head as well. Make sure to keep as much metal-on-metal contact (without shorts that is) to conduct heat away. You won't gain much heatsinking if you can't conduct that heat to the exterior of the host.

Also, you might consider one of those G-series lenses anyway. The 3-element lenses drop quite a bit of power, and won't really improve the beam all that much.


Top