Welcome to Laser Pointer Forums - discuss green laser pointers, blue laser pointers, and all types of lasers

Buy Site Supporter Role (remove some ads) | LPF Donations

Links below open in new window

FrozenGate by Avery

Pictures of my AT Laser Athene II RGY

ok none of them photos are very good.

do one from the top so i can see everything


ok right

locate the PSU for each item.
there should be a psu for the galvos, the psu will connect to the galvo amp.
there should be a psu for the green laser and psu for the red lasers.

coming from each laser psu there should be a black and red wire going into the dmx, these will be your TTL wires.

from the galvo amp there should be three wires XYG going into the dmx.

these are all the wires you need to hok up to a DAC
 
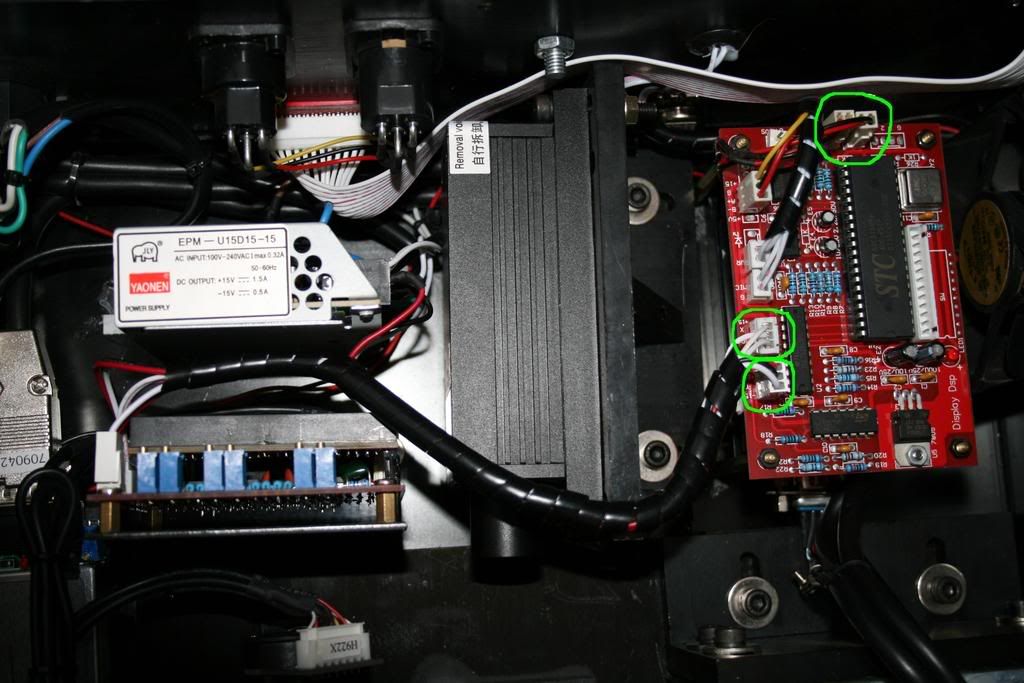
ok i guessing these are the ones you need.

both red and black TTL's for the lasers.

XYG and the other is power for the DMX

IMG_06531.jpg
 
ok i guessing these are the ones you need.

both red and black TTL's for the lasers.

XYG and the other is power for the DMX

IMG_06531.jpg
 
Thanks Andy, I will be there, will bring it with me. If Norm's DAC & PSU get here in time I may well get it fitted too. I intend to fit some sort of switching device in to switch between the DAC and the inbuilt DMX controller to give me a bit more scope. I theory I should just need a multipole switch to switch over the X, Y & Blanking signals from one board to the other.

I have just won a 150mW Argon laser & PSU off of EBay for £50 and am looking for a scanner system for it now.
How do you rate the ScanEco 30Kpps system?
 
andy_con said:
ok right

locate the PSU for each item.
there should be a psu for the galvos, the psu will connect to the galvo amp.
there should be a psu for the green laser and psu for the red lasers.

coming from each laser psu there should be a black and red wire going into the dmx, these will be your TTL wires.

from the galvo amp there should be three wires XYG going into the dmx.

these are all the wires you need to hok up to a DAC

Found all the wires, there actually all marked up on the board on closer inspection plus I have downloaded the ScanEco10 .pdf manual and it's virtually the same board I have here only it only has one TTL input. Mine has two.
 
ah i see the argon is green and blue.

bring your stuff to the meet and we can talk then. just make sure you come find me as its going to be a buy day for me being the official camera man
 
Posted this on PL but will post here as well considering this was the original post :)

IMG_0756.JPG


Firstly I built up the DAC board as per the instructions from Norm. I cut a suitable slot into the back of my scanner case and fitted the rearward protruding 25pin ILDA socket into it and secured it with screws. This turned out to be strong enough to be able to fully hold the weight of the board and I didn't need to secure the board any other way.

IMG_0757.JPG


I cut down 2 printer socket nut/bolts from the back of an old PC to secure the board to the rear ally plate.

IMG_0758.JPG


The whole board fitted snug in between the back plate and the cooling fan.

IMG_0762.JPG


I then started to add the wiring starting with the Bipolar 15+/- supply from the original scanner supply. I did purchase Norm's 15+/- supply but didn't need it in the end as the one in the scanner was more than capable of running the DAC and the rest of the components together.

IMG_0763.JPG


IMG_0764.JPG


IMG_0765.JPG


IMG_0766.JPG


I decided to take all the wiring back to a 4pole 2 way switch that I purchased from RS and have it switchable between the DAC and the original on board DMX 128x graphics generator. I did this simply by switching over the R+, G+, X+ & Y+ input's to the Galvo amps from the DAC and the DMX board. I tied all the - lines together and grounded the lot to one point.

IMG_0767.JPG


IMG_0768.JPG


IMG_0769.JPG


All the wires waiting to be connected to the wafer switch segment.

IMG_0770.JPG


IMG_0771.JPG


The wiring from and to the DAC.

IMG_0772.JPG


The DMX graphics generator board.

IMG_0774.JPG


The wafer switch now wired.

IMG_0775.JPG


When the rest of the switch arrives from RS, it will be fitted through this hole and will switch between the DAC and the original graphics generator.

IMG_0776.JPG


IMG_0777.JPG


Back
Top