Welcome to Laser Pointer Forums - discuss green laser pointers, blue laser pointers, and all types of lasers

LPF Donation via Stripe | LPF Donation - Other Methods

Links below open in new window

ArcticMyst Security by Avery

OSRAM 60W multilaser chip with 24 beams - JLM450nm

Joined
Feb 12, 2016
Messages
589
Points
63
Thank you for watching.
I already started to think that no one is interested in this chip and my pictures any more. Tomorrow I will post more test results.

These multi lenses are generally crap, this is what we know from trying many previous arrays with such kind of "general" optics from PJs like A130, H1600, V1... but if your objective is not to make a long distance beam, just for focusing on phosphor is might be fine.

Is this one driver for both Nichia and Osram (85V and 110V output)? I thought that there are different drivers for each chip.
12V input looks too low to me, too - the input current has to be very high and would be hardly achievable from other batteries than LiPo. It is strange because the similarly looking drivers (I bought one from ali) for NUBM08 block have 24V input like one would expect for such wattage.

What is your objective with these batteries? I hope not to make a portable ice cooled device capable of Nichia beaming for more than 25 min???


Joined
Jul 10, 2015
Messages
9,799
Points
113
I plan to work with these in time, been spending a lot on another interest.
Please post lots of pics of the unit and the beams, people like pics :)
 

likevvii

Member
Joined
Mar 2, 2020
Messages
74
Points
18
It is mainly extremely cost prohibitive and in addition, mentally stressful of danger when you first start. Not very well documented and not sold as a consumer plug and play item. I am sure many people have found and will find your posts to be interesting and educational to read, and useful in alternative ways. Even researchers that build projectors may come across here because there is practically nothing to start with, so any info is good info.
People may read, but not many may post because they have not had any experience with it.

Yeah, the driver is strange. It might even have a 24V+ version. I didn't dig too deep because I already plan to use more well documented ones.

My objective to build the battery is because I am building a spotlight and it needs to be very portable. In my world, 25min is well enough for me because I just play around with it for fun. I don't actually have a use for a spotlight.

The bare minimum required for nichia is 10cells @ 10.5A each. High capacity 21700 cells perfectly match the current requirement of ~10A.
So I just make 1 pack first, and if I like using it, I can just keep making more packs and wire them in parallel for more capacity.

__

I was wondering how much thermal capacity compared to batteries required for your cooler was needed, so let us do the math together.

Assume:
You have 7.5kg (~2 gallons) of ice.
Total energy capacity your cooler can absorb (I assume your values) = Ice -20Cº to 0Cº + Phase Change + Water 0Cº to 25Cº

Phase change from ice to water = 333kJ/kg
Specific heat of Ice = 2.1kJ/kg/Kº
Specific heat of Water = 4.2kJ/kg/Kº
1kJ = 0.28Wh


2498kJ from phase change of 4kg of ice
315kJ from ice at 20º of change
788kJ from water at 25º of change
Total maximum energy absorbed = 3601kJ , converted to watts = 1008Wh
After losses from time and handling -30% = 700Wh cooler capacity

Battery used: Samsung INR21700-50E 5000mAh @17Wh/cell @70g
Osram + driver power consumption = 220W
Osram heat output @ 33% efficency = 130W


At max power, your cooler can cool 1 osram chip for:
700Wh / 130W = 5.4h

In order to run for 5.4h at max power, you would need:
5.4h * 220W = 1,188Wh / 17Wh cell = 70 cells

So your Ice to battery weight ratio is:
7.5kg water / (70 cells * 70g) = 3:2 ice/battery

*Please, please double check my math!!
 
Last edited:
Joined
Feb 12, 2016
Messages
589
Points
63
Hi,

Yes, your calculatuons look fine to me. I just would omit ice thermal capacity because even just from chiller it might be not -20ºC. And I add some water into the mix at start to have "full contact" with tank surface.
I also doubt that any Li battery can make >3A at serial connection if they are just packed in a torch body. Maybe with soldered contacts. But I would choose Lipo, otherwise you would need too many series in parallel...

Sure it is not turnkey ready to use device. Here we have to do a lot of trials and assembling. But this is the fun. And time, expenses, a lot of time and expenses...


So now the pictures:

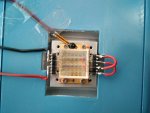
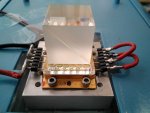
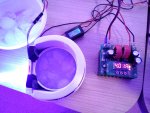
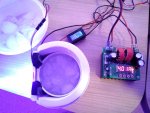
I connected the rows as 2S2P (2 goups of 2 rows in series, the polarities look like this array was designed for that), so BST400 driver would be OK to ouput 4A at 52V. What would make 2A curent through each LD.

Interesting that this Osram array is pretty compact and all its beams would fit into a 20mm PBS. Nichia 31T acc. to specs must be bigger - so if one wants to combine 2 - he would need an expensive 1" PBS or bigger...


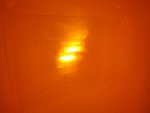
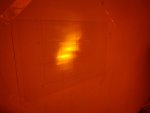
So here is the combined spot of all the beams (I draw 50x50mm squares on the paper) at 0.5A through each LD: it looks that most of power would fit into 50x30mm spot at 5m distance with only a few from the total of 24 LDs beaming to the side.

What I found bad - the small contact surface of that Al tank with chip block - even with Arctic Silver 5 grease it cannot conduct 150W of waste heat to the ice tank at full 2A current through each LD. With tank full of ice+water (0ºC) I can hardly keep the array brass body temperature at 49ºC by mixing ice with a spoon all the time.
If mixing stopped, T quickly rises over 55ºC (then I turn the laser off).
But at 3A current (what makes 1.5A through each LD) and ice stirring the brass body T can be kept at 38.5ºC over many minutes.

The driver display shows: 3A at 50V and 4A at 52V, so 208W consumption of this array at 2A passing through each row is right.

Finally I decided to manufacture a much bigger mounting block for this chip on the long wall of this tank in order to have contact surface as big as it can be.
But this is for the future. CNC workshops are closed until the end of confinement here in Spain.

Later I will try another Al bowl I have prepared for this occasion.

01.jpg02.jpg03.jpg04.jpg05.jpg06.jpg
 

likevvii

Member
Joined
Mar 2, 2020
Messages
74
Points
18
On average, how much do you get charged for a machined part. For example, a 50x50x10mm block with holes and taps in it.
I'm also going to get some stuff machined and the quotes I get are decent, but maybe I could get a reference from you.
 
Joined
Feb 12, 2016
Messages
589
Points
63
If you are not DIY hobbyst any price is fine. Just think how much would it cost you to buy tools, manufacture the block and clean the living place from turnings afterwards.
And if the workshop makes a mess, they can do a replacement with no charge. With 0.01mm precision.

If I pay 80usd for one NUBM44 or 450usd for 31T array, I would not try to save on pieces which determine the life expectancy of these LDs...
 
Joined
Feb 12, 2016
Messages
589
Points
63
Hi CDBEAM, RC and others,

Where are you? Already a week and no single like to my previous pictures! I know we live in difficult times now but the life has to go on.

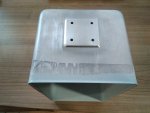
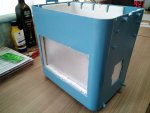
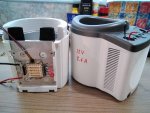
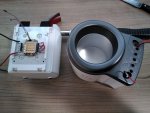
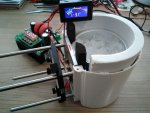
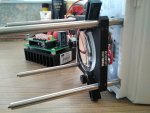
Sitting this week in confinement I did some more experiments - this time with a small "wine bottle chiller" from ebay, for which small Al tank I made an adapter plate for the Osram chip. You can see big M4 and M6 nylon screws attaching it to the tank body. Here the contact surface is large enough to ensure proper heat transfer and allow 20-30ºC at the chip during 2A current through each LD (4A through 2 parallel series of 6 LDs).
When not beaming the lowest T I could reach with freshly crushed ice from chiller was -3ºC.

And when Osram chip is working at full power one can see how the ice melts really quickly! Pity that this tank`s volume is so small but for 1-2 minutes of beaming it was enough.

The beams are not super parallel and do several spots after 5m but when focused at 20cm distance with a Thorlabs coated lens the spot looks very tight.

small tank 1.jpgsmall tank 2.jpgsmall tank 3 chip at 25º.jpgsmall tank 4 chip at 29º.jpgsmall tank 5 chip at -3º.jpgsmall tank 6.jpgsmall tank 7.jpg
 

likevvii

Member
Joined
Mar 2, 2020
Messages
74
Points
18
Very nice!

Do you use a normal spherical plano convex lens?

I will soon be able to cut off the multi lens and experiment with the height once a few components arrive in the mail. Sad that express shipping takes so long these days. But at least it is still working.

Any type of glue anyone can recommend me? I have little experience with glues in general. Seems like UV glue is best for these applications.
I want the possibility of removal and optical clarity is not important. Will not out gas if it gets hot either.
 
Joined
Feb 12, 2016
Messages
589
Points
63
Yes, 2" plano convex Lens, Thorlabs ref. LA1979-A.

If you want to play with positioning of multi lens I would suggest to make a proper XYZ-translating multi lens mount. However I have little idea how to make it for your set up, in my set up with 60mm cage bars I would try to combine these 2 parts into one purpose oriented piece:

Possibility of removal is not usually a thing a glue is made for. If the contact surface is big enough, a simple double side adhesive tape could work for the start.
And once you cut off the glass part please post the pictures what is under it with enough enlargement. And keep it protected from dust.

BTW in your calculations above you accepted that the ice mass was 7.5kg because the cooler was advertised as 7.5L big on ali?
Those are chinese sellers numbers, the real size of Al tank inside can only hold 2.5kg of ice, not more.
 
Joined
Feb 12, 2016
Messages
589
Points
63
Here are holes the focused beams of Osram melted through a 0.4mm thick metal (reflector from a dismantled 3D printer). I took about 1 min.

For comparison, this thing with 16 NUBM08 beams made a smaller hole in 15 seconds. At 68V, 3.5A, so the power and power density must have been comparable to NUBM31T.


Reflector from 3D printer.jpg


Top