- Joined
- Aug 25, 2012
- Messages
- 116
- Points
- 28
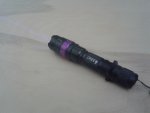
When I first saw this host on DX, I immediately knew it needed to be done. A coworker of mine said, "Quit being cheap and do it... It's 14 bucks for crying out loud!" So here it is:

When I started off with this host, I knew it was going to be an ambitious project. I wanted every function the original flashlight came with to be retained, including charging port, and externally focusable beam with fixed lens. With that, I picked up my digital caliper and got to sketching with my pencil. The result is something quite unique. Instead of a fixed laser assembly and adjustable lens, the lens is stationary, while the AixiZ module moves to focus the laser!
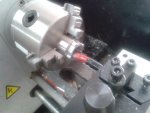
The first thing that needed to happen was the modification of the flashlight itself, as well as the AixiZ module. The module no longer needed to be the mounting point for the lens. Therefore, the threads on the midsection were bored out using a drill bit mounted to the tailstock of my lathe.

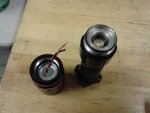
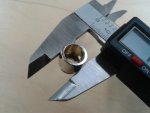
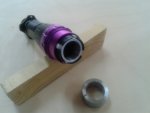
Once that was taken care of, the pill was bored out to create a mating face that the new heat sink would press in to. In order to mount this small aluminum part, I had to make a collet that would hold the fragile piece without crushing it, or destroying the threads. Where I work there is lots of scrap stainless, so I made it from that. Not the most flexible stuff, but plenty strong, and plenty FREE! Below you can see the collet in action, and another with the collet next to the flashlight holding the modified part.


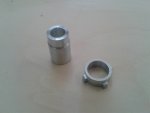
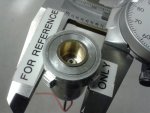
Now that the flashlight is ready for some new parts, the calipers came out with Solid Works to make some good drawings and basic dimensions. At this point it was decided to use the internal bore of the flashlight to help keep things concentric. As the parts were made, there was a lot of careful 'test fitting' of the parts, to make sure they were neither too loose, nor too tight. Here is the heat sink, along with the modified pill that will focus the AixiZ module.

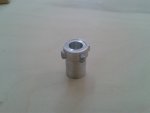
Here they are pressed together.

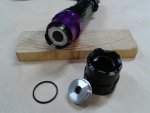
Once the heatsink was complete, it was time to work on the lens assembly. The dimensions are very similar to the original acrylic lens that came with the flashlight, with some added profiles for visual appeal. Again, the inner bore of the flashlight head was used to keep things concentric. Because this part was so thin, and with the obstruction of the crown, it was a nerve-racking guesstimate as to whether or not it would fit before parting off the piece. It turns out, the lense mount was slightly larger, so the crown had to be bored out, ever so slightly, for an accurate fit.

At this point we're ready for the hardware!!! The DT0811 diode was extracted from the sled and pressed in to our modified module. I ordered an Ebay special AR coated 2-piece glass lens for 405nm, and that wound up threaded in the lens mount. The driver for this project was an Odic Force Lasers OFL74. There are some things to know about this driver. First off, it is too large to fit in the rear can of an AixiZ module, both length-wise and width-wise. I eventually had to do without a rear can. To add some extra support, I used clear heat shrink tubing over the board, and filled the rear of the enclosure with silicone adhesive. That way the wires, which will move a bit when focusing, won't come loose, or cause other solder joints to fail.

During earlier phases of the build, I ordered one board to evaluate how it would do. I can't say whether it was a bad board or something I did, but the driver died on me before I could light the diode. The diode was fine, and the test load tuning procedure went as expected, but the diode didn't light. This was later confirmed when I connected it back to the test load. I had no output, and a bit of magic smoke release from the regulator IC after turning it up. I later ordered another pair, and the first worked fine. The other I'll save for another build.
Despite the first driver, overall I was impressed with the company. They sell directly from their website, as well as Ebay, and they include a small pamphlet with instructions. Coming from the UK to Texas wasn't too long of a wait, either. Best of all, these drivers are rather inexpensive in comparison!
Now back to the build... Putting this thing all together had some pros to it all on their own. Above the charger port, there is a copper plate for the (+) positive lead, followed by a plastic spacer. The driver was powered by soldering the lead directly to the copper plate, and the negative lead was pinched between the plastic spacer and aluminum retaining ring. The photo below shows what it looked like before soldering.

With this host, you don't need to worry about twisting and untwisting the wires to thread on the head. Once the wires are soldered, the module was completely 'unfocused' out of the head to thread it on the battery compartment. The module doesn't turn when focusing/defocusing so wires stay straight.
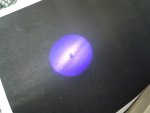
Here I have something for the rocket scientists of the forum. I took this pic of the unfocused beam pattern thinking someone here could say whether or not it is all aligned up in a satisfactory manner. As far as I can tell it's great for me, but I'm also looking to learn a bit. Even if I'm far out in left field any replies are appreciated!

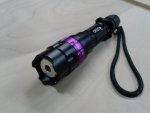
Overall, I love how the laser came out. The host has some good heft to it, and feels great in your hands. It has an anti-roll ring that also tightens against the battery compartment, so it serves a double purpose. It originally came with a clip, but it slips off quite easily once the tail cap and anti-roll ring are removed, without damaging the host. As an added bonus, the threads on the flashlight focus ring is not as fine as the threads on the lens, so I don't have to turn the head 53 times to bring the beam to focus. I'm not sure how efficiently this design will cool the diode, but we're only talking about 75mW here, which is plenty for me. It has all the features one would expect from a higher end manufactured laser, with the satisfaction of DIY.
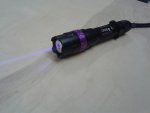
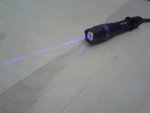
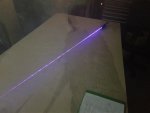
Now for what many of you photon heads were waiting for... BEAMSHOTS!
I found my smoke machine, BTW.


I hope everyone has enjoyed the photos. Until next time!
EDIT: There is a typo in the tile. This is a Q5, not Q6. Those responsible have been sacked.
When I started off with this host, I knew it was going to be an ambitious project. I wanted every function the original flashlight came with to be retained, including charging port, and externally focusable beam with fixed lens. With that, I picked up my digital caliper and got to sketching with my pencil. The result is something quite unique. Instead of a fixed laser assembly and adjustable lens, the lens is stationary, while the AixiZ module moves to focus the laser!
The first thing that needed to happen was the modification of the flashlight itself, as well as the AixiZ module. The module no longer needed to be the mounting point for the lens. Therefore, the threads on the midsection were bored out using a drill bit mounted to the tailstock of my lathe.
Once that was taken care of, the pill was bored out to create a mating face that the new heat sink would press in to. In order to mount this small aluminum part, I had to make a collet that would hold the fragile piece without crushing it, or destroying the threads. Where I work there is lots of scrap stainless, so I made it from that. Not the most flexible stuff, but plenty strong, and plenty FREE!
Now that the flashlight is ready for some new parts, the calipers came out with Solid Works to make some good drawings and basic dimensions. At this point it was decided to use the internal bore of the flashlight to help keep things concentric. As the parts were made, there was a lot of careful 'test fitting' of the parts, to make sure they were neither too loose, nor too tight. Here is the heat sink, along with the modified pill that will focus the AixiZ module.
Here they are pressed together.
Once the heatsink was complete, it was time to work on the lens assembly. The dimensions are very similar to the original acrylic lens that came with the flashlight, with some added profiles for visual appeal. Again, the inner bore of the flashlight head was used to keep things concentric. Because this part was so thin, and with the obstruction of the crown, it was a nerve-racking guesstimate as to whether or not it would fit before parting off the piece. It turns out, the lense mount was slightly larger, so the crown had to be bored out, ever so slightly, for an accurate fit.
At this point we're ready for the hardware!!! The DT0811 diode was extracted from the sled and pressed in to our modified module. I ordered an Ebay special AR coated 2-piece glass lens for 405nm, and that wound up threaded in the lens mount. The driver for this project was an Odic Force Lasers OFL74. There are some things to know about this driver. First off, it is too large to fit in the rear can of an AixiZ module, both length-wise and width-wise. I eventually had to do without a rear can. To add some extra support, I used clear heat shrink tubing over the board, and filled the rear of the enclosure with silicone adhesive. That way the wires, which will move a bit when focusing, won't come loose, or cause other solder joints to fail.
During earlier phases of the build, I ordered one board to evaluate how it would do. I can't say whether it was a bad board or something I did, but the driver died on me before I could light the diode. The diode was fine, and the test load tuning procedure went as expected, but the diode didn't light. This was later confirmed when I connected it back to the test load. I had no output, and a bit of magic smoke release from the regulator IC after turning it up. I later ordered another pair, and the first worked fine. The other I'll save for another build.
Despite the first driver, overall I was impressed with the company. They sell directly from their website, as well as Ebay, and they include a small pamphlet with instructions. Coming from the UK to Texas wasn't too long of a wait, either. Best of all, these drivers are rather inexpensive in comparison!
Now back to the build... Putting this thing all together had some pros to it all on their own. Above the charger port, there is a copper plate for the (+) positive lead, followed by a plastic spacer. The driver was powered by soldering the lead directly to the copper plate, and the negative lead was pinched between the plastic spacer and aluminum retaining ring. The photo below shows what it looked like before soldering.

With this host, you don't need to worry about twisting and untwisting the wires to thread on the head. Once the wires are soldered, the module was completely 'unfocused' out of the head to thread it on the battery compartment. The module doesn't turn when focusing/defocusing so wires stay straight.
Here I have something for the rocket scientists of the forum. I took this pic of the unfocused beam pattern thinking someone here could say whether or not it is all aligned up in a satisfactory manner. As far as I can tell it's great for me, but I'm also looking to learn a bit. Even if I'm far out in left field any replies are appreciated!

Overall, I love how the laser came out. The host has some good heft to it, and feels great in your hands. It has an anti-roll ring that also tightens against the battery compartment, so it serves a double purpose. It originally came with a clip, but it slips off quite easily once the tail cap and anti-roll ring are removed, without damaging the host. As an added bonus, the threads on the flashlight focus ring is not as fine as the threads on the lens, so I don't have to turn the head 53 times to bring the beam to focus. I'm not sure how efficiently this design will cool the diode, but we're only talking about 75mW here, which is plenty for me. It has all the features one would expect from a higher end manufactured laser, with the satisfaction of DIY.
Now for what many of you photon heads were waiting for... BEAMSHOTS!
I found my smoke machine, BTW.


I hope everyone has enjoyed the photos. Until next time!
EDIT: There is a typo in the tile. This is a Q5, not Q6. Those responsible have been sacked.
Attachments
-
 H50 1_131538.jpg113.7 KB · Views: 96
 -
 H50 AixiZ_083509.jpg119.7 KB · Views: 90
 -
 H50 Bore_105834.jpg130.8 KB · Views: 102
 -
 H50 Collet_111016.jpg97.2 KB · Views: 100
 -
 H50 Heatsink_170515.jpg92.6 KB · Views: 80
 -
 H50 Heatsink2_171541.jpg85.9 KB · Views: 96
 -
 H50 Lens_131245.jpg127.5 KB · Views: 100
 -
 H50 Pressed_134719.jpg145 KB · Views: 94
Last edited:


