Welcome to Laser Pointer Forums - discuss green laser pointers, blue laser pointers, and all types of lasers

Buy Site Supporter Role (remove some ads) | LPF Donations

Links below open in new window

FrozenGate by Avery

"hdd galvos" Experimentation and project in the works

Just FYI.. less mass will mean faster response. The more material you can remove from the moving mass, the better your scanning rate can be.


thanks thats what i figured but i dont have any time right now to mess with the arms that would have to be after my competition but i am going to prototype a sort of galvo later on and ill keep that in mind. right now i think with just a few more modifications i can get about 210hz possibly more if i modify my circuit or decrease the weight of the arms. i guess its still way slower than proffesional galvos but it does produce some great effects. oh and since i last posted pictures i have moved on to a final revision of my circuit on a larger breadboard.
 
Last edited:
Since you have the motion apparatus nearly finished. Your next goal should be to add some feedback so you can have real position control.
 
With that big mass feedback wont get him very far. But damping would help.

Here is a open loop schematic with a damping network.

http://www.camtech.com/archive/A102_AX200.pdf

Note that it takes the ratio of a purely resistive load vs the inductive/resistive load of the galvo. Thats what the 2 extra Rs, one potentiometer,and the capactive coupling do in the output network, which is fed back as negative feedback. This should damp the ringing to about 3 cycles on a square wave input to your galvos.

Steve
 
i wasnt planning on getting into feedback and trying to get it to move to any specific position. LSRFAQ i can isolate and see how i would wire the "damping" part of the circuit but what exactly would that do and what do you mean when you say ringing? would this effect the duty cycle of my sqaure wave? would i need this if i allow the end user to input there own control signals? meaning i have my own control circuitry built in but allow the option to switch to an auxillary source. sorry if i dont understand if its overwhelmingly obvious. *edit/ update* today i shortened the travel of the arms and they display a better response to audio along with reaching a higher frequency 95Hz max which is way under what i have previously posted i guess i measured wrong a while ago. * second edit lol* i now realize that i was only measuring one side of the frequency and since i flip flop the polarity i can multiply what i read with my o scope meter by two for each arm movement which would be 190Hz :)
 
Last edited:
Your images would clean up considerably with the damping. It stops overshoot and ringing in the images.
 
Wow dude, respect for the breadboard build. Most people would've already soldered a big electric system like that on hole pcb's. I'm looking forward seeing the outcome of this on video.
 
yeah it got really messy on that board and once i added some more stuff i had to move on to my final revision of the circuit on my latest breadboard (one section bigger) so i could see what i was doing again and add more stuff like all of my led indication. i like making the larger breadboards rather than connecting multiples i find that annoying. and hopefully i can put up a video real soon but idk if i should wait untill i get my pcb made or untill everything is working on my breadboard :thinking:. ill put a picture of my circuit with all of the rgy :cool: led indication soon.
 
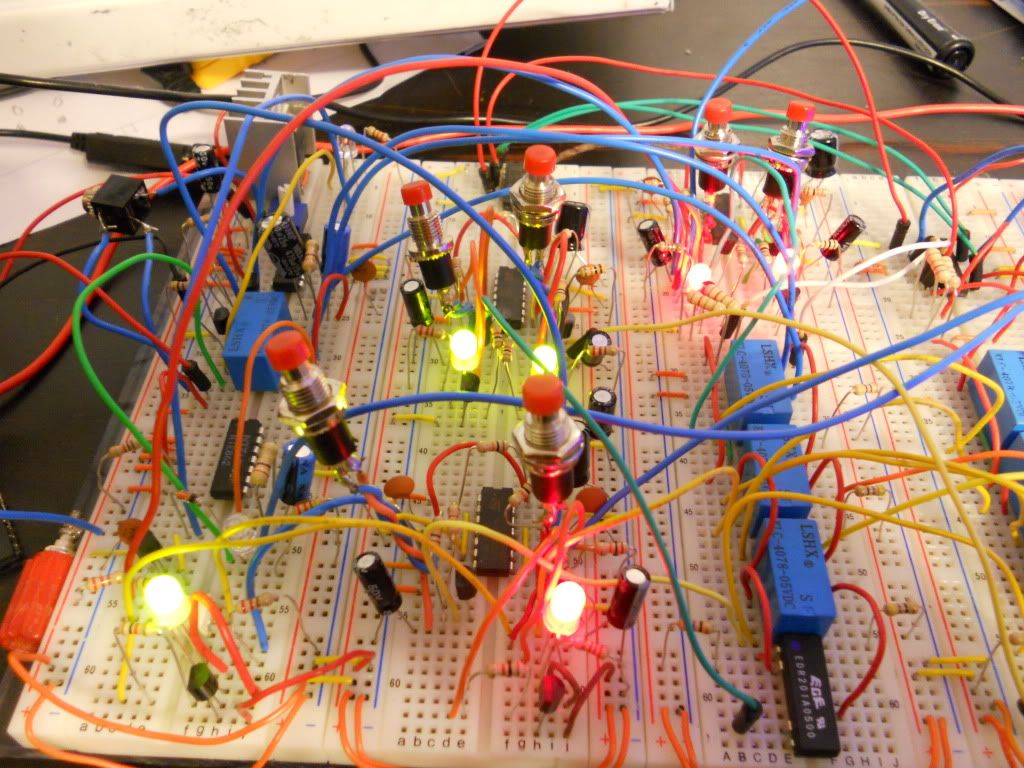
this is a section of my final breadboard with the RGY led indication.

DSCN0788.jpg


when you apply power to the circuit all of the RGY LED's will be red by default and once a button is pressed the corresponding led with change to green exiting the default setting into the designated setting assigned to that push button and led which varies from standard control, the changing frequencies that are being alternated when driving the hard drives, flip flop, audio/standard control, etc etc etc. right around the end of this month i should have my PCB designed and ordered and while my PCB is being shipped i will be making my enclosure and ill be sure to post some pictures once i assemble it.
 
Really lookin forward to seein this working, damn good job, id love to be able to do stuff like this
 
Darn.. thats a lot of prototyping boards!

It must use a shitload of power to operate those harddrive arms as galvo's though... lots of mass to move around!
 
if i remember right they wanted to draw an amp as is but i had them limited down to about a 1/2 of an amp with standard frequency. with audio they draw just about the same and the amplifier ic's can handle it with no problem.
 
Hi! Very nice your project :D
I have a question... What you used for mounting the mirrors?

Thanks
 
@ sourcegeek, i had the mounting rods machined along with some small slides with a set screw in each then just used epoxy to glue them on. sorry that its been a while but Ive been pretty busy with school. Ive abandoned my circuit board design since i have left way too much room for error. Ive just jumped everything over to a perf board and have started wire wrapping. while im doing that im also actively designing my control panel and enclosure. should have some pics up soon of the control panel.
 
Oh, nice!
What will be the function of the control panel? What will control?
I'll wait for the pics :D
 
Last edited:
@ sourcegeek, read the last couple post on the first page of this thread.

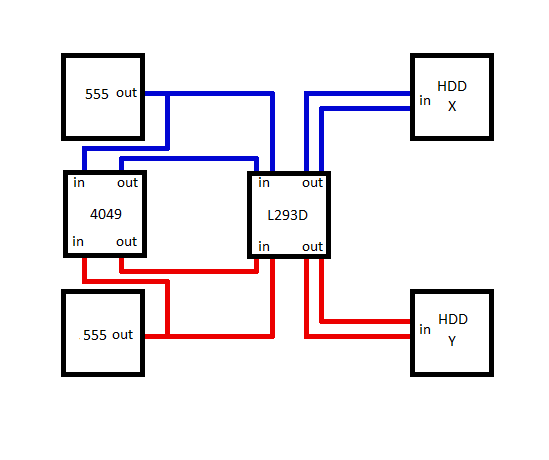
thought this might be a little helpful to some of you i hope its not too vague. the 4049 is a hex inverter (6 inverters in one package) you only need two but i had a 4049 and it happens to have 6. the L293D is a sort of dual h bridge (allows you to reverse polarity while switching more current if needed) but on the datasheet they call them half bridges. keep in mind this is just a block diagram and if you happen to build this you might run into some problems with current draw from your HDD's since all HDD's are different. in my case i had to throw in a couple of 1/2 watt resistors to keep some stress off of the L293D and i also bought an ic heat sink that clips on.
hdddriverblockdiagram.png


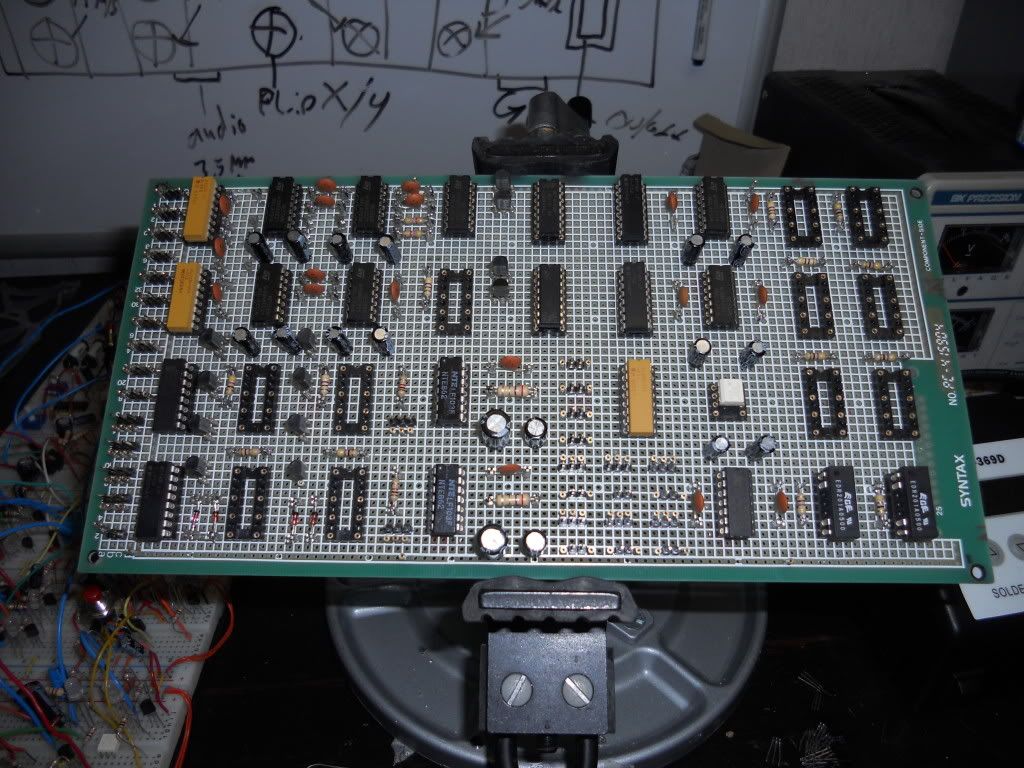
i have just about all of my parts placed on my perf board. as soon as i get them placed ill start wire wrapping and testing. in the mean time im still designing my user panel.
DSCN0799.jpg
 
Last edited:


Back
Top