jayrob
0
- Joined
- Sep 21, 2007
- Messages
- 9,862
- Points
- 113
Also, check out 'big brother'... My new Stainless Steel 18650 build kit! Polished!

http://laserpointerforums.com/f64/fs-stainless-steel-18650-kit-polished-perfect-445-a-52159.html
Hey I realize that there is no end to the different hosts that can be modified into a laser kit. And I have quite a few kits already. So with that in mind, you won't see me offering too many more unless I find a really nice host!
Lets hope these hosts stay available because they are one of the nicest little hosts I have seen yet!...
This is my new kit called the Stainless Steel CR2 kit... It is available with all of the normal options as my other kits. (except the tritium marker - I don't want to machine into the nice polished stainless steel finish)
For a 445 build, you can get your diode pre-installed into an AixiZ module with lead wires soldered on from daguin or DTR.
In that case, you will just connect your diode leads, to my driver leads... ('Hot' option kit)
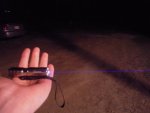
Yes... Polished! The host has been polished on a buffer, and it is so nice...

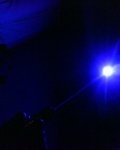
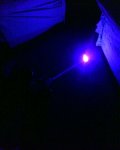
Here's my 445 build in this little gem...

Made from solid stainless steel. Then polished...
It has a GITD tail cap, and will make a beautiful little blu-ray, red, or 445 build using a FlexDrive and a CR2 primary or rechargeable...


The build (assembly) will be the exact same as my Pocket Mini kit.
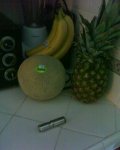
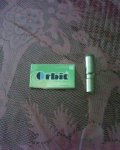
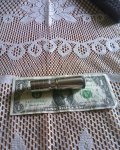
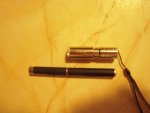
Here is a picture for size comparison:

The pricing and options for the kit will be like so...
* SS CR2 basic kit - $44 (host/heatsink/drill the pill)
* Add 'Hot' option - $48 (let me know the current setting)
* Copper heatsink upgrade - $8
* Press fit heatsink design option - $7
* EzFocus adapter (if desired) - $20 (designed for fitting my 405-G-1 or 650-G-1 lenses)
* 405-G-1 glass lens assembly - $55
* 650-G-1 glass lens assembly - $52
* Shipping - Message for total (based on PayPal fees plus postage)
* Shipping policy:
Shipping Policy
I think your going to like this little gem!
Build tips:
You will need a 1.5mm Allen wrench for the heatsink set screw. (wrench not included)
If you just get the basic kit (host/heatsink/drill the pill), I will remove the brass ring and board from the pill, and drill out the top of the pill to open it up.
Then you will be removing the driver components from the board, and soldering your positive and negative lead wires to the board. (use your DMM for testing)
You can mount your FlexDrive or Micro Boost driver into the pill. (I like to use strong ‘red’ double sided tape and mount it flat)
Just make sure that none of the contact points on the driver is touching any metal…
Battery position – Case negative. (negative end of the battery towards tail cap) CR2 primary, or CR2 rechargeable.
The best battery is this one: (IMO)
RCR2 Unprotected Rechargeable Lithium Battery

With the ‘Hot’ option kit, I will have the driver installed for you. With the current set to the agreed upon setting, and lead wires soldered onto the driver as well. Ready for you…

Tool tip:
The trickiest part for the assembly, will be to thread the pill/driver, together with the heatsink/module (and diode), into the head of the host as one assembly without letting the heatsink turn separately from the pill. This would obviously twist the wires.
One method, is to pinch the heatsink and pill between your thumb and which ever finger fits in through the front of the host, hold them tight together between your thumb and finger, while turning the head of the host with your other hand until it is all the way in place.
Then, just a final tightening of the pill with the tips of some needle nosed pliers to make sure it is tight. (can't have the heatsink loose, it will twist while focusing)
If there are no slots in the pill for the needle nose tips, then you can always 'snag' the solder blobs with the tips. You just need to get the pill 'snugged up' against the heatsink as good as possible.
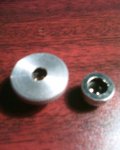
The best method I have found for install (or dis-assembly), is the use of this nice tool that I made... (made from brass)

With this tool, I can thread it into the AixiZ module after it is mounted in the heatsink, and ready for final assembly. The diode will not get touched by the tool...
I thread it in hand tight, then stand the tool upright with it through the head of the host.
It is easy to put pressure on the 'pill/heatsink assembly' using this tool. (to keep them from turning separately from each other)

Then just use your other hand to turn the head and get the assembly in place.
After the final tightening of the pill, you can just unscrew the tool from your module.
And of course, it is a great tool for dis-assembly as well...
It is an especially useful tool if working on really small builds, such as pens or Key Chains...
It is solid brass, then machined to size, threaded for AixiZ, and drilled at the tip for diode clearance. I offer this tool for $23 dollars plus $3 dollars shipping if anybody is interested...

http://laserpointerforums.com/f64/fs-stainless-steel-18650-kit-polished-perfect-445-a-52159.html
Hey I realize that there is no end to the different hosts that can be modified into a laser kit. And I have quite a few kits already. So with that in mind, you won't see me offering too many more unless I find a really nice host!
Lets hope these hosts stay available because they are one of the nicest little hosts I have seen yet!...
This is my new kit called the Stainless Steel CR2 kit... It is available with all of the normal options as my other kits. (except the tritium marker - I don't want to machine into the nice polished stainless steel finish)
For a 445 build, you can get your diode pre-installed into an AixiZ module with lead wires soldered on from daguin or DTR.
In that case, you will just connect your diode leads, to my driver leads... ('Hot' option kit)
Yes... Polished! The host has been polished on a buffer, and it is so nice...

Here's my 445 build in this little gem...

Made from solid stainless steel. Then polished...
It has a GITD tail cap, and will make a beautiful little blu-ray, red, or 445 build using a FlexDrive and a CR2 primary or rechargeable...


The build (assembly) will be the exact same as my Pocket Mini kit.
Here is a picture for size comparison:

The pricing and options for the kit will be like so...
* SS CR2 basic kit - $44 (host/heatsink/drill the pill)
* Add 'Hot' option - $48 (let me know the current setting)
* Copper heatsink upgrade - $8
* Press fit heatsink design option - $7
* EzFocus adapter (if desired) - $20 (designed for fitting my 405-G-1 or 650-G-1 lenses)
* 405-G-1 glass lens assembly - $55
* 650-G-1 glass lens assembly - $52
* Shipping - Message for total (based on PayPal fees plus postage)
* Shipping policy:
Shipping Policy
I think your going to like this little gem!
Build tips:
You will need a 1.5mm Allen wrench for the heatsink set screw. (wrench not included)
If you just get the basic kit (host/heatsink/drill the pill), I will remove the brass ring and board from the pill, and drill out the top of the pill to open it up.
Then you will be removing the driver components from the board, and soldering your positive and negative lead wires to the board. (use your DMM for testing)
You can mount your FlexDrive or Micro Boost driver into the pill. (I like to use strong ‘red’ double sided tape and mount it flat)
Just make sure that none of the contact points on the driver is touching any metal…
Battery position – Case negative. (negative end of the battery towards tail cap) CR2 primary, or CR2 rechargeable.
The best battery is this one: (IMO)
RCR2 Unprotected Rechargeable Lithium Battery

With the ‘Hot’ option kit, I will have the driver installed for you. With the current set to the agreed upon setting, and lead wires soldered onto the driver as well. Ready for you…

Tool tip:
The trickiest part for the assembly, will be to thread the pill/driver, together with the heatsink/module (and diode), into the head of the host as one assembly without letting the heatsink turn separately from the pill. This would obviously twist the wires.
One method, is to pinch the heatsink and pill between your thumb and which ever finger fits in through the front of the host, hold them tight together between your thumb and finger, while turning the head of the host with your other hand until it is all the way in place.
Then, just a final tightening of the pill with the tips of some needle nosed pliers to make sure it is tight. (can't have the heatsink loose, it will twist while focusing)
If there are no slots in the pill for the needle nose tips, then you can always 'snag' the solder blobs with the tips. You just need to get the pill 'snugged up' against the heatsink as good as possible.
The best method I have found for install (or dis-assembly), is the use of this nice tool that I made... (made from brass)

With this tool, I can thread it into the AixiZ module after it is mounted in the heatsink, and ready for final assembly. The diode will not get touched by the tool...
I thread it in hand tight, then stand the tool upright with it through the head of the host.
It is easy to put pressure on the 'pill/heatsink assembly' using this tool. (to keep them from turning separately from each other)

Then just use your other hand to turn the head and get the assembly in place.
After the final tightening of the pill, you can just unscrew the tool from your module.
And of course, it is a great tool for dis-assembly as well...
It is an especially useful tool if working on really small builds, such as pens or Key Chains...
It is solid brass, then machined to size, threaded for AixiZ, and drilled at the tip for diode clearance. I offer this tool for $23 dollars plus $3 dollars shipping if anybody is interested...
Last edited:


