

D
Deleted member 49011
Guest
Hey ,
one of my more random simple projects
I wanted to try and have a go at time lapses but was finding it difficult to find a camera so in my DIY'ness I got a mini arduino 3.3V board , 2 NPN transistors and a Samsung PL81 12Mp digital camera with a damaged LCD and had ago at making one
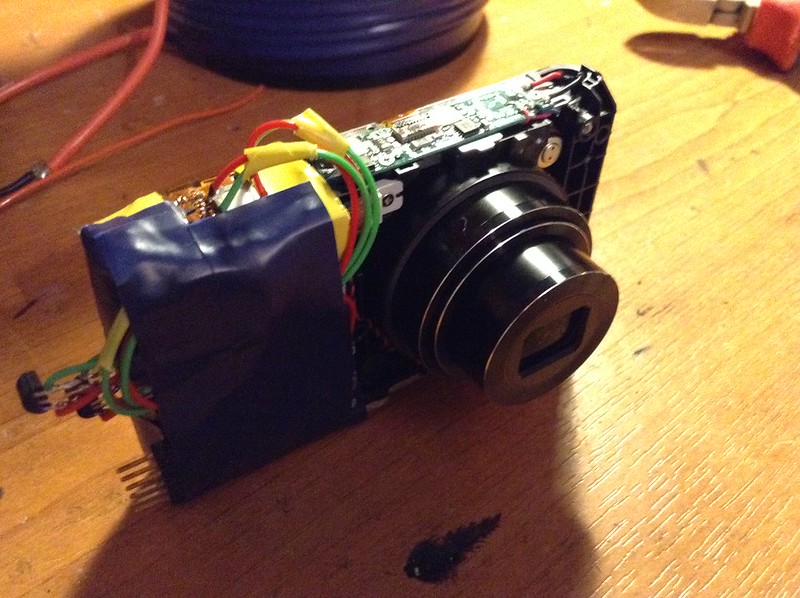
First I removed the case from the camera with a little help from brut force , This camera requires two buttons to be pressed , the first one "arms" the camera and sets the auto focus , with the second button actually taking the picture .
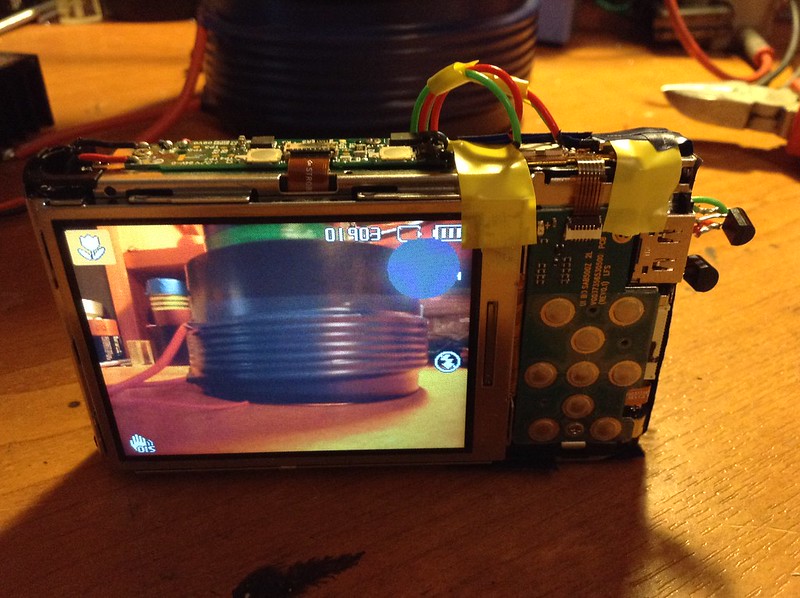
The cameras self power off has been turned off so the camera will never sleep and always stay on .
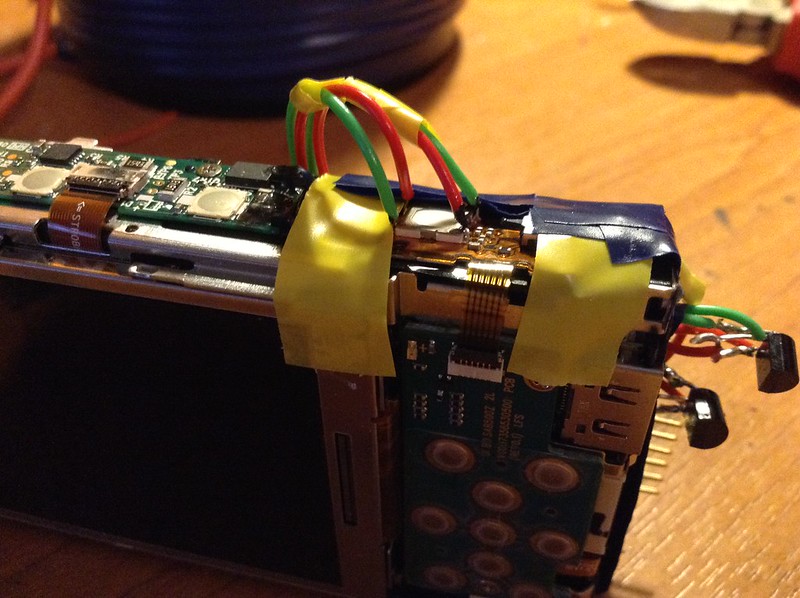
Next was finding what pins on the photo button did so after abit of "see what happens" moments I found which 2 pins on the button did what . using my oscope I checked to voltages on the pins 2 sit at 0 V , with the other 2 sitting at 3.6V so it seems the pin needs to be grounded to trigger the response so that's where the NPN transistor come into
play .
IMG_0021 by TwirlyWhirly555, on Flickr
2 NPN transistors , one for each button is connected with its collector on the 3.6V pin , then the emitter is tied to arduino and camera ground .
IMG_0024 by TwirlyWhirly555, on Flickr
The arduino code simply runs a loop with a delay , first the "arm" button is pressed then a 1 second delay the "photo" button is pressed , the camera takes the picture then the code delays for a set number of seconds ( 300 seconds for 5 minuets intervals ) and this repeats over and over
IMG_0026 by TwirlyWhirly555, on Flickr
The camera is using a 4Gb SD card and is set to 5Mp photos , with about 2000 photos able to be taken , I will have to "fake" the battery using a 3.7 Volt regulated source feeding the two battery pins to keep the camera running all the time
So hopefully the arduino is fairly accurate and I should get a time lapse of some plants like cress soon")
one of my more random simple projects
I wanted to try and have a go at time lapses but was finding it difficult to find a camera so in my DIY'ness I got a mini arduino 3.3V board , 2 NPN transistors and a Samsung PL81 12Mp digital camera with a damaged LCD and had ago at making one
First I removed the case from the camera with a little help from brut force , This camera requires two buttons to be pressed , the first one "arms" the camera and sets the auto focus , with the second button actually taking the picture .
The cameras self power off has been turned off so the camera will never sleep and always stay on .
Next was finding what pins on the photo button did so after abit of "see what happens" moments I found which 2 pins on the button did what . using my oscope I checked to voltages on the pins 2 sit at 0 V , with the other 2 sitting at 3.6V so it seems the pin needs to be grounded to trigger the response so that's where the NPN transistor come into
play .
IMG_0021 by TwirlyWhirly555, on Flickr
2 NPN transistors , one for each button is connected with its collector on the 3.6V pin , then the emitter is tied to arduino and camera ground .
IMG_0024 by TwirlyWhirly555, on Flickr
The arduino code simply runs a loop with a delay , first the "arm" button is pressed then a 1 second delay the "photo" button is pressed , the camera takes the picture then the code delays for a set number of seconds ( 300 seconds for 5 minuets intervals ) and this repeats over and over
IMG_0026 by TwirlyWhirly555, on Flickr
The camera is using a 4Gb SD card and is set to 5Mp photos , with about 2000 photos able to be taken , I will have to "fake" the battery using a 3.7 Volt regulated source feeding the two battery pins to keep the camera running all the time
So hopefully the arduino is fairly accurate and I should get a time lapse of some plants like cress soon
Last edited by a moderator:

