Welcome to Laser Pointer Forums - discuss green laser pointers, blue laser pointers, and all types of lasers

Buy Site Supporter Role (remove some ads) | LPF Donations

Links below open in new window

FrozenGate by Avery

DIY Dryfire Laser for Pistol Training?

Joined
Jul 30, 2008
Messages
4
Points
0
Hi everyone, I was wondering if I could get some help or ideas for DIY project I would like to try. Currently, there a few laser dryfire products on the market used for pistol training. The idea is to replace live ammunition with a bore-sighted laser pointer which is activated by pulling the trigger of the gun. This allows for instant feedback on where a shot is placed while saving money on ammunition. Unfortunately, they cost a few hundred bucks.

So I was thinking about making my own dryfire laser, possibly by inserting the laser into a spent casing or a plastic dummy round. If I could then attach an on/off button to a wire, I could put it onto the trigger. The other option is a thin enough laser pointer/pen that could sit inside the barrel, but that would also need a method to get the on/off button to the trigger. Any ideas on how this can be done?

Below are some search terms (links had to be removed) for a demo of a dryfire laser, some images of dummy rounds, and then some product info on the dryfire lasers on the market.


Dryfire Laser Demo
At Google: videoplay?docid=-8192714298260014267&q=beamhit&ei=nOmPSNLXBZOGqgPSvuihCA&hl=en


Dummy Rounds
Saf-T-Trainer Dummy Ammo...


Dryfire Lasers
Beamhit, bullite...


you may be able to find a laser that can sit on the front of your gun, inside may be to small (depending on the diameter). They sell switches for certain lasers, such as at atlasnova.com you may be able to run the switch down the barrel behind the trigger. You can email them and see if it is possible, unless someone else has something they would like to add.
 
laserwanabe said:
you may be able to find a laser that can sit on the front of your gun, inside may be to small (depending on the diameter). They sell switches for certain lasers, such as at atlasnova.com you may be able to run the switch down the barrel behind the trigger. You can email them and see if it is possible, unless someone else has something they would like to add.

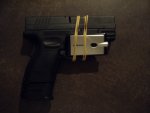
Thanks, I had initially tried something similar using a cheap $5 radio shack laser pointer (image attached) just to see how the concept felt. I worked pretty well, but it had a slightly rounded base made it move around too much, keeping it from staying on target. I figure that a casing might be the most solid way to keep the pointer attached to the gun, and would also allow the pistol to be holstered and drawn. It would also keep live ammunition out of the chamber, as a redundant safety. The barrel diameter is 9mm, so a laser pointer would have to be maybe 7 or 8mm diameter at most. Do they have any that narrow? Otherwise I was wondering if I could put a laser diode into the casing with a method for adjusting its angle (so it points straight down the barrel) and attach the wiring and a switch.


I think those atlasnova switches will solve half of the problem...
 

Attachments

  • P1010029.JPG
    P1010029.JPG
    139.8 KB · Views: 2,796
GooeyGus said:
you could always get a 3.3mm module, I'm sure it would fit in the barrel and your power supply could be where the clip goes.

Ahh, heres one. With a total diameter of 4mm, it utilizes a 3.3mm diode. SHould work just fine! I THINK it has a driver included too.


Cool, thanks. That one should be small enough for me to rig some sort of sighting mechanism. Is there a tutorial here on how to assemble the basic components; diode, battery supply, push button, driver (what's a driver)?

Below is the cheap laser I have relative to a 9mm round. It's attached to some wafer with the on/off button built in. I don't really understand the wiring.
 
rog8811 said:
you need a bore sighter.

(there must be cheap ones out there somewhere...)

Most have a switch on the side or the back but I would guess it wouldn't be to hard to modify them....
Regards rog8811

Thanks, I was looking into a bore sighter but they seem to only be for the longer riffle rounds, not pistols. But you're right, that would probably work perfectly for long guns.
 
FoodCubes said:
[quote author=GooeyGus link=1217392900/0#4 date=1217493100]you could always get a 3.3mm module, I'm sure it would fit in the barrel and your power supply could be where the clip goes.

Ahh, heres one. With a total diameter of 4mm, it utilizes a 3.3mm diode. SHould work just fine! I THINK it has a driver included too.


Cool, thanks.  That one should be small enough for me to rig some sort of sighting mechanism.  Is there a tutorial here on how to assemble the basic components; diode, battery supply, push button, driver (what's a driver)?

Below is the cheap laser I have relative to a 9mm round.  It's attached to some wafer with the on/off button built in.  I don't really understand the wiring.


[/quote]

The good thing about the laser that I linked you to, is everything seems to be done for you. All you need to do is hook up 3v and you're good to go! they say the driver is already inside (driver regulates the amount of current the diode can draw) so you dont need to worry about making one. Just connect the - and + pins to a 3vDC source and you're set. You could do it with a single Li-Ion battery cell, such as a cr123a. Or even an 18650 for a SUPER long battery life.
 
Walmart sells one of these things for somewhere around $45 Look in the sporting goods area.
 
Your weapon looks like a 9mm or a .40 and both sizes are big enough to house a laser diode.
You'll need a cheap red laser pointer, 3 button cell watch batteries small enough in diameter to fit into the brass case of an expended round.
Some thin, insulated wire; a PCB type, momentary push button switch; epoxy putty -sometimes called "super putty"; solder and soldering iron; and some black electricians tape to insulate the back of the switch and to use as an insulated "sleave" around the batteries.

Take a few inches of electricians tape and your button batteries, stack the batteries (all facing the same direction) and while holding the stack, pinched between the thumb and index finger of one hand, wrap the tape tightly around them. -This will create an insulated sleave to hold the batteries together.

Wire one end of the PCB switch to the + positive lead of your diode, the other end of the switch is wired to the positive end of your stacked button batteries (if you can, go ahead and solder the wire directly to the battery -you won't need to change batteries in this thing for about ten years). The negative - lead of the diode is wired directly to the negative end of your stacked button batteries.

Take your expended round and pop out the used primer. this will leave a nice hole in the center of the bottom of the casing. The PCB switch goes face down into the casing, so the rubber nib of the switche's button is just poking out of this hole where the primer was. Use a little square of electricians tape to insulate the back of the switch and then stuff your battery stack into the case behind it.

You use the super putty to mold around the diode and lens, so it's roughly bullet shaped, with the end of the lens positioned at the tip of your super putty "bullet". Let the epoxy putty set until hard (I suggest using the putty made for repairing pipes. It has a metal base, drys a nice lead color and is super hard.) You find this putty in the paint dept. of any hardware store. It looks and feels like clay. Mashing it together activates the epoxy and you have about 10 minutes where you can mold it like clay before it starts to harden.

Load your "laser bullet" into your mag, jack your round and fire your piece.
The firing pin will fall on the button sticking out of the back of the round and flash your laser. -depending on how far out the button sticks out of the back of the round, the firing pin will either rest on the button and your laser will stay on until you recock your weapon, or if the button is more inset inside the rounds case, the firing pin will only monentarily contact the button, giving you something like 1/30th of a second laser flash.

From there, it's even simpler to make a photocell target that can give you visual or audible feedback when you hit the target.

NOTE:
I'm new here, so I can't post pics or links, otherwise I could show you exactly how its done with pics.
Until then, just google the items you're unsure about, like "photocell" or "PCB Button"

Good luck to ya!
~SK


Back
Top