Welcome to Laser Pointer Forums - discuss green laser pointers, blue laser pointers, and all types of lasers

Buy Site Supporter Role (remove some ads) | LPF Donations

Links below open in new window

FrozenGate by Avery

Building of THOR has begun

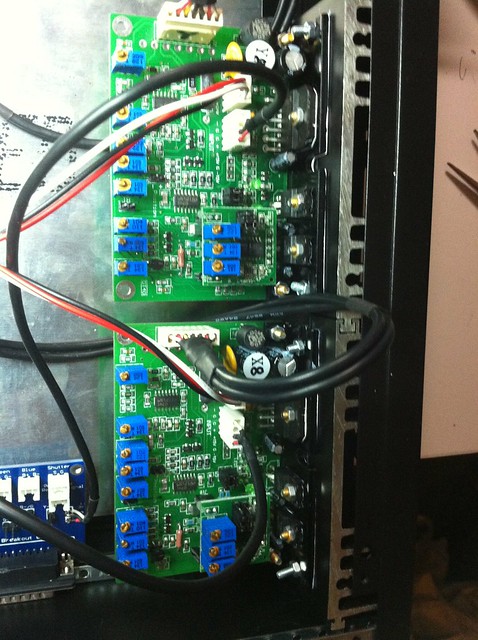
After feeling how toasty warm the galvo amps get when running for 30 seconds, I decided they needed some cooling...
5473593786_85477f02ef_z.jpg


(yes I cant drill to save my life, but the bolts hold them firmly there). Attached complete with heatsink compound. If tuning is nessecary, every pot is right there in plain view.

I'm going to need a 3U case, and mount all my psu's vertically. Thats ok, I'll stuff a single green or RGY into this case :)

Yep, they get HOT.

My pair of amps came with oversized heatsinks, even then, they need forced-air cooling if they're to remain cool to the touch.

This is with the included PT-ITRUST card, running at around 12kpps. Anything faster, and I'd assume air cooling would be required in order to maintain stability.


yeah mine got toasty warm just projecting a grid pattern at 18kpps to see how it looked. I didnt run it for long. They get mildly warm just idling.
 
Hi folks - this project is still going ahead - sorry about the lack of updates - I became violently ill in may and havent been back till now. Still on road to recovery, but will finish thor off before the end of the year.

Thumper is getting all my attention at the moment as most if not all its parts are here, and ready to be assembled (apart from an extra 30 capacitors).

Will keep you all posted.
 
Ok changed projects again - back to the Thor project. I want to get this one finished more now I've had a chance to play with quickshow and a 2 watt projector. oodles of fun.

The projector I played with (I didnt have a camera) I got to see inside - it was all CNI modules and had DT40 pros. Bit of a waste considering all the guy does with it is beams. We tried some graphics and they are stunning.

Next purchase will be a type H case from winni @ goldenstarligting in china. This will greatly simplify the build, and save me a fortune in tools. Also getting the scanner block mounting plate from Dave at lasershow parts.

Then I'm getting quickshow (more than likely also from dave) after I buy the argon laser off daguin here on these forums.

Finally I'll then be getting the green laser. Single colour and then add more (blue followed by red) as budget allows.
 
Last edited:
Hehe, 3U is a good idea. I only _juuustt_ managed to squish everything into my 2U case, and I have the DT25's with a single amp board luckily!
 
Ok I ordered last week a box type H from goldenstar, along with a flight case, optical bench and all the little niceties (dmx showcard, digital DMX etc). The cost of the case was $204. Add to that $125 for DHL shipping (understandable, its a 22Kg box) brought the total to to $339. Shipping on an Ion cost me more than this, and that was the equivalent of priority mail international (with insurance), for a lower weight box.


A friend has decided to help (financially) with the construction of THOR so long as I help him in return building him one, and we decided on two simple rules. If you dont put in for the projector (e.g. buy diodes, modules or other parts), you dont use it. Same thing goes for if something breaks, or you're careless and break something, you fix it. Works for me. So we opted for the flight case, and he fronted up the cash for the box on his paypal. Once this ones complete we'll build a second in the same style case, and then keep one each. In the meantime we can share the first THOR and take turns buying bits in for the second. This spreads out the cost a bit, yet gets us one projector fairly quick.

The next step will be me buying the quick show. Unlike my mention in the spaghetti thread, I'm not going to use that "modified" software; instead opting to jump straight to FB3 & Quickshow. He is already in the know that I have an argon I want to pay off first and doesnt mind waiting.

The specifics of this case are:
Its heavy, at 22kilos in the flightcase. I will weigh it outside the flightcase.
Its big. At 46x32x15 cm - Plenty of room for a powerful setup.
It comes with a thick baseboard (12mm) for the optics
Its a dual layer design with two cooling fans on the lower deck for amps, PSU's etc
It has a showcard, dmx in/out, ilda in/out, and a few other niceties.
The best bit: ALL the damn holes are cut. I've never had much luck cutting square holes for exit apertures for example, but I can handle a tap and die set.

If the show card beams I'll just bypass it. Besides, they are usually pretty lame graphics coded into them and only do TTL anyway.

So Winni @ goldenstar should be sending "our" box in a couple of days. I'll post pics up on here when it arrives.

The two projectors will be identical in value, but not parts - he may choose for more watts and a lower priced set of scanners (lower scan angle). I've advised if its graphics he wants, to stick with 30Kpps+ though.

The mitsubishi 300mw and 500mw diodes have changed my thinking. If we can find the right correction lenses, a pair combined will produce over a watt of red that should fit the scanner mirrors. A tonne cheaper than a K-Vant!
 
Some of you asked about the case - its available from goldenstarlighting.

You can contact Winni on wenxiaoni716@163.com

Ask for a case pricelist. If you want CNI modules, ask for that too.

Heres the latest pricelist I got fron Winni on my hard drive. I got it just before I bought the case.

http://dl.dropbox.com/u/8730864/2012-new Animation laser price list(USD).xls

It may be out of date by now so best to ask Winni. She'll help you out.
 
I just did a layout diagram. This is what my projector will look like inside. Excuse my uber paint skills. The things intercepting the lasers are mm1's with mirrors. The diagonal things near the scan block are my dichros.

attachment.php


The mm1's with mirrors will eat a little power, but they make nearfield alignment pretty easy.

The setup also means the front cover can be removed for farfield only, and the top cover has to come off for nearfield. It also avoids burned fingers - only ONE mm1 is in the beam path, and thats the one redirecting the blue laser. So on that one it is possible to burn ones finger on the red laser. But for alignment purposes you should be using low power anyway, and align the blue with the green first, and then the red.

The layout mimics the shape of the baseplate supplied with the case. It doesnt lend itself well to upgrades (unless I am swapping out a module), but since I am going for fairly high powered lasers to begin with, for me it wont really matter.

And boom there I go again. triple posting. Bad me (sorry mods!)

edit: least I didnt quadruple post this time. The box arrived!

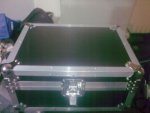
Flight case:
attachment.php


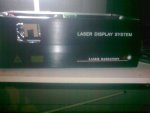
Front of case:
attachment.php


And no I have not stuck alfoil or an emergency blanket inside my projector. Its a trick of the overhead led worklamp. The scanner block will be lower as the baseplate is presently sitting atop its mounting screws, as I installed them so I dont need to go through the trial and error of finding them in amoungst 5000 other screws that came with the box (with 1000 spares). On that note, that baseplate is mighty thin. I wonder if its just a TEMPLATE baseplate. Either way if it warps due to heat it will become a drilling/cutting template for a thicker one.

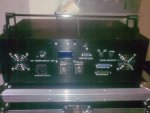
Rear Control panel:
attachment.php


Yep - the on off switch is missing. I need a new one. Silly me pushed it through from the wrong side of the panel (duh) and the only way to get it back out was to destroy the switch. They're only $5 each at jaycar anyway.

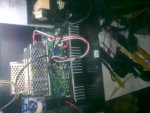
The guts... so far :P
attachment.php
 

Attachments

  • layoutlpf.jpg
    layoutlpf.jpg
    18.9 KB · Views: 418
  • front.jpg
    front.jpg
    52.6 KB · Views: 342
  • flightcase.jpg
    flightcase.jpg
    60.3 KB · Views: 435
  • guts.jpg
    guts.jpg
    66.8 KB · Views: 372
  • rearpanel.jpg
    rearpanel.jpg
    65.3 KB · Views: 402
Last edited:
Finally I got myself a drill...

attachment.php


Since I suck at drilling straight, this thing should save my sanity. Right now I am waiting to pay for the repair of my iphone (thats why my photography lately sucks - nokia), then get some micro mounts from Pat B on PL, and finally the first laser - a 500-800mw green from winni @ goldenstar. Then I can start construction.

I also intend to order the stanwax ILDA GEM and their ILDA board, which has several saftey features I'd like to see in my projector. Laser wave have a new 637 red out at 600mw power thats in my budget, and I'm getting some OEM laser glasses in the group buy.

edit: baseplate is now fitted, and holes for the scan block are also drilled. I need to get some fastners now to bolt it to the baseplate. Next step will be removing the whole shenanigans to make holes for the dichros. But that I can only do once I have a laser to help with alignment. In the mean time I intend to remove the bottom again and drill the holes for the scanner amps as well.

Since I wont be using the power supply that came with it, I'll add the holes for the 2 x 24v supplies later. Hopefully I can get all 12 or 5v lasers so I can use a 12v 1A and 5v 6 a power supply or even a 12V 8A one to run the fans and lasers.
 

Attachments

  • drill.jpg
    drill.jpg
    51.6 KB · Views: 399
Last edited:
update!

Galvos and dichros are now installed. Next step is bounce mirrors and galvo amps, stanwax ILDA breakout and wiring the rear panel. Then I'll get lasers.

Final laser choices:
DHOM 500-800mw green
1W 445 diode with 405-g1 lens and anamorphic prisms in B&W tek 473.
600mw 637 from laserwave.

Only if a big change comes for red in the next two months will the red decision change.

attachment.php


The dichro holders wont fit the other way round, so I flipped the optics over and fitted them that way. This gets the scanner head as close as possible to the aperature window, a must for DT40W's. Since alignment should be carried out at low power, I should have no fear of burning my fingers aligning the beast.
 

Attachments

  • half done.jpg
    half done.jpg
    34 KB · Views: 332


Back
Top