Welcome to Laser Pointer Forums - discuss green laser pointers, blue laser pointers, and all types of lasers

Buy Site Supporter Role (remove some ads) | LPF Donations

Links below open in new window

FrozenGate by Avery

Broken optics

Joined
Jun 22, 2011
Messages
2,431
Points
83
This is an old 532nm from DX, which was "rated" 300mw (it's obviously underspec but still the brightest green I have).

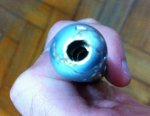
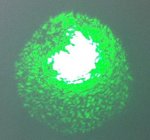
A few months ago the poor thing slipped and fell to the floor, breaking the lens. I didn't know this forum back then so I tried to remove the cap by force to no avail. The only alternative to get it to output something was to use a nail and break the rest of the lens until I could remove it from the aperture - it worked, the laser is still powerful but the unfocused "dot" looks like a giant amoeba..

This host is quite common and I have a couple of broken lasers with good lenses, any ideas if I can get this cap removed and replace the lenses? How would I go about doing it without breaking the crystal?
 

Attachments

  • IMG_1366.JPG
    IMG_1366.JPG
    74.4 KB · Views: 234
  • IMG_1367.JPG
    IMG_1367.JPG
    25.3 KB · Views: 260
  • IMG_1365.JPG
    IMG_1365.JPG
    53.9 KB · Views: 260


Drill a 1/2 inch hole in a block of wood and cut it in half then put the cap in it and put it in a vice and pull.Btw I didn't think of this idea I saw it in a video.
 
Pull? I always assumed it used some sort of screw!
I'll see if I can borrow a drill and try it, thanks!
 
I have used the wood block approach for years.
The cap is pressed into the housing. Use hard wood.
The lens holder likely is screwed into the module.
Go carefully-
HMike
 
If you need a picture. The head will come off scratch free but that is too late for you.
The head is pressed in just what Mike said.

IMG_4167.JPG
 
Last edited:
If it slips out I put one wrap of paper around the pen and try it again. If fails then two wraps, eventually the pen will sit tight as the Excaliber sword in the stone. :D
 
It worked... kinda! I thought the cap would go and leave the module screwed to the body but in fact the module was screwed to the cap.
Luckily the module was identical to a 5mW I had (also from DX), so I switched the external lens and cleaned the internal one.

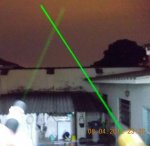
Here are some pictures of the parts. The module has no positive terminal so I just held the wire the the case. The beam looks a lot brighter compared to a 10mW rated greenie. It can be easily seen even on a very well lit room.

I don't know if I should try to get it back on the host, I'm afraid it's gonna break.
I might just solder the wires to it and find another enclosure. What do you guys think? Would a plastic cover overheat (guess so, it gets warm quite quickly)?
Where's the best place to solder the positive wire?
 

Attachments

  • DSCN0274.JPG
    DSCN0274.JPG
    94.4 KB · Views: 213
  • DSCN0276.JPG
    DSCN0276.JPG
    98.5 KB · Views: 239
  • DSCN0277.JPG
    DSCN0277.JPG
    79 KB · Views: 222
  • DSCN0278.JPG
    DSCN0278.JPG
    93.4 KB · Views: 254
Not sure but I think the positive wire goes directly on the module or the + diode pin.
 
Last edited:
Thanks! Still open to suggestions about getting it back on the host or finding another enclosure.
 
This may not be the answer your lookin for or maybe not even what you mean but i just worked with a module similar to that one from dx and the positive wire goes on that little silver dot in the middle of the driver where the driver meets the module. Like clear in the front of the driver.
 
Thanks, I'll probably try to solder it later. I'll post pictures if I get something done :)
 
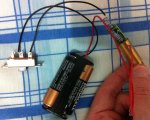
I've soldered a wire to the internal lens case, another to the spring and a small bridge to bypass the onboard button. Now it's way easier to connect it to the batteries :)

It's strong but weaker than I remember (could be my memory, it's been broken for over six months).

It gets very hot very quickly, even the battery clip springs get hot!
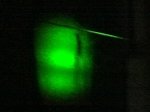
And it's also mode hopping :/ It's TEM02 on that picture, right?

Can it be something I did wrong?

BTW it looks like it's exactly the same module as this one.
 

Attachments

  • batteries.jpg
    batteries.jpg
    76.5 KB · Views: 329
  • modehopping.jpg
    modehopping.jpg
    28.8 KB · Views: 239
Found a nice box for it and resoldered the main resistor, it's far more stable now.
And I can leave it sitting on it's own 'cause it ain't round anymore ;)
 

Attachments

  • beam.jpg
    beam.jpg
    93.4 KB · Views: 223
  • box.jpg
    box.jpg
    86.4 KB · Views: 266


Back
Top