Pman
0
- Joined
- Nov 28, 2012
- Messages
- 4,441
- Points
- 113
Needed something to do so I looked through all my stuff and finding I had (1) 405nm SLD3234VF and (7) 650nm LPC-826 diodes I purchased some DTR 5.6mm modules and a few more AixiZ inexpensive drivers and emptied out some Altoids tins along with a Sucrets one (already had some other empty tins) and built 8 units.
The drivers were just cheap ones found here on their site but also sold on Ebay from them:
2pcs adjustable current laser diode driver 80-500mA w/TTL, AixiZ
When I originally went to set them I thought something was wrong until I found out I had to use both the power + and TTL +.
Set the boards just past the farthest point which takes it over 350 and then is very dependent upon voltage. Used all LiFePO4 batteries to keep the voltage low enough to hopefully not blow the diode and it seems to have worked like a charm.
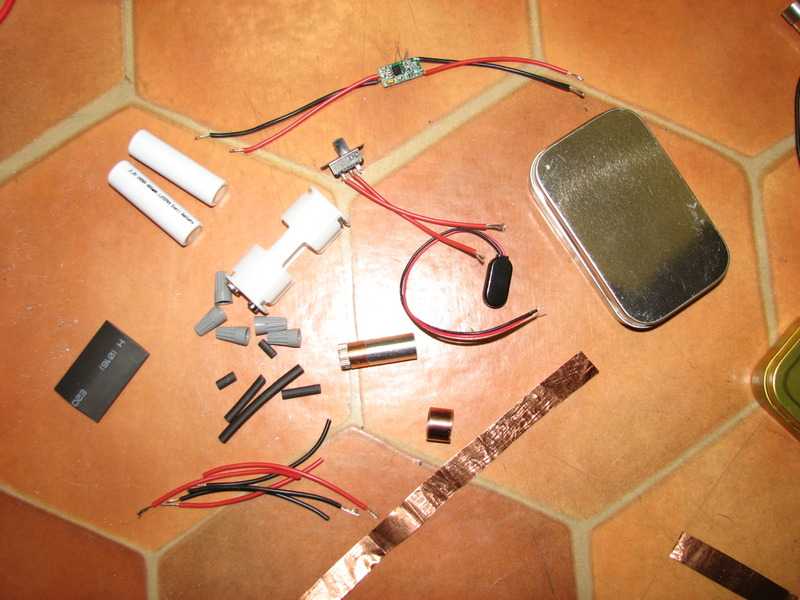
Don't ask me to explain why the driver needs to be set just past the max setting to hit the 500 range because I have no idea. If you set it just a bit higher than that it will go to 0. You can't have a common ground either or the diode will blow so that is why the board is isolated just using a piece of large shrink tube (not actually shrunk but held inside it with a piece of electrical tape on each end). The rest of what you see is a copper coupling for additional heat-sinking, a micro switch, some thin copper to make up for the space between the module and copper coupling, some wire nuts and either a (2) AAA or AA battery holder and a 9V clip on for the battery holder if required.
Here's the parts layout:
Didn't bother taking the pics but you just press the diodes in with your handy dandy diode press set, solder a couple wires to the + and - after cutting the bottom unused pin, heat shrink tubing over the soldered connections and screw on the back module piece for protection to the module pins/wires.
Use a dremel too carefully make your holes for the micro switch and module lens. Press in the micro switch after soldering your wires and if you cut the hole tight you don't need to bother using epoxy to glue it in place. Have to check your switch before gluing as the ends are usually open for the switch o slide and you don't want any glue there.
Mix up some epoxy and glue down the module (and switch if needed). I always cut the hole for the module so when you place the module down it aligns correctly with the module touching the case flat but it's also very important to do it this way so that you don't have to cut into the lid to allow for the lens holder (focusing knob) to screw in properly so the lens can get close enough to the diode to focus to infinity. Takes only about 15 minutes to go on from here (just because you want the 5 minute epoxy to cure pretty well) and wire nut everything together for a complete unit and you can solder the wires onto the driver board when it's curing.
Just wire nut your connections at this point and test.
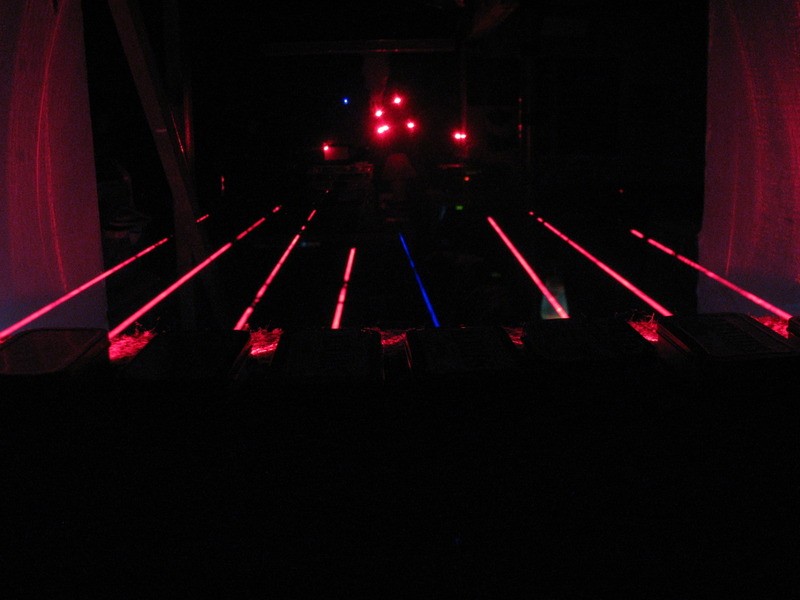
With a G-2 the 405nm is over 150mW and all the 650 are over 400mW. Using the standard plastic lenses that come with the modules the 405nm is about 135mW and the 650nm are easily above 300mW and would output more if I didn't have to turn the plastic lenses backwards to be able to get infinity focus.
I've messed with all of them for at least a week now and they all seem to work great with no indication of a failure looming and burn stuff really well if you're into that. Takes no more than a couple seconds to burn through a cd case") . Costs me maybe $20 to build one if I didn't already have most of what I needed. Probably spent about $40-50 for the stuff I was missing to complete all of them including buying a few more LiFePO4 cells to replace a few of the ones I used.
. Costs me maybe $20 to build one if I didn't already have most of what I needed. Probably spent about $40-50 for the stuff I was missing to complete all of them including buying a few more LiFePO4 cells to replace a few of the ones I used.
The originally had (2) of those 405nm diodes but had set the driver just slightly too high and those diodes don't like it and go "poof" if you try and push them. The other went "poof" down to 15mW seemed pretty odd to still work with that output. Just make sure you set the driver for 150 MAX and preferably just under that especially if you are using an inexpensive multimeter
Yeah, they are only about $5 but still stinks if you blow one. The 826 are much more robust and give way more output for the buck.
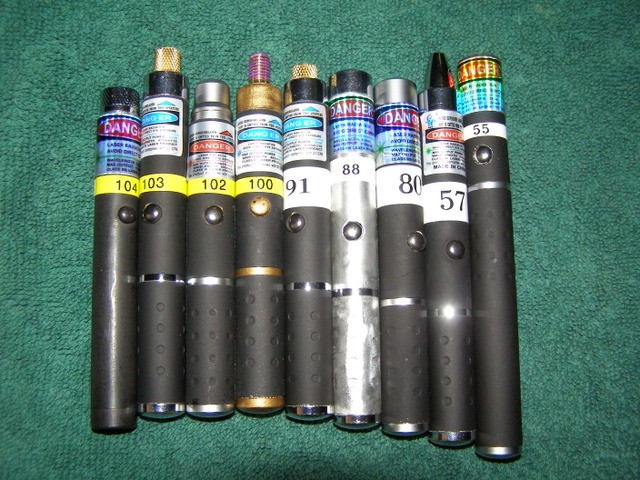
Looks like the silver and gold ones on the end were cut off in this pic. The all silver and gold boxes are the size of the altoids ones but have no markings on them. I believe I bought them on Ebay many years ago but I'm not sure. Also found I have a bigger tin that is about twice the size but I haven't done anything with it yet. Tempted to make one with multiple color diodes but don't have any left.
You can see looking at a few of them that it's pretty simple
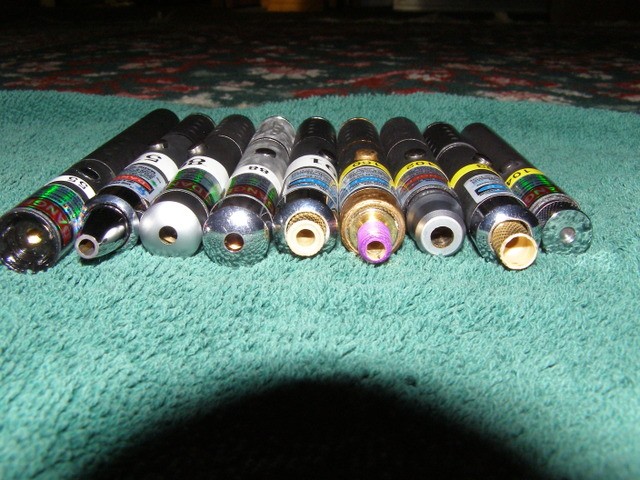
Crappy pic but the lenses and switches are aligned pretty nice.
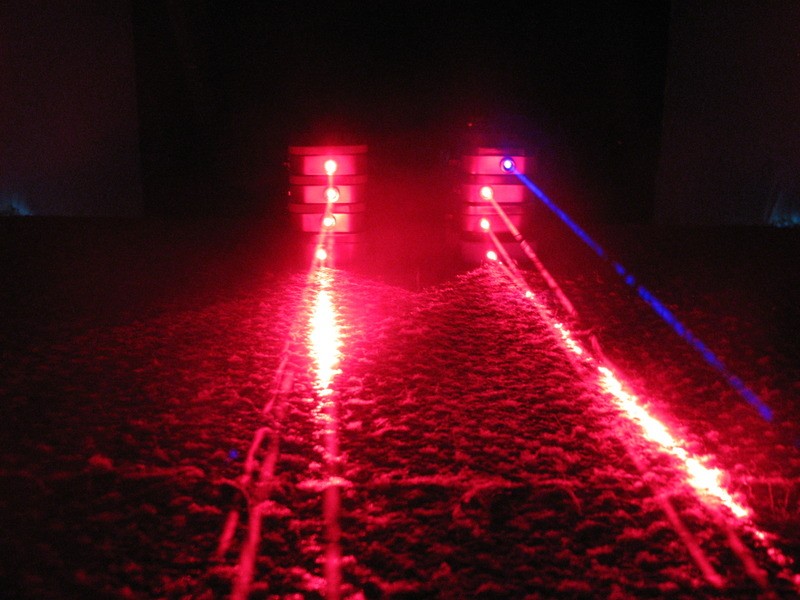
Just a very slight amount of Vape smoke added
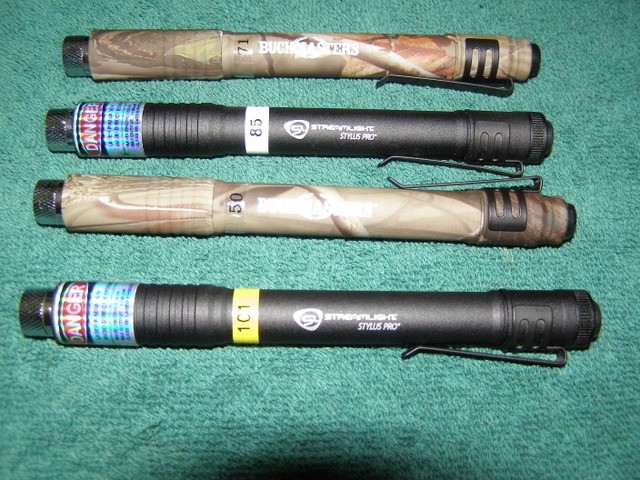
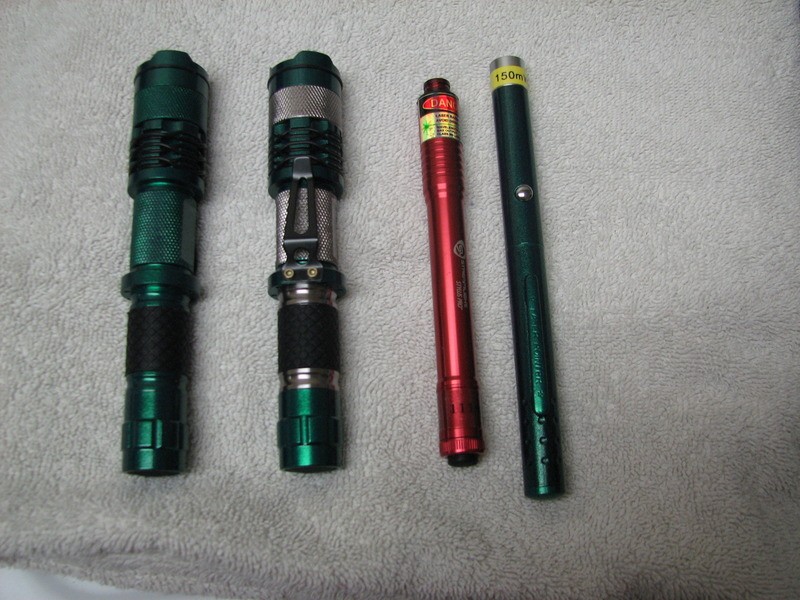
I'll add a shot of 4 bonus units I made. The green ones I painted all have Fasttech 532nm modules 2 of which are over 100mW (the other is just under) and the red one I painted I tossed in a 650nm module I found in one of my boxes that I had forgotten about and it's also over 100mW and has a custom focus adapter on it. That pen style one that has the 150mW 532nm in it has such high output because I took off the top lens section of the module so it's just raw diode output but creates a really nice strong wide beam. Have the upper section still if I felt like screwing it back on but it's more interesting this way
Any questions I'll be happy to answer. Probably should have thrown in the 532nm one I had made a while back but forgot about it. Anyone knowing the deal with that driver I'm using feel free to comment on it. I also built a 638nm laser with a 700mW DTR diode (800mW +) and a PT-54 phlatlight into a project box with no driver running off parallel high drain 18650 batteries that kicks out some serious red drawing 16 Amps recently for something to do plus a few other projects. Haven't felt like posting things lately as my left kidney is causing me all kinds of grief and I keep having to take migrain pills (yuck). My birthday on Monday (the big 50) and received a small amount of $ and am tempted to try out a PT-121 but am still looking into them. DTR has some red and blue ones complete with the heat sinks and lenses and also some complete PT-54 reds too. Prices are really good in my opinion. Wish my 54 had the lens assembly.
The drivers were just cheap ones found here on their site but also sold on Ebay from them:
2pcs adjustable current laser diode driver 80-500mA w/TTL, AixiZ
When I originally went to set them I thought something was wrong until I found out I had to use both the power + and TTL +.
Set the boards just past the farthest point which takes it over 350 and then is very dependent upon voltage. Used all LiFePO4 batteries to keep the voltage low enough to hopefully not blow the diode and it seems to have worked like a charm.
Don't ask me to explain why the driver needs to be set just past the max setting to hit the 500 range because I have no idea. If you set it just a bit higher than that it will go to 0. You can't have a common ground either or the diode will blow so that is why the board is isolated just using a piece of large shrink tube (not actually shrunk but held inside it with a piece of electrical tape on each end). The rest of what you see is a copper coupling for additional heat-sinking, a micro switch, some thin copper to make up for the space between the module and copper coupling, some wire nuts and either a (2) AAA or AA battery holder and a 9V clip on for the battery holder if required.
Here's the parts layout:
Didn't bother taking the pics but you just press the diodes in with your handy dandy diode press set, solder a couple wires to the + and - after cutting the bottom unused pin, heat shrink tubing over the soldered connections and screw on the back module piece for protection to the module pins/wires.
Use a dremel too carefully make your holes for the micro switch and module lens. Press in the micro switch after soldering your wires and if you cut the hole tight you don't need to bother using epoxy to glue it in place. Have to check your switch before gluing as the ends are usually open for the switch o slide and you don't want any glue there.
Mix up some epoxy and glue down the module (and switch if needed). I always cut the hole for the module so when you place the module down it aligns correctly with the module touching the case flat but it's also very important to do it this way so that you don't have to cut into the lid to allow for the lens holder (focusing knob) to screw in properly so the lens can get close enough to the diode to focus to infinity. Takes only about 15 minutes to go on from here (just because you want the 5 minute epoxy to cure pretty well) and wire nut everything together for a complete unit and you can solder the wires onto the driver board when it's curing.
Just wire nut your connections at this point and test.
With a G-2 the 405nm is over 150mW and all the 650 are over 400mW. Using the standard plastic lenses that come with the modules the 405nm is about 135mW and the 650nm are easily above 300mW and would output more if I didn't have to turn the plastic lenses backwards to be able to get infinity focus.
I've messed with all of them for at least a week now and they all seem to work great with no indication of a failure looming and burn stuff really well if you're into that. Takes no more than a couple seconds to burn through a cd case
. Costs me maybe $20 to build one if I didn't already have most of what I needed. Probably spent about $40-50 for the stuff I was missing to complete all of them including buying a few more LiFePO4 cells to replace a few of the ones I used.The originally had (2) of those 405nm diodes but had set the driver just slightly too high and those diodes don't like it and go "poof" if you try and push them. The other went "poof" down to 15mW seemed pretty odd to still work with that output. Just make sure you set the driver for 150 MAX and preferably just under that especially if you are using an inexpensive multimeter
Yeah, they are only about $5 but still stinks if you blow one. The 826 are much more robust and give way more output for the buck.
Looks like the silver and gold ones on the end were cut off in this pic. The all silver and gold boxes are the size of the altoids ones but have no markings on them. I believe I bought them on Ebay many years ago but I'm not sure. Also found I have a bigger tin that is about twice the size but I haven't done anything with it yet. Tempted to make one with multiple color diodes but don't have any left.
You can see looking at a few of them that it's pretty simple
Crappy pic but the lenses and switches are aligned pretty nice.
Just a very slight amount of Vape smoke added
I'll add a shot of 4 bonus units I made. The green ones I painted all have Fasttech 532nm modules 2 of which are over 100mW (the other is just under) and the red one I painted I tossed in a 650nm module I found in one of my boxes that I had forgotten about and it's also over 100mW and has a custom focus adapter on it. That pen style one that has the 150mW 532nm in it has such high output because I took off the top lens section of the module so it's just raw diode output but creates a really nice strong wide beam. Have the upper section still if I felt like screwing it back on but it's more interesting this way
Any questions I'll be happy to answer. Probably should have thrown in the 532nm one I had made a while back but forgot about it. Anyone knowing the deal with that driver I'm using feel free to comment on it. I also built a 638nm laser with a 700mW DTR diode (800mW +) and a PT-54 phlatlight into a project box with no driver running off parallel high drain 18650 batteries that kicks out some serious red drawing 16 Amps recently for something to do plus a few other projects. Haven't felt like posting things lately as my left kidney is causing me all kinds of grief and I keep having to take migrain pills (yuck). My birthday on Monday (the big 50) and received a small amount of $ and am tempted to try out a PT-121 but am still looking into them. DTR has some red and blue ones complete with the heat sinks and lenses and also some complete PT-54 reds too. Prices are really good in my opinion. Wish my 54 had the lens assembly.
Last edited:


") Nasty buggers.
Nasty buggers. . Have the drivers, switches, battery holders, batteries and all the miscellaneous stuff but only one 5.6mm module left. Don't know if I can swing the rest ($). Have to count what I have left of my birthday $ as I just spent most of it on a green phlatlight pt-121 someone is selling on Ebay for $34 (includes the shipping but no heatsink, lens or wiring) and the 3 different complete ones DTR is selling (PT-121 red, blue and PT-54 red all with their heatsinks, lenses and wires). The one PT-54 that I had with no heatsink or lens is so bright getting 16A that I have to see what the others can do. The green one is especially nasty in lumen output according to the data sheets at what looks to be 4-5000 lumens with 30 or so amps which I think will be 4x the amount of the 54. Going to parallel 4 brand new Samsung 25r cells and test the amps (actually I'm betting it pulls 40+) and voltage drop to see what it really pulls. Have no way of testing the lumens but I expect to be in shock at the output. Good thing I've got glasses