Philipnzw
Active member
- Joined
- May 19, 2019
- Messages
- 122
- Points
- 43
It has been 1 year+ since i joined LPF, damn time flies. I still vividly remember seeing jayrob's stainless steel flashlight builds when i first opened my account here, and how in love i was with the smaller form factor builds. After many trial and errors over the year, i now present to you all, my very own 14500 stainless steel build!
Here's some pictures and a short story of how i made it.
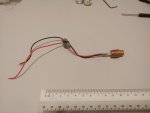
Here was my testing set up, the driver i used is a generic chinese driver. 17mm in diameter, capable of 1.8A output, apparently. However, i do not have my multimeter with me so i can not verify that. My driver is similar to another member in LPF that came across this driver, in that the Potentiometer DOESN'T WORK So i just bit the bullet and tested the LD with whatever current the driver is giving me. Fortunately, everything is fine.
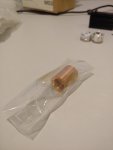
To create a heatsink for my host, i took some measurements of the inside of the 14500 torchlight. I don't have any calipers so i just use a plastic ruler but hey it worked. The heatsink is 18mm in diameter, 23mm length. The is a 12mm bore hole for our standard 12mm modules. At the back, there is a 16.80mm hole with 5mm depth, this way, standard 17mm drivers can be press fitted snugly into it. I also added a small hole at the top for a M3 set screw. After i double and triple checked the dimensions, i sent the CAD files to a CNC service provider in china, and had the dude CNC it for me in T2 grade copper. The price was okay, not cheap and not too expensive. Thankfully there was free shipping.
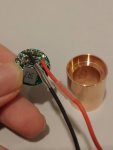
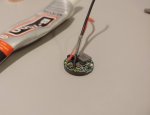
Whoever designed this driver must have been high on something As you can see, the + and - contacts to the LD are all the way at the sides of the driver. This increases the chances of it contacting the copper heatsink and forming a short, potentially killing everything. I don't have any insulating material with me so i used some silicone glue left over from my handphone repair projects. In the second pic, you can see how the glue is curing and turning yellow. I made sure to cover both solder joints with a decently thick layer of silicone glue. Then of course i press fitted the driver into the heatsink.
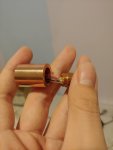
Next, i cut the wires short, soldered them to the LD and inserted the laser module. Working in such small place was no fun, especially setting the heat shrink properly. I kinda messed up and shrank it by accident, so its a little uneven and ugly, but it did wrap tight after i heated it even more.
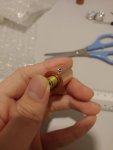
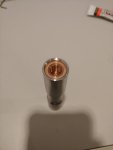
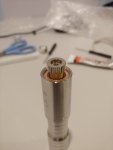
Pop it a set screw to hold the module in tight. Slide the whole thing into the host, and we are done! For this build i used a wacky 12mm FL 6.35mm diameter single element collimating lens. It was dirt cheap on taobao so i snagged it for a test. Turns out, it was too far away and also too small to catch all of the laser light coming from the LD, leading to lower brightness and power at the output. So i switched it to a G8 after all this.
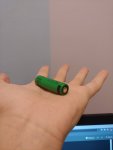
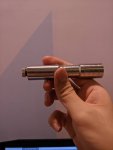
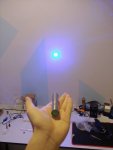
Since this build can draw up to 1.8A, i charged up my SONY US14500VR2, which can provide up to 2A continiously. And the build is complete. I usually use this battery for my sharp 505nm @300mA so this is the first time i'm drawing this much amps from the battery, i think its okay as the battery only got slightly warm after a long period of use.
I am absolutely in love the size of this build. It's tiny, yet not small in such a way that the run times are abysmal. In fact, i'm guessing that it can run for 1 minute straight, from a cold start.
It also very pocketable, compared to something like a 18650 host. I just love this form factor so much.
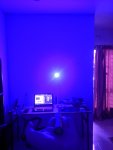
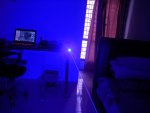
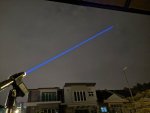
Beam shots in next post.
Here's some pictures and a short story of how i made it.

Here was my testing set up, the driver i used is a generic chinese driver. 17mm in diameter, capable of 1.8A output, apparently. However, i do not have my multimeter with me so i can not verify that. My driver is similar to another member in LPF that came across this driver, in that the Potentiometer DOESN'T WORK

To create a heatsink for my host, i took some measurements of the inside of the 14500 torchlight. I don't have any calipers so i just use a plastic ruler but hey it worked. The heatsink is 18mm in diameter, 23mm length. The is a 12mm bore hole for our standard 12mm modules. At the back, there is a 16.80mm hole with 5mm depth, this way, standard 17mm drivers can be press fitted snugly into it. I also added a small hole at the top for a M3 set screw. After i double and triple checked the dimensions, i sent the CAD files to a CNC service provider in china, and had the dude CNC it for me in T2 grade copper. The price was okay, not cheap and not too expensive. Thankfully there was free shipping.


Whoever designed this driver must have been high on something
Next, i cut the wires short, soldered them to the LD and inserted the laser module. Working in such small place was no fun, especially setting the heat shrink properly. I kinda messed up and shrank it by accident, so its a little uneven and ugly, but it did wrap tight after i heated it even more.


Pop it a set screw to hold the module in tight. Slide the whole thing into the host, and we are done! For this build i used a wacky 12mm FL 6.35mm diameter single element collimating lens. It was dirt cheap on taobao so i snagged it for a test. Turns out, it was too far away and also too small to catch all of the laser light coming from the LD, leading to lower brightness and power at the output. So i switched it to a G8 after all this.


Since this build can draw up to 1.8A, i charged up my SONY US14500VR2, which can provide up to 2A continiously. And the build is complete. I usually use this battery for my sharp 505nm @300mA so this is the first time i'm drawing this much amps from the battery, i think its okay as the battery only got slightly warm after a long period of use.
I am absolutely in love the size of this build. It's tiny, yet not small in such a way that the run times are abysmal. In fact, i'm guessing that it can run for 1 minute straight, from a cold start.
It also very pocketable, compared to something like a 18650 host. I just love this form factor so much.
Beam shots in next post.
Last edited:


