Welcome to Laser Pointer Forums - discuss green laser pointers, blue laser pointers, and all types of lasers
Buy Site Supporter Role (remove some ads) | LPF Donations
Links below open in new window
FrozenGate by Avery
Navigation
Install the app
How to install the app on iOS
Follow along with the video below to see how to install our site as a web app on your home screen.
Note: This feature may not be available in some browsers.
More options

You are using an out of date browser. It may not display this or other websites correctly.
You should upgrade or use an alternative browser.
You should upgrade or use an alternative browser.
Re: Ericsson, "piggy-back".
- Thread starter frogger
- Start date


rog8811
0
- Joined
- Jul 24, 2007
- Messages
- 2,749
- Points
- 0
.....and don't just delete your original post, it makes it look like we are talking to ourselves 
For future reference you can edit your post for ever more...too late with this one though
Regards rog8811
For future reference you can edit your post for ever more...too late with this one though
Regards rog8811
Morgan
0
- Joined
- Feb 5, 2009
- Messages
- 2,174
- Points
- 0
I'll try again but I'm still not getting all the photos attached. Seems I can only attach one per post?
Here's the written description for the moment anyway....
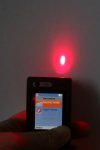
This is my first build using parts mostly sourced at Stonetek. I began with a x16 Sony diode, an Aixiz module and a RCKSTR driver.
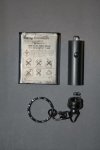
These were assembled and checked leaving me looking for a permanent power source and host. As this was a budget build I looked at what I had to hand and found a few obselete mobile phones. Looking at the batteries in them they seemed to fit the bill as they were rated at 3.6-3.7V and around 950mAh, (not always to be believed as this appears to be underestimated and is more like 4.0V!). The Ericsson was my first choice as it had the smallest battery, (part no. BST-33), and a good, "Fits in the palm of your hand", feel. Battery chosen, I looked for a host...
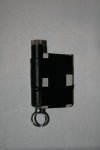
I found this in the shape of an LED keyring torch. After removing the internals I discovered, conveniently enough, the barrel was just about perfect to slide in the Aixiz module. I turned the push-button switch around 180degrees and, after trimming my wires, put the module where the LED had been. All that was left was to solder wires from the new module housing directly to the battery terminals. This had to be done with some care as these batteries apparently have some delicate protection circuitry inside. Once soldered, the housing was simply taped to the battery to form a nice little laser unit that can either be used on its own or, "Piggy-backed", with the phone. I really like the fact I can see how much charge is in the battery. Okay, this is just a function of the phone anyway, but it gives a bit of confidence that if the laser is weak, it's not because the diode is unwell!
Hopefully there is at least one pic attached and if anyone wants to see the others, I will happily post more.
I will get the hang of it eventually!!!
;D
Thanks for reading, (I'll leave this one up no matter what!)
M
Attachments
Morgan
0
- Joined
- Feb 5, 2009
- Messages
- 2,174
- Points
- 0
rog8811
0
- Joined
- Jul 24, 2007
- Messages
- 2,749
- Points
- 0


Morgan
0
- Joined
- Feb 5, 2009
- Messages
- 2,174
- Points
- 0
Spot on Rog, Thanks.  How did you shrink them? I posted one of those pics the other day and it worked fine. Didn't think I did anything different???
rog8811
0
- Joined
- Jul 24, 2007
- Messages
- 2,749
- Points
- 0
I uploaded them to my photobucket account, they seem to resize themslves. go here http://photobucket.com/ sign up for an account (it is free) upload your photo's when you hover over the photo 4 codes will appear below, copy the bottom one, IMG CODE and paste it into your post. You can check the result by hitting the preview button.
To fit them, without a scroll bar, as an attachment they need to be 640 X 400.
Regards rog8811
To fit them, without a scroll bar, as an attachment they need to be 640 X 400.
Regards rog8811
Morgan
0
- Joined
- Feb 5, 2009
- Messages
- 2,174
- Points
- 0


