Welcome to Laser Pointer Forums - discuss green laser pointers, blue laser pointers, and all types of lasers

Buy Site Supporter Role (remove some ads) | LPF Donations

Links below open in new window

ArcticMyst Security by Avery | Browser Hide by Avery

New Laser gun 75W+

Borislav@87

Active member
Joined
Mar 20, 2022
Messages
355
Points
43
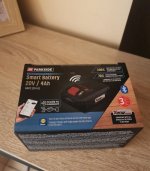
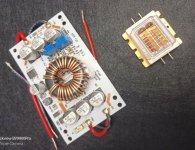
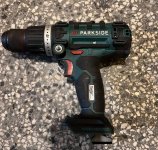
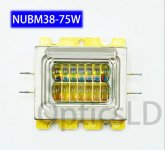
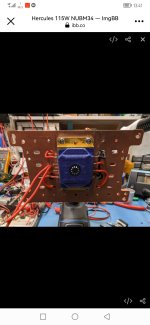
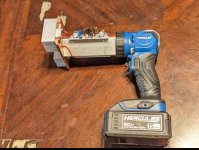
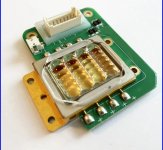
Hello. Winter is coming and I'm starting another project. This time I decided to make a laser gun out of a screwdriver. I bought a new battery 20V/4Ah, body damaged screwdriver. I will be using the same 600w boost converters that I used for the previous such laser. This time instead of a NUBM35 laser array, I ordered a NUBM38. He looks the same. I don't know how they differ. I still haven't decided what the cooling will be. I have a few ideas which I will share at a later stage when I get the components.
 

Attachments

  • Screenshot_20231028_183348_com.sirmamobile.prodavalnik_edit_1512130671797379.jpg
    Screenshot_20231028_183348_com.sirmamobile.prodavalnik_edit_1512130671797379.jpg
    482 KB · Views: 21
  • Screenshot_20231028_184455.jpg
    Screenshot_20231028_184455.jpg
    991.6 KB · Views: 21
  • Screenshot_20231028_183415_com.sirmamobile.prodavalnik_edit_1512432535869208.jpg
    Screenshot_20231028_183415_com.sirmamobile.prodavalnik_edit_1512432535869208.jpg
    917.1 KB · Views: 21
  • Screenshot_20231028_184419.jpg
    Screenshot_20231028_184419.jpg
    603.8 KB · Views: 14
  • Screenshot_20231028_183348_com.sirmamobile.prodavalnik_edit_1512130671797379.jpg
    Screenshot_20231028_183348_com.sirmamobile.prodavalnik_edit_1512130671797379.jpg
    482 KB · Views: 18


Hello. Winter is coming and I'm starting another project. This time I decided to make a laser gun out of a screwdriver. I bought a new battery 20V/4Ah, body damaged screwdriver. I will be using the same 600w boost converters that I used for the previous such laser. This time instead of a NUBM35 laser array, I ordered a NUBM38. He looks the same. I don't know how they differ. I still haven't decided what the cooling will be. I have a few ideas which I will share at a later stage when I get the components.
I read in the spec sheet that the NUBM38 is NUBM35's big mama, so "she" looks the same not "he";)
 
Any info on what the difference is though? or are the same diodes and lens as the NUBM35
 
I stopped using those boards as some were defective and they overheat too easily but this board works very well and it has soft start so your laser array is never damaged.


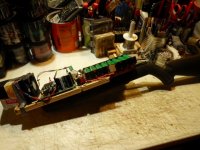
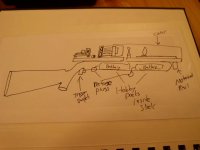
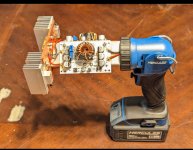
Also you have more room and a better more steady hold if you build to a rifle pattern, my toy in the pic is not my finest work, but you can see the concept and these power supply work very well.

A better idea would be to use hobby battery packs and put them inside the stock then use the space to mount a motorized beam expander on a linear motion rail, even better would be to build our own arrays with improved beams.

SANY7266.JPG
SANY7270.JPG


Last edited:
This one will surely be better. I haven't had any problems so far with the current ones. In my case, it cannot heat up because I very rarely use the laser and always in short intervals. I've glued it to an aluminum radiator if it gets hot. But until moments it didn't happen. I also ordered this 150mm aluminum radiator, but I don't know if I will use it for cooling. It would look very ugly with it sticking out the front. I have some raw copper material and will probably make a cooler out of it


Aluminum Dense Teeth Heatsink Extruded Heat Sink Computer Water Cooling System 100/120/150/200/300x69x36MM
 
@RedCowboy
I want to make something similar and compact like this laser.
 

Attachments

  • Screenshot_20230328_134124_com.facebook.katana.jpg
    Screenshot_20230328_134124_com.facebook.katana.jpg
    861.5 KB · Views: 20
  • Screenshot_20231028_224700_com.android.gallery3d_edit_398108141435605.jpg
    Screenshot_20231028_224700_com.android.gallery3d_edit_398108141435605.jpg
    744.4 KB · Views: 19
  • Screenshot_20231028_224704_com.android.gallery3d_edit_398115845711125.jpg
    Screenshot_20231028_224704_com.android.gallery3d_edit_398115845711125.jpg
    508.1 KB · Views: 19
  • Screenshot_20231028_224721_com.android.gallery3d_edit_398122855378311.jpg
    Screenshot_20231028_224721_com.android.gallery3d_edit_398122855378311.jpg
    745.7 KB · Views: 18
Sure and you could add a folding stock or quick attach/detach stock later if you wanted to, so maybe more of a longer pistol build to keep it narrow/sleek and a forward grip is always nice.

Did you see the build Gryphon made, I like his rail concept bullpup with slant forward grip.


1.jpg
 
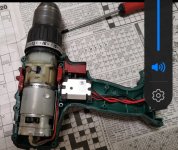
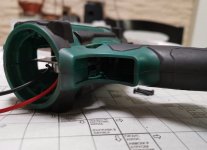
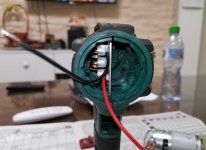
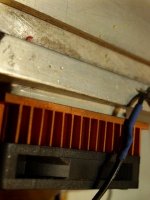
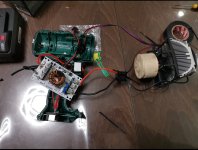
I disassembled the screwdriver. There is enough room inside to put the converter, and I will also put another small one for the fan, because it will run on 15 volts. I'm going to put another switch, because this one increases the current according to the pressure. That's it for now. I'm waiting for the laser array to fire. My goal is to make as compact a laser as possible. I will also put protection if it exceeds 70 degrees to break the circuit.
 

Attachments

  • Screenshot_20231105_192609_com.android.gallery3d_edit_29036963678901.jpg
    Screenshot_20231105_192609_com.android.gallery3d_edit_29036963678901.jpg
    433.9 KB · Views: 6
  • Screenshot_20231105_192616_com.android.gallery3d_edit_29050968917962.jpg
    Screenshot_20231105_192616_com.android.gallery3d_edit_29050968917962.jpg
    456.3 KB · Views: 7
  • Screenshot_20231105_192620_com.android.gallery3d_edit_29058774371085.jpg
    Screenshot_20231105_192620_com.android.gallery3d_edit_29058774371085.jpg
    338.4 KB · Views: 6
  • Screenshot_20231105_192623_com.android.gallery3d_edit_29065972216397.jpg
    Screenshot_20231105_192623_com.android.gallery3d_edit_29065972216397.jpg
    340 KB · Views: 5
  • Screenshot_20231105_192625_com.android.gallery3d_edit_29073087963792.jpg
    Screenshot_20231105_192625_com.android.gallery3d_edit_29073087963792.jpg
    344 KB · Views: 5
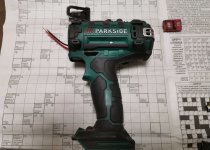
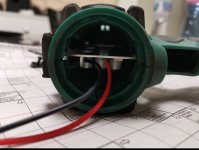
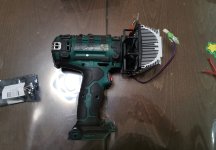
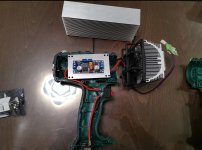
Today I was able to do these things on the body. I put in the converter, there will be a second one for the fan. The wires to the diode and fan will go through the top of the body. Tomorrow I will do the element for attaching the radiator to the body.
 

Attachments

  • Screenshot_20231109_232834_com.android.gallery3d_edit_186868910411589.jpg
    Screenshot_20231109_232834_com.android.gallery3d_edit_186868910411589.jpg
    510.2 KB · Views: 12
  • Screenshot_20231109_232832_com.android.gallery3d_edit_186858844823570.jpg
    Screenshot_20231109_232832_com.android.gallery3d_edit_186858844823570.jpg
    423.5 KB · Views: 12
  • Screenshot_20231109_232829_com.android.gallery3d_edit_186849076244925.jpg
    Screenshot_20231109_232829_com.android.gallery3d_edit_186849076244925.jpg
    490.6 KB · Views: 12
@RedCowboy
Today I bought another laser array, but this time it's NUBM37 / 125W. I also bought 2 of these 900w converters. As I will use one of them to power the NUBM37. But that will be a new topic. For cooling I will use one of these radiators. I will take the size 200mm, and there will be 3 fans in the back


Attachments

  • Screenshot_20231112_122211.jpg
    Screenshot_20231112_122211.jpg
    696.8 KB · Views: 5
From what I have seen the nubm35/nubm38 has the best grouping of beams over a short distance, but let us know how your nubm37 compares.

Also to push one of my nubm38 testers to 5A I have been testing a TEC pad and fan over fins, so the TEC chills the array's heat sink and then the fan blows heat off the hot side of the TEC with an additional copper heat sink with fins, this lets me drive @ 5A for short duty cycles, I can also pre chill the arrays heat sink.
 

Attachments

  • SANY7283.JPG
    SANY7283.JPG
    48.9 KB · Views: 6
  • SANY7284.JPG
    SANY7284.JPG
    201.3 KB · Views: 6
@RedCowboy

Yes, I will share impressions of NUBM37. I expect more power at close range. At 4A it will probably go up to over 150w. I think a 200mm radiator with 3 fans will do for 1 minute of non-stop work. I will put a thermal switch at 70C and an electronic thermometer to see the current temperature of the radiator. Like my current NUBM35 which is boxed. This way I can see the temperature in real time and there is no danger of overheating. I expect this 900W driver to be good and not screw up the array.
 
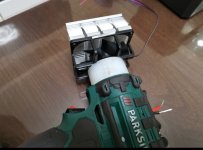
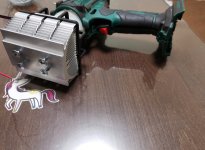
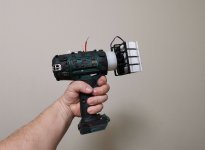
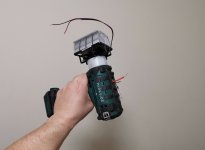
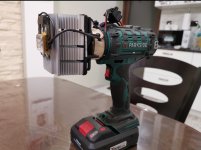
Everything is ready. I expect to receive the NUBM38 array this week and have everything wired up and set up. We made a plastic one that I glued to the fan and I clamped it to the drill. I took some pictures to see how it would look.
 

Attachments

  • Screenshot_20231114_195342_com.android.gallery3d_edit_1315271966986.jpg
    Screenshot_20231114_195342_com.android.gallery3d_edit_1315271966986.jpg
    497.2 KB · Views: 8
  • Screenshot_20231114_195339_com.android.gallery3d_edit_1308966642508.jpg
    Screenshot_20231114_195339_com.android.gallery3d_edit_1308966642508.jpg
    343.8 KB · Views: 8
  • Screenshot_20231114_195337_com.android.gallery3d_edit_1302959098759.jpg
    Screenshot_20231114_195337_com.android.gallery3d_edit_1302959098759.jpg
    472.1 KB · Views: 8
  • Screenshot_20231114_195334_com.android.gallery3d_edit_1296769391989.jpg
    Screenshot_20231114_195334_com.android.gallery3d_edit_1296769391989.jpg
    284.2 KB · Views: 8
  • Screenshot_20231114_195332_com.android.gallery3d_edit_1290439053448.jpg
    Screenshot_20231114_195332_com.android.gallery3d_edit_1290439053448.jpg
    284.4 KB · Views: 8
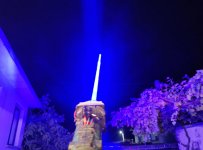
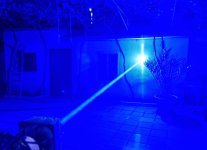
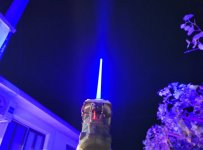
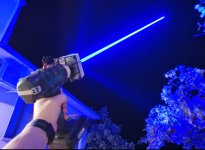
I assembled the laser today. He had a lot of nerves. I spent an hour trying to remove the array from the board because it is very likely that if force is used it will be damaged. Then I assembled everything, having previously set the driver, which was brand new, to 4A current. I just put everything together I go out to try the laser and it doesn't work. The driver was corrupted! Good thing I had another one that I had used. I put it on and in my haste to set it up I had messed up the polarity of the diode with the circuit going through the multimeter. I also include nothing. Then I saw that I had mixed up the poles and I felt sick 😄. Fortunately, I had messed up the settings of the multimeter, I had not moved the socket where the amperage is measured 😄 Accordingly, no current passed through the diode and it was not damaged. In this case, the second mistake saved my diode. Cooling works surprisingly well and does not heat up at all after 40-60 seconds of operation, but it is cold outside. As a comparison with the NUBM35, I can say that the NUBM38 has a much better and tighter beam. It's possible from my number if the lens is better put together, but there is a difference. On NUBM35 the beam becomes wider in the distance, while on NUBM38 it is visibly denser. It also seems a bit bluer than NUBM35 to me. However, I cannot confirm this.
 

Attachments

  • Screenshot_20231122_234337_com.android.gallery3d_edit_312583629279904.jpg
    Screenshot_20231122_234337_com.android.gallery3d_edit_312583629279904.jpg
    339.9 KB · Views: 20
  • Screenshot_20231122_234335_com.android.gallery3d_edit_312576919315322.jpg
    Screenshot_20231122_234335_com.android.gallery3d_edit_312576919315322.jpg
    339.4 KB · Views: 19
  • Screenshot_20231122_234331_com.android.gallery3d_edit_312568292634073.jpg
    Screenshot_20231122_234331_com.android.gallery3d_edit_312568292634073.jpg
    334.7 KB · Views: 20
  • Screenshot_20231122_234328_com.android.gallery3d_edit_312560076853866.jpg
    Screenshot_20231122_234328_com.android.gallery3d_edit_312560076853866.jpg
    381.4 KB · Views: 20
  • Screenshot_20231122_234326_com.android.gallery3d_edit_312552799837721.jpg
    Screenshot_20231122_234326_com.android.gallery3d_edit_312552799837721.jpg
    396.9 KB · Views: 22
  • Screenshot_20231122_234323_com.android.gallery3d_edit_312545187655431.jpg
    Screenshot_20231122_234323_com.android.gallery3d_edit_312545187655431.jpg
    360.7 KB · Views: 22
  • Screenshot_20231122_234320_com.android.gallery3d_edit_312536100556995.jpg
    Screenshot_20231122_234320_com.android.gallery3d_edit_312536100556995.jpg
    546.9 KB · Views: 23


Back
Top