- Joined
- Jun 20, 2015
- Messages
- 273
- Points
- 43
Just finished this today after getting the diode at least 2 months ago, then waiting for optics for several weeks to be shipped from Poland then revising the design several times as soon as I would sit down to build it.
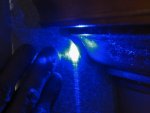
Lately I've been used to the divergence of the M462 and NDB7675 and though I find the beam quality to be nice through a G7 with those diodes, I still wasn't fully happy with the divergence with either one, coming from a history of argon, small and large frame HeNe and late 90's DPSS prior to wandering in to the consuming hobby of laser building with single mode reds ripped out of DVD-RW drives. Given that I had never seen an '07E or 44 in person, I knew from pictures that I was probably going to want correction for the N465 (same divergence as 07E from what I gather) but after firing it up with test driver I was surprised at how pronounced the line is that these high output diodes throw. I will say that other than the fast axis divergence, the beam quality of the N465 is superb through a G7 lens... clean, artifact free and super sharp.
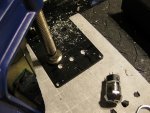
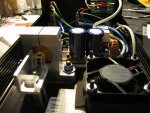
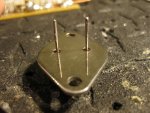
After spending too much time looking in to corrective optics, I settled on OPT's 6X cylindrical pair.. the deep footprint looked much more stable and maneuverable than the other 6X pairs I looked at, the others having a profile akin to that of a deck of cards standing on end. No thanks. Also the OPT pair has a transmittance of something over 99.5%.. that's crazy talk. They even offer the pair with a brass mount, making the vast majority of the alignment struggle vanish. Which I accidentally didn't order. Home Depot (my parts bins) to the rescue! Trimming down, evening out and squaring perfectly those brass pillars that hold the lenses was truly a bitchasaurus to accomplish with only hand tools. And sanding. And sanding. ... ..
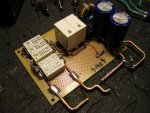
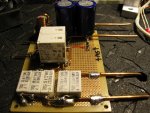
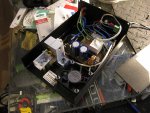
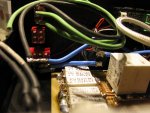
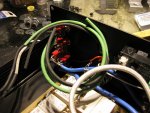
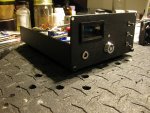
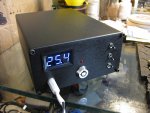
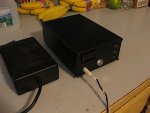
Like the other units I've made prior, I wanted selectable output. Rather than using a double throw switch to change current set resistors (too easy and reliable!), I built a circuit using relays that allows for a "button press" type of action, controlled by a momentary toggle. Tap up for high power, down for low. By using relays the unit always starts up in low power, this being an attempt to incorporate some level of safety in to this thing.. it's also satisfying to click the toggle, the parallel relays clank in unison with an accompanying tactile pulse through the chassis as it delivers a roughly ~100X increase in power.
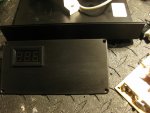
Low power - 440mA (40-ish mW)
High power - 3400mA (around 4 watts)
Bottom switch - power
Middle switch - standby
Top switch - toggle output
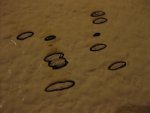
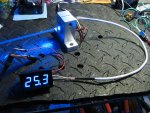
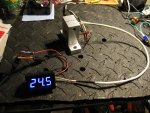
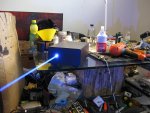
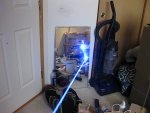
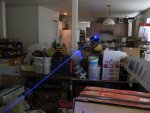
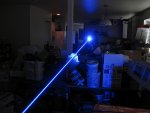
Corrected through the cylinders and focused to infinity this thing burns black spots in the white paint on my wall in less than 15 seconds after reflecting off of a mirror on the other end of the room. After testing it downstairs across the length of the house it's still burning the wall over 45 feet away. Yikes. After traveling that distance it's honestly difficult to tell if the spot is any larger than when it left the aperature. It must be. At least a hair. Awesome beam quality through those OPT cylinders.
Since there's not a lot of info on this diode, if you have any specific measurements you would like to know or would like pictures of anything particular (relating to the laser!) I'll be happy to accommodate... as far as I know, it is a canned NUBM07E, though I'm interested as to whether or not the two have any differences aside from the can.
Looking forward to the new year.. 2017 seemed a little toxic.")
Lately I've been used to the divergence of the M462 and NDB7675 and though I find the beam quality to be nice through a G7 with those diodes, I still wasn't fully happy with the divergence with either one, coming from a history of argon, small and large frame HeNe and late 90's DPSS prior to wandering in to the consuming hobby of laser building with single mode reds ripped out of DVD-RW drives. Given that I had never seen an '07E or 44 in person, I knew from pictures that I was probably going to want correction for the N465 (same divergence as 07E from what I gather) but after firing it up with test driver I was surprised at how pronounced the line is that these high output diodes throw. I will say that other than the fast axis divergence, the beam quality of the N465 is superb through a G7 lens... clean, artifact free and super sharp.
After spending too much time looking in to corrective optics, I settled on OPT's 6X cylindrical pair.. the deep footprint looked much more stable and maneuverable than the other 6X pairs I looked at, the others having a profile akin to that of a deck of cards standing on end. No thanks. Also the OPT pair has a transmittance of something over 99.5%.. that's crazy talk. They even offer the pair with a brass mount, making the vast majority of the alignment struggle vanish. Which I accidentally didn't order. Home Depot (my parts bins) to the rescue! Trimming down, evening out and squaring perfectly those brass pillars that hold the lenses was truly a bitchasaurus to accomplish with only hand tools. And sanding. And sanding. ... ..
Like the other units I've made prior, I wanted selectable output. Rather than using a double throw switch to change current set resistors (too easy and reliable!), I built a circuit using relays that allows for a "button press" type of action, controlled by a momentary toggle. Tap up for high power, down for low. By using relays the unit always starts up in low power, this being an attempt to incorporate some level of safety in to this thing.. it's also satisfying to click the toggle, the parallel relays clank in unison with an accompanying tactile pulse through the chassis as it delivers a roughly ~100X increase in power.
Low power - 440mA (40-ish mW)
High power - 3400mA (around 4 watts)
Bottom switch - power
Middle switch - standby
Top switch - toggle output
Corrected through the cylinders and focused to infinity this thing burns black spots in the white paint on my wall in less than 15 seconds after reflecting off of a mirror on the other end of the room. After testing it downstairs across the length of the house it's still burning the wall over 45 feet away. Yikes. After traveling that distance it's honestly difficult to tell if the spot is any larger than when it left the aperature. It must be. At least a hair. Awesome beam quality through those OPT cylinders.
Since there's not a lot of info on this diode, if you have any specific measurements you would like to know or would like pictures of anything particular (relating to the laser!) I'll be happy to accommodate... as far as I know, it is a canned NUBM07E, though I'm interested as to whether or not the two have any differences aside from the can.
Looking forward to the new year.. 2017 seemed a little toxic.
Attachments
-
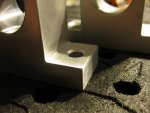 Image100005_picc.jpg218.9 KB · Views: 59
 -
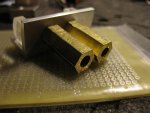 Image100008_picc.jpg204.8 KB · Views: 81
 -
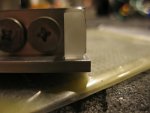 Image100010_picc.jpg176.1 KB · Views: 58
 -
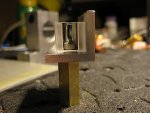 Image100011_picc.jpg196.7 KB · Views: 63
 -
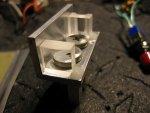 Image100012_picc.jpg187.3 KB · Views: 79
 -
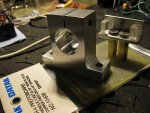 Image100013_picc.jpg271.6 KB · Views: 68
 -
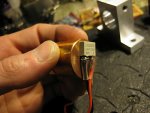 Image100014_picc.jpg208.8 KB · Views: 69
 -
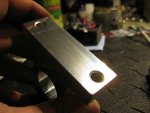 Image100004_picc.jpg173.2 KB · Views: 80
Last edited: