Welcome to Laser Pointer Forums - discuss green laser pointers, blue laser pointers, and all types of lasers

Buy Site Supporter Role (remove some ads) | LPF Donations

Links below open in new window

FrozenGate by Avery

Helium Cadmium Laser Help (Omnichrome series 74)

AntSLA

0
Joined
Jul 5, 2018
Messages
5
Points
3
I have an Omnichrome series 74 He:Cd laser and I am having trouble getting it to produce UV light. I've found a manual and it says the following:

"The Helium pressure in the plasma tube is a few Torr. Cadmium vapor is ionized in the discharge capillary by cataphoresis at the rate about 1 milligram per hour. Within the capillary Penning ionization of the Cadmium atoms by metastable helium atoms produce the necessary population inversion to produce optical gain at 441.6nm or 325.0nm."

I am currently getting a violet/blue visible light which I'm guessing is the 441.6nm but I am not getting the 325.0nm UV. I am wondering if it is anything to do with the Helium pressure/temperature because on the power supply there is an LED for cadmium heater and an LED for the helium heater but the helium heather LED never comes on, could it be faulty resulting in only blue light?

Any insights would be greatly appreciated.

Thanks,

Ant.


The helium heater should come on very rarely. It only comes on if the He pressure is low.

The Cd heater will be on every startup as it must vaporize the solid cadmium metal on every run.

How long are you running it for? A HeCd takes 10-15 minutes to heat up and start lasing once you set it to run.

Are you sure it's the UV model? What's the full model number? I'll see if I can dig out the list of models from when I had one.

What are you terminating the beam on? The UV emitted by a HeCd will make many things fluoresce a very brightly, plain white paper for example fluoresces nrightly with quite a deep blue colour. Terminating the beam on a piece of metal should produce no fluorescence.

What colour does the tube glow on startup and once it has been running for 15 minutes?
 
Last edited:
Thanks for the reply.

The laser is used in an old SLA 3D printer from 1999. The printer uses a UV laser to solidify UV photo-reactive resin and it is the original laser from when the machine was first manufactured so must be the UV model. On the side of the laser it just says series 74 and there is a label on top that has the numbers 22595-101-00, I don't know if this is a model number. There is also a label near the aperture saying "Visible and invisible laser radiation. 50mW maximum at 325-442nm".
The machine has not been switched on since 2006 and the laser has about 460 hours run time.

I was terminating the beam on a piece of paper which I didn't realise fluoresces under UV light. The main reason I am thinking something is wrong is that neither of the two power meters inside the build chamber are picking up a signal from the laser even after manually positioning the beam over them using the machines scanning head (after each layer of a print the laser should be automatically scanned over the two power meters that measure power output and I think some other properties and stops the build if anything is wrong). I will try terminating again tomorrow with a piece of metal as you suggested to see if the blue I'm seeing is the laser or the paper fluorescing.

As for the tube, it glows a sort of orange colour when first started and after a while turns white.

Thanks again.


There's some advice for running these in this thread on PL, from back when I had one of these. Worth reading it all, not that long.

https://www.photonlexicon.com/forums/showthread.php/8622-Omnichrome-Series-74-HeCd-manual

Will see if I can dig up more.

Manual: https://www.slideshare.net/brianstuckey1/omnichrome-he-cd-laser-manual

Sounds like it's definitely the UV version and you were just seeing the fluorescence from the paper. Guessing you got a small dot (1mm diameter or so) and not just a big splash, like you see when you first light the tube? If so, it's lasing and not just spontaneous emissions from the plasma.

If it hasn't been run in 12 years maybe let it run for a few days solid, they don't like sitting too long without running, can cause the He pressure to go high. Helps that you got a nice low hours head (almost as low as the one I had @ 93 hours). Sounds like it's running just fine though, really. Can check the tube voltages using the test points on the head to be sure, I think the correct readings are in the manual, as is the procedure.

Warning label is generic across all versions, so they whatever version you get has a 325/442nm label on it, even if it's only doing one or the other.

74 series refers to the tube length in centimeters, they came in 39, 56, 74 and 112. All of which have sub models at various wavelengths/powers. I think the other number you gave specifies that, though it has been a long time.

What's your power meter rated for? What sort of power meter is it? These only do 15-30mW at 325nm. Could be too low to meter or the wrong meter for 325?

Let us know how you get on with the metal test (be careful about reflections, risk of retinal damage is low to zero but it's still not good to blast your eyes with UV).

Tube colour sounds good! :beer:
 
Last edited:
That is so cool that you got a working He-Cd with low hours. These are becoming rarer every year now. It seems likely that the He pressure could be too high after sitting for so long. Having it run on low for several hours each day may resolve that problem. Congratulations. I am envious. :yh:
 
A friend of mine has about ten of them but can’t get helium3 to recharge them all. The cadmium was easy to recover but the helium3 forget it. Way 3xpensive now. You an use regular helium but you loose 40% of the already low power.

I have a 266 25 ujoule 1khz laser available. Solid state never need replaced.
 
Thanks for the replies. I have done the check with a piece of metal and the beam is invisible so it must have been the paper fluorescing, thanks for the suggestion.

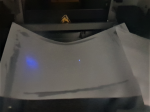
One problem I've got now (when using paper), although its probably the delivery optics rather than the laser, is that I'm getting the small focused spot but to the side of it I'm getting a blue blob of unfocused light, I've attached a photo. Its possible that something has been knocked out of alignment during the various machine moves over the years since it was last run, we also had to be quite rough with it to get it onto the van to move it to its current home. It could possibly explain why the beam isn't registering with the meters, not all of the light is making its way to the spot so the power might be too low.

The meters are the standard ones that come in the SLA machine. I'm not sure the rating or type, they are black boxes on an angle with a circular window in them with what looks like a mirror inside. When you set the machine to measure beam power it scans the beam over the circular window but it does not seem to be reading anything. You can also manually position the spot over the window and it should display the power on screen in real time but It just says 0mW for both sensors.

Yes I'm quite lucky to have the machine, it was being thrown away because it hadn't been used in so long, no one seemed interested enough to use it (this might be because the resin for the machine is stupidly expensive as I've now discovered), so it was just in the way and I by chance found it and rescued it a few days before it was to be scrapped. Apparently most of these machines of this age that are still in use have had the He:Cd lasers replaced with solid state lasers which means 325nm resin have now been discontinued as the replacement lasers produce 355nm light. 355 resin should still work but will take longer to cure so it will take longer to print.

I'm going to leave it switched on for a while as suggested. Would high Helium pressure cause a loss of power?
 

Attachments

  • HeCd Spot - Resize.png
    HeCd Spot - Resize.png
    640 KB · Views: 32
I have seen satellite beams on argon lasers, but nothing like what you have shown here. The satellites I have seen were collimated, but this one you have shown doesn't appear to be. I suspect it could be a mirror alignment problem, but I wish UltimateKaiser would chime in here as he is far more knowledgeable about He-Cds than I.
 
You're in luck. :) I'm kinda the resident gas guy, and I rarely look in the help section, but today I did. I actually maintain several HeCds. (I may even be the only active member who still has some of these that are working?) Yes, if the pressure is high it can cause issues, but omnichrome HeCds generally dont have that issue nearly as often as Liconix ones. Glad to see you 've got it lasing to some degree. UV output can be deceptively dim. If you have low output, then you should first check your voltages from your reference points. check them against the sticker on the top. they should be the same the Helium replacement should NOT run but once in an extreme blue moon and usually not very long. if you can answer a few questions, I can give you very precise info on what to do to get this tube super happy. DON'T mess with the helium heater circuit. I have one where I actually physically removed the fuse from it just in case. It can irreversably damage the laser if the supply isn't set correctly. There is no way to re-gas omni tubes sadly due to the way they are constructed.

Which power supply do you have? the 100B? or the LC-500? (I assume it's matching, but it's a good reference)
how many hours are on the tube? (nvm i see it in a previous post)
using the testpoints, measure the active tube current running and on standby. active should be 100mA+/-1
do the same for the voltage. generally should be what the sticker says, but usually may not be exact due to adjustments. usually around 2650V. and should be 3000 even when cold.
filament voltage isn't necessary, but usually is about 6V IIRC, I can check. These tubes have two, a normal and a spare sharing a common cathode.
check the He reservoir reference Voltage too. It should be exactly what the sticker says, and hopefully it should have a label over it saying it's set already and not been messed with. (Don't mess with it)
Also, DO NOT perform a remelt. this may help, but it will more likely cause at least some harm, as it also adds some Helium in many cases.
There's some other stuff i'd have you measure, but I don't have pictures to show on hand atm.

if your power is low, you might gently press on the output end mirror mounts and see if that affects it at all. it may just be a minor misalignment of the invar frame. and it tends to happen alot on larger lasers like this. the tube can flex around in there to some degree and it happens alot as it gets shifted around. after you have your tube voltages measured, you can slowly adjust the cadmium heater/tube voltage pot to adjust for power as well. do it about half a turn at a time allowing several minutes in between adjustments for the laser to thermally stabilize. CCW turns the heater up and reduces tube voltage, adding more Cd vapor, CW reduces it if I remember correctly. generally best performance is just slightly under maximum power. Keep in mind that adjusting the Cd heater also changes the thermals of the tube so if a huge change is made, you may have to do some minor alignment tweaks as well. skillful balance of the two will net you the best results. just go slow and be careful not to lose your beam. These are very complex lasers to maintain, so take care as you work. if you lose your beam, you may not get it back.

Edit: also, pretty obviously, make sure you let the Cd vacate the bore before shutting the laser down. do not turn it off if it is lasing. let it take several minutes on standby to flush the bore of Cd before powerdown. I often find the shutdown timer is often not long enough, especially on the larger 74 series lasers, and especially if they've been left on for a long time. They are terrible at cooldown due to the tube being so long with the one measely fan at the front. the 56s are much better in this regard with the fan at the back....
 
Last edited:
You're in luck. :) I'm kinda the resident gas guy, and I rarely look in the help section, but today I did. I actually maintain several HeCds. (I may even be the only active member who still has some of these that are working?) Yes, if the pressure is high it can cause issues, but omnichrome HeCds generally dont have that issue nearly as often as Liconix ones. Glad to see you 've got it lasing to some degree. UV output can be deceptively dim. If you have low output, then you should first check your voltages from your reference points. check them against the sticker on the top. they should be the same the Helium replacement should NOT run but once in an extreme blue moon and usually not very long. if you can answer a few questions, I can give you very precise info on what to do to get this tube super happy. DON'T mess with the helium heater circuit. I have one where I actually physically removed the fuse from it just in case. It can irreversably damage the laser if the supply isn't set correctly. There is no way to re-gas omni tubes sadly due to the way they are constructed.

Which power supply do you have? the 100B? or the LC-500? (I assume it's matching, but it's a good reference)
how many hours are on the tube? (nvm i see it in a previous post)
using the testpoints, measure the active tube current running and on standby. active should be 100mA+/-1
do the same for the voltage. generally should be what the sticker says, but usually may not be exact due to adjustments. usually around 2650V. and should be 3000 even when cold.
filament voltage isn't necessary, but usually is about 6V IIRC, I can check. These tubes have two, a normal and a spare sharing a common cathode.
check the He reservoir reference Voltage too. It should be exactly what the sticker says, and hopefully it should have a label over it saying it's set already and not been messed with. (Don't mess with it)
Also, DO NOT perform a remelt. this may help, but it will more likely cause at least some harm, as it also adds some Helium in many cases.
There's some other stuff i'd have you measure, but I don't have pictures to show on hand atm.

if your power is low, you might gently press on the output end mirror mounts and see if that affects it at all. it may just be a minor misalignment of the invar frame. and it tends to happen alot on larger lasers like this. the tube can flex around in there to some degree and it happens alot as it gets shifted around. after you have your tube voltages measured, you can slowly adjust the cadmium heater/tube voltage pot to adjust for power as well. do it about half a turn at a time allowing several minutes in between adjustments for the laser to thermally stabilize. CCW turns the heater up and reduces tube voltage, adding more Cd vapor, CW reduces it if I remember correctly. generally best performance is just slightly under maximum power. Keep in mind that adjusting the Cd heater also changes the thermals of the tube so if a huge change is made, you may have to do some minor alignment tweaks as well. skillful balance of the two will net you the best results. just go slow and be careful not to lose your beam. These are very complex lasers to maintain, so take care as you work. if you lose your beam, you may not get it back.

Edit: also, pretty obviously, make sure you let the Cd vacate the bore before shutting the laser down. do not turn it off if it is lasing. let it take several minutes on standby to flush the bore of Cd before powerdown. I often find the shutdown timer is often not long enough, especially on the larger 74 series lasers, and especially if they've been left on for a long time. They are terrible at cooldown due to the tube being so long with the one measely fan at the front. the 56s are much better in this regard with the fan at the back....


I think you are the sole active member with any functioning HeCd now. Rub it in why don't you... :crackup:

Good information, some of which I forgot in my original post. Been a long time since I had a HeCd. :yabbem:
 
Yeah the only other person I know who has one i think is daguin, And I don’t think he’s active anymore. And his is a liconix tube anyway, And they function slightly differently
 
Thanks for the replies.

I will check the voltages hopefully today if not later this week. I have noticed a sticker with various voltages on but have not checked any yet. The power supply is the 100B I think but I'll double check. The laser is controlled by the SLA machine so you switch it off from the control computer which takes a few minutes, I usually wait for the fan to switch off on the laser before turning the machine off. It is possible to just switch the machine off at any point which just kills the power to everything, luckily I knew not to do that when the laser is on. It is possible to manually switch the power supply knob to shutdown which I had to do the other day (the knob is normally in the middle position) because the computer has a bit of a bug which means there was no way to access the laser controller utility so I had to manually shutdown the laser before I could restart the machine. I didn't think to put it into standby first though. Sometimes If I switch the laser back on quite soon after switching it off I get the Temp lockout LED on the power supply, which goes off if I leave it off for a few minutes, could this be the cooling issue you mentioned as the laser unit normally has a cover with a grating over the opposite side of the fan which probably doesn't help with cooling?

I'm going to look into the various optics for alignment hopefully this week I'm just waiting for some UV laser goggles before I open the optics cover with the laser on (I've never worked with UV before so don't have appropriate safety glasses, most of my experience is with IR). I can currently only open the shutter with the door of the machine closed which has a window with a UV filter, which is how I took the photo of the fluorescing paper.

Yep you have the 100B, or some variant of it then. The A is a lower voltage variant with some minor changes to run the 39 and 56 models (and the 112 as it's just 2x 56s end to end). the B has a few tweaks to run the 74. Later the 39s were discontinued and the supply was edited from analog to digital making the LC-500, which runs both the 56 and 74. The original has some variants that allow remote operation. but the front knob still take priority. If you flip it to shutdown then the supply starts counting line pulses making a timer run, and the current is reduced to standby level, and the Cd heater is turned off to allow the bore to flush before cutting the discharge. it is then allowed to run with the fan for a short time to help bring the temp down. it's never long enough though, so sometimes I end up just doing it manually by running standby until lasing stops then doing a shutdown. Standby is basically just shutdown without the timer-so it stays on perpetually without using Cd in any appreciable amount. :p

Trying to restart the tube after a shutdown will yes, generally give the lockout. that's normal. It's simply telling you that the tube is too hot to re-ignite safely, as they run at quite a hot temperature during operation. The tubing is made of a low expansion fused silica glass to keep it from cracking. it's quite a work of art glasswork-wise. it turns on the fan and pulls air until the tube has come down in temp to allow a restart attempt which is measured by a diode at the tube's anode ende. It's quite hard on the tube to attempt hot restarts, and very hard on the power supply so try not to do it too often. Do not ever turn off the power to the machine or to the supply by turning the key switch except in an emergency! doing so will immediately hot kill the tube discharge and can result in Cd condensing freely wherever it pleases, which can plug the bore or otherwise allow it to settle on the optics or other trouble. It tends to do that enough without help so don't give it an excuse.

These are exceptionally complex and fragile lasers. They are quite a miracle to get them working. Lots of little things have to all come together and be maintained within narrow margins to get laser action. If any one thing is off, then the whole system goes out of whack. They're quite the troublesome kid on the block which is why they were very eagerly replaced. they didn't last on the market too long, as people got fed up with them quite often due to how expensive and troublesome they were, and their fairly short lifespans.

Processing and producing HeCd tubes makes creating HeNes and Argons look like child's play. I have a bare 56 tube that never finished production. it's quite a marvel to look at...I'll see if I can post some pictures. These are one of my favorite laser types....It's a pity they're such a pain to use and care for. They sadly are all ticking time bombs however, as they don't store well so they will all die used or not, it's just a matter of when-as unfortunately the one thing that saves them will also be their downfall...the Helium reservoir. While it extends their lifetime in service, it also slowly causes tubes to go overpressure with time even while not in use, so it's kind of a double edged sword for people that want to preserve them.
 
I've found the problem with the sensors not detecting the beam. I got some UV laser glasses and opened the cover for the delivery optics and the beam was clipping one of the scanning head mirrors rather than shining directly on it meaning most of the power was not reaching the build chamber. I have now realigned one of the mirrors and now rather than the dull blue spot (When terminated on paper) about 1mm in diameter and the unfocused blob, I get a tiny very bright spot and the sensors are now detecting the beam. The machine is the "high resolution" edition meaning it has a lower power laser (6mW) with a smaller spot size to allow printing higher detail. There are two sensors one gives a reading of 4.5mW and the other just under 6mW. I don't know if this means that there is still slight alignment issue or the calibration of one or both of the senors has drifted. They give a power value and a graphical representation of the intensity distribution of the spot. I'm now under the impression that they are CCD beam profilers. I did a very brief test build on Friday with an old part file still on the computer from the previous owner and the laser is successfully curing the resin :D. My main issue now is getting my own files onto the computer (MS-DOS) :thinking: .

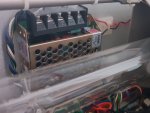
I had a look inside the laser when I first got it out of curiosity (I've never seen a He:Cd laser before) and took some pictures of the tube because, as you mentioned, the glass work is very impressive. There is an area on the inside of the outer tube near where it goes under the circuit board that has some kind of cloudy/powdery coating I didn't think to take a picture of it at the time but was wondering if it was condensed cadmuim (I don't know if the cadmium vapor goes into the inner or outer tube) and I guess it's not supposed to be there based on that diagram from the manual as it seems to be quite a distance from where the condenser should be. You can just about see it a bit to the right of the second picture, cloudy grey in appearance. I am still planning in measuring the voltages but haven't got around to it yet.
 

Attachments

  • OmnichromeS74 - 1.jpg
    OmnichromeS74 - 1.jpg
    95.4 KB · Views: 20
  • OmnichromeS74 - 2.jpg
    OmnichromeS74 - 2.jpg
    148.1 KB · Views: 20
  • OmnichromeS74 - 3.jpg
    OmnichromeS74 - 3.jpg
    110.3 KB · Views: 21
Yeah the grey cloudiness is just cadmium dust that didnt condense in the condensing area and escaped the bore and into the larger tubing area. The entire front of it is covered in insulation, so it wanders back a little ways before it finds tube walling that is cool enough for it to settle on. Lots of well used tubes tend to have big gray patches inside of them for this reason, and it's both messy and beautiful. Sometimes they can actually end up depositing in such a way that they end up creating large crystal patterns and even long thin dendrites as they deposit on one another.

6mW is low but reasonable, I personally would expect it to be a bit higher, And some of it may come back as time passes and with some adjustment. I can tell you what your tube is rated to produce if you tell me the model number
 
Last edited:


Back
Top