Welcome to Laser Pointer Forums - discuss green laser pointers, blue laser pointers, and all types of lasers

LPF Donation via Stripe | LPF Donation - Other Methods

Links below open in new window

ArcticMyst Security by Avery

"hdd galvos" Experimentation and project in the works

3zuli

0
Joined
May 30, 2009
Messages
810
Points
28
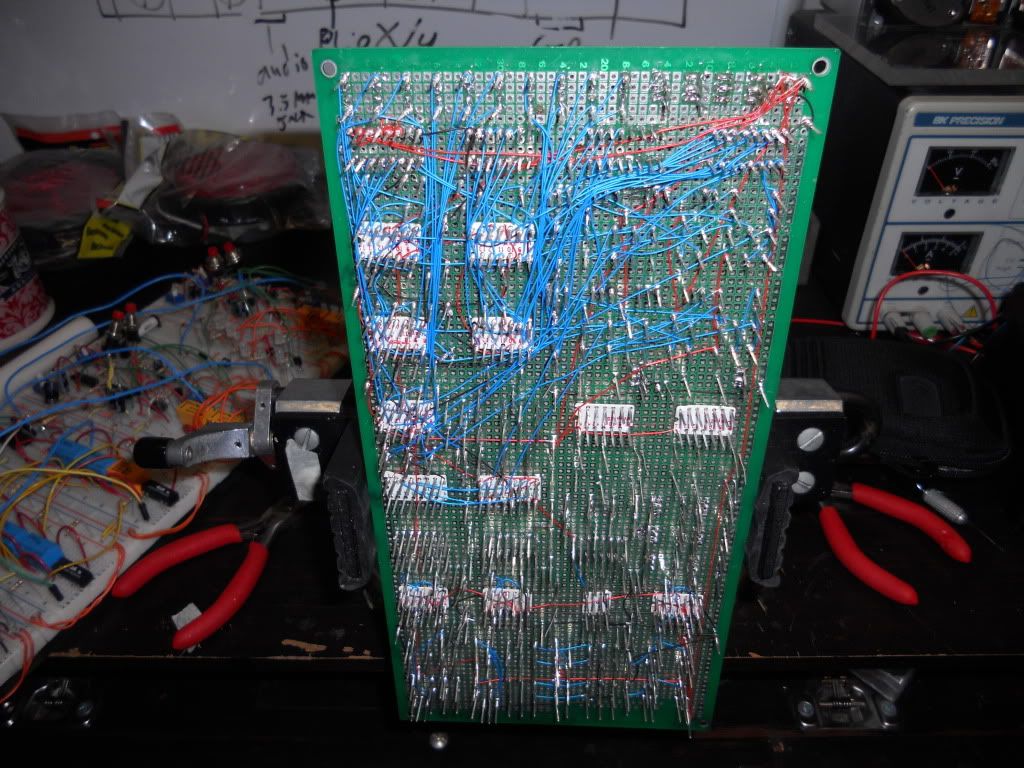
Now that looks impressive. So what functions are integrated on this board?


Joined
Mar 15, 2010
Messages
158
Points
0
-2 variable frequencies per axis/HDD (standard control)
- an alternate function per axis that alternates between the two frequencies chosen.
-two channel audio input along with an output to external speakers. gives up to 5 or 6
watts per channel.
- an audio/standard control function.
- a "flip flop" function for standard, audio, and audio/standard.
- a whole slew of led indication along with a status led circuit to show what parts of
my user panel (as soon as i build it) are being used.
- on/off function per channel
 
Joined
Mar 15, 2010
Messages
158
Points
0
its coming along
DSCN0835.jpg


finally collected all of the goodies for the user panel :)
DSCN0836.jpg

thats 10 rgy led's and there panel mount clips, 10 momentary push buttons, some audio jacks and power jack, two 1 turn 100k potentiometers, two 1 turn 10k audio potentiomters, and some 10 turn 100k potentiometers which are currently knobless but i plan to make some with this little beauty i just purchased.
DSCN0840.jpg
 

ARG

0
Joined
Feb 27, 2011
Messages
6,772
Points
113
That's a really nice lathe. How much did it cost?
 
Joined
Mar 26, 2010
Messages
3,220
Points
0
The chinese built mini lathes like that are fairly cheap. $500-$600 for a new one, less if you can catch someone else upgrading and snag a used one.
 
Joined
Mar 15, 2010
Messages
158
Points
0
managed to mount some hard drive arms on some plexiglass.
DSCN0891.jpg

Having the arms mounted on the original frame of the hard drive is convenient but needs some machining. Since i can do that machining out in my shed this is a nice alternative. all i did was size my plexiglass, clamp it down squared up with the edges, and transfer the mounting holes with a drill press.

*edit* oh and if you were wondering that does happen to be one half of a vanilla Oreo sitting on my desk right there :)
 
Last edited:
Joined
Mar 15, 2010
Messages
158
Points
0
Yeah and its my nightmare. Over this summer i slowed down on the whole project and started some new ones. In that short hiatus Ive seemed to forget a few things. I now have decided to make a more simpler driver so i can finally have some fun.
 
Joined
Mar 26, 2010
Messages
3,220
Points
0
Still looking forward to seeing these work, though I have a couple of suggestions as to your 'galvo's themselves.

The first would be to shave off the 'arms' that held the heads originally. I'm assuming you'll have your mirrors mounted to the central axis of each anyway.

Another is to relocate one of the 'galvos' so you have as little vertical height difference between them as possible. This will reduce the size of the mirrors required to not have losses from the first galvo 'overscanning' the second.

Any mass reduction that can be done in the system will likely show noticeable improvements in your maximum attainable scan speed.


Top