Welcome to Laser Pointer Forums - discuss green laser pointers, blue laser pointers, and all types of lasers

Buy Site Supporter Role (remove some ads) | LPF Donations

Links below open in new window

FrozenGate by Avery

First 660nm in progress

All the chinese goggles I have that look like that, regardless of color, have been crap. I think the *best* of those style i've tested have had an OD of 0.7.


I took some digital photos today.

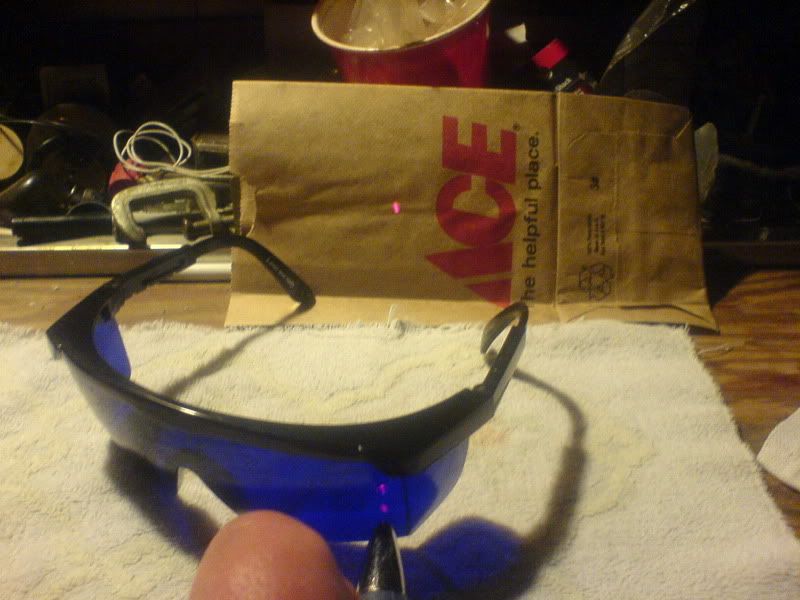
First, a replay of the comparison on post #7. I used the same cell phone camera and <5mW red laser pointer. I'm even using the same lighting and paper bag.

The <5mW laser spot.
027.jpg


Pointing through the T-Rex BP3003.
028-1.jpg


Pointing through the CE certified Eagle Pair 190-470/610-760nm. Some red remains, but it's very dim.
030.jpg


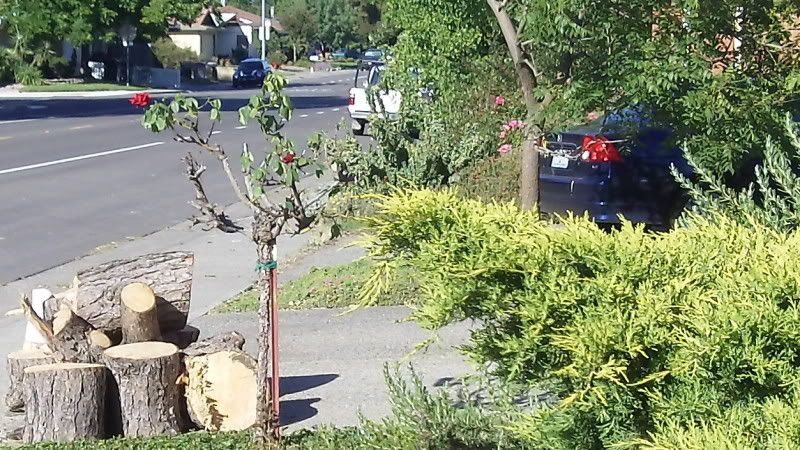
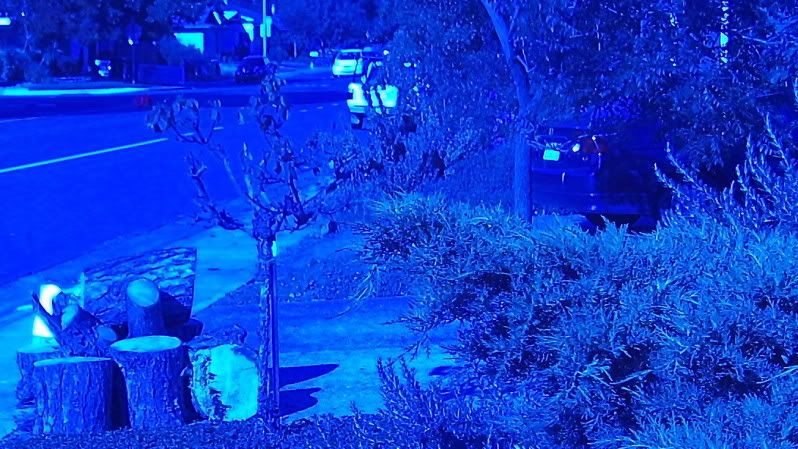
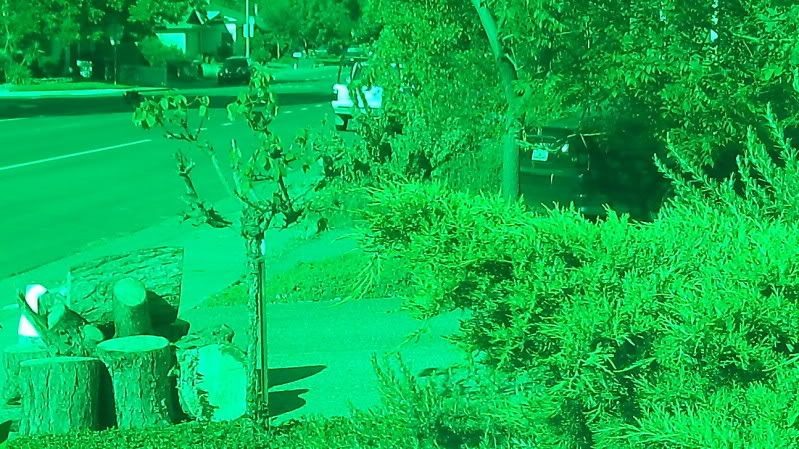
I took the goggles outside and made some still shots with a Kodak Zi8 video cam in the still camera mode. I cropped these a bit to show detail. Notice the red rose: this is a nice deep red close to 660nm. The red taillight lenses on the black car are a lower wavelength. The red chosen for tail lights is further into the orange. There are a few other red blobs in this field of vision.
011a.jpg


Through the T-Rex blues. You can still see some red remnants.
012a.jpg


Through the Eagle Pair greens. The reds appear black (no color).
013a.jpg
 
On those last pics, Run them through some image editing software and separate the RGB channels, then just look at the red channel. That will show you what's up.
 
Re: First 660nm in progress (Done!)

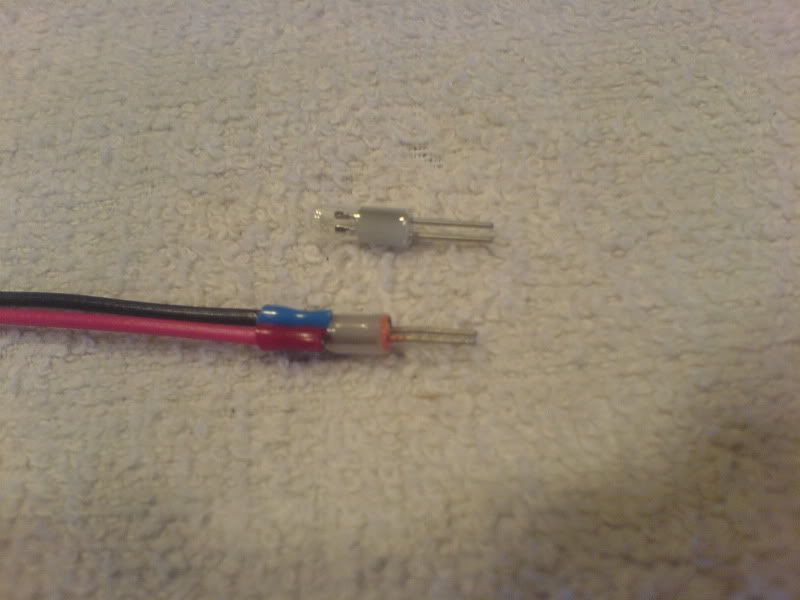
I killed the rkcstr driver two weeks ago as well as the diodes. Bad test connection. The new rkcstr arrived last week and the LPC-815s got here yesterday. I harvested one of the diodes last night and wired up the new rkcstr with a little less wire this time. I'm getting good at harvesting and mounting diodes. I cut the globe from one of the MiniMag bulbs (MiniMag comes with a spare bulb stored in the end cap) with a fine bastard file, removed the filament and used it as a plug to connect the driver to the MiniMag bulb socket and switch assembly. I marked the plug and bulb socket for polarity.
005ar.jpg


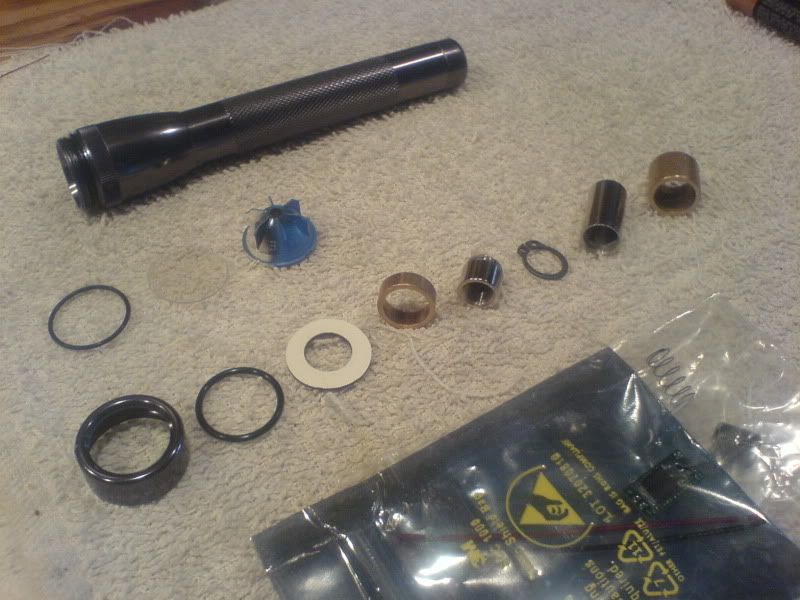
The parts used for this MiniMag build. The goal is to retain the original barrel switch and end cap. It's not easy to cram all of the needed components into a MiniMag.
013-Copy.jpg


Top: The MiniMag head, barrel and end cap. The only modification to these parts is to shorten the end cap. I'll explain later.

Second row from top: Three of the MiniMag parts that are not used in this project are the original thin O-ring, lens, and reflector.

Third from from top: parts in the order in which they are installed. MiniMag lens ring, fat O-ring (7/8 X 3/4 X 1/16), the washer cut from 1mm Formica with 12mm hole, bronze heat sink section, one half of the AixiZ laser module, C-clip: 10mm, second half of the AixiZ module, main bronze heat sink.

Bottom row: various electronic parts in anti-static bags including the laser diode, wire, glass AR coated lens assembly and laser driver.

The additional mechanical parts were purchased at Ace Hardware. Bronze is not a particularly good heat sink material but should work OK for this project. Copper and aluminum are much better for this purpose, but I couldn't find suitable pieces. I don't have a lathe to machine a proper heat sink so I'm making do with what I can. The bronze bearing material is .5" ID, 5/8" OD. The O-ring is from the plumbing department.

Last evening, I used nearly the same driver adjustment and test set up as two weeks ago. The test leads are not a problem: just set them up securely and carefully. The laser diode will not be used to make these tests. I'll solder that directly to the driver after tests. I adjusted driver output with a dummy load and measured voltage across the resistor, setting the driver for 360mV. I tested with both DMMs to make sure. I'm being more conservative with the output this time. After this test, I waited 30 minutes to let the driver and diode return to room temperature and repeated the test. The DMM showed 365mV initially, which settled down to 361mV ten seconds later. The old Equus DMM will handle the amps so I tested driver output again measuring current directly from the driver output (no dummy load). The test showed an initial 370mA that settled down to 360mA ten seconds later. No further adjustments being necessary, I disconnected the meters and proceeded to finish the build. Output for this 660nm will be about 220mW, maybe a little higher for the first five seconds or so. I read somewhere that using the AR coated AixiZ lens is worth another 10% in output power over the plastic lens, so maybe I can call it a 240mW laser.
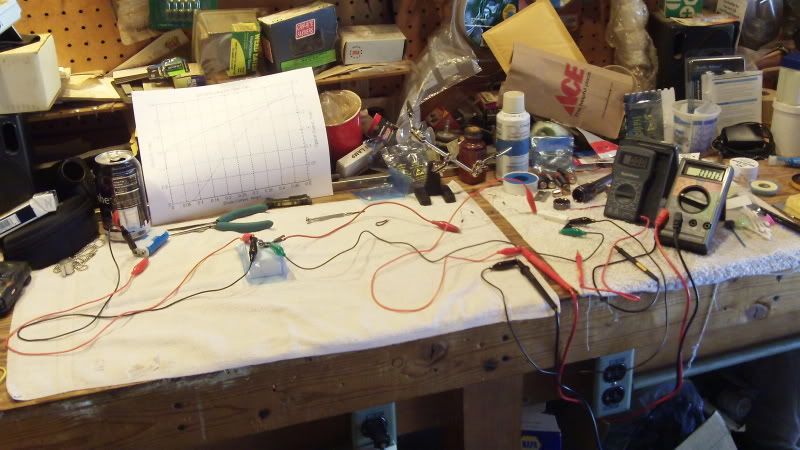
008wb.jpg


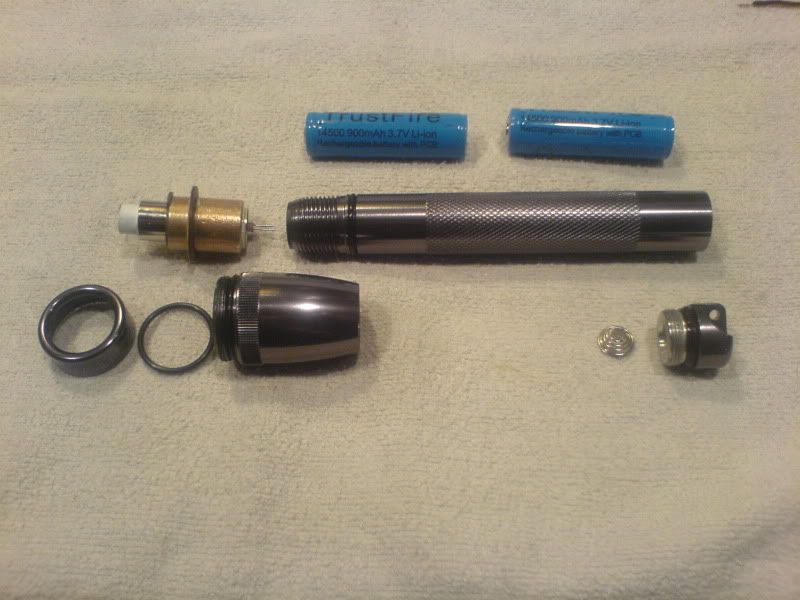
All ready for final assembly. I used a hacksaw to cut a good 1.5 mm off the thread end of the end cap. I also snipped two full loops off the top of the battery spring and another one loop from the wider base of the spring. That will accommodate additional length of the two protected 14500s. The cut coil at the top of the spring will be sharp enough to scratch up the bottom of a battery, so I sanded it down and used some stout long nose pliers to bend the cut end toward the center of the spring.
010ar.jpg


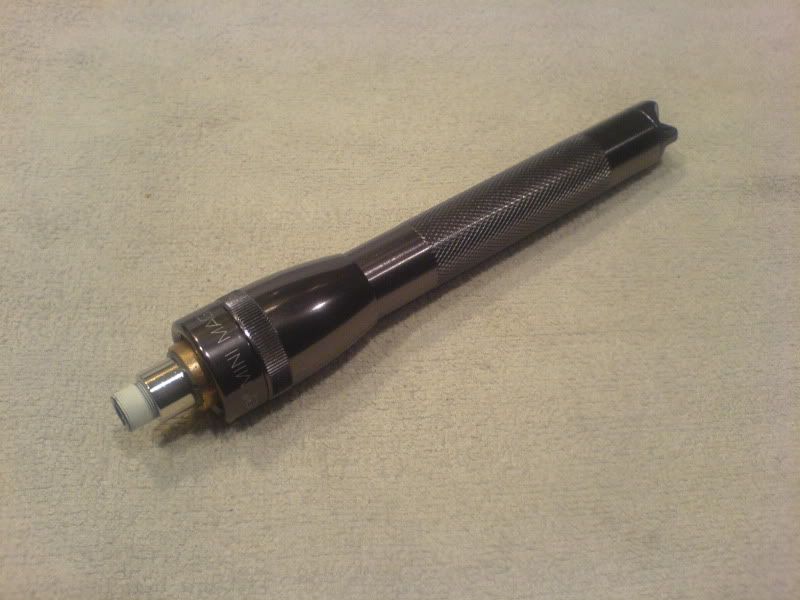
The assembled MiniMag 660nm. She has a big nose, but I think she's beautiful. Yes, you turn it on by holding the hood with one hand and twisting the barrel slightly. It's a nice, silky feeling and positive acting switch. The AR coated glass lens protrudes from the AixiZ module farther than the plastic lens.
012ar.jpg


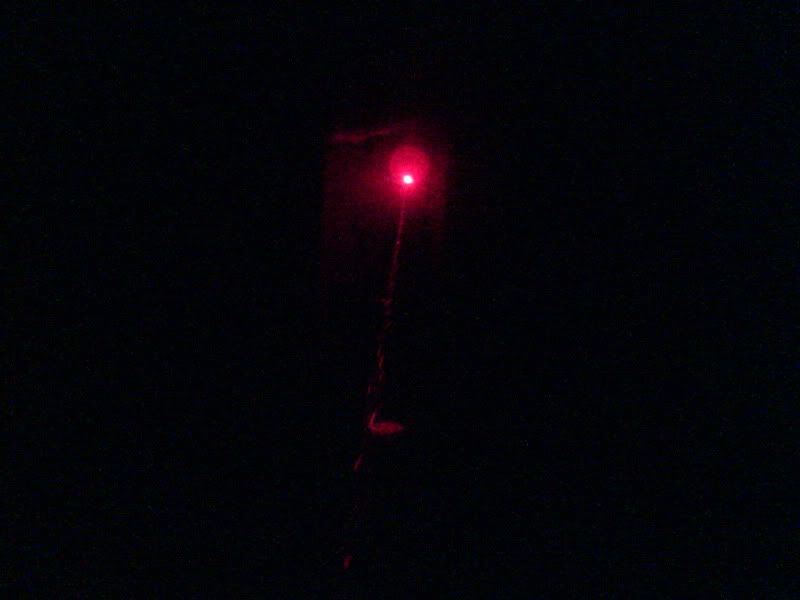
More cell phone shots. Shooting 25' across a hazy garage and hitting the far wall.
019ar.jpg


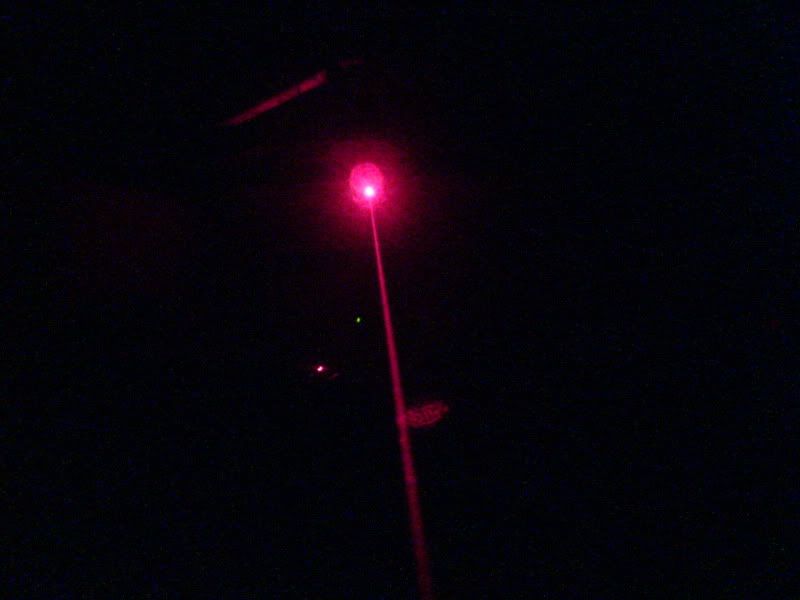
Now, this is what amazes me. I took the laser out to the backyard at 11:30 p.m. and aimed for some tall trees. I could see the red beam! It was faint, but there. I didn't expect to see any red beam in clear air. I took this shot showing some of the beam and the spot hitting the wall of my house 50' away. I could see this beam much better than the cell phone cam could.
001beam2.jpg


I'm a happy camper.:yh:
006.jpg
 
Last edited:
The only thing I see of note is you should have made your heatsink a little longer. You have to remember that the diode is in the very front of the module, so your relying on a fairly small cross sectional area to transfer the heat back to your thicker heatsink and the host.
 
With 8.4VDC from the 2x14500s I expected the driver to produce the most heat: so that's where I put most most of the heat sink material. In actual operation, the driver and the diode seem to produce about the same amount of heat with this laser. I was surprised by how much heat the diode will produce.

From a room temperature cold start at 70 degrees F: the forward section of the Aixis module (containing the diode) warms to body temperature (about 100 degrees F) at about the one minute mark. I ran it for 90 seconds continuous yesterday and the same section felt warm after 90 seconds.

If the laser is already at 100 F (warm weather, prior use, residing in a pocket) then the run times are shorter. The laser will feel warm after a 20 second run time and hot after 30-40 seconds.

I could add some heat sink to that forward section of the Aixis module but I don't plan on burning with the laser, so run times will be pretty short. I'd just rough up the nickle plated surface of the Aizis module with a file to increase surface area for the adhesive and stick the heat sink on with Arctic Alumina.
 
I took qumwefox's advise to heart and installed aluminum heat sinking over the laser diode. Anything that lengthens the life of the LD is good for me.

This is the yzer MiniMag v.2. It still shows an amazing beam at night. My wife (who is no dummy: a biochemist with several international patents in gene splicing) loved the beam when shot into the sky, especially the "sparkly bits" created by dust or tiny insects in the beam path. The ruby red beam from this laser is amazing.

I'm getting disgusted by digital camera results and may post film camera shots of the beam at night with my old Nikon film camera in a few days.

Close-up: new heat sink glued-on with Arctic Aluminia.
018-1.jpg


The cooler look of yzer MiniMag v.2
014.jpg
 
Last edited:
If you have any questions about this 660nm build let 'em rip. Ill be happy to answer. As long as I've been around, I've never heard a dumb question. Do you know a better better way to learn answers than to ask questions?

The aluminum heat sink shown above was purchased yesterday at Ace Hardware for $2.19 plus tax. I found it in the fastener department as 1/4" aluminum cable stop. I cut it down lenghtwise, drilled out the hole and finished the surface with emery cloth.
 
Last edited:
Another thing I just spotted that I missed the first time. Socketed diode connections equal dead diodes in the long run.. just FYI heh. You mentioned already killing one diode and driver due to bad connections, and a socket is a bad connection waiting to happen. Sockets are fine before the driver.. just not after them.
 
Great documentation yzer! Looking forward to see what you do in the future! Congrats on the successful build. You should try a 2W blue next =D . Also, nice idea with the heat sink. I'll have to consider that. Aloot cheaper then many of the other options out there.

Qumefox, mind explaining what you mean by socketed diode connections? I'm rather curious as to what that is... hopefully i'm not doing it.
 
Another thing I just spotted that I missed the first time. Socketed diode connections equal dead diodes in the long run.. just FYI heh. You mentioned already killing one diode and driver due to bad connections, and a socket is a bad connection waiting to happen. Sockets are fine before the driver.. just not after them.
In this build the socket connection is between the batteries and driver input. The laser diode is soldered directly to the rkcstr driver output.

Two weeks ago I killed a driver and diode with bad test lead connections prior to assembly. That was a learning process. :D The socket connection in the MiniMag isn't ideal but it seems to work fine. In the MiniMag the socket and switch assembly rotates along with the head. It's the contact on that rotating socket I would be most concerned about but it works OK, too. No sign yet of bad contacts anywhere.
 
Great documentation yzer! Looking forward to see what you do in the future! Congrats on the successful build. You should try a 2W blue next =D . Also, nice idea with the heat sink. I'll have to consider that. Aloot cheaper then many of the other options out there.
Thanks, rd. The diode heat sink is another Ace Hardware item from the fastener department. It's an aluminum cable stop 1/4" that cost $2.19. I cut it down to size and drilled out the 1/4" hole to fit the Aixis module.

I like messing around with two part epoxies. The Arctic Alumina is good stuff. It's very stong adhesive. It cures fast so it's important to slop it on quickly to get a seal without voids. Masking tape or teflon tape can be used to protect areas from slopping over. Excess Arctic Alumina can be wiped off during the first couple of minutes or removed with a razor blade for the first 20 minutes or so. It can be removed completely during the first couple of minutes with a Q-Tip dampened with rubbing alcohol.
 
In this build the socket connection is between the batteries and driver input. The laser diode is soldered directly to the rkcstr driver output.

Ah, if this is the case, it will be fine heh. Your initial description made me think the socket was between the diode and the driver.

Qumefox, mind explaining what you mean by socketed diode connections? I'm rather curious as to what that is... hopefully i'm not doing it.

Having to rely on a socket that the diode plugs in instead of solidly soldered wires. In a test rig where your testing lots of 'cheap' diodes back to back it'd probably be ok so long as you keep an eye on it. In a build.. no. Contacts will corrode over time unless you happen to keep your lasers in a 100% moisture free environment.. Meaning you've never exposed it to normal air... ever... Corroded connections lead to intermittent connections. Which lead to fried diodes. In a build you want solidly soldered connections between the diode and the driver, preferably using as short of a wire length as you can get away with.
 
Last edited:
Should be OK. The thing I don't like about the plug and socket idea is that I had to be very careful during final assembly to avoid bending the prongs on the plug. The complete laser module and face cap must be plugged into the socket gently while screwing the face cap and head together. Luckily, the only time the head would need to be taken apart and reassembled is for diode replacement. The batteries are changed out through the end cap.

I've got a lot of battery capacity with the two 14500s. I haven't charged the batteries yet and still have 7.6 VDC.
 
Here is a follow-up now that I've used this laser for a week.

I've used the laser at least several minutes per day. From room temperature the heat sink over the diode begins to feel warm after about 40 of continuous use but the head (over the driver) still feels cool.

Everything still works perfectly. I'm keeping the laser in a plastic bag for storage until I can find a suitable cap to protect the lens. The silicon clicky covers won't fit this one.

During testing and operation I learned that the rkcstr driver produced a lot more heat operating near 8.0 VDC than it does at 7.5. I won't recharge the batteries until they reach 6 volts. After charging the batteries fully I'll have 8.4 volts so I suspect I'll use a dummy load on them to bring the batteries down below 8 volts before putting them in the laser. That way I'll still have a lot of battery reserve left between 6-8 volts without all of the unneeded driver heat.

I looked at a twenty-foot distant laser spot with the T-Rex BP-3003 blue goggles. These goggles are of no use with 200mW+ 658-660nm red. The spot was still very bright. I'm using the Eagle Pair when needed. I won't use the laser indoors or spot items at close range without wearing good goggles.

Watch out for laser splash coming out of the AixiZ glass lens. Two weak nodes of diffused laser light about 180 degrees apart can be seen diverging from the beam. This light shows a semicircular pattern. A person could stand in front of the laser and away from the beam but still be hit by this splash. I don't think that the splash is strong enough to be harmful but I won't take any chances and make sure no one is standing anywhere in front of the laser during use.

With all of the 1-watt and above lasers in use remember that these LOCs make for very powerful lasers. I'm respecting mine more all of time. 220-240mW is a very dangerous power level when used in a careless way. Properly collimated, this laser travels a long way.

I'll probably build another laser in the fall but I'm leaning away from a high powered 445nm. I enjoy lasers with excellent divergence right now so a 100mW+ green is looking better to me all of the time.
 
Last edited:


Back
Top