MurphyMurph
Member
- Joined
- Feb 3, 2020
- Messages
- 49
- Points
- 18
Hey guys, here is another project I completed this summer. This is something I've been wanting to build since the 44-V2s became available.
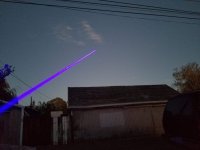
I've been holding off on posting this until I could get some decent night shots, and we have finally had a solid week of crystal-clear night skies!
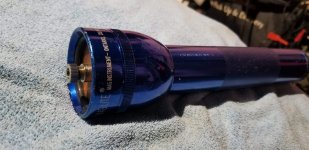
The host is a 2 D-Cell LED Maglite.

Figuring out how to disassemble the Maglite was an absolute nightmare, but I finally did figure it out.
To make room for the driver and its heatsink, I cut off part of the 'switch cylinder' and soldered my wires for + & - .
I used the spring for the original LED to replace the one in the tail-cap and used conductive epoxy to hold it in place.
A piece of scotchbrite on the tip of a dremel sanding bit was used to expose the aluminum for ground.
And as for the battery spacers, I tediously wrapped duct tape around the outer diameter of 2x 21700s until they
matched the inside diameter of the Maglite body, making removable DIY battery spacers.

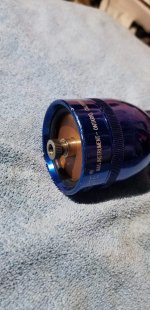
I machined and powdercoated some beefy heatsinks.


Then used Arctic Alumina to fix the driver to a small 22mm heatsink ( I think made for Raspberry Pi ).
As a temporary solution, this is held in place using thermal tape.

Below are shots of the finished build.


Here is another Maglite for size comparison. The reason that I made the heatsink so big was mainly for runtime, I wanted something that could easily do 45 seconds on and dissipate heat efficiently. Also, I wanted the build to still sort of resemble the original Maglite look.

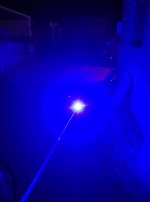
Using an ACS5500BU Buck driver that I set to 5A, and using a G-8 Lens, the meter settled at 7.315W
To be honest, starting out many years ago with just a 125mW Wicked Laser, I never actually imagined that I would have a handheld this insane!!

Beamshots will follow below.
I've been holding off on posting this until I could get some decent night shots, and we have finally had a solid week of crystal-clear night skies!
The host is a 2 D-Cell LED Maglite.
Figuring out how to disassemble the Maglite was an absolute nightmare, but I finally did figure it out.
To make room for the driver and its heatsink, I cut off part of the 'switch cylinder' and soldered my wires for + & - .
I used the spring for the original LED to replace the one in the tail-cap and used conductive epoxy to hold it in place.
A piece of scotchbrite on the tip of a dremel sanding bit was used to expose the aluminum for ground.
And as for the battery spacers, I tediously wrapped duct tape around the outer diameter of 2x 21700s until they
matched the inside diameter of the Maglite body, making removable DIY battery spacers.
I machined and powdercoated some beefy heatsinks.
Then used Arctic Alumina to fix the driver to a small 22mm heatsink ( I think made for Raspberry Pi ).
As a temporary solution, this is held in place using thermal tape.
Below are shots of the finished build.
Here is another Maglite for size comparison. The reason that I made the heatsink so big was mainly for runtime, I wanted something that could easily do 45 seconds on and dissipate heat efficiently. Also, I wanted the build to still sort of resemble the original Maglite look.
Using an ACS5500BU Buck driver that I set to 5A, and using a G-8 Lens, the meter settled at 7.315W
To be honest, starting out many years ago with just a 125mW Wicked Laser, I never actually imagined that I would have a handheld this insane!!
Beamshots will follow below.


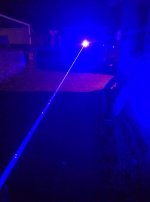
") . None of my C-Clamps were big enough and I didn’t trust my other tripods to support its weight. Also, a Sanwu 3X BE was used to tame the divergence of the NUBM44-V2.
. None of my C-Clamps were big enough and I didn’t trust my other tripods to support its weight. Also, a Sanwu 3X BE was used to tame the divergence of the NUBM44-V2.


")