BlackOps
0
- Joined
- May 7, 2016
- Messages
- 139
- Points
- 28
Hi, a couple days ago, i zapped my 405nm laser with a piezo, after 3 times, it died . I know its stupid. And that sh*t happened while i'm going on vacation next week. No way i would get a new diode by then.
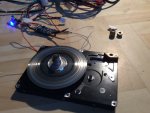
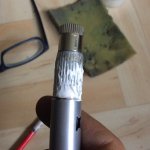
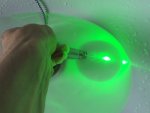
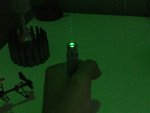
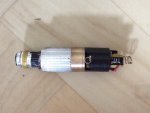
But i found some usable laser parts from 2013 and 2012. And i thought, why not make a laser based flashlight from it. I wan't to take some lazing stuff with me. It took me 2 days to make this device. (It took me 2 hours to clean the optics. Let alone, sealing it). I know its not the best host, but it weights about 100 grams and all i can say is, it feels great after waxing it. This time, i made an uncollumated laser projector. Now its an helicopter like flashlight. The thing can highlight some trees 300 meter away. And it does it bright. Beam is still visible. It can handle some brutal shocks and drops on the ground. (I put an O-ring around the crystal set, which absorbs the shocks. Tested it, and it works great. Unlike 80% of the green lasers)
I enjoy this thing. I also put an GOOD IR filter in there to reduce unnecessary output power. The optical cavity consists about 28 parts. I know, its a lot, but its all to make it watertight, resistant against drops and dirt. I put some good springs and retainer rings in there to align the optics and prevent them from moving even when dropped of a building! Everything had to fit and match in size.
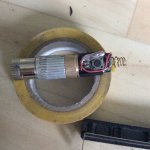
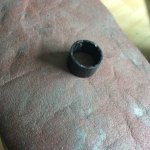
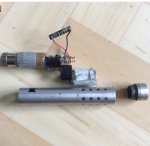
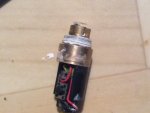
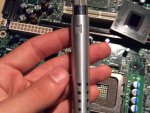
I also but an BMS circuit in there. The button is bypassed with 2 LVDS wires to ensure high conductivity and solder connections are made. Thermal paste and sealing rings has been added to conduct heat from the brass element (containing the diode and the crystal set) to the nice aluminum heat sink and to double seal it. The module it pressed in the housing with thermal paste all around it. If the device heats up, the entire device heats up. The battery is quite isolated from the outer host") as the steel tube has been added, more on this later.
as the steel tube has been added, more on this later.
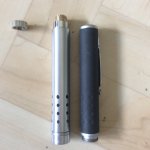
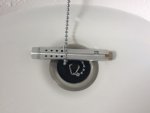
I made the tail switch myself, its almost done. I need to add an O-ring to it and seal the button side with a nice rubber button from a camera or dead flashlight.
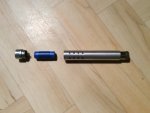
A stainless steel tube has been added to make sure, the battery isn't moving and prevents making that enjoying feeling when moved or tapped. Therefore making it more heavier and qualitative. And it protects the battery from drops as the tube has bubble wrap around it. Fits tight and nicely.
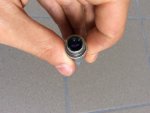
Everything is press fitted. And overall nice feeling. I will try to make some pictures this night at a small beach where no one is to show you how powerful this flashlight is.
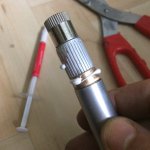
This laser is constructed with 48 parts. And i gotta say, i enjoyed building this one (with exceptions for cleaning the optics)
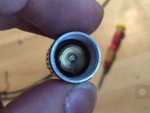
Laser is powered by an ICR10280 180mAh lithium ion battery. It last a whole night, or a whole day when used non-constantly. Charging takes around 25 minutes.
. I know its stupid. And that sh*t happened while i'm going on vacation next week. No way i would get a new diode by then.But i found some usable laser parts from 2013 and 2012. And i thought, why not make a laser based flashlight from it. I wan't to take some lazing stuff with me. It took me 2 days to make this device. (It took me 2 hours to clean the optics. Let alone, sealing it). I know its not the best host, but it weights about 100 grams and all i can say is, it feels great after waxing it. This time, i made an uncollumated laser projector. Now its an helicopter like flashlight. The thing can highlight some trees 300 meter away. And it does it bright. Beam is still visible. It can handle some brutal shocks and drops on the ground. (I put an O-ring around the crystal set, which absorbs the shocks. Tested it, and it works great. Unlike 80% of the green lasers)
I enjoy this thing. I also put an GOOD IR filter in there to reduce unnecessary output power. The optical cavity consists about 28 parts. I know, its a lot, but its all to make it watertight, resistant against drops and dirt. I put some good springs and retainer rings in there to align the optics and prevent them from moving even when dropped of a building! Everything had to fit and match in size.
I also but an BMS circuit in there. The button is bypassed with 2 LVDS wires to ensure high conductivity and solder connections are made. Thermal paste and sealing rings has been added to conduct heat from the brass element (containing the diode and the crystal set) to the nice aluminum heat sink and to double seal it. The module it pressed in the housing with thermal paste all around it. If the device heats up, the entire device heats up. The battery is quite isolated from the outer host
as the steel tube has been added, more on this later.I made the tail switch myself, its almost done. I need to add an O-ring to it and seal the button side with a nice rubber button from a camera or dead flashlight.
A stainless steel tube has been added to make sure, the battery isn't moving and prevents making that enjoying feeling when moved or tapped. Therefore making it more heavier and qualitative. And it protects the battery from drops as the tube has bubble wrap around it. Fits tight and nicely
.Everything is press fitted. And overall nice feeling. I will try to make some pictures this night at a small beach where no one is to show you how powerful this flashlight is.
This laser is constructed with 48 parts. And i gotta say, i enjoyed building this one (with exceptions for cleaning the optics)
Laser is powered by an ICR10280 180mAh lithium ion battery. It last a whole night, or a whole day when used non-constantly. Charging takes around 25 minutes.
Attachments
Last edited:


")


 :beer: