Welcome to Laser Pointer Forums - discuss green laser pointers, blue laser pointers, and all types of lasers

LPF Donation via Stripe | LPF Donation - Other Methods

Links below open in new window

ArcticMyst Security by Avery

Wicked Lasers Rebuild

Joined
Oct 6, 2015
Messages
1,377
Points
113
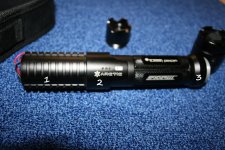
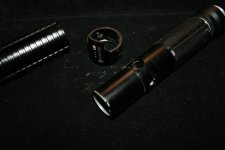
Ah if you are a veteran on this page many remember i purchased a wicked laser i believe was around $40+ so after so many years i made a decision to replace the diode its very simple nothing to press in just place and screw the head on i also added a tiny bit Thermal Compound see images diode used is a M140 M-Type
i have other wicked laser and i just compared the beam and the M140 M-Type is more blue interesting i will post beam pic's soon the batteries i have are no good UltraFire hehe 🤔
-
DSCN3683.JPGDSCN3684.JPGDSCN3686.JPGDSCN3687.JPGDSCN3688.JPG


Photophile

New member
Joined
Dec 22, 2022
Messages
9
Points
3
Were you able to take the host down any further? My smart switch is intermittently going out, and I see a repair in my future.
 

Photophile

New member
Joined
Dec 22, 2022
Messages
9
Points
3
Have you seen anyone on here that has done a tear down of a WL with pics and instructions yet? If so, a link would be greatly appreciated.

I have been cautious of disassembling my Spyder III Arctic. The top barrel on my device is slightly loose like it would unscrew, but feels like a set screw or something is still slightly engaged still. Mine is the 1W 2011 model.
 

Dusty_Lenses

Active member
Joined
Apr 15, 2022
Messages
101
Points
28
Have you seen anyone on here that has done a tear down of a WL with pics and instructions yet? If so, a link would be greatly appreciated.

I have been cautious of disassembling my Spyder III Arctic. The top barrel on my device is slightly loose like it would unscrew, but feels like a set screw or something is still slightly engaged still. Mine is the 1W 2011 model.
Im tearing one down now looking to upgrade with a nubm44. The construction seems to be all press fit and epoxy. The front end heatsink is glued over the main tube, havent figured out the switch or the batt indicator yet but may just leave them, not sure.
 
Joined
Oct 6, 2015
Messages
1,377
Points
113
I mix up the smart switch & the driver if you pull on the wires the driver will come out the switch and the led's i can't see,
everything unscrews the is no proxy i just checked all mine wicked lasers none have proxy unless Wicked Laser did add proxy to some :alien:
 

Dusty_Lenses

Active member
Joined
Apr 15, 2022
Messages
101
Points
28
I mix up the smart switch & the driver if you pull on the wires the driver will come out the switch and the led's i can't see, everything unscrews the is no proxy

Thats a mixup that can be costly.

So to get to the switch and the LED indicator lights, #1 in the pic is epoxied on and slides off the main tube, then
#2 is epoxied and clamps the switch in place which also has to be slid off (be carful of the LEDS and switch). #3 is
the base of the main tube with the threads for the tail cap. #3 is tightly press fit into the main tube (no need to remove)

Same process for the Krypton, the difference is #1 is twice as long, and more epoxy 🍺
 

Attachments

  • arctic.jpg
    arctic.jpg
    760.4 KB · Views: 6
  • arctic-b.jpg
    arctic-b.jpg
    557.8 KB · Views: 6
Last edited:

Photophile

New member
Joined
Dec 22, 2022
Messages
9
Points
3
Thats a mixup that can be costly.

So to get to the switch and the LED indicator lights, #1 in the pic is epoxied on and slides off the main tube, then
#2 is epoxied and clamps the switch in place which also has to be slid off (be carful of the LEDS and switch). #3 is
the base of the main tube with the threads for the tail cap. #3 is tightly press fit into the main tube (no need to remove)

Same process for the Krypton, the difference is #1 is twice as long, and more epoxy 🍺
Any tips on the removal procedure?

With all the epoxy, I’ll most likely wait until the switch completely goes out. That will more than likely be soon since I have to cycle the smart switch to enter the combination every time that I need to use it for a few seconds.
 

Dusty_Lenses

Active member
Joined
Apr 15, 2022
Messages
101
Points
28
Any tips on the removal procedure?

With all the epoxy, I’ll most likely wait until the switch completely goes out. That will more than likely be soon since I have to cycle the smart switch to enter the combination every time that I need to use it for a few seconds.
Depends how much epoxy was used in the first place. You have to unscrew the module in the front where the diode sits so that you just have an empty tube with leads from the driver, then heat and start working at it. Warm it up with a hairdryer to soften but nut burn up anything. From there its a battle of wits 😋
 

Photophile

New member
Joined
Dec 22, 2022
Messages
9
Points
3
Depends how much epoxy was used in the first place. You have to unscrew the module in the front where the diode sits so that you just have an empty tube with leads from the driver, then heat and start working at it. Warm it up with a hairdryer to soften but nut burn up anything. From there its a battle of wits 😋
👍🏼 Thanks, I feel a little more confident about digging into it now that I know what to expect.


Top