

Nute
0
- Joined
- Sep 18, 2014
- Messages
- 172
- Points
- 18
Hello, My name is Nute and I've been actively stalking the forums for a while now. I just recently finished my first ~1.25w 445nm build, and would like to share it with you guys. Here are the build specifics:
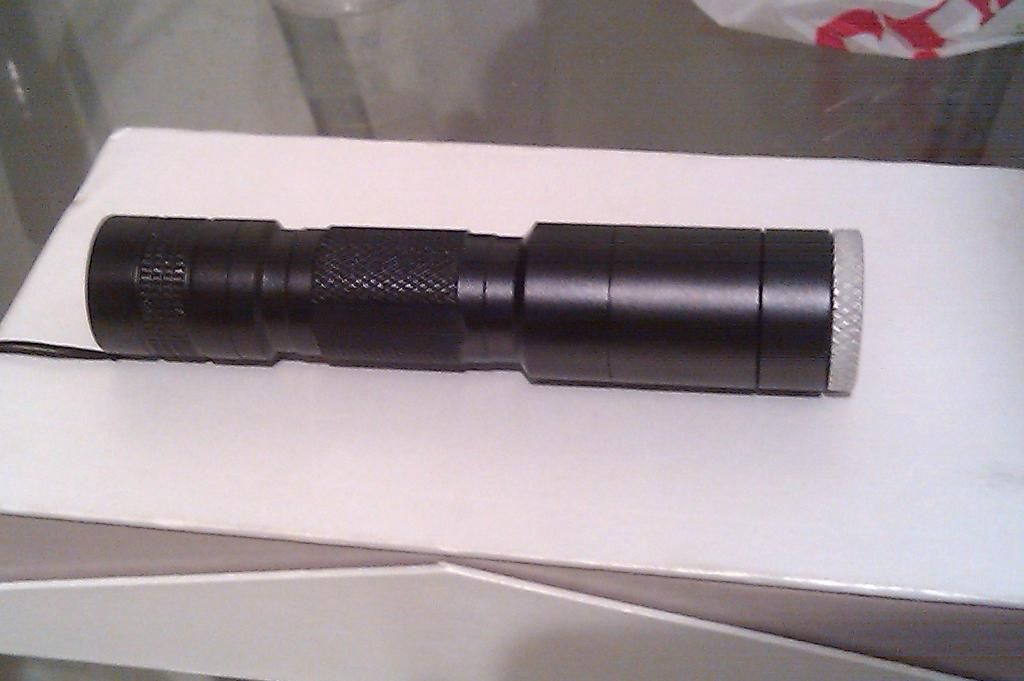
Diode: A140 (rachaelocke2006 Ebay)
Module: Copper (DTR)
Lens: Three Element Glass (DTR)
Host: Unbranded C6 (Survival Laser)
Heat Sink: Un-Anodized Aluminum C6 (Survival Laser)
Driver: 1.25A Fixed Current Driver (Survival Laser)
Focus Ring: Knurled 4.75mm x 1 inch (Custom Made by Mr. Ed Crouse "eac67gt", Dad of "Mrcrouse")

I pressed my A140 diode into my copper Aixiz module using the supplied back portion of the module and a vice. I then countersunk the diode with a 5/32 piece of brass tubing In the vice. Then I soldered my + and - laser diode wires to my diode using a creative method I found here on the forums (You take the stripped portion of the wire to be soldered to the laser diode and wrap it into a loop around another piece of wire. Generously dab flux on the loop. Take your soldering iron and add solder directly to the tip. Take this now drop of solder and place it into the loop you created. You now have a solid tinned loop. You take this loop and hold its center directly on top of the diode pin and apply quick heat. The tinned loop will drop and adhere to the diode pin in a fraction of a second with minimal heat. Repeat process). I then soldered my buck driver into the supplied brass ring, and pressed it into the pill. After screwing the pill into the host, I soldered the driver + and - to the Laser diode + and -. Then I slid my module into the heat sink and vigorously tightened the set screw. I slid the heat sink into the host, and without allowing it to twist, added my bezel ring. Lastly I screwed in my lens and Custom focus knob. I then added my batteries, and the build was complete!
NOW HERE ARE A COUPLE BEAM SHOTS!!!
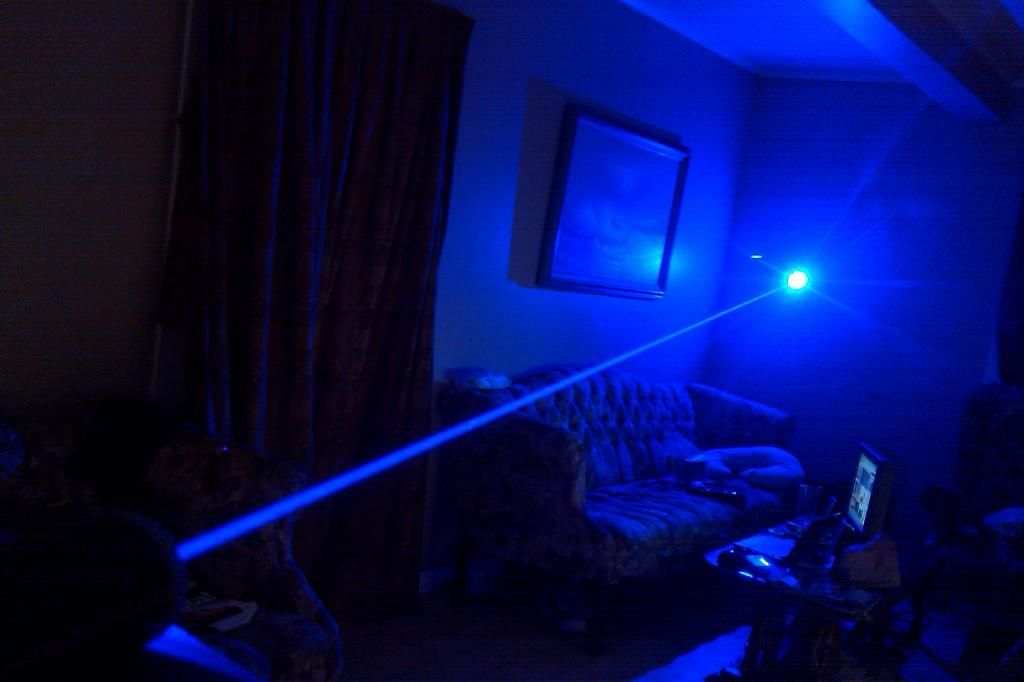
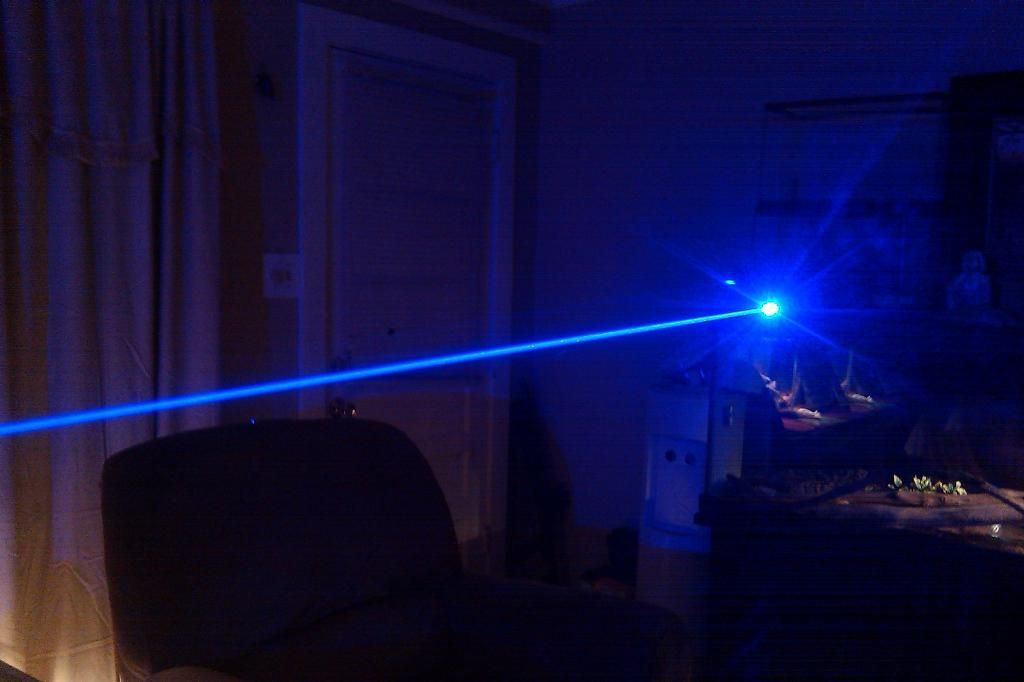
As hard as it may be to believe, this is the actual color of the beam in person. I could be wrong, but I suspect that this is because of the current that the diode is being driven at.
I hope you all enojyed viewing this as much as I did making it! :na:
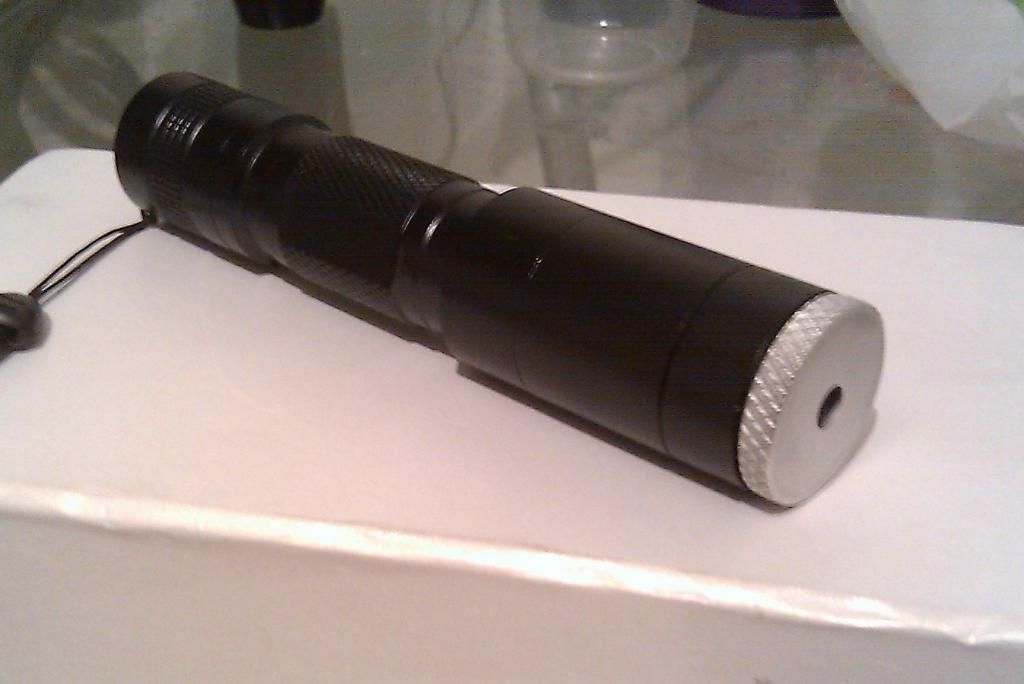
Diode: A140 (rachaelocke2006 Ebay)
Module: Copper (DTR)
Lens: Three Element Glass (DTR)
Host: Unbranded C6 (Survival Laser)
Heat Sink: Un-Anodized Aluminum C6 (Survival Laser)
Driver: 1.25A Fixed Current Driver (Survival Laser)
Focus Ring: Knurled 4.75mm x 1 inch (Custom Made by Mr. Ed Crouse "eac67gt", Dad of "Mrcrouse")

I pressed my A140 diode into my copper Aixiz module using the supplied back portion of the module and a vice. I then countersunk the diode with a 5/32 piece of brass tubing In the vice. Then I soldered my + and - laser diode wires to my diode using a creative method I found here on the forums (You take the stripped portion of the wire to be soldered to the laser diode and wrap it into a loop around another piece of wire. Generously dab flux on the loop. Take your soldering iron and add solder directly to the tip. Take this now drop of solder and place it into the loop you created. You now have a solid tinned loop. You take this loop and hold its center directly on top of the diode pin and apply quick heat. The tinned loop will drop and adhere to the diode pin in a fraction of a second with minimal heat. Repeat process). I then soldered my buck driver into the supplied brass ring, and pressed it into the pill. After screwing the pill into the host, I soldered the driver + and - to the Laser diode + and -. Then I slid my module into the heat sink and vigorously tightened the set screw. I slid the heat sink into the host, and without allowing it to twist, added my bezel ring. Lastly I screwed in my lens and Custom focus knob. I then added my batteries, and the build was complete!


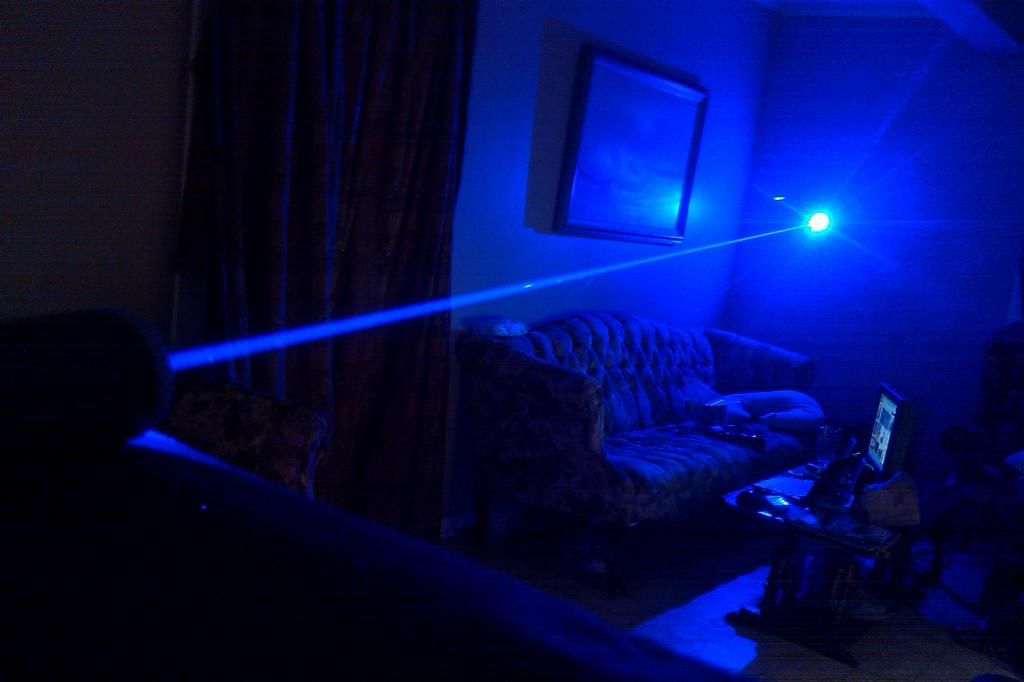
NOW HERE ARE A COUPLE BEAM SHOTS!!!


As hard as it may be to believe, this is the actual color of the beam in person. I could be wrong, but I suspect that this is because of the current that the diode is being driven at.
I hope you all enojyed viewing this as much as I did making it! :na:
Last edited:


 That focusing knob makes the c6 look way better.


