Welcome to Laser Pointer Forums - discuss green laser pointers, blue laser pointers, and all types of lasers

LPF Donation via Stripe | LPF Donation - Other Methods

Links below open in new window

ArcticMyst Security by Avery

Sweet red labbie build

Joined
Jul 4, 2008
Messages
2,036
Points
48
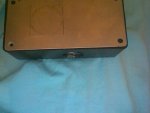
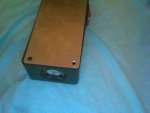
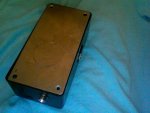
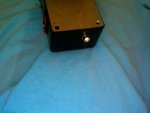
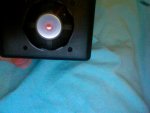
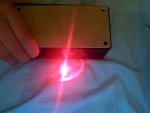
So, today in the mail I got a ~245mW red module from daguin and a heatsink from bryce007, so I spent like 3 hours messing with a heavily used project box (that's why it's ugly) and putting in a fan, switch, wires, etc and rearranging all of that like 4 times. When you flip the toggle, it turns on the indicator LED (I made it dim so as not to be annoying) and the fan. The pushbutton turns the laser on and off, I might add a toggle or something for keep-on. It runs on 4xAA but could be rewired very easily to use a wall outlet 9 or 12 volt. Have some pics.

Will
 

Attachments

  • Photo 28.jpg
    Photo 28.jpg
    71.4 KB · Views: 169
  • Photo 29.jpg
    Photo 29.jpg
    84.2 KB · Views: 204
  • Photo 30.jpg
    Photo 30.jpg
    96.6 KB · Views: 172
  • Photo 31.jpg
    Photo 31.jpg
    90 KB · Views: 184
  • Photo 32.jpg
    Photo 32.jpg
    93.4 KB · Views: 180
  • Photo 33.jpg
    Photo 33.jpg
    70.5 KB · Views: 195


Joined
Jul 30, 2009
Messages
487
Points
0
Nice build, some pics of the inside would be nice if possible.
Did you glue or screw the switches into place? Also, what do you recommend for cutting out the plastic for mounting the switches and fan?
 
Joined
Jul 4, 2008
Messages
2,036
Points
48
Nice build, some pics of the inside would be nice if possible.
Did you glue or screw the switches into place? Also, what do you recommend for cutting out the plastic for mounting the switches and fan?

Sure thing, I'll post them tomorrow. They're pretty crazy though. All of the switches are put through a hole (made with a drill then I get them to the best size I can by grinding them down with a dremel if I don't have the right bit) and screwed on the other side. Same thing with the LED holder. I use a spade bit for thin plastic, and a regular bit on thicker plastic.

will
 
Joined
Jul 30, 2009
Messages
487
Points
0
did you secure the heatsink with screws aswell? I would have thought it would be easier to use a small amount of adhesive thermal compound than drilling pilot holes into the heatsink
 
Joined
Jul 4, 2008
Messages
2,036
Points
48
did you secure the heatsink with screws aswell? I would have thought it would be easier to use a small amount of adhesive thermal compound than drilling pilot holes into the heatsink

I don't want to screw with the heatsink, and I hate gluing cause it ruins the host. So I just propped it up on a copper block, and held it in place with some electrical tape and the battery holder kind of forces it against the side. So it's in there firmly.

will
 
Joined
Jul 4, 2008
Messages
2,036
Points
48
Nice build!

thanks
also I won't be able to post internal pics till monday, sorry! I have to go to montana and move furniture for the weekend right after school, and there is no internet :( it'll be pretty damn boring.

will
 
Joined
Jul 30, 2009
Messages
487
Points
0
So how long do those 4 AA batteries last? 4x1.5V would equal 6V, and I'm assuming you are using a rckstr driver since you talked about connecting to a wall outlet of 9v-12v?
 
Joined
Jul 4, 2008
Messages
2,036
Points
48
So how long do those 4 AA batteries last? 4x1.5V would equal 6V, and I'm assuming you are using a rckstr driver since you talked about connecting to a wall outlet of 9v-12v?

I havent gone through a whole set of batteries yet, but I have noticed that it doesn't provide enough current to run the fan at full power when the laser is on. Also, the laser has started fluctuating a bit, which suggests poor life (about half an hour on cheap alkalines). Yes, I'm using a rckstr and I'm going to get some power ports and wall adapters soon.

will


Top